HOLIDAY DONATION DRIVE - SUPPORT MSW - DO YOUR PART TO KEEP THIS GREAT FORUM GOING! (Only 36 donations so far out of 49,000 members - C'mon guys!)
×


augie
-
Posts
4,669 -
Joined
-
Last visited
Content Type
Profiles
Forums
Gallery
Events
Everything posted by augie
-
 Two words ----- VERY nice.
 -
Thanks to all again. Yes, there's a lot of hot air on this log. But hey, we're having fun and that's what this is about. SJORS- Yes, I guess I'll go with white in the future. Just couldn't see the running rigging at all with that. Charge up the drill mate-----there be yards to shape !
- 1,668 replies
-
- 2
-

-
- syren
- model shipways
- (and 1 more)
-
Whatever you choose I'm sure it will shine!
-
Take your time! I went the other way on mine and left the margin planks natural to match the deck. I'm looking forward to seeing your painted version
-
Thanks Anja, Popeye , Robert and Larry. Bob- We all know that every ship model comes out uniquely. I think we have Chuck's, RustyJ's and now yours reposted (or being reposted) either in the forum or Gallery. Each is different and reflects the outlook, personality and expertise of the indivdual builder . They are all worth following. It's a shame we lost much of the narrative but that's water under the bridge. Your re-post highlights the use of alternate woods in portions of the build which is just fantastic. I hope Roger continues with his scaled-up, all natural finish version as well.
-
ERIC- I recall that I got 2-3 planks in the jig at a time. Since you're bending basically just the 1st and maybe second plank in each run (assuming your using 25 foot planks scaled down), you get into a sequence of bending, drying, actual planking and you just roll along, mass production style. Hope that makes sense. For every curved plank at the bow, you're going to be laying 3 or 4 more almost straight ones as you work toward the stern (or vice versa). So you are not soaking every plank and putting it in the jig to dry. Also, working on both sides at the same time gives you plenty of time to let planks dry. Unless you're going to plank the whole hull in one day . It makes sense once you start.
- 1,668 replies
-
- 2
-
-
- syren
- model shipways
- (and 1 more)
-
Oh those things......all 6 of them (still somewhat confused). I'm going to take a page out of you-know-who's book and wait for the pictures
-
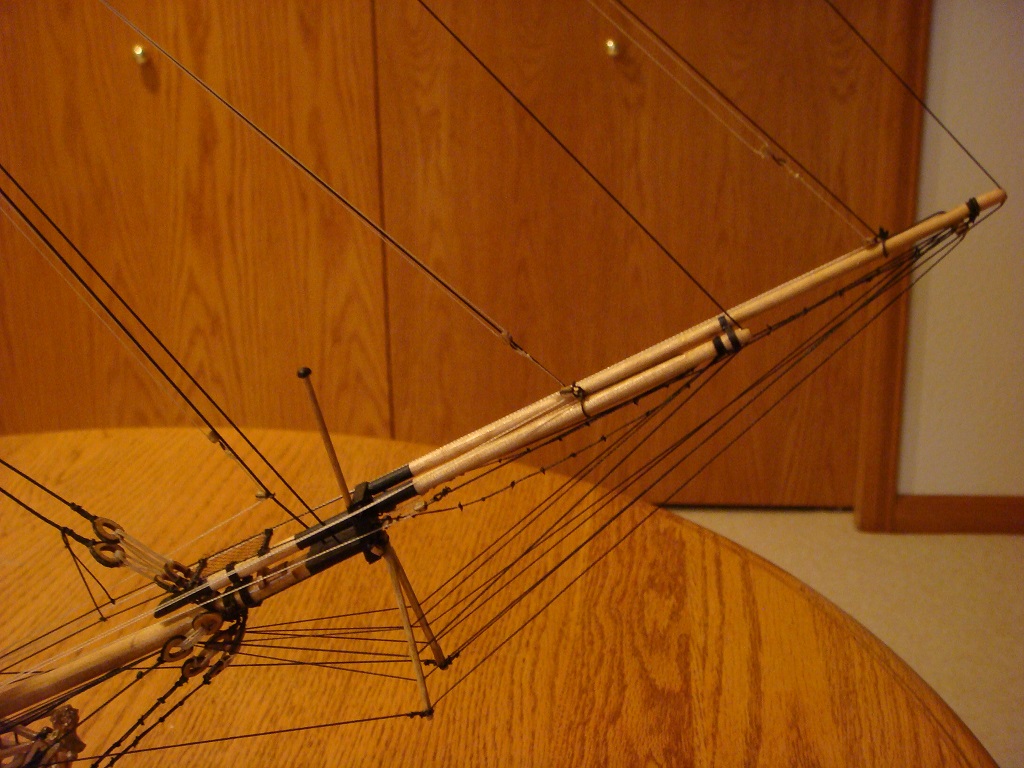
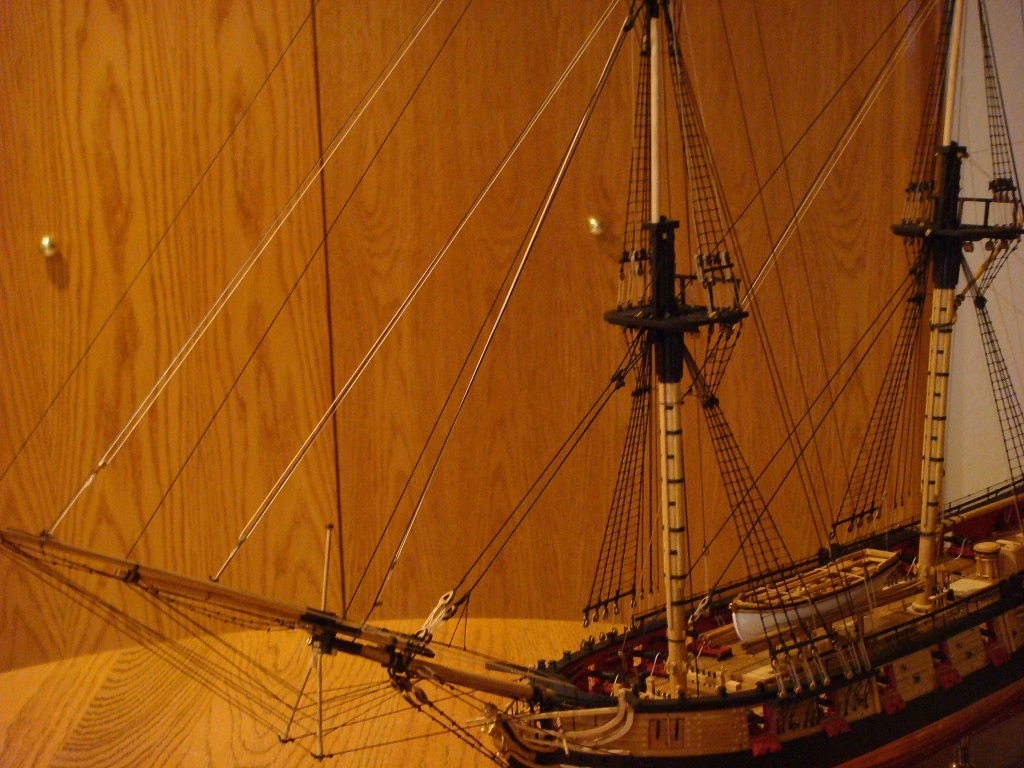
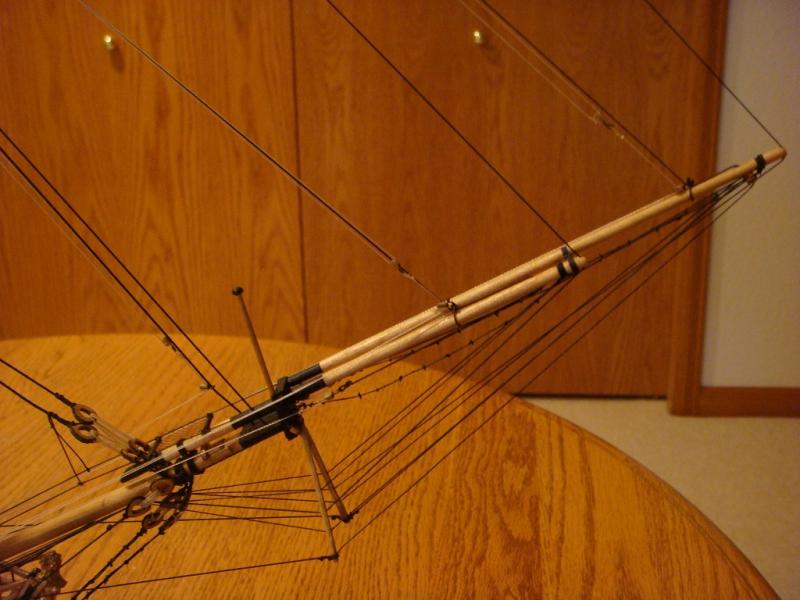
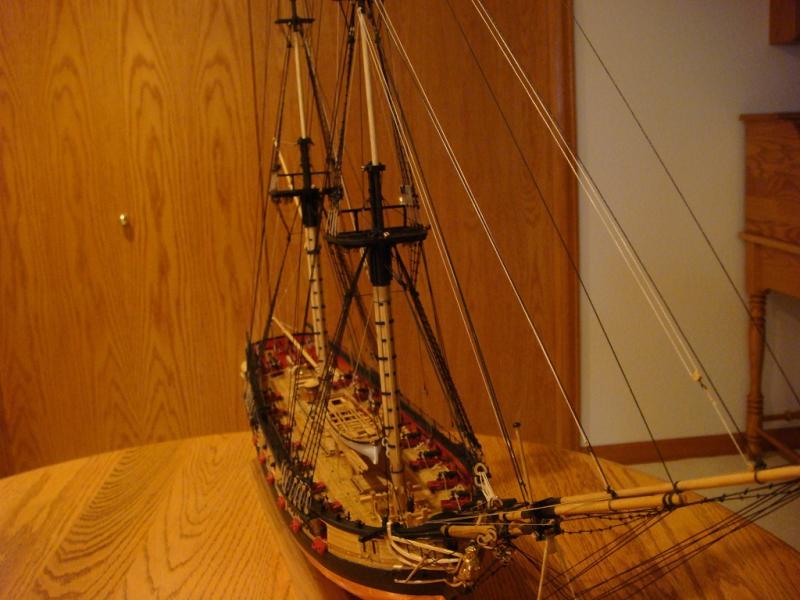
OK, time for an update. The running rigging, up through the addition of the yards, has been completed . Basically we're talking stays and halliards. I apologize for the photos as it's seemingly impossible to get the right background to show what's going on. The rope coils on the finished lines are in place. Will now be moving on to the YARDwork, which I hope will go as well as mast construction. I may need to take a break to do some real yardwork like planting tomatoes simultaneously. This will at least beat shoveling snow in between stropping blocks. This next phase will take a while so stay the course 'til I return!

- 1,668 replies
-
- 5
-
-
- syren
- model shipways
- (and 1 more)
-
Page 1 was back in the Stone Age. I had to go back myself and see what I might have said!! The plank bending jig is depicted at the bottom of page 18 in Chuck's Practicum. It is simply a board onto which is transferred the outline of the hull as viewed from directly overhead. So you are looking down at the curvature of the bow through midships. Along that curve I set in nails every inch or so protected with the shrink wrapping they use on wires (heat shrinkable). That wrap keeps to nails from discoloring your planking. You might want to lay in 2 parallel rows of nails so the planks are held firmly. Once you have your plank spiled and ready to go, you soak it until pliable and set it, on edge, along the curvature of the nails. Let it dry WELL and when you take it off it will hold the curve. Then, with a few final adjusments and sanding, it will fall right in place on your hull. By applying it after it has dried, it will not shrink after it is glued on the hull. If you don't use the jig and simply glue a wet plank in place it will shrink and leave unsightly gaps which can be murder on a single planked hull (especially up here at Mile Hi where the humidity is usually VERY low. Sounds complicated but one look at the photo in the manual gives you the idea.
- 1,668 replies
-
- 1
-
-
- syren
- model shipways
- (and 1 more)
-
Give me a break Alex. I can't tell what looks better......the stem or the stern. The wacky engineering you've portrayed is really special. And I'll just bet it worked!!!!!!
-
Simply unbelievable.
-
Thank you for re-posting this beauty, Bob. As always, we can already see the crispness of your work.
-
Looking forward to a shot of the stern from below. Looks like the overhang will be similar to that at the stem. Very unique.
-
Now, now Sjors. Figuring all this stuff out is part of the FUN. You're in no hurry. Now as far as crew, figure 5 men for each gun, a bunch to sail the ship while the others are fighting, a cadre of officers and a bunch of Marines. 200 won't do it! Oh, on Mirage you'll need another 25 just to polish the brass
-
That's SOME sander !!!! She's looking good so far. I like your use os spacers for consistency.
-
Wayne - thanks for your treatise on starfish. Some here may simply be curious as to whether they are edible (with fries, gravy and cheese) or as a surf 'n turf with groundhog.
-
Do not fret. We all have friendly 'reminders' on board our vessels!
-
No, not sleepy ---- just thawing out. Looking forward to your canons!!!!!!!
-
Thank you for the narrative, Piet. Your father, and all who served with him, have my sincerest gratitude. That said, I am looking forward to this memorial build with great anticipation.
-
It's not for me......... but for everyone. She deserves it
-
Great idea Andy. Sure beats the old bath towel routine!
-
Very pristine work there John. I too am curious about the sail hoops.
-
Looking great Sjors! And glad to hear Corel is helping out.
-
Yup, a confirmed darksider ----- more tool talk! I'm going to need to take a few photos of my Exacto knife and post it on my log
-
Mercury by DSiemens - FINISHED - BOTTLE
augie replied to DSiemens's topic in - Build logs for subjects built 1801 - 1850
So it's YOU who starts the food frenzy. May need to report you to a Moderator