HOLIDAY DONATION DRIVE - SUPPORT MSW - DO YOUR PART TO KEEP THIS GREAT FORUM GOING!
×


EdT
-
Posts
2,213 -
Joined
-
Last visited
Content Type
Profiles
Forums
Gallery
Events
Everything posted by EdT
-
Thanks, everyone. I really appreciate these comments and "likes". The work around the stern is very absorbing and thus very interesting. Since that last photo the next curved piece - the transition up to the wale thickness - has been added and the last piece to go around the stern got clamped on for drying this morning - so maybe it will be in place by Christmas - busy times though. Happy holidays, everyone and thanks again. Ed
- 3,618 replies
-
- 3
-

-
- young america
- clipper
- (and 1 more)
-
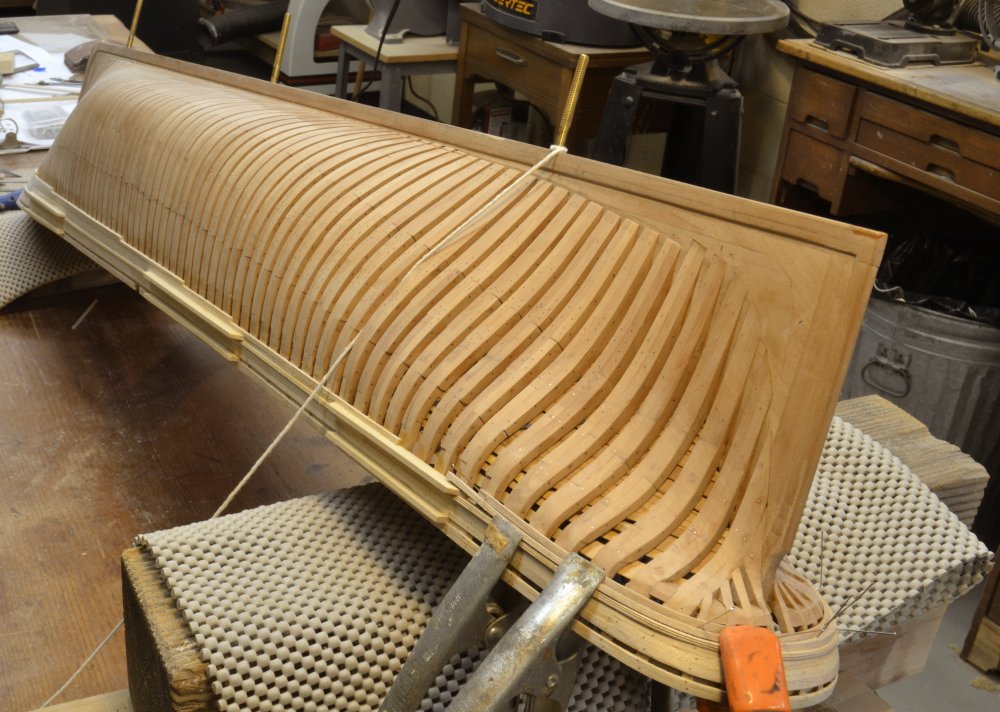
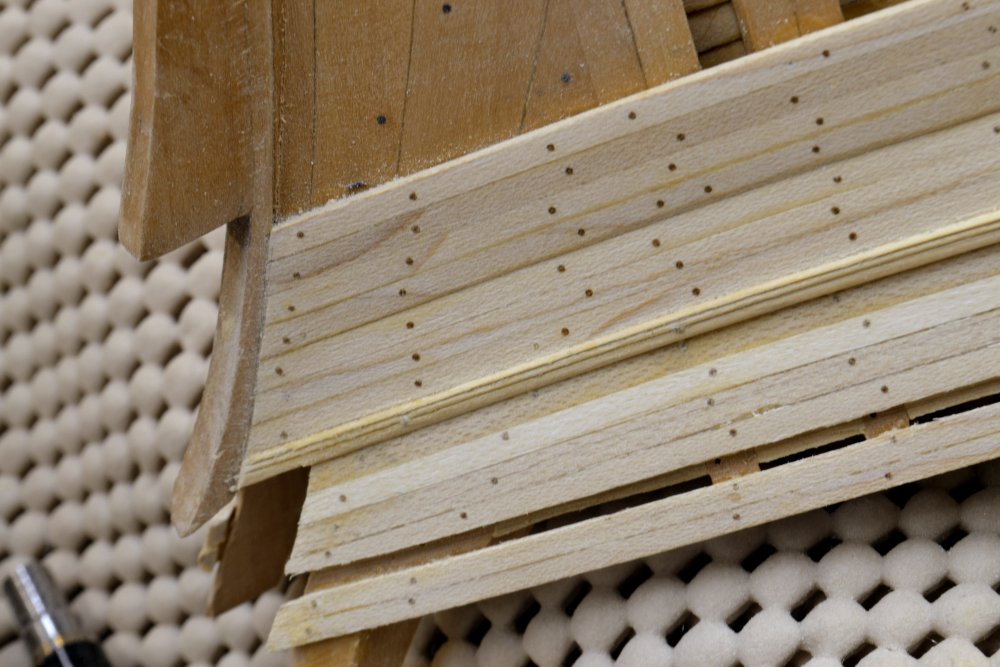
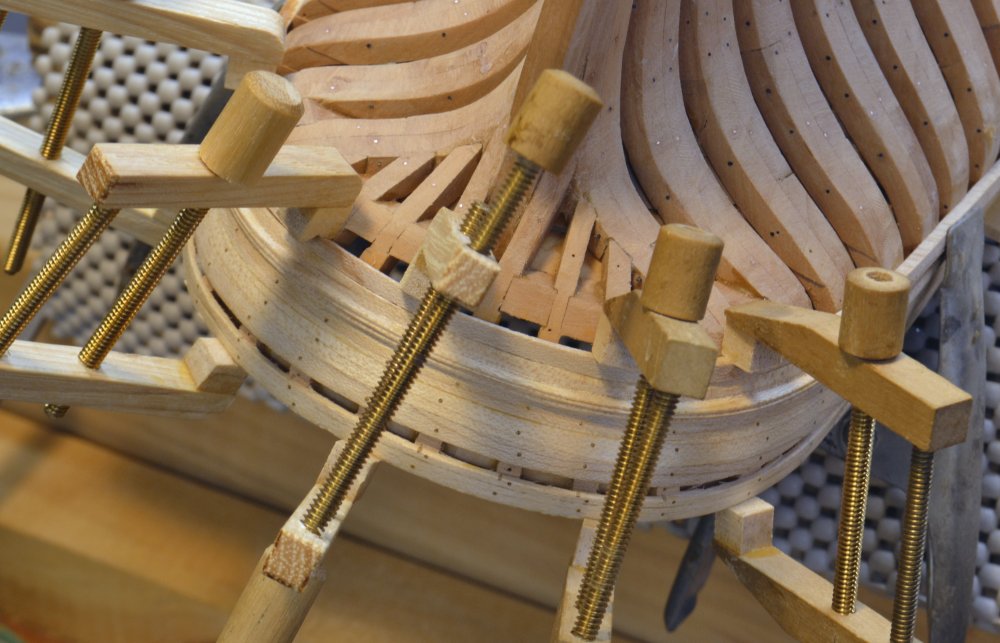
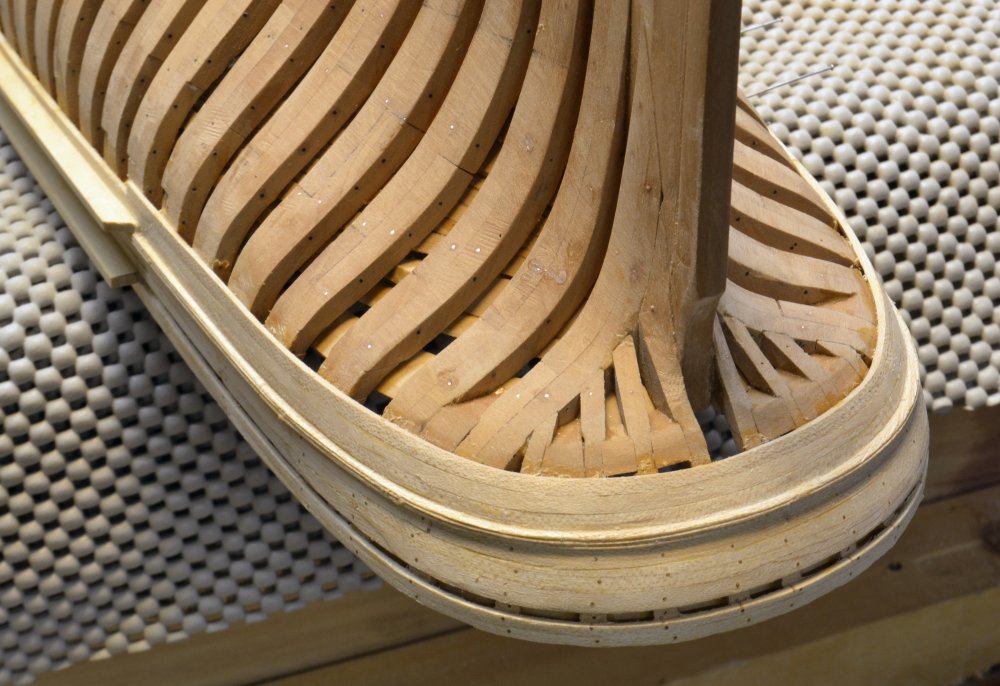
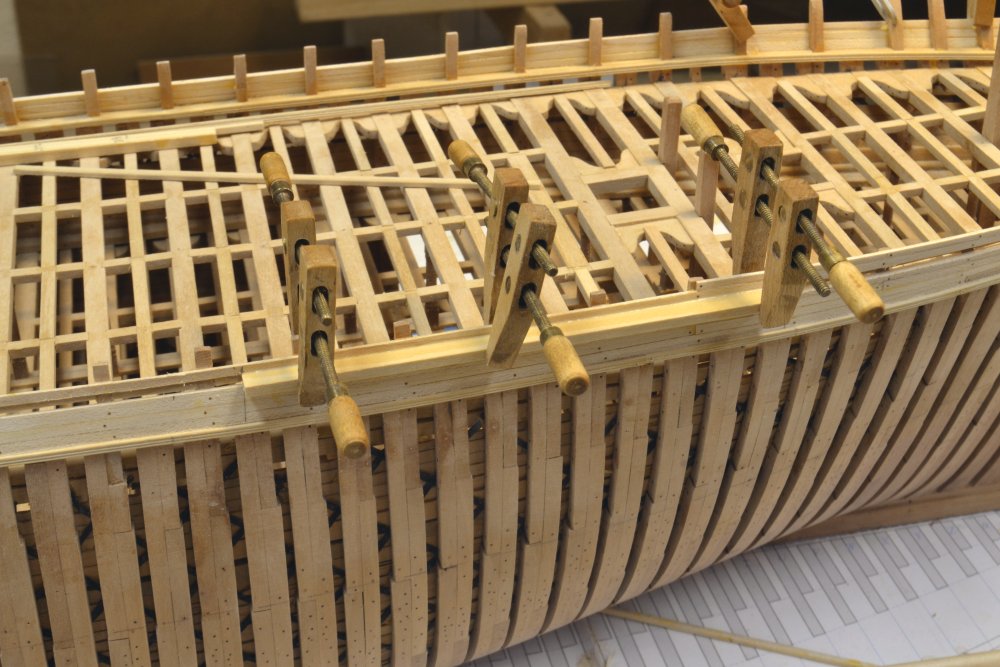
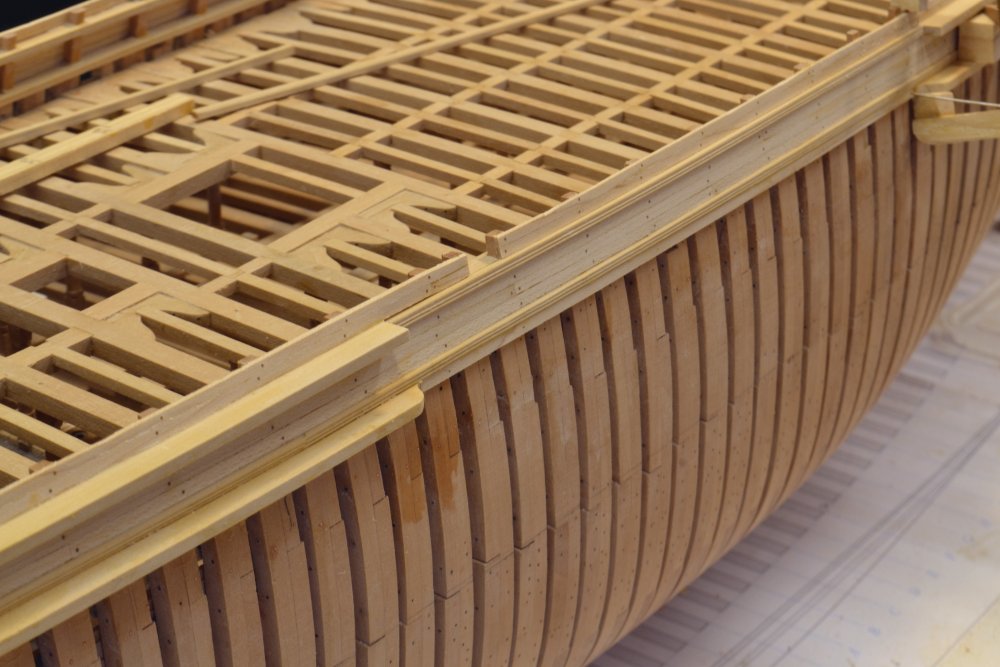
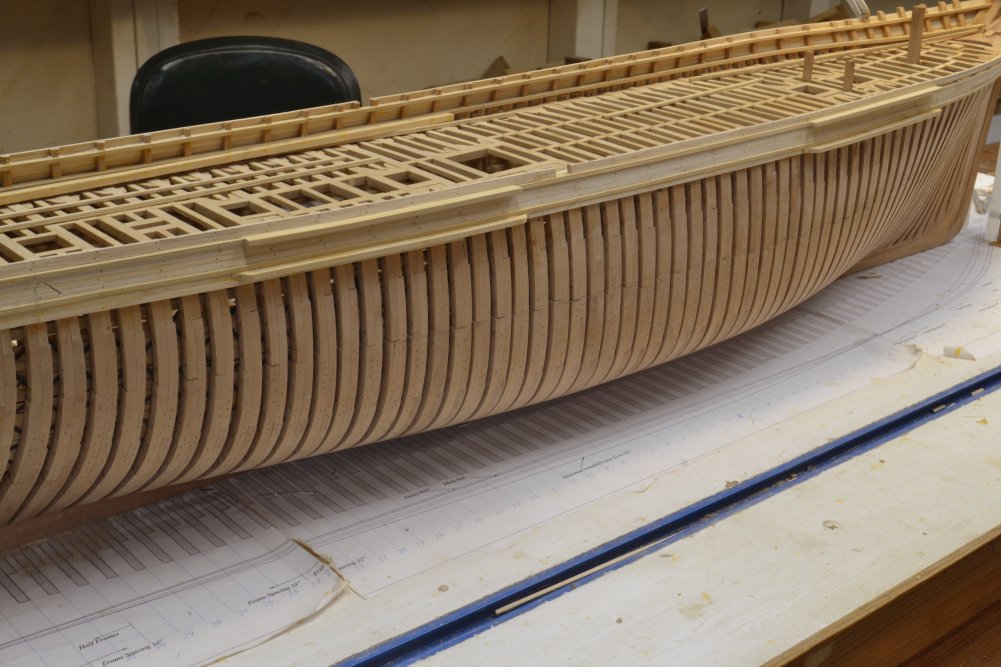
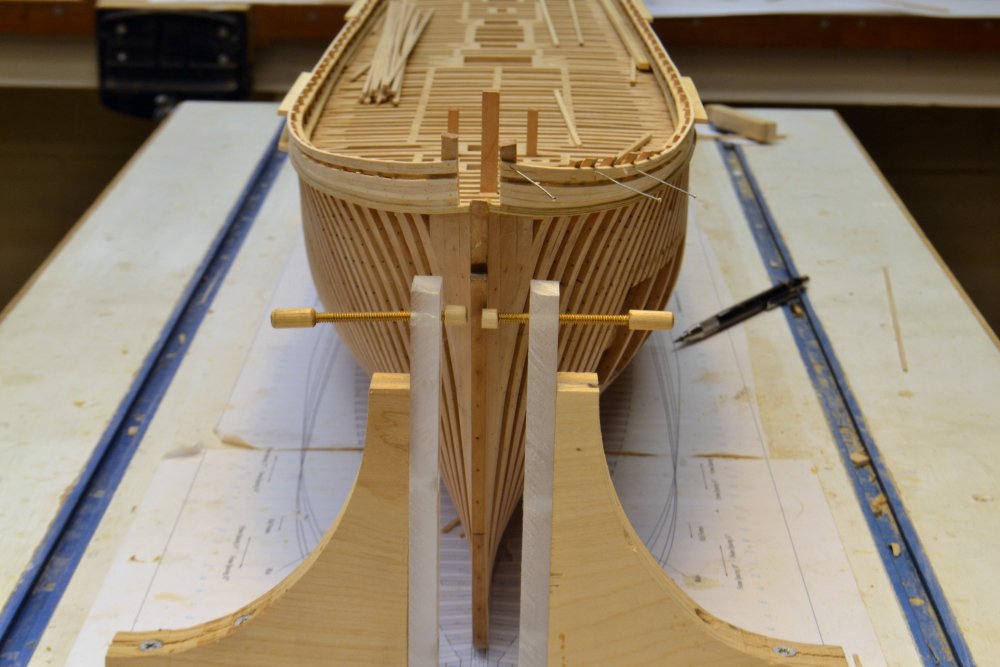
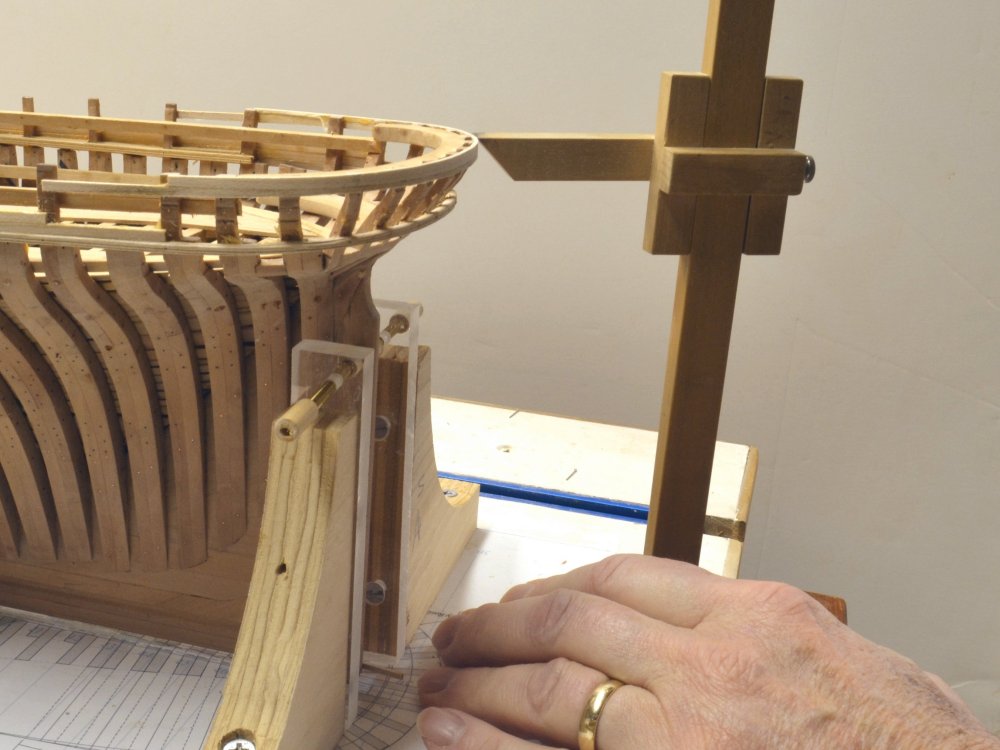
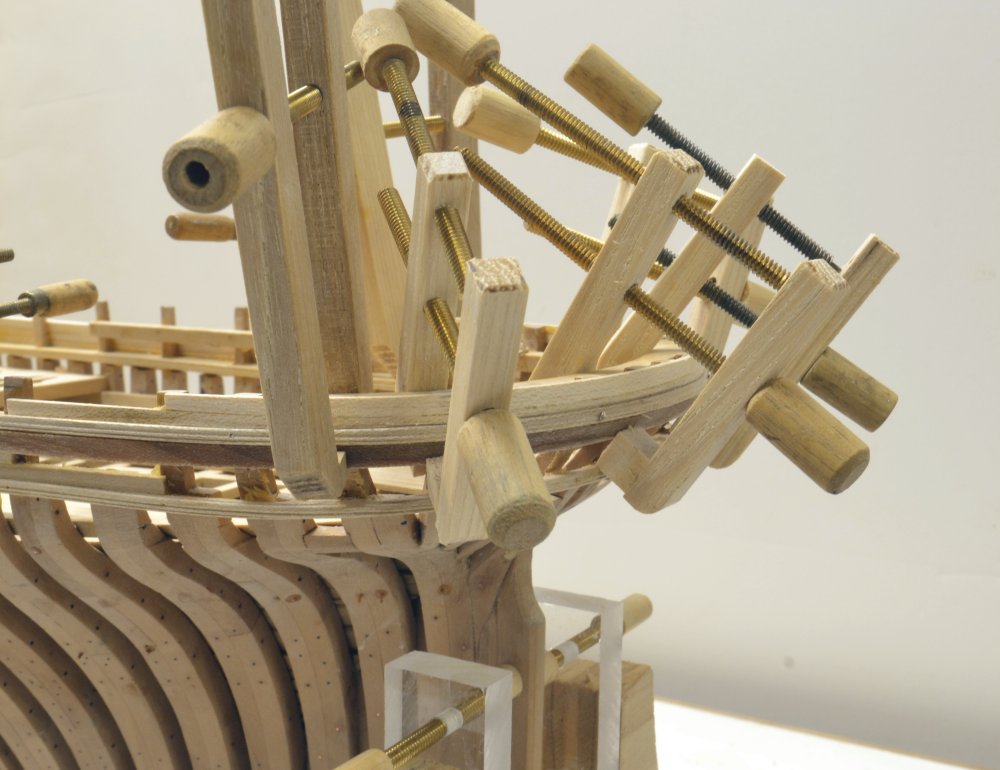
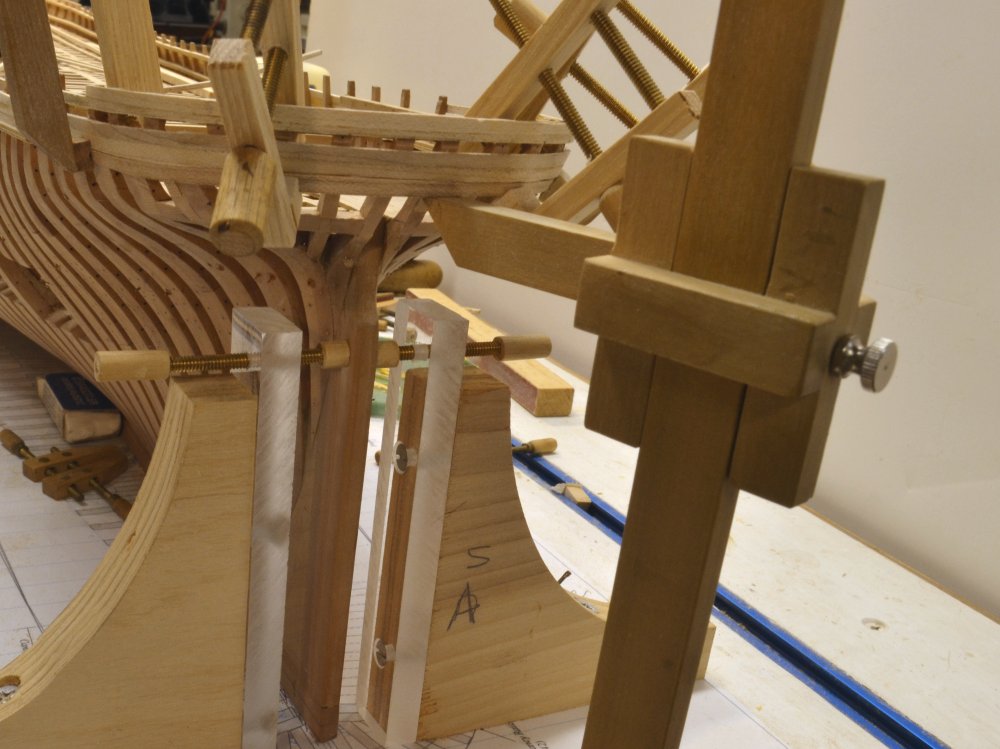
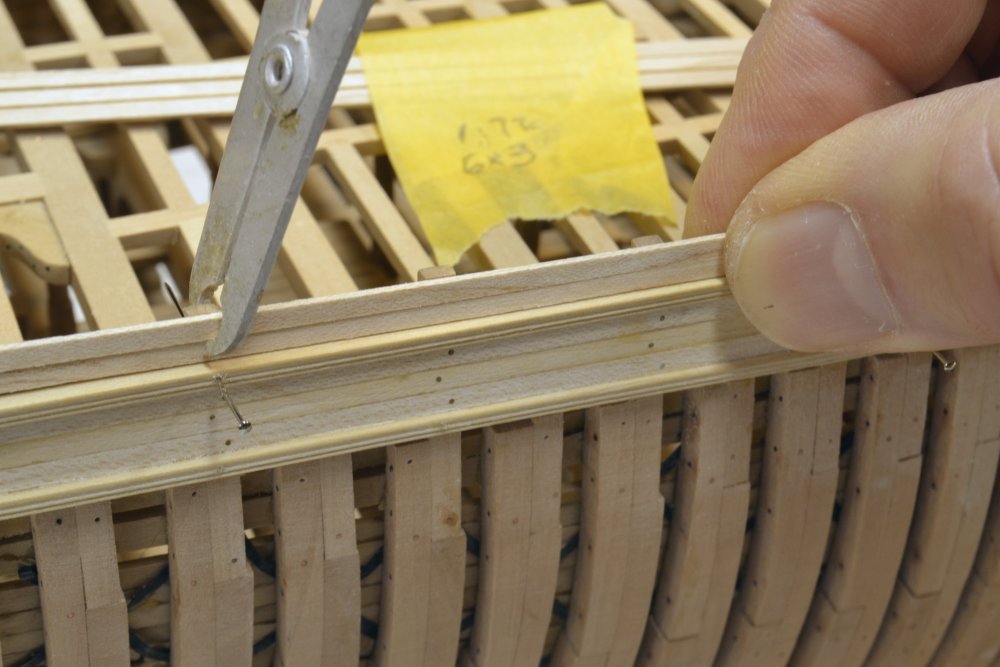
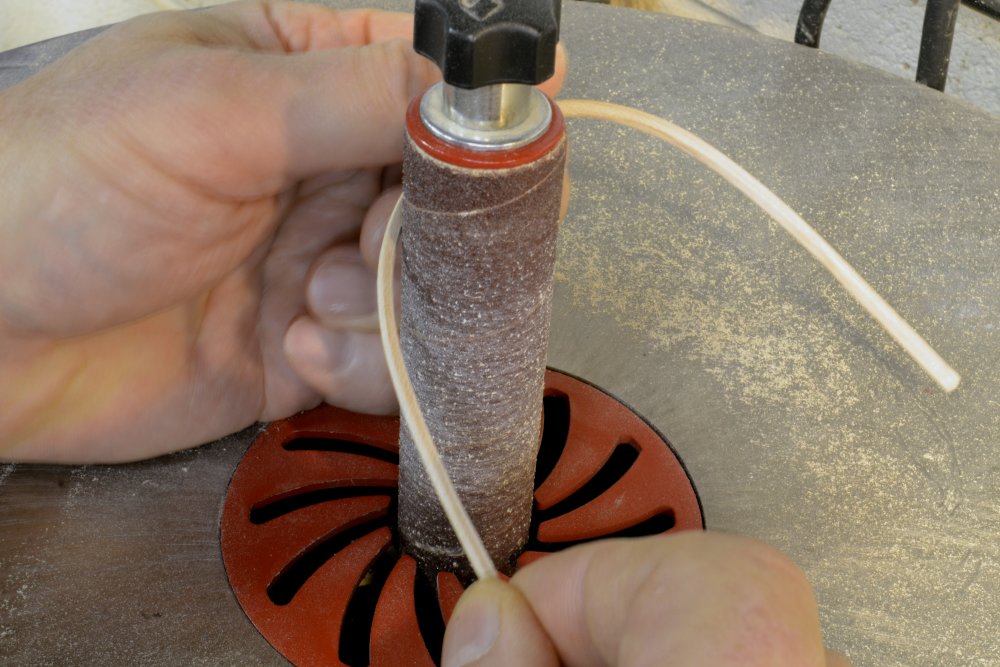
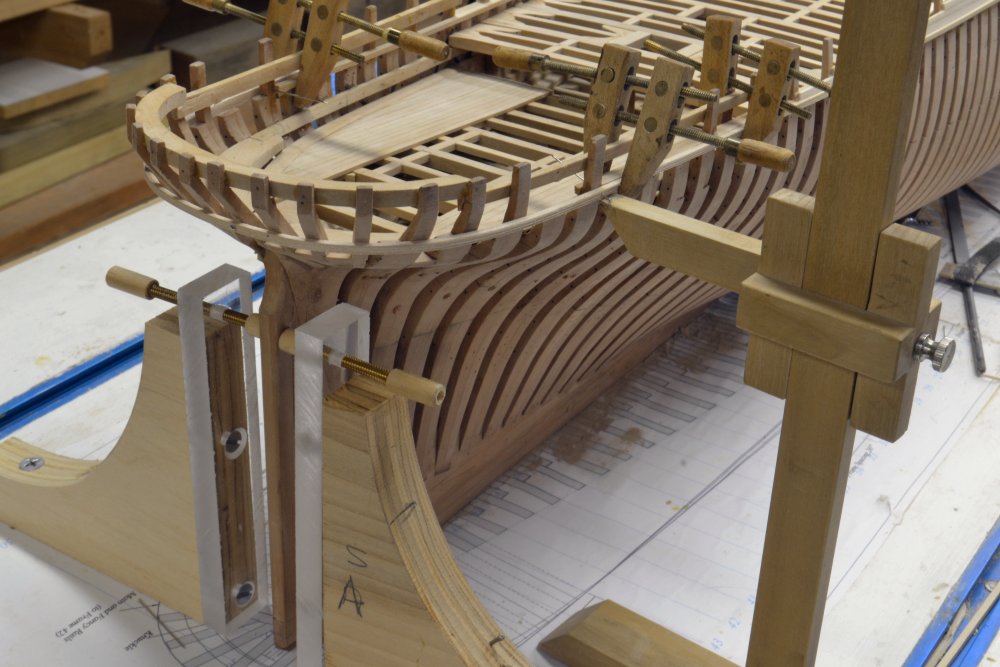
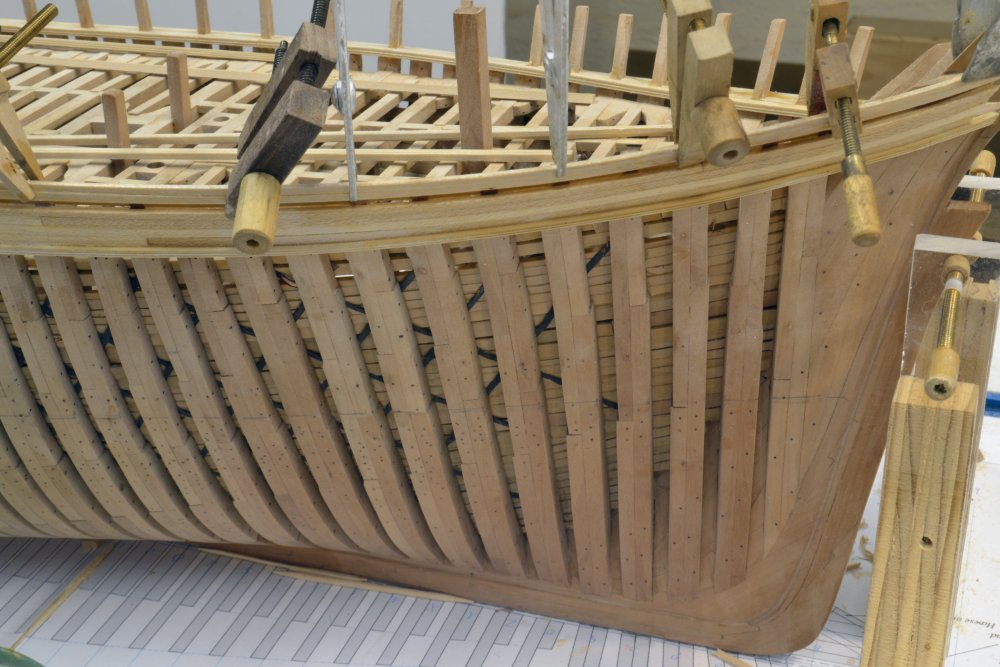
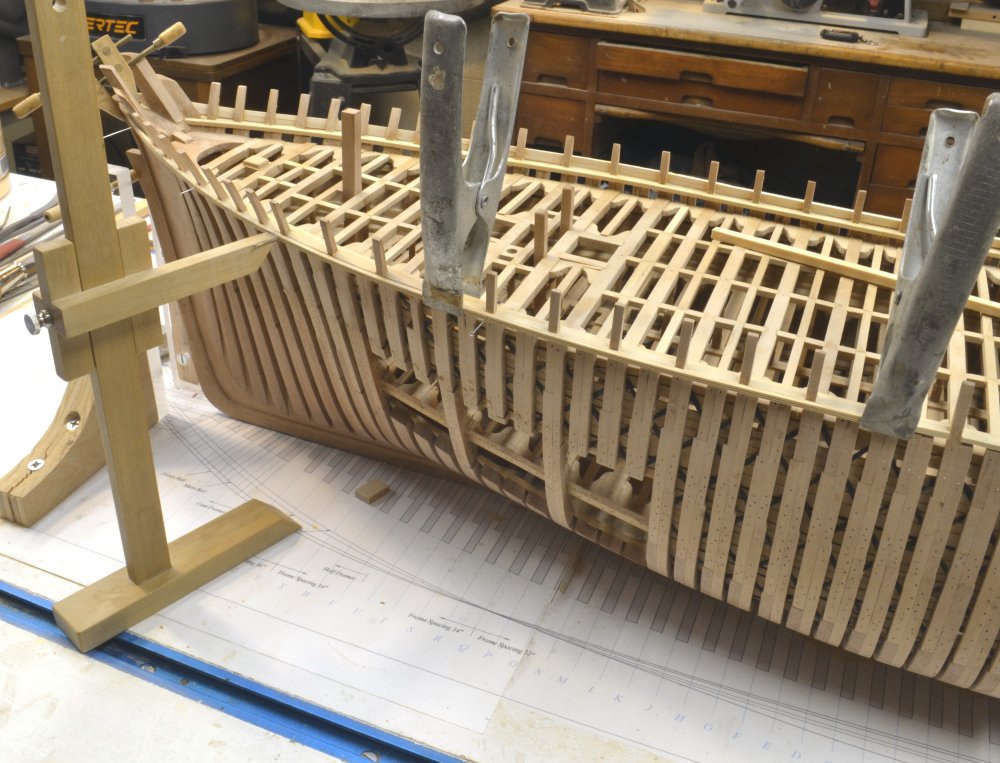
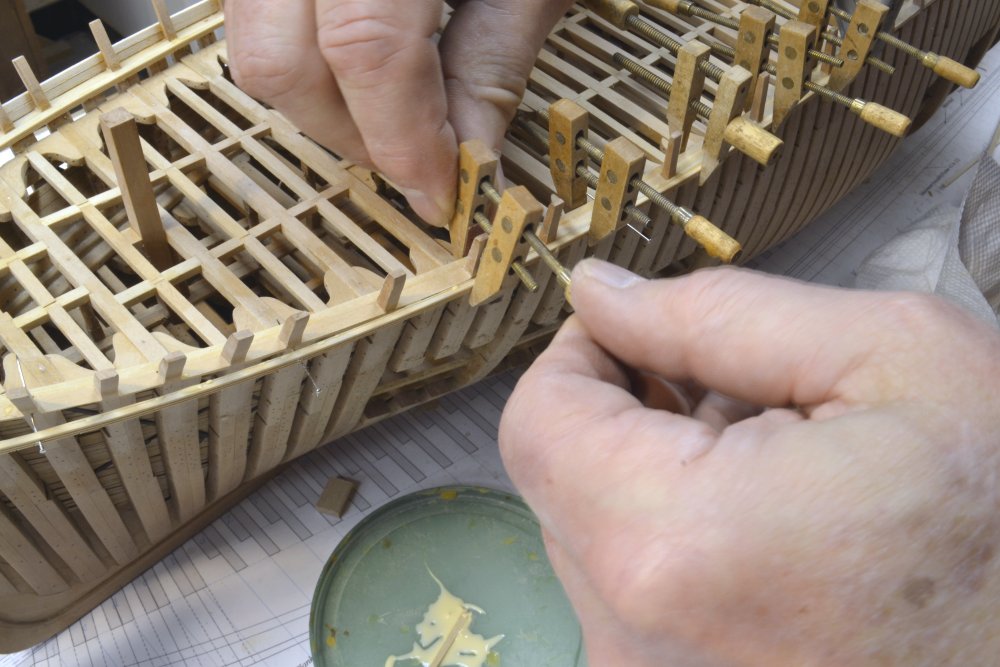
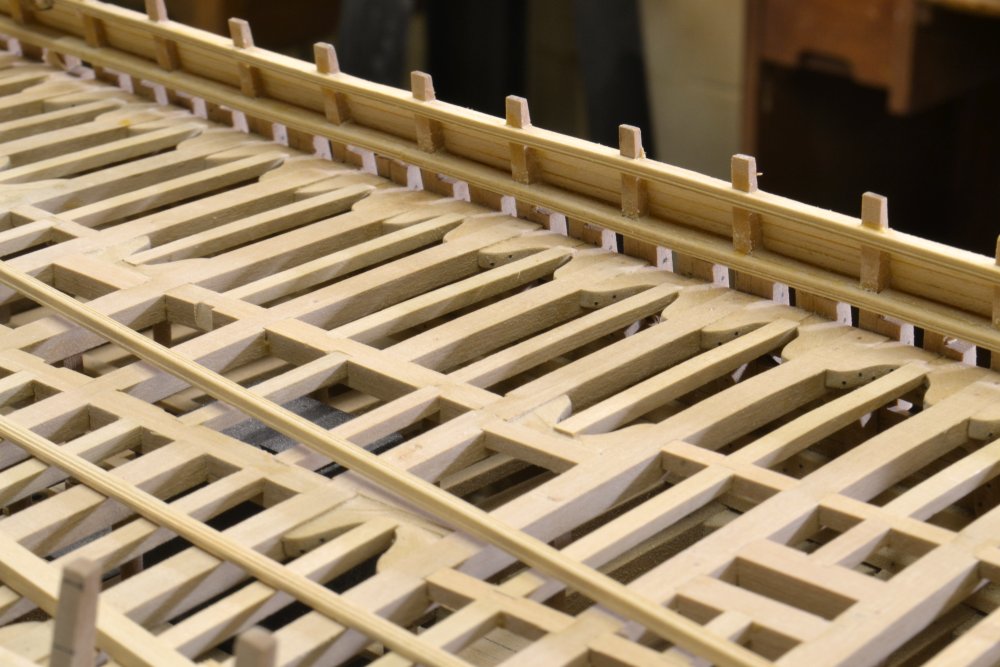
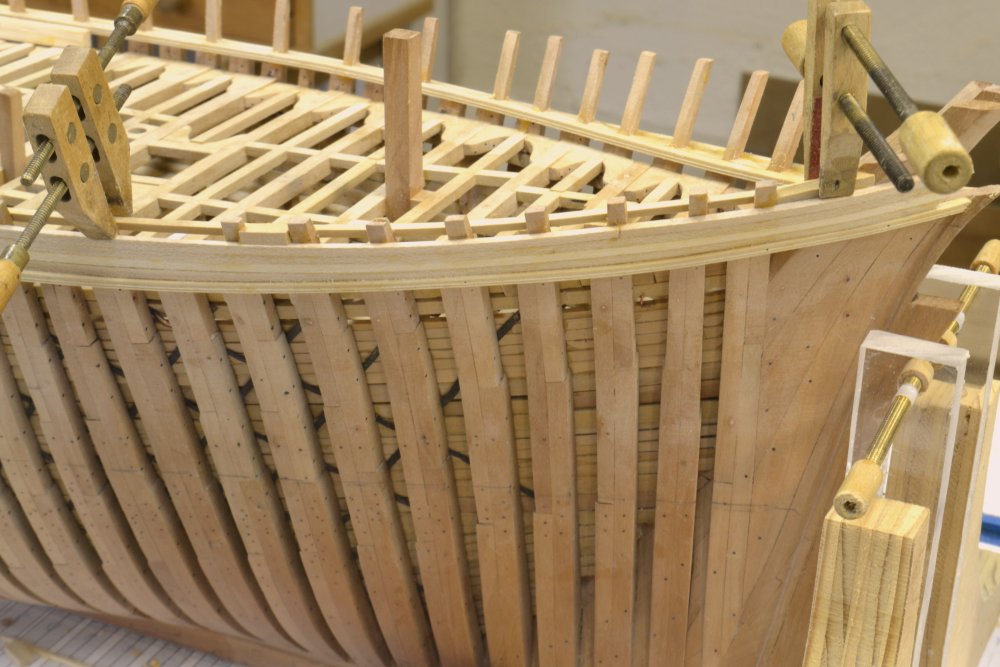
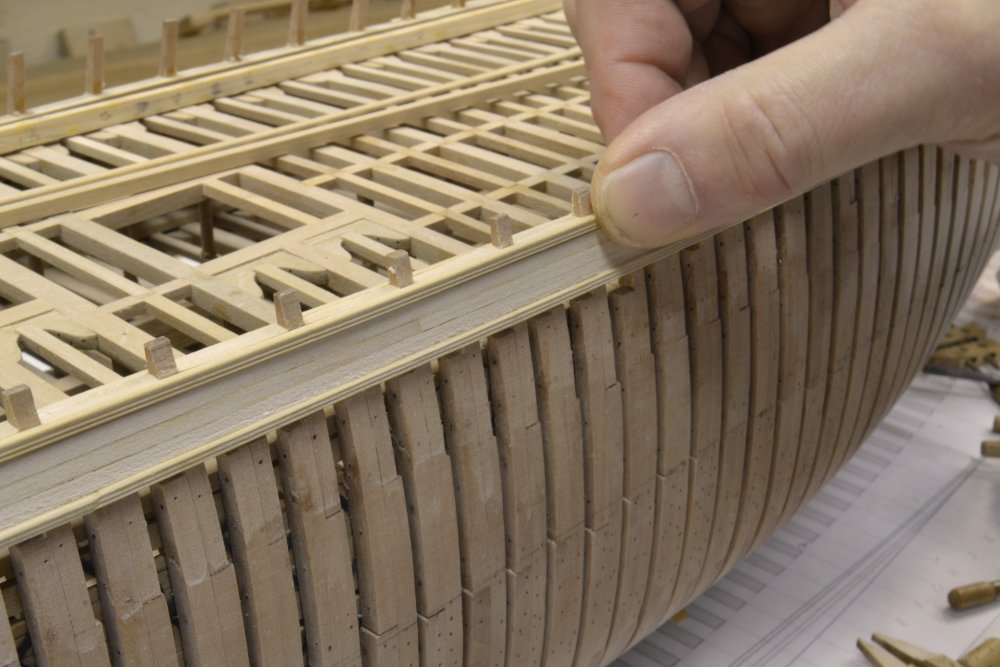
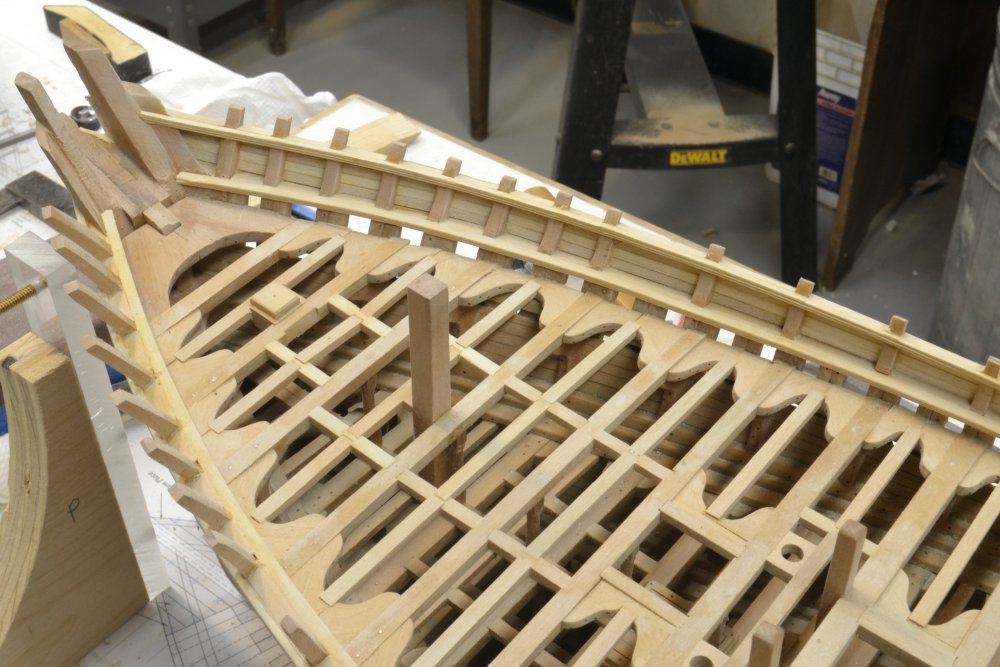
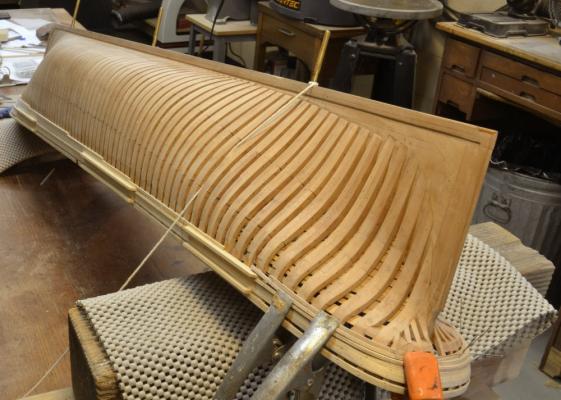
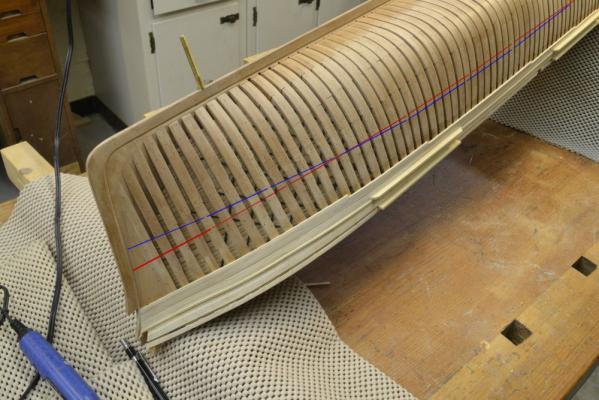
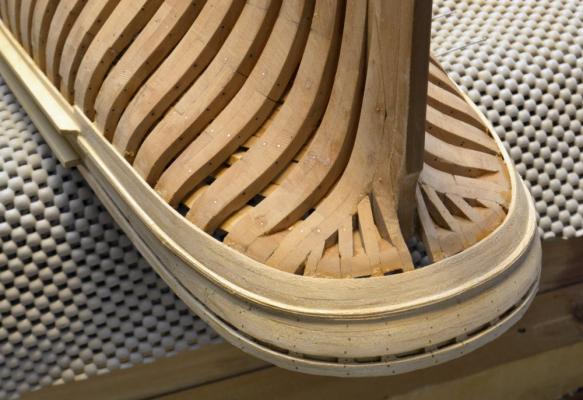
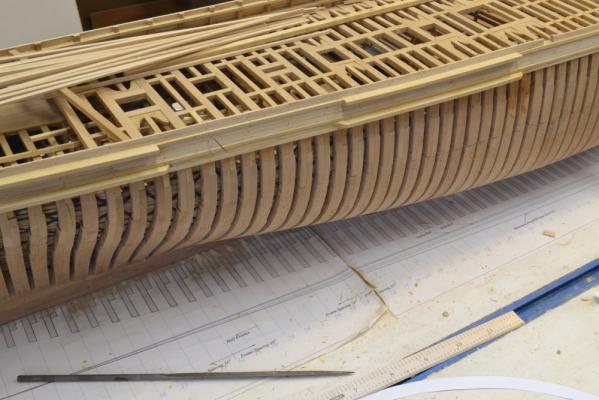
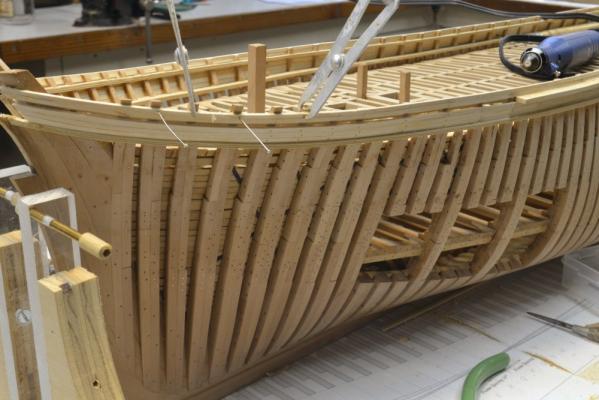
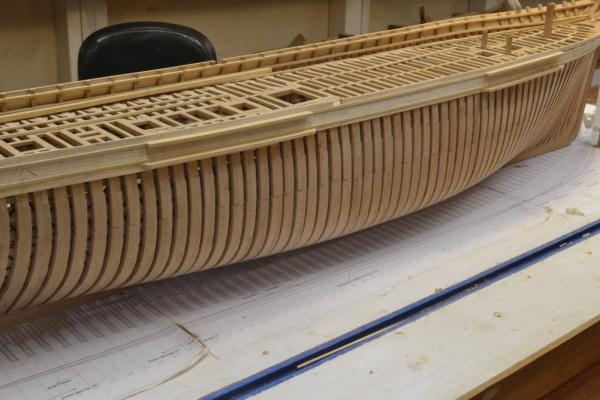
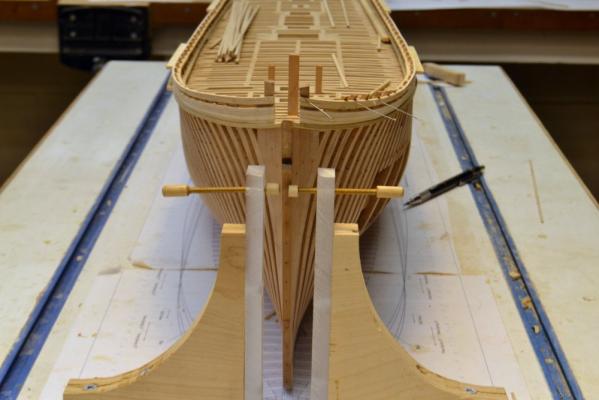
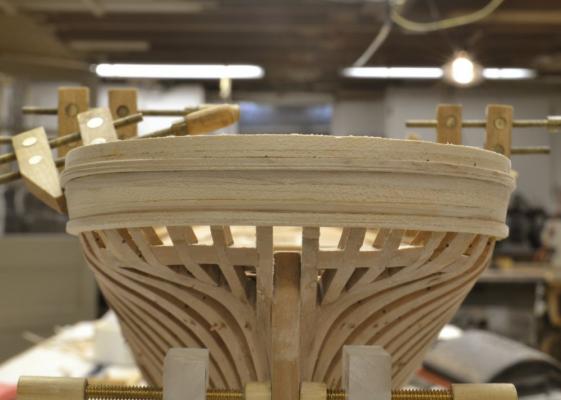
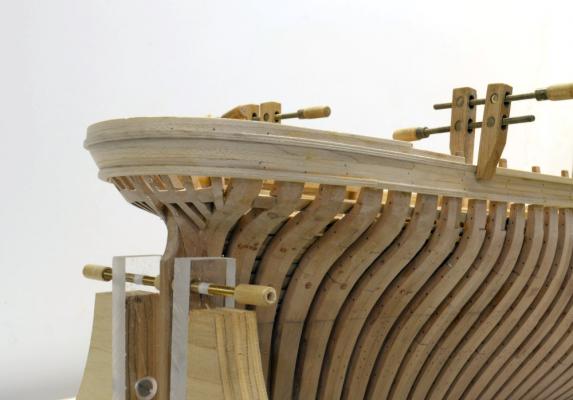
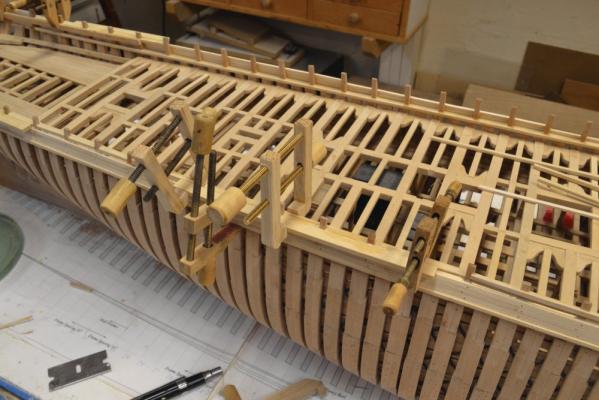
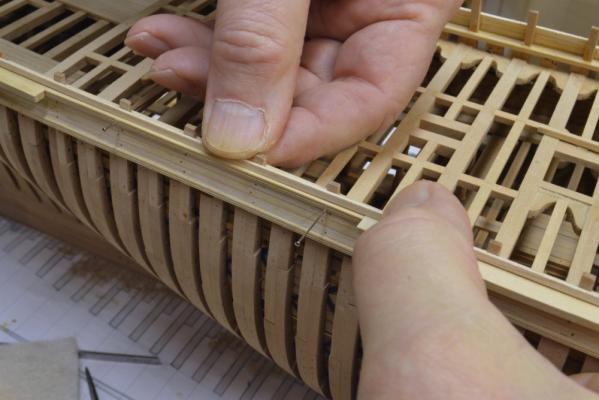
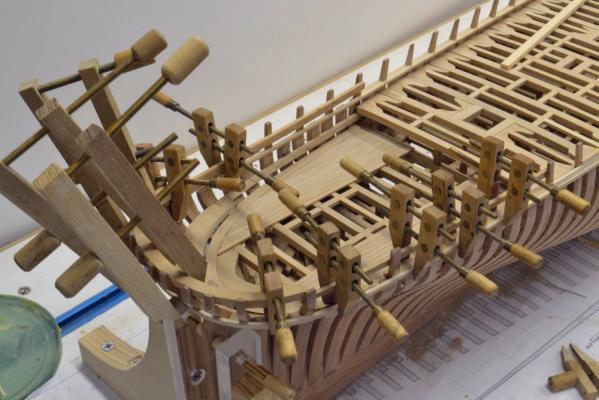
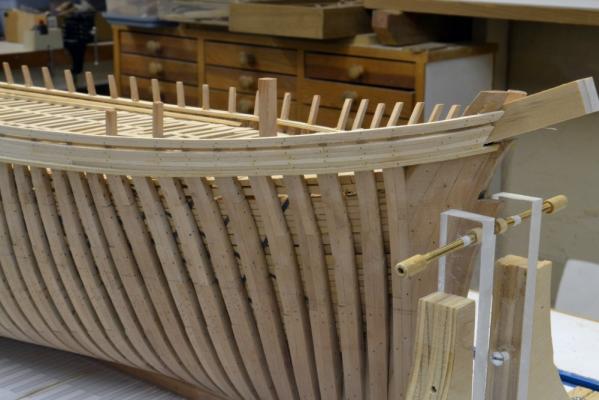
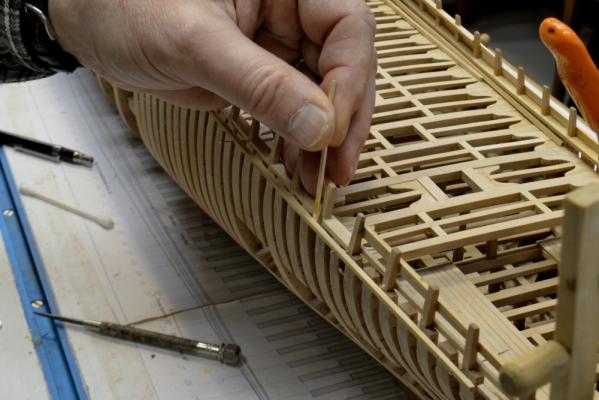
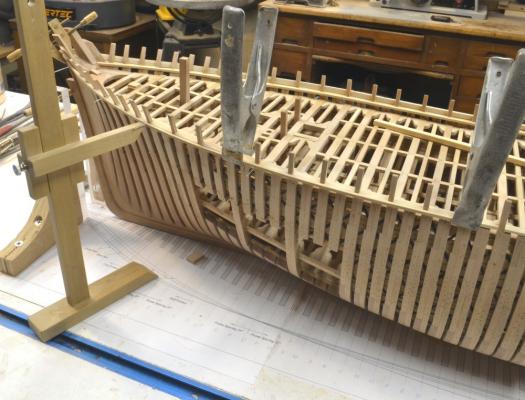
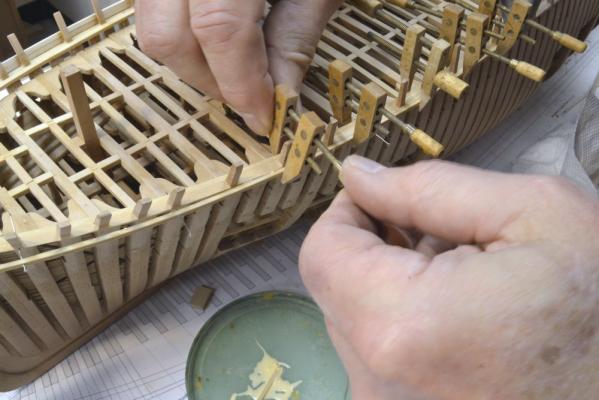
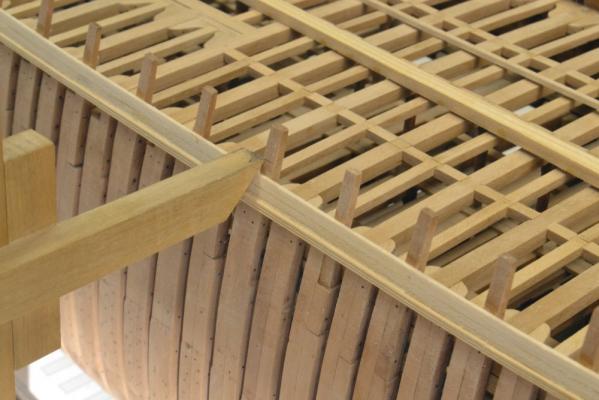
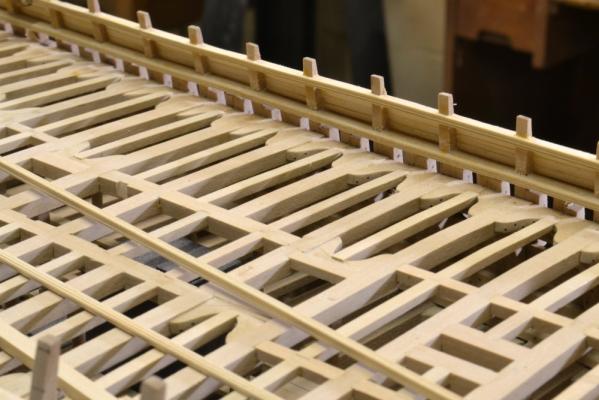
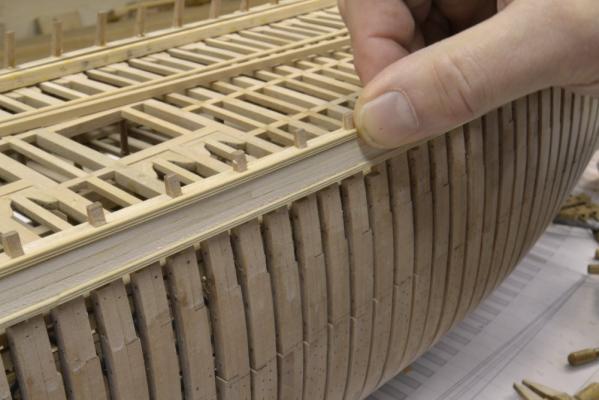
Young America - extreme clipper 1853 Part 101 – Planking and Wales To conveniently work on the planking below the channels, the hull was inverted as shown in the first picture The toptimbers are no longer as vulnerable with the planking installed up to the top so there is minimal risk of damage. I still use carpet padding as a precaution and have tied the hull down to keep from pushing it off the bench. The next picture shows some of the planking installed at the bow. The hull is marked with pencil lines to show the extent of the wale and the load waterline. I have highlighted the lower edge of the wale in red and the lwl in blue. The wale is 6” thick and there are roughly 20 strakes of 6” wide planks from top to bottom. The top strake transitions from the 4” common to the 6” wale planking two strakes below the lower channels. That break in thickness can be seen in these pictures. The next picture is a close-up of the “hooding ends.” The wale planks are pared down to match the depth of the rabbet. The treenails are hard bamboo (old garden stakes) – very hard and very dark. The grain flecks and the color variation in the maple planks is a bit distracting, but all of this planking will be painted. The planking around the stern was done concurrently with that shown above. In the next picture the second strake below the planksheer rail has been curved and is clamped to dry. Each of these is boiled for over an hour, clamped as shown below and left overnight to dry. It can then be glued with a similar clamping arrangement. This is really a one-step-per-day process. The last picture shows the three strakes below the rail – levelled off but not yet finish sanded. The next strake will be the transition strake to the wale thickness. There may be one more circumferential strake - at the "knuckle" - but the planks below will butt into the last of these. The ends of the the planks below will bolt into the supporting chocks between the stern timbers. The chock around the helm port has not yet been fitted. Space is left for the main rail. The area between this and the lower rail will be decorated with a bas-relief eagle and some s-curved vines. The words “Young America” then “New York” will be lettered below the lower rail on these lower three planks.. Ed


- 3,618 replies
-
- 44
-
-
- young america
- clipper
- (and 1 more)
-
Thank you all for the comments and likes. They are brightening up the so far dreary winter. I appreciate the comments on the lines of the hull. They are so gracefully and slightly curved - without any breaks or interrupting appendages that the slightest deviations show up - usually when its too late to fix them. the planking is proceeding. Will have some pics soon. Ed
-
Young America - extreme clipper 1853 Part 100 – Rails and bulwark continued Work continued this week on the topside rails, planking and channels. The first picture shows the forward starboard upper channel being installed. These are 6” thick. Note that the main rail sections are missing in this photo – being only temporarily fitted at this stage. In the next picture the mizzen and main lower channels have been installed. Note that – unlike the uppers - these are “streamlined” at the ends. I believe these lower channels spent a good deal of time in the water. The main rail sections are positioned only in this picture. The stack of planks on the deck are destined for the starboard side down to the wale. In the next picture the entranceway has been cut into the upper strakes. The last section of topside planking is being glued in the next picture – held by pins and a couple of screw clamps. The next picture shows the topside planking completed – except for treenails. The toptimbers have been cut off flush. The next picture shows the run of planking from almost directly forward. Planking of the starboard side down to below the waterline is next on the agenda. This will take some time with the narrow planks used on these ships. The model will be inverted to make this work possible around the stern. Planking on the port side will go just a few strakes below the lower channels – leaving the framing on that side open below that height. Ed

- 3,618 replies
-
- 39
-
-
- young america
- clipper
- (and 1 more)
-
Lovely work, Remco. I could be wrong, but I believe all were the same length - but the upper straps are fore shortened in the drawings due to the hull curvature. Note that the bolt spacing on the drawings decreases on the higher ones. If you think about it from a strength point of view, there is no reason why these should be of different lengths. I'd vote for making them all the length of the lowest. That one and the next couple are shown in true view. Ed
- 1,214 replies
-
- 5
-
-
- sloop
- kingfisher
- (and 1 more)
-
Thank you, everyone. Elia, I share your fascination with Young America's stern - its both beautiful and complex. Doing it justice is a challenge. I wish I could say it took just one try, but the final solution worked well and it is presentable. Its by no means finished. Planking below the lower rail and around the "knuckle" still awaits. Ed
- 3,618 replies
-
- 1
-
-
- young america
- clipper
- (and 1 more)
-
I can't add any knew words, Micheal, but the like button just seems completely inadequate. Beatiful design. Beautiful workmanship. Can't wait to see it running. Ed
-
Bravo, Dave! Ed
-
Fascinating, Micheal. I don't know what else to say. Ed
-
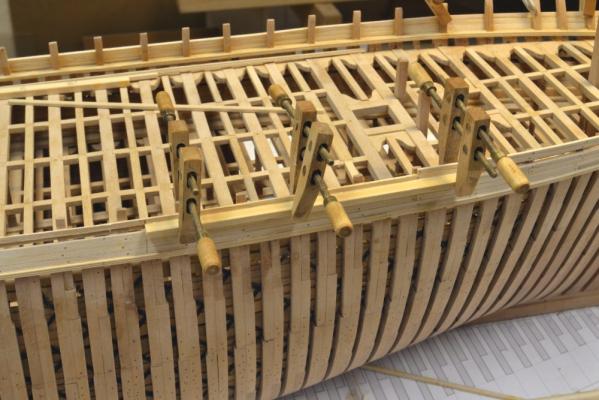
Young America - extreme clipper 1853 Part 99 – Rails and bulwark continued Most of the work since the Thanksgiving holiday has consisted of fitting the rails and planking around the upper stern. This has been challenging and there has been some rework along the way. I will forgo a full tutorial and summarize. The planksheer rail was fitting around the stern in an earlier post. To fit the members above this and to refine its exact curve better, I decided to start at the top where the heights are easiest to measure as shown in the first picture - and to adjust if necessary. The top of the planking around the poop corresponds with the top of the poop decking at the side. This is also the top of the frames and the underside of the fancy rail that caps the bulwarks around the hull. These heights are critical. In the next picture the first strake of planking below the main rail has been boiled and clamped to dry. The main rail was shaped to fit and is only pinned in place. It will be painted white and the surrounding hull - and the lower rail -black, so it will not be permanently installed until much later. The dark, saturated plank being fit is held tightly against it. These planks not only curve around the stern but twist to fit the slant of the underlying timbers. Lots of new clamps here made for this awkward work. The next picture shows the third and lowest planking strake being fit. The height gauge is being used here to check heights at points around the stern. The lower rail has been removed for this. The next picture showing the finished work is the acid test. I’m not sure which was a bigger problem in judging this, my glasses or the camera lens, but this is the final version. Both rails have now been replaced with newly formed, clean versions. The originals suffered from all the fitting, clamping and refitting. The next picture shows a different angle. All this work was done in hard maple because it will be painted and it was easier to bend. The main rail is still only fitted temporarily. The planking is now ready for Treenailing. There will be a carved, gilded America eagle placed between the rails. I can’t wait to plank below the lower rail around the stern – more twisted planks and more clamping issues. A job for the new year. With the stern work completed the top members around the rest of the hull will be easy to fit. In the next picture the mizzen channels are being installed. The top channels are set at the height of the main rail and the lower channels just below the planksheer. Notches for the chains will be cut later in situ. The channels will be capped with moldings much later. In the next picture the starboard main channel is being installed. There is still much work to be done on the port side. In the next picture a section of main rail is pinned in place and one of the topside planks held against it. There are two of these 6” x 3” planking strakes above the rail. They must fit tightly down on the rail and the channels. The channels were most likely bolted to the outside of the planking to keep them outside the main watertight skin, but I am installed them against the frames to improve their strength on the model. The appearance will be the same. In the last picture the uppermost planking strake is being held in place to check its height against the tops of the frames. A white capping rail – the fancy rail – will fit over this, but much later. There is no inside planking above the main rail, so the fit on the frames will be visible. Ed


- 3,618 replies
-
- 40
-
-
- young america
- clipper
- (and 1 more)
-
If you were me, Micheal, you would probably have thrown those gears away a month or two before you needed them. Ed
-
Like a piece of jewelry, Micheal.
-
ancre LE BONHOMME RICHARD by Jeronimo - FINISHED
EdT replied to Jeronimo's topic in - Build logs for subjects built 1751 - 1800
Thank you, Karl, for the excellent explanation. The process is very similar to what I do using Swiss pear, but I do not use sealer before the wax. If the sealer is water based - and therefore probably acrylic - it will add no color. If it is, for example, shellac based it will add some yellow to the color, as will most natural waxes. The sanding sealer may account for some of the silky smooth surfaces in your work. A very good method. Regardless, your results are quite beautiful. Thanks, again for taking the time to explain - and for the pictures. Ed- 662 replies
-
- 5
-
-
- bonhomme richard
- frigate
- (and 1 more)
-
I know what you mean, Micheal. I have some 12' lengths of 4 x 6 Douglas Fir in my workshop - about the size of YA's stern planking in fact. Whenever I look at it these days I think of the effort it must have taken to wrap one these around a 15' radius at an angle through its cross-section some 30 odd feet in the air. One can only admire what it took to build one of these monsters in those days. Ed
- 3,618 replies
-
- 3
-
-
- young america
- clipper
- (and 1 more)
-
Thank you, E&T. Very kind words. Right now I am a bit stressed over both progress and precision - and of course the two are sometimes in conflict as you must well know. The work on the upper bulwarks and rails - especially around the stern - is going slower than my impatience would like, but with the long sleek lines of the ship there is little room for error because every bump or imbalance stands out. The work has taken me back through the drafting process and even to the original table of offsets on a few occasions. I sometimes long for the complex breaks in line and the clutter of external features of the earlier ships. But the challenge is part of the deal - so who's complaining? Ed
- 3,618 replies
-
- 6
-
-
- young america
- clipper
- (and 1 more)
-
ancre LE BONHOMME RICHARD by Jeronimo - FINISHED
EdT replied to Jeronimo's topic in - Build logs for subjects built 1751 - 1800
I love your process on the top, Karl. First rate - and beautifully executed. Also, I may have commented on this in the past, but I love the rich nutty brown color of the wood. What species are you using and what finish? thanks, Ed- 662 replies
-
- 1
-
-
- bonhomme richard
- frigate
- (and 1 more)
-
Dave, The clipper sterns were kept small - just large enough to accommodate the helm and the rudder mechanism. They were light and raised up to reduce drag when heeled. Gone were the wide wing transoms and full buttocks of earlier years. Ed
- 3,618 replies
-
- 1
-
-
- young america
- clipper
- (and 1 more)
-
Magnificent. Simply magnificent. Ed
-
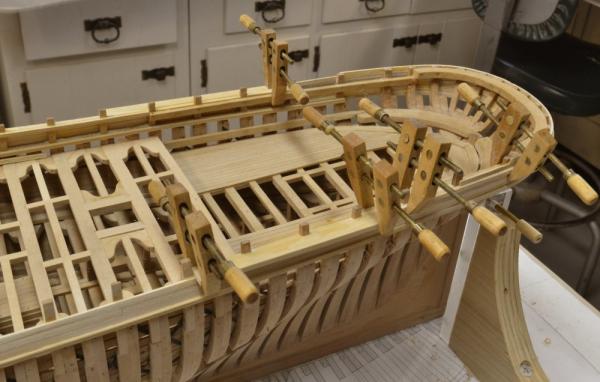
Young America - extreme clipper 1853 Part 98 – Planksheer / Main Rail continued The planksheer rail around the stern was made from hard maple. Although the remainder of the rail is Castelo, my stock was too old and dry to bend around to the required curve. No problem with the maple. All the maple will be painted. In the first picture the section around the stern has been formed and is being beveled to fit against the slanting frame timbers. In the next picture the rail is being positioned and pinned at the proper heights using the height gauge. This fitting took some time. The bevel of the rail is most pronounced at the very stern and is vertical at the forward ends of the piece. With the pins setting the heights, the rail was glued into place as shown below. Lots of clamps required for this. There was a lot of waiting during the forming and gluing of the stern rail, so work continued concurrently at the bow. In the next picture, planking above the main rail is proceeding. Space has been left for the main rail itself. This will be installed after it and the surrounding planking are painted – as described earlier. In the next picture all of this planking has been treenailed. Once the planksheer rail around the stern was installed, the rail was continued forward on the port side. In the next picture it is held in position with pins and is being glued. Planking of the upper sides will now continue up to the top rail – the fancy rail. Ed


- 3,618 replies
-
- 35
-
-
- young america
- clipper
- (and 1 more)
-
I continue to be enthralled, Micheal. I had almost forgotten the size of this until you mentioned the 1/8 shaft. Will you need oil seals? Ed
-
Thanks, everyone - on Thanksgiving morning - that means I have chores to do. Druxey, I will not hide the fact that it was only a lot of checking. There was some remedial rework - and as always with rework, some lessons learned. One is that (if I do this again) I will always leave generous excess in the lengths of the top timbers - as they did in the shipyards. Thanks, Maury. The only thing I know about patience is that I haven't got a lot of it. Again, Happy Thanksgiving, all.
- 3,618 replies
-
- 2
-
-
- young america
- clipper
- (and 1 more)
-
A complex bit of work. I'm still not sure I understand this last piece, but will patiently await the next steps. Amazing. Ed
-
Looking wonderful, Micheal. Really superb work. Ed
-
Young America - extreme clipper 1853 Part 97 – Planksheer / Main Rail In the first picture the a portion of the port outer planksheer rail is being fitted. The height gauge is being used here to check the height along the rail before inserting pins to hold the correct line. This part of the rail needs to be beveled to fit against the flare of the bow. In the next picture the rail is being glued with the pins holding the line. I spent a lot of time checking heights this week. In the next picture the height of the lower edge of the main rail is being marked out to set the top of the band of planking between the rails. The distance between the height of the planksheer and the main rail varies over the length of the hull. This became apparent when setting these points. It seemed wrong, but the drawings verified this. This made me suspect my drawings but the original table of offsets confirmed the variation. The planking of this band between the two rails is further complicated by the flare out at the bow. This makes the true projection of the band wider than shown on the vertical section. These differences are small, but critical if the planking is going to converge at the top of the frames. I was doing a lot of height checking this week. A part of the inside of the main rail and fillers between frames have been installed in the next picture. The “look” of the inside of the bulwarks is starting to emerge. An outside view of this work at the bow is shown in the next picture. The bottom of the inside of the main rail must match the height of the top of the outer band of planking. The next picture shows why. In this picture the outer main rail is being fitted. Its top is flush with the tops of the filling pieces between frames. All these rails are horizontal. The last picture shows the inside of the bow at this stage before fitting the main rail in this area. I say "fitting" because the outer main rail will not be installed until later - for painting reasons. The next step is to install the thin planking above the main rail up to the tops of the frames leaving a tight space for the outer main rail. This will be installed after the surrounding planking and the rail itself are painted - black and white respectively. It is also time to fit the rails and planking around the elliptical stern. Can’t wait. Time for a holiday break. Happy Thanksgiving everyone – well at least everyone in America. My British friends used to tell me they celebrated thanksgiving on July 4th. Cheers, Ed


- 3,618 replies
-
- 44
-
-
- young america
- clipper
- (and 1 more)
-
Thank you all. I am glad to be finished with the major deck framing effort and to be getting into some different interesting work. Jan, to answer your question from a few posts back, the 1:72 model will be about 36" high from keel to the top of the mainmast - almost 220' on the real ship. Ed
- 3,618 replies
-
- 1
-
-
- young america
- clipper
- (and 1 more)