HOLIDAY DONATION DRIVE - SUPPORT MSW - DO YOUR PART TO KEEP THIS GREAT FORUM GOING!
×


EdT
-
Posts
2,213 -
Joined
-
Last visited
Content Type
Profiles
Forums
Gallery
Events
Everything posted by EdT
-
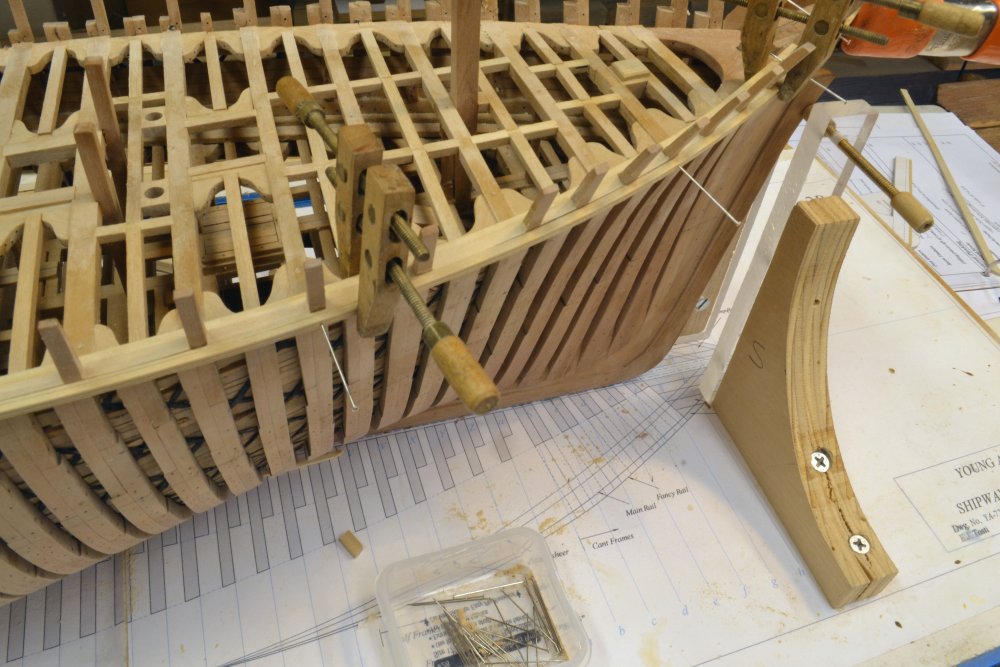
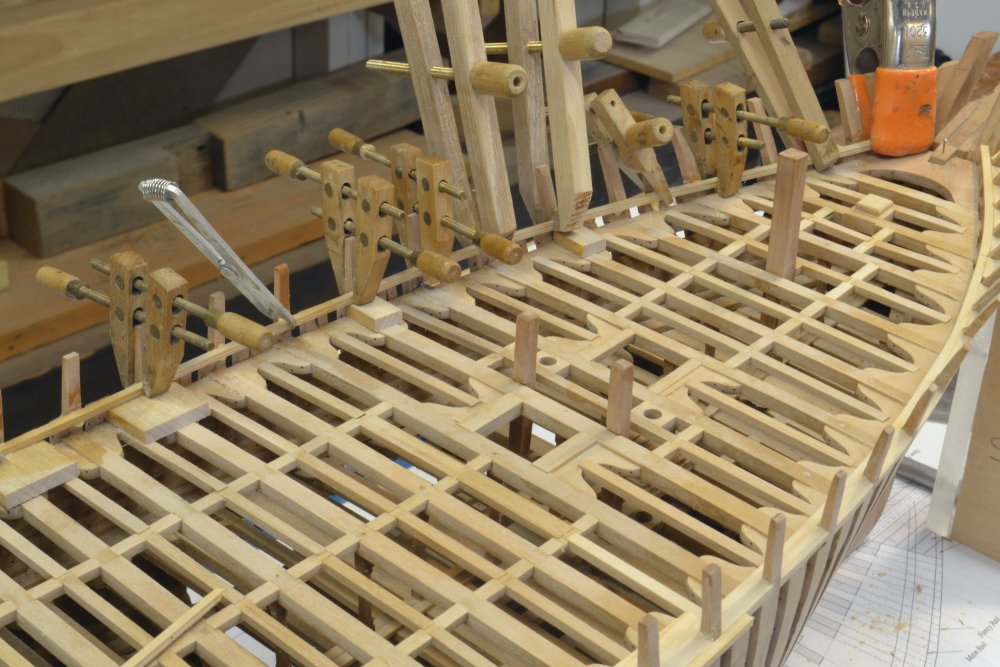
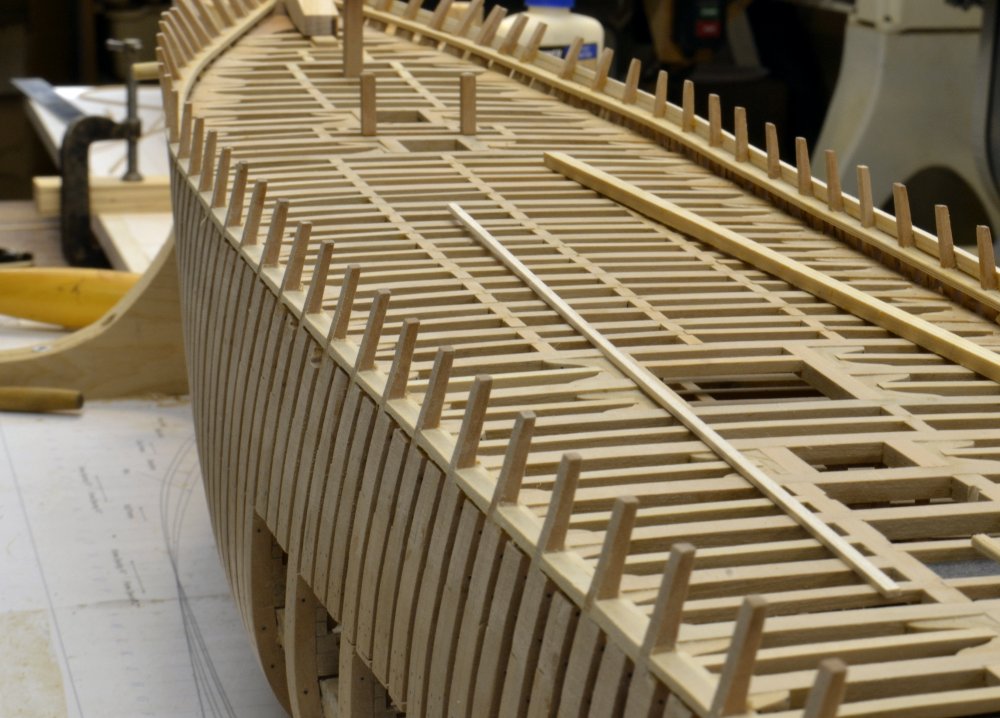
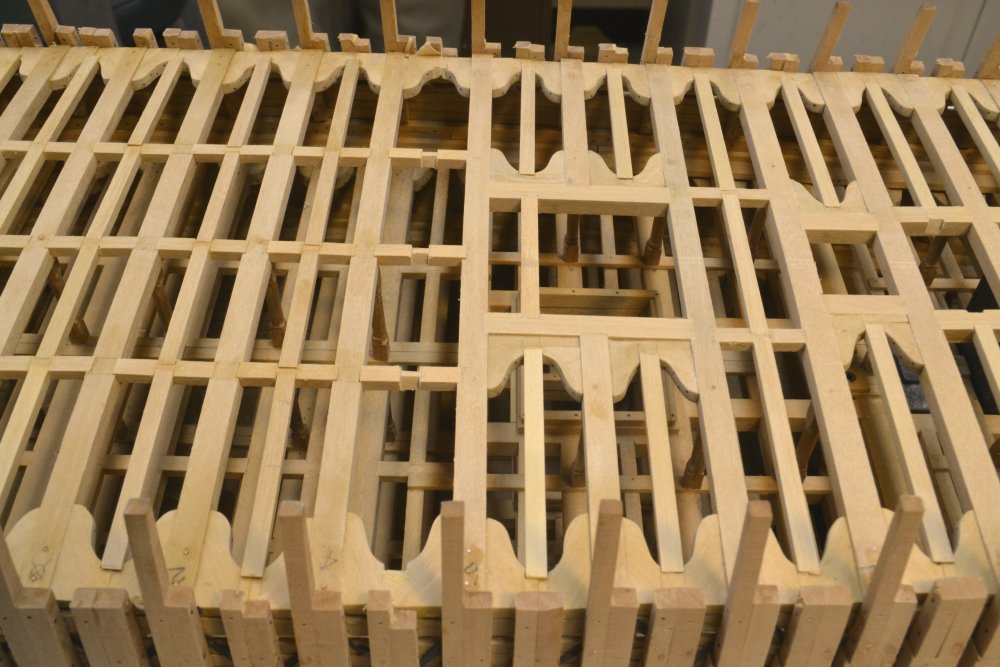
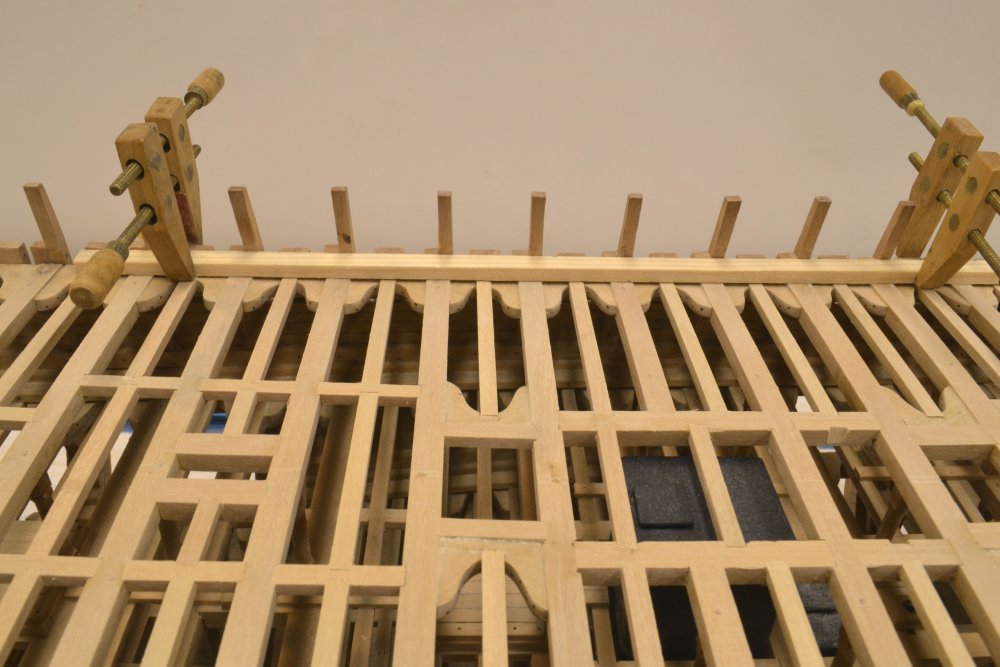
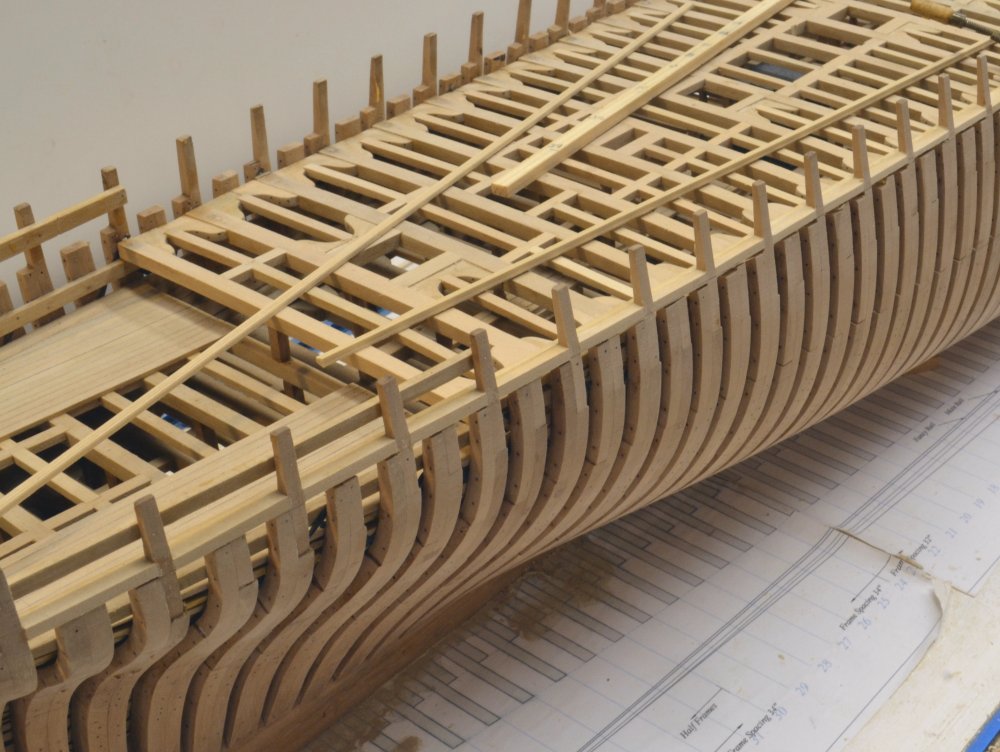
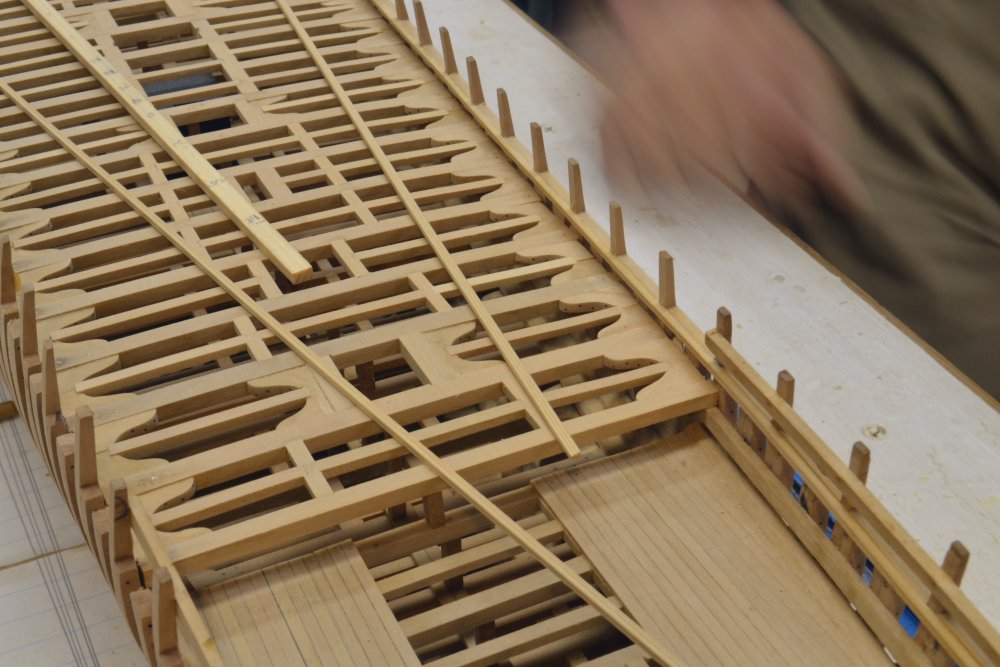
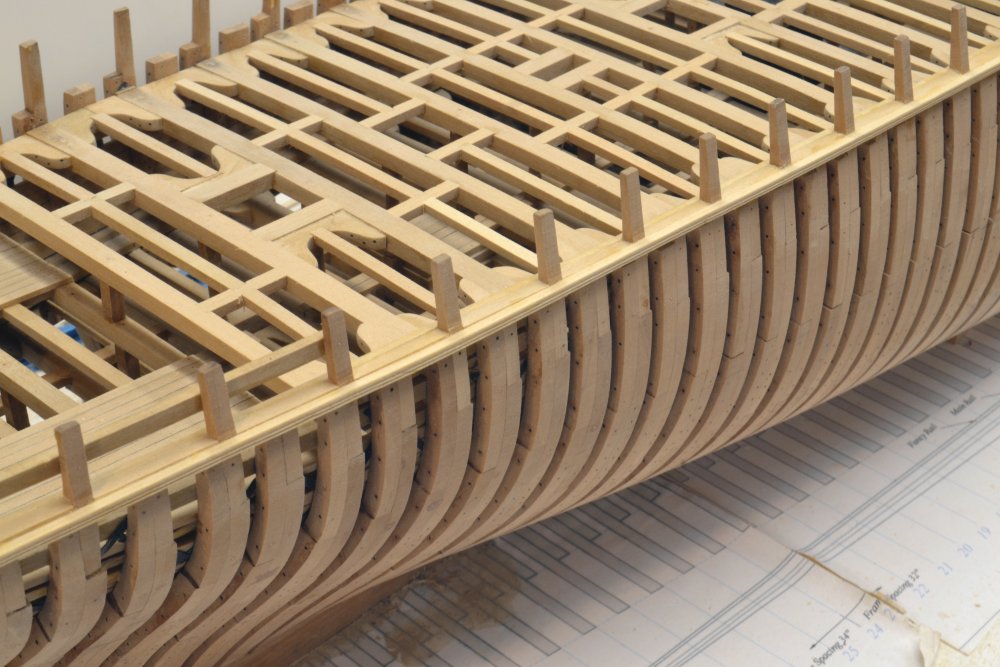
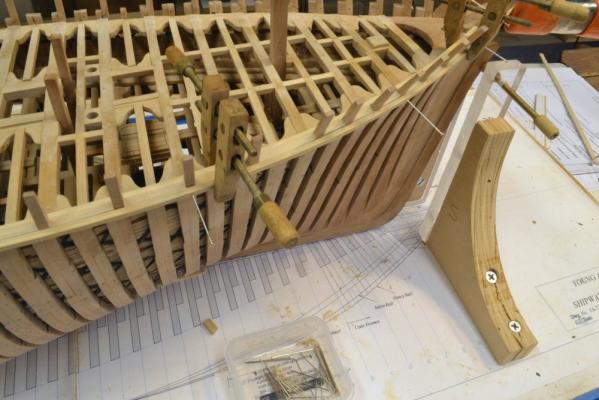
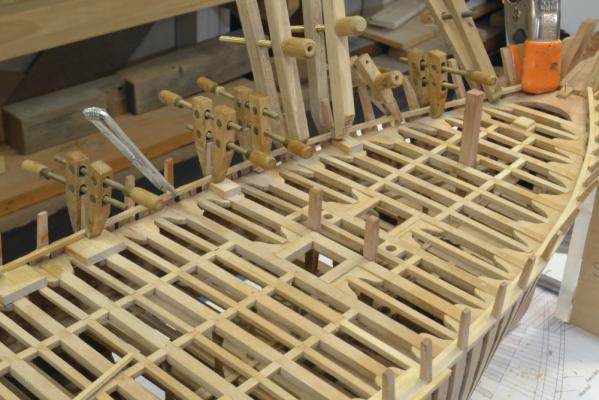
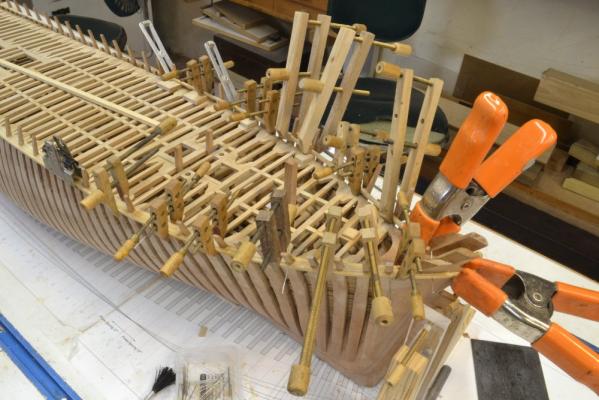
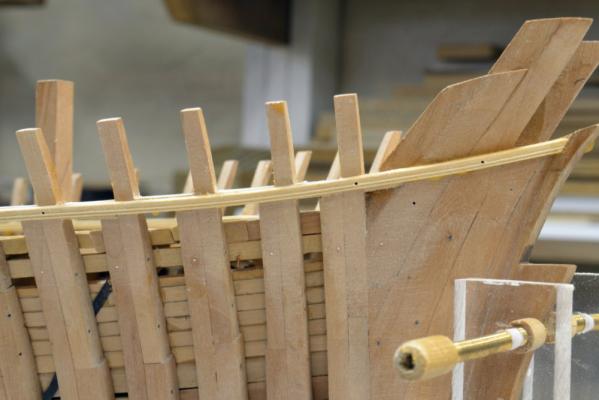
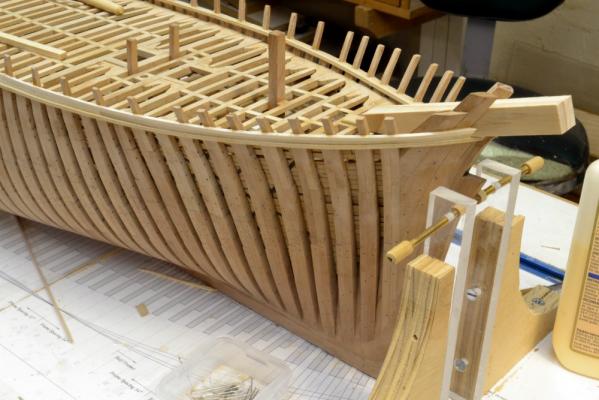
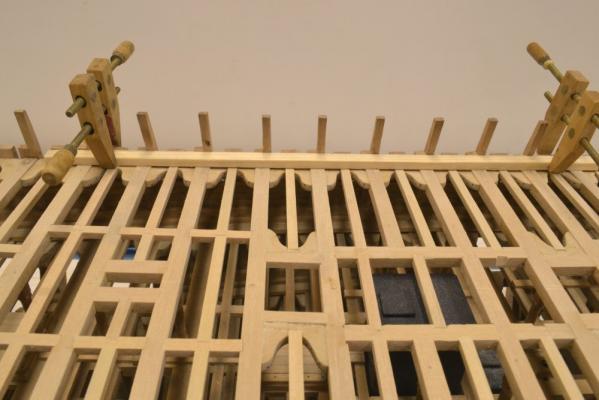
Young America - extreme clipper 1853 Part 96 – Planksheer continued In the first picture the starboard planksheer rail is being fitted at the bow. Pins were needed here to hold the position when clamping due to the outward flare of the sides. This part of the rail also had to be beveled on the back side to keep the top face level. In the next picture the inside rail on the port side is being glued. While the glue on that rail was drying the starboard outer rail was glued. As you can see it was all hands on deck for the clamps. Anything that resembled a clamp was drafted into service to keep every part of the rail tight to the side. The next picture is a close-up of the forward rail on the starboard side. In the next picture a dummy bowsprit has been fitted and planking has begun above the rail on this side. I am using hard maple for the external planking. It will be painted. The last picture shows the port side ready for the outer rail. The inner rails and spacers between top-timbers are now completely installed on both sides. Getting these rails finished – including around the elliptical stern – and planking up to the main rail is the next order of business. Ed

- 3,618 replies
-
- 37
-

-
- young america
- clipper
- (and 1 more)
-
Jan, that will takes some checking. Look in later. Ed
-
Fascinating work, Micheal. Will you be making piston rings? Is it 4-cycle? I can't wait to see the valve train. Ed
-
Thank you, everyone. No hand cramps, David, but an occasional brain cramp - usually when I am checking height measurements. Mark, those reverse curves at topside had me wondering for a long time until I concluded what you have said. Either everyone knew the secret or it was just not important and left to discretion. It also took me quite a while to decipher that the reconciling sweep was easy to set using a point on one of the diagonals - 3rd?, 4th? can't remember. Without that point there are an infinite number of possibilities - with it only one. TurboCad has a made-to-order function. Micheal, I thought someone might make the comment on the blur. I cannot claim high speed of movement and attribute the appearance of it to the 1/4 second shutter speed - and being in the way. Yes, Alan, my intention is to rig the model - something I did not expect to repeat after Victory, but so much of the beauty of these ships was in the rigging that I cannot resist. Thanks again, everyone. I am glad to have your interest. Ed
- 3,618 replies
-
- 7
-
-
- young america
- clipper
- (and 1 more)
-
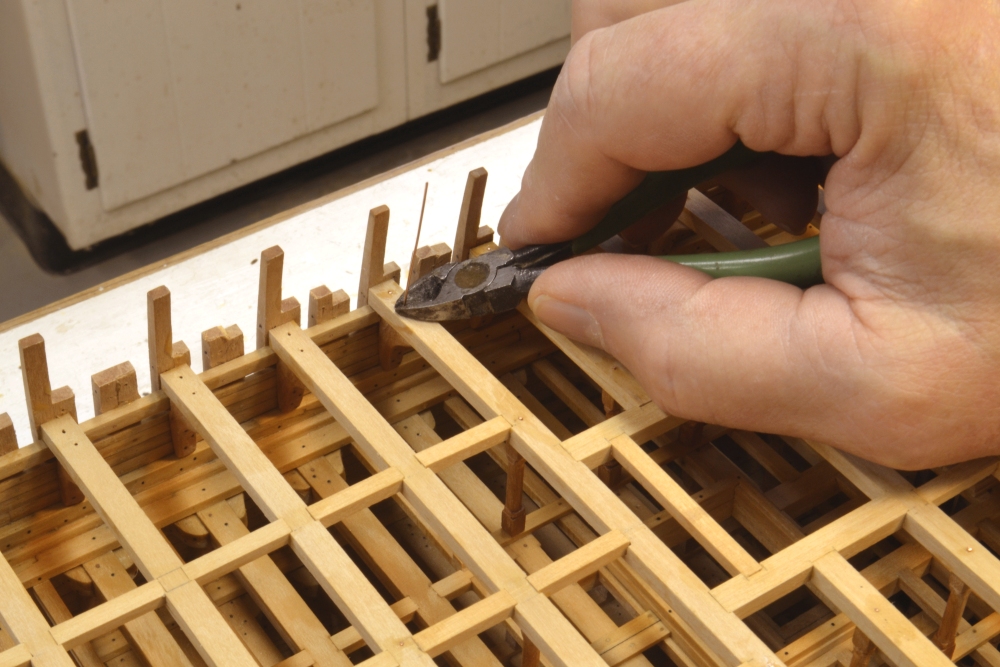
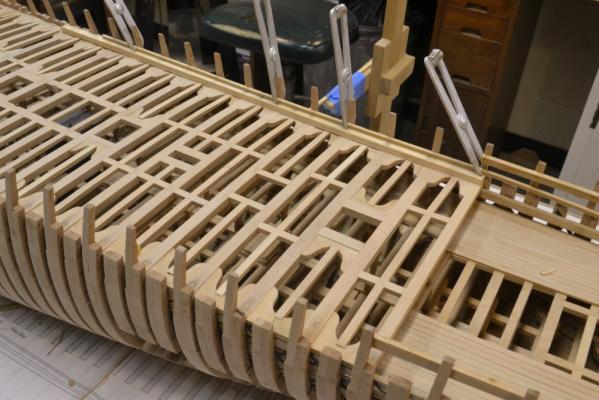
Young America - extreme clipper 1853 Part 95 – Main Deck Ledges, Planksheer The first picture shows the last of the work on the main deck ledges. The seats for the last row of ledges have been cut into the carlings and outside lodging knees. The next picture shows the completed main deck framing. The planksheer was the next order of business. This rail caps and seals off the tops of the frames at the weather deck - the main deck. On the outside it defines the sheer line of the ship. Internally it rests on the 11” deep main deck waterway. It would seem to make sense to install the waterways first, but to facilitate painting I decided to install the planksheer then slip the waterway underneath it later. In the next picture a strip of pine representing the waterway is being used to check the height of the upper futtocks prior to setting the planksheer. The cutoff heights of the upper futtocks were checked earlier and trimmed to match the lower edge of the planksheer rail. However, since the heights of the deck beams at the side evolved somewhat independently when the deck clamps were set, there was certainly room for discrepancies. After a fair amount of measuring, remeasuring and some adjustments, the first section of rail was ready to be installed. This is shown below. The 6" rail is a molded section with three beads. The lower two are half the diameter of the upper. The rail was formed with a simple scraper. The real planksheer was installed in one of two ways. It could be mortised to fit over the toptimbers or it could be made in two halves each notched to fit around the toptimbers from either side. To avoid all of this precision notching or mortising, I install the rail on one side, then fit blocks between the timbers, and then fit the opposite side – trying to make the joints relatively invisible. This will all be painted so there is no issue in this case. The next picture shows some blocks installed between frames. These also strengthen the joint between the frames and the inner rail. After the glue had dried these were sanded flush to the side. The tops were filed off horizontal and flush with the top of the inside rail. The next picture shows part of the starboard planksheer at this stage. The last step is to install and finish off the exterior rail as shown in the next picture. There is a similar rail a few feet up – the main rail – and then another capping rail – the fancy rail – fitted to the tops of the toptimbers. Ed


- 3,618 replies
-
- 38
-
-
- young america
- clipper
- (and 1 more)
-
Thank you, Guy.
-
ancre LE BONHOMME RICHARD by Jeronimo - FINISHED
EdT replied to Jeronimo's topic in - Build logs for subjects built 1751 - 1800
Fantastic work, Karl. Ed- 662 replies
-
- 1
-
-
- bonhomme richard
- frigate
- (and 1 more)
-
Thanks, everyone for the comments and of course all the "likes." The lodging knees did go fast. Maybe not 2 per minute, as druxey suggests, but more like .2 per minute - thanks to the learning curve and the process. Since the last posting. all of the ledges have been installed. I will post some pictures soon. With all of this deck framing completed, things should be getting more interesting. Thanks, again.
-
Glad to see you back, Gary. She looks terrific as always. Ed
-
ancre La Salamandre by tadheus - 1:24
EdT replied to tadheus's topic in - Build logs for subjects built 1751 - 1800
...and I would certainly agree. Ed -
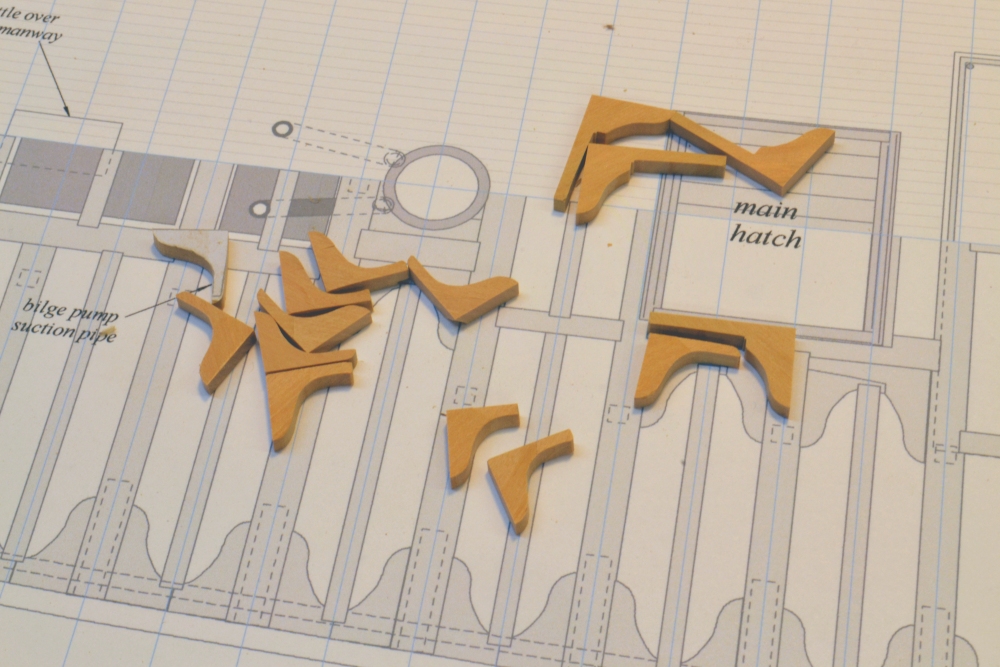
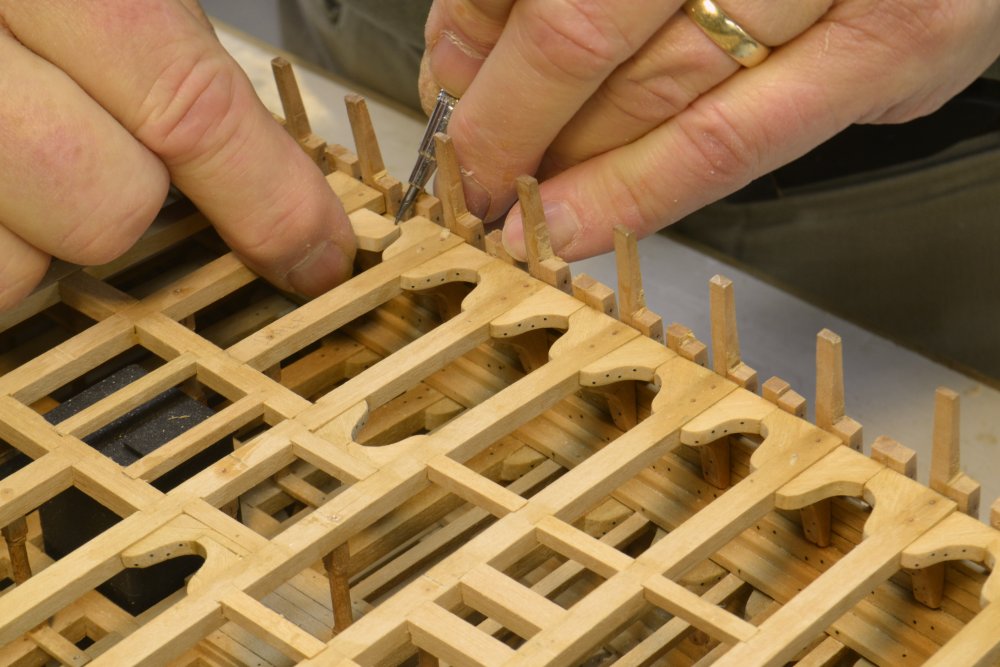
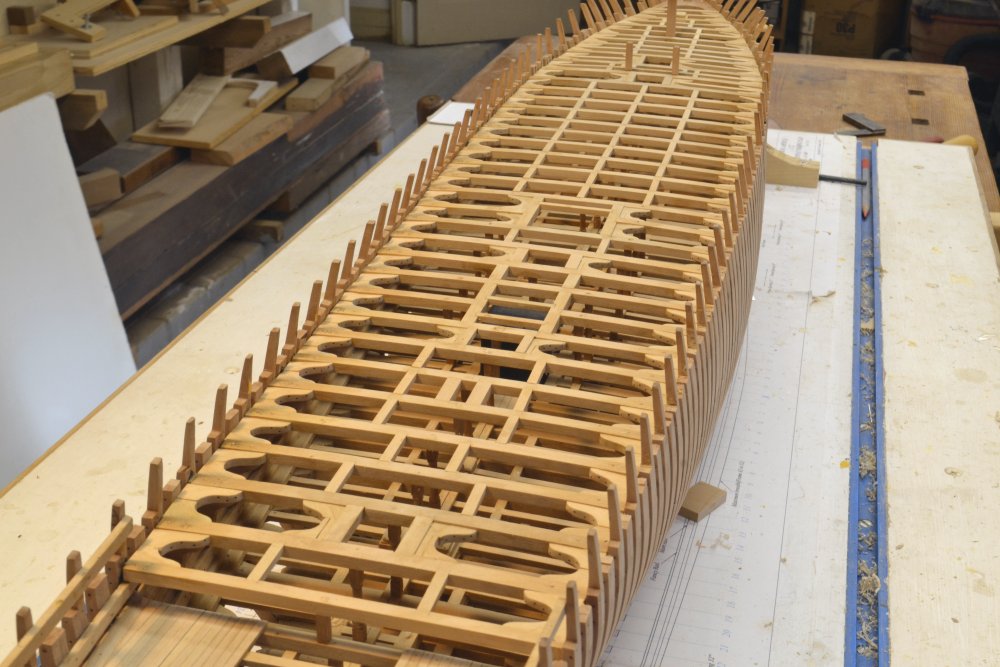
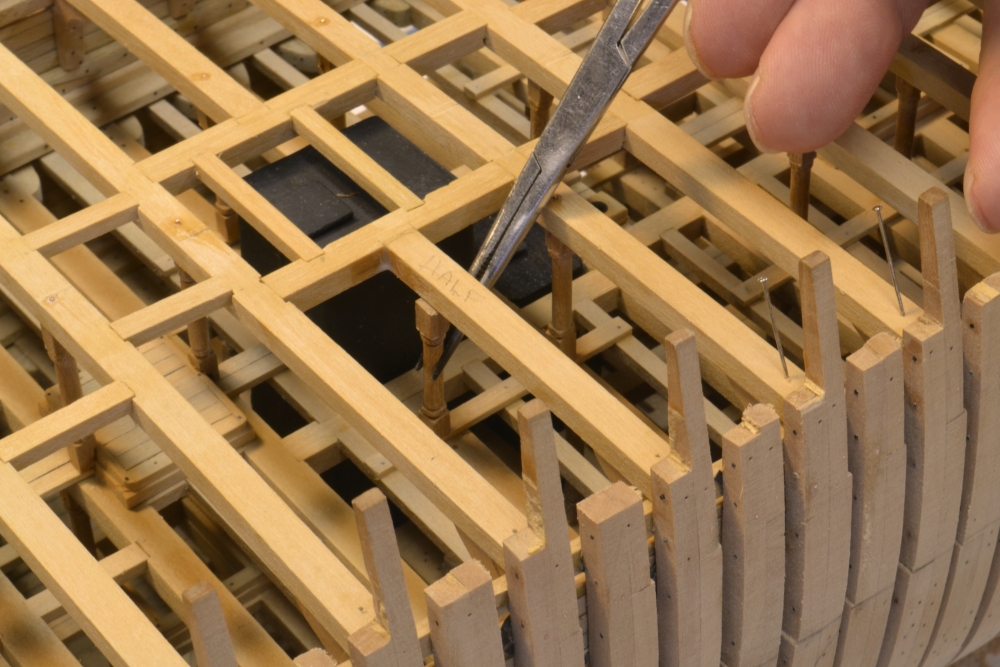
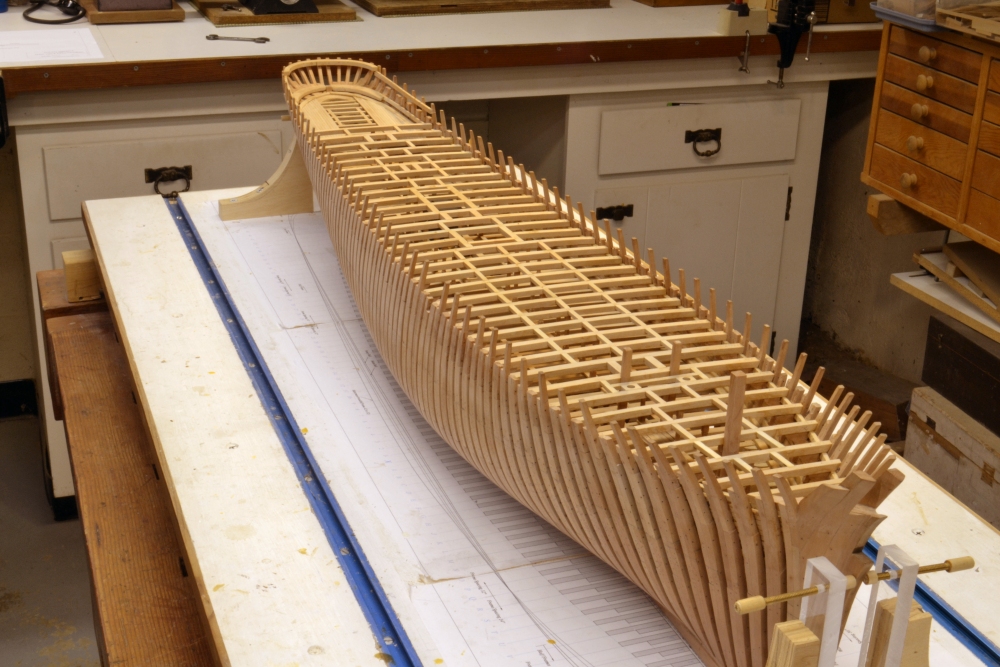
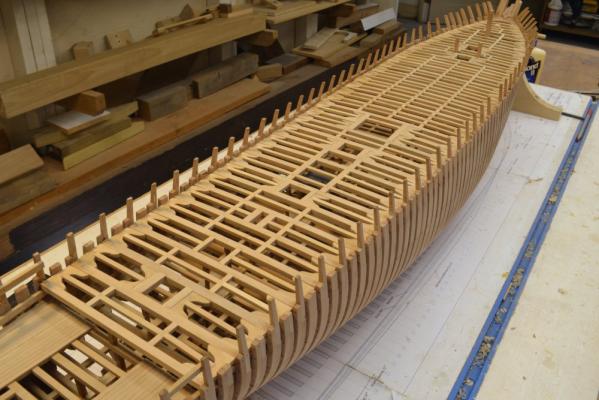
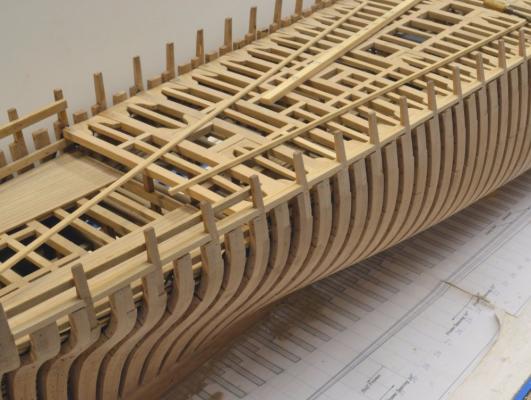
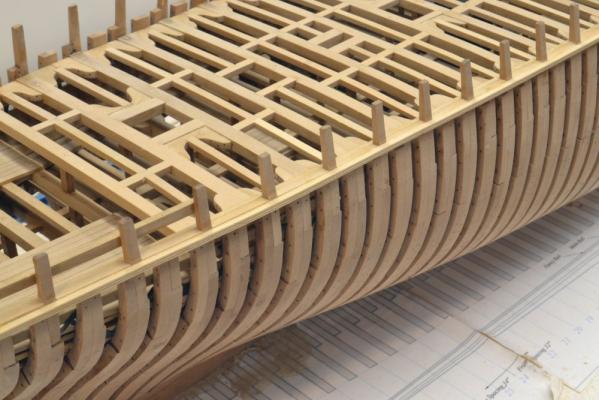
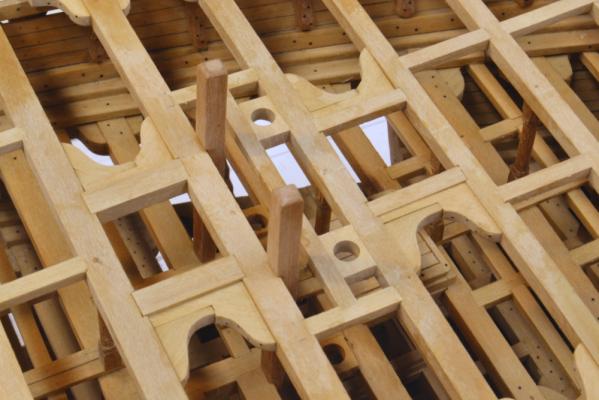
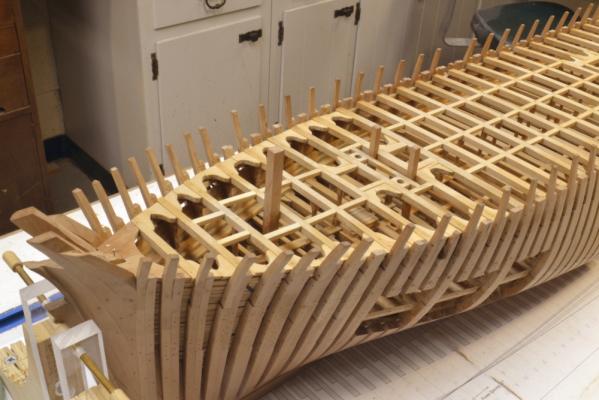
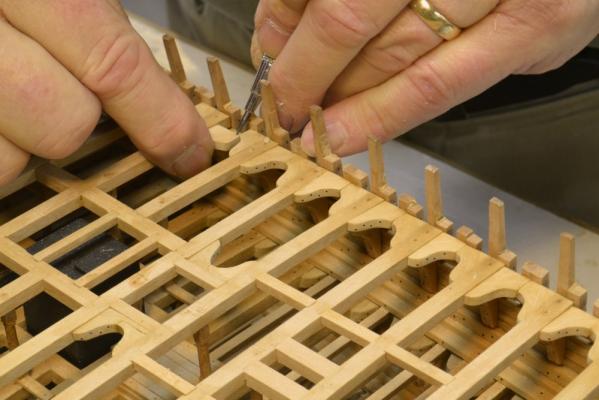
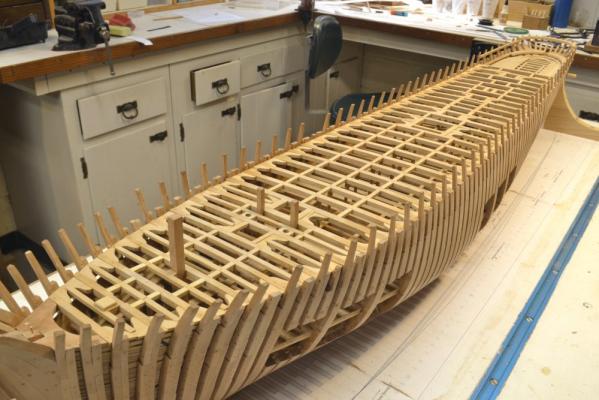
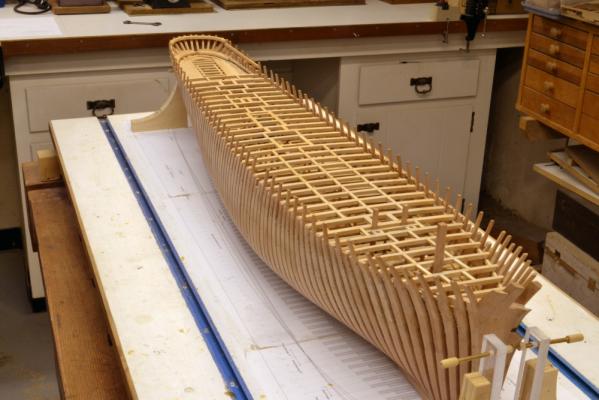
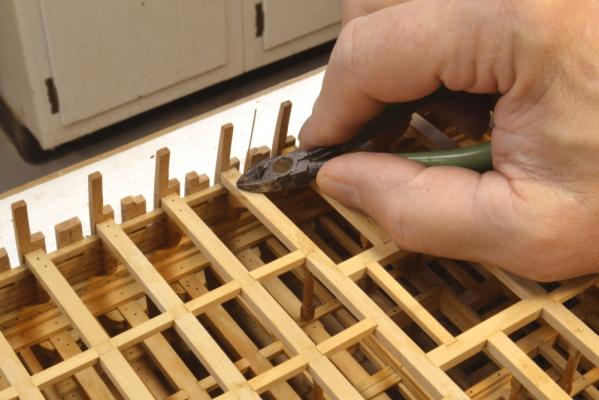
Young America - extreme clipper 1853 Part 94 – Main Deck Framing 5 Because the main deck framing supports the mast partners, knees are installed as reinforcements at the partners. I also installed them at the hatchway openings. I made these as overlapping knees. I did not go to this trouble for the lodging knees at the side because their fore and aft arms are not visible on the model. I do not yet know if these central knees will be covered with decking or not. The first picture shows some of these knees before installing. The next picture shows a few installed at the main mast partners and at the hatch just aft of this. I installed these central knees first before going on to the major task of setting all of the ten dozen or so lodging knees at the sides. The next picture shows this lodging knee installation proceeding aft from the bow. The next picture shows a closer view of this work. This is one type of lodging knee combination used on these ships and is the one I used on all of the decks. It is the simplest – with the fore and aft arms simply butting. They will be covered by the waterways in any case. In the picture a knee is being marked so it can be cut to fit neatly between its partner and the beam. Bolts are then installed, the knee is polished up and then glued in. The next picture shows all of the main deck lodging knees installed. And, finally, a picture of the full hull at this stage. The next step will be to install the ledges between each of the beams to complete the framing of this deck. Ed


- 3,618 replies
-
- 41
-
-
- young america
- clipper
- (and 1 more)
-
Beautiful work as always, Remco. II really like the idea of removable struts on the eyes on the spectacle piece. Ed
-
HMS Naiad 1797 by albert - FINISHED - 1/48
EdT replied to albert's topic in - Build logs for subjects built 1751 - 1800
Beautiful work , Albert. Ed -
Thank you, Steve, for letting me know others are having the problem and providing the link to the MSW topic on this. I also appreciate the other comments. As I said, I am aware the this is an IE problem and that other browsers do not have it. I am not ready to switch all my browsing off IE at this stage for a number of reasons. I will use Chrome to make the Word formatted YA posts, but I would much prefer to see a text editor on MSW that supports the most widely used desktop browser - i.e. IE - excuse the pun. (Some stats for those interested: Earlier this year Chrome combined with Android overtook IE on total US browsing use (desktop +mobile). IE still holds the desktop lead - 43% vs. Chrome 31% and Firefox 12%. Firefox usage has been dropping. I would expect Chrome will continue to grow, reflecting MS's failure to make headway in the mobile area. I use IE, Android and Chrome. Since there is already a topic on this on MSW, I will get off the subject here, but would still like to know of anyone who is having the big font problem on my posts. Ed
- 3,618 replies
-
- 1
-
-
- young america
- clipper
- (and 1 more)
-
Hello Everyone, I'm afraid I have been sidetracked from the work on YA for the last several days by the need to upgrade my computer system. Because of the numbers of large applications I use and the complexity of our home network, I dread this process. I have been putting it off since Microsoft withdrew support for XP but could no longer avoid it. I am now up on Win 7 and IE11. I mention this here because some issues surfaced related to MSW and particularly this topic and perhaps others may have these problems. First, when opening the YA blog I found that all text in my main postings was very large and bold like this. This problem also occurred on other major sites like Amazon and Wikipedia. This is caused by a font problem in Win 7 (at least my installation) that I have fixed. The second issue is a larger one. While I have had some annoying font inconsistencies on MSW posts with my previous XP/IE system, I was able to work around them. I normally post formatted text from Word into the full-feature MSW editor rather than type them in directly. This allows me to work on the a bit at a time and makes initial editing much easier. Also, this was the reason I was able to completely restore the 185 Naiad posts so quickly after the great crash. With Win7/IE11 I cannot paste any text into the full-featured editor and only unformatted plain text into the simple editor. I cannot format any text - even what I enter manually - using the editor features in either version of the editor. After much online research and trying many things, it appears the the MSW editor - like some other blog editors - is incompatible with IE11 (and perhaps win7?). To get around this problem I have installed Chrome and will use it for MSW only to allow me to continue to post. I have not yet posted a YA part by this method yet, but am using it for this post. I do not really want to start a dialogue on this subject under this topic, but wanted to mention it here in case others are experiencing this in my posts. If others are having similar problems or have solved this, let me know and I will start another topic elsewhere on MSW. I hope to be back in the Young America shipyard later today and to have part 94 up soon.. Ed
- 3,618 replies
-
- 2
-
-
- young america
- clipper
- (and 1 more)
-
Thank you, Sherry. By the way, I'm missing those San Felipe updates. Welcome aboard Dave and thank you for your comment and the book tip. I know of the book but have not read it. I believe I have it on my wish list. Ed
- 3,618 replies
-
- 1
-
-
- young america
- clipper
- (and 1 more)
-
I read through the Aubrey-Maturin saga twice separated by about ten years. The fact that I read through them twice probably says something about my love of these books. I would not place them in the annals of great literature - seafaring or otherwise. For that I suggest, in the seafaring genre, Melville or Conrad. The books do have their place, and I believe they fill it admirably. There are stumbling blocks, I am sure, for some. The swashbuckling action scenes are there, but are skipped over or take a second place to the relationship between the two men and the stresses on each of them. This quirky relationship between captain and surgeon is sometimes hard to comprehend, but I am sure there were many oddities in the connections formed by men who chose this way of life. If you doubt that, read some of Nelson's letters to and about his colleagues. I found the real value in these books to be the wonderful depth of information about the ordinary daily functioning of one of these vessels, the Navy and the political establishment they were a part of. While the affection between Aubrey and his crews sometimes stretched credibility, descriptions of daily life and routine are unique and priceless. I do not know of another source as descriptive of daily shipboard routine. I believe the inclusion all of this background to be the best part of these books - a personal opinion to be sure. Ed
-
Thank you for this tip, Frank. I will look for it. It may be interesting to note that Young America holds the sailing ship record for passage from Liverpool to San Francisco - 96 days, set in 1872. Were it not for severe calms encountered in the South Pacific leg, the voyage would have been even shorter. Ed
-
Great job, William, on those figurehead people. I had a fun time doing them at 1:96. Very hard to get them to strike the right attitude. Also, beautiful work on the stern galleries. Looking forward to seeing the 138 balusters. All the best, Ed
-
Thanks for that input, Greg. It was, of course, an earlier period but practices may well have persisted. No doubt that we would not drink the stored water - unchlorinated, lead or iron contaminated and from what source? I am sure that the benefits of copious quantities of alcohol were useful in numbing the senses of crews and keeping them manageable - they were in both periods often impressed into service and the life was pretty grim even for the willing. This was especially true in the later clipper years when other opportunities in the gold fields or in westward migration drained the pool of volunteers. Hence the term "Shanghaied." I continue to read what is available - non-fiction and also some good fictional resources (Conrad, Dana) on the clipper period. It is by no means as well documented as the early RN. In the mean time what we have is a need for some speculation. Suggestions on good sources for the period are most welcome. Ed
- 3,618 replies
-
- 1
-
-
- young america
- clipper
- (and 1 more)
-
Hi Mark, I have found very little information on these tanks. It is quite possible, perhaps even probable, that they were lead-lined. J L Mott offered this feature in the prefabricated iron tanks and lead was used routinely on potable water service. This would reduce contamination from rust and scale. No doubt the tanks could be emptied, possibly by draining into the hold to be pumped out by the bilge pumps or perhaps they could be pumped out directly. They may not have been emptied, only topped up, with freshening dependent on the usage rate. 8000 gallons is not a huge amount - one typical tank truck today. On a 120 day voyage, assuming 50 people, this would amount to about 6 quarts per day. Considering cooking and possible bathing, this is not a huge amount. I assume they were filled by pumping from quayside carriers or from gravity fed sources. Most of this is supposition. Ed
- 3,618 replies
-
- 6
-
-
- young america
- clipper
- (and 1 more)
-
Good luck with your project, Daniel. I look forward to it. Ed
-
Very impressive, Micheal. Very impressive. I can't imagine working to that precision on something so small - or even something large. I am catching up a bit with your posts. I agree very much with the idea that satisfaction comes from working out solutions to the many different problems we face in this craft. If it were not for those challenges in research, planning, testing ideas, etc. building these models would be much less engaging - for me at least. I agree with the person who recommended ribbands in one long length. I pieced the ribbands near the stern on YA and regretted it. Its very easy to introduce discontinuities into the curve. One piece, uniform thickness, straight grain - important factors. Laminating the ribbands should give their curve more set - ie make them stifferand less resistant to flexing. Great work. Fascinating. Ed
-
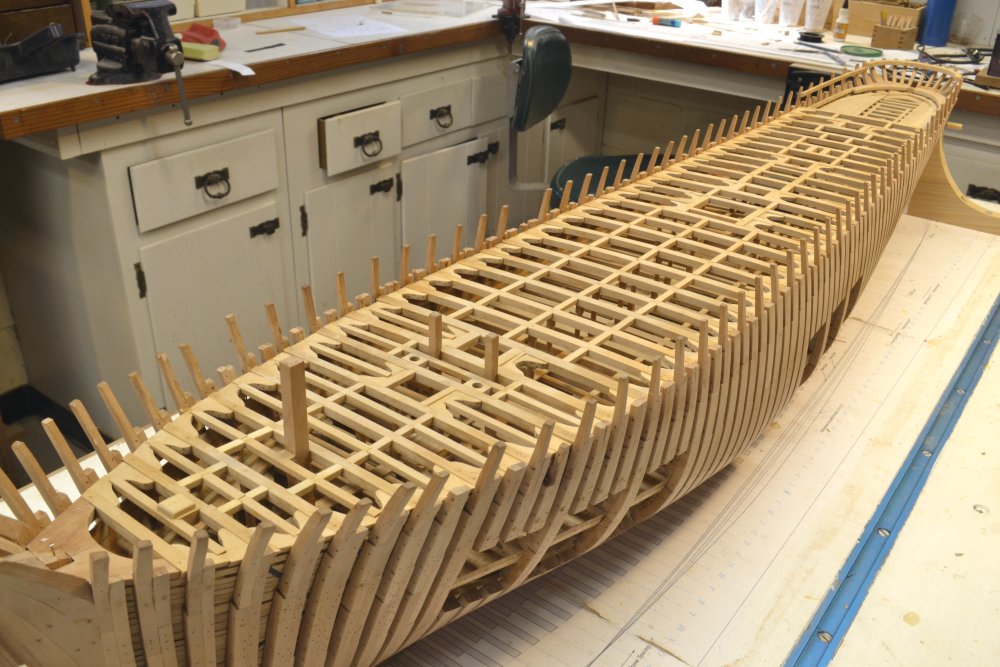
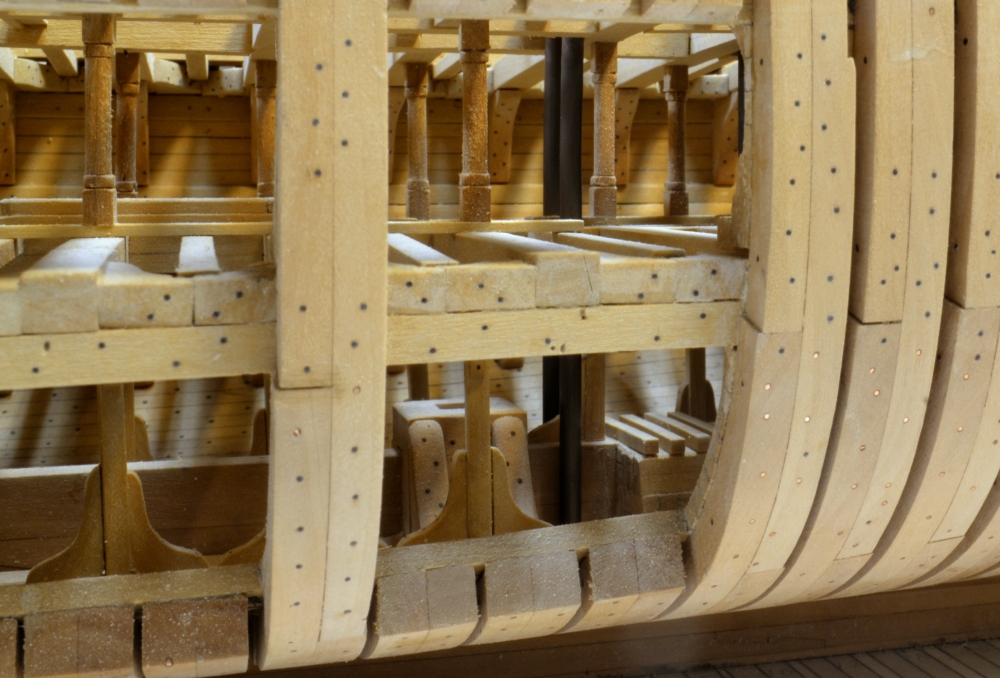
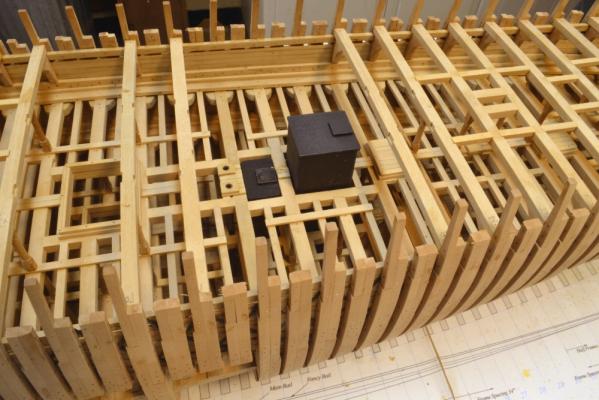
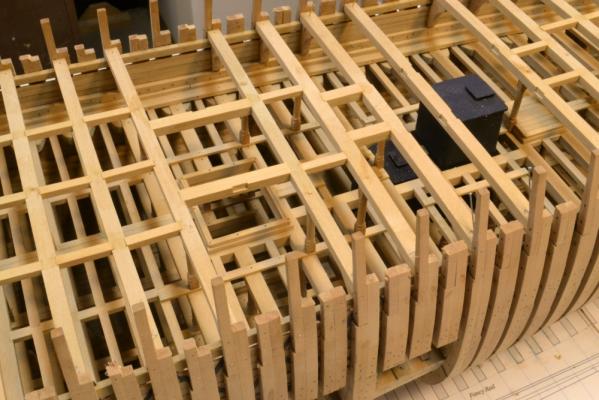
Young America - extreme clipper 1853 Part 93 – Main Deck Framing 4 The two large fresh water tanks needed to be permanently installed before the main deck framing could be completed. The first photo shows these two tanks in place. The tanks were iron and rest on heavy wood bases in the hold over the keelson. These bases were shown in earlier posts. The tanks were made from cardstock glued on to wood blocks. The picture also shows tops of the lower sections of the bilge pump suction piping just forward of the tanks. The next picture shows the run of these pipes down to the limber channel. The pipes are copper tube. The upper sections between these pipes and the pumps on the main deck will be installed later. The 4”x4” dunnage timbers on the base for the forward tank can be seen in this picture – taken before setting the tanks - just aft of the pipes. The main mast step can be seen just forward of the pipes. (This was shot at an aperture of F32 and very slow shutter – much better field depth vs. the pictures in last post.) In the next picture the framing in the midship area is approaching completion. All of the full beams have been installed in this picture including their hanging knees and pillars. In the picture the headers for the main hatch - with scores cut for the half beams - have been fit as well as the main mast partner carlings. In the next picture the framing over the tanks has been completed and the last pillar under one of the half-beams is being test fit. All of the pillars are pinned with copper wire bolts top and bottom. The fitting of this last pillar finishes the deck beam setting. The next picture shows the hull with the main deck framing at this stage. Next will come the lodging knees for all these beams and the ledges – but first a few housekeeping items needed to be taken care of. One of these was literally a housecleaning of the workshop that might be partially noticeable in the above picture. This tidying up also included installing 10 dozen or so functional copper wire bolts with epoxy to further secure the main deck beams and knees. One of these is being installed in the next picture. There are two at the end of each beam – one through the beam into the clamp and one through the beam into the hanging knee. The other task was to apply wax finish to all of the structure from the middle deck up to just below the main deck beams. This cannot be done easily after the ledges are installed. The deck framing has not been sanded at this stage as might be noticed. This will be done once after all of the ledges are installed. Ed


- 3,618 replies
-
- 49
-
-
- young america
- clipper
- (and 1 more)