


Wintergreen
-
Posts
1,002 -
Joined
-
Last visited
Content Type
Profiles
Forums
Gallery
Events
Everything posted by Wintergreen
-
Haha, memory is good, but short on my behalf 😄 A little like Doris in Finding Nemo... Sorry about the repetition. Will move to the back for a while so as to not disturb you with mindless questions.
- 179 replies
-
- 1
-

-
- longship
- Helga Holm
- (and 1 more)
-
Well done on the frames! Do you use your card trick this time around as well? If so, the fit is extraordinary. Keep it up!
- 179 replies
-
- 1
-
-
- longship
- Helga Holm
- (and 1 more)
-
Good progress Vaddoc. I feel your pain with all the outtakes. Add it to the "learning by doing" account 🙂 As for shaping the stem, I second what Michael Bricklayer writes above. Plank the hull, with fasteings and all, then shape the stem. Don't worry about leaving scuffs and marks on the planking. My guess is that you will sand the hull as well taking away any small mishaps. That's how I'd do it at least. Keep it up!
-
If you take a photo of the plans, laying on a table, I think that is okay to post. They will then be distorted and can not be used. But I would guess that scanning them and then posting would be an infringement of copyright. So, dont' do that. 😉 And while I'm here, Welcome to MSW! Enjoy your stay 🙂
-
Nice, Well done GB! *Rumbling applause from the audience* About display, do you put them in different spot in your home or are they gathered in a case of some sort? Would love to see the collection 😉
-
Glad to see that the door knob is set just above the cockpit coaming also. That would've been a bummer otherwise 😉 Looks excellent, Michael!
-
Excellent display! Thanks for sharing your work with us 🙂 Yes, lockdown is a bummer. Let's restrictions and such will be lifted soon.
-
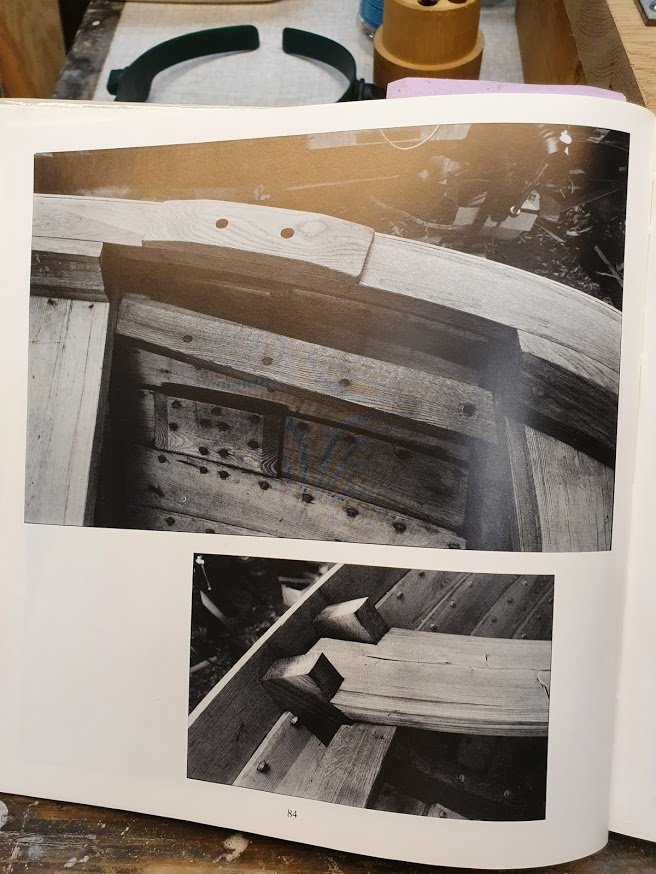
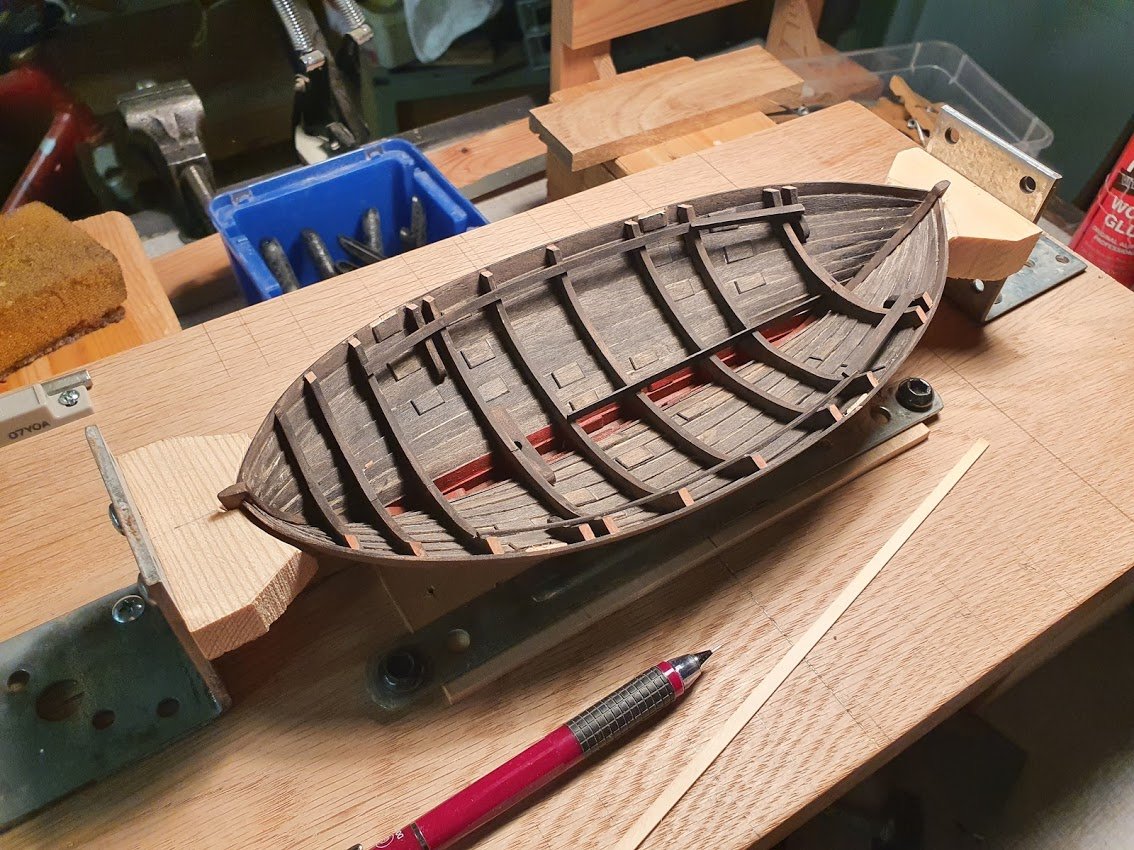
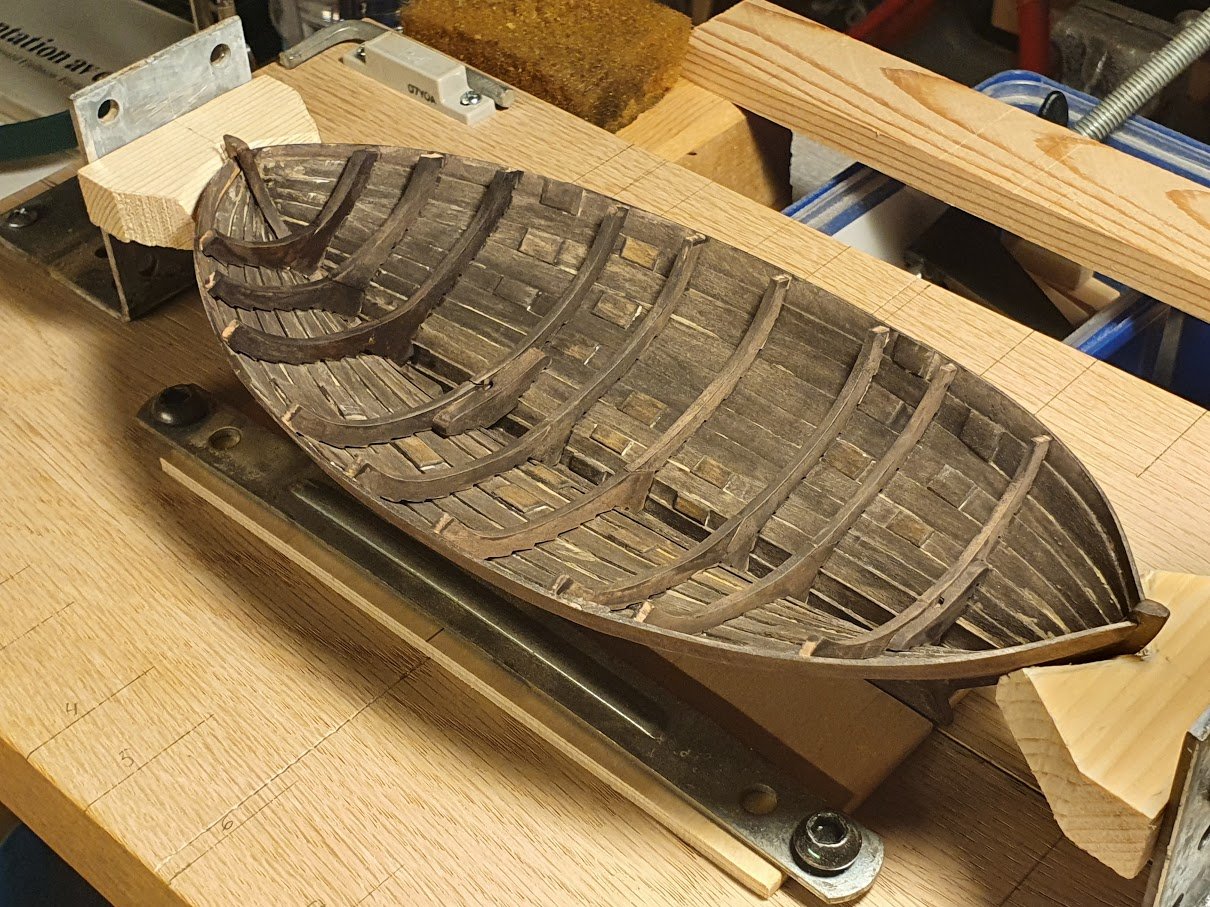
Work continues. Pinrails in place. There will be twarths securing them. I also started trimming the frames ends with a (very) sharp chisel. Worked fine. However I need to secure the sheer strake with pins/dowels... First a picture from the book on those pinrails. "Pinrail" might be wrong also since I think it will act as support for the traveler. Another detailed picture showing uplings and stringer. And finally, the build. The board on the center line will support floor boards. The shipwright also dabbed a couple of coats of lead paint (aka red acrylic) in the bilge for authenticity sake. Thanks for likes and comments!
- 240 replies
-
- 11
-
-
Yeah, me too. Back to under the stone from whence I came.... slowly humming diddelidoo...,
-
Wow, neat! Thanks for the tutorial. I have that job down the line soon on my build... Keep it up!
-
Thank you John and Vaddoc! Vaddoc, I did pin them with treenails (bamboo). 🙂 And yes, spot on on the guess. More on that subject later though.
-
What Michael said. It is like that little extra tasty bonbon in the bowl of candies. Very nice lit photos and calm background. And that #11 blade really explains the size as well 😮 Keep it up!
-
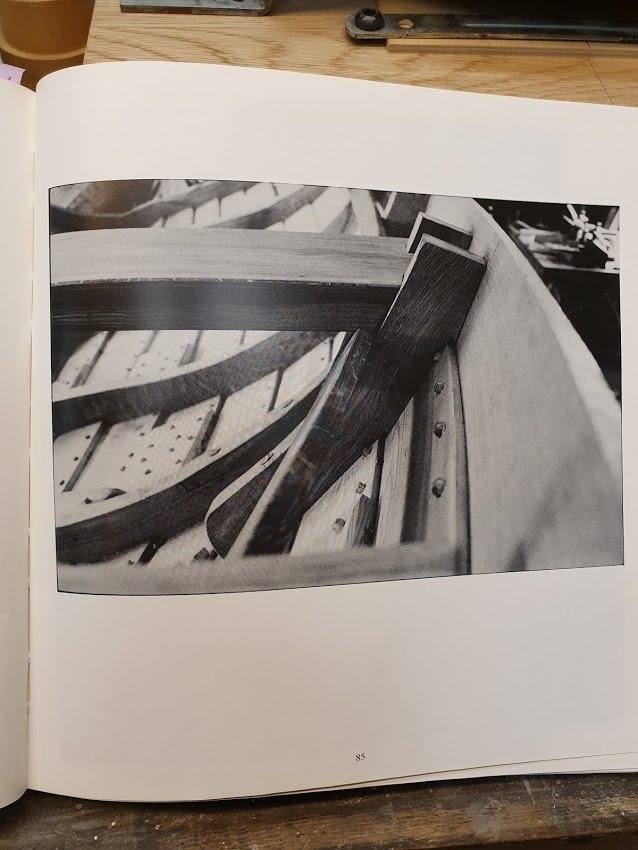
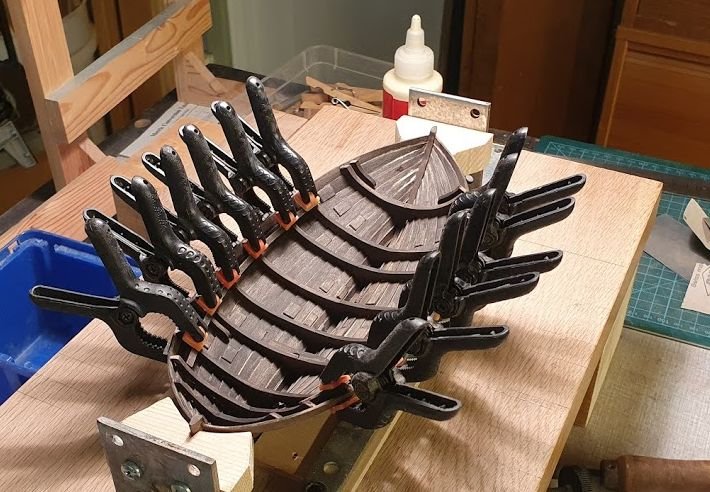
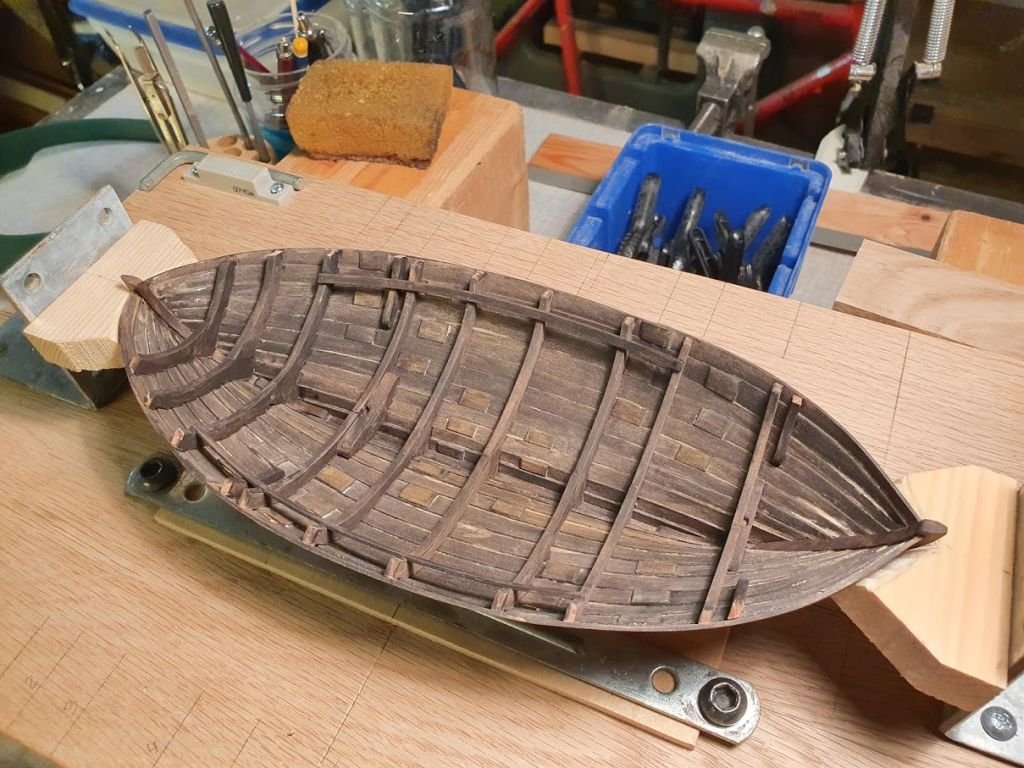
Hello again! Work continues. Bits and pieces. I guess the pictures tells the story.. After extra supports were carved and glued in place, cutting the stringer was next. With no suitable power tool I used a simple backsaw to cut them out from stock of near correct thickness. Here they're glued in place. Can never have too many clamps, can we? 😉 A bit too long at the front, which the sharp eyed viewer will notice. And here pinned and a bit of touch up of paint. Only relying on the glue joint wasn't sufficient. Ask me how I know... Another curious viewer might wonder why it stop short at the back. Well, that last section will take a pinrail on each side, that's why. I probably need to address floorboards next because I think the thwarts will be very much in the way once they're in place. Thanks for shown interest, comments and likes! Much appreciated. 🙂
- 240 replies
-
- 13
-
-
Yep, that searchlight is really accurate 🙂
-
Good progress vaddoc. That the stealer fits both sides is cred to your detailed layout. Enjoy the moment 🙂 Keep it up!
-
What the others said! The diorama really adds life to the ship and that shed is just spot on! Thanks for sharing, and don't mind the time it took. It's kind of a journey and sometimes we don't want the journey to end, that's all. Looking forward to the next Mario-installment 😉 Keep it up!
-
Hey guys, look up bitao7697s' setup for his Young America. I think that is @michael mott means.
-
I meant "understatement", but you've seemed to get the point anyway 😉 My sweenglish kicks in from time to time 😁 Keep up the nice work!
-
That is quite an underestimation on your part. With a hull merely 5 inches long, ... I mean, planking that takes considerable skill! Well done GBmodeler!
-
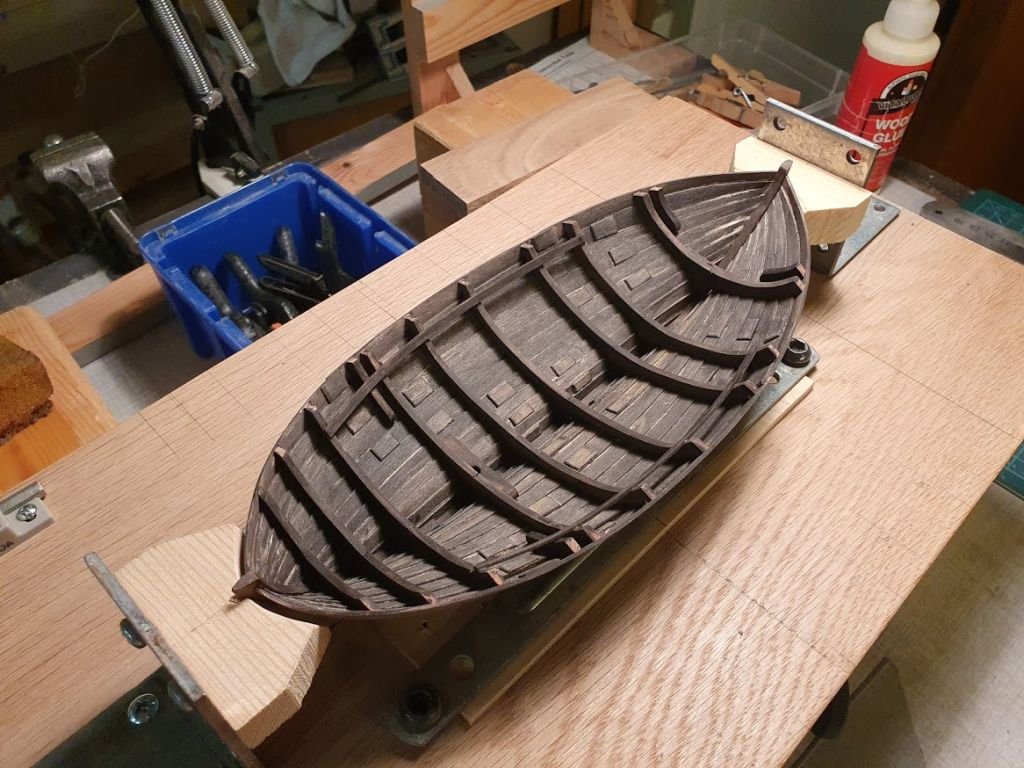
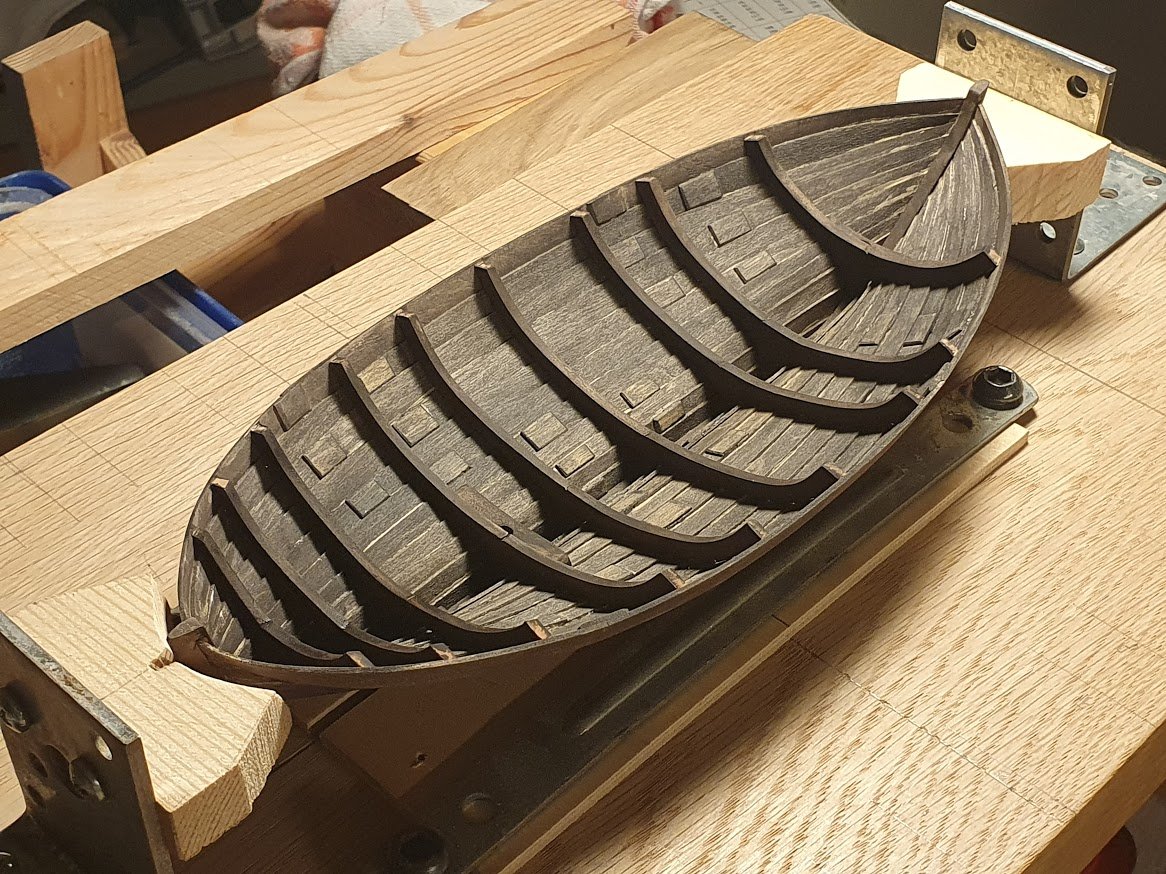
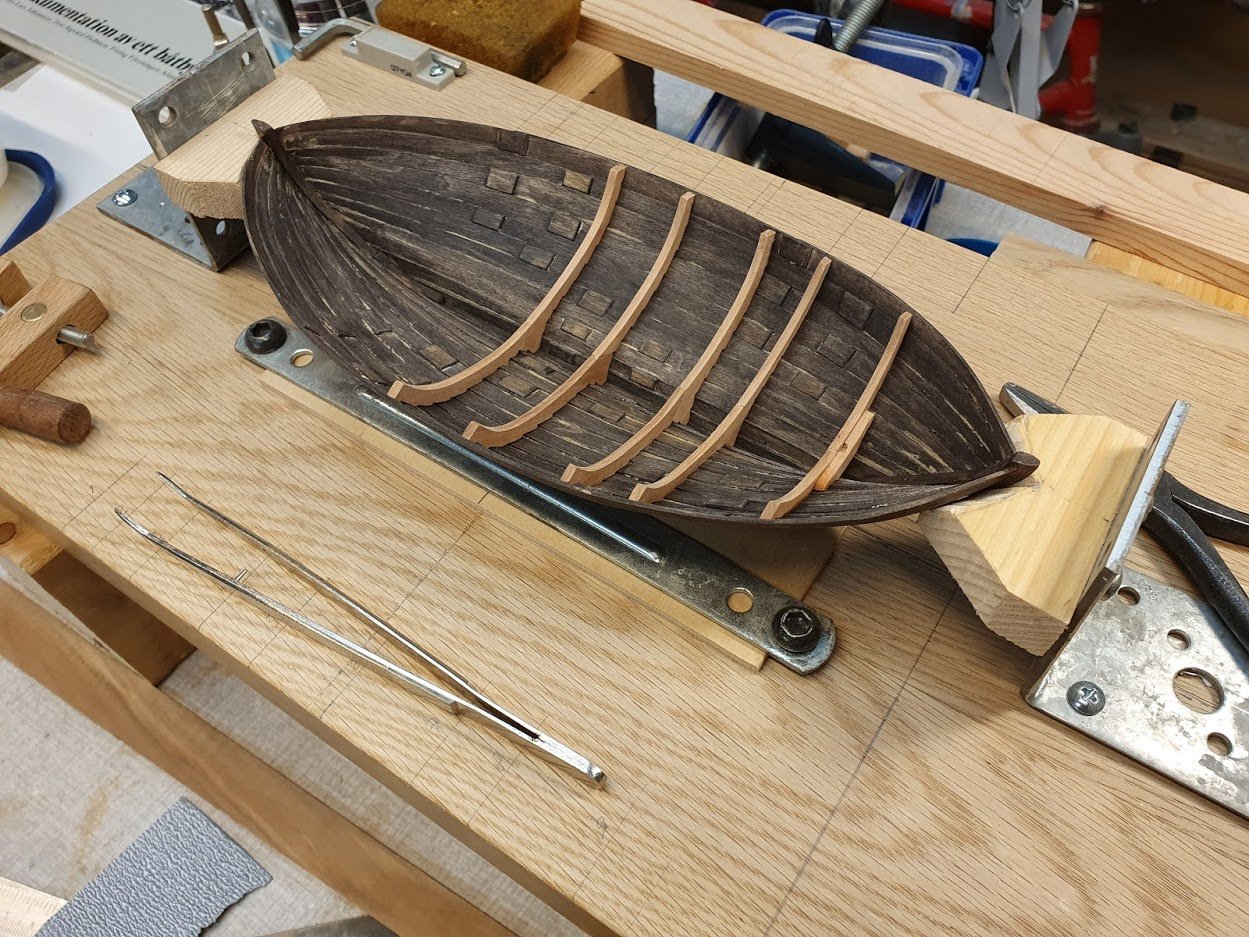
So before the weekend kicks in with full force and focus shifts elsewhere, another update. This one is more of a milestone actually. All frames are in place! Yay 😄 The boat will be two masted sprit rigged, hence two mast supports are visible in the stern shot. Bow view: And stern view. The three most forward frames are still wet from paint, therefore a little darker than the rest. I mentioned in my previous post that a stringer is next. However I need to cut some more uplings (?) Each larger thwart needs more support than what a single frame accomplishes. After those are in place the stringer is next. Then I need to check what the shipwright in the book did next. I guess it is easiest to actually follow the steps from real build. Another thought when looking at the above two pictures is that with "correct" lighting all the small discrepancies wont show 😉 In the bow view above the light is much more forgiving than in the stern view. Something to consider when it goes on display. And thanks for likes and comments!
- 240 replies
-
- 12
-
-
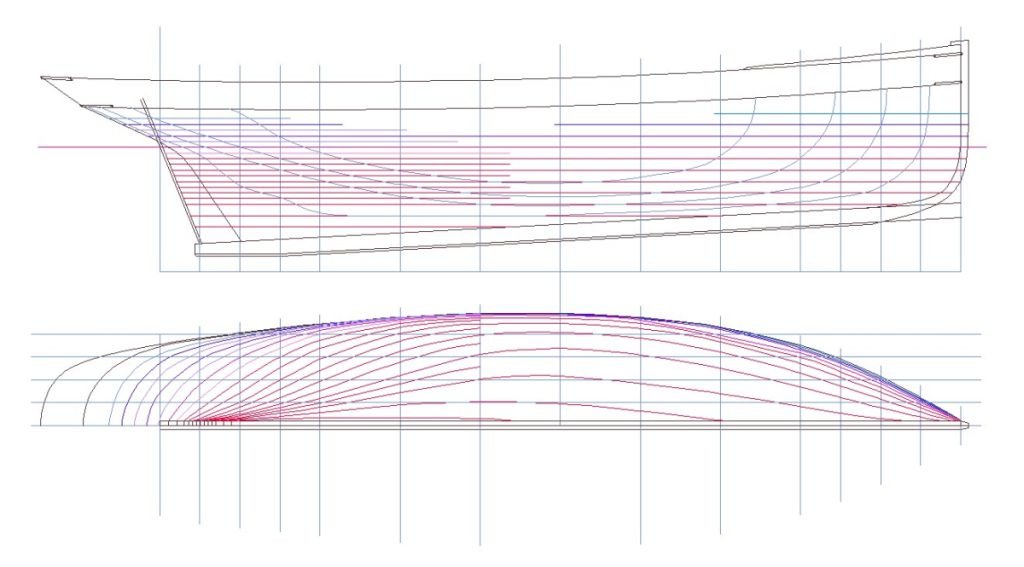
Just a wee update. Managed to get most frames in. Three to go. Next up will be stringers for the thwarts I think. In the photo below there are actually four frames to go... And then a small teaser for what will be my next build. 😉 I'm still in the preparatory phases as can be seen of the somewhat ugly first buttock line.
-
A little like when back in school you had a comb and took off one peg every day, counting down to summer holiday. But from the looks of it, you're in for summer school 😄 Kidding aside, one rivet at a time and you will get there....eventually. Keep it up!
- 179 replies
-
- 1
-
-
- longship
- Helga Holm
- (and 1 more)
-
Excellent detailing and weathering. She really looks like she's been out numerous times. But where on earth did you get the jaws???
-
Ah, details! Like spice on a dish, that (not so) little extra 🙂 Suddenly the whale knot found a proper place. Same meaning in Swedish actually, valknop or Turkish head knot. Google told med the origin is from the Viking age. Well what do you know. Used one as a boy scout to keep the scarf taught. Lovely rope work nevertheless GL!
- 86 replies
-
- 2
-
-
- whaling
- clinker built
- (and 2 more)


