


Wintergreen
-
Posts
1,002 -
Joined
-
Last visited
Content Type
Profiles
Forums
Gallery
Events
Everything posted by Wintergreen
-
Yes, I pondered over such a thing first. But several reviews said it takes a bit of force to form the rods. So, I came up with the above idea, which proved useful. A laser scanner would surely work, but then I try to keep things simple and always the K.I.S.S rule in mind (Keep It Simple, St...).
-
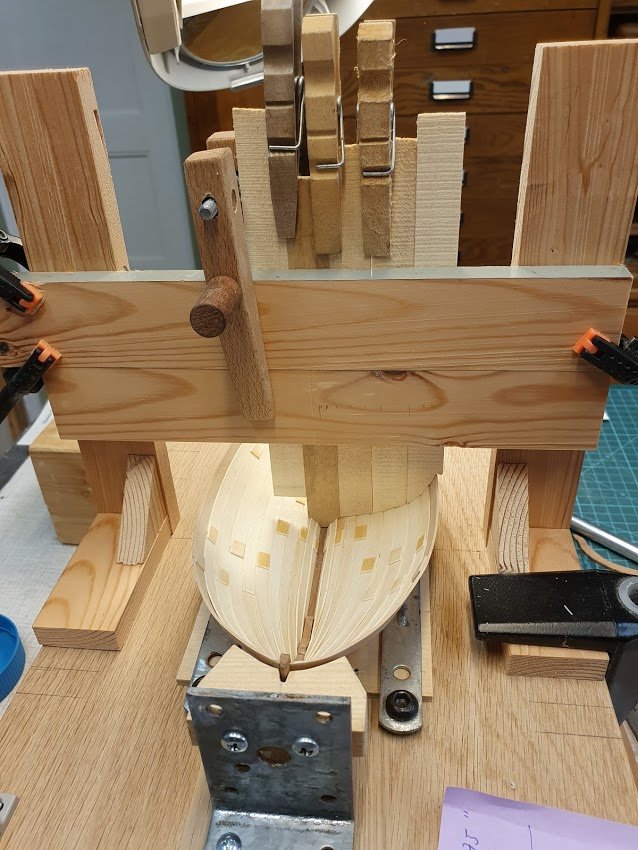
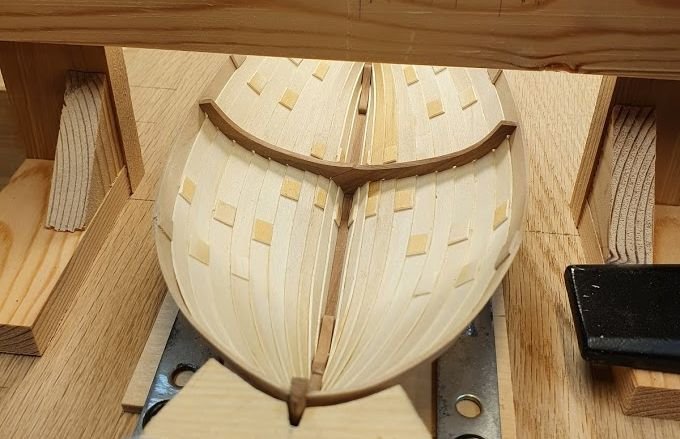
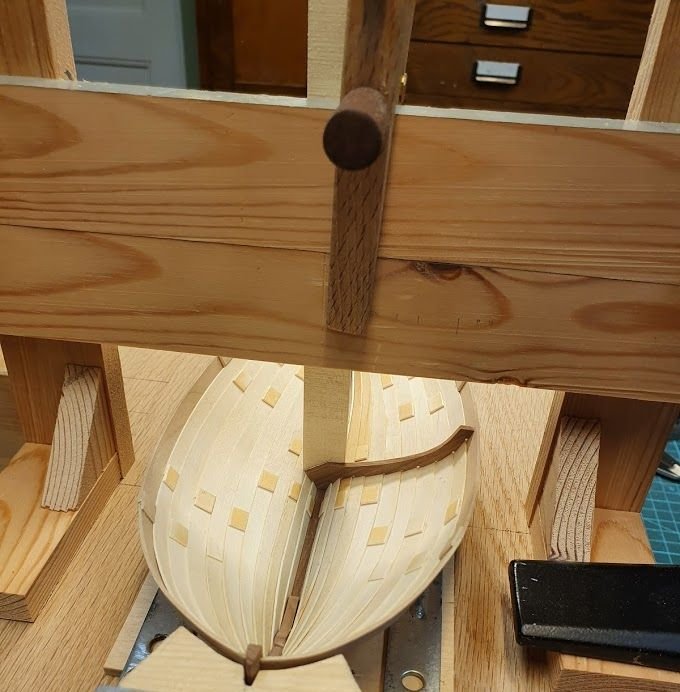
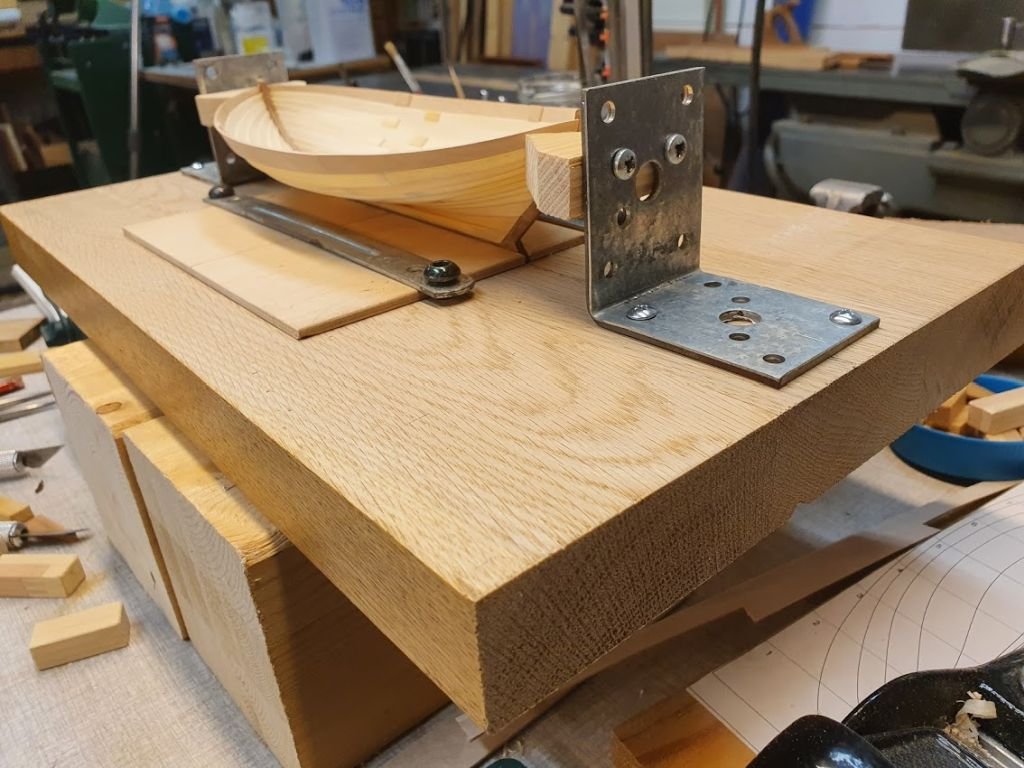
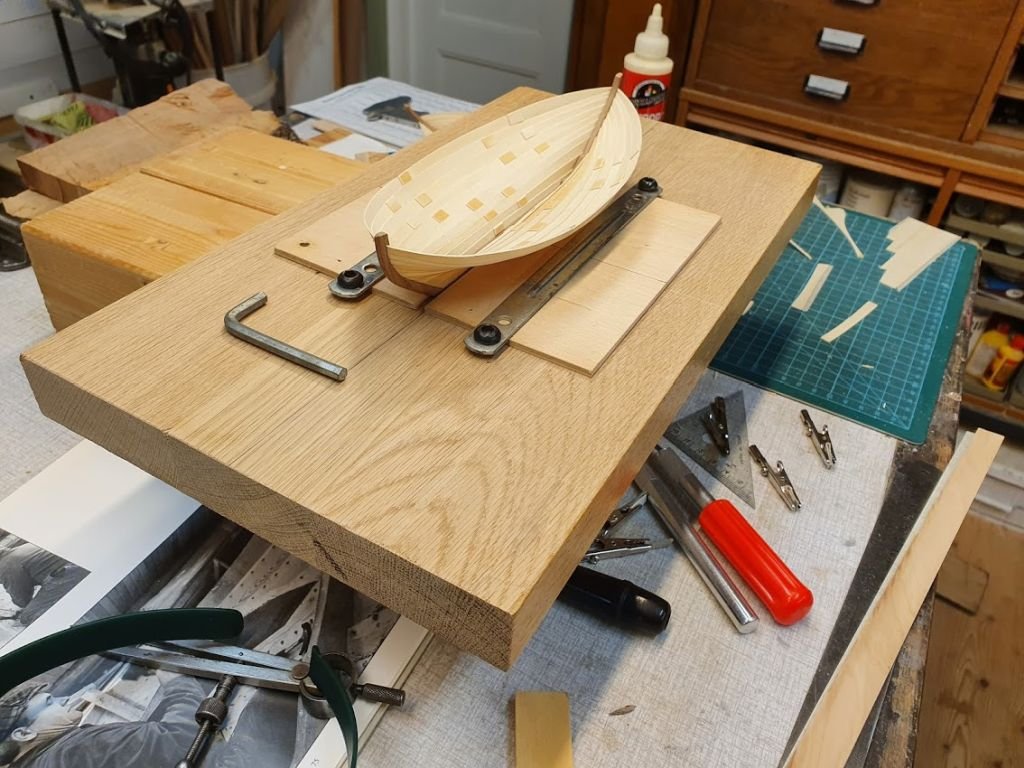
Well, this didn't turn out half-bad if I may say so myself. 😉 They're not glued in place yet since I ponder over finishing. Now, how did that happen you ask? My depth probing resulted in this template. A little bit off, but decent. Tricky part was in the bilge and that it has 23 spots to conform to at the same time... and paper is flimsy to work with. So, suggestion from @wefalck was given a thought. I saw @bolin using that method as well. On a bigger subject it would work for sure. I gave it a try with each paper strip matching 2-3 planks. Not usable in my case was the conclusion. Still to flimsy. Also, the frames are very similar and only changes shape slightly for each pair for and aft so something that could be used over and over again was to prefer. Came up with this idea: Boards of roughly the same thickness as the frames, cut from birch. 15 mm wide (guess that's something like 5/8"). Leftmost in this picture is reference side. Once port template was done, a new reference was clamped on. Pros: only three planks to ease in to for each template board. can be used for consecutive frames with just minor adjustments. clamps easily to the gantry and can be managed without fiddliness (not a word, I know, but you know what I mean) Once satisfied it is a simple task to take them all, secured with a tape on the far side and clamps at the ends and transfer result onto framing material (apple, 2,3 mm thick). Cons: Well, not a con really, but it takes time. But that's true for all things considered in a 1:30 ratio to true world. 😉 And an in-between shot with port frame half done. I even managed to get the limber holes in, or what they're called. 🙂 Best of all - it didn't take all day to produce one full frame! Also, thanks for given attention with likes and comments!
- 240 replies
-
- 15
-

-
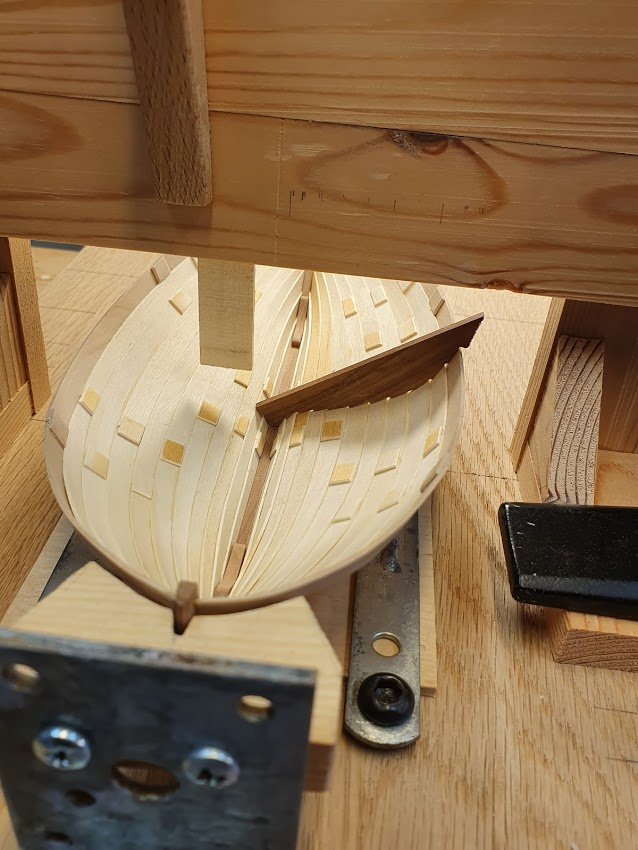
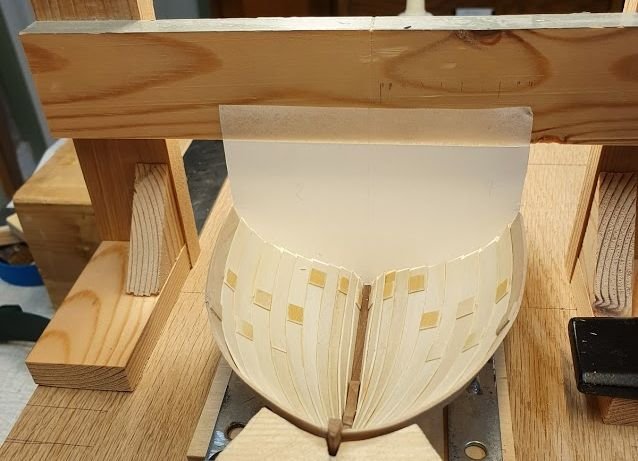
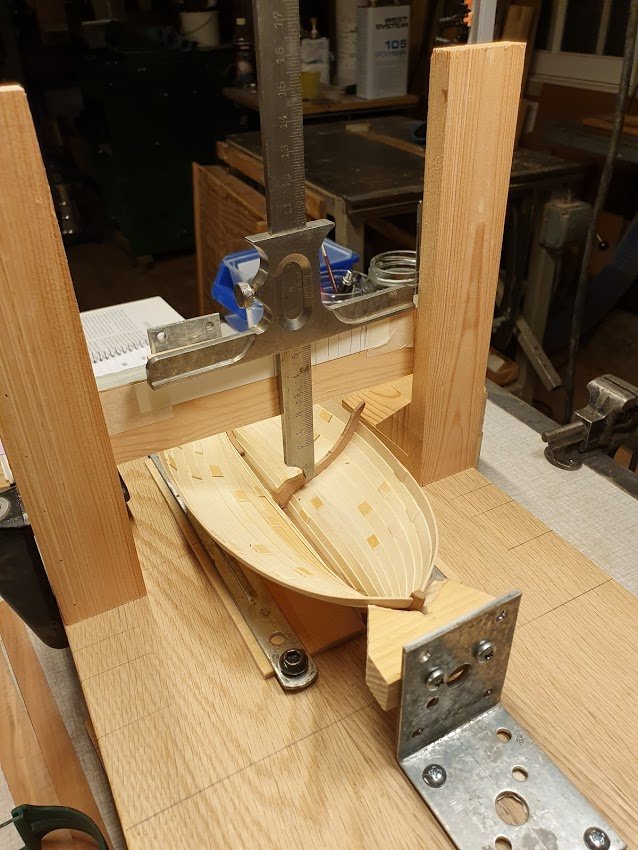
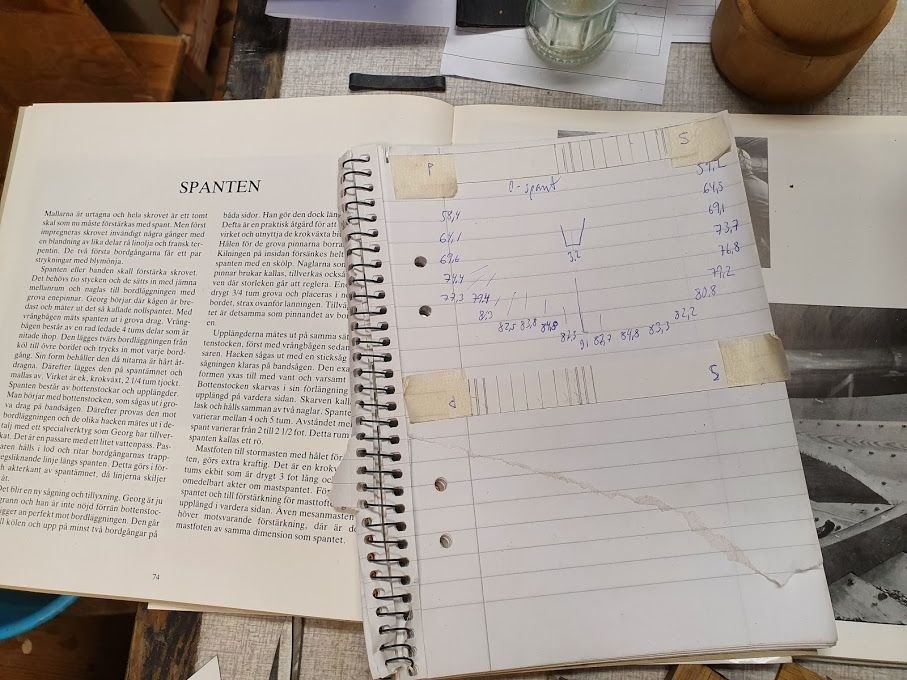
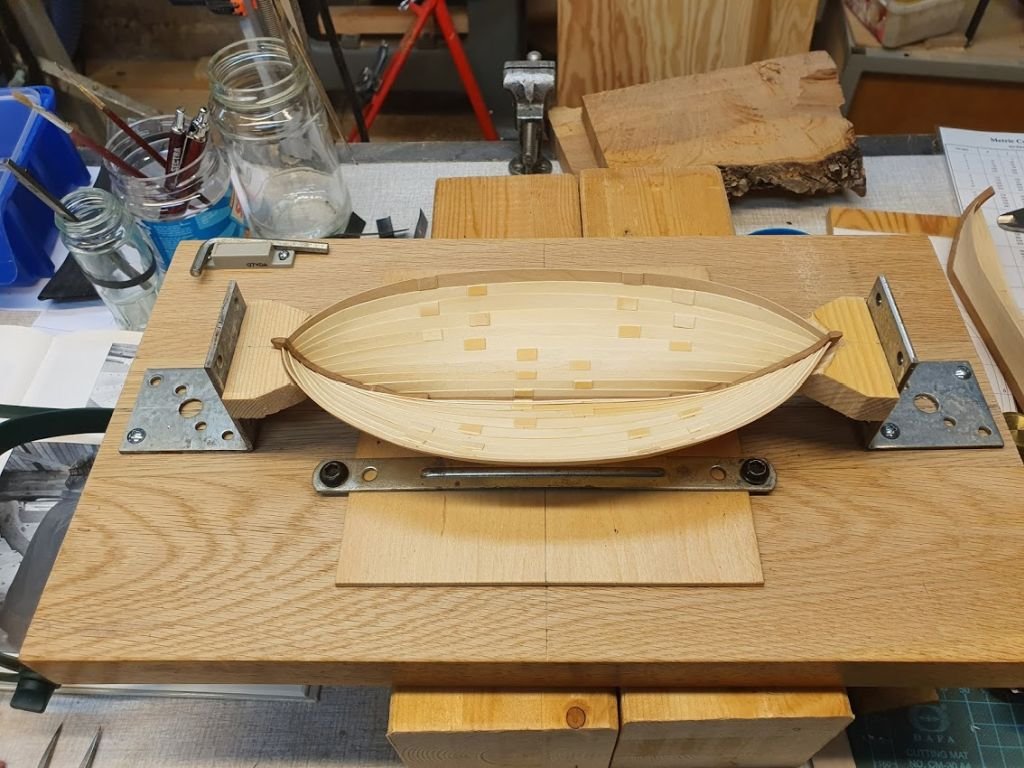
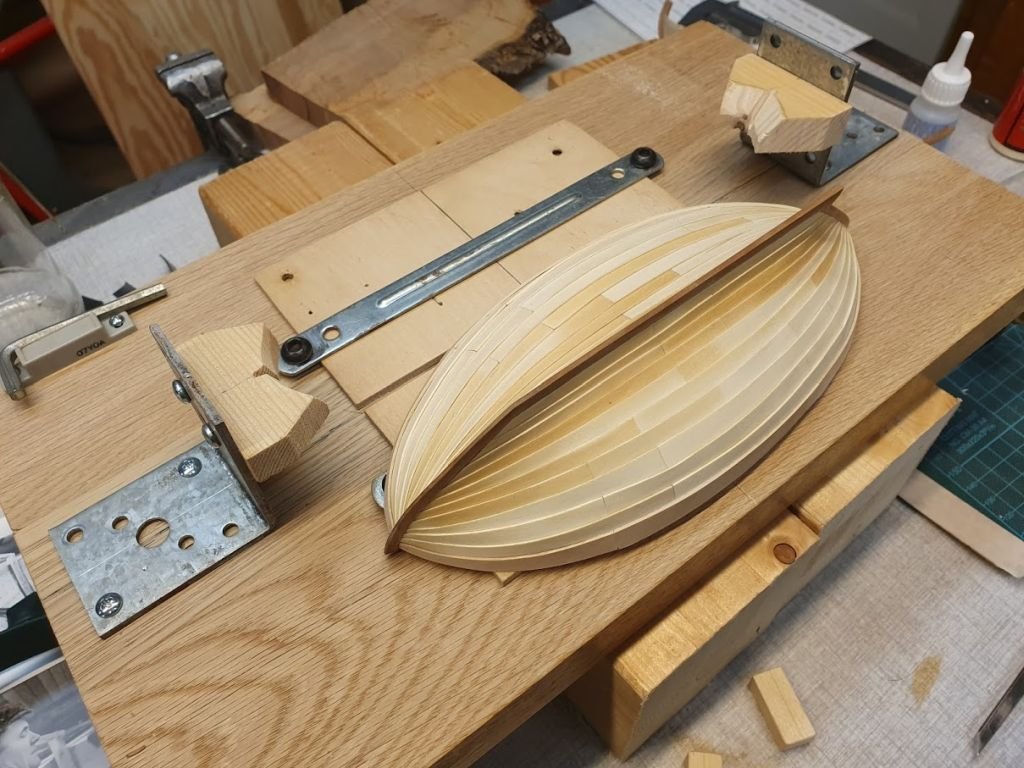
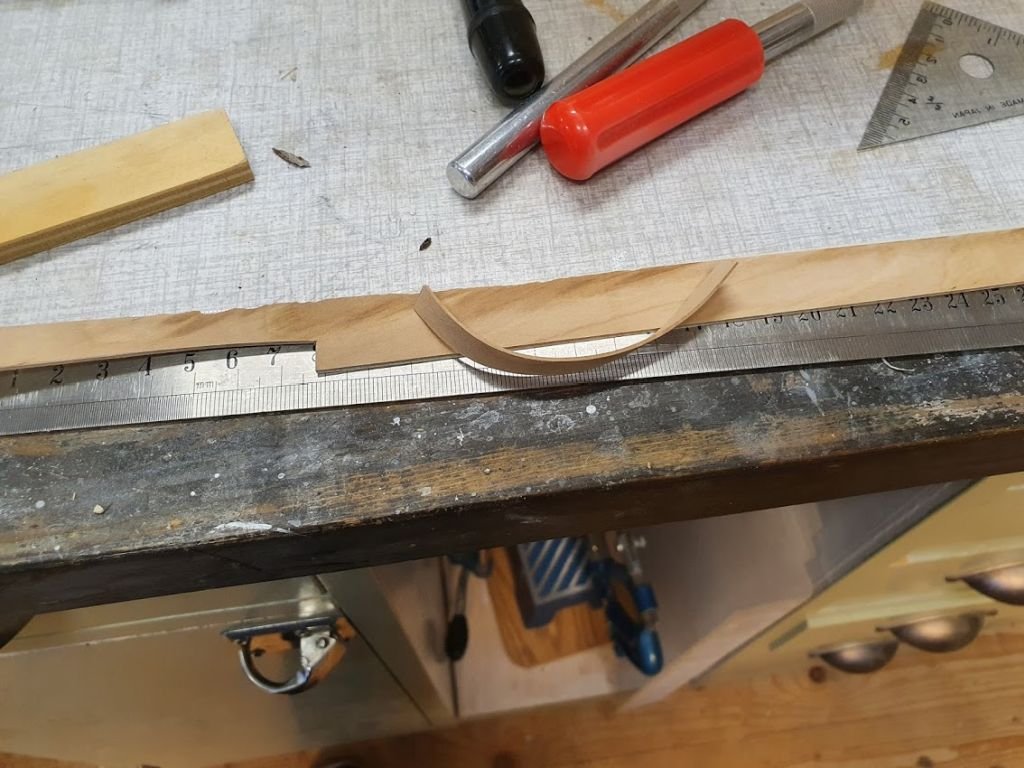
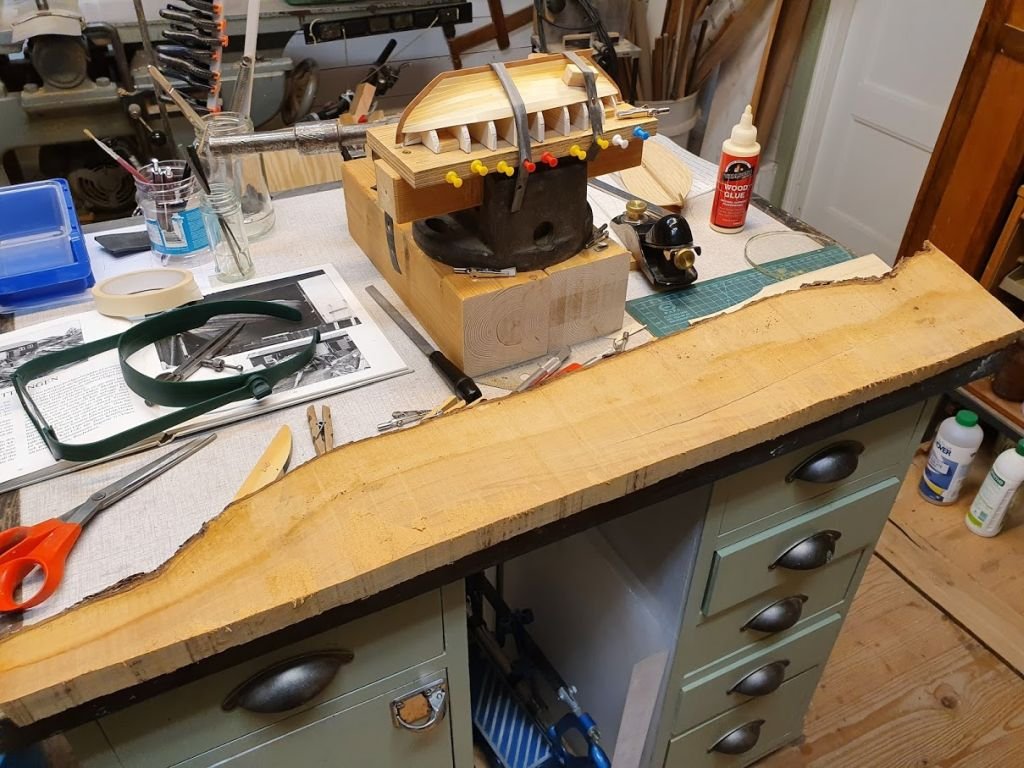
Hi guys! Thanks for comments and likes. 🙂 About frames. At the moment, this thing about clinker-boats does not seem so appealing any more... a Kingdom for a carvel built hull! Well well, insert words like "perseverance" and "patience" and "long term goal" here. I made an effort with a piece of cardboard and a compass to see what the challenges were. And boy, they were many. In the first picture that first effort can be seen lingering around in the hull. Basically one needs something to take measurements from, like a gantry. Then something to lift the measurements with. A caliper seemed like a good choice, but to flimsy and could be guaranteed to be vertical. A depth gauge on the other hand has all the right attributes for this. For every measurement a line was drawn on the paper strip to mark its position athwartships. The results can be seen i second picture. For those that can read my figures you will see that the hull is not a perfect mirror image. It's not by much but the eye will catch it if allowed. Next step I guess is to take measurements for all frames and then transfer them to a paper. Cut out, test fit and if okay, transfer to wood and, well, I think you can guess the rest. In the above picture the line that goes across is aft perpendicular. The shorter lines represents the front face of each frame. In addition to the frames there will be two mast steps and a couple of shorter frames, merely uprights to support thwart by the masts.
- 240 replies
-
- 12
-
-
Ouch. I feel you and the frustration about the hidden error. Good you found a way to spot it and further correct it. Keep it up!
-
Thank you guys! @druxey - Thanks for your approval! Your build of the Royal Barge was what set this in motion once upon a time. I am of course careful to show only the best angles of the hull 😉 Carvel or lap strake is quite unforgiving and I didn't managed to get port and starboard equal. Port side is a little higher, but that will not be prominent once on display I think.
-
Or as I said to my line manager that I work to get the money to pay for my hobbies and it's a shame that work so severely affects hobby-time 😄
-
So, after first day at the office, well, home office for the time being I was eager to get out and finish of the sheer strake. Apple was equally easy to bend as birch but as it turns out, much harder to sand. Which is a good thing because it holds edges really well. I will not treat you with any close ups just yet because even if it looks really good and there has been quite a lot filing and sanding the sheer is not exactly where I want it. Yesterday I also finished the building board. It will make due for small builds but for my next project I need to build a larger one (oh, a cliffhanger..). Next up will be frames and other internal members. For that I need to revisit the plans in my computer to figure out placement and such. Please excuse the occasionally unfocused images. They do however add that airy touch and enhances the subject somewhat 😉
- 240 replies
-
- 17
-
-
Truly exceptional workmanship and an astonishing model. I think what we are witnessing here is the true difference between The Master and The Apprentice in that the Master has failed more times than the apprentice has tried. I mean that in a positive way bitao7967, since you mentioned in an earlier post that only the piece that passes your high standard gets pictured.
- 257 replies
-
- 2
-
-
- young america
- Finished
- (and 1 more)
-
Very nice planking there Mike! Really sweet. And boxwood, don't think I'll ever use it, but it seems quite extraordinary. Keep it up!
- 969 replies
-
- 2
-
-
- hahn
- oliver cromwell
- (and 1 more)
-
She's just flying! Well done, mate. Very smart display 🙂
- 69 replies
-
- 2
-
-
- Galway hooker
- fishing
- (and 2 more)
-
Small boat x large scale = handy sized model Excellent job on the planking and details GL. I especially like the rope coils and the compass 🙂
- 86 replies
-
- 1
-
-
- whaling
- clinker built
- (and 2 more)
-
Yeah, sounds tedious. It looks very good though! I guess the clenched side will be a bit of a challenge, washer and all 😉
- 179 replies
-
- 5
-
-
- longship
- Helga Holm
- (and 1 more)
-
Looks like a boat, it does, your Orca 🙂 Keep it up!
-
Yes, they are! Good work there Vaddoc
-
Carl, yes they do. As you most certainly have read in any international paper Sweden has not indulged in total lock down. Blablabla death rates, numbers and all. Anything and everything can be shown with statistics... Anyway, my line of work is in deployment of medical IT. No shortage of work there I can tell. 😉
-
Sorry wefalck, of course there is glögg! Still plenty in supply 😉 season is not over yet 🙂
-
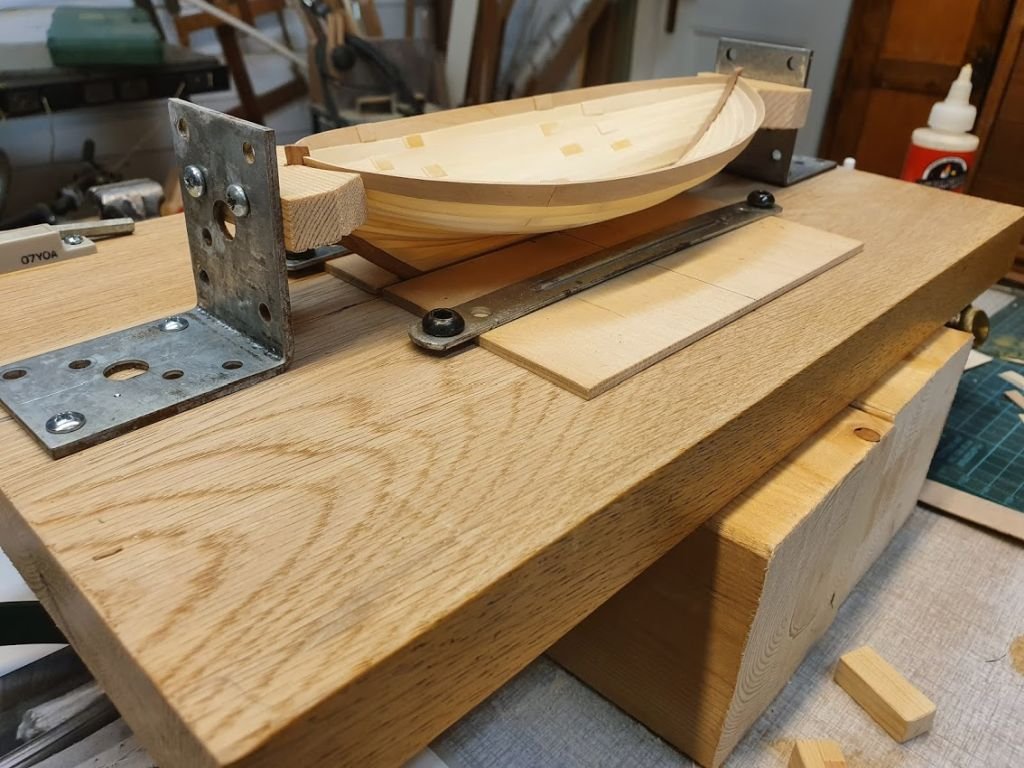
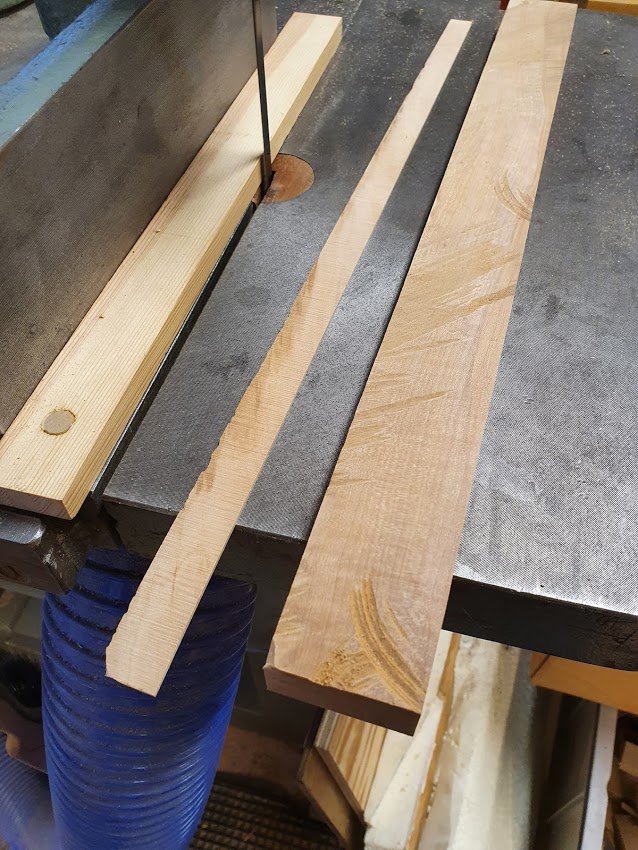
Wefalck, you are most welcome! There is coffee and biscuits in the back and free seats up front. Planking is progressing nicely. Takes time and a crazy sharp chisel to get it right, or at least descent looking. Yesterday I was aiming to get rounds 9 and 10 in place, but after a hizzy-fit (i.e. small mental breakdown) where startboard front plank came off with a rush I decided against that goal and called it a day. Round 9 was in place though. On the replica build the sheer plank is in white oak, while all other planking is in pine. Therefore I will do the sheer plank in apple, which the center line is also made of. A slab is put into picture to show its "raw" form. Some cutting, planing, more planing and then ripping. The pine piece is there just to get some distance between the blade and fence. The ripped piece is ca 1.5 mm thick, hence over to my home made thickness sander to get it down to just shy of 1 mm. I guess apple is a little like pear with not to prominent structure. Birch, which is used for the planking is known to bend well, but apple I didn't know about. A small test was made, and well, there will not be any problems with bending apple... Finally so round 10 is in place. One round to go... In preparation for fitting out, which I intend to do with the boat right side up a slipway is under construction. Base is some scrap white oak glued together. The screws are just tapped directly into the base, no nut or so. If not abused, tapping threads in wood holds surprisingly well. To finalize the slip some kind of end support needs to be figured out. Will google around here on MSW to see what ideas can be useful. Last pic for today. I am fairly satisfied with the planking. Actually, this is the best lapstrake/clinker planking I've ever done! Well, to be honest, it is the only clinker planking I've done bar the first attempt, which was never ment to be more than just an "attempt". Tomorrow is bank holiday and after that my free time diminishes to that of regular, working people.

- 240 replies
-
- 16
-
-
I don't know what the three previous attempts looked like, but the last looks up to it! Well done!
-
Looks good Joe! I also like the coloring scheme. The yellow has a very nice hue about it. Keep it up!
- 140 replies
-
- 1
-
-
- benjamin w latham
- model shipways
- (and 1 more)
-
To use Mads expression on youtube channel Sail Life: Pretty dang spiffy! Keep it up!
-
Looks like a seaworthy boat George. When I'm to old for sailing I might buy a motorboat with such lines 😉 Keep it up!
-
Seems you're off to a good start there Neil. First I couldn't tell if it were some kind of speedboat, but the latter pictures with forward cabin and sides kind of revealed it. Will it be RC or static? After a little more browsing I got that it's the boat from the movie Jaws of course! Keep it up!
-
And a couple of minutes after that, the already cut one will reappear 😄 Nice progress Vaddoc. Where do you source such tiny screws?

