


Wintergreen
-
Posts
1,002 -
Joined
-
Last visited
Content Type
Profiles
Forums
Gallery
Events
Everything posted by Wintergreen
-
Nice little boat you've got going here Gbmodeler! The clinker planking looks like it should also. Well done 🙂
-
Nice frames. But a bit odd with shrouds inside of the bulwarks. One would think that they'd interfere with the cargo that way. Would be interesting to know why.
-
KeithAug, that sounds, well, harsh. I will from now on consider 15 degrees completely okay and will not complain more 😉
-
A couple of days above freezing, add some heavy rain and I think you can figure it out @Nirvana 😉 Now it's back below zero again... too bad with the snow.
-
Good progress Bolin! One thought crossed my mind and that is about the bulwarks. I guess they will come on later and be carvel planked? One reason I only manage one or maybe two frame pieces a day is patience as well 😉 Keep it up!
-
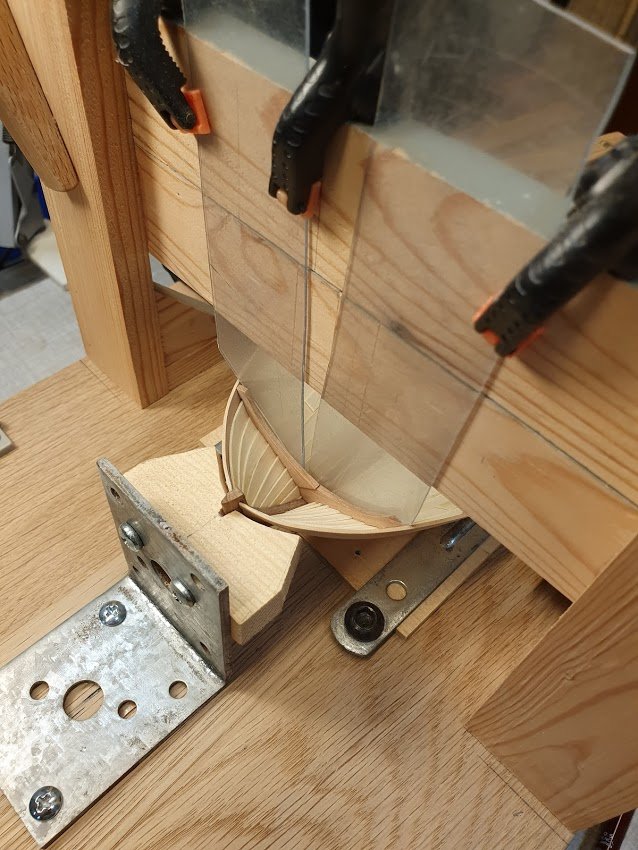
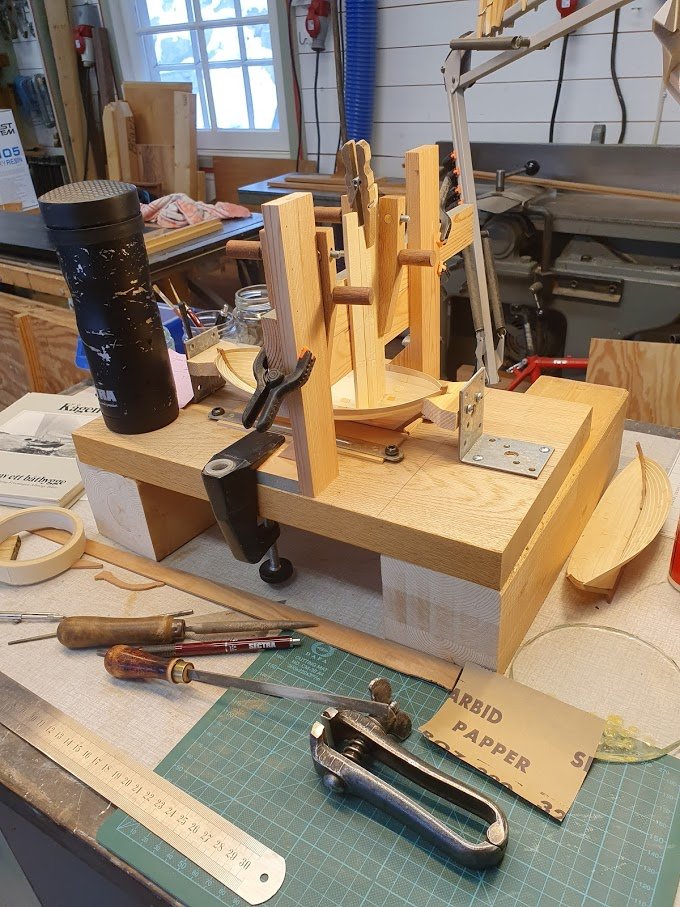
Yep, still here, plodding along. Just one fram pair to go. I haven't counted, by my guess is that every frame piece goes in and out of the hull up to 50 times. So each pair of frames, that's 100 times. Multiply by nine, that's.. hm... 900 passes in and out. For some reason I don't think a real shipwright needs that many jumps in and out of the hull. This is the 2nd pair being test fitted. Just one pair to go, the front most one. And here are the other, waiting for final fit and glue. And no, I haven't used the draw knife to bevel the frames! It belongs to another project where I needed a quick way to bevel off some carlings. Yes, sounds like deck work, but it's actually project Insulate workshop ceiling, going on. 😉 Soon I will be ready to mount the frames and leap on to next subject of the hull. And, thanks for likes and comments!
- 240 replies
-
- 14
-

-
Excellent posts Mike! By a quick www search I found a store in NL that currently has the 0,75 l can for just 35€. That is ordinary paint price to me 🙂 What tool did you use to apply? Brush or sponge? Airbrush? That would be fancy...
- 969 replies
-
- 2
-
-
- hahn
- oliver cromwell
- (and 1 more)
-
Yay, it's not finished yet 😉 More delightful work. A side note, what brand is your mini table saw I see in the background?
- 86 replies
-
- 1
-
-
- whaling
- clinker built
- (and 2 more)
-
Very well sir, thank you, now I see them. 🙂 note to self: add to wishlist - mini table saw. probably European brand since shipping from the states is horrendously expensive. In a world of changes it is soothing that your Montague is always there, plodding along with small updates now and then. Keep it up and carry on!
-
@garyshipwright, another tooling question if I may. Going through the pictures above there are a lot of goodies, but I don't see any mini table saw. A full size, yes, but no mini. So what do you use to mill planks I wonder? Having big tools myself I ponder over future additions (addictions?). 😉 Thanks.
-
Sounds like you've got a plan. That's good. 🙂
-
Copy that @neilm My thought was that it is easier to do the paint job when there is easy access, like having the deck house freed from the hull, and then glue it in place when painted.
-
Looking good! What are your thoughts about painting? Are the deck structures removable for easy access f.ex? Keep it up!
-
That's a very well executed ships boat! Up to your usual standard 😉 Keep it up!
-
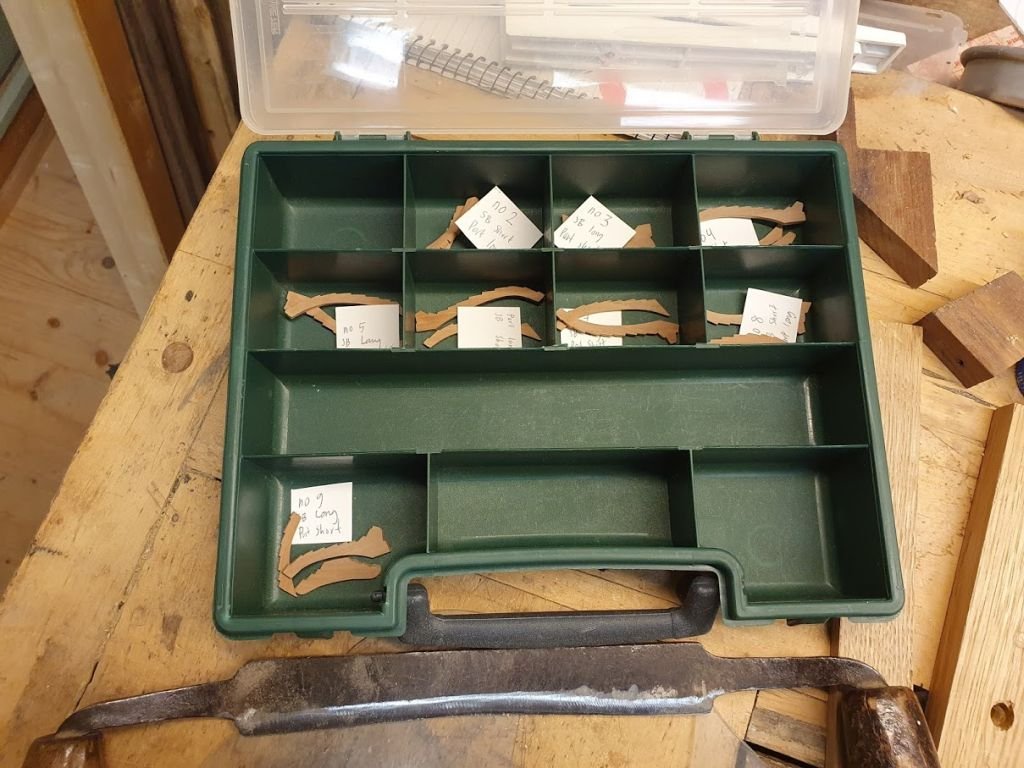
Just a wee update so you I'm still at it. 😉 Main problem now is outside temperature. Since my workshop is heated by an air-air heater, when mercury drops below -5 Celcius it can't really keep the shop warm. So, extra heater is engaged. Starting out at around 12-13 degrees inside in the morning, temperature slowly raises to 15-16 at lunch time, and if lucky, another degree during afternoon. The last couple of days it has been lovely winter with down to minus 10 Celsius. Say no more. (My workshop is adjacent to the garage btw). Anyway, the task at hand is cutting frames. I manage one half frame per day during weekdays and maybe 1 to 1.5 full frame per day on weekends. The template sticks works really well. Frames 4 to 8 are done and waiting for fastening. Currently work is on the after most frame, no 9. No 4 and 9 also has a maststep partner. At the moment a break was needed since I realized that I need to redo frame no 4. However, on another note I got really excited today since the plans for my next build arrived as pdf:s. Yay! That'll be fun when time comes. Need to be done with this one first though. As always, thanks for Likes and comments! Appreciated 🙂

- 240 replies
-
- 14
-
-
Nice to see this kit being built. Your painting is very good. Spray paint or by brush I wonder? And I was particularly glad to spot Regina in the pond. I did put ballast in mine but have no intention of splashing her. Keep it up!
-
Hi Bianca and welcome to MSW! You will see that there are a lot of helping hands here on this site, but I think that "patience" you must master by yourself 😉 Having a bunch of daughters I have no problems visualizing the challenge 😄 However, if you get stuck, just reach to this community and tips and suggestions will come. About the "then he broke it" - what can I say, even with the best intentions we sometimes fall utterly short 😄 Keep it up!
- 7 replies
-
- 1
-
-
- sakonnet daysailer
- first build
- (and 1 more)
-
What you show above is just pure excellency! It is really telling when you snap the pictures holding the objects in your hand. Then it is possible to appreciate their sizes 😮 Keep it up! Edit: Didn't see the last post until after I submitted my response. Well, the cure for our uneasiness you've already found. Looking forward to the expansion 🙂
- 86 replies
-
- 1
-
-
- whaling
- clinker built
- (and 2 more)
-
Yes, the colour is correct but what about the smell of tar? Have you managed that as well? Looks excellent!
- 179 replies
-
- 4
-
-
- longship
- Helga Holm
- (and 1 more)
-
Soo, what are you waiting for??? 😁 Sorry, just kidding. Well done on the frames part. Keep it up!
-
Coming along just fine 🙂
-
Looks good. If that is the proper distance apart, there will be a lot of frames to make...