SkerryAmp
-
Posts
809 -
Joined
-
Last visited
Content Type
Profiles
Forums
Gallery
Events
Everything posted by SkerryAmp
-
 Wow Larry you can really knock out a tune I am not so sure about the posting of us singing though, I am thinking that may break local noise ordinances at the very least!
 -
Looks terrific Popeye!!! I hate it when the blotchiness attacks! But if I can even it out I am sure you will have no problem at all!!!! (not that it really shows that much to begin with )
-
Take your time and heal up - that is most important - we will be here, I assure you Your work is outstanding!
-
Wonderful work on the 12 Apostiles Jack. Really looks impressive and your diligence is showing through. The can idea for bending planks is ingenious! So simple and from the looks of it so effective! Good luck with the operation!!
-
Excellent choice my friend. The contrast is great looking and "classy". I approve, carry on
-
Thank you gentlemen! The new toy is wonderful - so much control, it really is nice. May have an update tonight, taking the Admiral out to dinner - her choice, so not sure where we are going but am sure it will be grand!
-
Sorry popeye - did it, cracked that box open and off we go. Wayne - glad to see you back at it a bit, can't wait for the pics - so close to the finish line eh? Can you feel it
-
Nicely done Gulf and LOVE The laser idea! Looks like you are moving along nicely and love the attitude!! The grates are DEFINITELY to big. I wanted to adjust mine but decided to just go with what the kit gave me and it resulted in one of the aspect I am least happy about. It looks like a platform rather than a grate. Max had a grate idea (get it grate.. idea - I crack myself up). You could also just sand it a bit. Assemble it and lay it flat on some sandpaper and reduce the thickness - CAREFULLY, the edge a bit fragile. Regardless - just be happy with what you do and that is all that matters!!
-
The images that popped into my head of going at a wooden ship model with a belt sander were hilarious - thank you for that imagery and WHEW that you resisted!! Nice work though so far - the planking looks good and am sure you will solve the puzzle of the remaining bands!
-
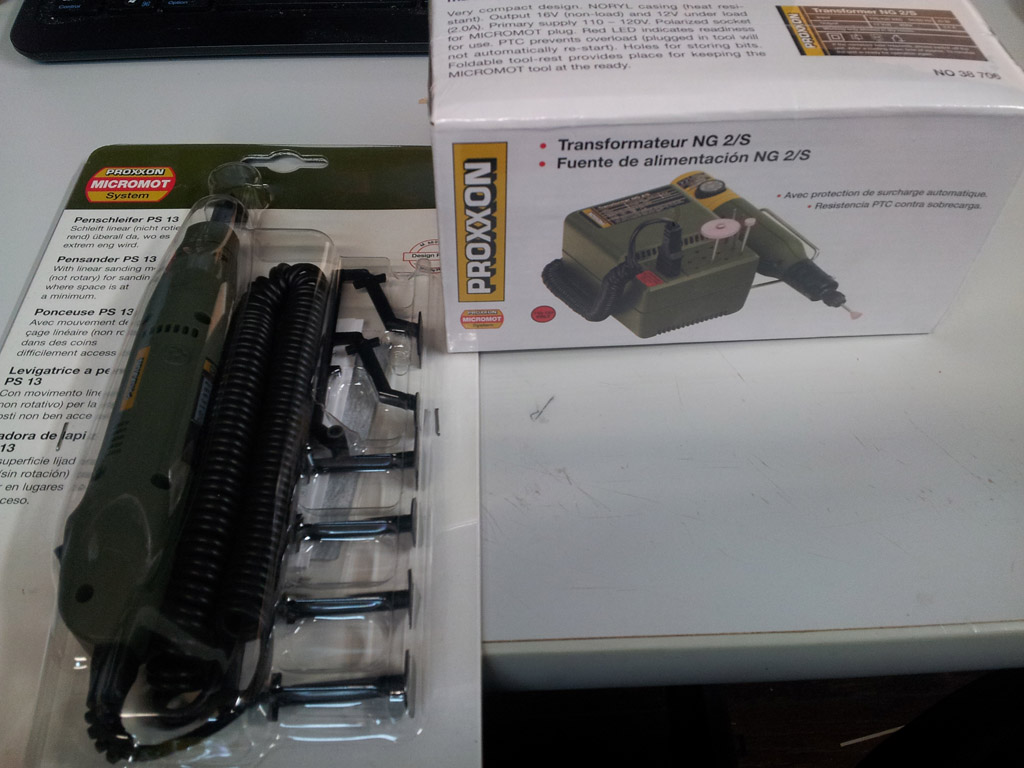
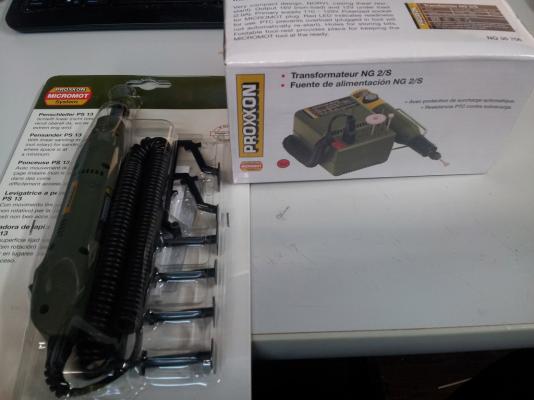
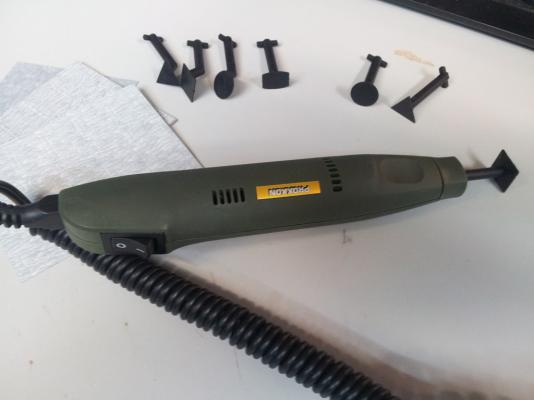
So the next step will be thinning the bulwarks as well as laying the keel stem and stern. I remember thinning and shaping the bulwarks on the Phantom being a bit of a nusaince because but mustered through it - well, things may be a bit different for this one. Happens to be the Admiral's and my 9th year anniversery this week. For that, she let me order the Proxxon Pen Sander. I had seen a couple people rave about pen sanders, and I had been looking at it for some time but kept bouncing between it being a gimmick tool or not... well; the unit is really kind of neat. Although she said something else is coming but she won't tell me what. Anyway, the proxxon pen sander =) Comes with some nice "bits" for the sandpaper, various shapes and angles for all kinds of small area sanding, and strange positions. The sandpaper is "okay". Not the best but you can use any self adhesive sand paper and just cut it to shape. Quite neat - just played with it on some scrap wood to see how it did and was impressive for a small unit like this. Can't wait to thin them bulwarks now!! Just thought I would share for tonight! Enjoy!
-
And our saga comes to an end - whew! Thanks to a generous stimulus package from Mr. Popeye - there is planking to be had!! Pop was gracious enough to invite me up to his place and let me tell you guys something... One - it goes without saying but Popeye and the Admiral are wonderful people! Thank you again sir for inviting me to your home. Meeting yourself in the flesh and your lovely wife was a great night! My wife and I really enjoyed the visit! Two - Yes; he is Popeye and nails the gestures, and the voice and can even make an excellent popeye face! And Three - WOW, his work is amazing in pictures but in person is even more so. What a great experience it was to have the opportunity to meet him and see his work live! And he had just what the doctor ordered! A little sanding and the influx of planks from popeyes private stock is working out quite well so the Mayflower is back in rotation! No pictures quite yet (sorry Sjors) but soon - VERY soon.

-
Thank you sir - yes, the white on the hull is changing the complexion of the ship drastically!! Not ready for viewing yet, but will be soon.
- 97 replies
-
- 1
-

-
- Willie L Bennett
- SkipJack
- (and 2 more)
-
It's already a work of art... 100 hours eh? not bad, not bad.... let's go let's go move it move it move it!! (ducks and runs for cover)
- 2,191 replies
-
- 2
-
-
- confederacy
- Model Shipways
- (and 1 more)
-
No no no, YOUR masts are great! My masts, on the phantom when I did that one up - well - took many tries to get it straight!
-
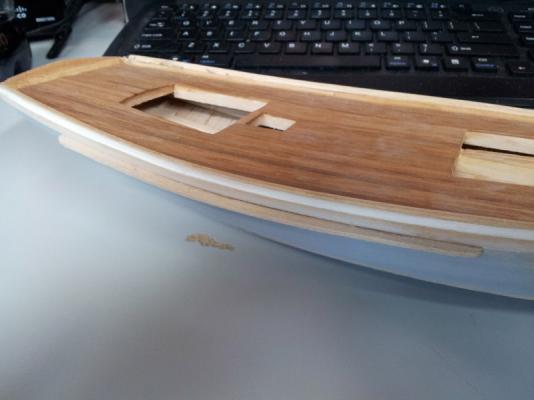
Thanks popeye, this one will have the lower hull painted but has some maple and something else (can't recall right now) for the upper. So as long as I can get a good first planking down and smooth it will be fine. I can fill and sand the heck out of it. Not sure why but it is going much slower than the mayflower did. The planks on that one laid in nicely and glued and setup quite well not much fuss. This one isn't behaving quite as well, a lot of clamping pinning resetting going on. But it is on it's way....
-
Thank you gentlemen - not much but every little bit moves it that much closer. Started painting the hull last night, will sand and put a second coat on tonight and see how where it's at.
-
Thank you Wayne! I can honestly say seeing your pics resurface with the water shots etc help a bit pushing it over the edge and onto the table - just fell right out of the closet again and fell open. I couldn't just let it sit there! And Thanks for the heads up on the parts listing, I was not aware of that but will check it out!
-
That is fantastic Rich - BIG congrats to you sir!!!
-
Quick, someone get Augie a cookie; of course now we can all start calling them strings just to see the reactions we can get! Great looking mast Sjors - quite complicated and tall but most importantly STRAIGHT!
- 1,873 replies
-
- 4
-
-
- occre
- san ildefonso
- (and 1 more)
-
Augie a bad influence? Say it isn't so! The last set of pictures looks great but wow - I have been proven to be a noob apparently, I looked at those pictures TRYING to find what Jim was talking about. Felt like a where's waldo adventure. Finally found it but took me FAR to long to.... humbled!! =) But, looks awesome - love the structure and it is coming along so nice and tidy
-
AAAAAND in the spirit of moving forward, as was said here by a few people - even a deadeye here and there is progress - SO, I attached the side gaurds today. Not a huge addition, but with that added I was set up to throw on the first coat of paint. So it is currently drying. It is going to need a few coats . To do the sideguards I just copied the plans to the heavy blue paper to make templates and cut them out of some scrap wood I have with that kit. Ran some diluted white glue along the edge and pressed it into place using two dots of CA to tack it into place while it dried since i couldn't get clamps in there. Then, a final sanding and shaping once in place and they were ready to go! I didn't cut the whole for the dredge roller yet, I want to be sure where it is going to lay once done. While I know where it is supposed to be, sometimes what I am off JUST a tad so may need to compensate. Until later all... Keep enjoying what you do and doing what you enjoy!!
- 97 replies
-
- 6
-
-
- Willie L Bennett
- SkipJack
- (and 2 more)
-
That is pretty much how I run through these. GO where the inspiration takes me and move between them. As long as they keep moving forward then I am moving forward as well .
-
not sure what to say - incredibly kind of you sir . PM incomming!