SkerryAmp
-
Posts
809 -
Joined
-
Last visited
Content Type
Profiles
Forums
Gallery
Events
Everything posted by SkerryAmp
-
 That game was NUTS! I am glad my wife has a CPR cert, needed defibrilation after that. Loved it and hated it at the same time!
 -
Thanks all for stopping in! @Richard: Thank you sir - hopefully this goes smoothly @Augie: Oh, trust me I will be referencing Wayne and Sarah's work QUITE a bit! I don't really have much of an excuse for too many mistakes with that kind of reference at my fingertips @Mark: LOVE IT, I will have to try that next time - I ended up down on the floor with a dustpan. Next time I will try the termite angle! =)
-
Basswood is the ole tried and true and have no issues working with it. However, that being said, when I can swing it I have come to enjoy Holly for decks and Boxwood for hulls.
-
May as well throw another "love it and use it all the time" into the ring. Same model from the looks of it.
-
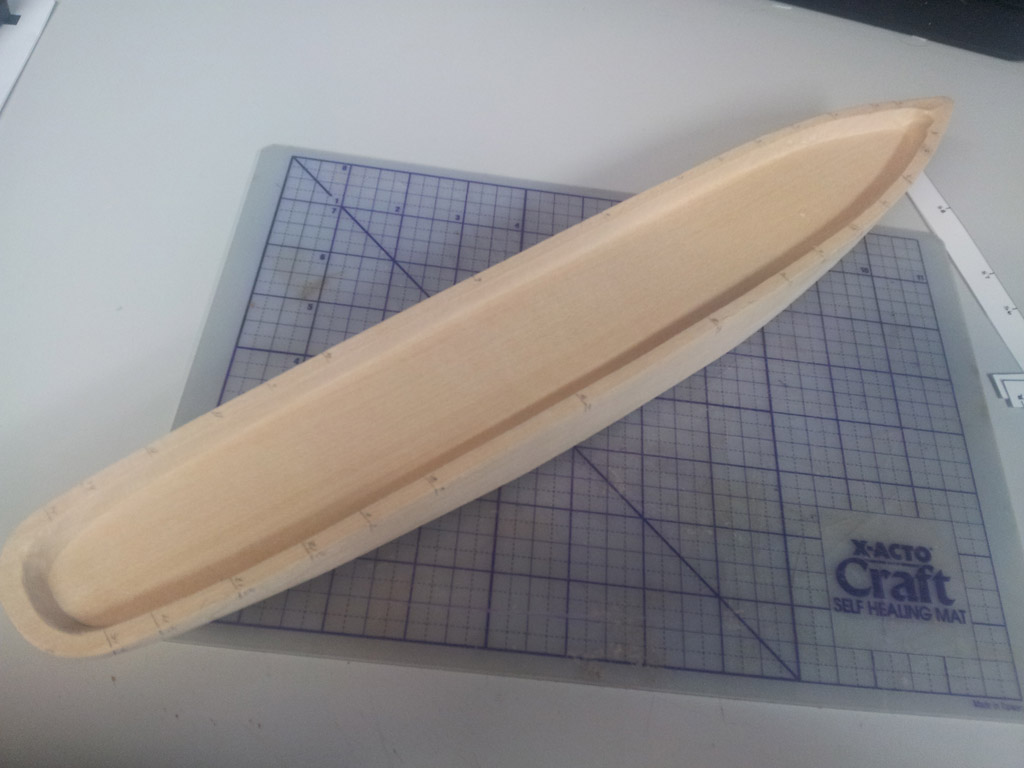
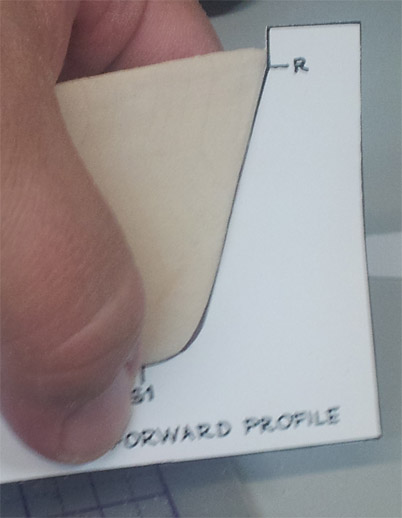
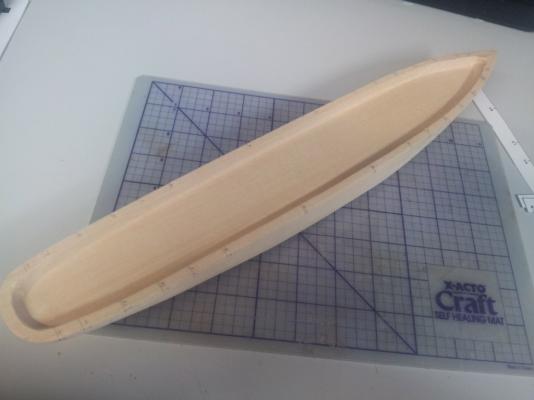
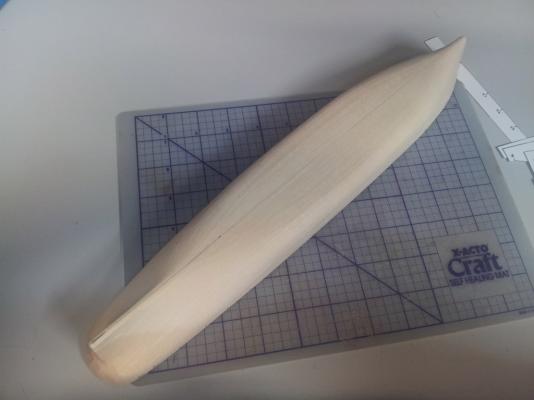
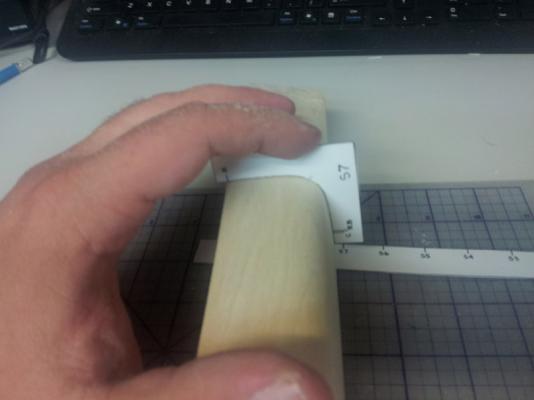
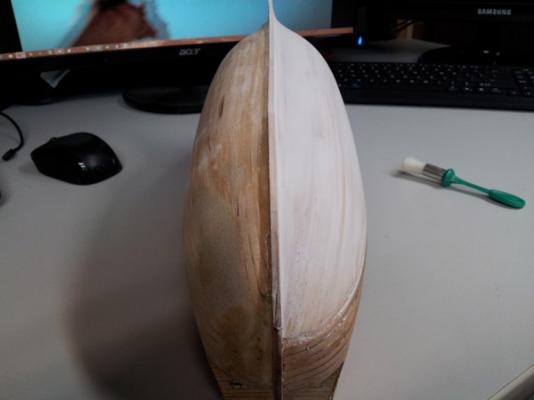
So, once it was all unboxed and the instructions gone over and the mats inventoried i threw in some re-runs of "Frasier" and started at it. The first step was very reminiscant of the Phantom. First was to mark the station lines, I used the 1:1 plan to get an accurate marking and the rails, then carefully extended the lines a bit down the hull side. After checking those a couple of times it was time to find the center line of the hull/keel. That wasn't too bad actually. I was impressed that at least the roughed hull I was in pretty good shape. I just measured, remeasured, cross checked and remeasured again using a digital caliper and sketched in the center line. From there, it was sanding central. If you have never done a solid hull let me tell you - there is a lot of sanding. As I type this I am surrounded by the fruits of the sanding and trying to figure out how to vaccuum all of this up at 1:30 in the A.M without waking the Admiral. Of course, if she walked into the office and saw this first thing in the mornign I am not sure I will fair much different . Anyway, I sanded. Sanded and measured, and remeasured and sanded Sanded some more, and then a little more.. until finally - she took shape. (I was going to take pics of each station but thought that wuld be a bit much since there are 15 of them) So, the base is done. It is now sized, shaped and sanded. Ready to be put aside and onto the next step tomorrow. Until later folks! Enjoy!!

-
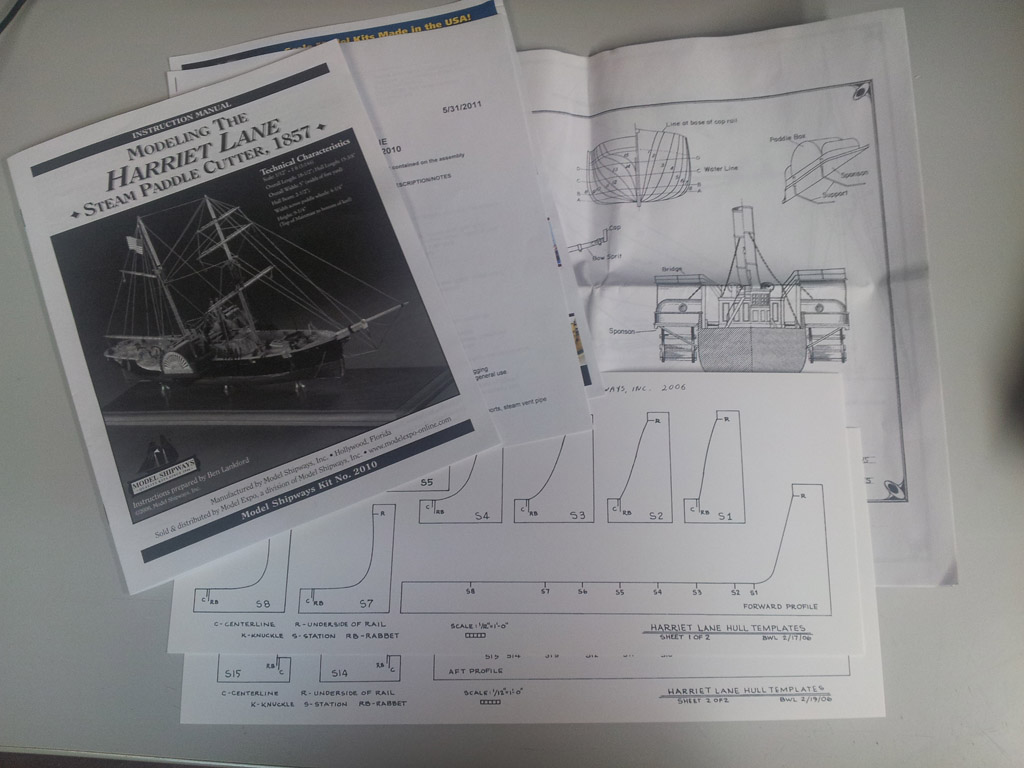
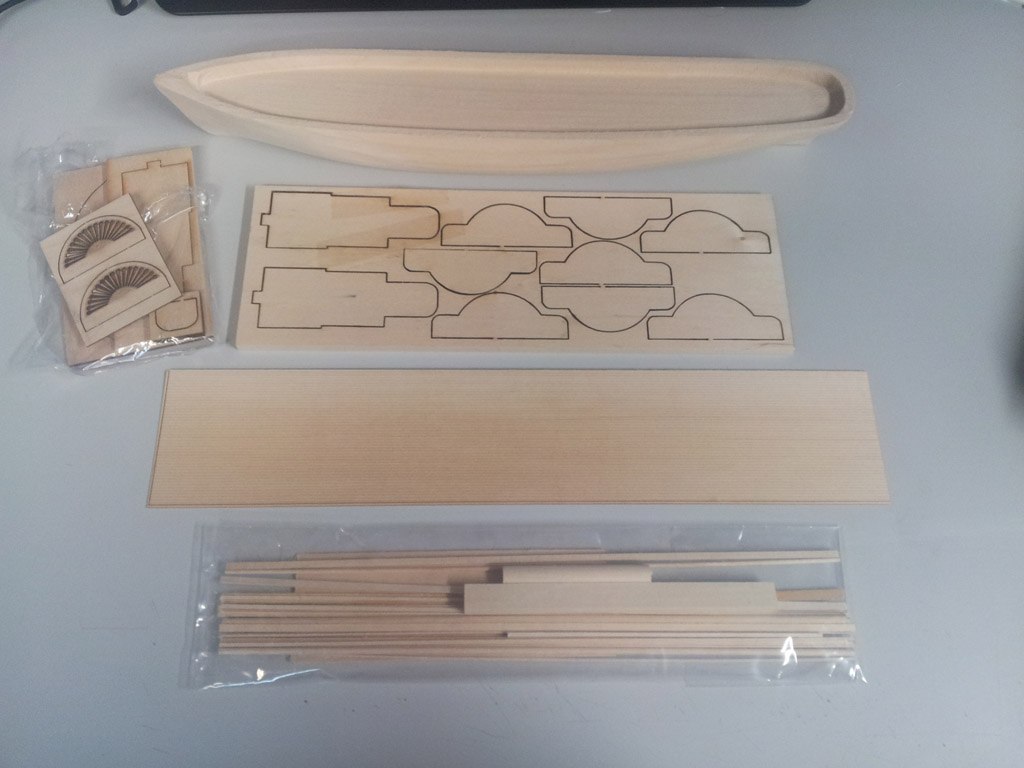
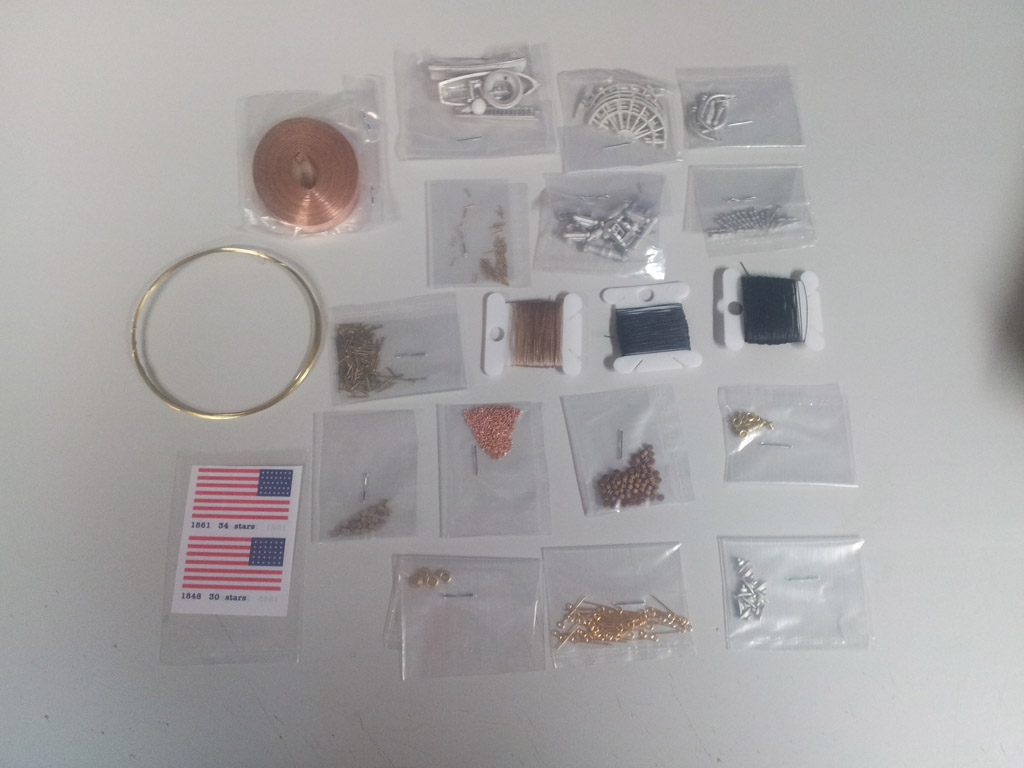
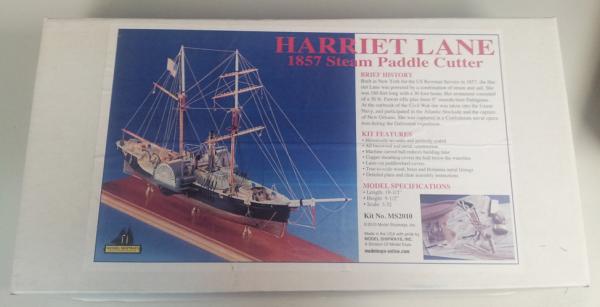
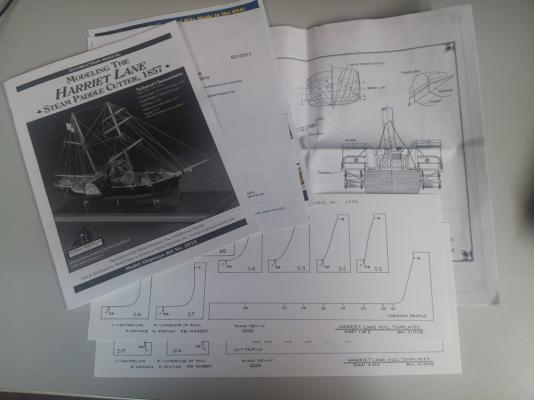
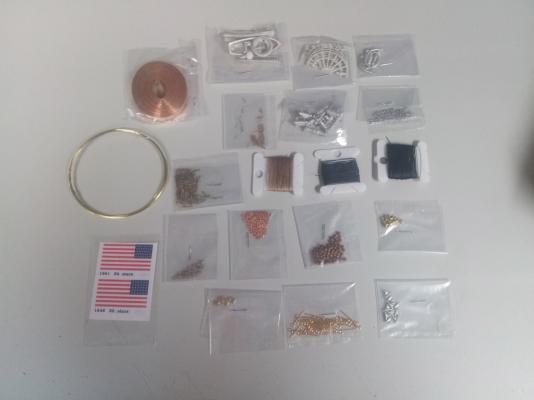
So, we begin with the customary unboxing. (I do apologize for the pictures. It wasn't until I was done tonights set that I realized why they were coming out "foggy". I somehow (no idea how) got something on the lens of my phone. So I will have to figure out how to clean that up). The box is pretty hefty compared to the other kits I have build by Model Shipways, gives the illusion there is a "ton o stuff" in there, but fear not - it really isn't much differen than any other solid hull kit. Pretty standard paper work. Mats list, templates and what seem to be pretty good plans. The instruction book is thin which surprised me, but they seem to really pack information into each page. We have the wooden bits. For the most part I will be using what comes with the kit. I will be scratcbuilding the details on the cabin rather than using the decal/paper art that comes with it so will be using something like box or pear depending on what i have kicking around. Some of the details seems a little shallow, not sure I have the patience to carve them down like Sarah did but may see what if anything can be done with them. And finally the metal and "fiddly" bits. I already know I will be swapping out the rigging and blocks and using the ones from Syren Ship Modeling Company. I picked some up for the Mayflower and his stuff is just to darn good! I am not sure about the figure head yet, but will worry about that when I get to it! And that is about it for the boxing.....

-
Okay - so, was a little nervous about doing this. I recognize I need help but something about building these models is so enthralling to me it is hard to describe. With each of my other builds in varoius stages of stalled or slow going (Mayflower - waiting for me to be able to get some planking mats, Willie - spending some time learning how to solder and do metal work, Blue Shadow - planking going ever so slow) and the HL sitting in the closet calling to me and my resisting for MONTHS - I finally caved. Especially seeing Sarah's (slagoons) and Waynes (trippwj) wonderful work; I just had to crack it open. I know there is always the thoughts of orphaned kits along the way, but that isn't the case. Each will be done to completion. Mainly because I have the Syren and a couple others on my list but the Admiral has put the foot down and no new kits till the ones I have are cut down a bit . So, without further ado. I now toss my attempt at Model Shipways 1:128 scale USRC Harriet Lane into the mix. I only hope I can do close to as good as job as the others here. I definatel have inspiration. So, thank you to any and all who take interest, I am sure I am going to enjoy it and hopefully I can make it enjoyable along the way ON we go!!!
-
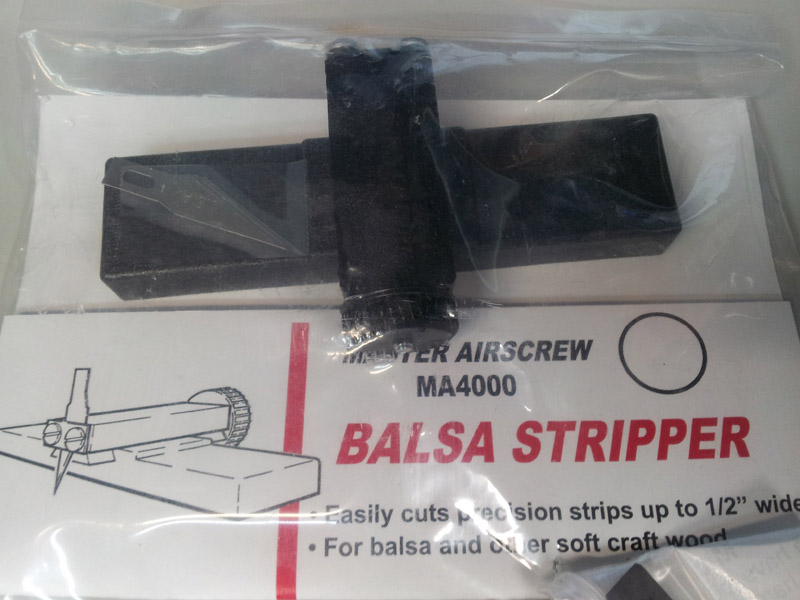
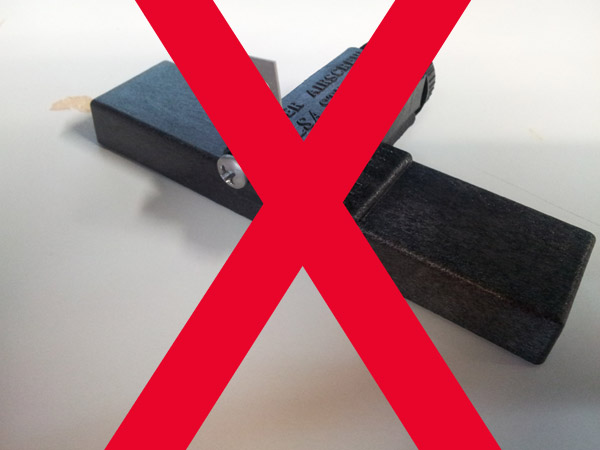
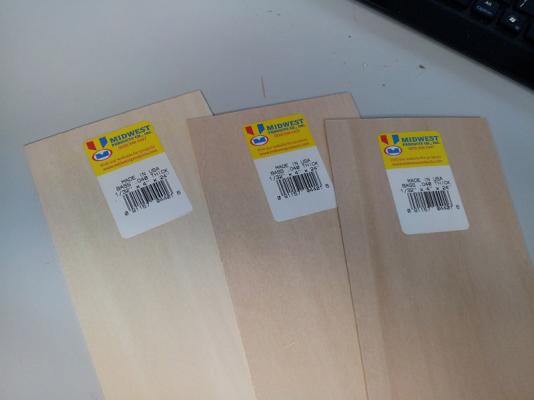
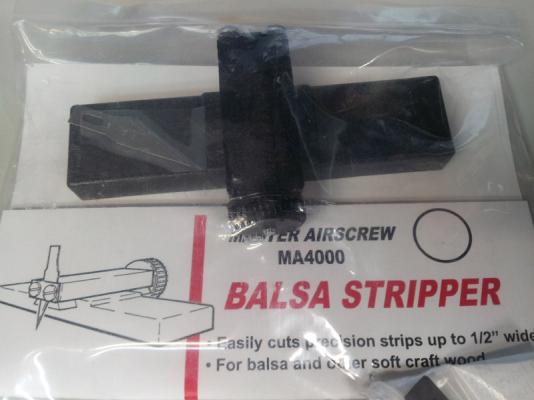
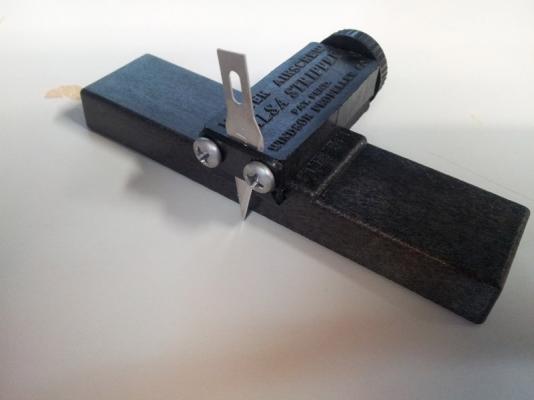
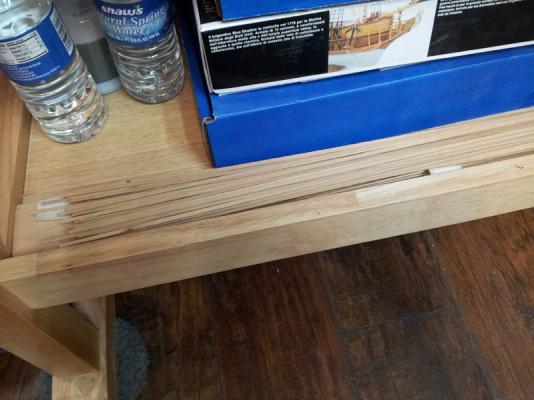
So, the Mayflower is begging me to keep working - yet, unfortunately I am out of planking stock. I ran around Nashua (a neighboring town) looking at Michaels, AC Moore, and a local hobby store (used to be a HobbyTown but now is something else hmm). Nothing. Nada. No luck. So, inspiration struck me. Why not make my own? So, I did grab some stock from the hobby store...... I searched around my closet because I knew I had kicking around somewhere.... YES. there it is... Balsa Stripper, planking stock.... this should be a breeze!! (sigh) Well, first the balsa stripper is a very neat little tool. Very simple. Loosen the screws, insert blade, tighten screws. Easy peasy right? The package comes with a #11 blade, but Micro Mark had attached a #24 blade with the note that they had found it cut hard wood better. Sweet! I am in business. The #24 blad doesn't fit. If it goes in from the top it is nowhere near the material to cut. If it goes in the bottom it extends too far and raises the tool so it won't slide along the stock. So, I put in the #11 and attempted to strip basswood! The #11 bent so much it was near impossible to get even strips. Regardless of the speed I went, slow and stead, fast rips... junk planks. I am sure it works great on balsa (it is called a balsa stripper after all), but my experience and my review of the unit on basswood? Survey says! So, I may try to head up to Manchester (the other direction of my town) and see if a hobby store up there may have some. Until then, the mayflower sits and waits.

-
I did a test fit of the wales yesterday and yes, MUCH much better. You were right sir! and glad I took the advice =). Using mud I admit is a bit unorthodox, but I have found in some cases it works like a charm. Especially since you can dampen it with a rag to smooth it out and cut down on the sanding needed. I tend to bounce between mud and hobbylite depending on what I am doing. very happy with how it is going now =) If only I had some damn planks!!!! ( Thank you Sjors, yeah first reply - was feeling a bit neglected (sniff sniff) JUST kidding. It is hard with so many great logs going to keep up with them. I didn't take it personally - this time .. but glad you are here! =) Thank you!! I like the tone it is taking, the colors are coming out better than I had expected. Once I get the paint on I will go over it with a semi poly and they should really deepen up a bit. Yeah, the rain did help indeed - and it is any given sunday that keeps us coming back each week =) Thanks for popping in and the good word - it is appreciated!
-
Sjors? Apprentice? Now I have heard everything......
- 1,873 replies
-
- 6
-

-
- occre
- san ildefonso
- (and 1 more)
-
Oooooooh, very nice! The doors came out quite well - nice having 1:1 plans to work from and they came out quite nice. The overall stain pulls it all together and looks sharp!! CAREFUL pulling the sides in, I had to do the same to some degree and well, now am trying to figure out how to fix an alignment issue on the Mayflower . I can't give much advice - but that I can warn ya about since the ships are so much alike. Really like that color and I normally don't like dark but it is nice and rich and classy!
-
I like how you used the paper mock cannon! I would not have thought of that. Looking good sir.. lookin good. (
- 2,191 replies
-
- 2
-
-
- confederacy
- Model Shipways
- (and 1 more)
-
Very nice Popeye - love the lighting on those shots through the grate. Makes the quality of the work stand out.
-
You can get hobbylite from Tower Hobbies if you can't find a hobby store near you. Really really great stuff!
-
Sorry to heaer that Dave, I know some paints and solvents can have wicked effects on some people - so it can be harsh, especially during winter when ventilation gets scarce. Good luck to you both, hope the reaction is to something easy like that to take care of.
-
The diligence and attention continue to amaze me. The frame is so busy and complicated and looks fantastic. Would love to try one myself but i think I will live vicariously through you for a while
-
Tops look real good Sjors! Watch out for that popeye fella - he's a bad influence!
- 1,873 replies
-
- 2
-
-
- occre
- san ildefonso
- (and 1 more)
-
Great news Rich!!
-
:champagne-popping-smiley-emotic :champagne-popping-smiley-emotic WoW Rich - that looks FANTASTIC!!! Love that feeling of finishing a kit (loved it with the old plastic stuff and loved it even more my first build) so HIGH FIVE! :champagne-popping-smiley-emotic :champagne-popping-smiley-emotic

-
That is what I am hoping, what you describe is pretty much how the one book describes it and it seemed to click with me the most. I know it is the base planking and a second one will go on top so technically I could just piece it together, sand and fill and just be done with it. However, I figure the times I try to do clean planking the better chance that eventually I won't need a tub of filler .
-
It's the blue shadow my friend, the Harriet lane came close to being opened because I was stalled
-
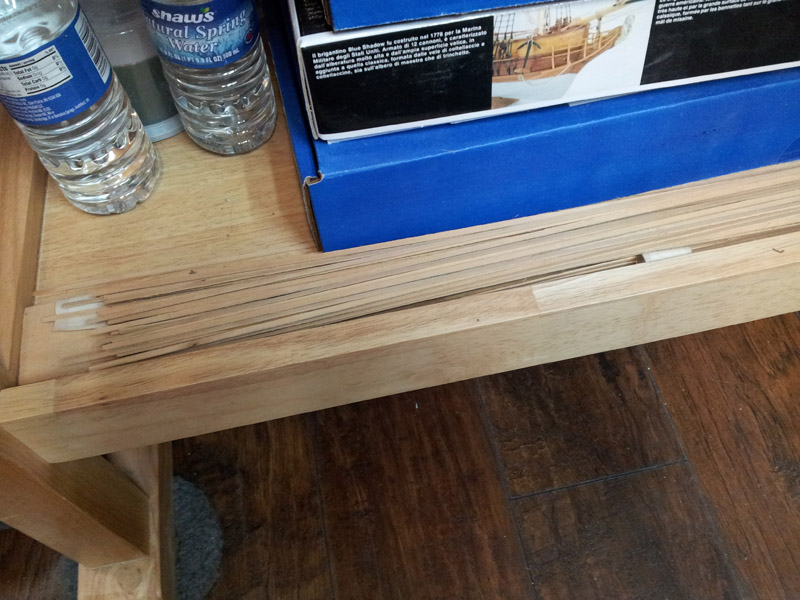
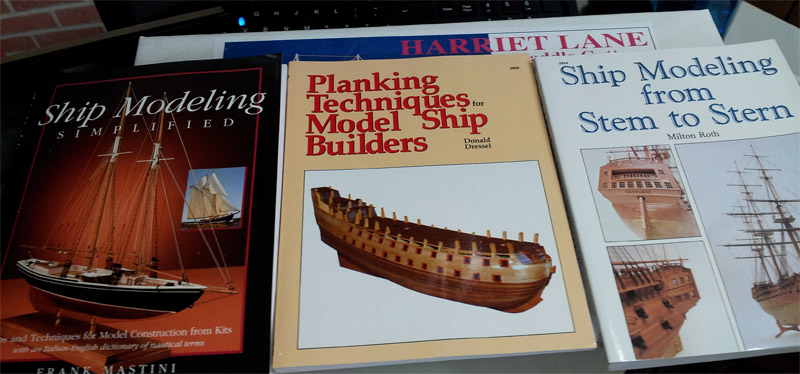
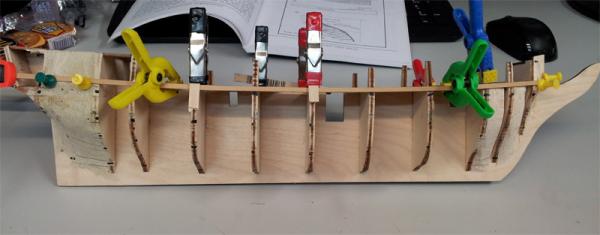
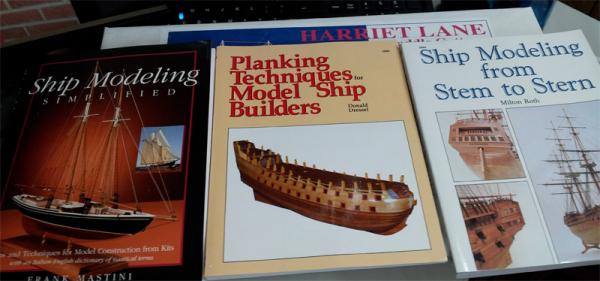
So. It would appear not only did Murphy move out - but a good luck leprechaun moved in. The wife and I have been having a bizarre streak of luck lately and tonight was no exception. As I just mentioned yesterday - the Blue Shadow was on hold along with the Mayflower due to a material shortage. Mainly - lack of planking material Mistakes chewed up what I had for the Mayflower and horrible wood needs replacing for the Blue Shadow. With three projects on the table, 2 stalled and one drying primer and filler; the urge to build something was strong (maybe the weeks of being away whow knows) but the temptation was great to crack open the harriet lane. I know - crazy right?... well - this is how close it came... From the closet TO the corner of the desk... Now, some time ago I had invested in some Pear, Boxwood and Holly from the Lumberyard. I keep my extra wood stock in the closet behind me and when I was looking for planking I went to use the boxwood I had gotten. Could not find it. I know I used some on the willie, but didn't think I had used that much but convinced myself I didn't have as much as I had thought. So, imagine my surprise when I went to the hobby bench, dropped my xacto, leaned over to get it and saw.... Yuppers, that is right - that would be the boxwood planking I had picked up and talked myself out of even existing: Sitting right there, to my right on the bottom shelf of my work bench I can't use it for the mayflower, but I can use it for the Blue Shadow... So - the USRC Harriet Lane will once again head back to the closet and await it's turn. The mayflower shall wait for her new shipment of lumber, the Willie will dry and sit as I continue to contemplate how to do some of the upcomming work, and the Blue Shadow shall hit the bench for a little bit. So. WIth that, the first planks were laid (just the initial ones along the deckline). I know I have only finished one ship and only truly planked one (the mayflower) but planking - the technique and the idea behind it sort of escapes me. Some of you guys are masterful at it so I am trying to figure it out so I can show more of my planking and hide less of it under filler and paint I picked up some books on the matter to help me out.... All three have great information (to me at least) especially trying to solve the mysteries of some aspects of ship building. I read the mats here on the site, took into account russ's suggestion (where has he been btw..hmmm) and I have perused some of the members methods as well as read through these books. Ultimately I had to pick and decided for the Blue Shadow I would go with the method talked about in Ship Modeling Simplified. We shall see hwo it goes. So - the planking... is off and running! What a day!! Until later all ENJOY!!!!

-
I just have to say - I am sitting at a very slow point with my current projects. A material shortage is holding them so it is picking this and that and scavenging for activities to move them forward. This thread springing back to life and the great pictures of the HL is reminding me I have one sitting in the closet that I could.... well... See wayne, look what you did!! -Adam
-
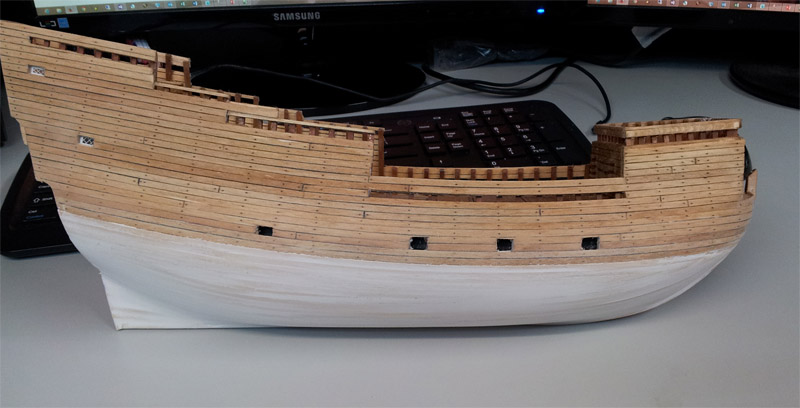
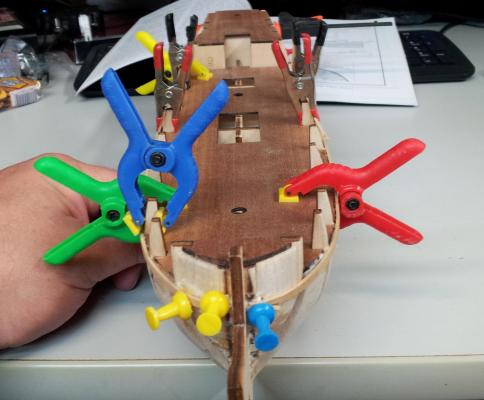
Augie: Thank you sir! YES it is a lot of planks - a LOT of planks. Makes me wonder what I would be getting into on a bigger ship - this one isn't big compared to so many others. . Thankfully it was sort of theraputic. Repetetive but theraputic. Randy: Thank you!! I am pleased with it so far. Congrats btw... pats didn't make it out of the jungle after all !! Popeye: Thank you as well! I was pleased with how the color came out, glad it came out even - and yeah the blotchiness worked itself out. I get a little skittish sometimes when it comes to the finishes. I was a bit concerned I was going to change the pear color too much - but it didn't so that risk paid off And after MUCH deliberation within my head, I argued with myself on whether to plank down to the keel. Back and forth, lots of name calling (I am not kind to myself sometimes). One side of me said some things, the other side said some things and unfortunately for me I sided with getting er done and done right. Popeye, you are correct, I could skimp and skip it and probobly most wouldn't see the extra lip but after some dry fits and testing it was just enough for me to say... dangit - he's right. So - with football on the television I spent the day working on the remainder of that side. She is now fully planked down to the keel and then I sanded and filled to get it ready for the paint. I am running out of wood though, so this week will go as far as I can until I can pick up some more to finish er off. It came out well. To fill it I used Sheetrock Mud which I have come to appreciate for large area work (hulls ). Very easy to work with, very easy to smooth out, fills in cracks and dings and knicks and can be reworked with a damp cloth if need be. So, it is white as you will see but that is just the sanded mud. The first pic. is my Mayflowers Two-Face impersonation (hopefully there are some batman fans here). And what it looks like with a little more sanding and shaping done. Ready for a final fill/sand, then a sealer and a coat of paint. Will be going over a couple other little blemishes, reasnding, sealing and painting most likely tomorrow night. Thank you all for checking in and the good words (they are appreciated). And thank you for the crits as well (just as appreciated). Popeye, thank you for keeping me honest Until later - ENJOY! -Adam

-
So. Has been a bit since any progress has been made on this kit. So I figured I would give an update because I know a couple people are watching it. The update is, currently this one is in a holding pattern. I have tried several time to get the planking going on this and I keep coming back with the same thought. The wood is horrible! I am not sure what kind it is; it is either bass or lime (according to the kit) but it is so stiff and brittle it is a major buzzkill to work with. No matter what I did I just did not like how it was coming out. So - I have decided that to get this kit to look really good (to me) AND be less of a pain to work on I am going to pick up some other wood. Most likely bass for the 1st planking (maybe box) but most likely some bass. Thinner width as well. So, work will be done but not for a couple of weeks. Will be ordering the wood for it next week. So, until then - the Mayflower, Or Willie (Or.... no, no, can't do it - 3 is fine!!) Enjoy! -Adam