
HOLIDAY DONATION DRIVE - SUPPORT MSW - DO YOUR PART TO KEEP THIS GREAT FORUM GOING! (Only 13 donations so far - C'mon guys!)
×


popeye the sailor
-
Posts
16,007 -
Joined
-
Last visited
Content Type
Profiles
Forums
Gallery
Events
Everything posted by popeye the sailor
-
 thanks Steve....yea, don't know how it happened. I haven't fully cleaned the lense yet, but what I did made a difference. all this time I thought it was the camera going south. I was gonna do a bit of work this evening, but after getting up late this morning and feeling the effects all day long, kinda took the wind out. my son Kevin was doing some work on his car, but ran into a snag and now it's sticking out of the garage with the nose all apart. this is a good thing, 'cuz I can't get the lawn mower out to mow the lawns {there is a god} this will set up my days off nicely.......whoooo-hoooo!
 -
one printer that I know of is the ALPS printer. I'm not sure if they are still in production, but there are refurbished ones out there for sale. roman numerals were quite common in early times, but numerical markers can be found on fishing vessels and filtered in among Naval and commercial vessels commissioned to the Navy. I've had some luck changing the background color and using white decal paper, but the background color needs to be at least a 99% match with the hull color, to be successful. no pastels please roman numerals can also be purchased in PE form too.
- 446 replies
-
- 1
-

-
- zebulon b vance
- deans marine
- (and 3 more)
-
Fokker Dr.I by hof00 - Hachette
popeye the sailor replied to hof00's topic in Non-ship/categorised builds
very nice progress HOF -
had no idea Mark...........came in to catch up.......man, I am so sorry to hear know that I care and am pull'in for you my friend. just one more thing that I'm bummed about..........
-
if they can do roman numerals.........that would be sweet! I had quite the time with my Revell Cutty Sark........the watermarks were the only ones I couldn't do. great job on the Vance Steve......hope to see another fine project soon! scratch building is like this: if you have what you want to do in your mind, and you have vision of what you want her to look like.......all you need to do is make her so with your hands you seem a creative sort......I have no doubts that you can pull it off! hoping there's more to this project.........if not, congratz on a job well done !
- 446 replies
-
- 3
-
-
- zebulon b vance
- deans marine
- (and 3 more)
-
ohhh........the likes have grown! thank you to those who have looked in....I'm glad you like it. it's really not a bad kit....got it for Christmas, so I have no idea what the admiral paid for it. I did see one on the oldmodelkits site, but I'm sure it can be found out there on the world wide web. I didn't run into too many complete build logs either, so I hope I did a good job with the assembly. I've got a hankering to look for one of the German rail guns.........I believe there were two of them......definitely would make for an interesting log thanks OC, Lou, and Sam.........painted or not, I'm gonna have to put up the addition to the shelving I did in the living room. the addition will likely give me two more shelves. the Arizona is next to be finished....I hope I can get 'er done quick.......I really want to move on
-
look'in good Kevin.......mov'in right along now that the soldering problem is taken care of real nice!
-
the hull looks great! great coverage too .......at one time I used to use Humbrol as well as Pactra. very good selection of colors and didn't go by a number system at the time.
-
thanks to every one for the wonderfully nice comments..........thanks also for the likes as well I'm really glad you folks enjoyed following along. what's next?.........aside from finishing a few outstanding projects {some of many}, I do have a couple that {to me} are unique. I could do the Lindberg Concord Stagecoach with figures and horses.......or I could start one I received just this past Friday. it's an HO scale model of the Thomas Point Shoals lighthouse. it has a lighted beacon and looks really cool! .......quite a few parts for a small structure. I've never built an HO building model before....quite taken with it when I saw it for now.....the Arizona.......back to the Sox & Martin {still ongoing}....and then the Vendetta. wood is calling me too........
-
sorry to hear you've been down with your illness..........glad your feeling better! the anchors look great!
- 1,306 replies
-
- 6
-
-
- syren
- model shipways
- (and 1 more)
-
thanks OC for the kind word thanks also to everyone for the likes. I didn't get to do any more on her......I'll have more time since the General is finished. another update soon!
-
OMG Richmond.........haven't seen anything 'Buster Keaton' in quite a while! the collapsing bridge was pretty cool.......so was the mortar! thanks!
-
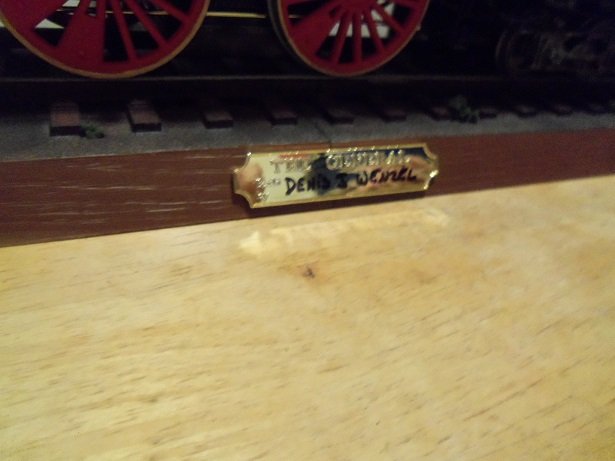
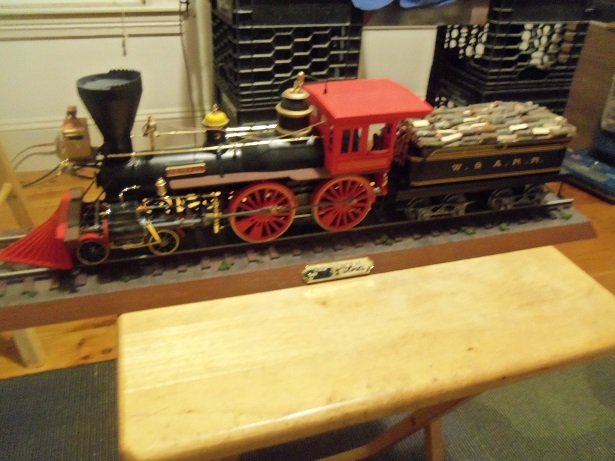
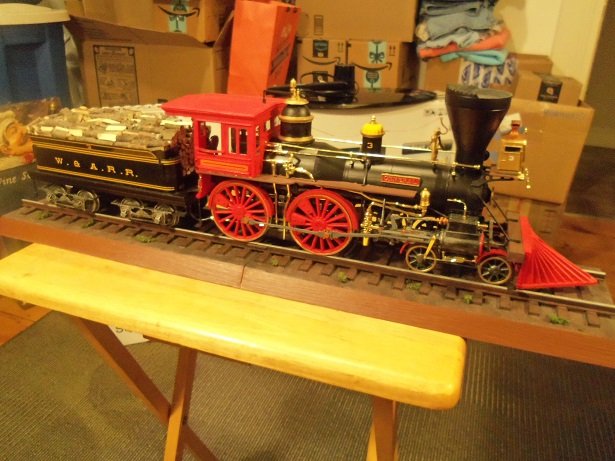
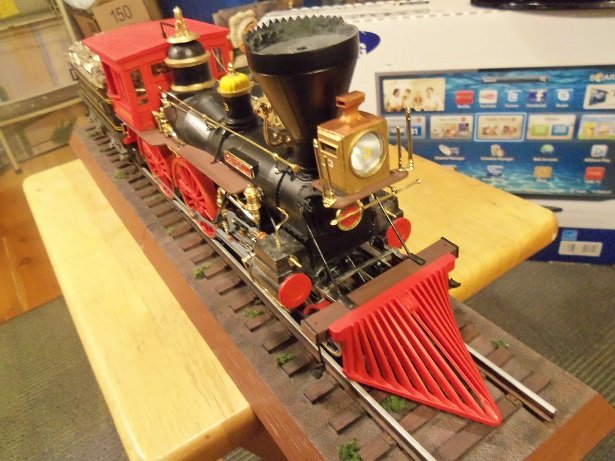
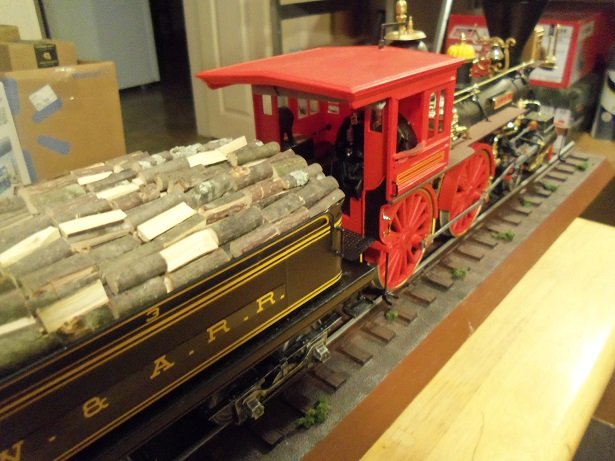
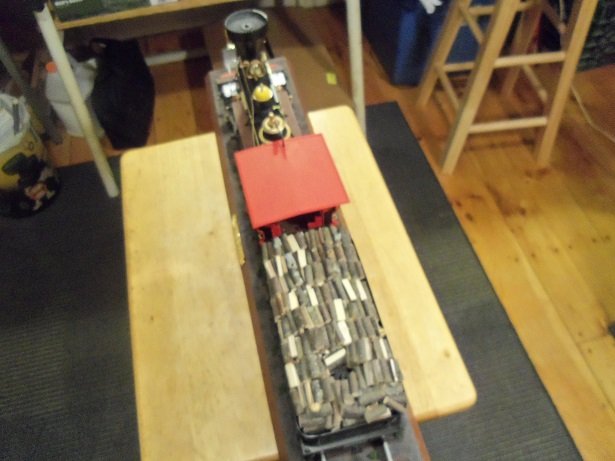
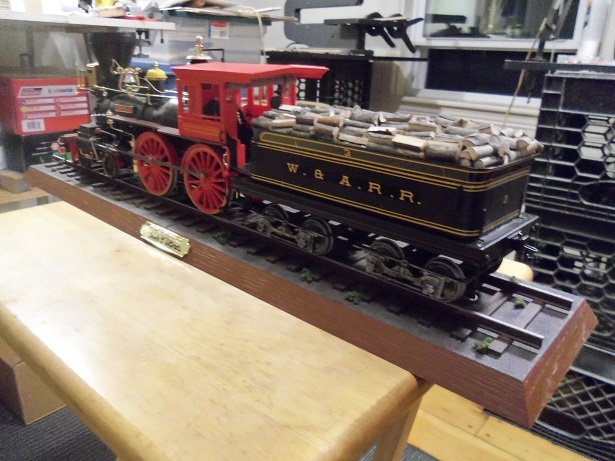
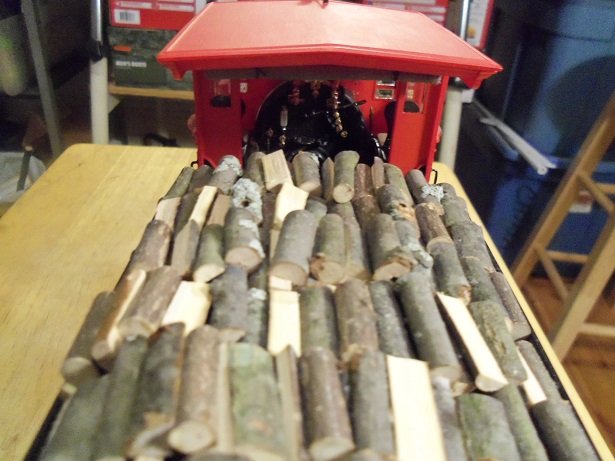
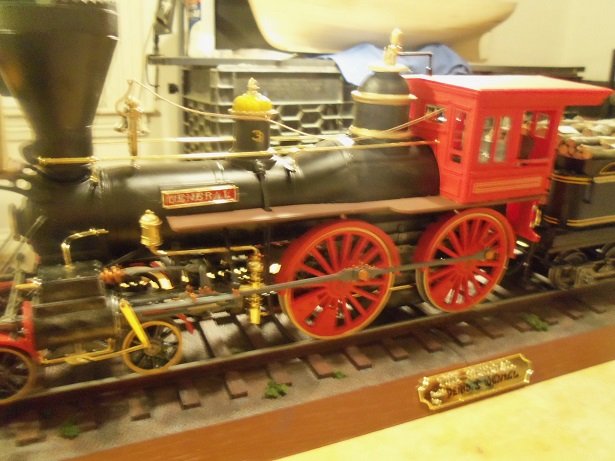
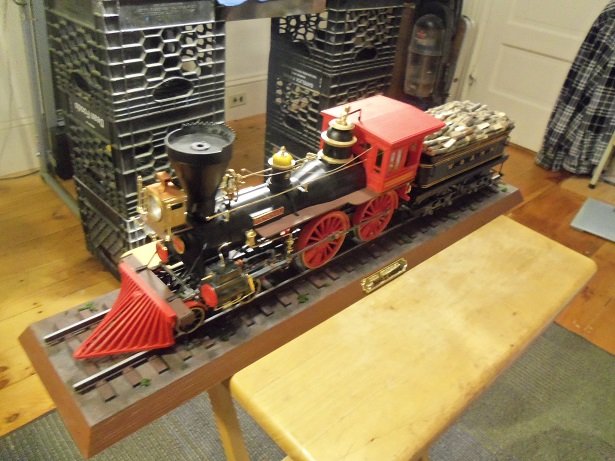
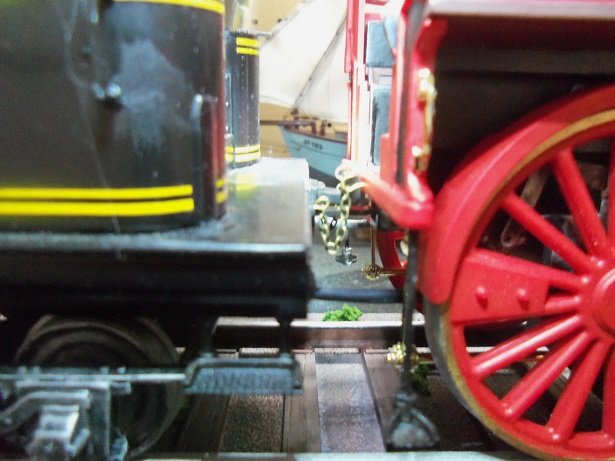
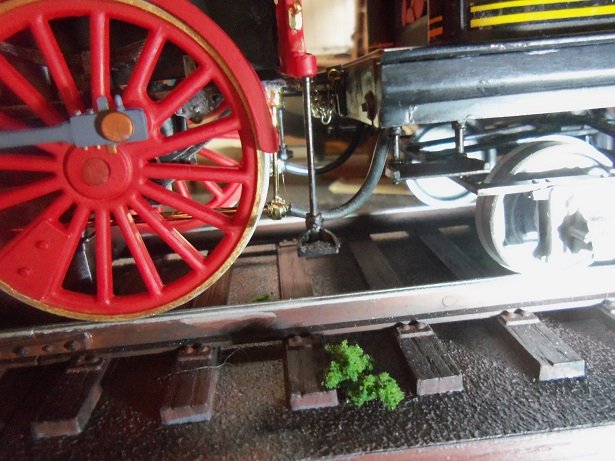
here are the gallery pictures. a huge thanks to all who followed along, and for all the suggestions you all gave. they were a big help. thanks to you as well Ken for your persistence about the wood.......the plastic parts that would have made up the wood load are languishing at the dump as we speak I'm glad I decided to take the plunge, and do it.......I like it so much better it came with it's own plaque........I was going to write Popeye on it, but posterity wouldn't know me from a hole in the wall, if I did the reflection from everything around it make sit hard to read: Denis J. Wenzel I don't even recall showing a picture of the head lamp in place I had fun building him.......uncovered a couple of quirks along the way. should anyone build this model, be sure to use very flexible hoses. again.......thanks to all who followed along
- 245 replies
-
- 23
-
-
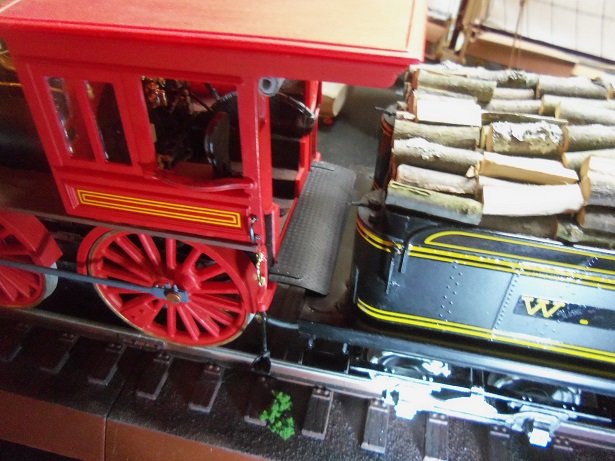
as promised, the finish is at hand for this project. it's time to join the two together. the pin that connects then wasn't the hard part, although during the finish assembly, it kept wanting to pull out. I gave it a dab of CA to keep it from happening. the water tubes were another sticky wicket........being very stiff {stiffer than I thought}, it gave me fits that they might break the plumbing free. they still might somewhere down the road.......cross the bridge when it occurs. after the pin was set in place, the chains were hooked up. I drilled out the water hoses to make connecting them easier. ....and then came the buzz kill..........the cover plate. ....and this concludes the model........it is finished! gallery pictures are to follow
- 245 replies
-
- 17
-
-
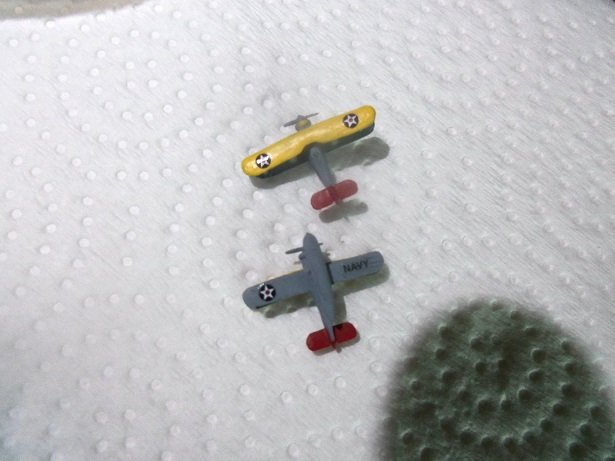
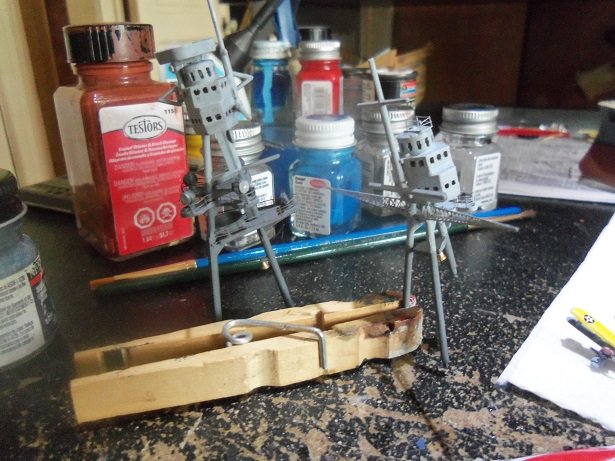
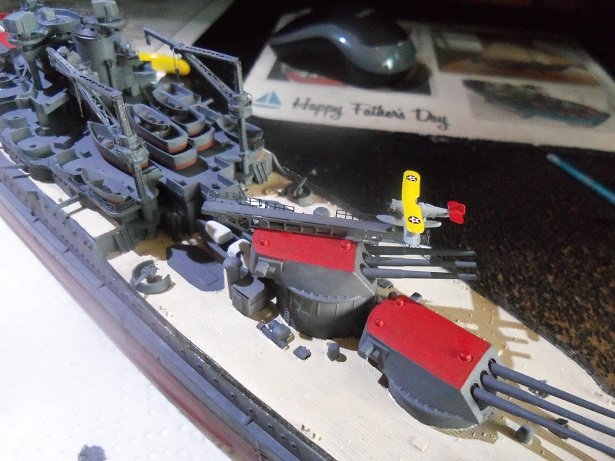
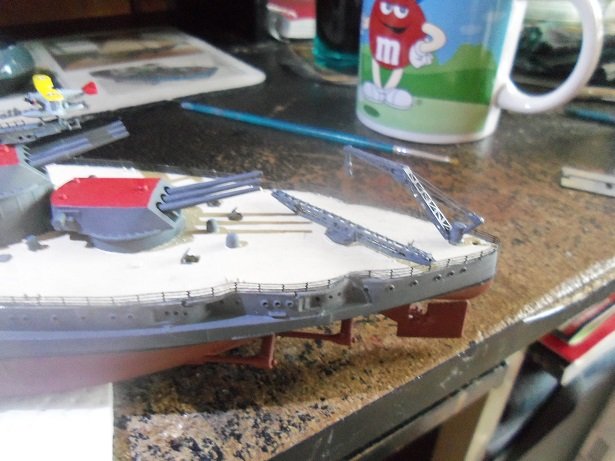
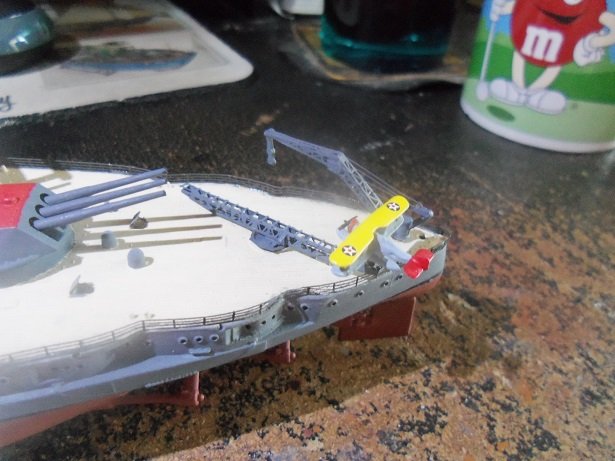
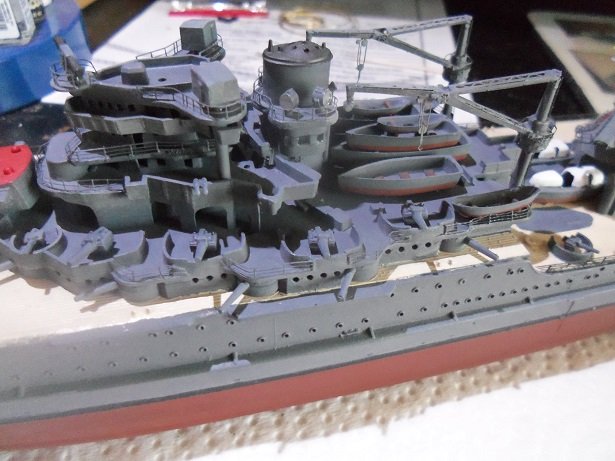
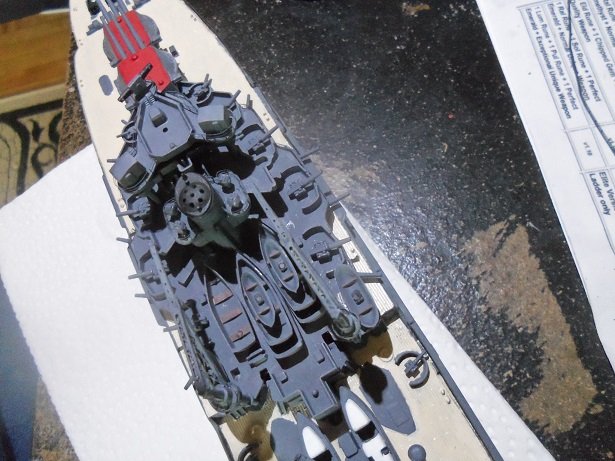
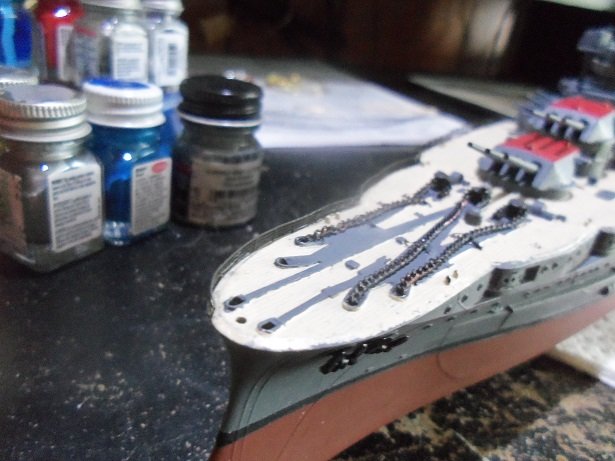
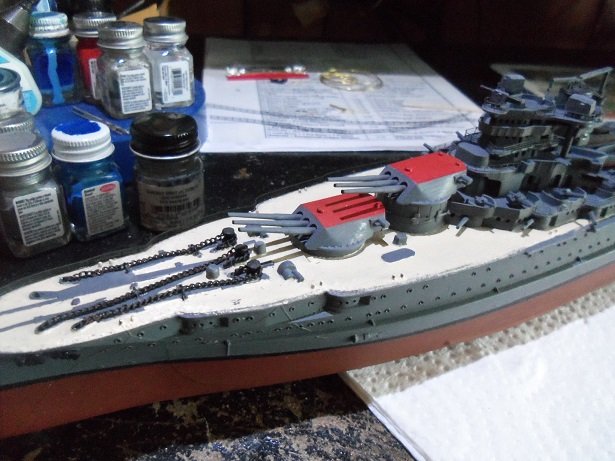
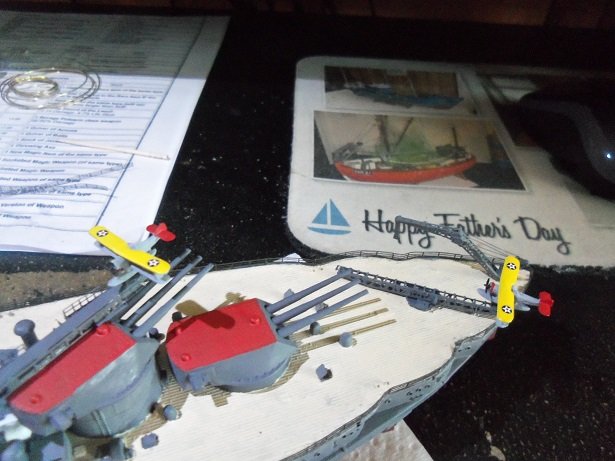
thanks for the tip Steve.......half the time, I don't use a primer. wood can be just as hard.....depends on the paint. I did the decal work to the planes........again, it's kinda sad I couldn't do the fuselage. the decals are from Gold medal models {Hannant's}......it seems the adhesive on the sheet is a bit thin. they didn't want to stick very well, but I slid them onto the revell decal sheet {the part that had the navy decal, after it was wet}, and that helped out. the painting of the cowl and prop was done too.......then I painted the top part of the tri pod masts....haze gray. one of the planes was added to the catapult on the turret the stern deck catapult and the crane was added next after it had a time to set, the other plane was added... the 11 inch guns were added next. I left off with the beginnings of cementing the fore deck railings in place. one side so far.......and I will have to see what to do about the mid ship............especially at the deck elongations for both sides. I got tired of the blurry pictures.......taking a look at the lense, I saw that something got on the outside of it! wiping it off, the pictures seemed to get better. not sure what it was I'll get the rest of whatever it is later.............could be just jammed!

- 259 replies
-
- 15
-
-
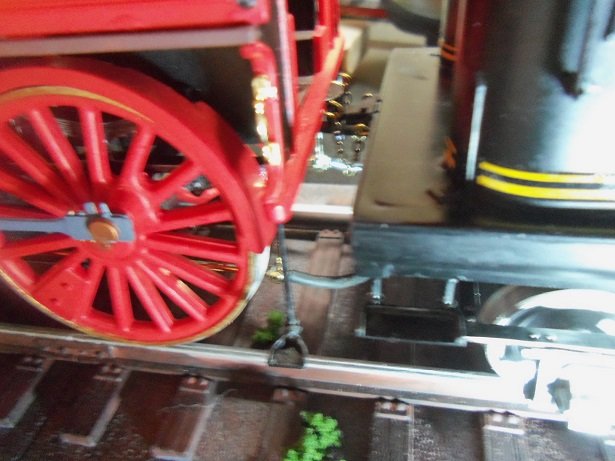
a very interesting video Kevin........thanks for posting it I'm sure cleaning soot is a lot less maintenance than cleaning ash from coal or wood I meant to get this model finished and buttoned up by this time. I did do a little on the General, there are two pairs of foot steps that go on each side of the front and rear of the loco. I had to let them set for a while.........got tied into the Arizona build, and this is as far as I got. I hope to have the two joined by day's end getting the train upside down took a little thought.......especially this late in the build. too many parts could have gotten broken off. thanks for the kind comments and the likes
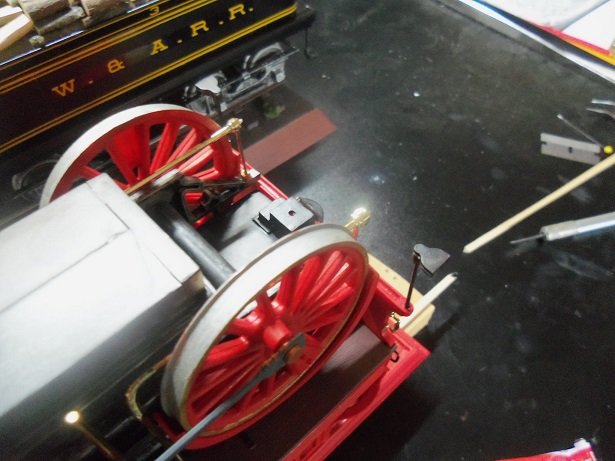
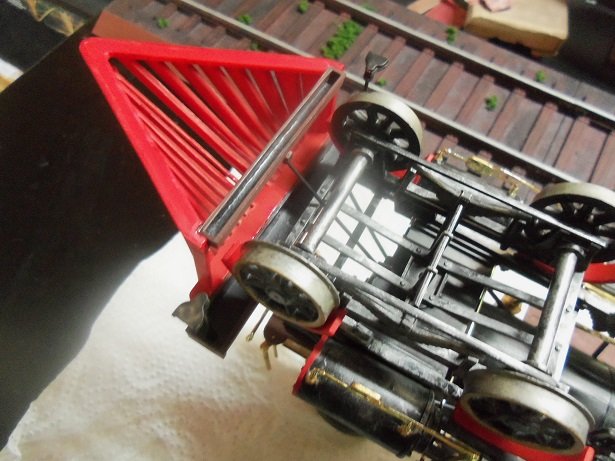
- 245 replies
-
- 13
-
-
you don't see to many kit with glue included.........older kits. interested to see
-
it finished up nicely Dan....and it looks great!
-
these are some superb mini projects Danny..........enhancing the railings is a very nice touch
-
well done on the decks.......really good tree nailings and wood grain appearance
-
great job on the finished module Yves........you did a superb job of simulating the wood lighting it is a very nice touch!