
HOLIDAY DONATION DRIVE - SUPPORT MSW - DO YOUR PART TO KEEP THIS GREAT FORUM GOING! (Only 13 donations so far - C'mon guys!)
×


popeye the sailor
-
Posts
16,007 -
Joined
-
Last visited
Content Type
Profiles
Forums
Gallery
Events
Everything posted by popeye the sailor
-
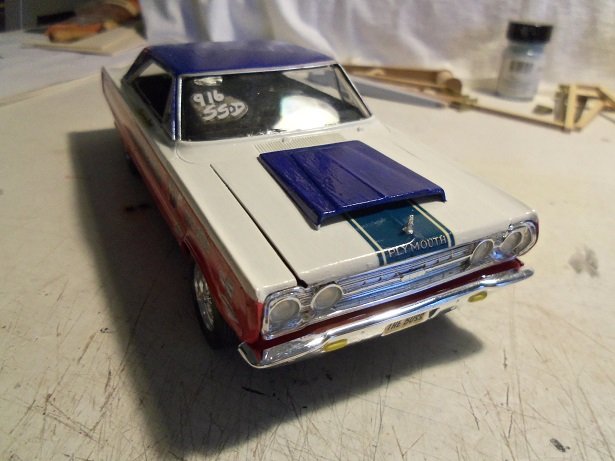
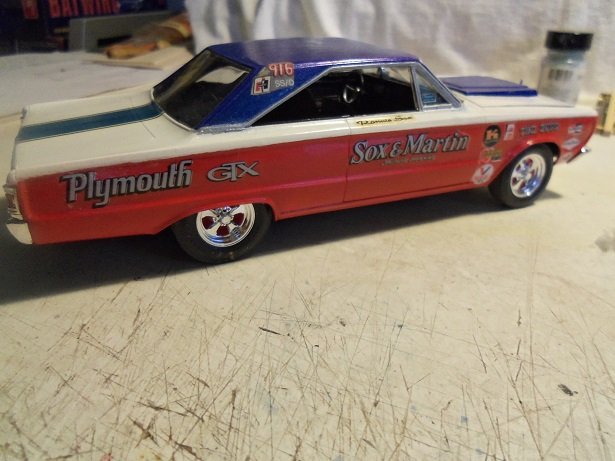
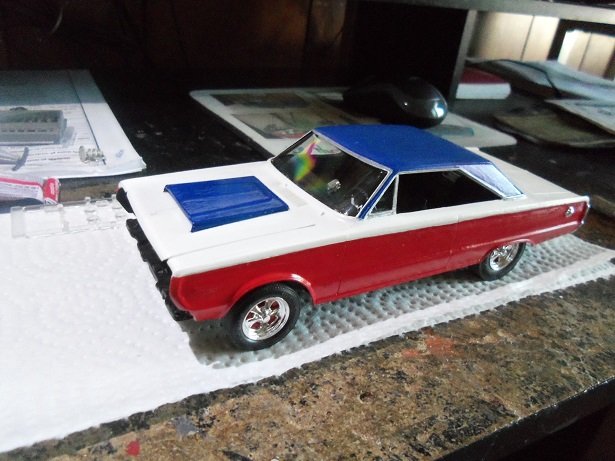
 decals are on........and this model is officially finished! came out rather well, in spite of the mistakes and problems I had building it. thanks to all for following along I almost lost the hood emblem too...........I thought it flipped of into the trashcan that's near my desk. I picked through it a bit..........thinking that it was a lost cause, I abandoned the search, but gave one last look around my desk. I found it under the shelf, under the right side of the desk. lucky to have found such a tiny object. when I laid the stripe decal on the hood, where the emblem goes broke out and caused a jagged mess around it. cutting tiny strips of the same color decal, I was able to box the spot in and tidy it up.
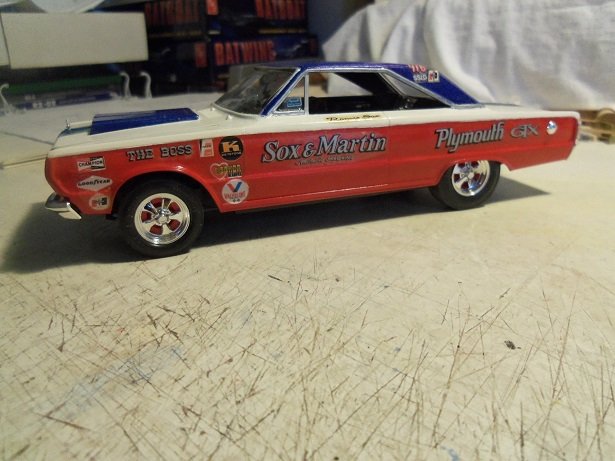

-
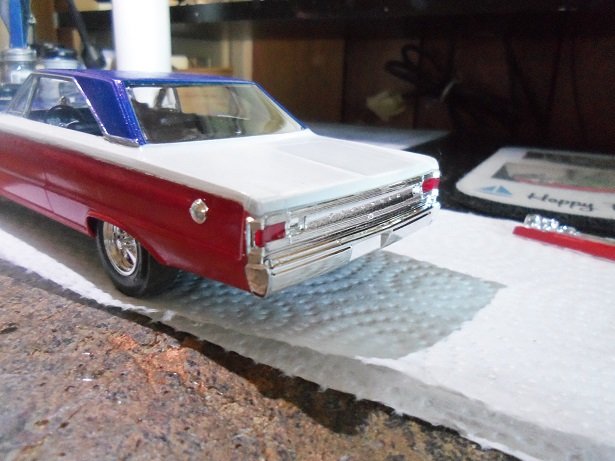
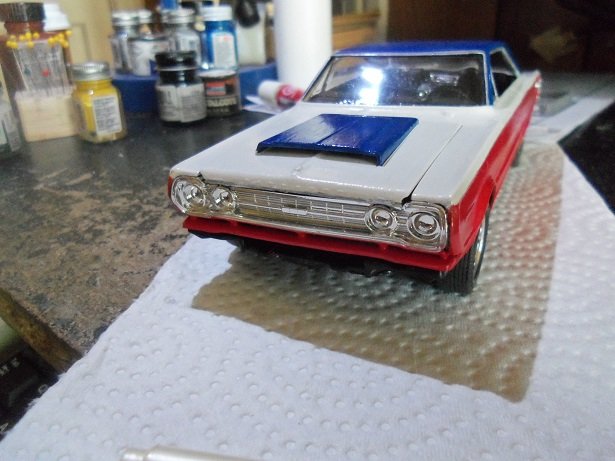
continued on with the headlights and front bumper.........almost lost one of the headlights. Gibbs was laying under my desk and I feared that it may have gotten into his fur.........it wasn't the case {thank heavens}. front markers and back up lights were added too. the upper radiator hose and a couple other parts finished it off all that's left now are the decals!

-
I have no pictures for what I did today on this project..........window work all the corners of the six sided structure are now painted.......next was to size the glass. the big windows were around 12 x 20.5 mm....give or take .5 mm. this marks the second time I've use the 'pick 'n place' tool......it did the job quite well. two smaller windows and the doors were around 12 x 12.75 mm....give or take.......they went in equally as well. next are the dormer windows........the one I feared broke did not come off the tape willingly......I had to repair it. I think I fixed it these windows are 8.5 square........I'll set the glass once I get them cut and fitted. hopefully I'll have some pictures for you soon thanks for look'in in..........hmmmmmm............yea, OK.......... I punned myself
-
that edging along the top of the tube chute? if it won't be seen........no foul I trust you didn't use that primer anywhere else the first module looks super in place!
-
your soldering is coming along splendidly.........looks very good the gun looks really good too..........aren't you glad it's not a smaller scale
-
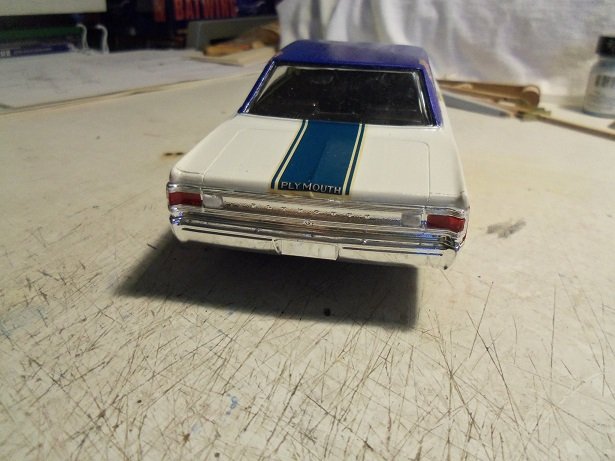
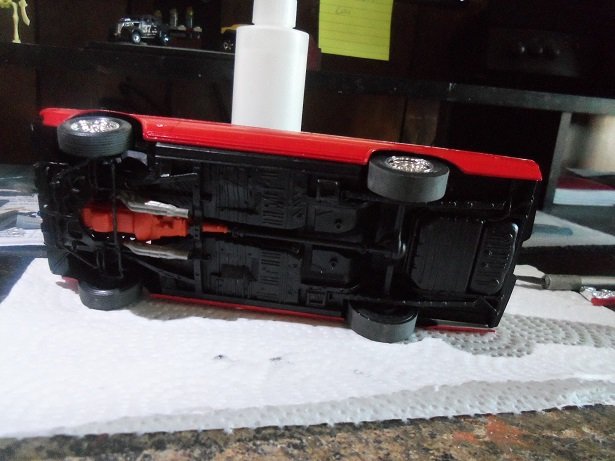
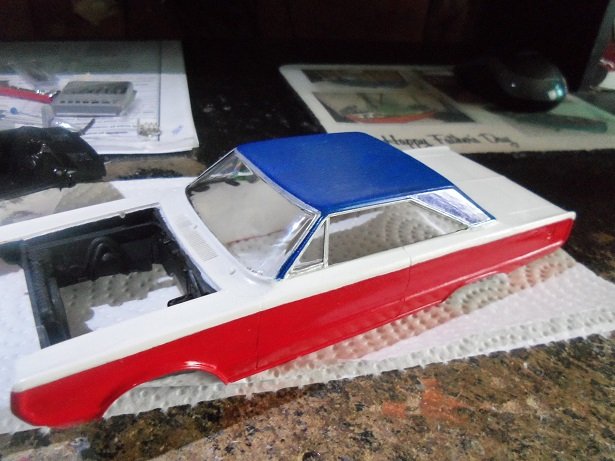
I let the body set all night..........the next morning, the rear inner wheel wells were painted flat black and allowed to dry. the chassis was then fitted into place........had no need to cement it! there are a couple parts that need to be added to the underside.............. ....as well as a few parts that will be added to the engine compartment. the rear grille and bumper are all a single part..........the taillights were added to it. I noticed that there a re back up lights.......I painted them and will add them later. the gas cap was added too. the hood fits on there so-so.........a tiny bit warped it seems...........I think it might have something to do with the hinges. there is a strip of chrome that completes the front grille, that need to be cemented to the underside of the front lip. not sure it will help it.........but it won't hurt I was tempted to paint the upper body {the white part} with the metal flake, but didn't want to risk a repeat performance of the paint like the last time. left it as is............ the front grille and lower grille bonnet was assembled and painted some time ago. it was added to the car at this time.......the headlights and marker lights will be added once the marker lights dry it's getting to the finish line.......pretty glad about it not my best, but at least it's not a total mess.

-
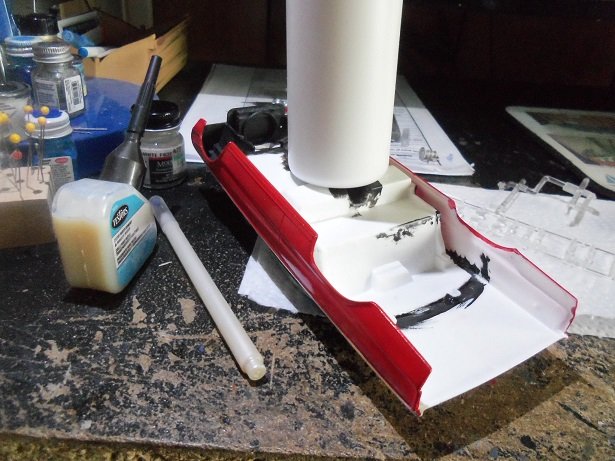
I though I would get more done..........I did, but it was very short lived. we went to the movies to see the second chapter of 'IT'. it was good, but it didn't have the same outcome of the first one. remakes.......gotta love'em............right?!?!?! so her is what I accomplished on the 7th. the front and rear glass were cemented in place. I decided not to do the side windows due to them being rather thick, and an ill fit. since I used window maker {and cement} to install them, I had to let the body set for a while........it cures much slower than regular cement. just as I was about to cement in the interior bucket, I saw that the windshield was off and there was a gap on the driver's side. this I had to repair before continuing on. this was the first time I used the 'pick 'n place tool....the pen like tool you see on the desk. it had a sticky ball of some sort of material on the tip, and worked really good for placement of the glass. I got a set of them from Billing Boats.........now a long time ago. I miss working with Tom........he and his wife were great people {they still are!}.

-
I got more done before we went to the seafood festival at Hampton Beach............it was a really good time. Dorian had the water quite active still.......some really impressive breakers.......made me wish I had brought along the camera. it never got close here, but I think the cape in Mass saw more than we did. this morning I did a bit more........I'll post it after I get further. thanks for the likes
-
I did the same Nils..........took care of the lawn stuff last week I'm on vacation this week........and to be bothered with those chores was something I wasn't going to let get in the way of a good time! I'm sure that the admiral is a happy camper right about now yes Pete.......my admiral also thinks my modeling is good.........I'm poop though if I don't take out the trash!
-
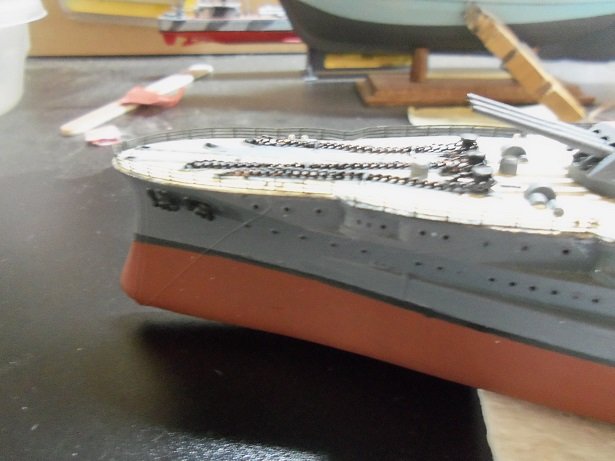
hello John..........so good to see how far you've come with the hull frame. she's look'in really fine...super nice contours to the outer hull. the stern looks really good too
-
off to the seafood festival today........so likely there won't be much done here. I did manage to do a little to the Sox & Martin this morning see food.........eat food.........sea food ...........eat food.............admirals badgering me.........would I be late for my own funeral?............
-
thanks Johnathan.......I'll never get as good as some here on the site but it is nice to have the ability to add detail that one thinks should be there. these older kits miss the boat.......sometimes wish it was around when I was younger. it's still trial and error. thanks to all for the likes
-
the brass axles is a nice touch......not part of the kit, I would imagine. definitely will add to the strength of the truck ...... the springs look good too.......as well as the 'I' beam construction........looks quite real
-
oh.....I dunno.....I've lived in New Hampshire all my life, with the exception of moving to Florida for five years. great in the beginning, but, all my family is up here. I began to miss the seasons too. I was in Florida to see it actually snow.......that was pretty cool interesting array of insects down there, I might add I had a good five years down there, but I'd rather be here.
-
understandably so..........there will be other Hornets......and the sting {to the pocketbook} will still be the same
-
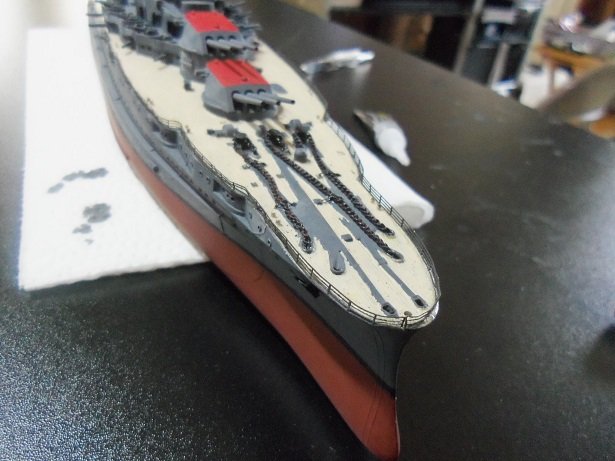
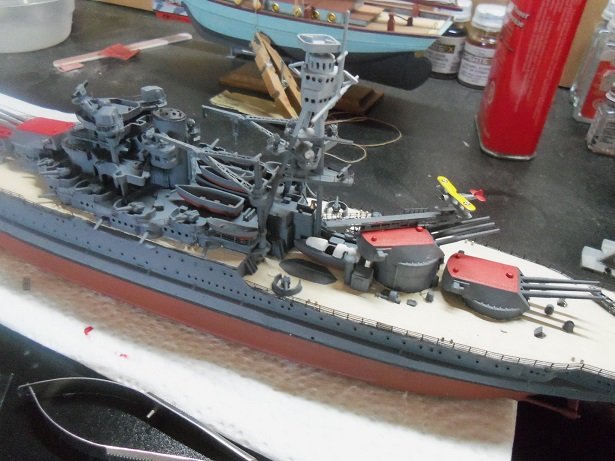
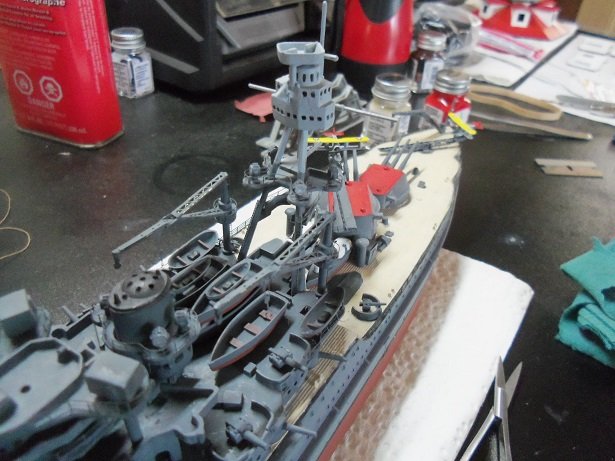
thanks Piet...so good to see you have you started a new project of late? ......miss reading your updates..... i did a bit on her yesterday.......added the port bow railing and the aft mast. I need to do a PE transplant to the tip of the bow........didn't quite conform to the shape once I touch up the aft mast, I can do the aft rigging
- 259 replies
-
- 11
-

-
I feel the same way OC..........site friendships are a welcome byproduct of site like MSW. there is no impersonality here {can't believe that's not a word }.
-
WOW.....very nice...........lots of great detail
-
the cap rail came out sweet!..........nice job!!!
-
huge second on that!!! you gotta be close to the finish line by now!
- 1,306 replies
-
- 4
-
-
- syren
- model shipways
- (and 1 more)