
HOLIDAY DONATION DRIVE - SUPPORT MSW - DO YOUR PART TO KEEP THIS GREAT FORUM GOING! (Only 13 donations so far - C'mon guys!)
×


popeye the sailor
-
Posts
16,007 -
Joined
-
Last visited
Content Type
Profiles
Forums
Gallery
Events
Everything posted by popeye the sailor
-
 most kit will include the swastika.........it's in pieces that have to be put together on the plane. serious pain in the butt if you have some of the older kits, you may find them.......I believe they were banned around the mid 70's. I don't believe I've seen a kit with the iron cross, but you can go online and find it.........copy the image and print your own decals. I do that for a lot of my odd ball decals. sorry i'm late to your tour.....I had to go lay down after I saw all your kits! I recently built the Chezooom corvair funny car......love the aircraft carrier and the bombers! now I know where all the gassers have gone! I almost bought the four engine dragster the other week....settled on the sox & martin instead. the Orange crate is an old kit......don't see that one around very often....... my stash pales in comparison
 -
really nice progress Vossie........ the cannons look great!
-
sorry I got to the fiasco late........not that I had an idea to add. having an automotive background, there is a product out there that is used to buff headlight lenses. clear finger nail polish, I believe, is another old remedy. ship doesn't look the worse for wear .........your still doing a stellar job!
-
very nice rigging with the cannons.......never knew that sideways was another option. learned something new
- 161 replies
-
- 2
-

-
- pegasus
- victory models
- (and 1 more)
-
after seeing what a tremendous job you did on the Bismark, I'm definitely following along! you sure have your work cut out for you I have the New Jersey, an already started kit that Lou thought I'd be interested in. the fellow building it died......Lou got it from his brother. the paint work that he did is very good.......I won't be changing it. that's quite a bit of aftermarket stuff..........scares the dickens out of me, that there's so much out there! looks like a fantastic journey......gonna be a fun project to be sure!
-
interesting mountain of kits you have, shown in one of your photos!
-
they also required sufficient back pressure too....they had trouble 'porting' them. there is no comparison between American engines and foreign engines.......we couldn't come up with the perfect turbocharged engines.
-
looks to be a very delicate model I'm a big fan of the westerns of the old days.......Wagon train, the Rifle man, Gun Smoke, Bonanza....to name a few. look forward in seeing more prep work is very important
-
good to see your still modeling.......haven't seen any progress in a while. you've always had a sweet tooth for this vessel too pulling up a seat as well
-
neat look'in graphics!
-
I think laser and jet are the same in that respect. I looked into an ALPS printer.......they don't make them any more, but I did find a place that sells refurbs. you could also do something like an oval of white and put the lettering inside the oval. I have something like that in the decal it program as well.....the circle with the number in side of it.....Gran Prix or Le Mans style
-
looks very nice.......what are those curved parts on the table....fuel rails or exhaust?
-
yes........white decal paper. you'll need to cut the image out exactly, but ink jet printers max out at 600 dpi, so they need a backing color to print on......kind of like a primer one way to do it, would be to do the image, and then change the background color {white}, to the color you've chosen for the model. my best example would be the Andrea Gail........I did the white name and stern marking, and then changed the background field around the images to emerald green. luckily, it was in the color spectrum within the program. there is a similar color spectrum in photo shop as well. the limit with this, is that you'd need to follow a color scheme that is within the spectrum........not too tough a pill to take
-
yea....I hear ya there. I run into the same problem with the 'decal it' decal maker I use. it's a transparency issue. at one point, I contacted them about it, and they mentioned that there was an update for it. I ordered it....think it cost me around $15.00............turned out, it was nothing more than an image expansion update. not that I needed it..........I can import any image I want to into the program. I'll contact them again....one of these days. so far, I have been able to work around it without too much trouble. I think I'll try and snap a few pictures of what this program is...I think you'll find it interesting I have one to........my youngest calls me whenever he has a problem. he can be a bit whiny, but he needs to get it into his head that it's mechanical and things do break down I've been showing him quite a bit...even showed him how to mount a passenger tire. I used to do it a lot when I was a kid.........after all, I was a farm boy....something breaks down in the field, the thing we worried about, was our father kick'in our butts, if we didn't get whatever it was up and running. I should show him how to use a bubble balancer....first I got to go buy one
-
look'in good
-
thanks for the kind comments I use enamels........it will get a primer coat and a light sand before the color goes on. I don't want to lose the texture, but if it does, I won't feel too bad. while I'm working on the undercarriage, I'm test fitting the plastic parts, so I'll know what joins where. you'll really have to post a log on one of your cars Ken.......it would be neat. there are quite a few train folk here on the site. on the old model kit website, they have a good selection of these HO kits for sale.......I have been tempted
-
came out really nice.......it's legible, that's half the battle. I have an assortment of plates that can be done with the decal maker....but with the transparency issue, I would have to print them using white decal paper, or paint the area that the decal is to go, white. if I use a darker color, the decal will get lost. metal flake black........nice paint job
-
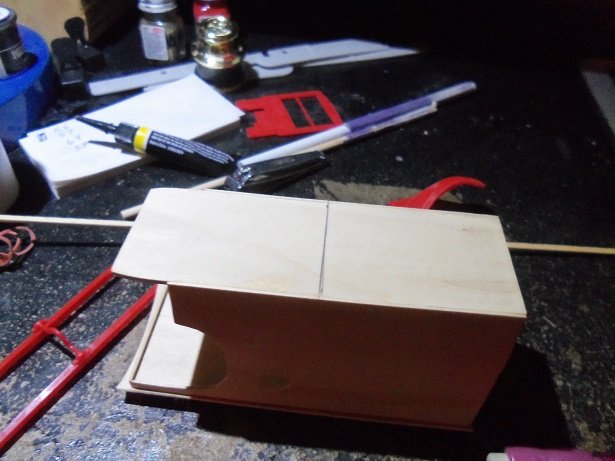
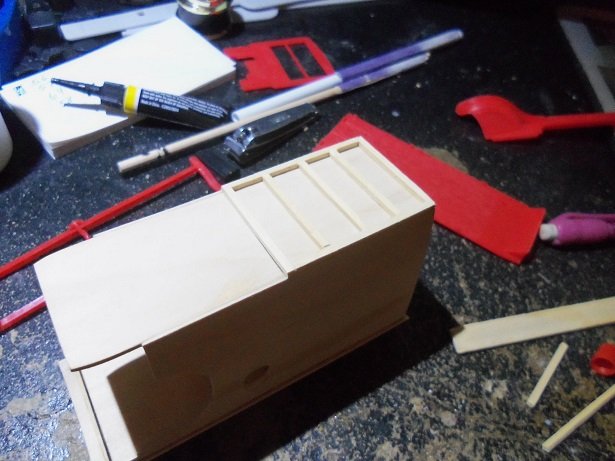
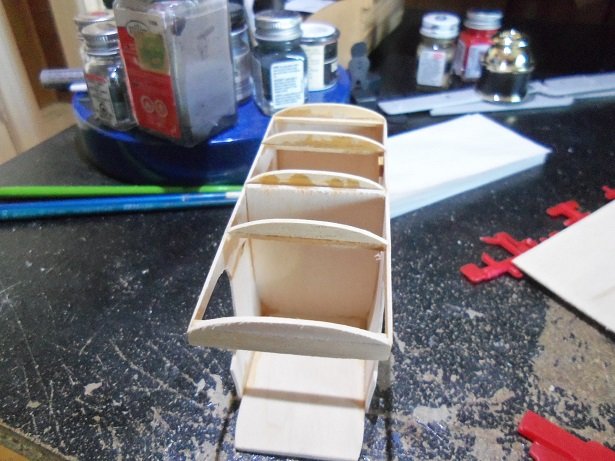
I did get back to her.......did a bit more. I forgot to mention that the prices for these car models is crazy! both of these kits went for $29.99.......the last time I bought a car model, they were around $22.00... well......anyway,........after doing more sanding to the roof ribs, rounding them off a bit more, I decided to close up the ceiling above the seat. that's what nulled the filler for the partition. with the roof ready to go, on went the skin I'm going to use the plastic parts for the fenders and firewall. I will need to make the engine cutout on the body floor......and also to the firewall, so I may have to make a cover for the interior. the undercarriage needs some fleshing out before the fenders and frame can be added. at this time, I can then think about what to do for an engine. the rear portion of the undercarriage framework was marked out........the thickness of the tabs was matched and the floor crossmembers were laid. the part behind the body is the floor........the tunnel riser can be seen.......it's not very high. I won't need to make it look like that, but there are a couple of other things that need to be done here as well. hopefully, I can get to it for the next update. I really want to get some paint on the body. it's driving me batty

- 91 replies
-
- 13
-
-
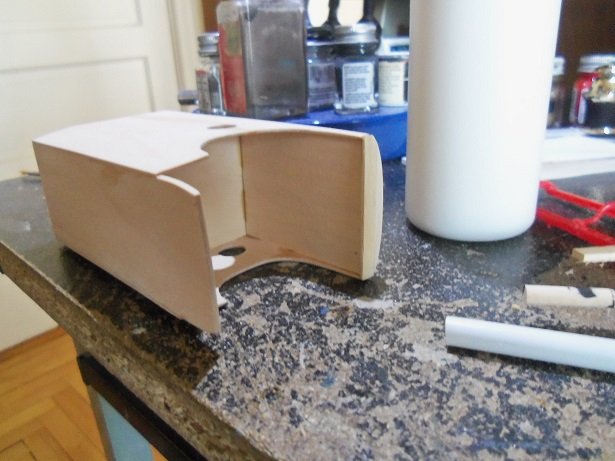
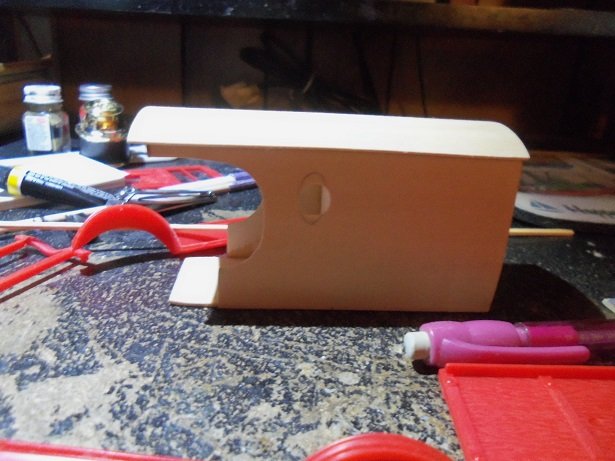
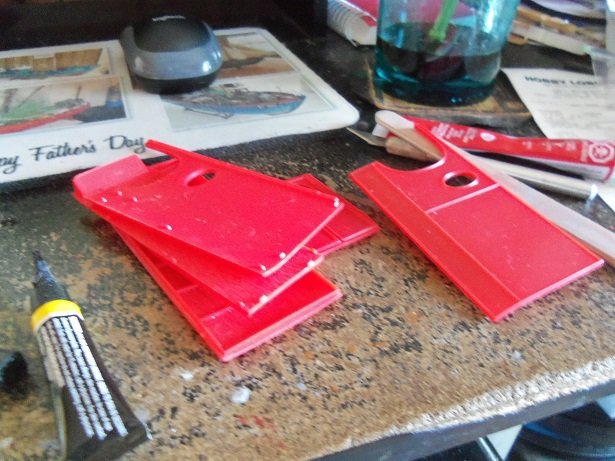
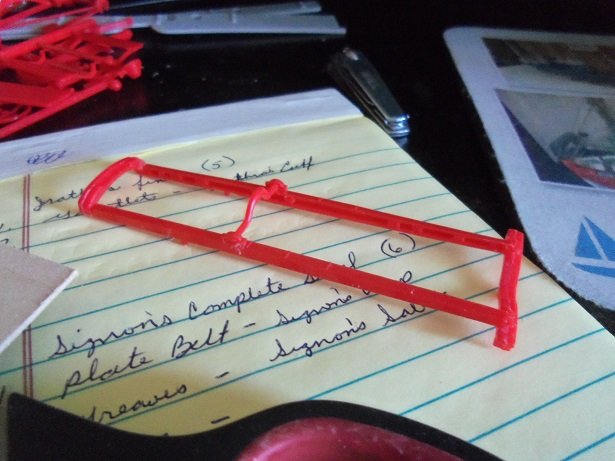
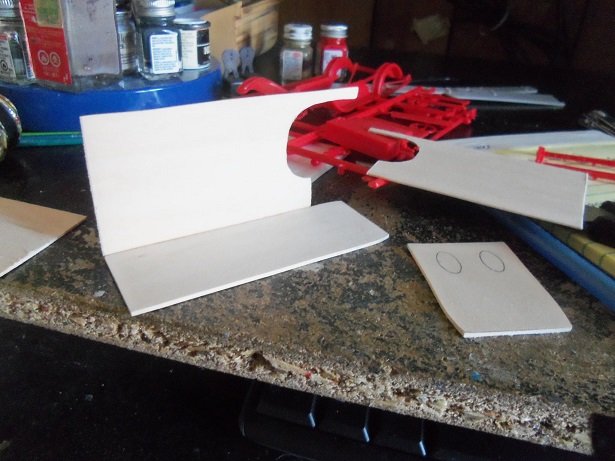
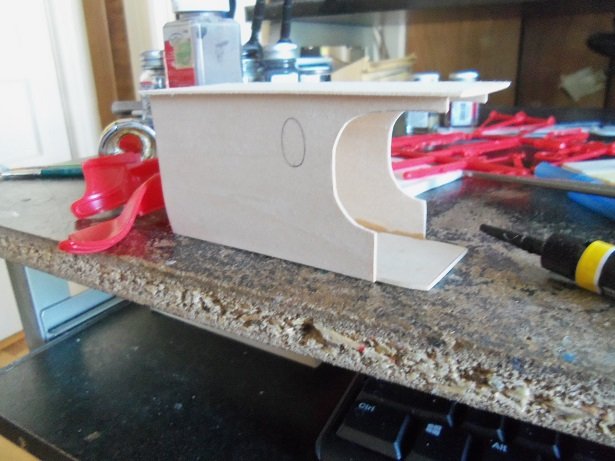
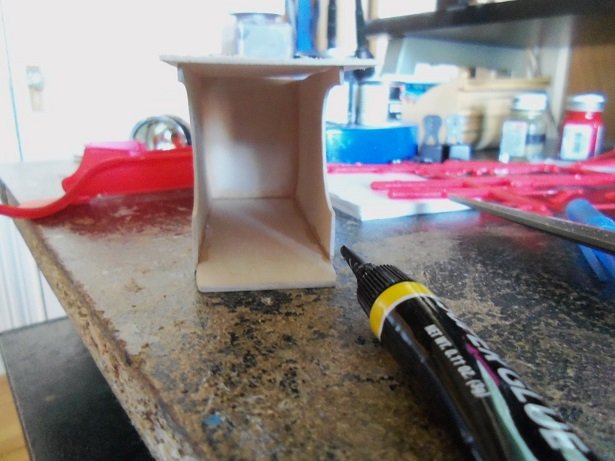
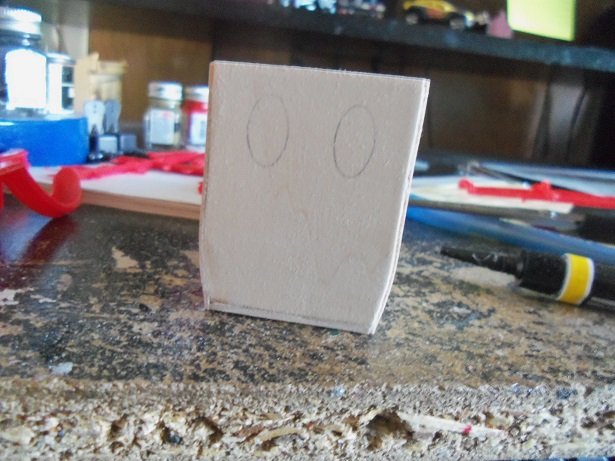
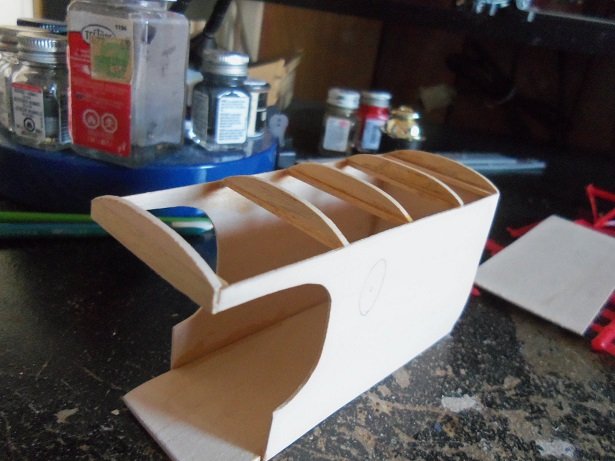
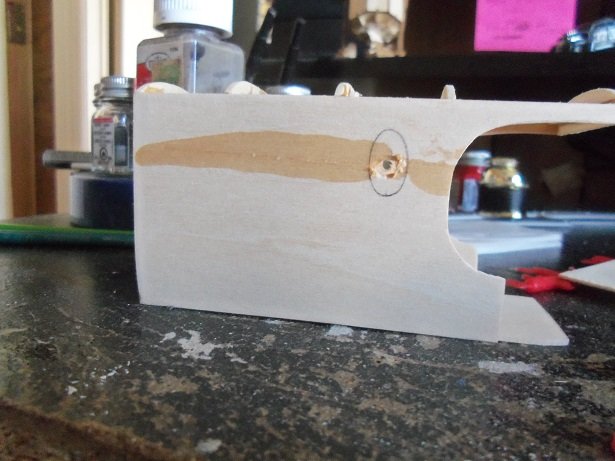
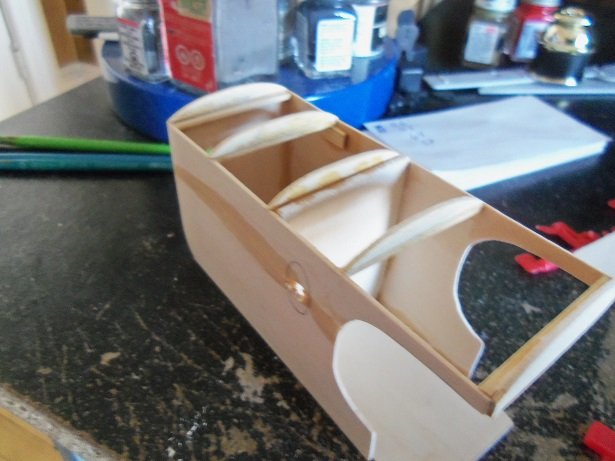
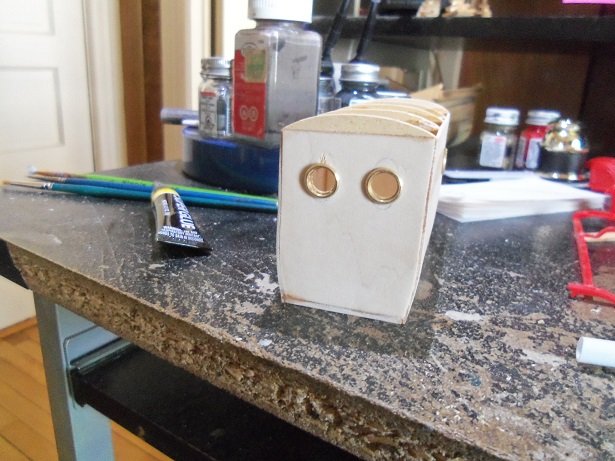
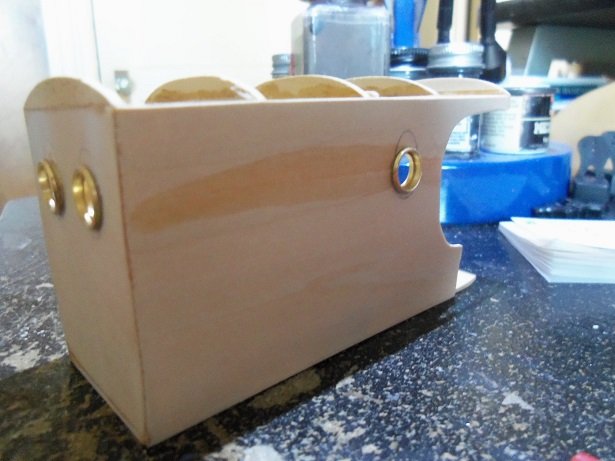
this poor model will never know what hit it ....and to think, this all came about because of a 283 small block 'kit' that I bought from old models .com. I mentioned to the admiral that I'd like to go to the local Hobby Lobby, to look for it's intended victim. she scoffed a bit, but we did go.......and I was disappointed with the selection they had there. the three in one kits that used to be common, I am convinced that they are no more and customizer kits have taken their place. I was going to select the ZZ tops Eliminator kit......but it's too low to the ground.......and I don't have anything in the way of gasser suspension for it. everything else had the A frame suspension.......that wouldn't do either. I did finally settle for this kit....hopefully I can do something to get the body off the ground. I have a name for her already.........now I need to plan some decals for her. as we were milling around, the admiral noticed this model...... she liked it............it's not something I usually model. I pointed to another that looked like it had vending machines sticking out of it.......but she liked this one. I grabbed it too. it does seem to have a charm to it.......kinda like the beer wagon, or the Tijuana Taxi. I enjoyed building them in my younger days.......and then another thought came to mind. I recalled the old Woody I had built.....I had soaked and separated some plywood, to fill in the panels. not the most perfect job, but it was interesting and fun to play with. asking the admiral what she though of the body being made of wood, she said it would be different.........she liked the idea once the kit got into the house, it didn't stay in the box long.........first order of business, was to gather up the body parts and trace then on some 1/16 basswood. I didn't even do a content review...not that many parts to speak of anyway. it is a small model. what there is of the frame was also assembled, consisting of five parts. the engine, which is a model T engine, was bagged. I'll save it for something else. the floor, sides and roof were all cut and assembly started after getting an idea of how the plastic parts fit together. I had drawn the oval windows.......for the model though, I will make them round, using some extra portholes from the Progress for the frames, and window maker for the glass. before long, the basic body was assembled I've done a little sanding here so far........more as I go along. the roof has some camber to it.......I'll give it a bit more. more sanding to go here as well....... something told me that I should have added the partition wall behind where the seat will go, before drilling out the windows. ....and of course, as I went up to a larger drill.....I heard and saw what I didn't want to see knitting it back together with some Ca..........I think it is salvageable.......now! let's get that partition in there! I did more work on the roof ribs too, in the meantime. I later filled in the top part of the partition, but I did something later that made what I did useless......wouldn't have had to do it. oh well I did finally get all of the windows to size.......the back windows........ ....and if the other side was a bit more cooperative, I could have shown both sides. I even had a thought about a drag machine using this body........call it The Medicine Man.........or Gypsy {then I though of Cher, and nixed that one } it's fun to think of all the possibilities for one silly little kit I ended up having to pause here...hope to get back to her later.
- 91 replies
-
- 11
-
-
does this beauty have a grille? if it does, the problem would be solved later on in the project painting the rims.......good since a lot of the old school folks didn't spring for the cragers and slotted rims anyway. looking very nice I'm in short supply for a lift kit fir the front ....I will have to make do. look'in very good
-
the netting looks amazing Greg........are there weights along the bottom of the nets to keep them down? I'm definitely glad I came in.......catching up is so sweet. I certainly hope your sending pictures to the folks you got this kit from.......they might as well have their jaws on the floor too! this has got to be your best work yet........have you thought of an aircraft carrier?
-
catching up on your progress OC, and I must say...your doing a splendid job! don't be too concerned if the dead eyes and lanyards are a tiny bit off........it looks more natural. having them all the same length is merely for appearance purposes only figured someone would have told you this......it pleases me to break the news to ya here's another little tip for ya.........if you were to touch the woolings on the masts {those wrappings on the first mast steps} fore, main and mizzen, it will enhance her a bit more. you can either use a color close to the standing rigging, or a flat brown, thinned down a bit....kinda like a wash. it's a bit more detail.......it's up to you if you want to do it.........you've done a really great job with the weathering along the entire model. the dead eyes on the tops came out nice as well........the smaller size is some really good thinking. keep up the stellar work......she's look'in superb!
-
poked into Round 2 last night........looks like they are revamping their site..... it's OK......I'm doing a bit more painting to the General.......but in the meantime, a bit of experimentation in in order. this morning, the admiral looked over my shoulder....ah....huh was all she said scratch building????? back in the day, I always thought of it as chopping
-
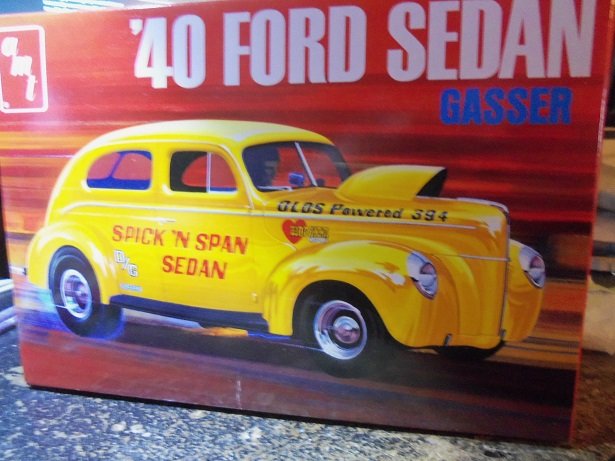
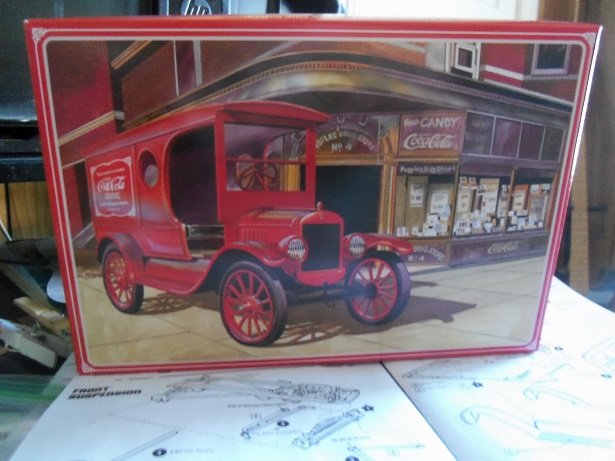
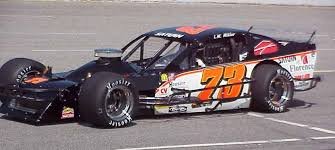
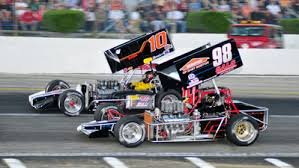
not so much that J........it's that after a while, they all look alike. especially if the kits are from the same company. yepper......back in the clay track days. I was living in Florida back then.......used to go to the track in Barberville. the good 'ole boys and the 'thunder cars'.......they even had a 'powder puff' class.......women used to get into it too. but as you pointed out, the complaining about folks cheating....and the association wanting to level the playing field {driver's skill VS machine & making the sport safer}...well, that began the down ward spiral choking the sport. one type of car that really isn't modeled are the modified and super modified........short frame and all engine super modified......with spoiler there were a few models around, but nothing like NASCAR and INDY. this is what usually happened to models that I grew tired of. saw these one time at Marlboro NY....what a spectacle! even with the engines mainly stock.......speed wasn't an issue I get the same feeling with the funny cars.......after a while, they get a bit repetitive. does one good to move around. the admiral is a good egg.......I did manage to visit the local Hobby Lobby.......and yes, I did pull a trigger {of sorts}. it's not really the one I had in mind.......all foose this and custom that.......the notion of the 3 in one model today has gone away......I couldn't find a single one that resembled anything like a gasser. the idea of the '55 / '57 chevy was a bust too....I saw nothing that had any options for a tubed front axle........only the A frame suspension. I have a very small spare parts reserve. so I settled on a '39 / '40 Ford sedan gasser model as a possible victim. it looks nothing like a gasser........ it does have some options for the different years, two different engines, and a few other bells and whistles. then the admiral saw this one model. there was a time where soft drink companies got into the model biz.........Orange Crush had three or four kits {that was some time ago}......Pepsi I believe had one or two........Coke not only has three or four out there, but you can also fine a semi tractor and trailer.......Budweiser too. she saw one of these Coke delivery vans....1923 Ford Model T. they also had a pick up truck and another one that resembled a giant vending machine {done as a model T type}. I've done models like the Beer Wagon, beach buggy {a garbage truck with surf boards on it}, the S'cool bus......and others. Jeeps.......I've got two Ecto 1's........both kits were actually of the Ecto 1-A, until I made the mods to one of them to build the Ecto 1 {so I'll have them both}. looking at it, I got some crazy ideas in my head....and so I scoffed it up too. currently, I'm collecting and building Batman vehicles.......I have the Michael Keaton Batmobile and the bat boat used in Batman returns {think that was Val Kilmer}. I still need to finish the Adam West Batmobile, and I have the Michael Keaton Batwing in the stash. yea......chrome is overrated....... as I once said, it's taken a back seat to the more realistic paints that we have today. back then, they were adding color to the plastic for those who weren't into painting.......some were even done in multiple color plastic, to make the finished model more attractive. I don't think that they took into account that us modelers would learn techniques and evolve as fast as we did. what did they expect? perhaps I'll poke around Round 2 and see what they have. if not, then I will have to wait till the smoke clears from the delivery that is still in the wings 🎶gonna be a hot time, in the 'ole town tonight! 🎶
.jpg.ecebc6fffe60df90e1e02e41694bd17c.jpg)
-
I agree.......that is a nice repair. I guess the big caution with it, is don't fudge with it too much. if the sliver of plastic is thin enough, it will become solvent enough to fall into place. plastic soldering