
HOLIDAY DONATION DRIVE - SUPPORT MSW - DO YOUR PART TO KEEP THIS GREAT FORUM GOING! (Only 13 donations so far - C'mon guys!)
×


popeye the sailor
-
Posts
16,007 -
Joined
-
Last visited
Content Type
Profiles
Forums
Gallery
Events
Everything posted by popeye the sailor
-
 your almost finished Kevin........must be a great feeling the stun booms are forward but slightly raised........kinda like the 2 o'clock position. I like the way you have your davits......looks good since there are no boats for them. I saw Jerry's ship......I had to do a double take stellar job.......congratz on your milestones!
- 1,319 replies
-
- 3
-

-
- caldercraft
- Victory
- (and 1 more)
-
I see your at it again......off to a darn nice start! that's an awful lot of Pe.......THE BRIDGE LOOKS GREAT
-
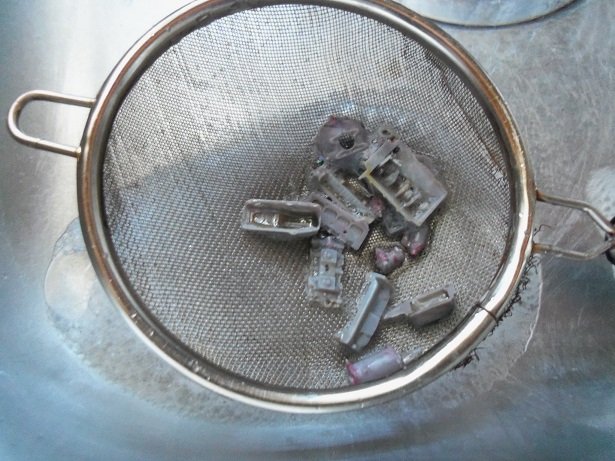
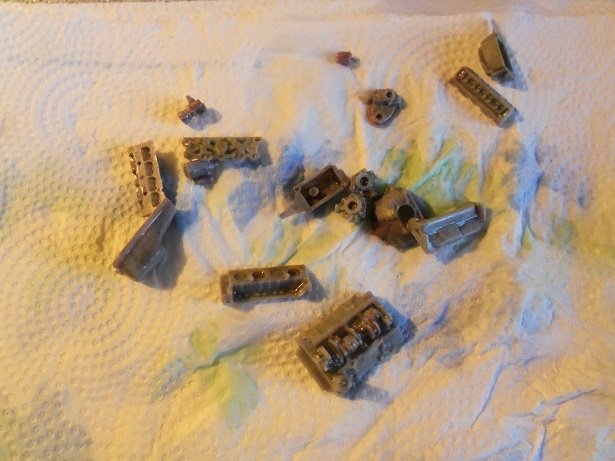
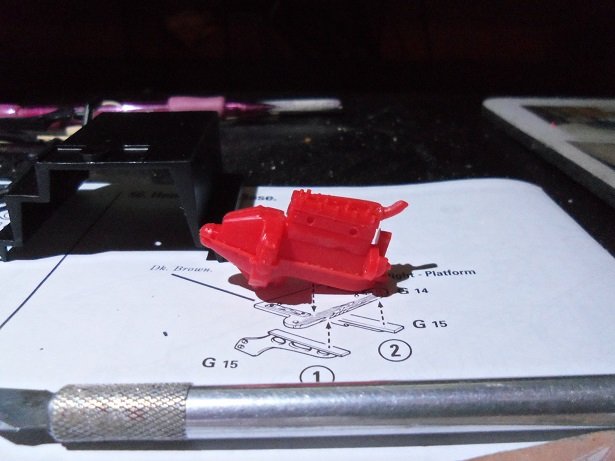
small update here........I have been looking at the bottles with the part in 'em. the engine parts seem unaffected by the brake fluid........the parts for the General though look ready to wash. I will leave them in for one more day.........I may end up painting over the chrome. I do find this rather odd......I haven't seen anything like this before. .....that was last night.........I left the computer without posting today after work, I looked at them again. the part for the General are peeling and bubbled up.......ready to be brushed and cleaned. the small block parts on the other hand, still looked as they did when I put them in. I said the heck with it and set up the cleaning area. I ws surprised to find that the chrome came right off! weird colored plastic........that's for sure on to the next step!
-
spoke too soon......didn't I?!?!?! nicely done! I like the weathering too........'battle tested'
-
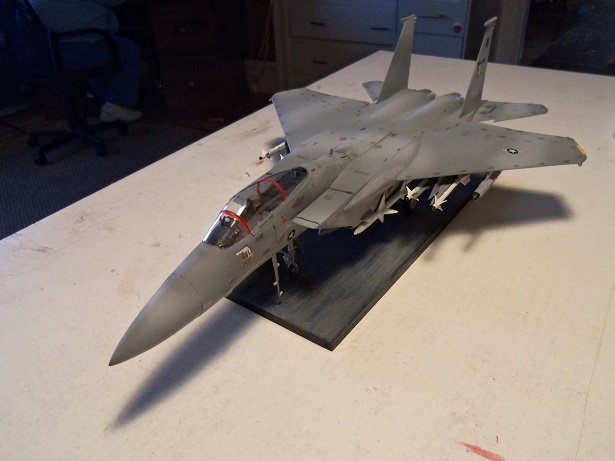
really nice model Jack l've only built one jet within the last year........I'm happier doing prop planes I'm a fan of the gray camo. I think the decals are suppose to be like that.......stealth. some hobby shops do carry decal sets for these birds, but these are more correct for the aircraft. here is my F15 Eagle. I do have an F14A Tomcat in the stash......future project perhaps you could do a log on that Dauntless .......
-
you'll fix it...........this I'm sure!
-
I hit the like button only because the chassis was shown..........
-
I could tell ya a few stories about Daytona.......party central we made a lot of folks angry at the bumper cars. cool you have history there CDW I see the article mentions the St John's river......interesting story about that river, about the time I moved down there. there was a lot of unrest with the KKK. I don't have all the facts, but in retaliation to what they were doing to the black community, a group of blacks killed the grand wizard's son and took his wife and child, tossing them in the ST John's river. neither survived. I moved down there in 1974...... this carried on until Christmas, when the KKK wanted to have a float in the Deland Christmas parade. against their better judgement, they allowed them, and during the parade, they were pelted with rocks and vegetables, which brought the parade to an abrupt halt! Michael is my best friend, since 1st grade. funny.......I noticed this kid being bullied by a couple of other kids........call'in him four eyes, because he wore glasses. I broke up the taunting with fists blaz'in {can't stand that bull s......}. his parents were like my second parents....they moved to Fla in 1969. it was Michael that convinced me to move down there best five years I ever had ! so many stories are you stalling J..........throwing in your trump card..........your dog to distract us?!?!?! you'd better tell Murphy to take a hike! we want to see this model in all it's splendor.......can't do it with that lout hang'in around! stop.............count to five..........breathe you'll get her fixed up.........and yes, I do what lame a$$ hinge your talking about....I quite agree
-
I lived in Lake Mac........used to live in Deland too. Daytona was my stomping grounds.......enjoyed going to the boardwalk. 1974 to 1979
-
oh........well then, you need to get busy grab a cheap model T kit and get the missing part from there! looks cool!
-
the truss cables and antenna really adds to her looks! awesome plane.....very well done and presented
-
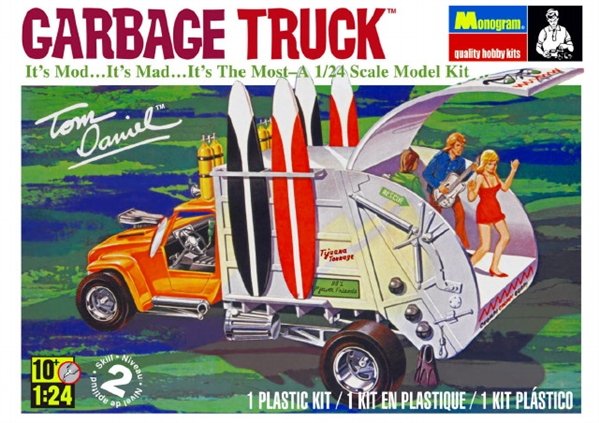
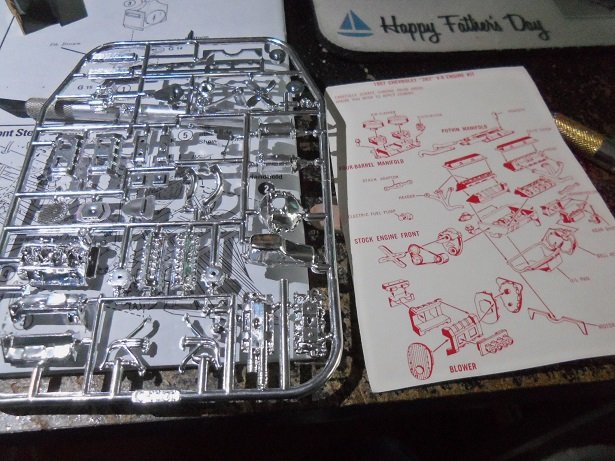
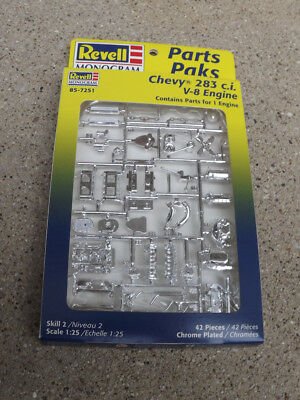
...add ten more like to this one! love it.........haven't seen that kit around at all! what rolling stock?........looks like all the parts are there. actually, I may have to eat my words.......I found it.......and I believe it may be available {I didn't look}. but I did mention the Garbage truck......a wild take on a surf buggy. check this out https://www.modelroundup.com/Monogram-Garbage-Truck-Surf-s-Up-Model-Kit-p/rmx-4198.htm I'm going to leave the sides bare......just do some sexy molding. there are decals to add, that will break up the manotany. I also need to outline the rear doors. I was going to post the news, but I can tell ya.......I got the engine! ohhhhhh, I like the Sox & Martin kit! got some nice detail, and the decals look pristine! I assembled the model T engine.........I also have the parts in the brake fluid already. I won't assemble it much more than this......I just need it for a size comparison. the Chevy engine looks smaller than 1:25...I'll take them at their word. I do recall this engine in a kit though......I do have my doubts that it was Revell {that's what they have it labeled as}. I do have a feeling though, that it won't be the supercharged version........that would make it too long. well hang my head and cry..........I'm not doing too well tonight.......proven wrong yet again it is by Revell!

- 91 replies
-
- 11
-
-
it's been so long........forgot about some of that weird stuff. to think.......I was going to do it to the '40 sedan during my time at Barberville, there was this driver.......won quite a few races. that ended when they found out that he was cheating the weight of the vehicle, with removable parts of his roll cage.........the bars were solid. all cars had to be a certain weight. needless to say, he took the walk of shame
-
great progress Ben.......didn't know you were majoring in ceramics redos are part of scratch building.......they go hand in hand
-
....catching up to your log.........so sweet! your bevy of boats look great together.......and the spread out of the yacht's decks show the improvements you've made on her! she's really coming along wonderfully! your almost done.........have you given any thought of your next project?
-
beautiful work Doris.........truly amazing!
- 1,035 replies
-
- 6
-
-
- royal katherine
- ship of the line
- (and 1 more)
-
your the modeler bud.........from the looks of your stash, you can go wherever you want awesome job on the Arado.....I agree, it will be hard to top this one
-
I especially hate it when you freshly paint a part and send it flying ............picks up everything the vacuum doesn't! minor setback chassis and interior looks great. I noticed you left in the rear seats.......are they molded? they are like this in the '40 sedan......I think I have enough spare plastic to modify them out. does dad know where you've been tak'in the car on week ends ?
-
hello Richmond,........I'm not sure. there were a few silent movies made surrounding trains. that would be something to look up
-
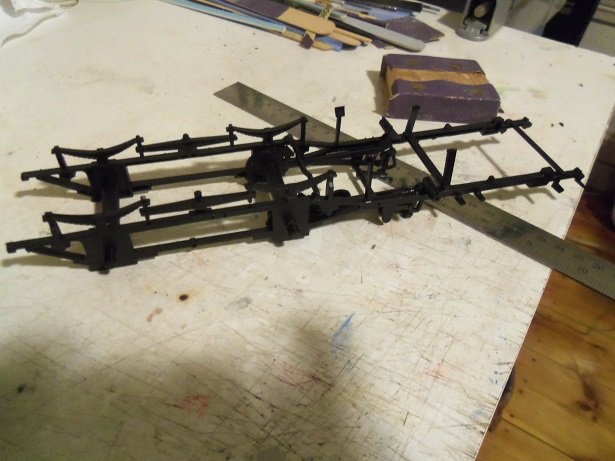
hello gents! yepper....I think I'm over the hurdle.......if it wasn't being down with the flu (or whatever it was}, it's the nasty cut I did to my pinkie. but I'm doing better......the finger is healing well and looks real good gotta get back to the table.....I feel I'm wicked behind! it is an MPC kit......when they went out, Round 2 bought up the molds and began producing the kit. the instructions are dated 2015. I believe that most of the model companies at that time, got on board with their own train kits, since kits were only produced by a few companies. the train model market was the last big nut to crack, seeming isolated within these companies. one must remember that trains were the last model subject to be offered, since most enthusiasts were still scratch building their models, and actually seemed to shun the 'pre fab' kit. they were also the last to adopt model scale classification, but they adopted their own.......instead of the fractional scale, they use a lettered scale. some of the layouts I've seen.......when you get into building model train, you enter a whole new world you won't find too many kits out there........model companies soon saw they they could never replicate what these folks do, and moved away from producing them. I knew that the Delorean had been produced as a model kit, but I have never seen these kits......cool beans! I do like to model movie cars ans such.......I'll keep it on the back burner I use brake fluid J........used that as long as I can remember. I had written something about it a while ago..........it does depend on how old the chroming is, as to how quickly it works. older kit are usually the quickest, while newer one take a bit longer. those two parts have been in there over night, and after thinking about it, I saw the heck with it and threw that dome in there too. the bad part in this case, is the paint is on chrome.......it will come off right along with it. I'm good with it I can start over........the paint got under the tape anyway, which didn't stick to the chrome too good. I had a masking tape for past projects that worked really good....then I tried that 3M blue......that was junk! the green frog tape I've been using has been good, but had let me down a few times {then again, I'm not in the habit of washing parts}. I took the bull by the horns last night and cemented the frame onto the boiler part of the loco. the diagram was not too good in showing how the rear part lined up with the four brackets on the body........under or over the tabs that stuck out. in fitting it, I adjusted it until the two sets of braces forward lined up to their mounting pads, and cemented it afterwards. I did the braces separate, since I had to clamp the rear section until it had set. another problem I saw, was that before this step, they want you to add the front truck assembly on the boiler body. I found that with the front cross member in place, there is no way to slide the truck through the frame. I'm setting up to add that today { I hope}. I'm doing more painting as well.......added the inner floor to the tender and gave that a shot of paint. I'll have an update soon
-
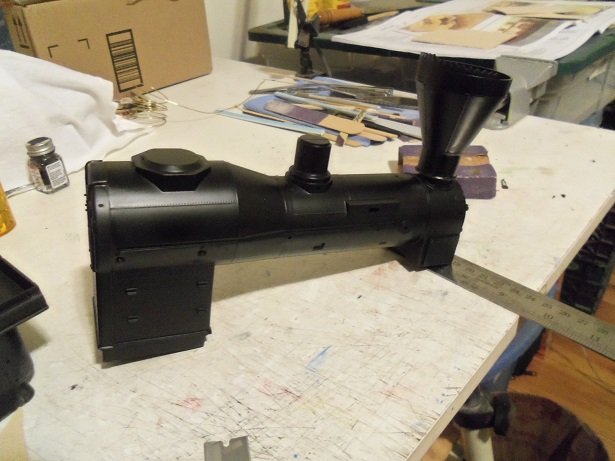
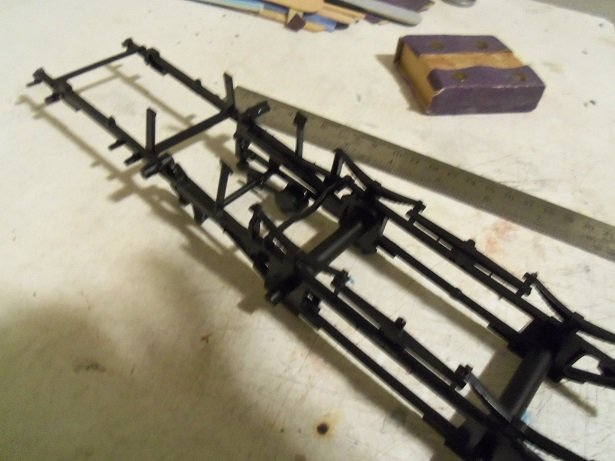
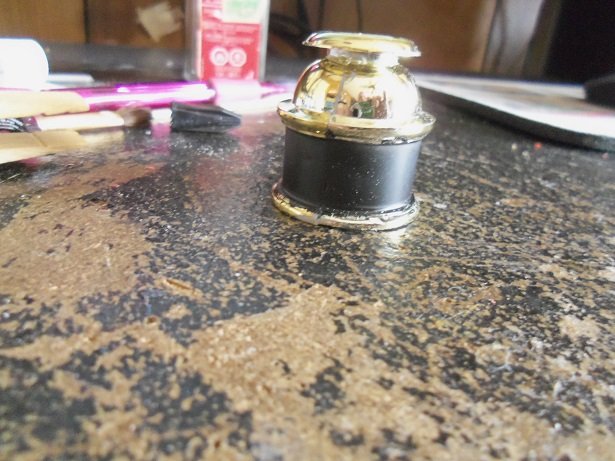
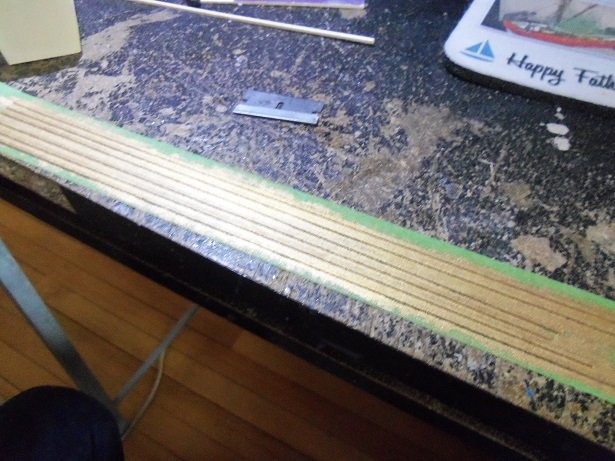
I made a little more progress on the General.......the more I tinker with it, the more I'm beginning to disagree with the Museum quality aspect of this model. the parts are terrible........if it not injection mold marks, it's minute flash along the edges of every nook and cranny. for anyone who has the original kit, I'd say you probably have a better shot of building a museum showpiece. they really need to retool the molds don't get me wrong, it will come out a nice looking model.......we'll see when we get there the main part of the loco has been painted. the flat black I used has just enough sheen......I like the way it looks. the smoke stack has been painted and cemented in place. the frame and reverse gear assemblies has also been painted. I went over practically every edge, to sharpen the edges and remove all the flash junk. reading ahead, there are these two parts that need to be de chromed.......the nose emblem and sand dome. the sand dome is to be painted yellow.........the nose emblem is to be painted multiple colors...makes no sense that they be chrome. so now they are in the process........makes me want to kick myself, because I should have done the stream dome as well. this dome is made up of three parts, the two halves and the top. it's bad enough that it suffers a poor fit issue, but I forgot that it needs to be painted around it's waist. painting on chrome is never good I'd toss it in the jar with the other parts too, but I wonder what would happen to it because of assembly....would it fall apart? I may have to take my chances and do it........this part is in real need of some sanding the center floor of the tender is another issue.......it's warped. I was going to paint it a rust color, but I think I'll cement it in place and paint the tender in it's entirety. this is one of those parts that will show very little on the finished model. to straighten it out, I cut a strip of 1/8 basswood and cemented it on the underside, like a spine. it will never be seen, and it does a great job of straightening the part out once this is in place, I'll paint the tender and move on from there.


-
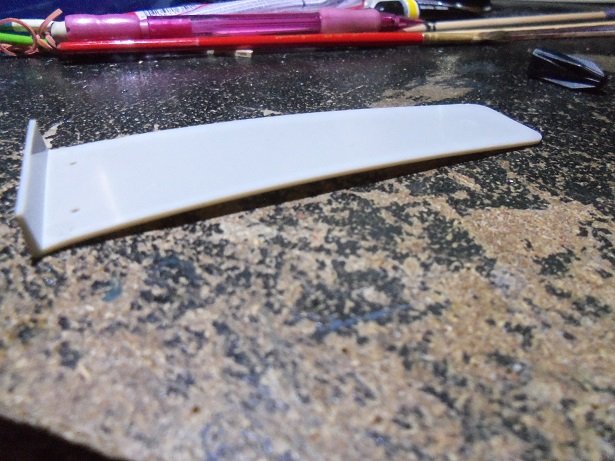
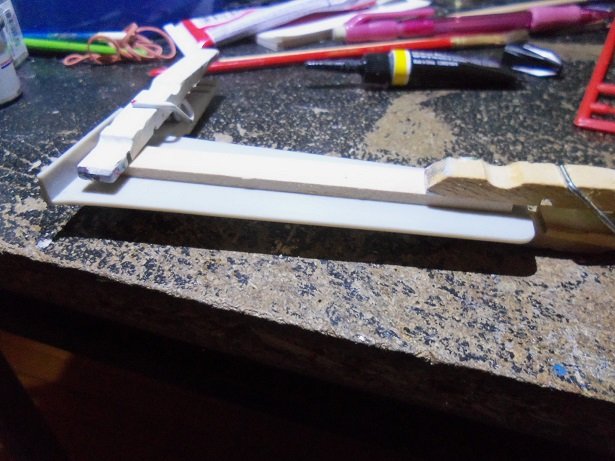
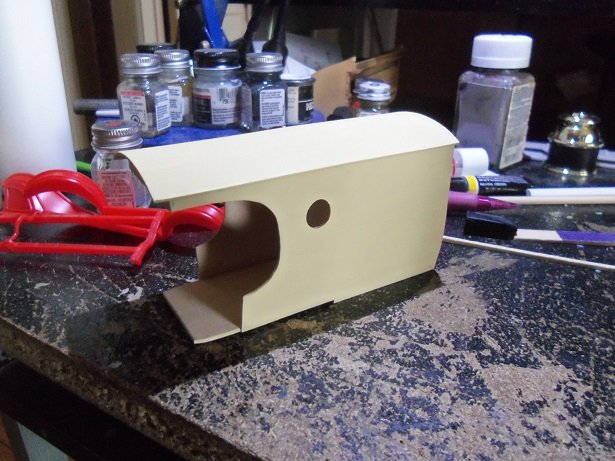
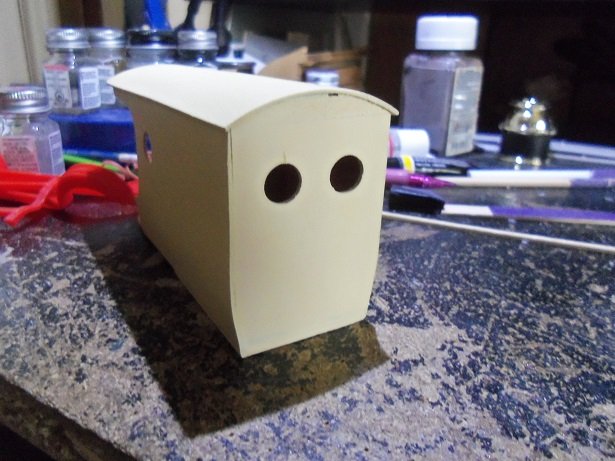
I've done a bit more on the coke mobile.......I am a bit hampered though due to a gash on my pinkie finger. I did it at work.......nothing major. I'm still waiting on the engine I ordered.......I may use it on this project. just for chucks and grins, I looked into the '40 sedan to see what the engines look like in that model........there is a stock flathead v8 and a souped up olds 394 cu in engine in the kit. both engines would look big in the small engine compartment of this buggy....so I may have to alter it some. I use enamels....to get a nice finish on the body, I'm gonna need to seal the wood with primer. I have a tin of white primer, but I couldn't get the cap off. so I settled for some Billing primer....I have one bottle left. it covers really nice, but smells the high heaven! I still need to paint the interior areas.... I only have flat red.......I could go over it with clear lacquer and still get a nice shine. I've also seen this model in white, and it looks really nice too. I want to do some trim work on the body after painting, some 2 mm thin strip painted gold will do the trick. the fire wall will need to be altered........I removed the plastic inside the raised outline. the top of the fire wall frame was flattened to fit inside the roof edge. the fenders, which will also be plastic, will need to be modified as well. as I'm fitting all this together, I'm test fitting the parts for the original model. there are few tabs to guide how the body and frame assembles. the engine, frame and drive train is assembled.........the body and fenders are assembled separate, and then the two are fitted together to pretty much finish the model. I need the engine to get the dimensions for how deep the fire wall cover needs to be. until then, I can't do much more. this model has a relatively short wheel base. they just shipped my order yesterday.......... kinda hoping that there is an engine option for the Sox & Martin kit.......but I'm not holding my breath. I may also need to make some custom exhaust too.

- 91 replies
-
- 12
-
-
please tell me that red on the plate wasn't you! I put a nice gash on my pinkie finger over the weekend.......a non modeling mishap, but my modeling has suffered a little because of it. can be a pain getting rid of mold lines on metal, but so far it looks good. nice work