
HOLIDAY DONATION DRIVE - SUPPORT MSW - DO YOUR PART TO KEEP THIS GREAT FORUM GOING! (Only 13 donations so far - C'mon guys!)
×


popeye the sailor
-
Posts
16,007 -
Joined
-
Last visited
Content Type
Profiles
Forums
Gallery
Events
Everything posted by popeye the sailor
-
 sounds like a fit change for me! ......where do I sign up?! the stairs are done...yes.........thanks for the kudos, but another problem has arisen. I did not realize that the tinted window material is two layers....that's why one of the windows popped off. I will likely just put it back on, but foe the rest of the windows, I think regular cello will be used. not only that, I didn't see the supplied window material for the helm, so I might have to do them in the clear cello too. the material had lines and stuff on it........would have looked cool.....oh well >shrug< thanks for look'in in........I should be resuming very shortly. I got carried away with the Progress ......and then with the funny car be back to hr soon
 -
hello Michael! thanks......I wasn't sure it would work....but I'm glad it did!!!! thanks again.........my other love. if the airbrush didn't mess up like it did, I think I might have gone a bit crazier with the paint. a bit of a hiatus from the boats.......better weather coming soon......I have more sanding to do. the admiral doesn't know this........but I'd love to get another one
-
jeeze........your doing spectacular work on both fronts! great Job on the John Brown....the rigging really finishes hr off nicely.............and suprb camo on the tank. great job my friend......👍
- 106 replies
-
- 6
-

-
- trumpeter
- john brown
- (and 2 more)
-
very nice! great looking ship
-
awesome build so far..........very nice presentation too! anyone who is building the model can down load this and use it to compare
-
how will you decide which is the good side? both sides are look'in good.........and it won't be you pick'in the display I think for a model this size, serving rope really isn't needed. there are plenty of different size thread on the market, and that would suffice solving the thickness dilemma. if this was a larger model, then you may need to do the standing and shroud rigging, but not much else. you can do it if you feel you need to, but keep in mind that there are other options.
-
she's coming along quit nicely Sjors............but what can you expect from your third......fourth ........or even fifth time around copper or black for me on the props. don't think they are like aircraft, and have yellow tips {I know.........just funn'in}. super nice job!
-
I love your stand..........where did you get it?!?!?!?!? very nice work! the thing to remember about the color schemes.......these were at different points in her career. is this one of her just starting out? what flotilla was she in at the time? to pinpoint an exact scheme, this is some of the info that will help you make the decision. I like it too.......I think you made a good choice.........but I would find out when that was though. there is similar controversy with the Arizona........I think it's a combination of cheap azz paint and water reflection.....you there are folks more knowledgeable than I, going all Sherlock Holmes over it. the deck work is wonderful.....so glad you visited and gave an update. don't make a stranger of yourself....this is an awesome project
-
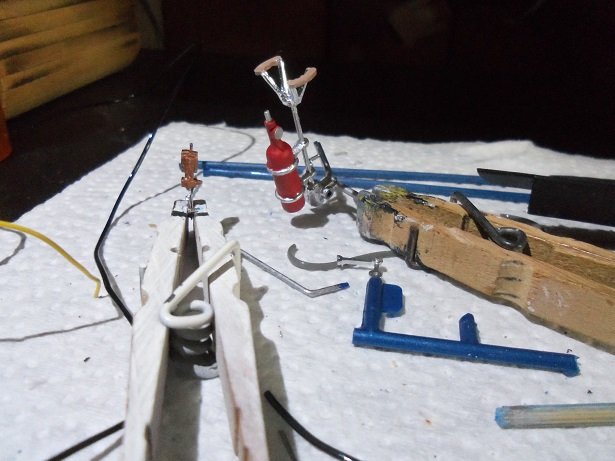
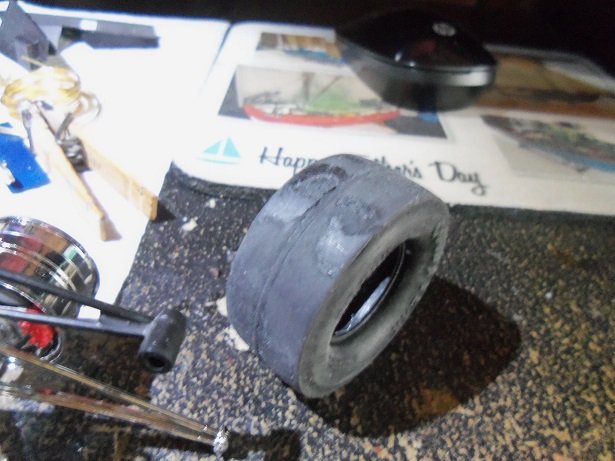
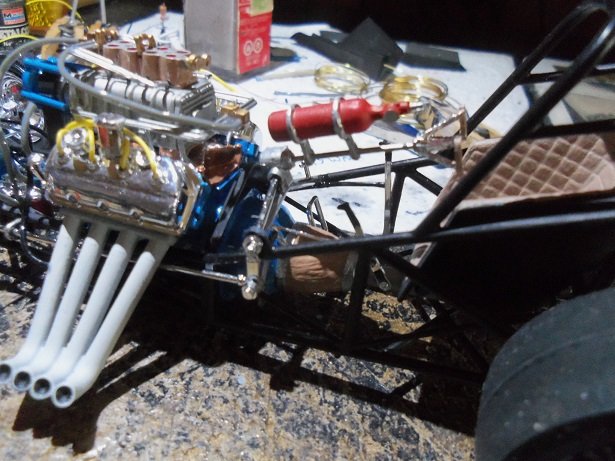
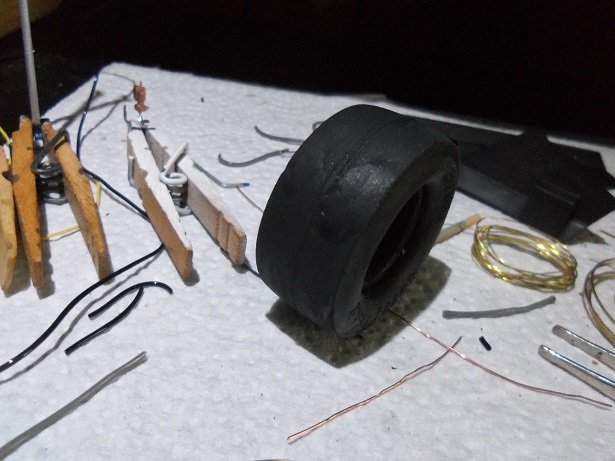
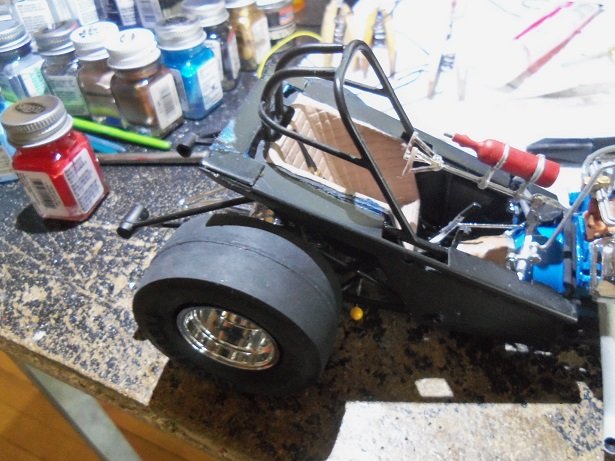
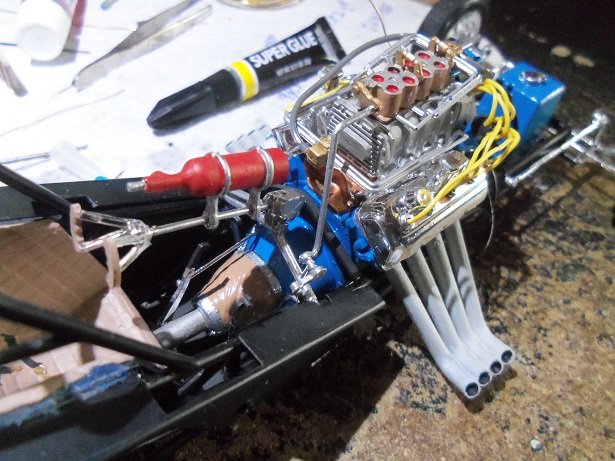
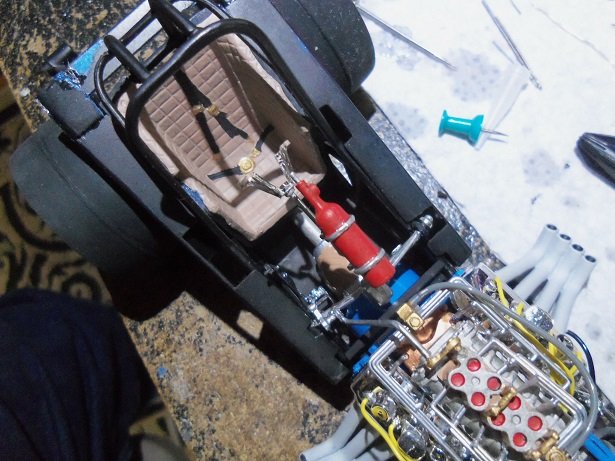
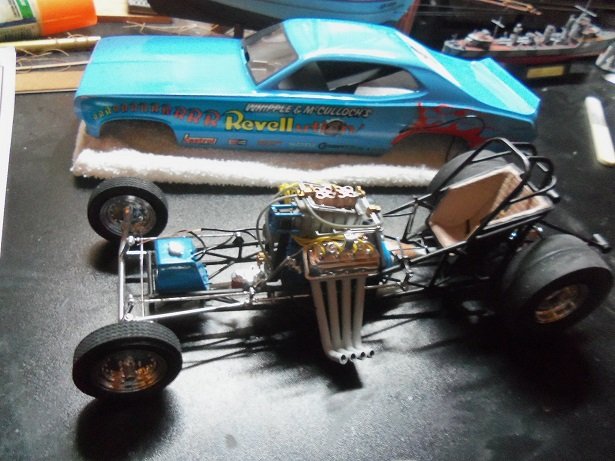
spit shine..........remember J..........I'm old school you had a heater core...........ha!, I had a brake job. as mentioned, I took the afternoon off thinking I'd have a head start on the week end, and got saddled with that! guess that what we're here for........our way of still taking care of our kids I also remember the Orange Crate........don't think I've ever seen the other one {now I have to go and look it up}. I didn't think I was seeing things it looks like a cool little upgrade........for an unsuspecting model and the x-actor you have my envy good sir OK..........so, I promised to fill you in on the eventful day I had.....well............lets start with the fuel shut off line. it was supposed to be run through the fire wall, under the right side header, and locate on one of the pins for the fuel pump. now that the engine is cemented in place and has had plenty of time to dry.....there is no way I'm gonna be able to move it from where it is. it ended up under the right side firewall tab, that rests on top of the frame. this does lift the engine on that side a tiny bit, but I don't think it will interfere with anything....so I'll leave it at that. before I tackled hooking that line up to the fuel pump, I finished my painting on the master cylinder and fire extinguisher. hooking the hose up was a pain.......made me wish the wheels were cemented in place......it wanted to roll everywhere! the super glue had closed up, so I had to use a pin to open the nozzle. not wanting to crush the hose, I fought some more.....the hose shifting in the tweezers grrrr! before long, I had it hooked up finally....the chassis stayed still long enough for me to accomplish this. it wasn't until I tried to move the chassis, that I would find out why it didn't move. super glue had bled out of the tube and onto the desk..........the one of the slicks rolled onto it, and is now glued to my desk! it took some doing to pull the tire off the surface....I dismounted the tire during the process, making it easier. as the tire pulled away, it took two circular patches out of my desk........and the clean up started, removing these two patches of wood and paint. this was not easy and it was very damaging.........the tire now has these two nasty craters in the tread surface. I do have to say.........the admiral was sympathetic.........wondering if I can order another tire. in 1:16 scale...........doubtful I will sand it a bit and remount it........but in the back of my head, there has to be a remedy for it assembling the steering box assembly was another pain, having to spread the frame apart to fit it into the slots. the pin for the drag link was a continuing fight.....the little cap for the linkage came off and the assembly came apart. being glad that it did that, {modeler's honor of using glue sparingly} instead of breaking, was a welcomed sight, and was easily reassembled. there is some opposite pressure that kept the assembly from staying in place, so I had to hold it in place for about 20 mins or so {great.........another 20 mins out of my life, that I can't account for to St. Peter}. but in the end, the assembly is finished........I couldn't check it right away, but I did check to if the steering still works..........and it did while I was wrestling with the steering, I came up with an idea for the tire....use the same stuff that caused the problem in the first place. the old tube of super glue hit the circular file....I got out a fresh tube and filled the craters with it. it was sanded when dry........seeing a few pits, I added more and sanded them when they had dried. the flat black I'm using for this model is really 'dead pan'. what I mean by that, is it's a combination of other bottles I've used on other projects....cleaning out the bottles, I add a small amount of thinner and shake it, to get the major part of the pigments out. then I rinse out the rest of the paint and then I have a clean bottle for mixing other paints. the collected flat black is now thinned down to the point, that any sheen that would be present, is now gone. I'm sure some have noticed that well mixed flat paint will produce a faint sheen when applied....adding thinner will kill it. to make a long story short.........I painted this over the tire, and this is what I got....I did wipe some off too. it was a good save....I was very happy with the results the tire was remounted before anything else happens! .......and it didn't take long either. the cockpit side panels and floor was added to the chassis. there was some unreasonable fit issues, but I manged to get them in place. it finishes off with the rear top panel, and the darn thing wouldn't fit. it didn't want to line up with the seat, nor did it want to line up with the side panels. the only thing to do here, was to cut part of the center out, that surrounds the back seat deck. the plastic is so hard and brittle, that the ears that were being created by doing this, cracked and broke off. after gluing the pieces back together, the part was fitted and cemented into place. I may have to decant some of the flat black.......remember, I used a rattle can to paint them. it can be sen that I have some touch up work to do....this plastic was very unforgiving. it can also be seen that I've assembled the throttle linkage as well.........the rod for the pedal, and the rod for the butterfly actuator. so now, the master cylinder needs to be added and hooked up, and the rest of the hoses {mainly the oil filter hoses} need to be connected.....and then I think I can call this model finished 🏁 my next project will test my painting skills
-
increasing the water temp will soften the decal. the newer the decal, the quicker the release. I use warm water for my decals. odd shaped decals are better if you don't cut around them........they won't hang off the edge of the sheet. if there is another decal on the piece, I work around it and put it on next......not much else that can be done {just don't let it dry}. hope it was nothing serious.
-
I see I wasn't the only person who should have just watched TV good to hear that Slixx is gonna hook ya up with another set. surprising, sine the date on those decals was 2005. then again, the point where they go bad is anyone's guess really...it depends how they are stored. I'll tell ya about my day tomorrow........it'll be like swapping war stories
-
oh.........BTW...there is an update. it's late and I gotta hit the rack! all I can say is.........if there was a day for stupid stuff to happen.......this was the day! tell ya about it tomorrow!
-
I was browsing through old model kits today, and I saw that they had an accessory kit in the Revell section. it is a 283 small block engine i:25 scale, and it can either be done stock, fuel injected, or blown with a very unique supercharger feature.......it appears to be fastened to the timing cover {unless I looked at it wrong}. the only problem is that it's entirely done in chrome. I see some de-chroming in it's future, if I bought it I also could have sworn to have seen a customizing kit fir 1:16 scale cars.......supercharged! that would be cool to get an older kit.......say the Nomad, or chevy Bel air, and soup 'er up believe it or not.......after I put decals on, I usually blot the paper towel on my tongue, and wipe over the decals, to remove the excess decal glue......I just went over the body with it too told ya it was a spit shine
-
that is one very fine model............not much of a landing gear set up. long.........make one wonder how it survived landings superbly done model
-
ohhhhh.....I love gassers! I wish they had a 1:16 scale kit out there of one! that's a very nice model CDW.......but don't alter your plans! your doing a great job on that Shinden.........and I think quite a few folks want to see the KI-45 come to life......including me thanks for the kind word J and CDW there are few options when stuff like this happens...........along with another one that just happened your gonna laugh when you hear this one.
-
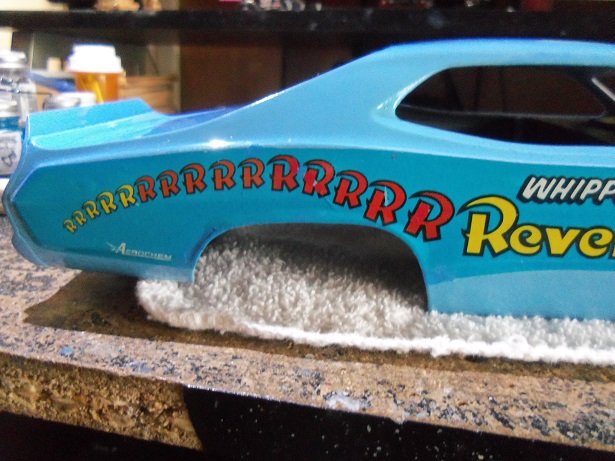
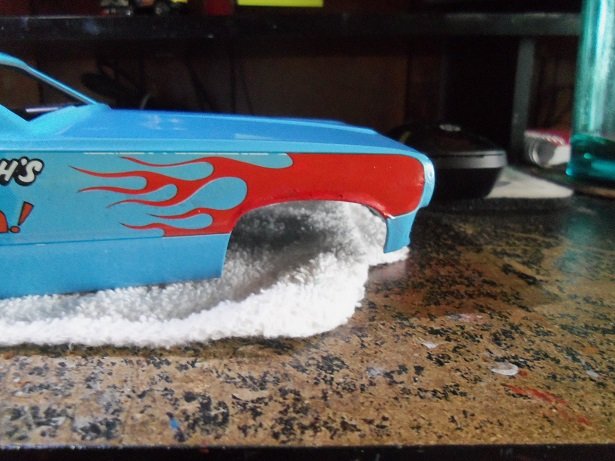
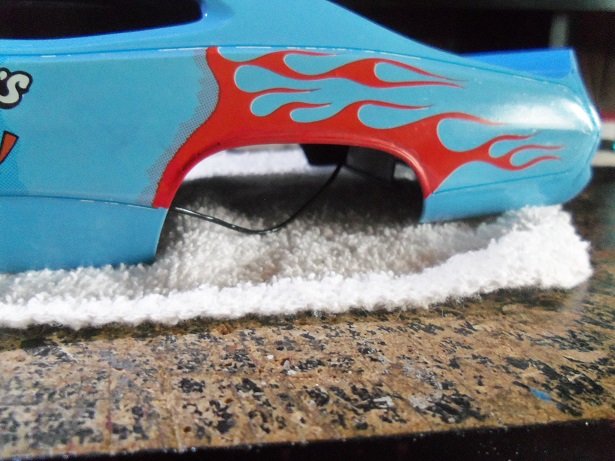
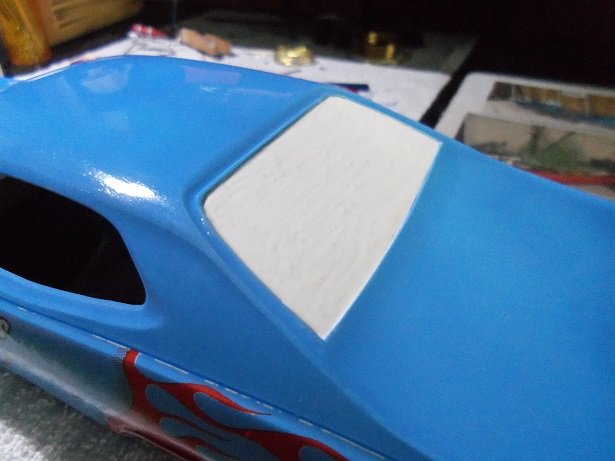
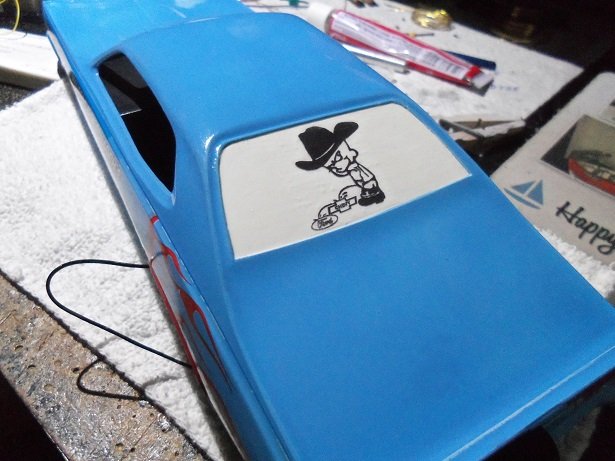
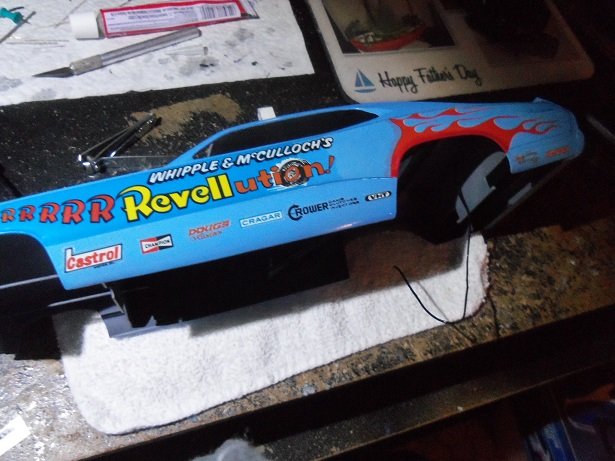
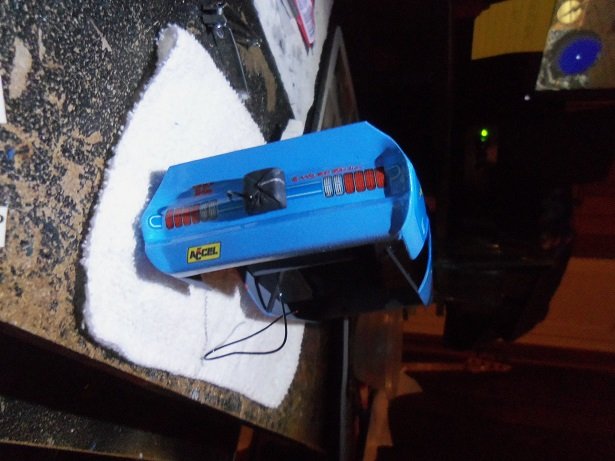
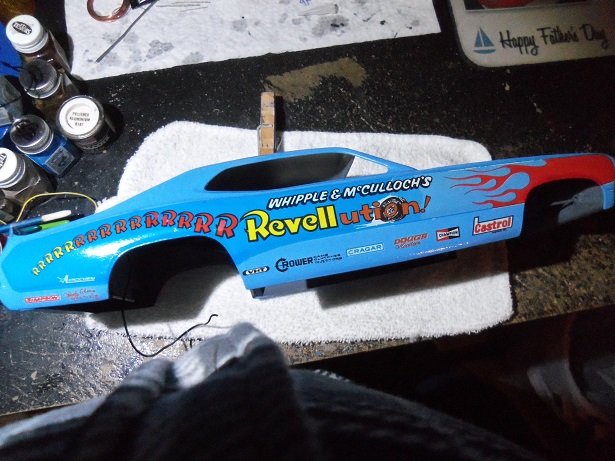
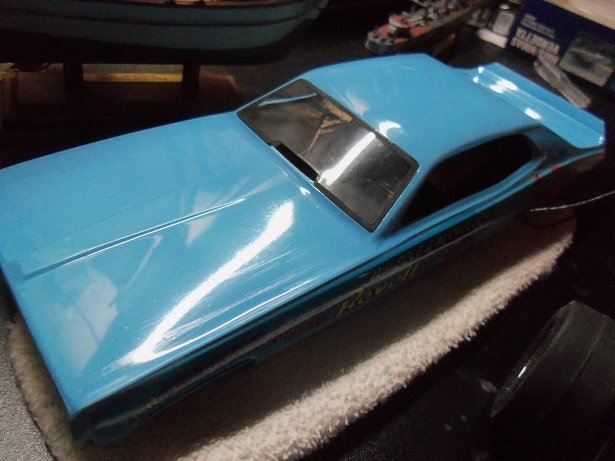
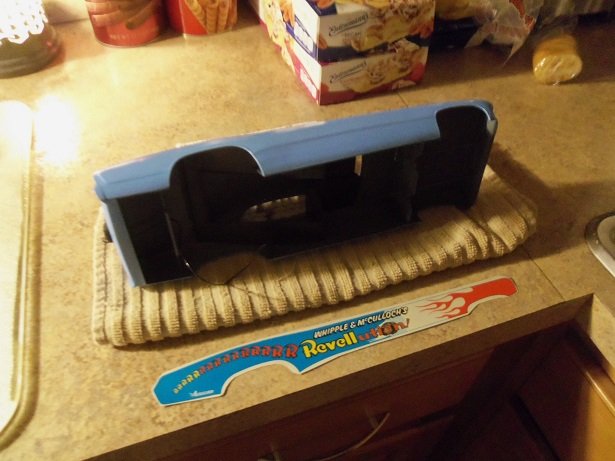
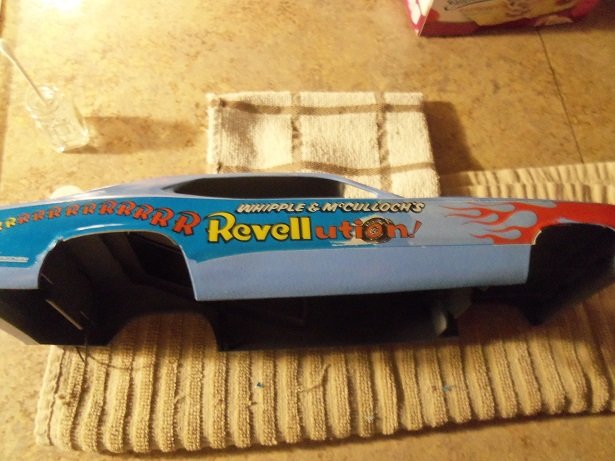
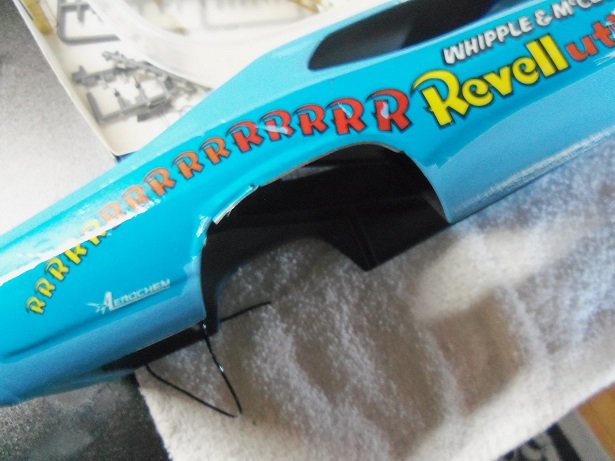
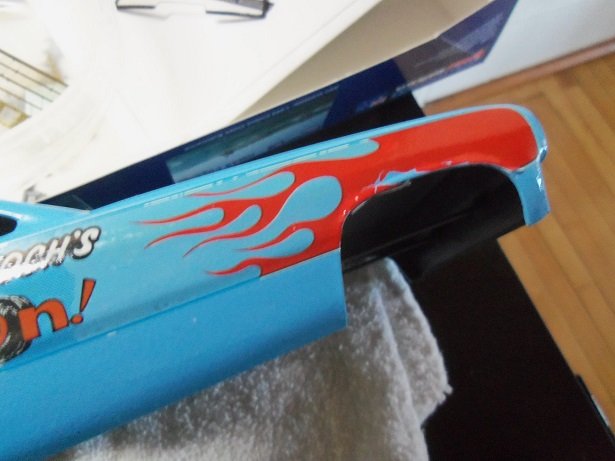
so now it's repair and redemption....gotta make it work. after trimming the excess decal around the wheel wells, a little more decal was removed around the outer edge for not sticking. knowing that I had to touch up the driver's side, I had tried to mix up some Blue to fix it with. the problem here, is that the blue changes hue....for this side, from front to back, making it very hard to come up with an exact match up. it does in one part, but gets noticeable near the end. I still need to play with the passenger side a little more....but it meets muster.........it's better than it was I also painted around the edge of the wheel well to give it that 'wrapped' look. the red was another problem......I have no gloss red.....just flat. I went with it, thinking that if it was too flat, I could go over it with clear lacquer and solve the problem that way. well mixed, flat colors sometimes give off a small amount of sheen........that seems to be the case here.....so I left it alone. I painted around the edge here as well, which completes the decal. I see I gotta fix that front corner again..........may need to cut the bad part out and retouch. the driver side came out much better. the rear window presented it's own problems........my plan was to go over it with clear lacquer. the can says that it works on plastic......but as I found out........not this type of plastic. it quickly became rough and 'buckled' with every brush stroke........it was eating the plastic after it had time to dry {now that the damage was done}, a plan B was performed.........going over it with a coat of window maker....of all things. I figured that it would self level itself and bring the sheen back to the window. using a brush created quite a few bubbles.......took like forever to get them out. too bad I have the body assembled......could have cut the window out and made a 'blind' for it. most of the roughness is gone........it still looks striated but with 'softer craters'......what else could I call it. ah, what the heck, I gave it the thumbs up and put the decal on it. here's Fred the driver side logo decals were laid in place......... I was going to put the Accel decals on the side window columns. when I went to reach for them, they were gone...........what the hey! I just cut them out and had them next to Fred........where could they have gone off to ?!?!?! I found one on the floor.......the other I feared, fell into the garbage can! I tried to locate it....emptied the contents of the can into the kitchen can piece by piece........but no luck....the decal was gone! so I only have one, and I'll need to figure out another location. logical.........the rear bumper. when I made these decals, I used a white decal paper......it's all I have. this actually works better for the decal......the white background makes a perfect base for the color. on clear decal paper, they come off rather transparent and tend to disappear, when placed on darker colors. you have to cut the decal out along it's edges though....and sometimes though, it can be a problem. I may make another down the road......if I do, I'll put it on the front bumper or spoiler.....who knows.......the other one may turn up when I least expect it to the passenger side decals went on next......... noticing some spots and stray finger prints, I gave it a spit shine. the gray interior was touched up, and then I cemented the windshield in place with the window cement. other than a few touch ups that I might see.......or meddle with........the body is done. the chassis needs to have the rest of the parts added to it and finish hooking up all the hoses. so, that will be the next update

- 172 replies
-
- 12
-
-
thanks J.........I should know that better 'n anyone. it happened.........nothing much I can do about it now. I'm not turning back from them, I've gone too far already. there aren't too many places that do 1:16 scale decals . so I guess I'll have to fix them somehow. thanks to all for the likes........I think I may have started something........look at J we're one man short of a epidemic...........anyone else wanna throw one out here?
-
great looking paint job.........the decals look really nice as well. they should look awesome together
-
this looks to be a very interesting project Danny....you don't see to many of these. if you think there should be added detail here and there, add it in......you are more than capable
-
wow.....quite a story......and quite a bit of damage too are you sure you just didn't stack something on top of it considering what you did on the Mustang......you won't have a tough time with the chassis {you already did wonders with the body}. jee........I hope I didn't send you down a dark path check either Plastruct or Evergreen......they carry other stuff beside 'rod' that may make it easier
-
I had a minor mishap last week, where I slipped on some ice and landed in a shrub........getting a poke in my right eye. I went to work anyway.....driving was a real trip...........luckily, I have a pair of glasses, that I use fort acetylene welding, so I could drive home.........I had no options...I had to go. it's much better now.....although it still feels like I got something in there. I tried to do a little something to the model too....every time I thought about doing it, something came up. I took the afternoon off yesterday.......I could get that passenger side decal on............but no. I get a call from the admiral, asking me if I could do a brake job on my son Kevin's girlfriend's car....failed inspection. kicking the dirt, thinking that this wasn't going to be a money maker, I said sure.......I'd love to after it was finished, I could relax a little.........doing all of life's little pleasantries, related towards settling in for my three day weekend. later in the evening, I decided that I would put the decal on. I put the driver's side on in the pantry, setting it up on a towel and the sink nearby, since this was a large decal. I had a dry blotter, a wet blotter, the dcal set, and the Q-tips laid out for the job. there was the same brittle condition...it took a while to get it the way I wanted it. there will be some minor touch ups. later........that's when curiosity killed the cat {so to speak}..........I checked on it and thought I could get the area around the wheel wells better. a little dab or two of decal set, I started to smooth and press it down.......and then the mid part of the decal shifted, creating some very ugly ripples! with trying to smooth and align it again, cracking and chipping occurred, and so now, I have even a bigger repair to do I can be my own worst enemy I'm not losing the decal for no one!
-
well now.........aren't you having a time for yourself! coming along quit well........yea, there are a couple that are a bit off, but they weren't drilled very well either. once they are all lanyard up....they should blend right in very nice work com'in down the pike!
-
that green {looks metallic} reminds me of the older MPC models....they used to mold them in metallic Green plastic. I think that is the same blue I have on the duster.....but I didn't mix it. I have like four bottles of light blue. I think I'll use it up on the Progress when I'm ready to paint her wicked nice paint jobs on the both of them.....are you working on the Vega too?