Jump to content

popeye the sailor

Members
  • Posts

    15,993
  • Joined

  • Last visited

Everything posted by popeye the sailor

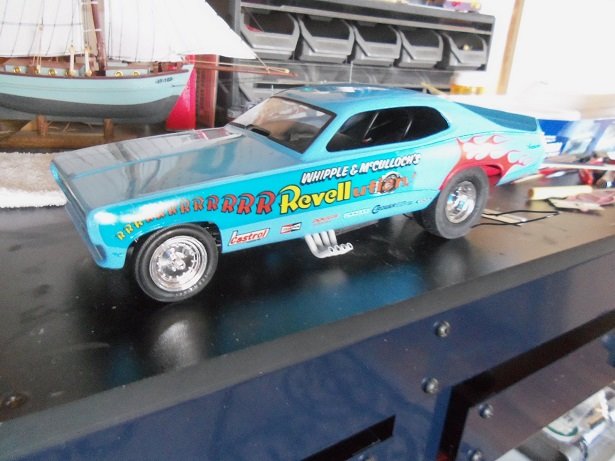
  1. I know J...........I finally got done with the work week. I should be able to put the finishing touches on her thanks Patrick.......far cry from what I did with the English Leather, I can tell ya that! I did a lot more painting on this car. I was also able to figure out things that my feeble mind couldn't back then. with luck, I should have it finished tomorrow
  2. did you check to see if the tires will match the wheel wells? the front suspension looks a bit long
  3. seems a shame to waste the clear parts though.......you could build the kit as two planes {if the kit supplies all the parts}. you could do the clear one, all closed up, with camo and paint, and for the grey plastic, you can have all the compartments removable ooooops! I forget.....that's what I would do! sorry....I get giddy 'round new kits.
  4. looks good J........good thinking to make those copies
  5. not really a race J........sorry to hear of the problems your having though. I'm just glad that this project sparked some interest. these are a very nice scale to work with, but are limited due to the lack of accessories out there to enhance it. thanks for the good word now that I see her in the flesh.......I'm not sure if I had the model I've built so many. I'll see if I can snag another one really like the picture and the link........I didn't know the Soapy Sales was a rail too!! Kewl! thanks Phil...appreciate ya look'in in I'm not quite done yet.......still a couple things to do. I did do a fit of the body on the chassis......the hoses off the fuel tank were holding the body up. I pushed it down lightly, and the body closed down the rest of the way. I left the body on for the time being......perhaps it will alter the hoses.....the natural bends that they seemed to have learned, all balled up in the bundle. one more update should finish her up.........and yes J........thre will be pictures!
  6. my brother had to pull the dash in a Ford Taurus........glad it was him and not me
  7. don't forget the popcorn sorry to see that
  8. well, just so you know that MSW allows you the ability to post pictures on the site. there are some sites that I joined and later left, because they don't allow it. I had a bad experience with one....... now I keep all my pictures on memory sticks.....much easier thanks for the link.......I also noticed that they have one for bi planes too. wouldn't be too hard to make other 'jaw' attachments to fit other types of hulls. sounds like my budget director is good with the idea of me ordering one.....but I see that it says that they are out of stock. I'll find out......thanks again yea......not sure if the Germans division-ed their ships like other navies
  9. looking really good Peter.........is that Obechi. I use the same wood.......I get mine from Billing USA. it's a rough wood.....but it does sand down smooth. that's a fine deal you'v got there......especially when the winch you show goes for around $24.00 on BB USA
  10. sounds like a fit change for me! ......where do I sign up?! the stairs are done...yes.........thanks for the kudos, but another problem has arisen. I did not realize that the tinted window material is two layers....that's why one of the windows popped off. I will likely just put it back on, but foe the rest of the windows, I think regular cello will be used. not only that, I didn't see the supplied window material for the helm, so I might have to do them in the clear cello too. the material had lines and stuff on it........would have looked cool.....oh well >shrug< thanks for look'in in........I should be resuming very shortly. I got carried away with the Progress ......and then with the funny car be back to hr soon
  11. hello Michael! thanks......I wasn't sure it would work....but I'm glad it did!!!! thanks again.........my other love. if the airbrush didn't mess up like it did, I think I might have gone a bit crazier with the paint. a bit of a hiatus from the boats.......better weather coming soon......I have more sanding to do. the admiral doesn't know this........but I'd love to get another one
  12. jeeze........your doing spectacular work on both fronts! great Job on the John Brown....the rigging really finishes hr off nicely.............and suprb camo on the tank. great job my friend......👍
  13. awesome build so far..........very nice presentation too! anyone who is building the model can down load this and use it to compare
  14. how will you decide which is the good side? both sides are look'in good.........and it won't be you pick'in the display I think for a model this size, serving rope really isn't needed. there are plenty of different size thread on the market, and that would suffice solving the thickness dilemma. if this was a larger model, then you may need to do the standing and shroud rigging, but not much else. you can do it if you feel you need to, but keep in mind that there are other options.
  15. she's coming along quit nicely Sjors............but what can you expect from your third......fourth ........or even fifth time around copper or black for me on the props. don't think they are like aircraft, and have yellow tips {I know.........just funn'in}. super nice job!
  16. I love your stand..........where did you get it?!?!?!?!? very nice work! the thing to remember about the color schemes.......these were at different points in her career. is this one of her just starting out? what flotilla was she in at the time? to pinpoint an exact scheme, this is some of the info that will help you make the decision. I like it too.......I think you made a good choice.........but I would find out when that was though. there is similar controversy with the Arizona........I think it's a combination of cheap azz paint and water reflection.....you there are folks more knowledgeable than I, going all Sherlock Holmes over it. the deck work is wonderful.....so glad you visited and gave an update. don't make a stranger of yourself....this is an awesome project
  17. spit shine..........remember J..........I'm old school you had a heater core...........ha!, I had a brake job. as mentioned, I took the afternoon off thinking I'd have a head start on the week end, and got saddled with that! guess that what we're here for........our way of still taking care of our kids I also remember the Orange Crate........don't think I've ever seen the other one {now I have to go and look it up}. I didn't think I was seeing things it looks like a cool little upgrade........for an unsuspecting model and the x-actor you have my envy good sir OK..........so, I promised to fill you in on the eventful day I had.....well............lets start with the fuel shut off line. it was supposed to be run through the fire wall, under the right side header, and locate on one of the pins for the fuel pump. now that the engine is cemented in place and has had plenty of time to dry.....there is no way I'm gonna be able to move it from where it is. it ended up under the right side firewall tab, that rests on top of the frame. this does lift the engine on that side a tiny bit, but I don't think it will interfere with anything....so I'll leave it at that. before I tackled hooking that line up to the fuel pump, I finished my painting on the master cylinder and fire extinguisher. hooking the hose up was a pain.......made me wish the wheels were cemented in place......it wanted to roll everywhere! the super glue had closed up, so I had to use a pin to open the nozzle. not wanting to crush the hose, I fought some more.....the hose shifting in the tweezers grrrr! before long, I had it hooked up finally....the chassis stayed still long enough for me to accomplish this. it wasn't until I tried to move the chassis, that I would find out why it didn't move. super glue had bled out of the tube and onto the desk..........the one of the slicks rolled onto it, and is now glued to my desk! it took some doing to pull the tire off the surface....I dismounted the tire during the process, making it easier. as the tire pulled away, it took two circular patches out of my desk........and the clean up started, removing these two patches of wood and paint. this was not easy and it was very damaging.........the tire now has these two nasty craters in the tread surface. I do have to say.........the admiral was sympathetic.........wondering if I can order another tire. in 1:16 scale...........doubtful I will sand it a bit and remount it........but in the back of my head, there has to be a remedy for it assembling the steering box assembly was another pain, having to spread the frame apart to fit it into the slots. the pin for the drag link was a continuing fight.....the little cap for the linkage came off and the assembly came apart. being glad that it did that, {modeler's honor of using glue sparingly} instead of breaking, was a welcomed sight, and was easily reassembled. there is some opposite pressure that kept the assembly from staying in place, so I had to hold it in place for about 20 mins or so {great.........another 20 mins out of my life, that I can't account for to St. Peter}. but in the end, the assembly is finished........I couldn't check it right away, but I did check to if the steering still works..........and it did while I was wrestling with the steering, I came up with an idea for the tire....use the same stuff that caused the problem in the first place. the old tube of super glue hit the circular file....I got out a fresh tube and filled the craters with it. it was sanded when dry........seeing a few pits, I added more and sanded them when they had dried. the flat black I'm using for this model is really 'dead pan'. what I mean by that, is it's a combination of other bottles I've used on other projects....cleaning out the bottles, I add a small amount of thinner and shake it, to get the major part of the pigments out. then I rinse out the rest of the paint and then I have a clean bottle for mixing other paints. the collected flat black is now thinned down to the point, that any sheen that would be present, is now gone. I'm sure some have noticed that well mixed flat paint will produce a faint sheen when applied....adding thinner will kill it. to make a long story short.........I painted this over the tire, and this is what I got....I did wipe some off too. it was a good save....I was very happy with the results the tire was remounted before anything else happens! .......and it didn't take long either. the cockpit side panels and floor was added to the chassis. there was some unreasonable fit issues, but I manged to get them in place. it finishes off with the rear top panel, and the darn thing wouldn't fit. it didn't want to line up with the seat, nor did it want to line up with the side panels. the only thing to do here, was to cut part of the center out, that surrounds the back seat deck. the plastic is so hard and brittle, that the ears that were being created by doing this, cracked and broke off. after gluing the pieces back together, the part was fitted and cemented into place. I may have to decant some of the flat black.......remember, I used a rattle can to paint them. it can be sen that I have some touch up work to do....this plastic was very unforgiving. it can also be seen that I've assembled the throttle linkage as well.........the rod for the pedal, and the rod for the butterfly actuator. so now, the master cylinder needs to be added and hooked up, and the rest of the hoses {mainly the oil filter hoses} need to be connected.....and then I think I can call this model finished 🏁 my next project will test my painting skills
  18. increasing the water temp will soften the decal. the newer the decal, the quicker the release. I use warm water for my decals. odd shaped decals are better if you don't cut around them........they won't hang off the edge of the sheet. if there is another decal on the piece, I work around it and put it on next......not much else that can be done {just don't let it dry}. hope it was nothing serious.
  19. I see I wasn't the only person who should have just watched TV good to hear that Slixx is gonna hook ya up with another set. surprising, sine the date on those decals was 2005. then again, the point where they go bad is anyone's guess really...it depends how they are stored. I'll tell ya about my day tomorrow........it'll be like swapping war stories
  20. oh.........BTW...there is an update. it's late and I gotta hit the rack! all I can say is.........if there was a day for stupid stuff to happen.......this was the day! tell ya about it tomorrow!
  21. I was browsing through old model kits today, and I saw that they had an accessory kit in the Revell section. it is a 283 small block engine i:25 scale, and it can either be done stock, fuel injected, or blown with a very unique supercharger feature.......it appears to be fastened to the timing cover {unless I looked at it wrong}. the only problem is that it's entirely done in chrome. I see some de-chroming in it's future, if I bought it I also could have sworn to have seen a customizing kit fir 1:16 scale cars.......supercharged! that would be cool to get an older kit.......say the Nomad, or chevy Bel air, and soup 'er up believe it or not.......after I put decals on, I usually blot the paper towel on my tongue, and wipe over the decals, to remove the excess decal glue......I just went over the body with it too told ya it was a spit shine
×
×
  • Create New...