-
Posts
16,007 -
Joined
-
Last visited
Content Type
Profiles
Forums
Gallery
Events
Everything posted by popeye the sailor
-
very nice .......lot of ventilation stacks. were you supposed to remove all those circles on the deck?
- 467 replies
-
- mikasa
- wave models
-
(and 1 more)
Tagged with:
-
hi all...thanks for the kind comments.......I impressed that this kit has struck up some fond memories for some of you. when you can remember some of the steps you took to build it, then you know you had fun building it. didn't have to be all gussied up and painted....but you built it, and you were proud of it the molds that produced this kit Yves are old......the flash and mold lines give it away {and the date stamp}. the new stamping under the deck, is how they mark them today........round 2 models does the same sort of stamping. I enjoy old kits........the nostalgia they bring to the project, makes them special. thanks for the kind comment I've never tried resin Sam...and PE is still new to me. I think I got the skinny of it now though.......and I have a lot of neat stuff to add, from the Hood PE you never did that with sprue......that is, unless you were trying to build the Sputnik thanks John........I had all that stuff gathered already.......it was about time I put it in a log I have two projects that I need to finish........then we'll see if I can make that silk purse. not sure what AMS is CDW.......but you remember the good 'ole days.... my brother and I would give them some ballast and send them out into the marsh in our back yard..........then shoot 'em with BB guns 😈 the plastic is strong within you Lou.........lash out!.........and finish your training! I may not get close to the real McCoy, but I think what I'll add to the model will look super!
-
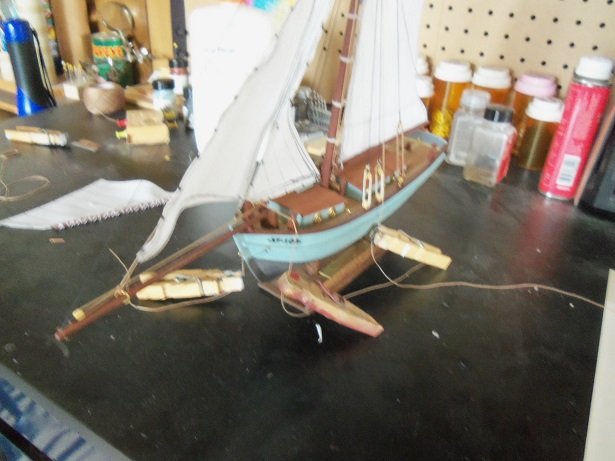
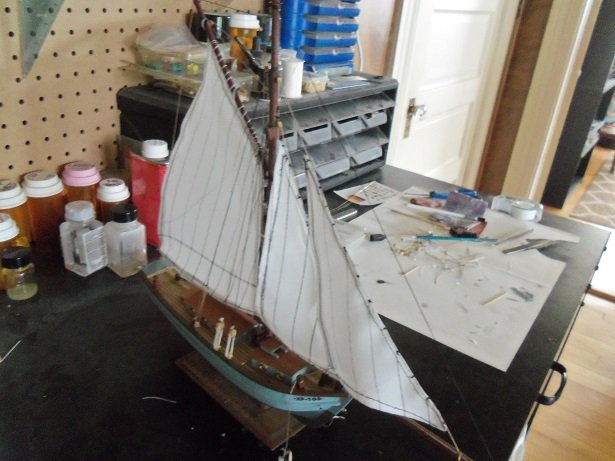
I also found some time to devote to this project. the revised block to raise the top sail higher was tied in place. I trimmed some of the tell tale lines and began to make rope coils for them. since I've added more to the rigging, I spent time figuring where to belay the new lines off, when the top sail is rigged in place. here are a couple pictures of where I am at the moment. there really isn't much left to finish her.
- 171 replies
-
- krabbenkutter
- authentic models
-
(and 1 more)
Tagged with:
-
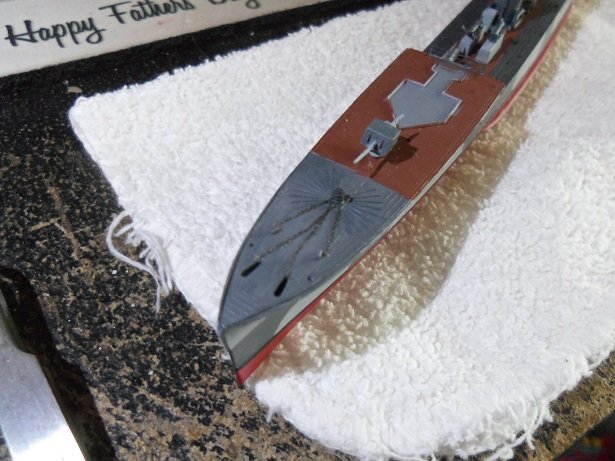
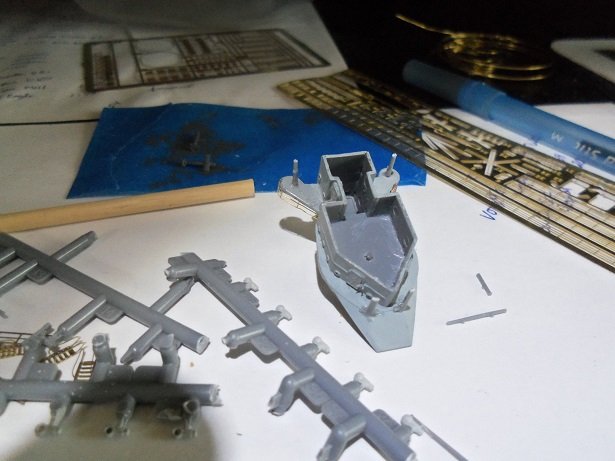
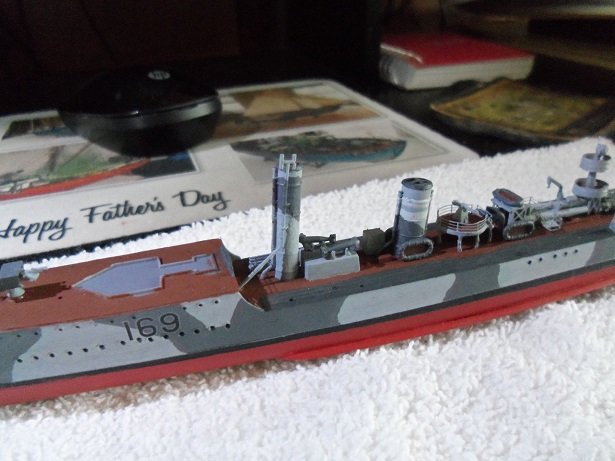
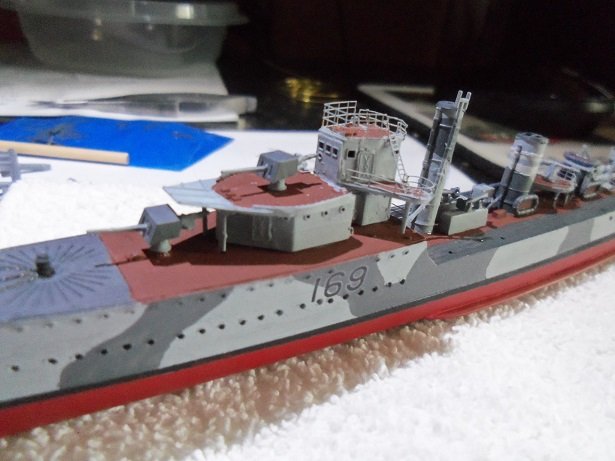
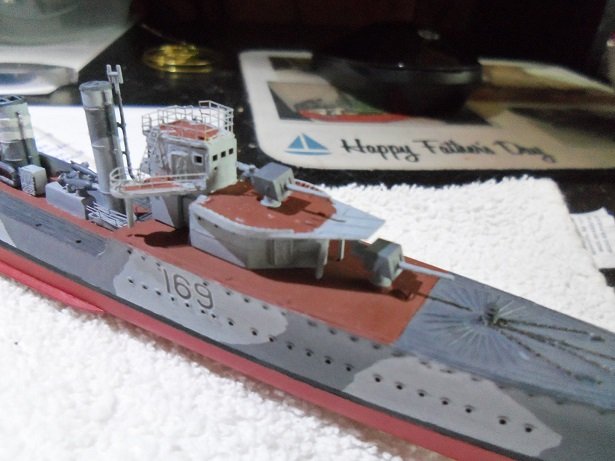
I meant to post this last evening...........sorry for being late with it. I did try to correct that backwards mast Carl..........broke while I was trying to refit it. I fixed it and will need to repaint it. as mentioned, I was play'in with the Vendetta all morning.........made some progress! the anchors have been painted, and I trimmed the screws........they had like three injection points from the sprue they are on. they will be painted soon. the fore deck gun has been glued in place, in preparation for the fore structure to be cemented in place, as soon as it is ready. I also painted the anchor chain.....which has been cemented in place as well. the paravanes have been added to the forward area.......I haven't cemented the funnel back in place yet......... I want to get the davits in place....them and the life boats are laying on the desk.....before they get lost! for the fore structure, the supports were added to it. the vents are visible here........I've painted them an off white {light gray}. I will either dab the throats with flat black or red......not sure which is better to use. here's where the funnel went back on.........I cleaned it up and it looks better. still need to put the depth markers on........I'll do that during the next session. more work on the fore structure........I painted the railings and touched up some of the glue marks. now I need to touch up the red areas and add more to it. I cut out the fore deck railings and trimmed the attachment tabs, but further than that the session stopped. we ran out for our Friday errands. I will try and get back to her during the work week.......I'm not promising....but I will try.
- 1,090 replies
-
- showcase models
- vendetta
-
(and 2 more)
Tagged with:
-
go into your profile....on the left there should be a signature page...don't forget to save you pre drilled 'em on the sheet..........I would have never thought to do that
- 105 replies
-
- thermopylae
- sergal
-
(and 2 more)
Tagged with:
-
no fret OC.........I brought the beans........we can have a 'blazing Saddles' moment! nice start Carl.......
-
if they are a molded part of the hull, they won't mention it. they could be rub rails. but looking at the ship and the hull........they look like they are there.
-
I'd save the sprues to make roll cages. I thought nothing in taking a car that I've gotten sick of, and bring 'er into the chop shop!
-
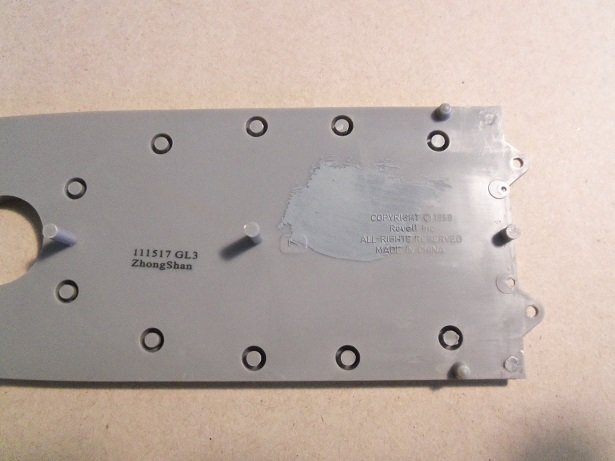
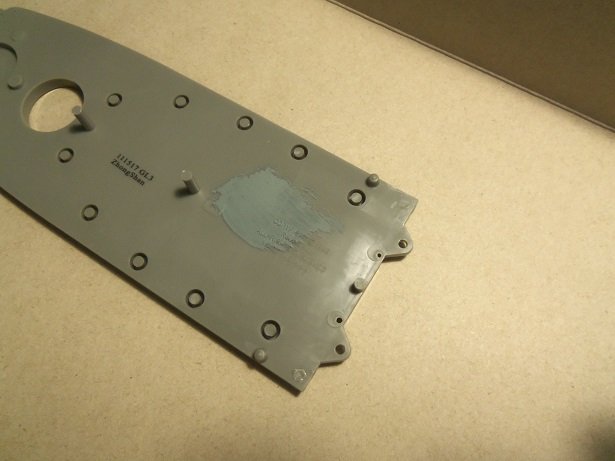
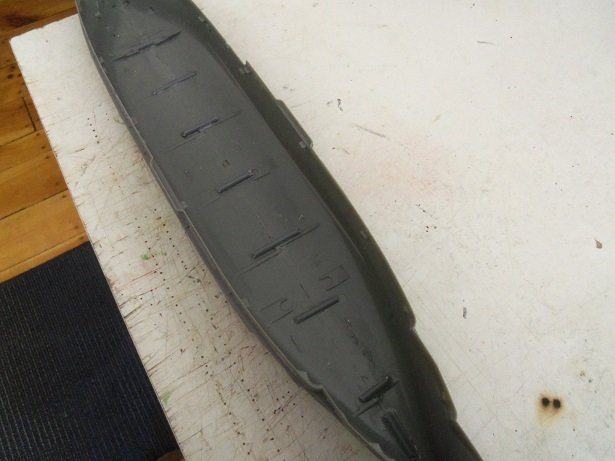
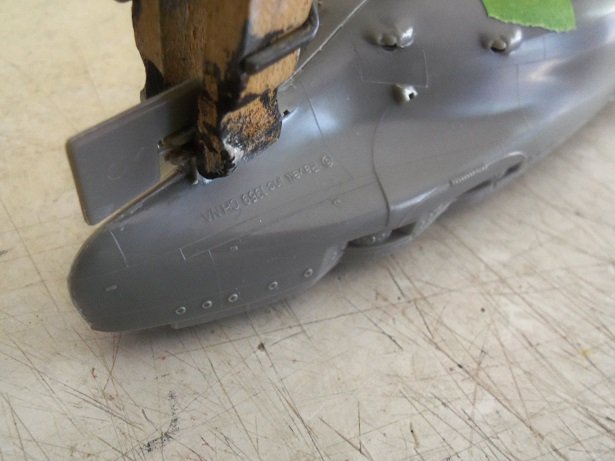
thanks all for the kind comments and the likes. been look'in in my stuff to find the chisel tips I used to use in my x-actors. ...had for quite some time, not sure what I did with them.....I'll find them thanks Lou and Elijah........if you noticed, they even put a logo and copyright under that section of deck I used as a paint test. funny........I saw that Chinese name there, and I had to go look to see if they were on Chuck's list. too many good legit kit to build, than to build their garbage but yea........Revell's had a history of doing that to some of their kits........on their 1:96 scale kits, they had the copyright and mold date on the topside of the deck {near the main mast I believe} been there, done that Sam.........I made the decks for the U.S.S. United states...........then I had to make 'em again 'cuz I waited to long and they warped. I did enough 2 mm planking, I think. I think lots of folks built this one at one time or another. Revell was very popular back in the 50's, 60's and 70's. I browse through oldmodelkits.com every once in a while, and it's like a nostalgia trip..........especially the cars and planes it would be 1 mm perhaps........and then it really would be a task and a half. I started the same way Chris............paint was lacking in the beginning. modelers were closed in........no internet to widen the scope. your best friend was the guy behind the counter at the local hobby shop........I had one. you considered yourself blessed if there was a modeler's club in your area. noe that the sky's the limit, we wonder how we got along
-
interesting history............I looked it up sounds like a really cool project.........I'm in
-
congratz Carl.........she looks fantastic! from the grunge.....to the rigging, she quite a life like model. where to next ?
- 292 replies
-
- g class destroyer
- trumpeter
-
(and 4 more)
Tagged with:
-
amazing work Greg.......she's look'in really sweet! 2 months to build her.........with all you've done.........and folks though I was a fast builder some superb work there........she looks great!
- 405 replies
-
- tamiya
- king george v
-
(and 2 more)
Tagged with:
-
hello Ken......welcome....glad to have you look'in the main decks {wood areas} are to be a teak color. a lot of the models I've seen leaned more toward a yellowish tan. I will like go a bit darker than that. the wood decks {scale decks, etc} are on the yellowish side as well......not too many chose to darken them at all. I didn't paint her up too much as I recall......painted things here and there and called it good. I consider this a second chance for me.....Don't think I can do no worse it'll be fun.........trust me now I wonder..........how many different brands of Arizona kits were out there when we were kids? not many I'll bet
-
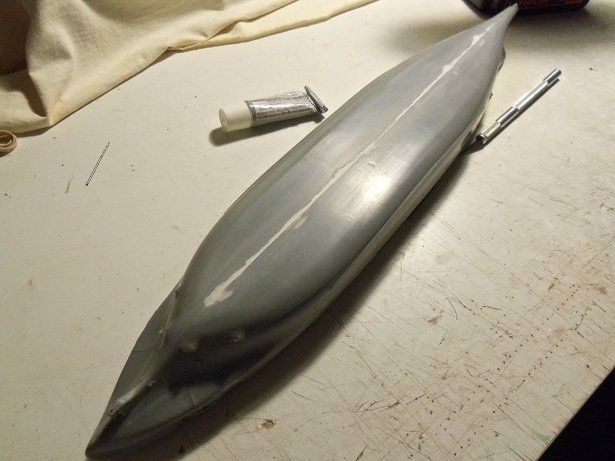
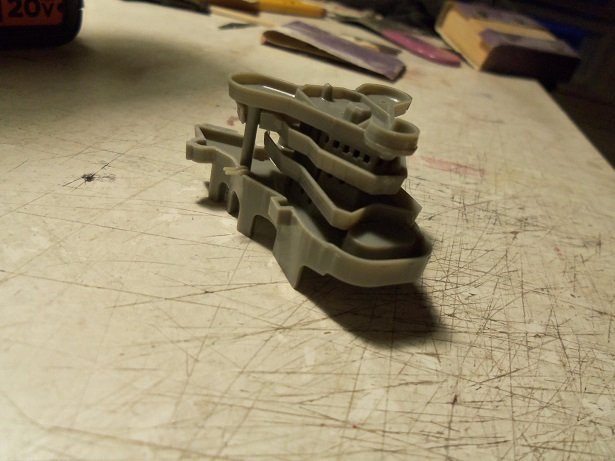
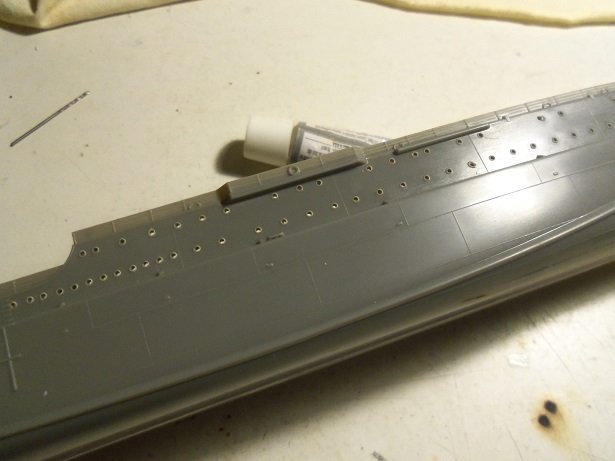
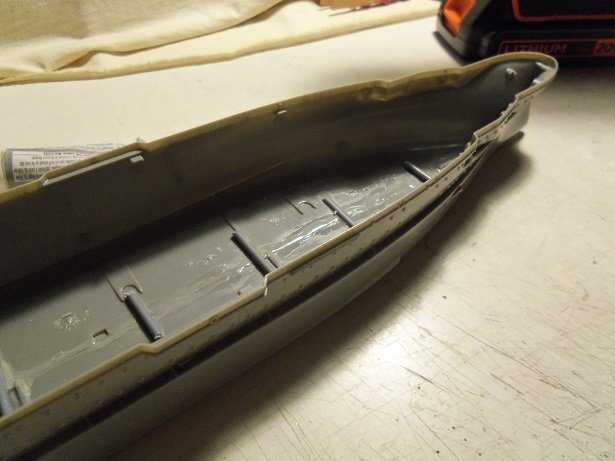
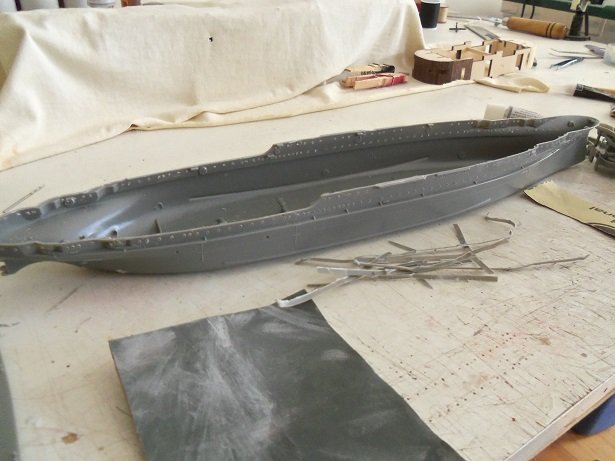
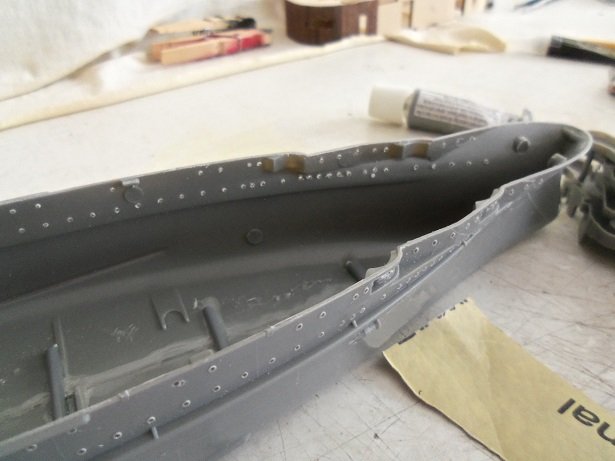
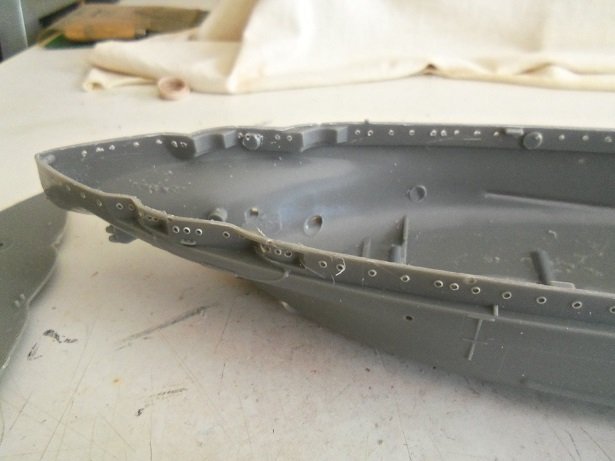
hello bglithero........should be interesting {I hope} your welcome to follow along. I'm glad they will work OC, 'cuz when I ordered the PE, I wasn't thinking about the railings.......all I got was the catapults and the cranes, along with a few other bits. I have a few pictures in the camera still, of what I did yesterday afternoon........after I mowed my jungle. to close off last week, I puttied and sanded the hull bottom, and did some trimming. in the hoop-la, the rudder popped off, but didn't break the gungeons {luck smiled on me}. so much for trapping it in it's place I'll wait till I do the screw shafts, to put it back on {why tempt fate}. I think I need a new tube of putty......every time I go to use it, I have to clear the nozzle {it's old stuff anyway}. then I cleaned most of the flash from the structure parts..........here you can see what I mean about the assembly issue. next, was the cheerful task of drilling out all the port holes. the ones on the recesses gave me issues.......I have an idea of how to resolve it. I still have the other side to do. there.......the rest of the pictures are here. my tinkering the other day was to drill out the other side portholes. once that was done........curiosity took over. I picked a small section, and commenced to chopping off the railings. going along the hull edge, I lightly scored along the railings, doing this a couple of times. when I felt I had gone deep enough, I bent them and broke them off. a couple of times, the knife went off line and onto the hull..........oooooopps! I rubbed the scratch with my finger nail, and it seemed to disappear {I hope!}. we'll see how it looks when it gets paint. you might be able to see what I mean about the recesses....they are a mess I think I'll try to cover them over with a plate of brass and redrill them........with not so many portholes perhaps. round injection mold marks can be seen........I had to cut them off because they interfere with the deck. with that done.............for the reason why I started the log 👉 the stern deck got cemented in place there's a couple small gaps on the starboard side.........but there it is...my big major development. I'd cement in place the fore deck section, but there are a couple of raised doors on the bulkhead, and I want to remove them, installing the PE doors before I do. might as well start right in with the PE so here it is.........where I'm at at the moment. it will likely be a little slow for now.......I have a couple of models to clear up first. it will give me a bit more time to experiment......and if I come up with something......no matter how small.......I will be sure to post it thanks for look'in in and the positive comments.
-
thanks OC........it's no longer there.........what a stupid place! thanks John.......it won't be exact........but I think I can feel safe in saying that this will be probably one of the few Revell projects out there. all I've been seeing is Trumpeter, Banner, Hobby Boss, among other 1:350 kit builds. ModelWarships has an extensive list of finished models. earlier this evening, I found another picture of her with the 5 inch guns closed in.........so I feel better about them look'in the way they do. I'm probably wrong about being one of the few......but I'll be the first here.......and that's pretty cool. anyway........at this point, I was look'in into the blue paint issue. I have some doubts about this, as I really don't view this color being the latest camo color. painting the turret tops 'bullseye' colors probably wasn't the best idea either. a short time after Pearl Harbor, they did away with that form of identification, and adopted a more subtle approach. I read somewhere, that at one point, the Navy got paint that didn't hold up..... fading, cracking and peeling was the result. fading and water reflection may have been a factor in the blue hue. there was talk about Mediterranean blue.......sea blue, and I compared it to Model Master Med Blue gray.......or light blue gray. for an experiment, I mixed Model Master Gunship Gray, with Billing's Matt Aircraft Blue.....and came up with this I can't really use this paint anyway.........the Billing's paint doesn't spray too well in my air brush. I've decided though, that I'll mix up a fresh batch using better paint, going a bit grayer in color.......but not too dark. with all the variations I've seen........is there really a wrong color? the tops will be done in Ghost gray........I've got plenty of that
-
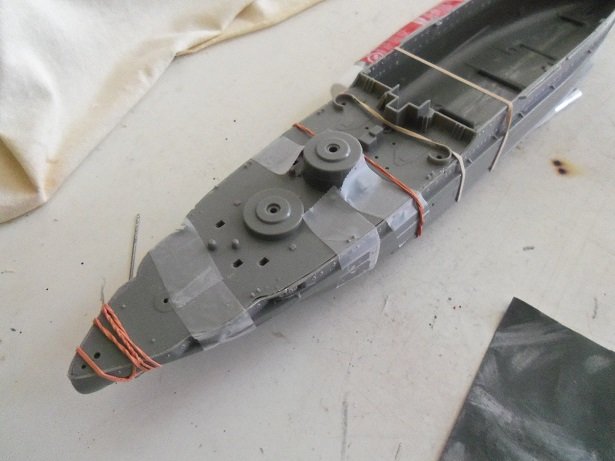
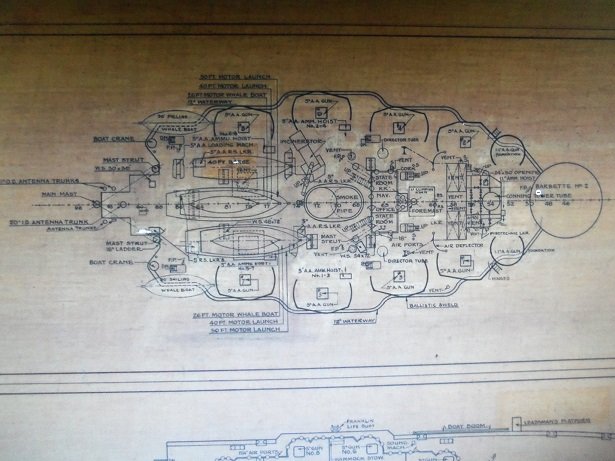
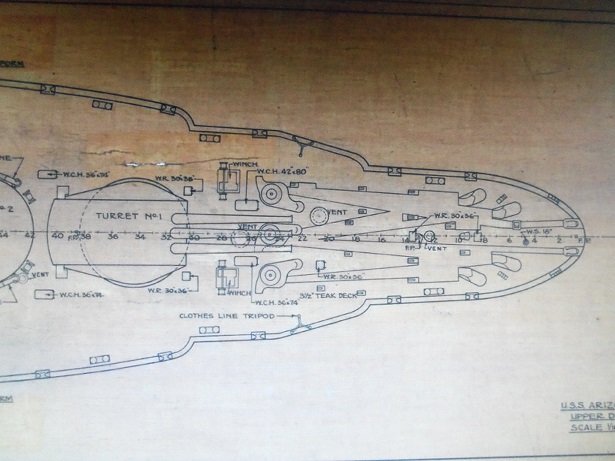
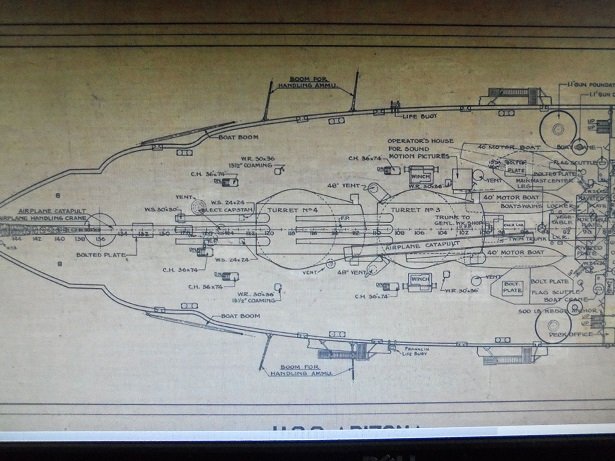
the decks were soon dry fitted in place. I see I'm gonna need to clamp the hull togther. the railings are about 4 mm high..... comparing a piece of 1:350 railing......I'm not too far off http://www.researcheratlarge.com/Ships/BB39/BOGP/ here I found some early plans on the Arizona. not that I plan to detail below deck, but they give me insight where doors and hatches are located. the two smaller AA guns were eliminated very late in her lifetime....likely removed at Puget Sound, her last major refit. the small structure I spoke of earlier is nestled between the two structures that support the third level decking.........just a simple square. the bow.... ....and the stern. I have hatches to cover the stairwells in the main deck. not sure about the booms.........I will have to look.
-
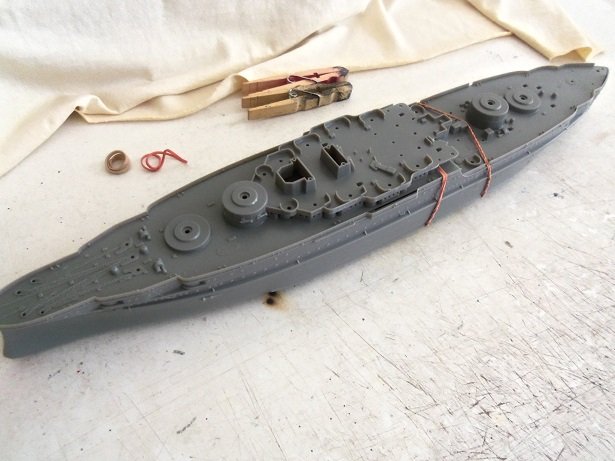
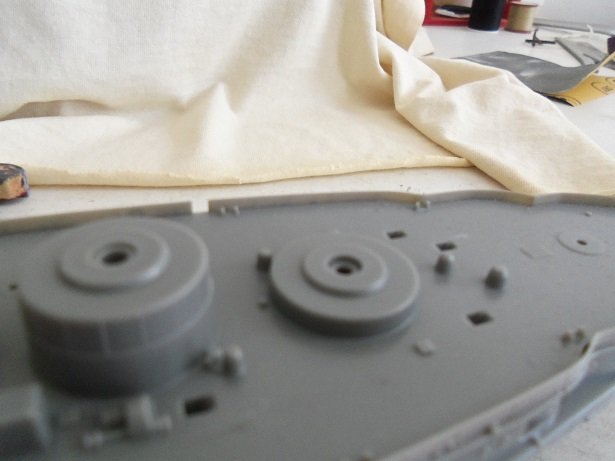
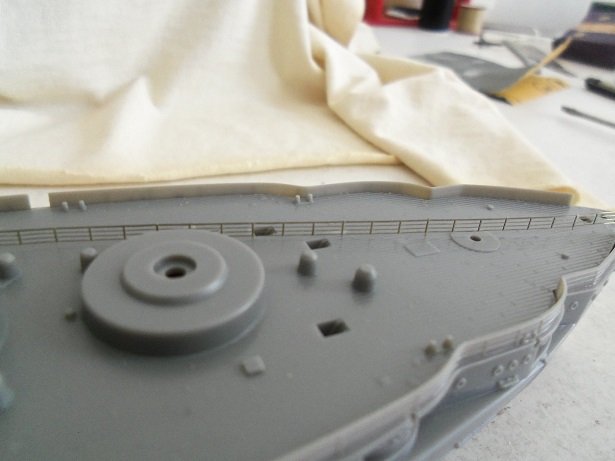
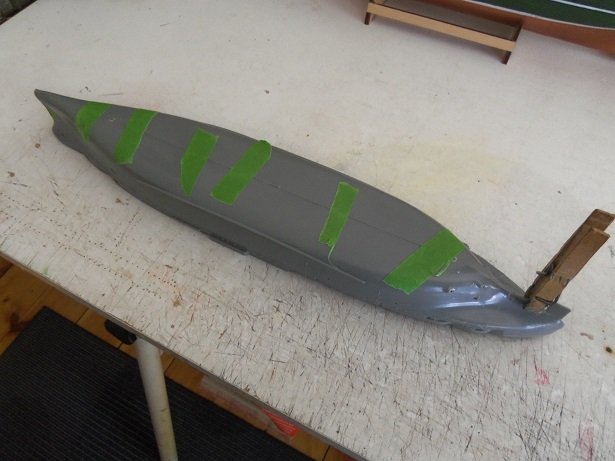
the armor isn't that thick really...........some areas I'm going to be removing anyway. I have a couple tutorials that I'm going to follow.......one of them is the Trumpeter kit, and it shows the PE very well. that will be a huge help for the hull, I'm not going to do too much.......I did some of it recently. that's what sparked me to start the log. anywaay.........what else. I've been pick'in at it for the last couple of weeks.......as mentioned, seeing what I can alter or add. I've done some edge trimming........I'm sure everyone has trimmed the slight flash lip along these edges, to sharpen them up. I wanted to see how tall the railings were from the deck. I was in the process of finding add ons for her. a suggestion led me to Tom's Modelworks. the hull was cemented together. or course, I trapped the rudder in it's place, so it would be movable. either I get a rudder that flaps around freely and loose........or I get one that sticks.........I had to get the latter. I had to clear around it so it would move better. then of course, the hull was warped........I cemented the bow and stern to line it up, and then glued the center as I taped it together. I still ended up with a bit of a gap. inside the hull, I took pieces of sprue and bridged the halves together. your gonna love where they etched the logo..........
-
I'm in........this should be awesome to watch he's starting off with a cliff hanger Mark
- 29 replies
-
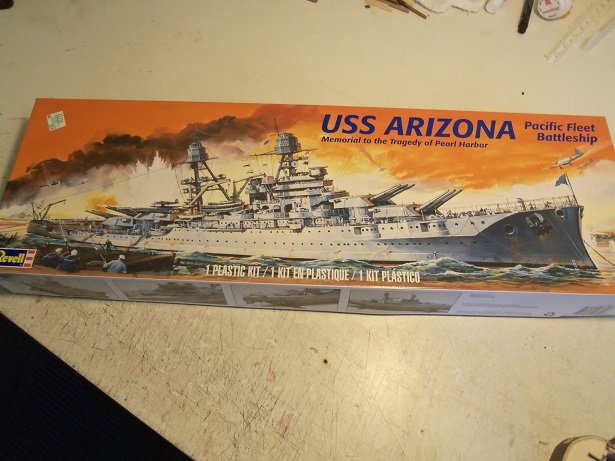
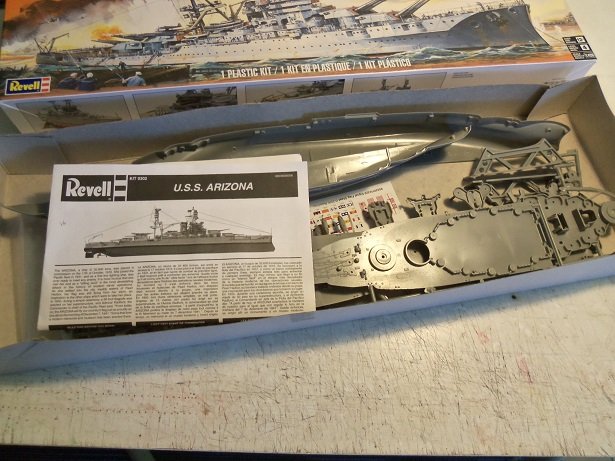
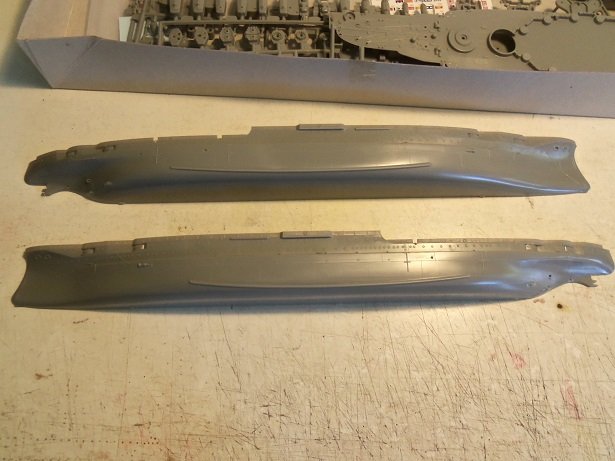
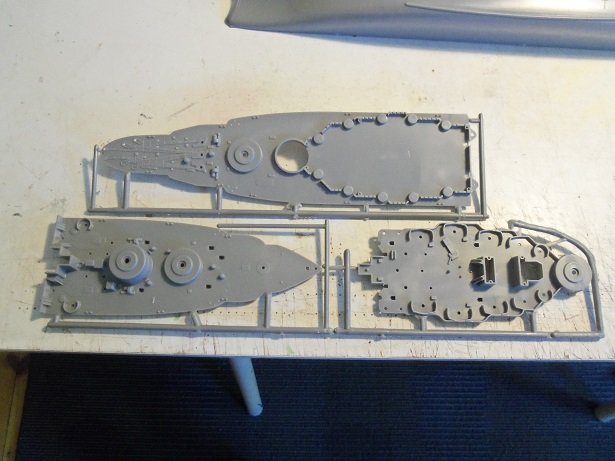
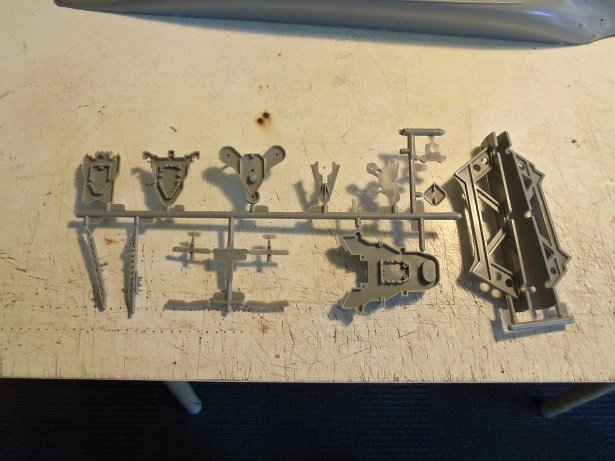
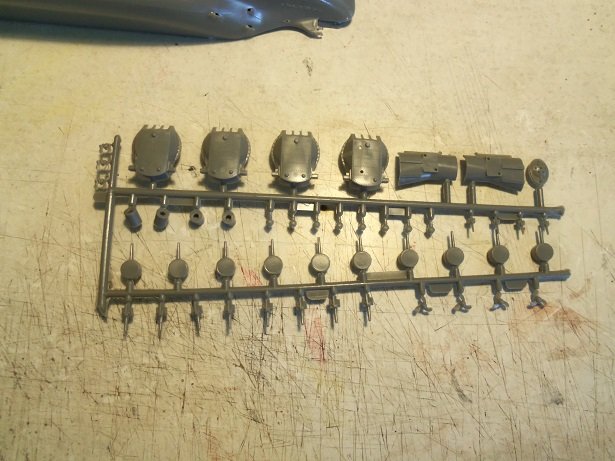
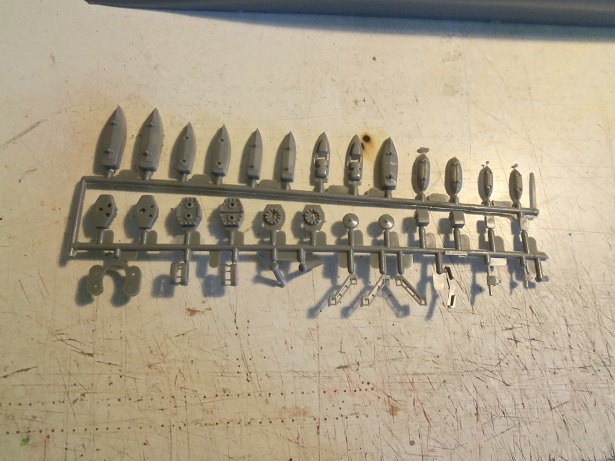
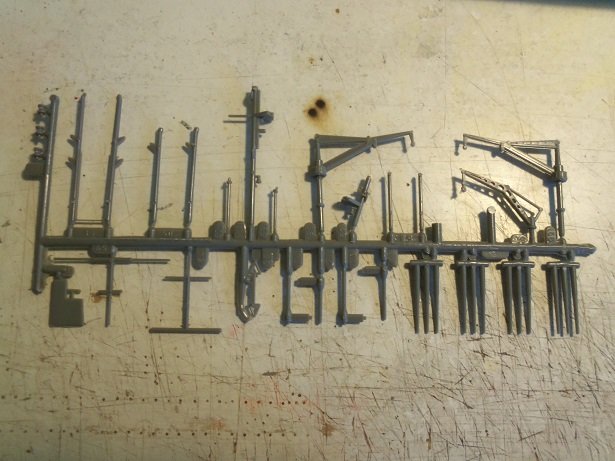
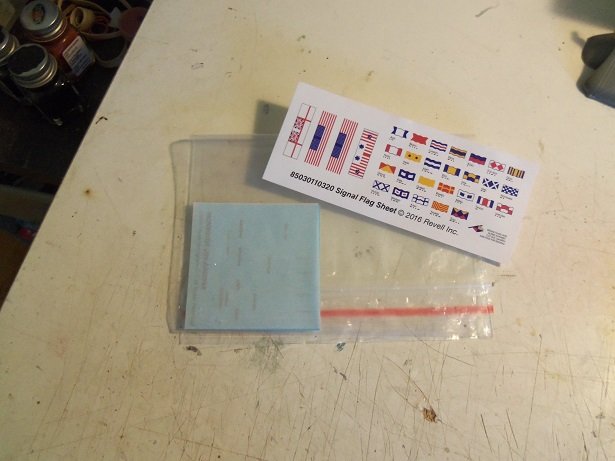
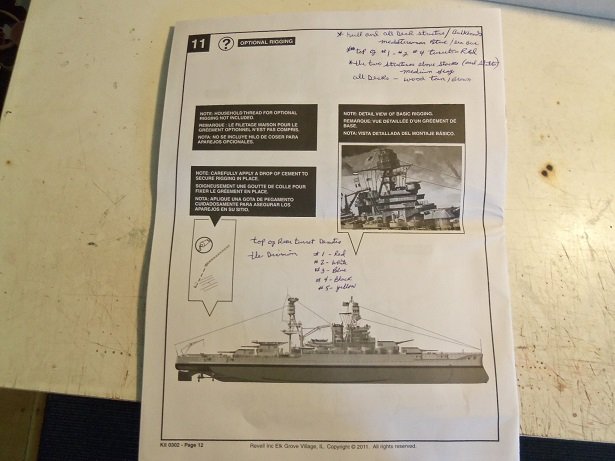
thanks OC and those who hit the like button welcome.........your hopefully going to enjoy what I'm gonna do to this kit icky mae..... I just went through some technical difficulties........I just got back on. dunno what happened?!?!?!?! we start off with the usual kit contents........this won't take very long as mentioned, the kit was produced in 1959........the molds haven't seen any tooling, since there is a good amount of flash. the edges and corners are not that crisp either, so some attention will be paid to that. when I bought the kit, I thought that the kit may have been retooled....I was wrong. the box art remained the same throughout it entire release.......here is the box art fresh out off the starting line. they put out another scale as well.....1:720, back in 1969. a second box update occurred in 2009..........here is the latest one that stole my heart 💘 not too much of a change.......no blueprint seal of approval and they moved the logo. still inaccurate stuff here......they show a single fixed wing plane, but in the box, they supply biplanes. likely the art.......nothing more. opening the box.......we see good 'ole gray the hull halves have the molded railings.........they will be coming off. drill out the port holes........maybe the hawse holes for the paravanes as well. the model measures 17 inches long, so it's a fairly decent size model. next are the main deck parts. paravanes are molded to the #2 barbette top, located on the second level deck. wish I could do something about them. I could try and replace them with some from a 1:350 scale kit, but I think they would be too big scale wise. I might not be able to get them off intact. the ten 5" guns that are encased in the superstructure are somewhat inaccurate......not much I can do about it, so they will have to be as they are. in quite a few pictures I've seen, these openings are supposed to look like a pill box, with the gun sticking out of them. I believe Trumpeter molded them in this fashion. ...then the superstructure parts........again......molded railings. I've seen other kits with PE railings, and I like how they look. I need to remove flash and pin marks as well. there is one small structure that is not present on the second level deck {pictures above}.......it locates between the two standing structures on the deck......I will try to add it. I haven't looked to see how visible it is.....I'll get into that later. the sea planes are here too....... on the box, it states that they are Vought O2U biplanes. I haven't read anything to clarify this........unless they are referring to the SO3C Seamew, but they were short lived because they were too slow. the first plane to leave her deck, was a Nieuport 28C fighter, back in 1920........she only had one catapult back then........the second catapult added at Norfork, 1933. this varies because the catapult atop turret #3 had never been fully installed. then, the armament sprue............the single stack in here as well. the ship's boats and fighting tops {slices} are on the next sprue. this is another example of the assembly issue.........when they are put together, you may see what I mean {if I don't figure out something first oh dear........much more to cover........and the admiral wants supper. grill time for me well.....not much more to show, except a decal sheet that I will need to add decals for the planes {they are lacking}.....and of course, the instructions. here are the cranes and mast parts....as well as the big guns. the catapults were on the first sprue, I think. I have PE for them......the cranes, and some other detail. what I see she needs, I will add from the Hood PE. should be a hoot! no insignias - early American Navy. I've also been taking notes....... OK......well supper time beckons. there is more.........I will be back in a jiffy
-
I've been milling over this model long enough........now I went and done it! assembly has begun. actually, it started a couple of weeks ago, but I was try to get an idea of what I could do, in dressing her up. I bought the kit a month or so ago............I remember building this kit in my younger days. I thought it had a wonky way of assembly back then....and I still think so today research on this model has been tough.......this particular model ranks lower than the Trumpeter 1:200 kit {and even that is subject to debate}......there are some 1:350 scale kits out there that rank even higher. info on this kit lacks as well..........after market just scratches the surface with gun barrels and bare bone PE. I call it that because there are some aspects that are not included in the PE kit. at first, I was all set to do a poor review on this kit........but now that I've had a chance to delve into it, there is a silver lining. for another model that I'm building, I purchased the PE set for the HMS Hood, and some of it can be used on this kit {even though it's a 1:350 set}. I ordered the PE set for the catapults and cranes.......but I didn't take into consideration that there were no railings in the kit {the price should have given it away}. after some measuring and comparison.......I can use the hood set for them as well. the two glaring downsides to this model, lies in how it assembles, and how few parts there are in this kit. this kit has only 133 parts, compared to the Trumpeter kit, which has over 1,048 parts. this doesn't even include the PE or add ons you may want to include. don't bother looking for a wooden deck for the Revell kit, because there isn't one. I can't fathom that.........a kit that's been around since 1959, and no one has developed a wooden deck for it! a lot of detail is molded....the railings, various deck fittings, and anchor chain, are just to name a few. but, with a little imagination, these issues can be modified and corrected. how the superstructures are assembled is another stumbling block........the mating joints run through the portholes, meaning part of the structure walls, are on both parts of the deck levels. this will make it harder to add doors and porthole enhancements. it has been a long time since I've done modifications to a plastic kit......but we'll give it a go. there are no logs here on MSW.......and there are scant logs anywhere else. it's my pleasure to be the first it sounds like i'm being hard on this kit........but don't let it throw ya. I enjoy an old kit 🔨⛏️⚒️
-
I did a search using Google....lots of good pictures looking at images. I'll look further
- 467 replies
-
- mikasa
- wave models
-
(and 1 more)
Tagged with:
-
the little ones are for the bollards......the larger ones are for the boarding ladder, which I probably won't use on my model. your on the right track. I wish they had them on the metal etch.......be careful, they break easily. very hard to drill them out too......not much meat there.
- 105 replies
-
- thermopylae
- sergal
-
(and 2 more)
Tagged with:
About us
Modelshipworld - Advancing Ship Modeling through Research
SSL Secured
Your security is important for us so this Website is SSL-Secured
NRG Mailing Address
Nautical Research Guild
237 South Lincoln Street
Westmont IL, 60559-1917
Model Ship World ® and the MSW logo are Registered Trademarks, and belong to the Nautical Research Guild (United States Patent and Trademark Office: No. 6,929,264 & No. 6,929,274, registered Dec. 20, 2022)
Helpful Links
About the NRG
If you enjoy building ship models that are historically accurate as well as beautiful, then The Nautical Research Guild (NRG) is just right for you.
The Guild is a non-profit educational organization whose mission is to “Advance Ship Modeling Through Research”. We provide support to our members in their efforts to raise the quality of their model ships.
The Nautical Research Guild has published our world-renowned quarterly magazine, The Nautical Research Journal, since 1955. The pages of the Journal are full of articles by accomplished ship modelers who show you how they create those exquisite details on their models, and by maritime historians who show you the correct details to build. The Journal is available in both print and digital editions. Go to the NRG web site (www.thenrg.org) to download a complimentary digital copy of the Journal. The NRG also publishes plan sets, books and compilations of back issues of the Journal and the former Ships in Scale and Model Ship Builder magazines.


