


popeye the sailor
-
Posts
16,007 -
Joined
-
Last visited
Content Type
Profiles
Forums
Gallery
Events
Everything posted by popeye the sailor
-
 sounds like an interesting idea. instead of a picture, try looking through magazines or surf the net for images to download. don't create a partition, it might ruin the depth of the room. you could even try and scratch build a table and furnishings. use your imagination on the rest.......wire makes good conduit piping
 -
this is where I left off looks really good!
-
she's a really sweet looking model............nicely done
- 89 replies
-
- 4
-

-
- independence lcs-2
- trumpeter
- (and 2 more)
-
yea........they are vulnerable little critters, aren't they?!?!?! it's just my tendency to work from the bottom up.....it's a wonder I don't put the props on already! who knows........the admiral didn't flip when I mentioned getting another Arizona kit.....so that might be in the making. then I can start over and not have such a messed up deck line we'll see what happens........ thanks for the kind comment......it's nice to see your following along.
-
I finally get over here in the scratch build forum..........I just had to see how you were progressing. I see you have made some really good progress on her.....she's looking great in her updated paint........and you've done quite a bit to the interior! very nice inside I really like how the wood grain peeks out from the black. I know how you feel about time........I haven't had much myself either. it's a good thing the hobby is forgiving in that respect. as long as your making progress, then the journey still continues keep up the stellar work!
-
catching up my friend..........I see your moving along at a fairly good pace. nice job on the figures.......and the beginnings of your brass work looks awesome! really nice to see
- 193 replies
-
- 3
-
-
- wilhelmina vii
- fishing
- (and 1 more)
-
finally I get to check on your progress here............and I find your nearing the end! a huge congratz to you........you've done such a masterful job on her.......looks absolutely gorgeous! must be rewarding to finally get to making the crate for her return so happy for you!
- 749 replies
-
- 5
-
-
- albertic
- ocean liner
- (and 2 more)
-
ROFL!!!!!!!! now, why didn't I think of that! I had to read this to the admiral.......she enjoyed the comment too! this was a project that went horribly fantastic.........I wish I could come up with another one thank you for the very kind comment. if you thought this one was cool......just wait till I start seeing things in my oatmeal
-
so sorry to hear of your ongoing health problems John........been hard for me to get over to the scratch forum, with all the logs I look at. I wish you well......thinking of you w/fingers crossed that you recover well and quickly! best wishes to Pam as well. the frame is coming along splendidly........can't wait to see the rest of it
-
checking in Pat on your progress.........amazing!
- 1,018 replies
-
- 3
-
-
- gun dispatch vessel
- victoria
- (and 2 more)
-
catching up on your progress Michael...........the parts you create always amazes me. such wonderful work!
-
Cutty Sark by NenadM
popeye the sailor replied to NenadM's topic in - Build logs for subjects built 1851 - 1900
looks great Nenad.....so glad to see your back at the table again!- 4,152 replies
-
- 3
-
-
- cutty sark
- tehnodidakta
- (and 1 more)
-
I use enamels, so I wouldn't encounter that problem, unless I added too much thinner. I'm not sure if acrylics are like this, but metallic enamels are very slow drying.........even after 12 hours, the threat of finger prints is quite high. I've taken to give it a coat of flat lacquer, to counter the shine and give it a hard finish. it's been a few years now, but I did this to another 1:96 kit...the U.S.S. United States, and it came out really nice. I even went further and made wooden decks for her. she sits in the closet still. about a year ago, I bought the U.S.S. Constitution.....private sale....for $15.00....I have plans for these two, since the Connie has the stern quarters parts, while the United States does not. both of these are second builds for me there is a gentleman here that has done great things with the 1:96 Cutty kit, building at least five different clipper ships from the kit hulls......how he came by all these kits is still a mystery.......he probably told me, but I forget. here is the link to one of his projects: enjoy
- 82 replies
-
- 2
-
-
- revell
- cutty sark
- (and 3 more)
-
all very interesting Carl...........I bought a couple of butterflies from this company..........they were very hard to make. I ruined the first one.......the second one is buried on my desk here ..........somewhere. I showed it to the admiral......when I showed her how long 12 mm was, she balked at it! I can just imagine what it would take to build it
- 1,090 replies
-
- 5
-
-
- showcase models
- vendetta
- (and 2 more)
-
nawwwww.....just throw it out there! if it sticks, your good! sometimes I show stuff that's taken me over a day to do.......I do try and limit redos........for fear that someone will like it, and I go and change it {not often I do them anyway}. lead on Mc Duff............Lou is keeping score
-
if this keeps up.........there will be more PE than the model. is there a model in PE sold anywhere? do you have all these add ons yet?........can you start with what you have?
- 1,090 replies
-
- 6
-
-
- showcase models
- vendetta
- (and 2 more)
-
thanks OC..........with the exception of a couple of builds, I've not had too much of a problem with the rudder. wouldn't you know it........I practically rip this one off! I think once the hull is painted and I can make the stand for it, I can better safeguard breaking it again I will let the dimple repairs set for a time, then I can cement on the circles and drill the holes. should look alright then........can't use too many though, need to make sure I have enough for the railings thanks also for the likes
-
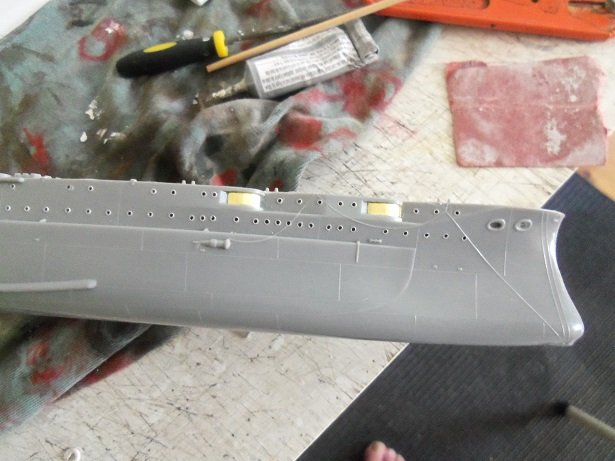
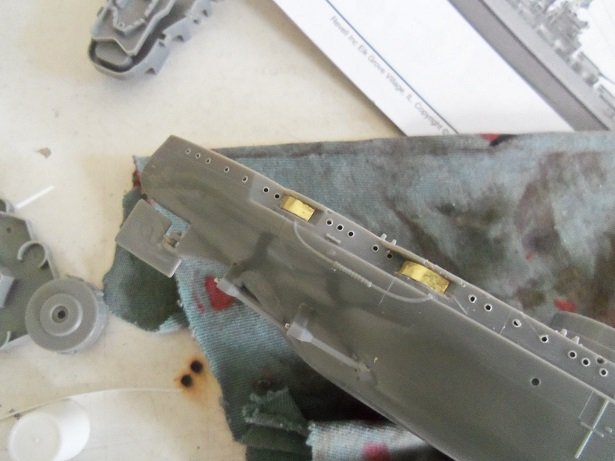
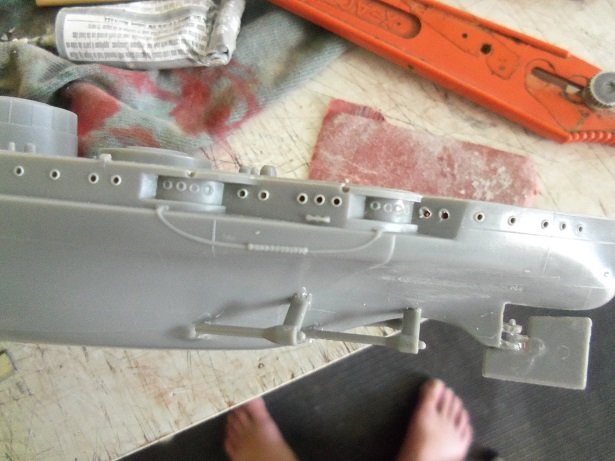
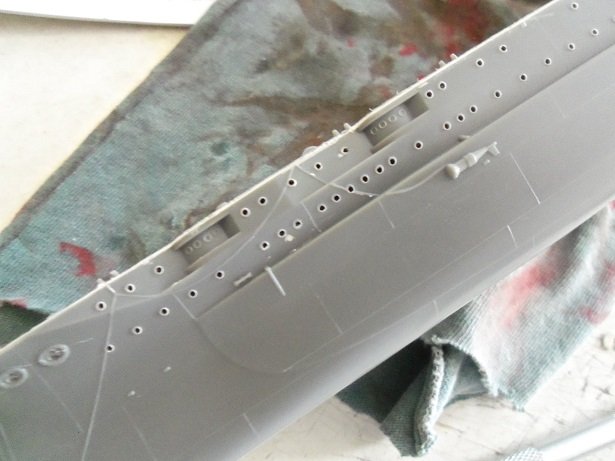
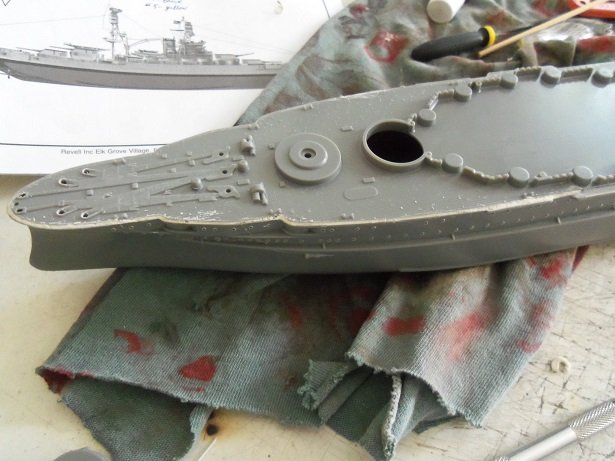
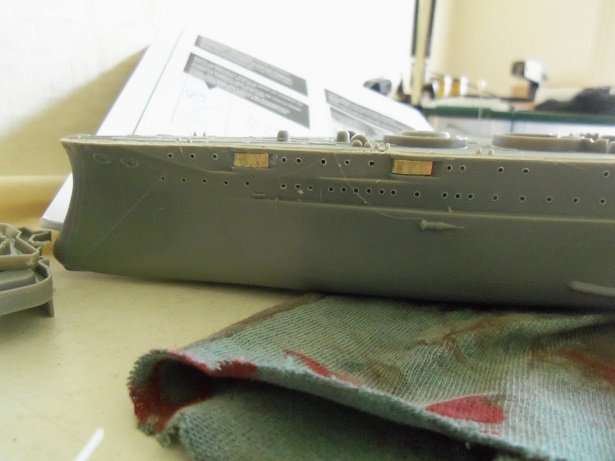
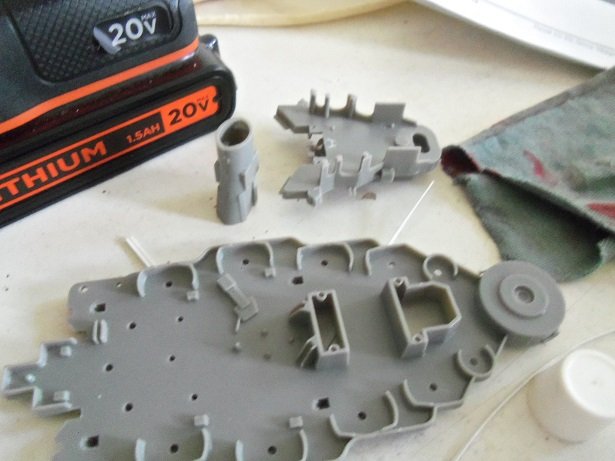
OK...........I broke away for a short time to cover over the port side dimples. I started to tinker with it this morning, thinking up a good way to fill in the deck / hull defect I created. I have some 1/16 angle stock {plastruct} that would work well, but not as intended. I laid it on the table and flattened it with a dowel....later separating it with my fingernail. the test fitting didn't go as I would have liked.......it just didn't look right........so I scrapped the idea and went with the aging putty I have on hand. I then started to fill in the dimples. cutting some thin brass into what looks like 4 mm, I began shaping and trimming...fitting them into place. I cemented them in with CA. I did the starboard side first......I had drilled these holes. the problem with them was that the portholes were molded around the curvature, and I tried to drill them that way. they looked hideous......I was off on a few as well. now.......I could leave them this way, or I could try an idea I have. the Hood PE has life rings........I could cement on.......lets say three per dimple, and drill out the portholes again. they would have the characteristic porthole ring, and there will be portholes.....painted over, they will hopefully look like part of the hull....no more defect. here is how they originally looked....before drilling. the fore end of the port side was the worse area for the deck. it is a little rough........really hate to try sanding it and lose some of the deck detail. I tried not to get too much on the deck..........I'm not that pleased with it. I'm hoping paint will hide most of it. I might also try the CA idea....it can't hurt getting back to it..........and finding out I broke the rudder, I fixed that and set to work on the port side. first was to remove the raised portholes....cut another strip.......and fit them in place. in addition to the reasoning behind not dealing with model Monkey, is the face that they are molded very different than the kit parts. I would have to cut away the structures that the fore structure sits on......... those two structures would need to be cut away...they are part of that upper level structure. there is a small structure that is not shown, nestled between these two.....I dunno, you can hardly see it. I don't know why some folks are making such a fuss about it....I'll look at it again, and if I don't see the need, I won't add it in. in the Arizona's latest refit.......the guns in the first pair of casements were eliminated. also, there are a pair of gun tubs aft of the mid ship bulkhead...deck level that shouldn't be there.........they weren't installed until 1941. even then, they were not fully installed when the ship was attacked. they were supposed to house 11 inch quadruple anti-aircraft guns. we will never know if they would have helped

-
I guess I don't have to ask for pictures from the earlier build.......never liked P.B. tried 'em and ended up putting all my pictures on memory sticks.....I know where all my pictures are very interesting porthole reno. well........if your gonna go off the deep end, you'll need some witnesses........I'll watch you go down the rabbit hole
-
wow.......looks like they cheaped out on the thread I've built two.......both of them, the older kits. I forget what happened to the first one, but the second one is still in the spare room, waiting to be finished. not sure if the log for her is still here, but if your interested, I can give you the links to my Word Press site. I've built several of these Revell 1:96 scale ships....love 'em. I was never a fan of the three section decks....here's how I modified the anchor chain and the windlass: https://cuttysarkdrydock.wordpress.com/2011/09/23/the-cutty-sark-windlass-revamp/ the one thing that I envy you over........is that your decal sheet is likely pristine! long story on that one
- 82 replies
-
- 1
-
-
- revell
- cutty sark
- (and 3 more)
-
it wasn't the price........the funnel kit looked nice.........most of the stuff wasn't over $20.00. it was the dating.......a bit later than when I want to base this model on. after 1940, some of the smaller guns were removed and there were some major changes. I did do a couple of things to the hull this morning. where I had botched the portholes on the fore and aft dimples, I'm plating them over with brass. these dimples, back in the 20's { if memory serves me}, had guns mounted in them. these being lower to the waterline on the hull, would get battered by waves, and so during an early refit, they were removed. I made a mess out of them trying to drill out the portholes, so now I'm playing damage control. I also did somewhat of a filler job for around the deck and hull. of course, all this meddling with the hull is not without less than desirable result....I broke the rudder to be frank, I'm just about ready to go out and purchase another kit, and turn this one into the memorial 😈
-
good bones for a restoration..........this is a very nice model! look'in forward in seeing how you finish her lucky man!
-
looks like you've been bitten by the bug! as you can see, there are different methods in dealing with the mast root....I would drill it out too. by notching the mast root, you limit how the mast is assembled.......if the steps are assembled, you run the risk of being off center. happy to follow along
-
.....but you didn't install the rudder at the same time. movable parts are nice, but not a big draw for me. they used to be back when the Lindberg line was in it's hey-day. a pin could have bee added to the prop and installed at a later date {as it looks like your intending to do}. I have never built this vessel........nor have I ever done the Blue Devil........both of these vessels seem to be quite popular in the modeling circuit of the past. this will be an awesome project to follow along with. I'm in