


popeye the sailor
-
Posts
16,007 -
Joined
-
Last visited
Content Type
Profiles
Forums
Gallery
Events
Everything posted by popeye the sailor
-
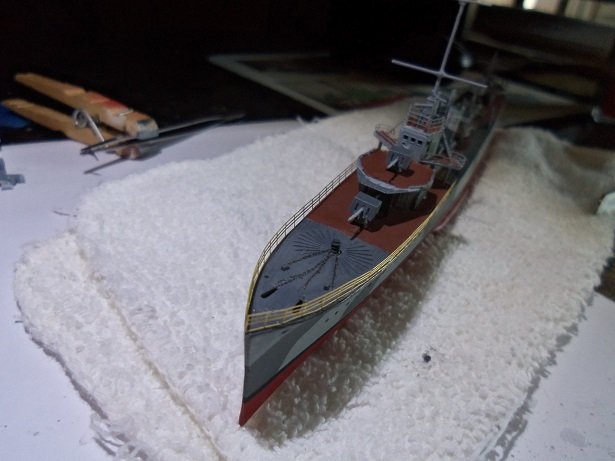
 "Have no fear of perfection - you will never reach it." - Salvador dali yes........but if one never tries, one will never achieve I'm a little late on the subject of the ship's boats, but you could take a look at how others painted their boats. but, in the case and function of this vessel, you could very well follow a 'safety regulation' type paint scheme. most life boats don a bright color, such as white, red, or even orange, above the water line......below you can give it an antifoul. some instances even allow a color stripe just under the cap rails. seeing that this vessel is red, you could easily follow the same scheme with the life boats.......if you have the vessel name embossed on the bows, that would be a nice touch too. you did a great job of eliminating that opening....looks very good so far
 -
I hope they are strong enough, when it comes to placing the boats on them. likely quite flimsy and won't take much pressure. that would be my fear! nicely done.......looks super!
- 467 replies
-
- 4
-

-
- mikasa
- wave models
- (and 1 more)
-
this is probably the most rewarding part of the build........but it is also the most tedious. it's better to take your time and get it right, rather than rush and run the threat of botching something up were you taking time off from work?.......I will be in another week or so. I have a one day work week coming up.......I can't frigg'in wait!
- 405 replies
-
- 7
-
-
- tamiya
- king george v
- (and 2 more)
-
fantastic looking model Danny.....very well done! I too will look forward in watching your next project....should prove to be a totally tubular build!
-
welcome to the fray Piet....still very early in the project. once I can get around the deck and hull cleaned up, I can begin painting. I also had a better look at what Model Monkey has to offer.......the time line is a bit off for me. most of the upgrades are after 1935.......more towards 1940 and the fateful day in history. with what I've seen with the parts offered though, they are pretty close to what I have in mind for them. I do plan to trim some of the barricades away and replace them with railings. I think that with what I plan to do, I can keep the integrity of the kit and enhance the looks of the model. Pennsylvania and Nevada fans should also look at that link
-
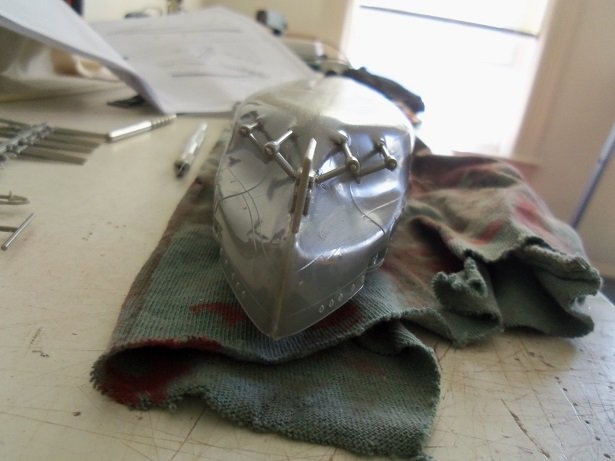
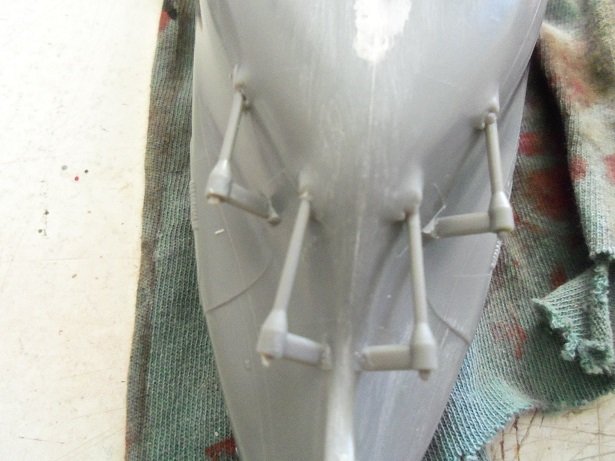
very neat looking plane
-
I think Danny uses the broken needle method too...........I also have plenty of toothpicks thanks for the ideas everyone one more day..........one more day.........one more day........{I keep telling myself that}
- 1,090 replies
-
- 7
-
-
- showcase models
- vendetta
- (and 2 more)
-
thanks for the good word gents I'll have to check out the site....thanks Ken for letting me know {I'll make the admiral mad at me or else!!!} I'm still thinking of a way to repair around the edge of the deck, matching the hull to it. I'd use the putty I have on hand, but I think it's too old.......the hull bottom might still need some touch up is that Face book Greg?
-
this is what happens when I don't check in ?!?!?! I'll have to do a video of what happens when I'm on the floor looking for lost parts. Gibbs comes over and it turns into a love fest I have to shield where I think the part is, so it doesn't get caught up in his paws. it's so comical! thanks for the kind word all........and thanks for all the likes two days are done........two more to go.......another exhausting week to be sure. in spite of what happened, getting the railings on wasn't too bad.......it could have been worse. I need to better control the CA, so I don't get the smears. now I need to paint them.......that will be a task in itself thanks again everyone!
- 1,090 replies
-
- 6
-
-
- showcase models
- vendetta
- (and 2 more)
-
funny........I used to play the bass. ships took over and now I hardly play either. trying to find my way back.......I do miss it somewhat
- 105 replies
-
- 1
-
-
- thermopylae
- sergal
- (and 2 more)
-
see....aren't you glad you painted them they really look great!
- 467 replies
-
- 8
-
-
- mikasa
- wave models
- (and 1 more)
-
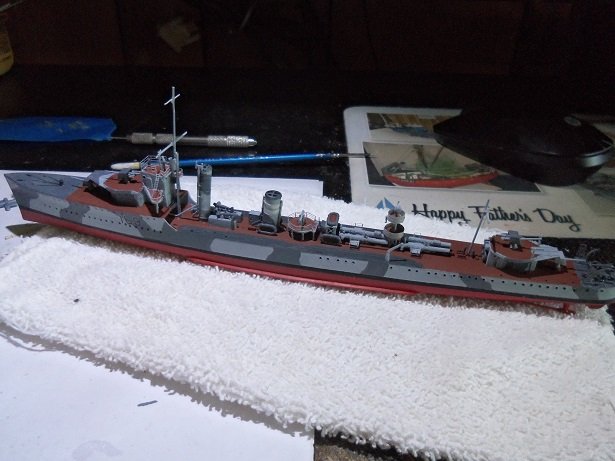
WOW OC! she looking the business now! the turrets look really good.........were the blast bags molded to the housings? I was reading how you installed the barrels on those smaller guns, and it made me think. why can't you drill holes in the mounts along the hull {the ones with the broken barrels}........and make the barrels from brass rod? could be doable she's look'in awesome.......keep up the good work!
-
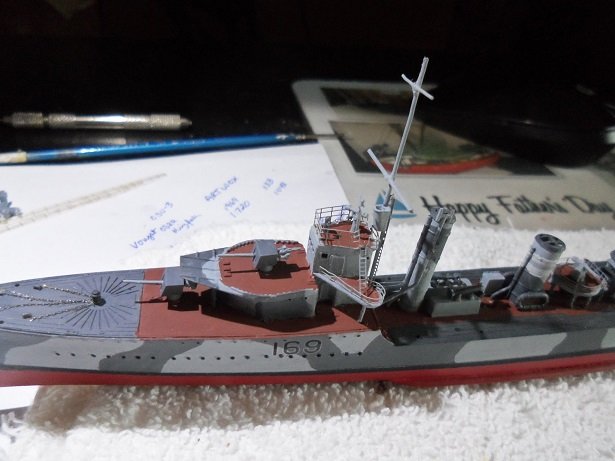
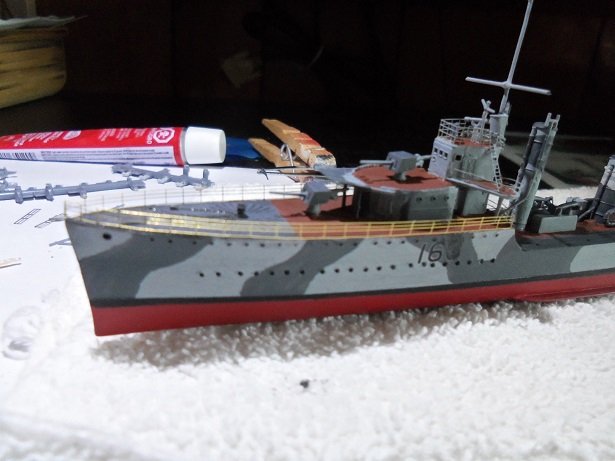
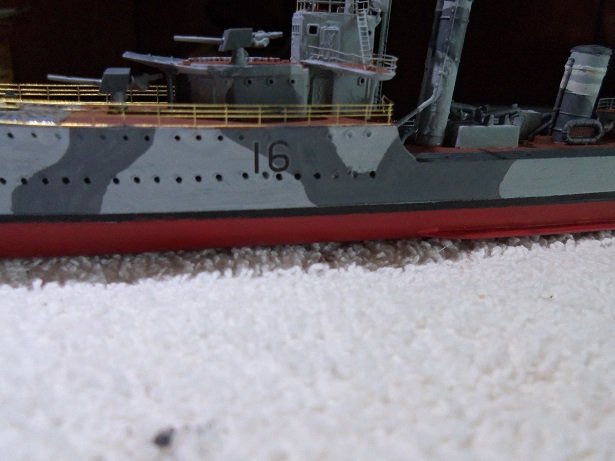
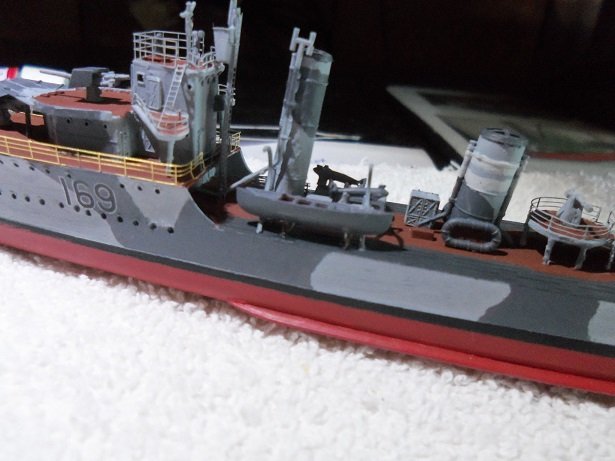
here more on the Vendetta's progress. after touching up the decks on the fore structure, a few more parts were cemented on the uppermost roof. the first couple of parts wasn't too bad, but the second binnacle decided to give me a fit. cutting it off the sprue, it flew off to never never land......couldn't find that bugger to save my soul either! I had no idea what direction it flew off in. I'd search for a bit........then give it a rest......then resume again a bit later. the fore mast is in place too.........I had to drill another hole, because it had too much rake. coming back into the computer room after getting some water for the decals....I saw a glint of brass on the carpet. the part is not brass?!?! no.........it was one of the pairs of boat chocks that I am going to use for the life boats! the other pair is still missing.........I got another pair from the Hood PE sheet. deciding to search again........I found the binnacle! comparing the two pictures, you'll see it the paravanes were added to the stern. so....this brings us to where I am now. next.......I finally did it! the fore deck railings are in place! but.......not without a small consequence. the CA obliterated one of the ID numbers! I wiped away a smear of Ca and there it went......one giant smudge! this was after I touched it up...the other side wasn't as bad. I have some more numbers, so I can put another back on......no big deal. I also had to redrill a few of the portholes........CA filled them in. the decal is back on, as well as the fore water markers.......all is well again...........but now I have to be extremely careful how I pick it up. I painted some stair ways for the fore deck..........and I began to add the davits and life boats. starting to really get somewhere with her now if I bet any further, I'll post it.


- 1,090 replies
-
- 14
-
-
- showcase models
- vendetta
- (and 2 more)
-
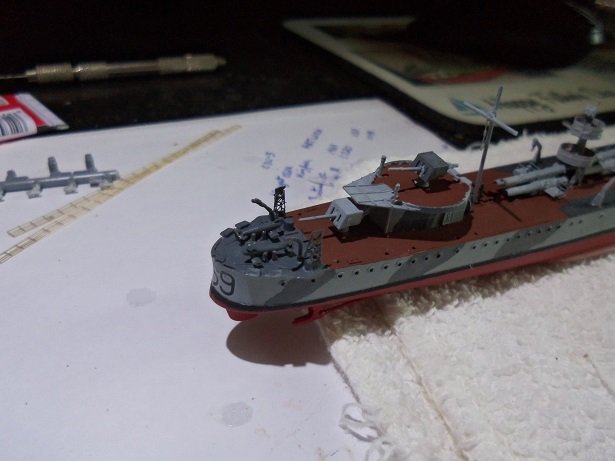
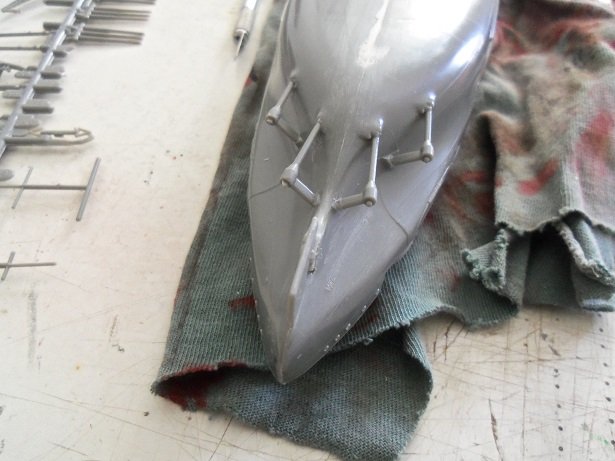
I figured I'd get the rudder back on, as well as the screw shafts. I thought they'd be a bit more elaborate, but this one doesn't have the bracketing , that others have. it's very simple. nice that the parts all don't share the same number.....running into cases where one is longer than another. of course, I had to open up a couple of the holes so they would fit. getting the rudder wasn't too hard.......after all, it popped out rather easily. I was careful not to break the gungeons.......the whitish stuff is where I scraped away more flash. the shafts weren't too tough to get them even either. the holes on the port side were a little deformed........I didn't do much for it. not that there is much I can do....maybe later before I paint. I did a bit more here and there, and assembled the two halves for the funnel. there's room for embellishment. more on it soon note: I did do away with the stamping, as can be seen
-
great progress on the rigging Jesse.......looks super
- 1,306 replies
-
- 3
-
-
- syren
- model shipways
- (and 1 more)
-
thanks gents for the good word. yes.......modeling has come a long way. as a young lad, I lived in the country........no opportunities to see, or even talk to folks about the hobby and what they were doing. the only time I had any immersion into the hobby, was when I'd visit the 606......the only hobby store in Manchester, New Hampshire. I didn't know of any other. I wrote an article some time ago........modeling was so isolated....exposure was nill, and work hardly ever saw the light of day. the internet changed all that got a little more done........show yas in a bit
-
try pulling out on them slightly where they attach.......I use the same diameter wire. I get mine from electric cords
-
slight adjustment........you don't want them flopp'in 'round like a fish like your avatar
- 105 replies
-
- 1
-
-
- thermopylae
- sergal
- (and 2 more)
-
your not push'in nutt'in..........I just want to see you succeed I see you have some on already..........looks good!
- 105 replies
-
- 1
-
-
- thermopylae
- sergal
- (and 2 more)