
HOLIDAY DONATION DRIVE - SUPPORT MSW - DO YOUR PART TO KEEP THIS GREAT FORUM GOING! (Only 53 donations so far out of 49,000 members - C'mon guys!)
×


popeye the sailor
-
Posts
16,007 -
Joined
-
Last visited
Content Type
Profiles
Forums
Gallery
Events
Everything posted by popeye the sailor
-
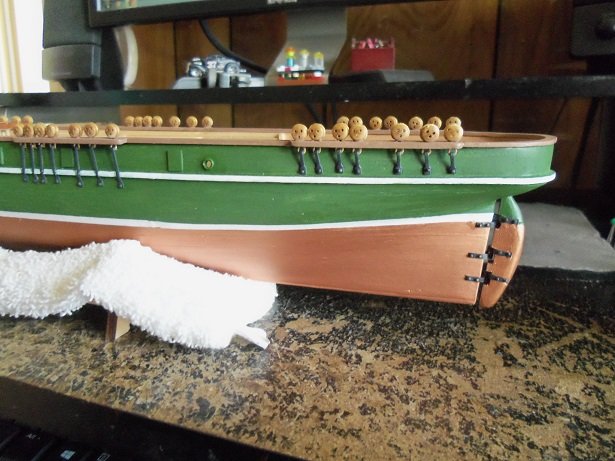
 it's too bad there aren't to be any windows along the sides of the hull.........shame to obscure such wonderful work I kinda get the dust thing.......you don't want that going on, but what about the constant jarring and moving the hull around? it could cause something to come loose. closing the stern at this time may put you at a disadvantage.
 -
looks like a lot of work now......but it could be done. you'd have to lower the angle at the bow, and raise the slots in the second bulkhead. fill in the gap under the deck tab with some of the plywood. of course, you'd need to check to see if this will hinder the look of the era ship your trying to model.
-
thanks for all the nice comments every one....and the likes as well jump starting a car isn't any different than starting an older car. on the car your jumping......pos on pos / neg on neg.....on the jumper car pos on pos / neg on any metal part of the engine {some cars come with hooks or eyelets for engine removal....or use a mount or bracket} I raise the idle of the jumper car for about five mins....should be long enough to start the car. of course it's a good idea to insure you have good connections.......I have the feeling the person who tried to start her car did not. when connecting the cables...neg last.......when removing cables....neg first. you don't want to create a voltage spike......that's when you run into problems I'm sure Per...if you were to start this kit, you'd do just fine.......just go scratch always glad your checking in Pat...no matter what the medium follow the direction above Patrick......you'll be jump'in 'em like a pro thanks Lawrence.......making the transom cap rail was not to tough to make......I still have to make railings that go around there.
- 453 replies
-
- 8
-

-
- thermopylae
- sergal
- (and 1 more)
-
hello Vivian! so good to see you've gotten back to the table sounds like you have some definite plans for this ship..........it'll be fun to tag along!
-
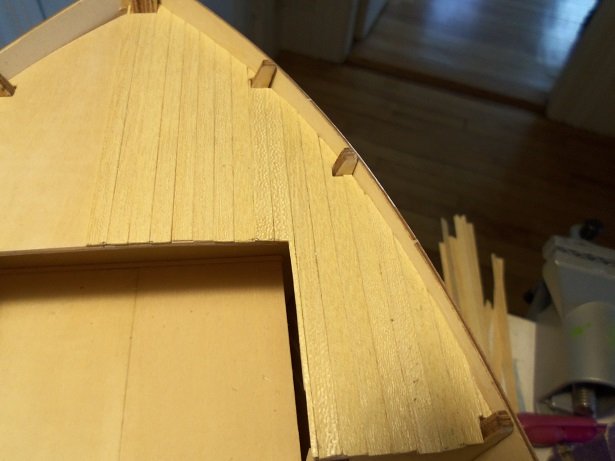
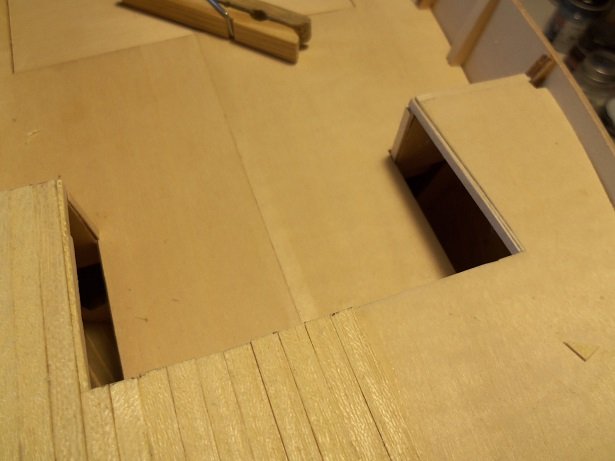
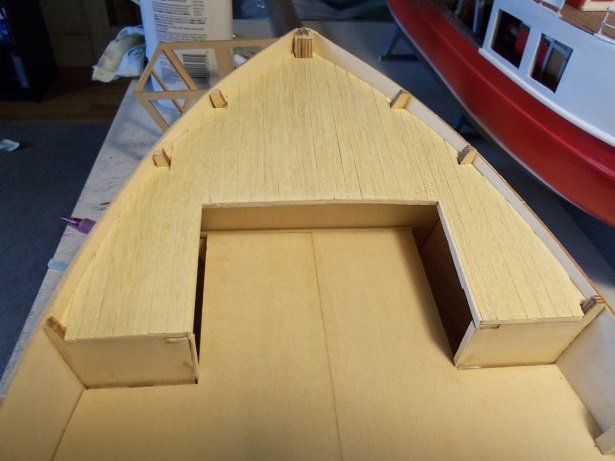
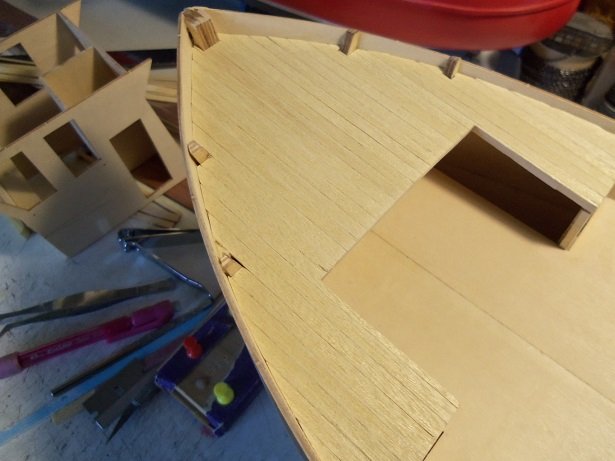
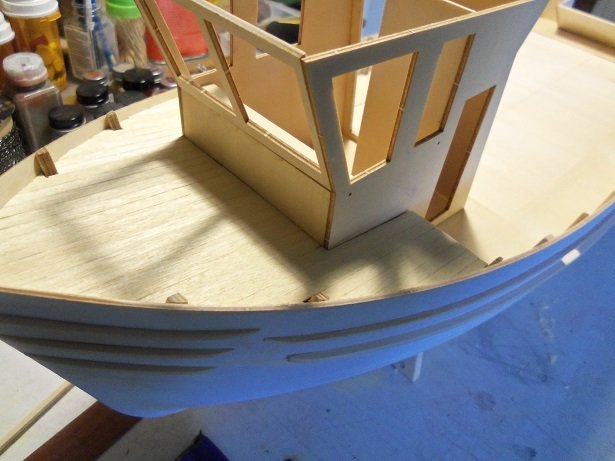
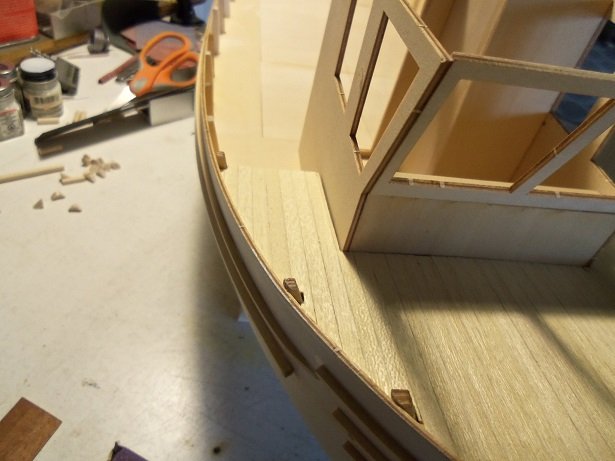
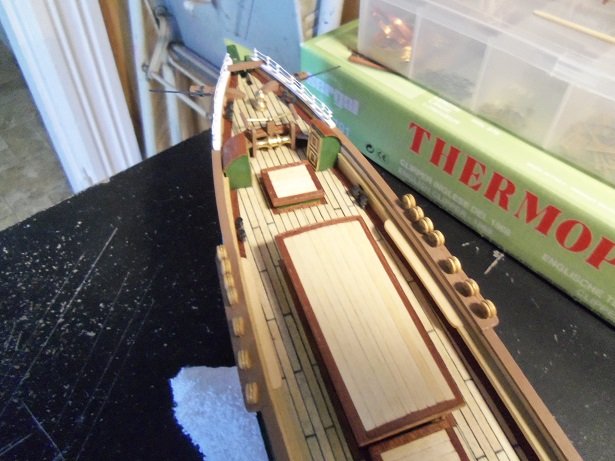
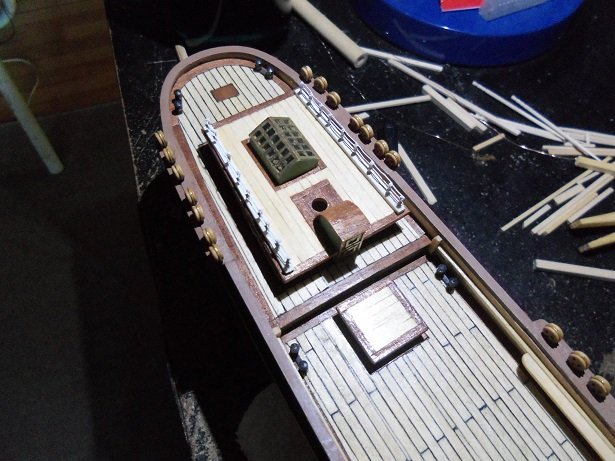
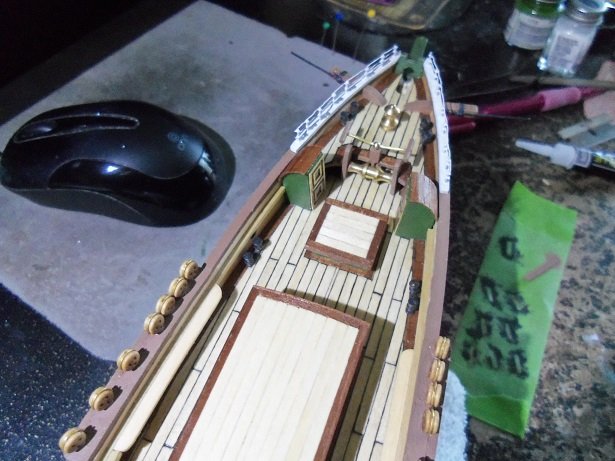
I managed to do more on this project.......although it turned into a two day event for me. I figured I'd straighten out the fore deck. there were some major gaps around the bulwarks, and the area that the pilot house fits in is a bit too wide. I'm sure that letting it sit around all this time, didn't do it any justice either. what I'm going to do is plank it over with some 0.5 x 5 mm thin strip, and then paint over it.......just as I did with the other fishing boat. I kinda liked how that came out. I have some of the Annegre strips......but since I intend to paint over it, I really don't want to use it. I also have a large supply of Obetchi {I think that's what it is} thin strips, given to me some time ago by a friend. I took most of the broken strips from the bundle to use first. doing the front area of the fore deck, starting from the center...working starboard. I took some narrowed stuff and shimmed the pilot house opening. I haven't cleaned up the planking yet. you can see along the port bulwark......the gaps I'm talking about. with the shimming done, I can plank over and hide it. I got a little further, when I got pulled away to look at my son's car again. it will never end I did get back to it this morning, and finished the planking. I did a little clean up and sanded the deck a little.....nee to do more. looks much better along the bulwarks.... with the pilot house fitted in place........it doesn't look too bad on the port side...... but I'm thinking one more shim strip for the starboard. I do plan to do some type of molding around the deck / pilot house.........it will look nice I was going to attempt to do the cap rails.......but though it might be better to do this first. if I paint, I'd have to get up under the cap rails......makes the task so much harder. I still nee to finish rounding off all the ends of the rub rails.

-
thanks for the good word gents.......and to all who hit the like button, an big thanks as well. this week was a tough week for modeling.........I simply couldn't get much of it. I even ignored the lawns, which I will need to mow next week for sure....... today, I had to run to the neighboring town to rescue our future daughter in law........her car wouldn't start. she told me that someone there tried to jump start her car.........I did it and the car started right up I think someone doesn't know how to jump start a car....hmmmmmmm. hope I can have another update on her soon.......she's not leaving the other table. only if she's being moved to my desk
- 453 replies
-
- 8
-
-
- thermopylae
- sergal
- (and 1 more)
-
congratz Greg! such a super looking build very well done.........flight deck ....the guns......weathered to perfection
-
I've made boat cover before, using the method your going to try out.......works reasonably well. lacing the ropes isn't too much of a problem either. looks like your reaching the finish line
- 2,625 replies
-
- 3
-
-
- kaiser wilhelm der grosse
- passenger steamer
- (and 1 more)
-
really good to see Jack did they do any judging........awards?
- 250 replies
-
- 2
-
-
- willie l bennett
- model shipways
- (and 1 more)
-
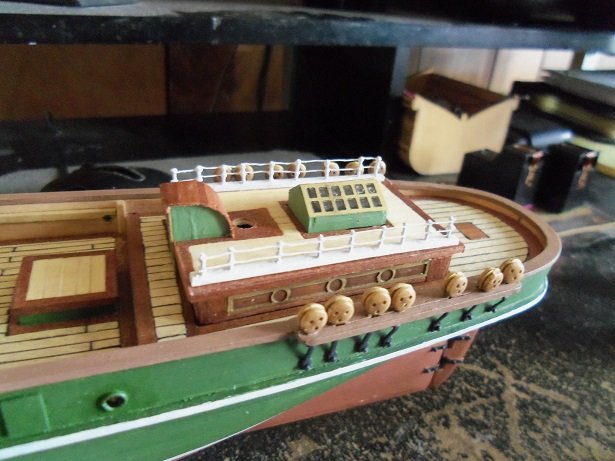
thanks Sam......and all who hit the like button with a lot of these furnishings made earlier, it doesn't take long to add them to the model. sometimes it's quite startling, to see all that progress in a short amount of time. what really stunk, was it took me a couple of days {with all the other crap I was doing} to update that Weebly log. what I have left now, is to update the Boulogne log on Word Press.......but that will be easy {only two updates so far}. I've done these logs on every build I've done since 2009........sounds crazy, but the feedback I've gotten from them has been quite positive and helpful to those inquiring. it's good though that it doesn't infringe on my build time too badly.......I still manage to enjoy onward and upward!
- 453 replies
-
- 7
-
-
- thermopylae
- sergal
- (and 1 more)
-
agreed.......if you were going to {and I know you mentioned this at the beginning} it would have been good to set the frame up from the start. now Billings does have an R/C version of this boat, which starts out with an ABS hull.......may have been a better fit for you. I have the plans for her.......I have the plans for the one your building.......used them to build the Andrea from a hull that I had modified. #526 is the kit number: http://www.billingboatsusa.com/31-experienced an advanced beginner's kit would be the white star......surly would make a good R/C boat. some kits are set up for it though....planked hull and all. the Boulogne Etaples is R/C enabled......I have the diagrams for it......not being an R/C person, I'm leaving her static.
-
looks good E.J. don't envy you on the sanding though........that's a lot of ship to cover. deck looks great too
-
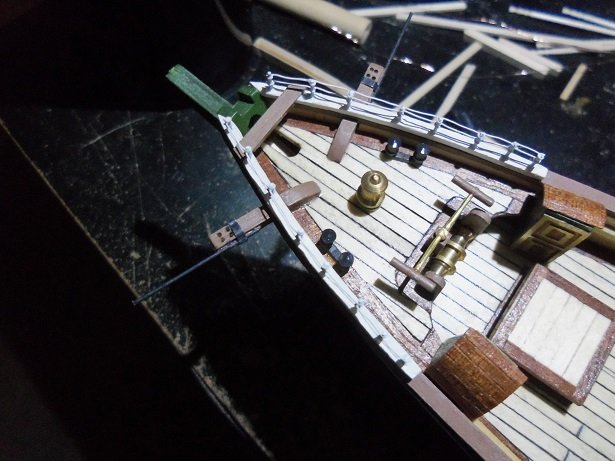
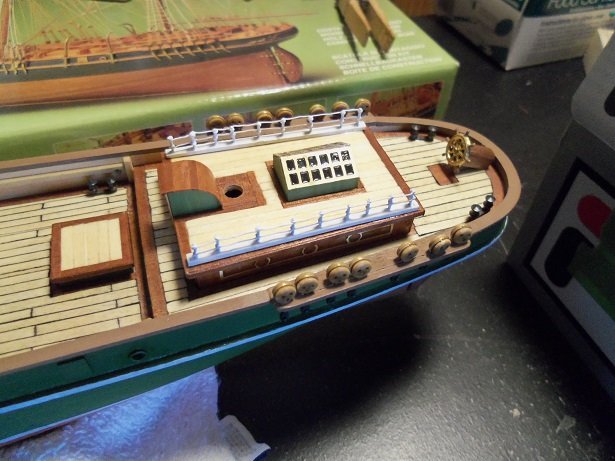
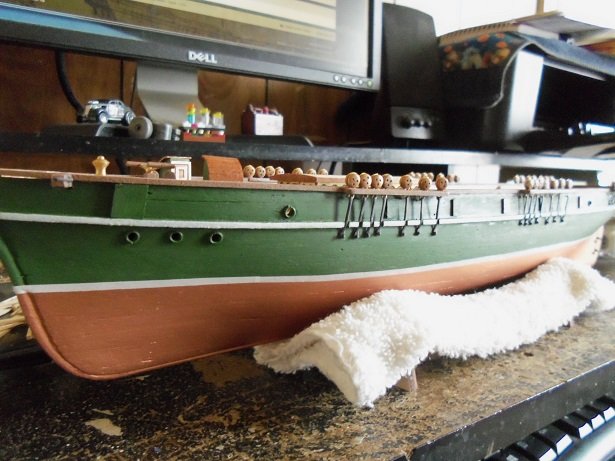
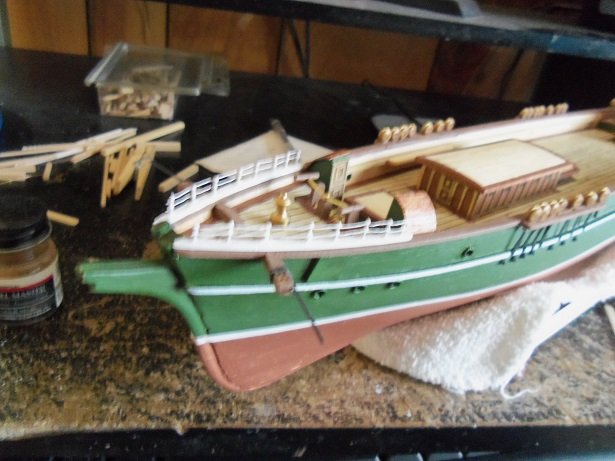
for the bow fife rail.......I kept it simple. it will span from railing to railing. still need to drill the holes..... I'm not sure it's good......but I caved. the aft cabin is now cemented in place. I will adjust the mizzen mast somehow. the ship's wheel and steering box is in place as well. ...and it wouldn't be fair not to show the bow. I made sure they were good pictures there's still more to go on the deck.........I painted the bilge pump and winch .....the last thing I did. today, I didn't do anything.........spent most of the day updating the Thermopylae log on Weebly, and was in and out running errands. I'm hoping to be able to sit back and play tomorrow. perhaps I can get something done on all three ship projects! thanks for look'in in!
- 453 replies
-
- 16
-
-
- thermopylae
- sergal
- (and 1 more)
-
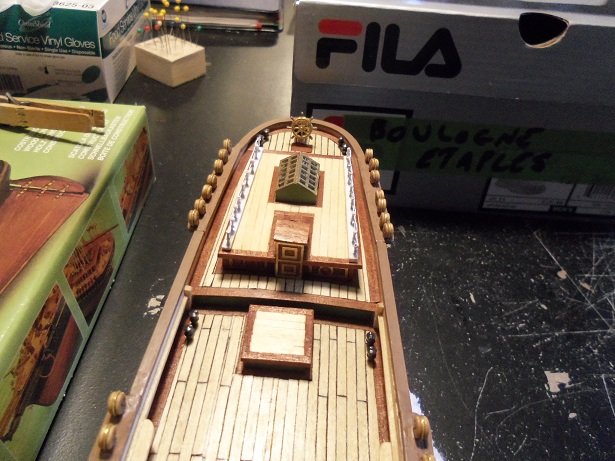
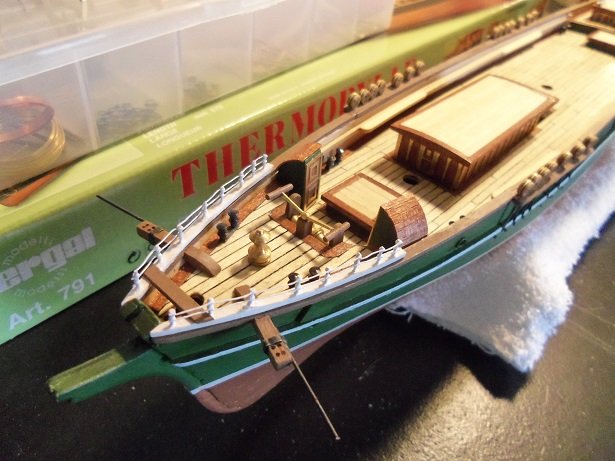
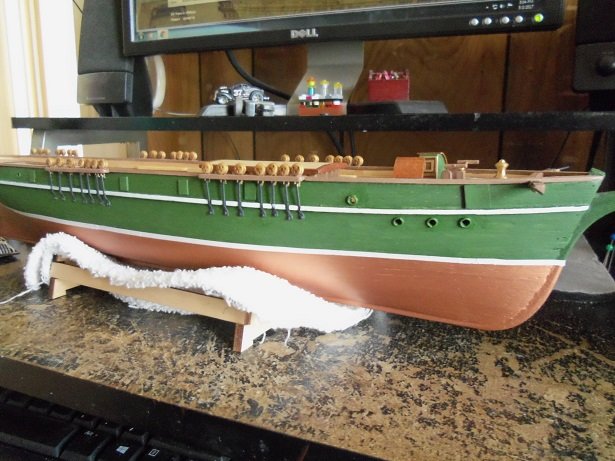
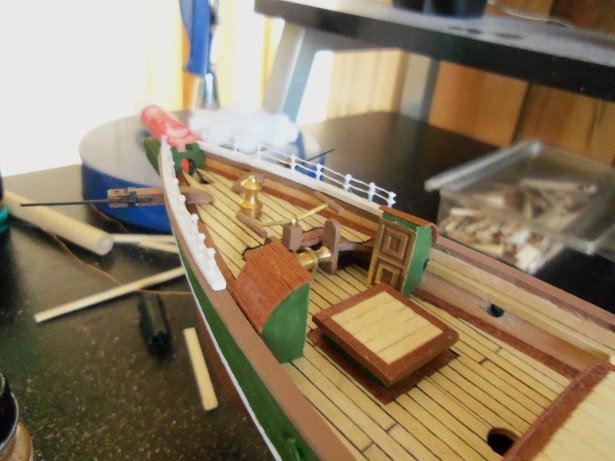
Boy!!! didn't I leave a pile 'o puss on my desk..........huh!!! that has since been moved to one side of my desk. I had an inspection by the admiral today......she was not happy! the Wharf got a number of violations.......including the improper compilation of wood! I promised that I'd have the place ship shape in no time.......she said I had better so what did I do......I added another boat to the table! I have been doing a bit of work to the Boulogne Etaples of late, but I spent yesterday afternoon doing a little on 'ole Thermie. most of the day yesterday, I was out getting our car inspected.........nailed it!......got my sticker and I'm legal. I came home.....ate lunch.......and dove in head first! the first thing done, was to fix that stripe I painted on the rub rail. it was a bit of a process, but I think it passes muster. the railings are cemented on the aft cabin roof. it's not cemented in place yet......still not sure if it's a good idea the bow railings are cemented in place as well.......I dumped the way I was making the bow fife rail. looking at other ideas. the bollards are now in place on the deck (s)
- 453 replies
-
- 15
-
-
- thermopylae
- sergal
- (and 1 more)
-
there you go! leave your options open and use what experience you have.......it's like the old saying "use what you know". Andrea is green......it'll blend right in try wrapping sandpaper to small blocks of wood.......different sizes if you can make them, the wood backing will help with flattening and will help to knock down the bumpy look. I'm pleased to hear your developing a game plan. I'm just glad that I can help.......and not sound like a back seat driver. "I come in peace.......I mean you no harm!" you know.......white flag, and all the while, thinking that someone will write a story about me some day......>don't mind me........I'm rambling<.........jes' be'in stoopid but really......glad I can help. I'm here for the ride, so ya might as well use me although I think that you ought to buy your admiral some flowers.......she thought of the idea BTW......I should have told you the story about me build'in the back porch stairs, when we owned our own place. my admiral even chuckles when she thinks of it.........an' don't think she doesn't rub it in every time I goof up
-
awesome! have a good day
-
I admire your determination..........very glad to hear that I can put defeat out of my mind as I mentioned....I'm no expert.....but I hope the willingness to help makes up for it. the Admiralty may have a point there..........I'd keep the idea in the back of your mind. done right, resin can smooth out your hull.......sounds like you have experience with it. resourcefulness can be the mother of invention....or intervention, depending how you look at it. I did a resin coat on one of my projects, and I was very happy with the outcome. my admiral is very sage, I find.......she enjoys what I do with my projects, and I try to involve her whenever I can. she is also a good sounding board, for when I'm undecided as to which way I want to proceed with a build. it stops though, when I pull out a plastic kit...... if I get in the way.......just give me a nudge and tell me to shut up
-
good to see your back at the table Larry.......nice progress considering time being tight. I hope all is well, or better
-
she look awesome.........truly great progress! decking and paint looks great!
-
you could also have modified a few of the davits and rigged the sanpans to them....that would look cool.
-
the way you have them looks really good! it's interesting that you got so many in the kit, when at sea or in port, they would be stowed away and out of sight. they add quite a bit of demention to the model
-
Yea.........I can't do it no more either. I used to when I used to pull my all nighters. I did that a lot when I built the first U.S.S.United States. I had to laugh last night.......I was watching a show about fishing......he was up in Norway. the fellow he was speaking with has a sled dog team....when Gibbs heard the barking, he started barking and then was like the RCA dog! he sat right up to the TV, nose pointed to the screen...didn't move the whole time
-
really taking shape now Frank. interested to see how you'll do the chain plates and dead eyes......I've never done them on the ship before.
-
Thanks - kind of you to say as much. There have been discussions (many) about the accuracy of the Vasa kits available. Corel is well entrenched at the bottom of the list as it fails in so many areas. For-all-intents-and-purposes I've pretty much had to "bash" this kit, and it still misses, compared to other kits available.... Ohhhh, I don't know about that Michael..........I think you've done just as well, as others who have tried. here's one for the 'ole back pocket..........no one will ever know exactly how she looked, it's anyone's guess, and any scholar's dream build on my friend.......she looks awesome!