
MORE HANDBOOKS ARE ON THEIR WAY! We will let you know when they get here.
×


popeye the sailor
-
Posts
16,007 -
Joined
-
Last visited
Content Type
Profiles
Forums
Gallery
Events
Everything posted by popeye the sailor
-
 sorry Eddie....this build has been suspended. they probably should lock it so no one can post.
 -
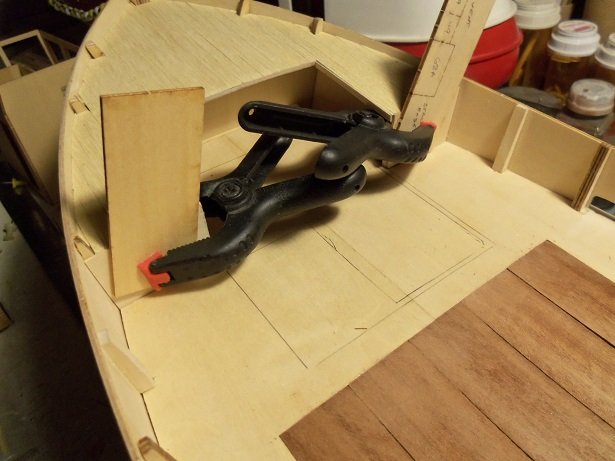
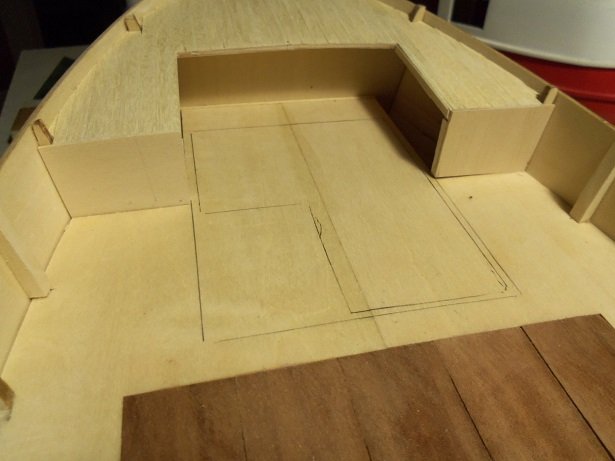
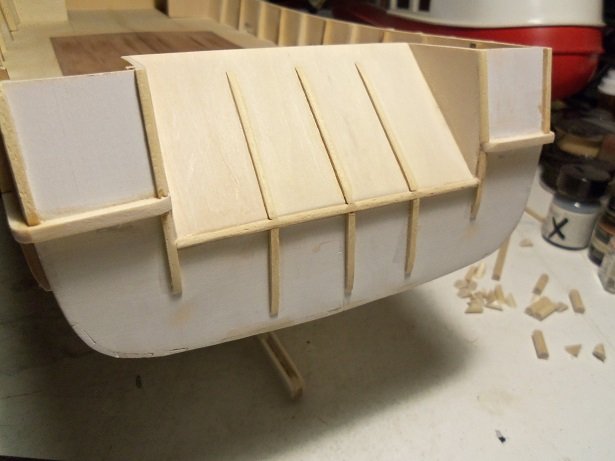
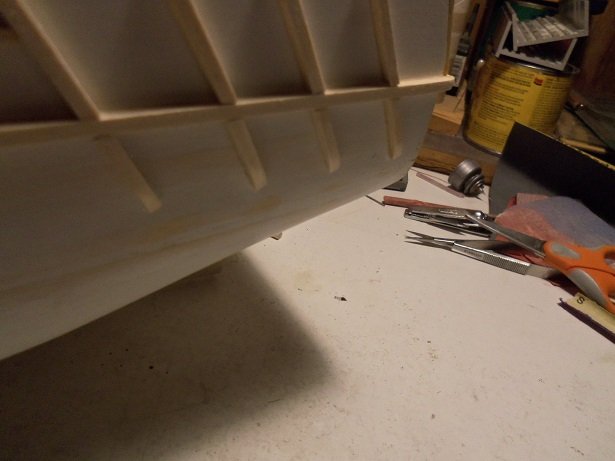
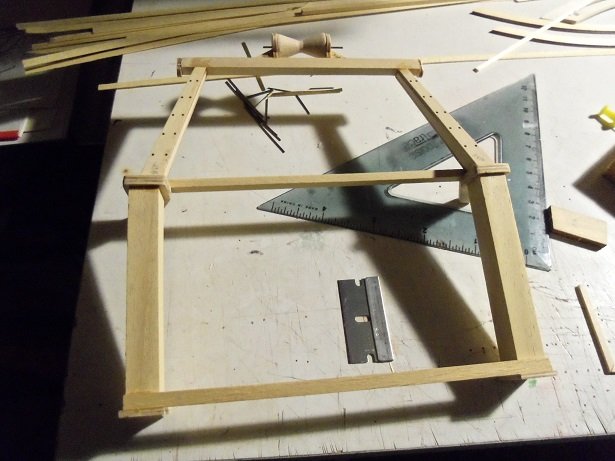
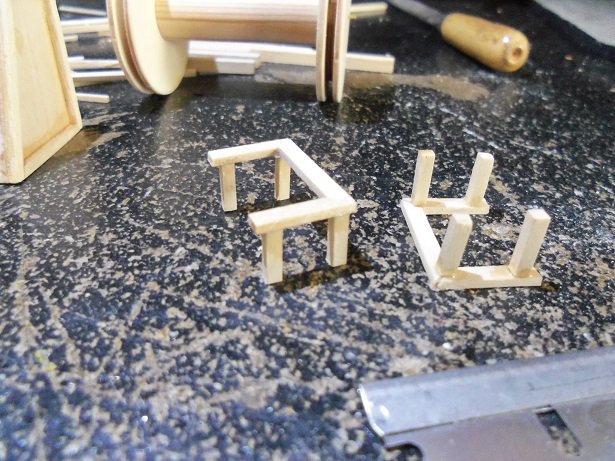
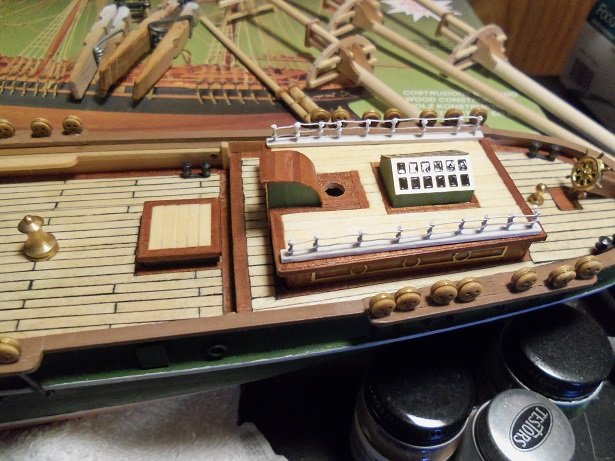
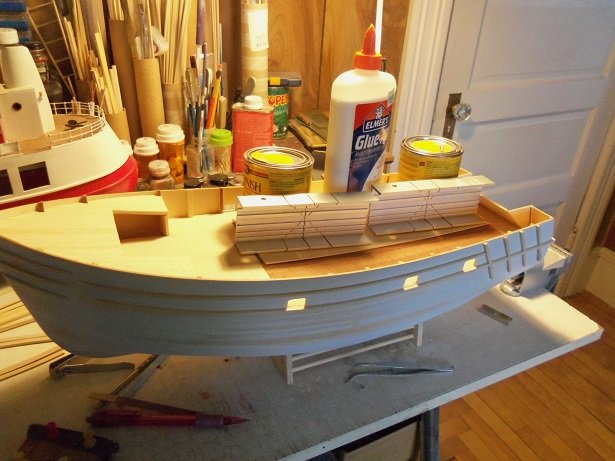
more progress was made on 'er.......starting with the bulkheads at the fore deck. I made up the panels and cemented them in place. more sanding was done as well......outside and well as inside the hull. these covered the mess....... the little gap at the bottom on the starboard side will be covered with the planking. the pilot house floor is mapped for planking too. I had my doubts about the stern rub rails......but now that I did it, it came out rather well. the rails that run inside the chute and all around it, have been rounded off, so it won't hinder the net. I went around outside the hull and rounded the other rub rails as well.......the only ones left now are the starboard side. the patch in the main deck has been sanded and the winch / net spool platform has been cemented down. it will be painted the same color as the deck. there is another platform that locates in front of the trawl rig. I found that the rig sits a bit more forward than what I been showing it at. I'll be gluing that one down before I paint...gotta figure out where it's supposed to be located at. I noticed in the plans that there is another spreader / support bar at the base........cemented it in place after the measure and cut. the net spool and bracket needed some stuff added.........framework wad added to the bracket, and the spool was assembled and sanded. the platform next to it is the winch platform........both of these assemblies will be located on the platform cemented to the main deck. well......that's it for now.......thanks for look'in in!


-
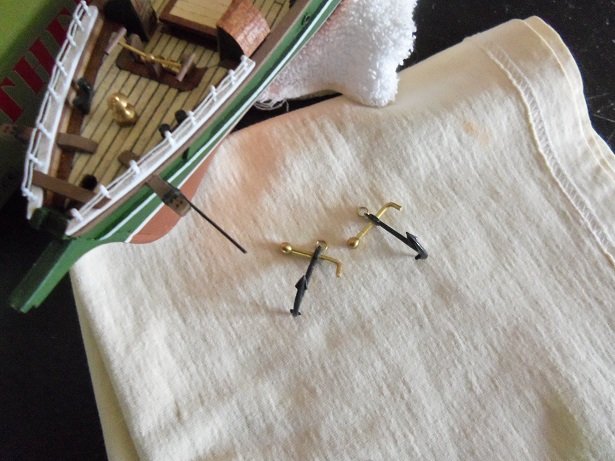
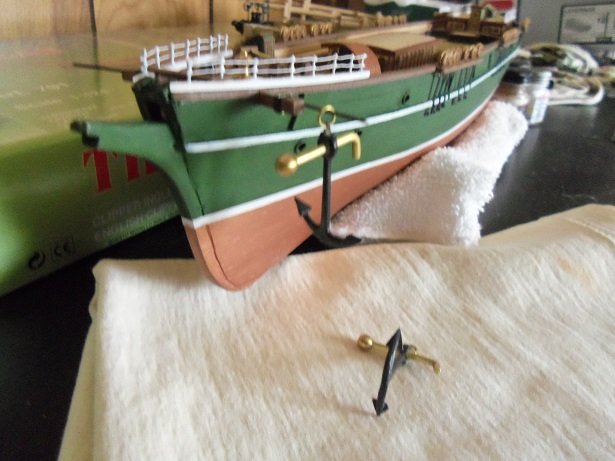
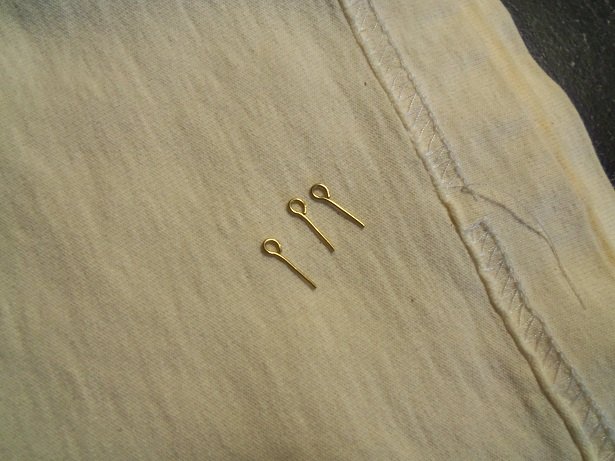
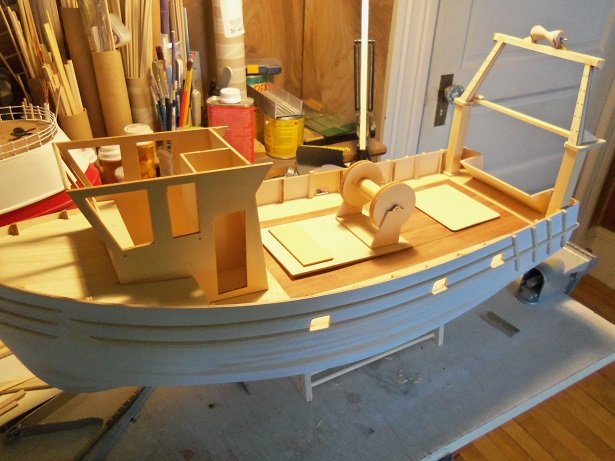
I've made a little progress....thought I'd share it with you all. I'm working on that poop deck railing at the moment....again. since the first try was a bust, I figured I'd try something else. I have the fife rails roughed out for the fore and main masts. I can't use the kit supplied ones, 'cuz the holes are already drilled for those wooden ones......the belaying pins I got would fall right through them. so, here's what I have so far... now, I mentioned the anchors.......I put the darn things together. definitely.......got to get some that are more to scale. I couldn't believe it! putting them together was easy.....that is, until I got to the eye rings. the holes for them were not drilled out......none of my bits would touch 'em. I remembered that I had some old dental bits that a friend had sent me. burned the first one out doing the first anchor...but it did drill the hole. I found out that the anchors are made of white metal......hard stuff, I can tell ya that it took two of those bits to do them both! the rings are on, but I didn't bother to do the puddin. check out the size. this will give you a better sense of their size....... another thing I noticed were the eye bolts. here is the size supplied in the kit....... I have two sizes of eye bolts........three if you count the ones I get from Hobby Lobby {I wouldn't use them anyway......they're too big too}. here's what I'm going to use instead. as I mentioned earlier....I need to get chain......there was none supplied in the kit. the capstan and binnacle are now in place on the deck......still more deck stuff to go hope to have more soon........thanks for look'in in.

- 452 replies
-
- 21
-

-
- thermopylae
- sergal
- (and 1 more)
-
thanks Vossie..........I'm more like a bull in a china shop it's too bad the tooth pick idea won't work on this project.........it's a good one though.....feel free to use it. I'm sure it would work on your project. for those whose been hitting the like button.......thanks to you folks as well
- 452 replies
-
- 6
-
-
- thermopylae
- sergal
- (and 1 more)
-
crossed is not an option.......glad your not going to do it I don't want to be known as the guy who steered a fellow com padre the wrong way. for-going them is your best option my apologies if my attempt at humor almost tripped you up.
-
apparently, your having all the fun you can handle. part of the starboard side is missing. that would have been my suggestion........remove the cut water. you can always make another. styrene sounds good for the deck.......I'll look forward in seeing your repair
-
to think.......this was my second project. I finished it before I was done with my first project, the Nordkap. I made another pair of nets for the trawler Syborn...I have a log here in the scratch build forum. I used the supplied netting for the Cux......I thought it was OK. I did find netting material at the local Hobby Lobby, but you may find some at a fabric store too.
-
get out! those coils are neat!! ....and you can see what your doing to boot! they are REALLY neat........and you did all the cannons. that's some great progress Jesse I wish you well my friend and hope you get better soon!
- 1,306 replies
-
- 7
-
-
- syren
- model shipways
- (and 1 more)
-
check out the craft stores, in the jewelry / bead depts............they carry eye bolts that have long posts. you can cut them to any length you need
- 652 replies
-
- 2
-
-
- royal william
- euromodel
- (and 1 more)
-
she's look'in better and better Doug. your doing a swell job......keep up the good work. keep on experimenting........there are many ideas yet to discover
-
hello there OC .....thanks for the good word I haven't forgotten about 'ole Thermie.........working on the fife rails at the moment. should have some kind of update soon.....thanks for look'in in!
- 452 replies
-
- 8
-
-
- thermopylae
- sergal
- (and 1 more)
-
good to hear Sjors.........your back on track! looks real good too
-
it won't be the first model without catharpins......back in my early days, I never heard of them if you really want them......you can do them in an X pattern......of course, you'd have to check to see if any nationality ever did that. good bet that you'd be the first person on your block to do that looking good my friend
-
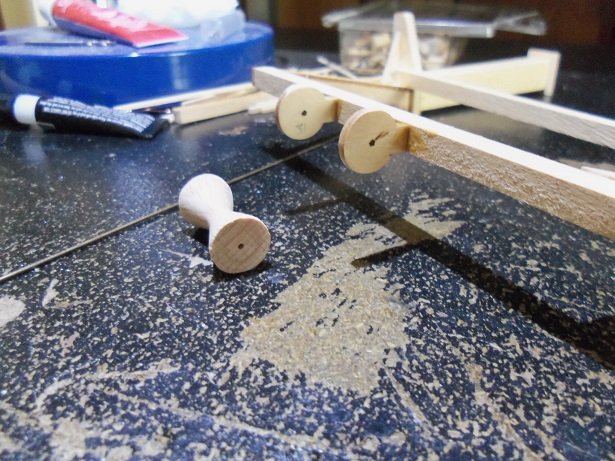
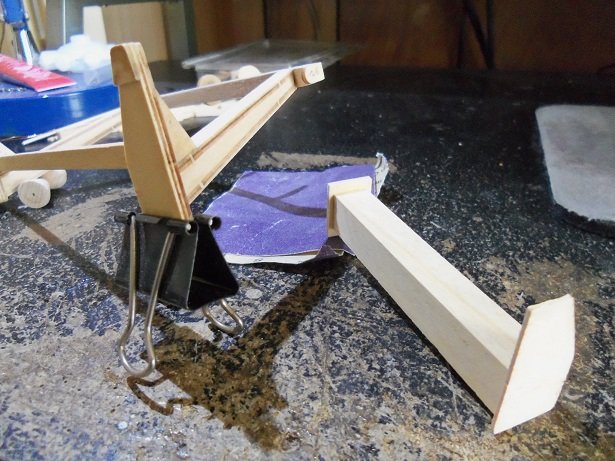
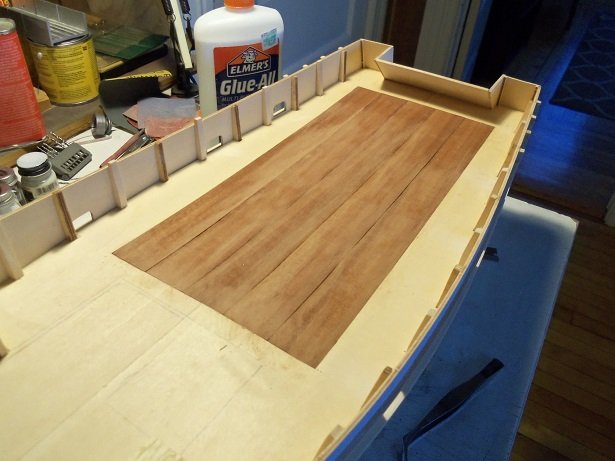
I took Monday off to surprise the admiral........she was very happy not to get up @3:30 AM I figured I'd play a bit with the Boulogne. have you ever had one of those days, where just about everything you touch, blows up in your face? first, I started with something easy......the spool that sits on top of the trawl rig. finding the center, the end caps were cemented in place. the hole was drilled through the spool......that went rather well too. there are two more parts that go with this........I though I'd do a little sanding to clean up the assembly. that's when the trouble started. this kit had a small problem with the laser cutting.....some of the parts had ply delamination, separating in a number of places. I glued them back together and fixed them all. one of the affected parts, the platform that separates the two sections of the rig, came apart in a big way......all the plys came apart at the same time! I glued one back and the other ply tore away. I had used white glue to reassemble them the first time around........I used CA this time and put it back together. with that problem solved, I continued with the sanding........then the top bar came off! what the heck is this.........bad glue!?!?!?! that was CA'd back in place as well......and the two parts I needed to assemble was done. the next thing I wanted to tackle, was the deck. the patch I put in the opening some time ago had rippled. I was going to use mahogany strips to fill it in flush with the deck....but in light of this new development, I'm not sure that will be possible. I could wet the patch and weight it down to see if it would conform to my wishes........or I could simply tear it out and start over. since I intend to plank over the deck, it will make no difference what I use to cover it.......but I have nothing to make up the difference. it equates to 1/64.........0.5 mm will have to do........and so, I used the mahogany {what a waste}. in hindsight......there are things I could have done in this instance.........I could have cut narrow slits in the ripples, to aide them in laying back down..........or I could have used the water method; laying a wet sheet of paper towel in between, to rejuvenate the wood. heck.......I just glued them in place. one thing I should have done to make it easier, would be to dampen the mahogany since applying glue to one side of the strip caused it to curl {what a pain to align}...but it is done. all these could've, should've, would've things........the fact is, I didn't. I did a little sanding........once the lip all around is flush, I will plank over this and the mess will be gone. it should stay now....relatively flat.......it feels flat to the touch. this morning, I messed around with the rest of the parts, figuring where some of them go. refresh my memory, since I haven't touched this project in some time. I did a dry fit of the parts I've already assembled. today, I'll likely finish the rub rails
-
the Renown kit might be a good fit. what is that .......a 1/4 x 1/4 length of square stock? show me the other side.....don't give up yet......
-
glad your hang'in in there! we would miss out on so much you've made some decent progress on the Biz.........she's a great looking model
-
What!!! they have pictures of this place! {just kidding}....not a bad part of the U.S. I don't like snow, but the spring and summer is great hope your operation goes well and the recovery is swift. the arch of the hull is good.......good to see her planked, now that you have this figured out glad you like the medium......is this your first? my admiral likes the ships I build, but yea......sometimes she gripes about my carrying on about them. I have to listen about her books.......she thinks they're real sometimes will look forward to your return.
-
so happy to see your back to the table! pulling up a chair to watch another of your masterpieces come together what a sweet looking hull!
- 1,035 replies
-
- 9
-
-
- royal katherine
- ship of the line
- (and 1 more)
-
I heard my name mentioned....... another thing to think about is that most copied techniques in rigging, were learned through war and captured ships. Dutch and Swedish ships were geared more towards merchant, than war ships {not to say they couldn't handle themselves}, so they're rigging techniques were mainly their own........pure from outside influences. the diagram I saw above didn't have them.........although the one picture with the block and tackle was pretty interesting. it's your baby Michael......do as you feel
-
neat way to make the chain gates........nice bit of detail! the sails look nice.......and yes, I totally missed that you didn't have the railings on! bot.....what a dummy I am! but your Cutty looks awesome, and your doing a swell job keep up the fantastic work!
- 525 replies
-
- 2
-
-
- cutty sark
- mantua
- (and 2 more)
-
nice planking I don't work with fancy tools either.......why change now I also make my own sanding sticks, but I use various widths of planking, along with various grits.
- 714 replies
-
- 2
-
-
- lady nelson
- victory models
- (and 1 more)
-
you made the bow look so much better Bob.....I am curious to ask though......would it blend your troubles at the bow more, if you were to make the curve at the turn a little more gradual. starting at #6 through #9 blend the curve to meet the knight heads {the frames at the bow stem}, rounding them out more. it looks like that's where your problem may have started......the curve continued from the hull sides to the bow. I'm not too familiar with these vessels.......I may be wrong. great work on the stern parts
- 682 replies
-
- 3
-
-
- halifax
- lumberyard
- (and 1 more)