


popeye the sailor
-
Posts
16,007 -
Joined
-
Last visited
Content Type
Profiles
Forums
Gallery
Events
Everything posted by popeye the sailor
-
 I think the last time I saw her, there was no rigging.........so, you've made quite a bit of progress she looks awesome! I like the flag too.......not too thick and hangs nicely......not very transparent either. wonderfully done Chuck!
- 1,051 replies
-
- 5
-

-
- cheerful
- Syren Ship Model Company
- (and 1 more)
-
if the plans show where the channels locate on the ship, I would say to follow them. a good rule of thumb is that the channels would start along side the mast hole, and trail past the mast hole, but it's not a solid rule. some will locate just ahead of the mast, to give the shrouds a pyramid shape. but you can be safe with the bounty. you should be able to bend the dead eyes slightly to give the angle they need.....or include this as you assemble them {it's safer}. I was going to say this last night, but I forgot. Billing's kits usually don't supply the chain plate loops for the dead eyes. they rely on you to make them from wire......not sure what they supplied in the bounty kit, but I've never seen any. that's why I specified Amati.......theirs are not split......solid hoops that can be spread apart and insert the dead eye. with a squeeze, they are closed, and the dead eye is retained in the hoop.
- 453 replies
-
- 8
-
-
- thermopylae
- sergal
- (and 1 more)
-
well.......hello birthday boy! just chimed in to see your name on the list! hope you have a great day
")
-
hello Steve. what I did with this kit......well the original chain plates were too small, so I used some from Amati. they fit the 5 mm dead eyes, which was supplied in the kit. when I crimped them, I left a eyelet that protrudes underneath, after the cover board is added to the channel. once you arrive at the length that will fit your ship {the Bounty} , I strung them on a brass rod via the hole at the end, and one by one, I cut them to the length of the first one. this will work well for the fore and main assemblies, but the mizzen might be a bit shorter. they do bend rather well.....be sure to leave an extra 2 mm or so, to create the hook for the eyelets under the channels. the ones in this kit were so brittle, they broke. I have a good supply of the Billing chain bars, since I've built a good number of Billing kits. I use them for a number of different things. I just used a pair of bent needle nose pliers to bend the hook......I did it pretty much by eye. I'm sure a jig could be created to insure they are exact. I hope this helps.
- 453 replies
-
- 7
-
-
- thermopylae
- sergal
- (and 1 more)
-
thanks for the kind comments, and to those who hit the like button. yes....scale is a big problem with this kit. the dead eyes are 5 mm........I'll have to check photos that I have, but if the second step has them.....I think I'll have it covered....got some 3 mm kick'in 'round somewhere. I've done some adjustments and scratch work.....but there's just too much to keep in check. I've opted to just finish building the kit, and take care of the major stuff as I go along. thanks Pat.......the main and mizzen are pretty much the same rake. the way the mizzen fits through the aft cabin, and then through the deck platform underneath, it put the mizzen out a lot more. I haven't cemented the aft cabin in place yet......I may cover over that hole, and insert a pin at the base of the mizzen mast. once I set it to the rake I need, I'll push on the mast and the pin will make it's own guide hole. another alternative is to trim the mast root on the side that will give me the ability to set the mast forward. I have a plan icky mae! I enjoy the clipper ship ........I built the Revell Cutty Sark twice. I also have the parts panels for this kit.......they are in very good shape. I think I can clone a few hulls with no problem. since this kit is so 'scratch' oriented, it will be easier to stay close to scale. I do have to say though.......it is an interesting kit. after all.....it's got me 'glued' to it for the past few weeks Hello Frank....welcome aboard as mentioned above, scale has been an issue with this kit. I've had to make do in a few instances. I don't think it will distract from the model once completed. I think even the blocks will be a little out of scale, at 2 mm {and I even plan to add double blocks too......none supplied in the kit} wait till you see the size of the anchors
- 453 replies
-
- 10
-
-
- thermopylae
- sergal
- (and 1 more)
-
this model's gonna drive me crazy John. I've done a little work on the masts........right now I have the mizzen running through the aft cabin, and they're not sitting half bad. any other time the rake would be different on all three. it's OK.......I'm not ready to cement them in just yet. thanks for the info John.......I'll keep that in mind. thanks for the likes everyone!
- 453 replies
-
- 5
-
-
- thermopylae
- sergal
- (and 1 more)
-
oh my.......another big one.. glad I'm here early to get a good seat! WOW!!!
-
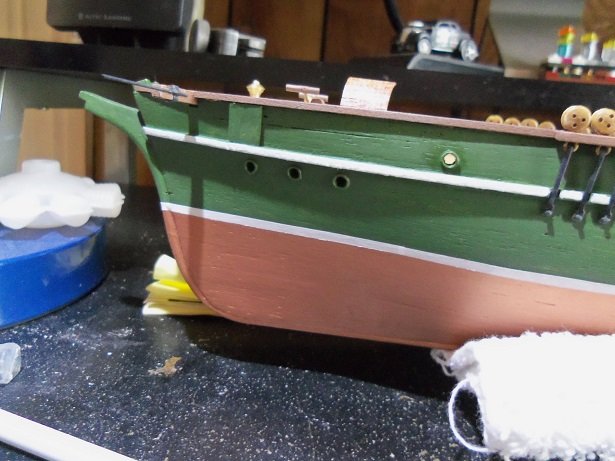
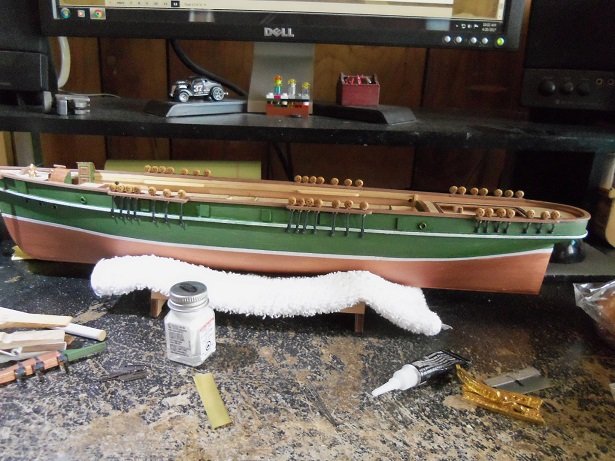
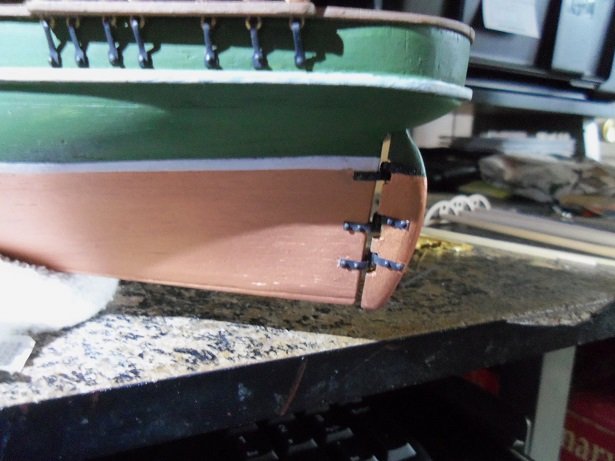
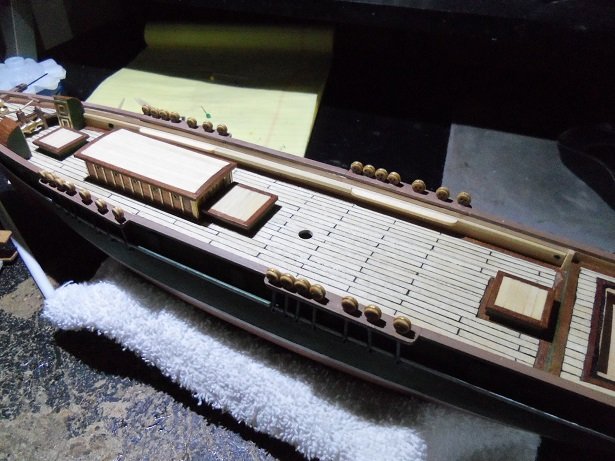
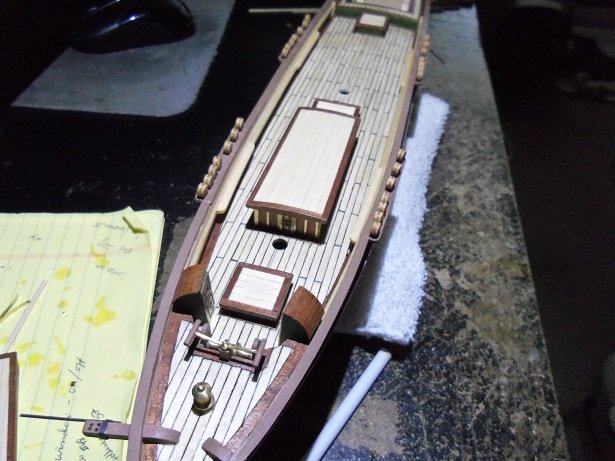
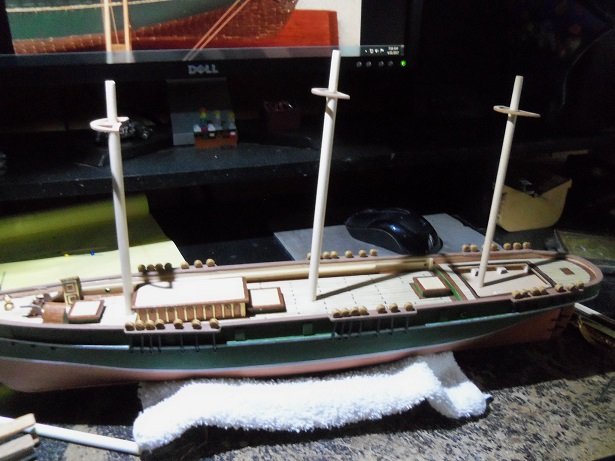
here's a bit more progress on the 'ole girl. the anchor guards are in place......and a little bit more. the rub rail has been painted.....I did a butcher job on it. it need another coat....then I can do all the touch ups on it. the rudder is now in place as well. I added some extra thickness to the pin rail between the fore and main pin racks, because it looks like there are some belaying pins along this area too. the main deck cabin and the hold covers have been cemented in place. I will have to check, but I may have to add small sections to the pin rails before the fore pin rack, and aft of the main pin rack.......there may be additional belaying points in these areas as well. I did more checking on the mast heights.....and as far as I can see......they are correct. I had also cut the mizzen as well........whittling down the cap areas of the masts, the tops were cemented in place. the bow spirit boom was also tapered at this time......still have to add the hardware. I will have check Cyril's model again.........but the plans show that there is a bit more rake to the main and mizzen mast, than the fore mast. I still have to adjust the mizzen....there's too much there, and quite noticeable. the width of the aft cabin might be a problem too. it's made from the kit parts, and doesn't leave too much room for pin racks for the mizzen. it's a rainy day today, great for finishing the rub rail stripe.
- 453 replies
-
- 14
-
-
- thermopylae
- sergal
- (and 1 more)
-
way to go Hennie!
-
I think the hull and deck planking came out great. some folks will mix the two hues of decking planks.......most of the time, it comes out looking good the scuppers look good, although I've seen them on other models, wider along the deck line. I should dig out the pictures of the scuppers on my Bluenose, when I made my assessments.....looked like my friend did it with a hatchet. I have a plan for mine.......haven't done anything with them {the project itself}, but I've had the itch......believe me! besides all the damage, there was another flaw in the one I have. my friend had a serious gap between the fore and aft decks. come to find out, there is a mistake in the plans. in the first production, the assembled keel measures at 300 mm. in the second production, the assembled keel measured 310 mm......and this is written in the plans! I learned about this from another gent who was building an older Bluenose. many models have many mistakes.......it's almost impossible to get them correct. all we can do is strive to do the best we can........and hope the paint work makes up for it. 99.9% of the time, they come out absolutely gorgeous! looks to me that your well on your way, not to disappoint
-
thanks Piet........good of you to drop by glad you like it!
- 453 replies
-
- 4
-
-
- thermopylae
- sergal
- (and 1 more)
-
I sent him pictures and an invite, but there was no reply. nope.........no George
- 956 replies
-
- 5
-
-
- andrea gail
- trawler
- (and 1 more)
-
so the plants are bits of sponge.......pretty cool! ....and the admiral will never know you defiled her sponge 'cuz.........sponges are full of holes anywaay!!! she's look'in as awesome as ever....your work in miniature is really inspiring. quick! pat me on the head.........I need some 'o that!
-
fabulous! she's look'in great! really like the molding around the bridge.......nice touch
- 2,625 replies
-
- 5
-
-
- kaiser wilhelm der grosse
- passenger steamer
- (and 1 more)
-
hello Greg.......glad to have you aboard! I was beginning to wonder. enjoy! thanks Rob......thanks again for clearing up my befuddlement. I think there might be a ship in this box yet! I still feel that the arrangement isn't completely correct.........if I knew I was going to scratch them out like I did, I would have added more. it is what it is thanks again for the good word! thanks to all for the likes!
- 453 replies
-
- 5
-
-
- thermopylae
- sergal
- (and 1 more)
-
the boats look good Greg........really doesn't matter what plastic the plane is molded from......it'll be painted anyway. could be a Japanese secret weapon.......the invisible plane
-
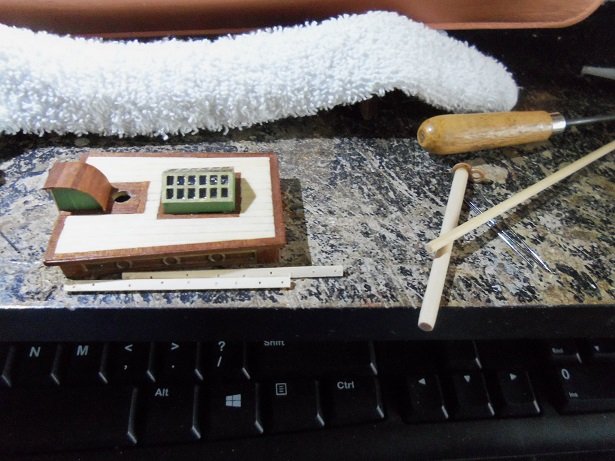
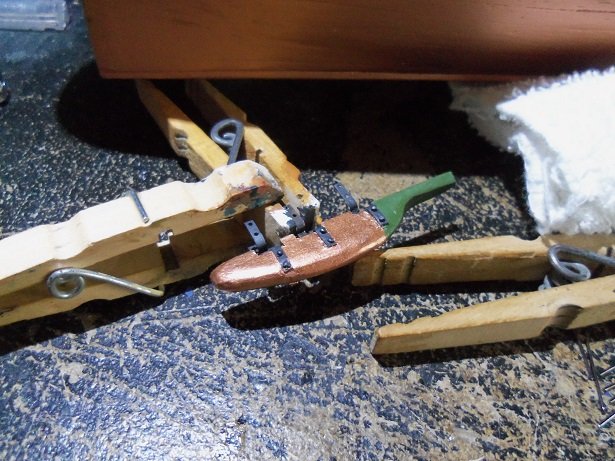
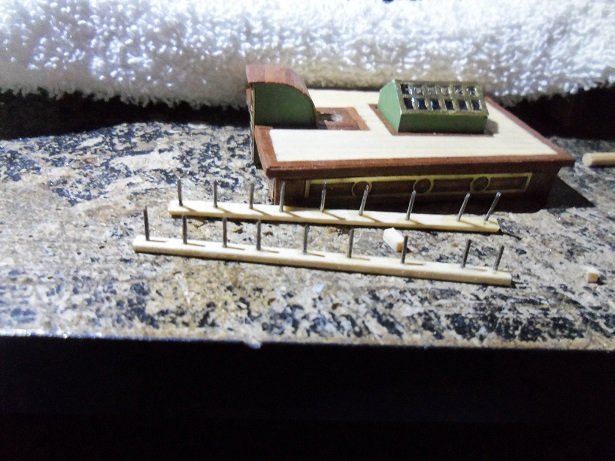
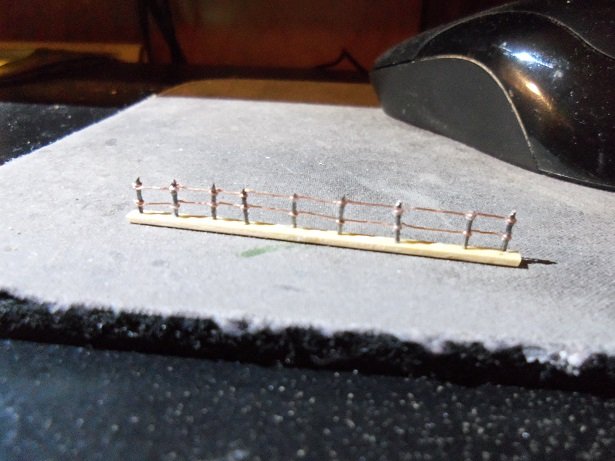
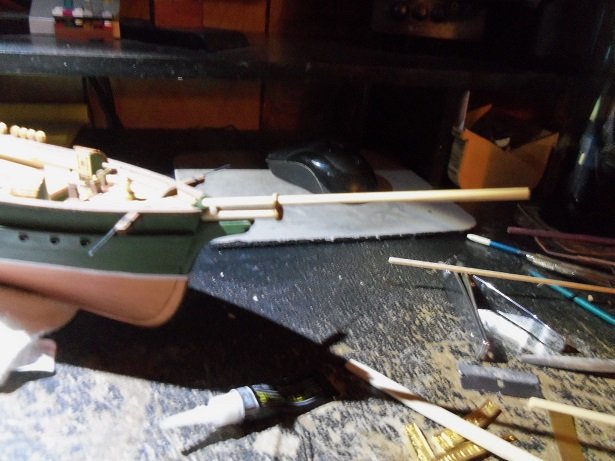
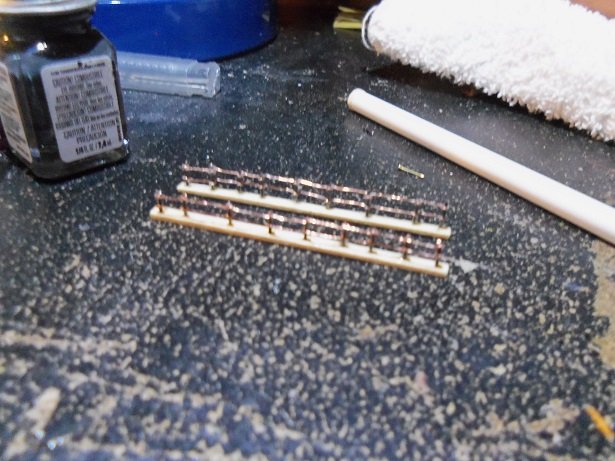
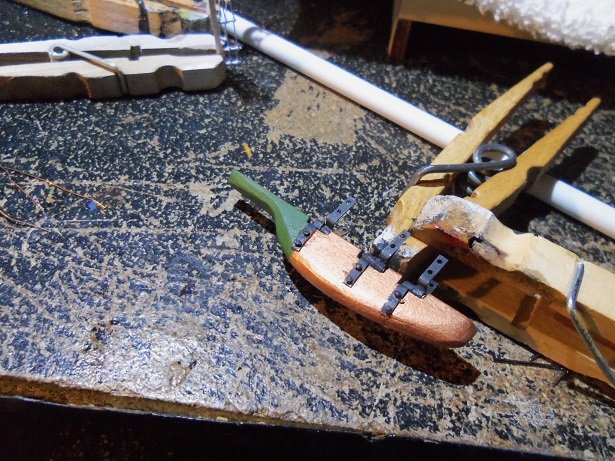
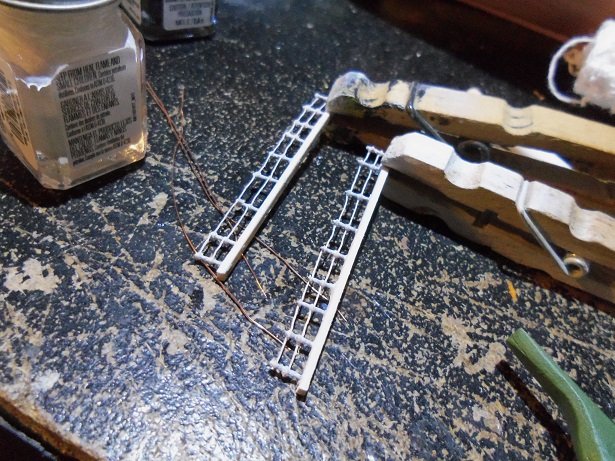
well......I had all intentions of getting the rudder installed on the ship......first thing I needed to do, was keep track of it after assembling the gungeons and pintles together, I notched the rudder. the rudder was touched up, ready to fasten on the assemblies. I told myself.......remember, ship side down............I still managed to get one upside down. after I fixed it, it was ready for more touch ups. by this time, with all the handling, the copper looked really dull. when dry, it was given a coat of lacquer to seal the copper {I had mentioned how Testor's metallic paints couldn't take too much handling......very soft paint}. in the mean time, I made a few aspects and pondered over others. the protective plate for the anchor was not included in the kit, so I made a pair. I also looked over the trail boards and the decoration for the stern. they are made of a gold plated metal....kinda thick and hard. I'd likely have to heat the decoration in order to bend it to the contour of the stern. as for the trail boards......they look terrible.......metal flash and I had to do some serious filing to them. I'll see what I can scratch instead I had forgotten that I needed railings for the aft cabin. there are also to be a pair of railings at the bow, and one around the transom. the bow railing bases I have soaked and bending on the pine board. for the cabin railings, I sanded the thickness down on a piece of strip stock and cut two pieces from it. holes are drilled down the length of them....an idea have I. the boom for the bow spirit was also cut.........getting ready to assemble. the rudder is ready for the booth. ok....this is gonna seem funny.......'cuz I didn't plan this. I didn't measure a darn thing. I've shown these before.......I got them from the jewelry dept from Hobby lobby. these are eye bolts with a stem that's about 4 inches long. I cut off the eye bolt with enough to be able to use them, and used the rest on the railings. I have others.......these are polished black. the stem part was chopped up into short pieces......I used the first one cut as a gauge. when I had enough, I began cementing them into one of the boards. after a few were in place, it became hard for the thing to stand up....kept falling over. so, I took the other board and lined the holes up to match {I had drilled both pieces at the same time}. oh........fancy that! a ladder! now, it just so happens that the 'ladder' is 8 mm wide........so I took a piece of 4 mm wide strip stock, and used it as a cutting guide. I still have some of that wire I stripped from a light cord.....tiny stuff. winding it was a trial at first, but the second one went much better.....and faster. I'm in the process of tweaking the rungs, so they are straight, the bow spirit and boom is assembled......still needs to be sanded and get some brass on it as mentioned, the second railing went much better........the picture is a little blurry. I blame it on poor lighting........ then the panic attack.......where's the rudder? I looked on both tables.....behind the desk.......through the garbage can by my desk.......and was getting ready to go get the bag I thew out earlier, to look though that! even the admiral started looking. it wasn't until she mentioned that the DVD I was burning in the other room was done, that I realized where I had left it. I'm doing the old burn the VHS cassettes to DVD......bought a handy program to do it. went in there.......and there it was!.......all dry and waiting for the next step. here is a better picture of the railings........they have a coat of flat white. they should get another coat, because I had to revive the paint.......now it's nothing more that white wash. the color of the wood shows through. perhaps tomorrow, I can begin populating the deck. still a few more aspects to make....


- 453 replies
-
- 18
-
-
- thermopylae
- sergal
- (and 1 more)
-
she's look'in great Gil........that's a wood I've not heard around the planking table. is it a flexible wood? is that plain water in that super soaker? hope your feeling better
-
looking forward in seeing your progress
-
that's quite a jungle you've got there there are many ways to make Flemish coils......some are very easy. one was a home made tool.........two small round plastic disc, pinned together with a push pin. the thread was wet down with diluted white glue and wound between the disc. looked like a winner to me I'm sure the fellow whose process I described, will chime in and give you more info. I've done close to the same thing......I used clear cello, so I can see how big I made them.
- 1,306 replies
-
- 8
-
-
- syren
- model shipways
- (and 1 more)
-
very good progress Sjors.........don't you dare go in the closet! I don't blame you for your thoughts on doing part work.........I find that with a kit, some steps can be combined, or would work better if the step before it was complete {most of the time I wing it anyway }. the paint work looks really good so far......can't wait to see her when the painting is done
-
I see you made some great progress since I last looked in Danny the frame is look'in really nice.........nice work on the sides too. working door latches sound like a cool idea.