-
Posts
3,837 -
Joined
-
Last visited
Content Type
Profiles
Forums
Gallery
Events
Everything posted by glbarlow
-
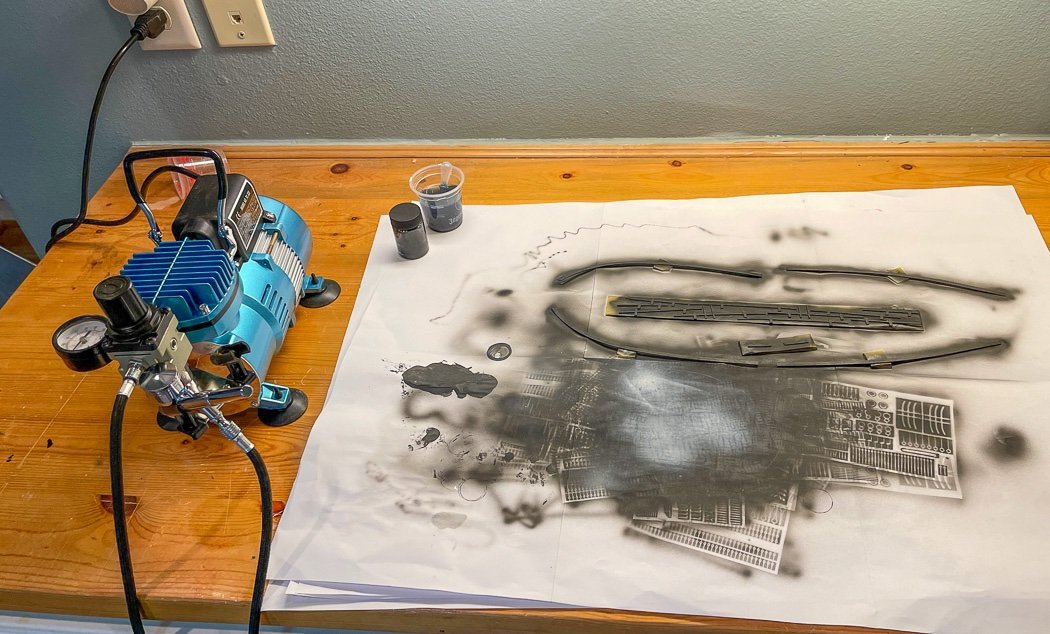
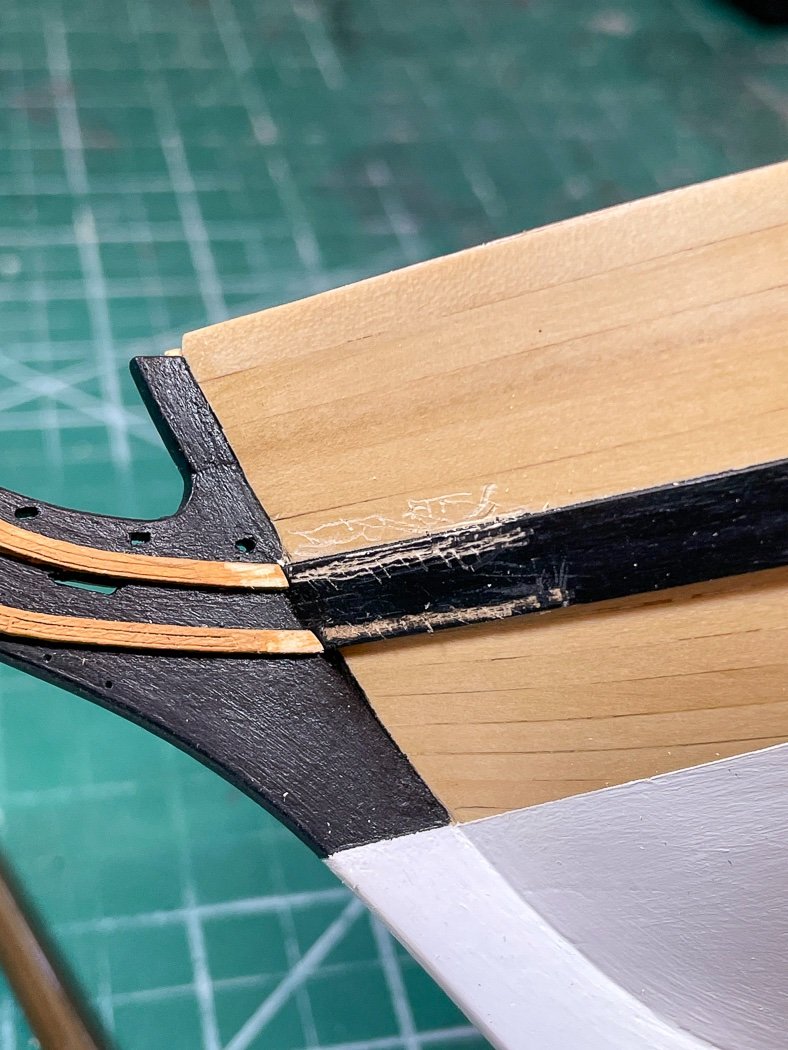
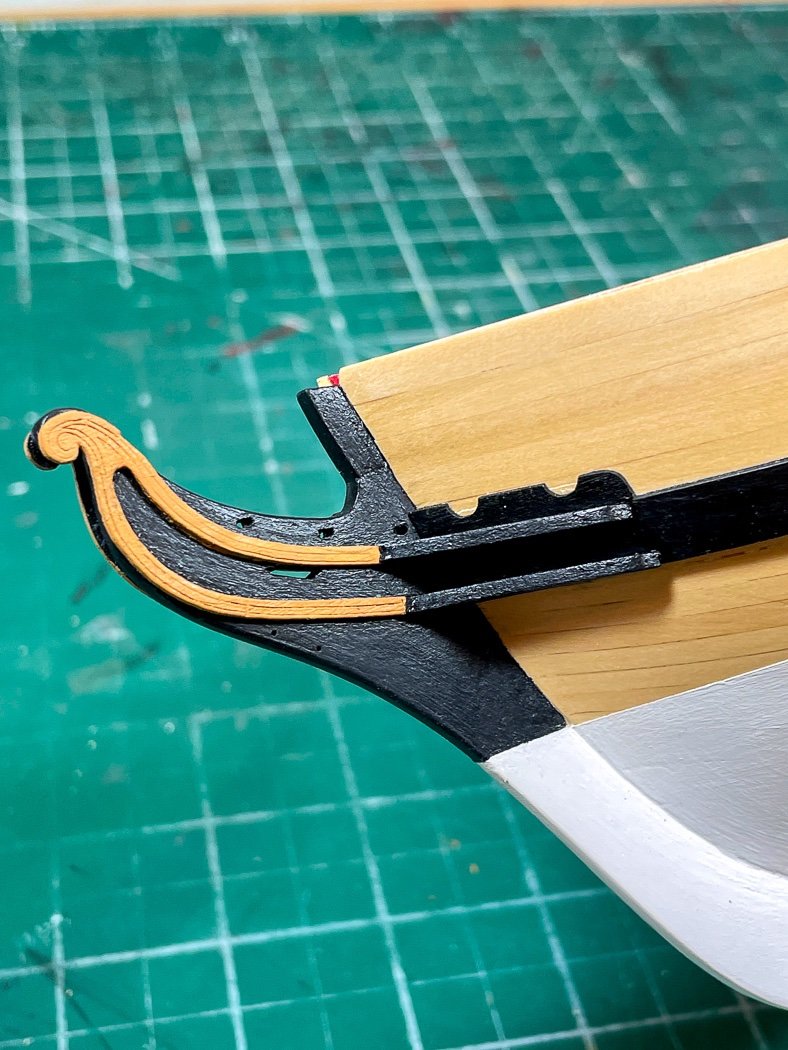
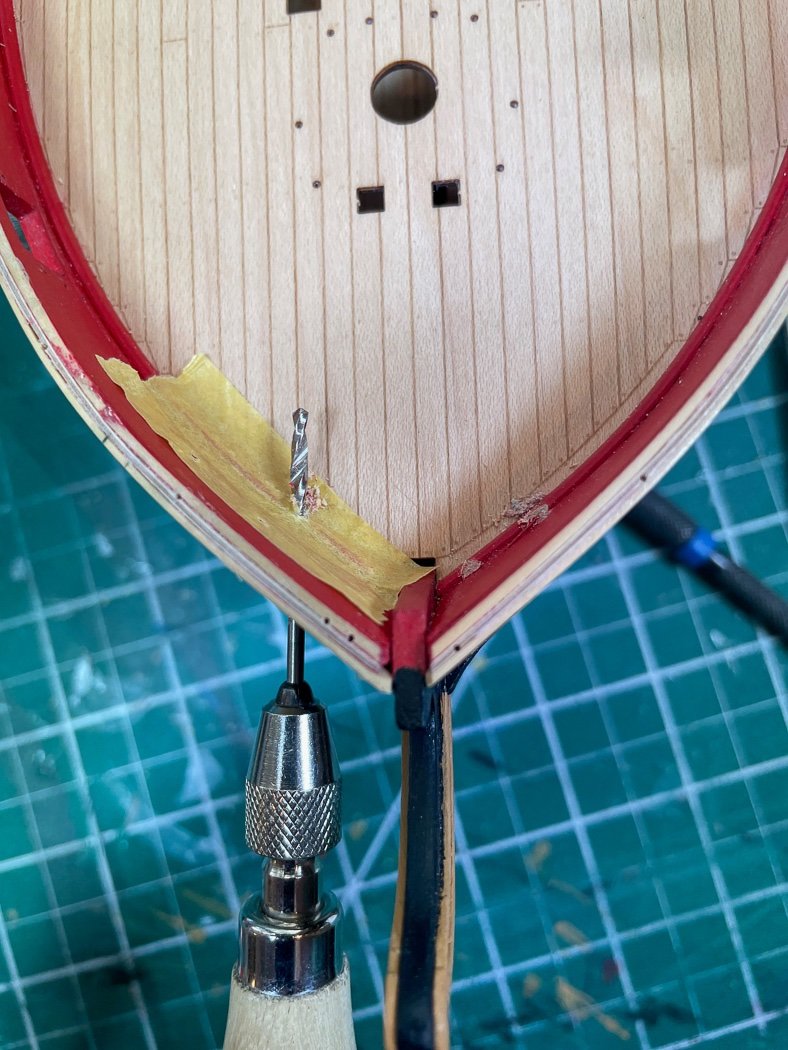
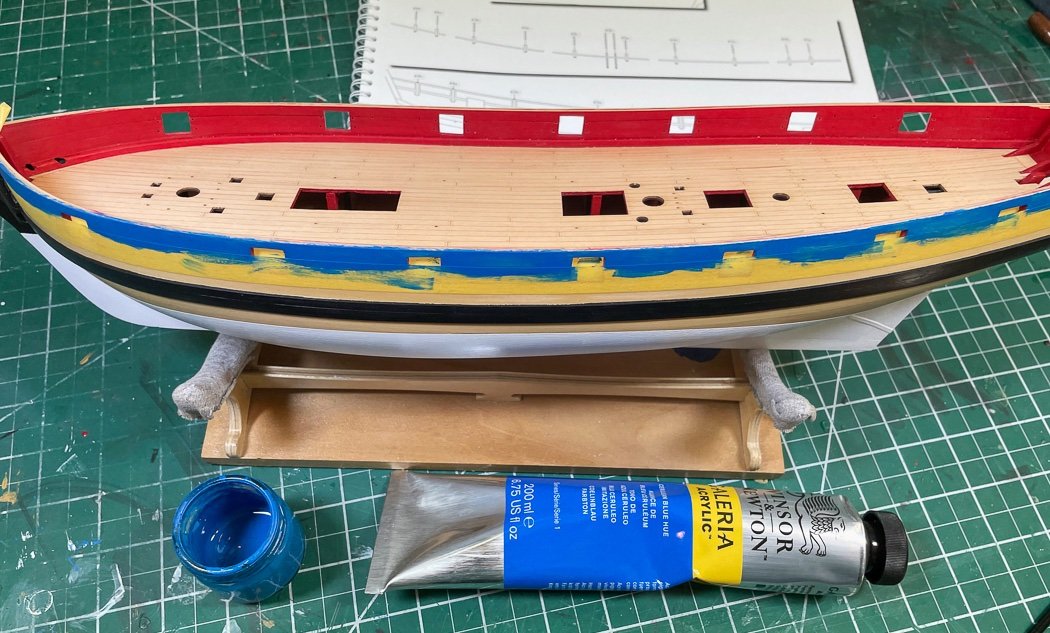
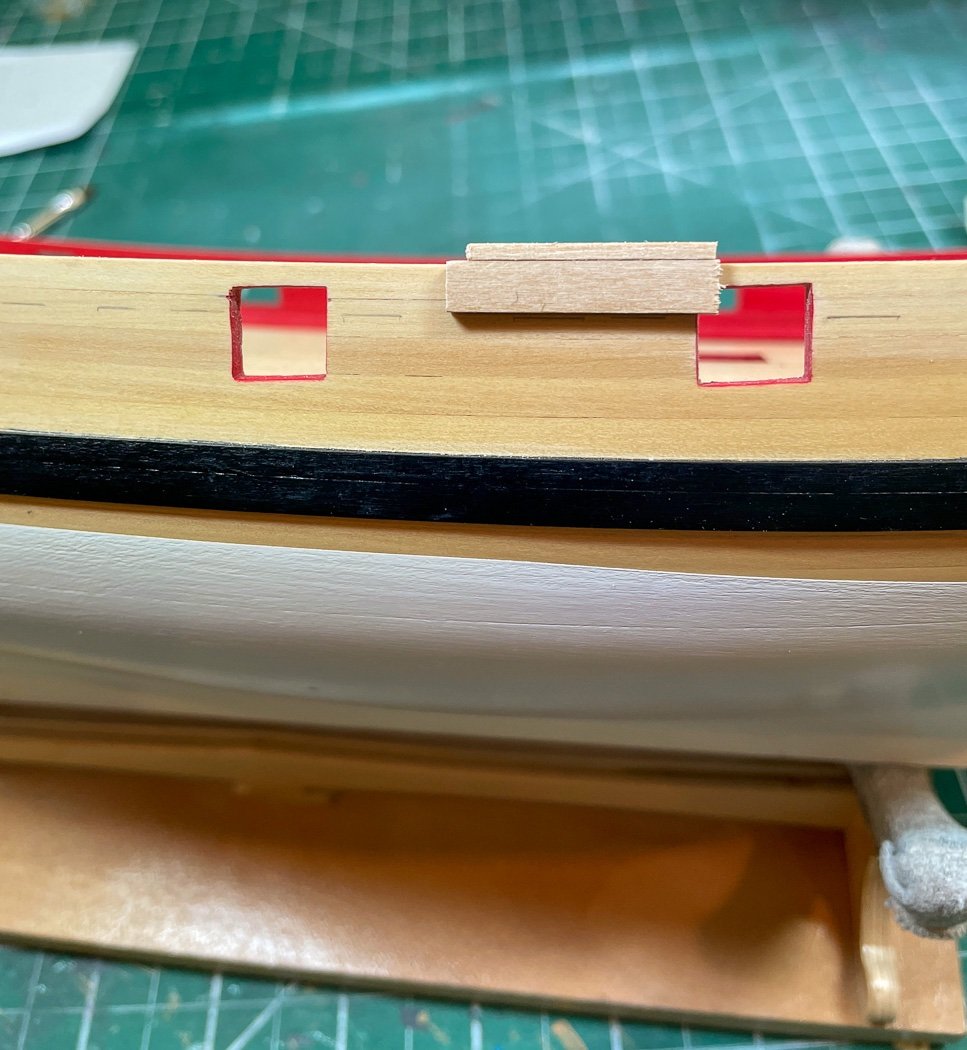
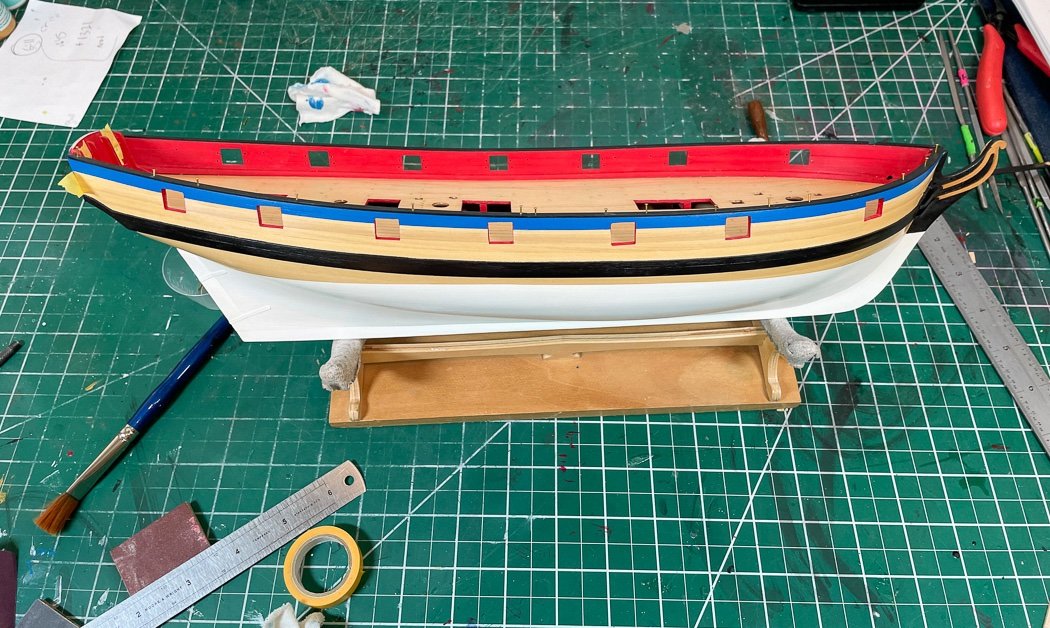
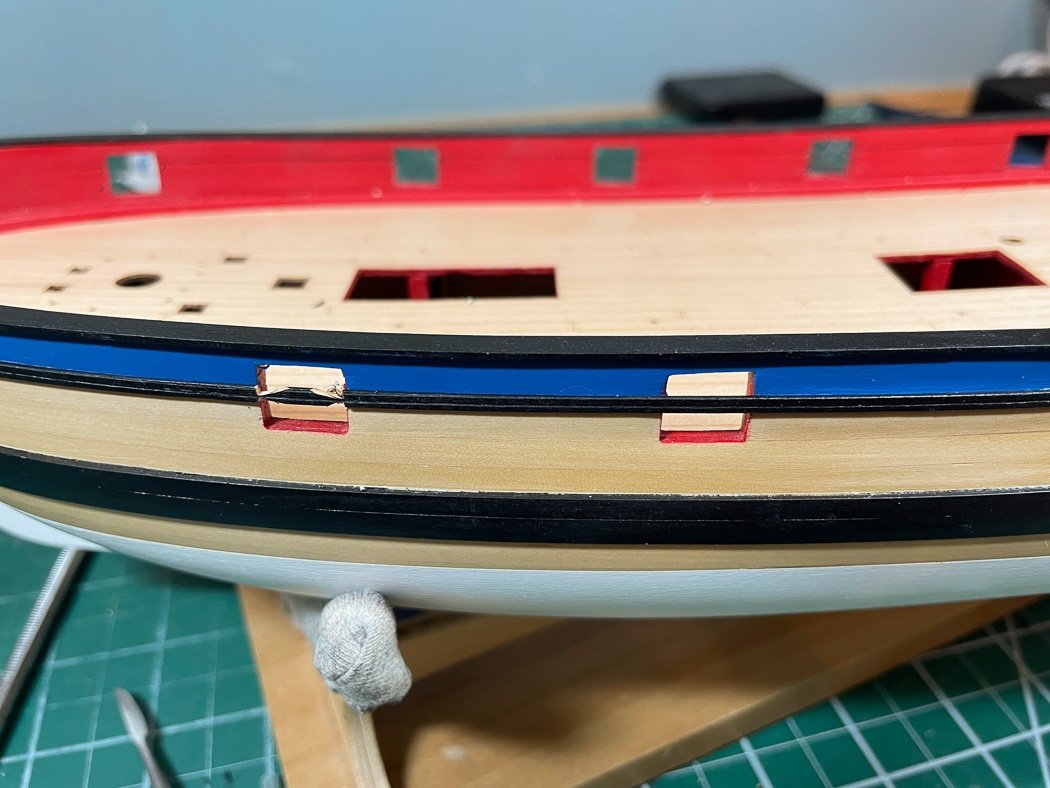
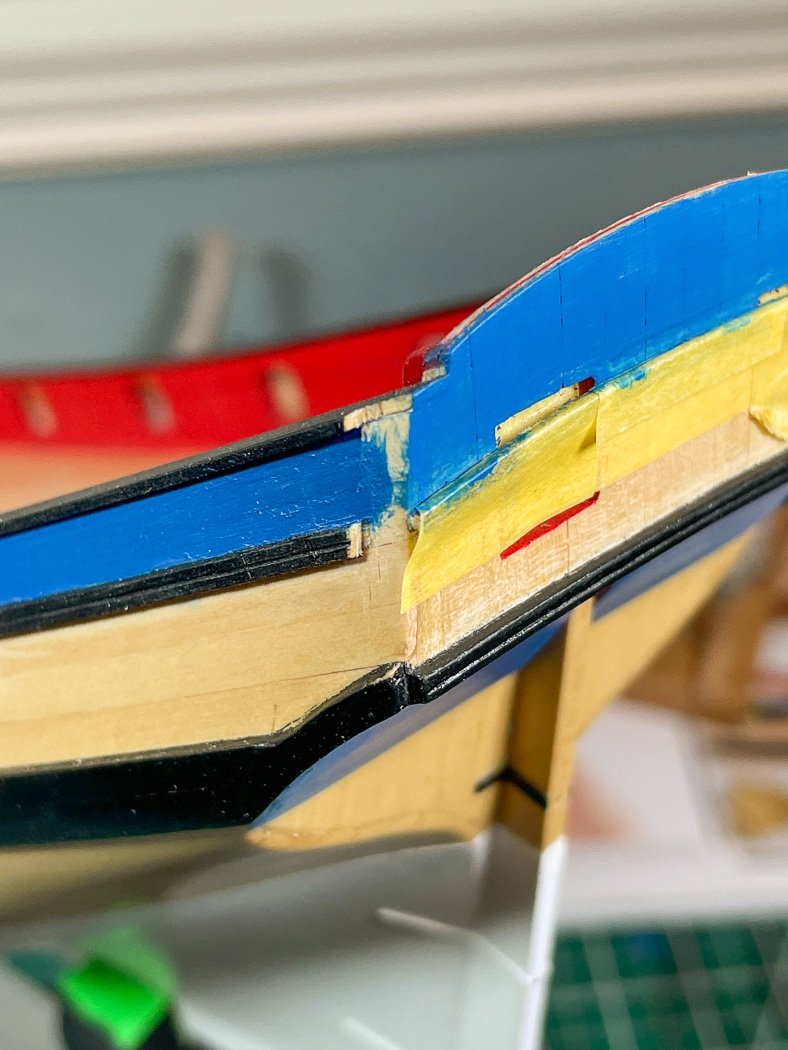
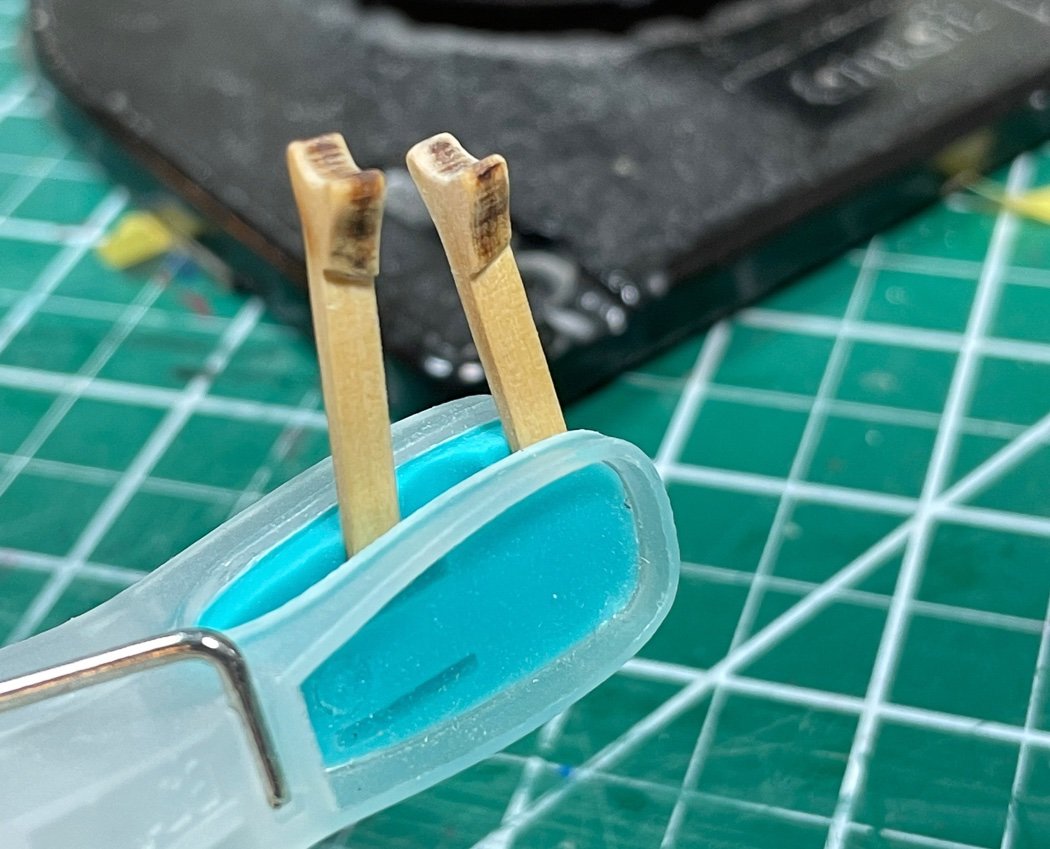
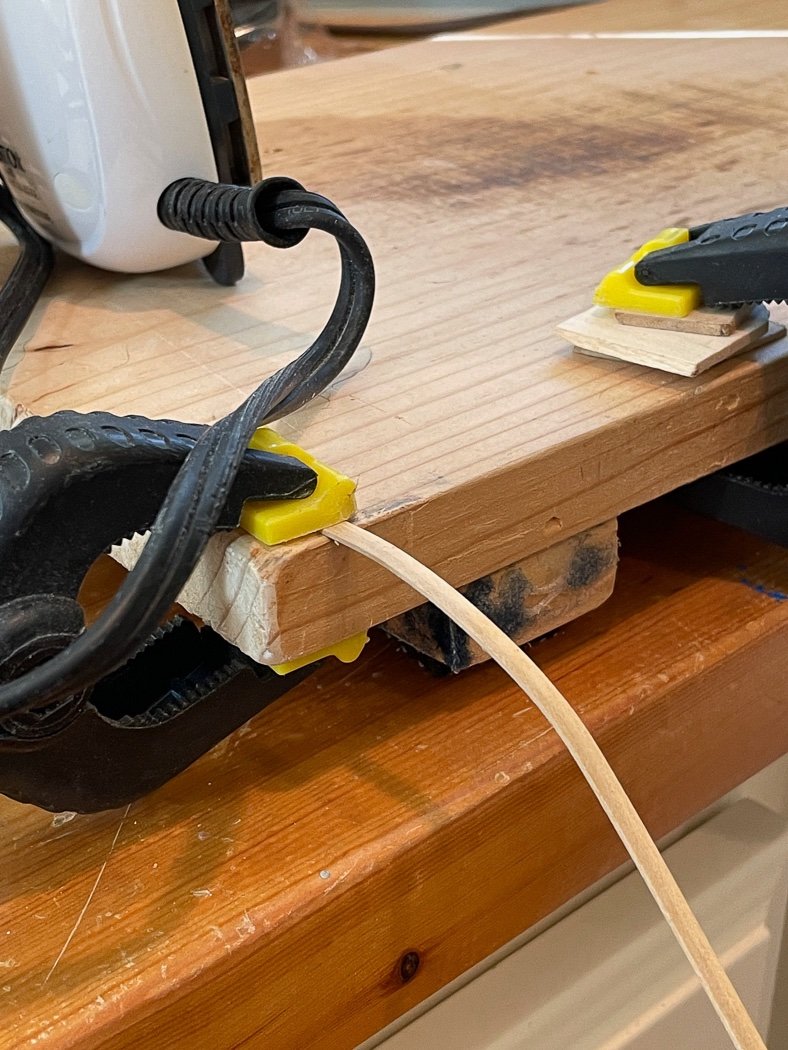
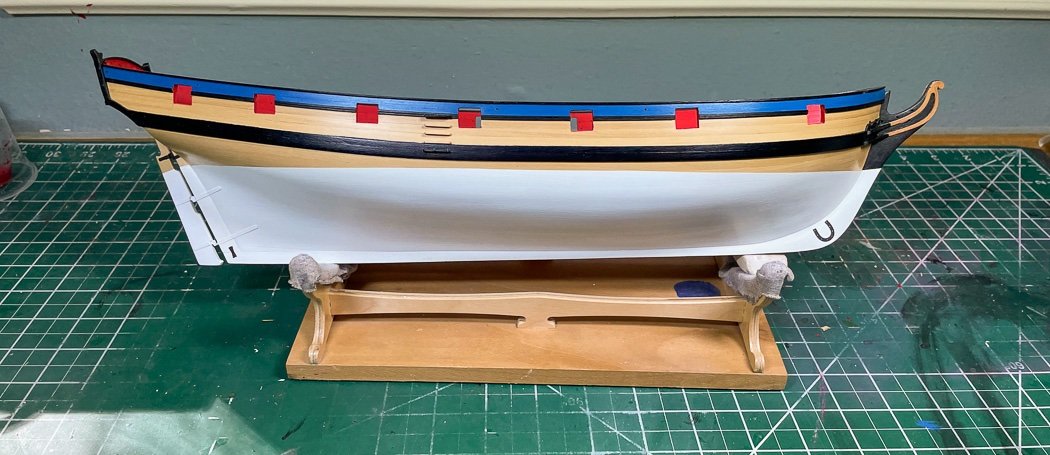
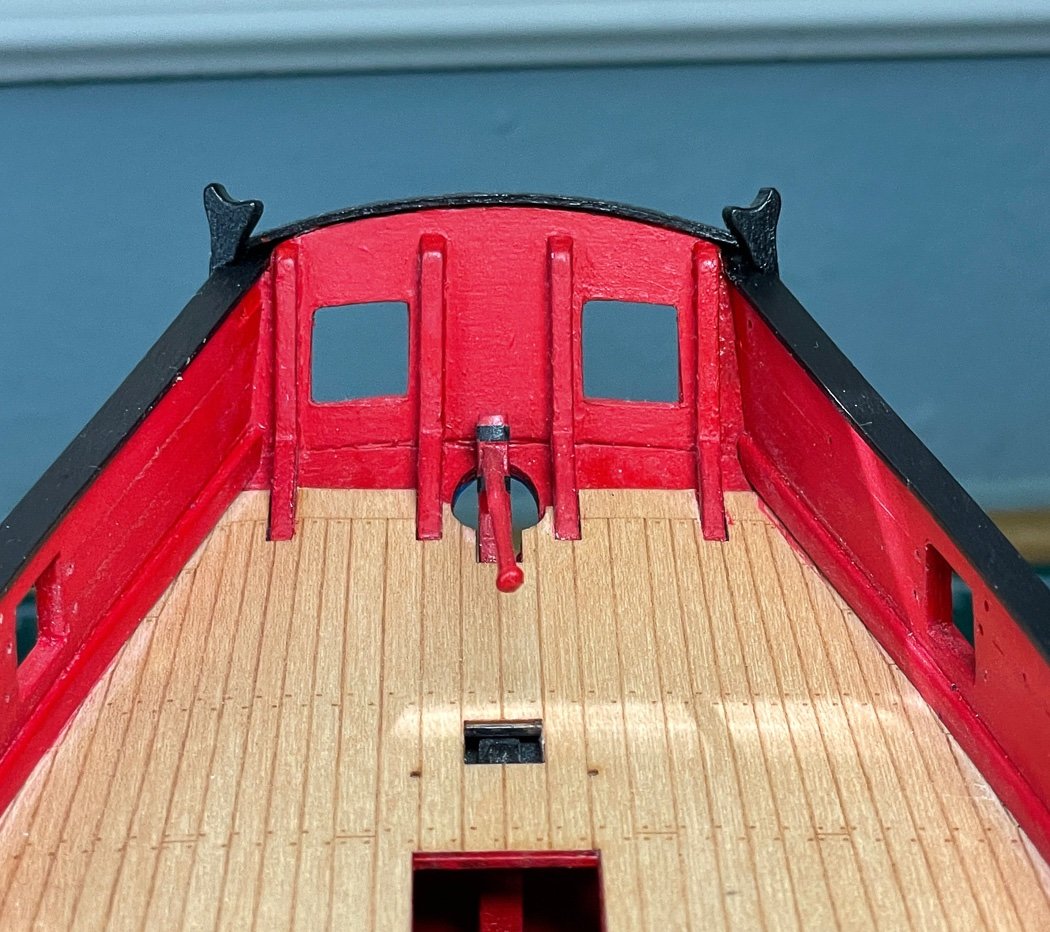
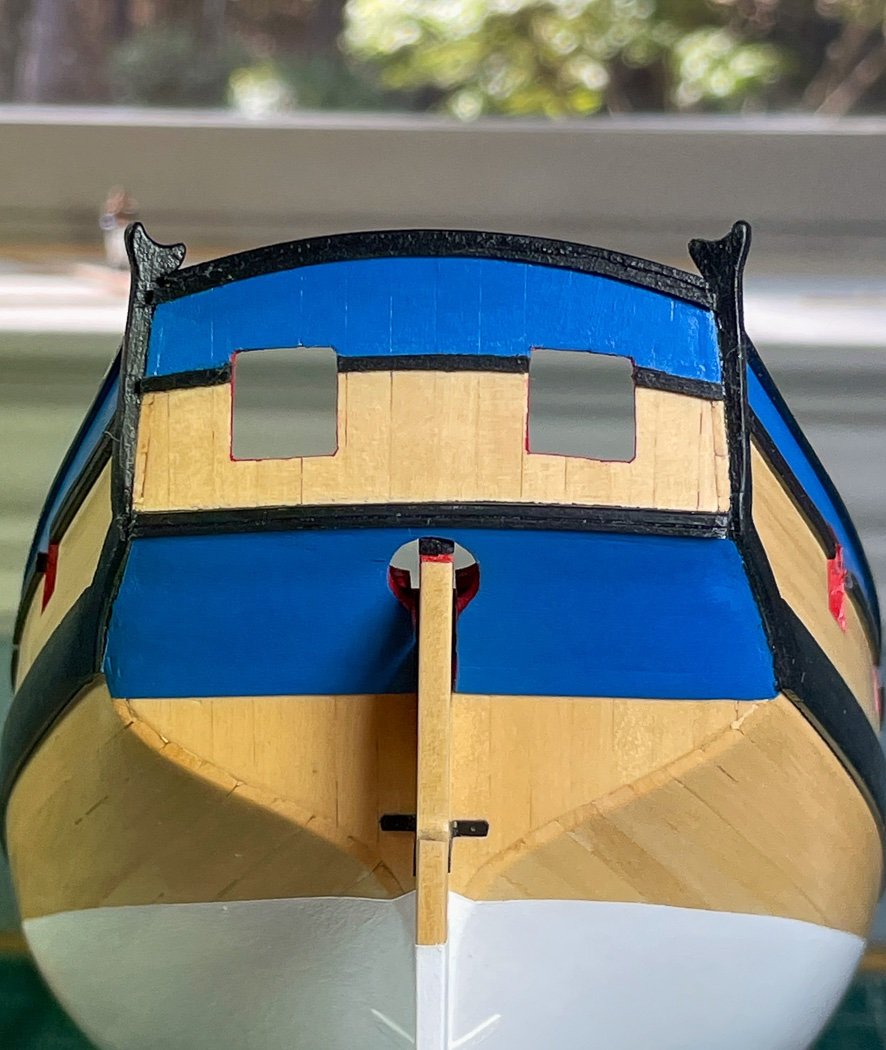
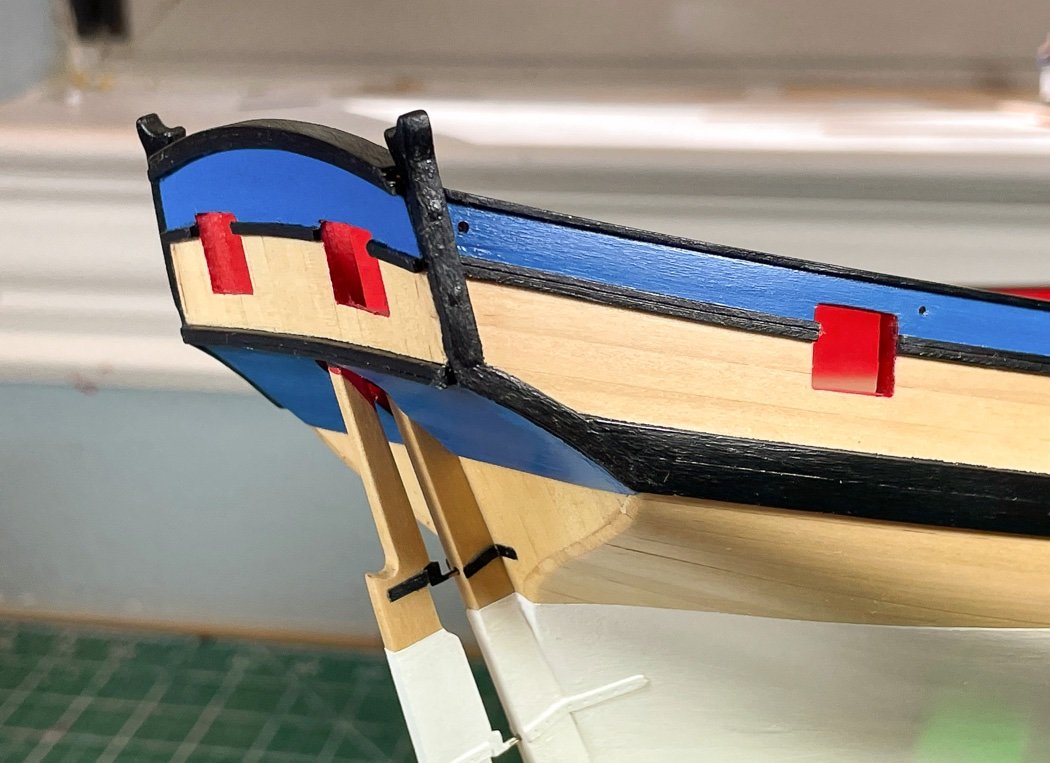
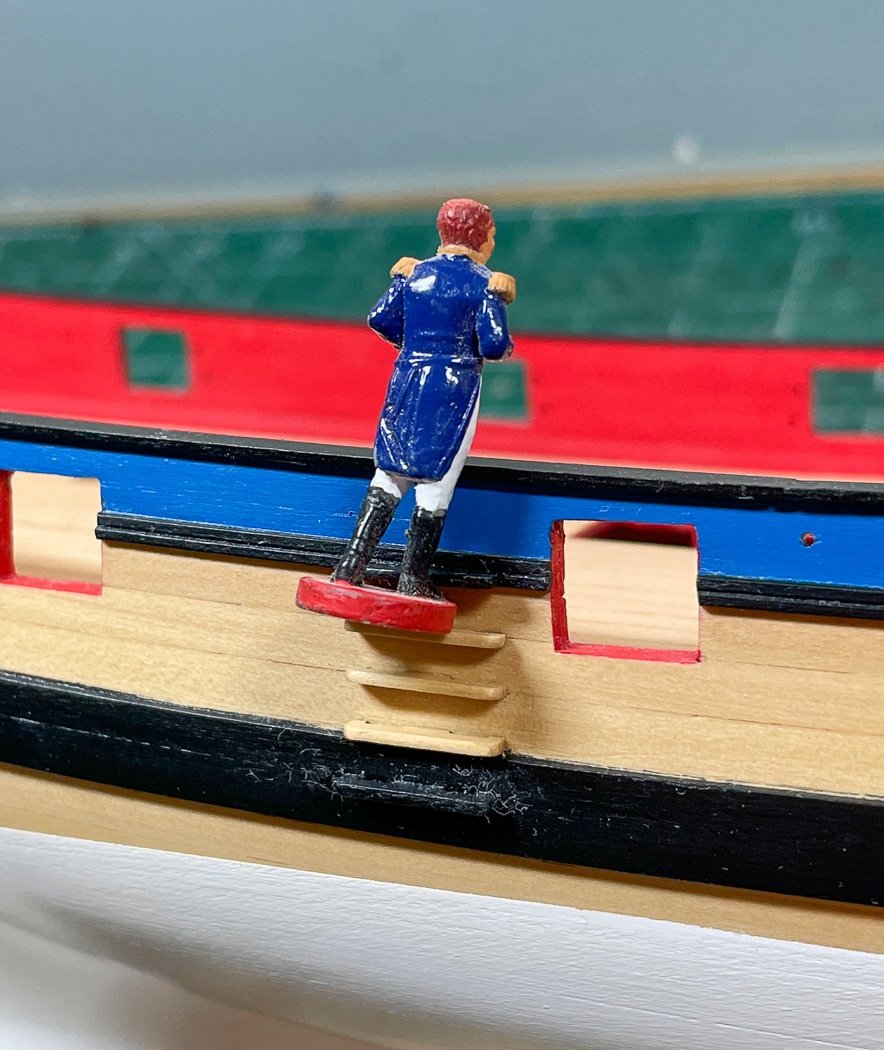
Upper Hull and Stern I’ve made some progress on the upper hull, largely completing it and the stern. Sometimes creation begins with destruction - I’m not sure it its essential but I usually “etch” a surface before gluing something to it as I’ve done here on the hawser holes (is that the marine name, sounds wrong 😄 and the first phase of the stem decoration. I also etch the mounting side of what’s being attached, in the recesses of my mind I see the glue adhering better. Maybe not… At any rate I’m careful to contain my knife attack to what will be covered. The instructions show these stem decorations as natural, I elected to paint them yellow ochre since I’ve painted the stem black. The engraving is very nice, but that means the paint has to be thin to not fill and cover the engraving….ask me how I know that…. I did encounter a small problem here. The decoration covered the slot for wrapping of the bowsprit, I had to enlarge/lower the slot with a file. It’s a good thing I caught it or it would have been 90% covered and very difficult to correct. I always assume these things are my fault and not a design issue - I had so many issues with the stem why not one more. This is also a good time to check the three small slots along the top of the stem. There are three brass pieces that slide through these slots, not just fit into but slide through to the middle of each. It’s a great design idea, but here again I had to enlarge the slots, mostly to remove excess paint. The temptation is to drill the hawser holes (there’s that name again, it can’t be right) straight through as they lie. However they need to instead be straight with the run of the deck since the hawsers feed along the deck to the hold. I go slow with these, a great opportunity to split some wood. First a pilot hole with a small bit, then a larger one and gently finishing with a round file. The tape on the inside helps prevent splintering. Sometimes the best jigs are the simplest one. To mark the paint line for the upper hull I just edge glued a 5mm scrap to another one in an L shape. It needs to be short since the deck curves. I just ran it along the cap rail marking with pencil (lightly so not to dent the wood) below then came back and ran Tamiya tape along that dashed pencil line. Before doing that I lightly sanded above the wales with 400 grit. This Cerulean Blue is the color I hope to use on Winchelsea and at any rate is a pretty color. I mix the tube with distilled water until I get the consistency I’m looking for and paint away with my brush. And end up with this. Ok, before I go any further, it’s time to confess. I have purchased an airbrush and compressor. My thanks to @James H who provided gracious and expert advice on what to get. I ended up with an Iwata Eclipse along with this basic compressor (which came with some cheap airbrushes, but I’m an all in kind of guy). I still prefer a brush for most things but there is stuff I think the airbrush will prove helpful, like gun carriages and priming PE for example (when I don’t instead blacken it). First up were the long trim pieces and the cap rails for the hull (I’m not brave enough to paint anything on the ship, it has to be done off to the side). No judgements please, I’m on a beginner’s learning curve. Here I went off book. I decided I wanted a simpler look that highlighted the pretty blue/black/boxwood/white combination. Plus I really don’t like swivel guns, I think they detract from the elegance of the hull and make it instead look busy. Of course I now lose the historical accuracy merit badge. So if I wasn’t going to mount swivel guns why include the swivel gun mounts. Instead I scraped a simple molding into a slightly larger boxwood strip and ran it along the bottom edge of the blue paint. I always run these things as one piece then come back and trim out the gun ports. I’m sure there are other ways to do this, but I prefer to use a really sharp #11 Excel blade. The #11 scalpel may be sharper, but it is way to flimsy for this onion peeling approach to trimming. I score it top and bottom at the edges of the port and peel it back from both bottom and top to prevent splitting - going slow is essential and not something to do after too much coffee, too much scotch, or while watching the Cowboys beat Philadelphia. In the 'always plan ahead' mode it was time to take a look at the stern. I wanted the blue trim to match up with the trim on the transom, separated by a black trim piece. It was also easier to mark and cut the side trim piece to match up to the boom crutches rather than trying to cut it away later (this applies if using the kit supplied hull trim as well). I spent a lot of time fitting the boom crutches, I wanted to turn them in a little bit (not thick enough to turn in enough) and match them up to the counter fashion piece for a contiguous flow. That meant both thinning them and matching up angles. Having done one the often more challenging task is to make the second one a mirror identical. Care is required to ensure they both wind up the same height above the cap rail. (the tiller is temporarily mounted, I see in the photo it isn’t straight, and I leaned up that paint in the corner later). A quick trip to the plank bending station to iron a curve into the transom top rail. It took a bit of fettling (my favorite English word) to get a good fit between it and the crutches, including a little beveling. With that the stern is complete. I added a couple of bolts to the crutches for no particular reason by drilling holes, inserting 24 gauge black wire, then cutting it off to stand a little proud before I installed the crutches and before I painted them. (rudder is temporary and not pushed in tight). There are a series of 1mm holes drilled in the hull for future rigging as per the plans. I always check the plans for anything I can do earlier because its generally easier to do earlier. I added the mounting ladder, stopping short of the layout shown on the plans. I didn’t necessarily want a rainbow of painted rungs with a blue one at top - and Admiral Cochrane on his visit to Flirt didn’t seem to need it to climb aboard. Lot of dust on that bottom rung, sorry Admiral we’ll get right on that. With that the exterior of the hull (minus the bow, that’s next) is largely complete. I’m happy with the paint lines (all by brush except trim). With the blue trim, black molding, and red lined gun ports I spent a lot, a lot of time going back and forth with a 10/0 Shader touching up and touching up again. I try to tell myself to move away from the paint jars, then immediately find something else to touch up. When I get to the 20/0 shader its really time to stop, and then…. Thanks as for your time spent to visit my log, the likes and the comments are always appreciated.
-
Looking good Paul, so near the finish line now. That has to be the world's cleanest work mat.
- 274 replies
-
- Cheerful
- Syren Ship Model Company
-
(and 1 more)
Tagged with:
-
I wouldn’t have built my first ship without the practicum. He may be ornery, but the Fair American (no longer produced) was a great kit and the AVS and Pride of Baltimore are great practicums. He may be over zealous about his copyright and IP, but isn’t that a thing on this forum.
-
The Nelson and Alert are essentially the same ship, a cutter ( though not near the same quality kit). Might want to consider that in your choices.
-
I build my first model, the AVS using the practicum by Bob Hunt of Lauck Street, I highly recommend his practicums. He’s a cantankerous old dude but I learned a great deal from his guided instructions, much of which I still use today. It is a great way to learn by the numbers. I’d definitely go that route as a first timer. Seems some have an issue with some of his business practices, I wouldn’t let that influence you, the practicums are great. Just don’t buy the one he did for a Chinese kit. The Alert is a much better kit than Lady Nelson, but LN is a good starter model. Cutters are cool ships, mast and rigging but in a much simpler form that a brig or frigate. You’d be crazy to start off with Victory or Vanguard, way too much the first, or third, time out. I thought Chris had stopped producing Alert, if that’s the case consider Flirt, more complicated but any Vanguard model is better than most others
-

Photographing your models
glbarlow replied to Patrick Matthews's topic in Photographing your work. How to do this.
There’s a whole long post on this topic, you should add this to the other methods listed there. -
I have HMS Speedy from Vanguard Models for sale. The kit is intact and in like new condition, barely touched and includes pear wood planking and fittings, copper plating, and resin cannons among many other nice features. It also includes upgraded Pear Block set and an upgraded Maple laser engraved deck, both purchased separately when I bought the model. The ship's boat is not included (I built it one day with my grandson), but a replacement is available on the Vanguard website. I'm asking $250 plus shipping, 40% off list price. This is a new design by Chris Watton. My reason for selling it is I later purchased and am now building HMS Flirt, a near identical kit and have HMS Sphinx waiting in the wings. I just won't get back to building this great kit. I have Chris' permission to sell my HMS Speedy. Please PM me with any questions.
-
I was a little concerned with the first photo🤣 Glad you’re back at it.
- 642 replies
-
- winchelsea
- Syren Ship Model Company
-
(and 1 more)
Tagged with:
-
A thin line applicator like I’ve shown in my log helps manage the flow and amount of CA used and keeps it off your fingers. Plus it takes very little CA to hold the plank. I run the applicator behind the plank as I press down and wind up with very little on my fingers or on on the plank. I’d be careful with acetone on the wood, you might first try gentle scraping first (one of the many uses for my dental scrapers). The Chuck method of edge bending is a big help since the plank is already formed to fit. As you said though, ultimately it comes with practice. Congratulations on finishing the planking, I hope you don’t mind a little more input but I suspect you’ll have paint runs with your taping as it is. Tamiya tape will stretch and conform to curves. I use a 6mm size to run as a single strip as much as I can, overlaying only where there is a straight line. Then a put 10mm tape above that less concerned with the line just to prevent paint going where I don’t want it, the 6mm tape curves more easily. Every overlay, especially short pieces, is an opportunity for a paint leak, paint build up, or a less than smooth line. Just a thought having recently painted Flirt’s hull.
-
There are not likely any video instructions but there are plenty of build logs including mine to search and review. They’ll give you lots of help. Take your time and read the logs as well as keep up your own, it’s the best way to ask questions and get answers here on the forum.
- 19 replies
-
- Lady Nelson
- Amati
-
(and 2 more)
Tagged with:
-
It is my hope to get it right myself some day. I agree on the painting. I had the same conclusion on Flirt. It needs the bottom and top to balance out. Besides, who doesn’t love painting waterlines. 🤣
- 341 replies
-
- Duchess Of Kingston
- Vanguard Models
-
(and 1 more)
Tagged with:
About us
Modelshipworld - Advancing Ship Modeling through Research
SSL Secured
Your security is important for us so this Website is SSL-Secured
NRG Mailing Address
Nautical Research Guild
237 South Lincoln Street
Westmont IL, 60559-1917
Model Ship World ® and the MSW logo are Registered Trademarks, and belong to the Nautical Research Guild (United States Patent and Trademark Office: No. 6,929,264 & No. 6,929,274, registered Dec. 20, 2022)
Helpful Links
About the NRG
If you enjoy building ship models that are historically accurate as well as beautiful, then The Nautical Research Guild (NRG) is just right for you.
The Guild is a non-profit educational organization whose mission is to “Advance Ship Modeling Through Research”. We provide support to our members in their efforts to raise the quality of their model ships.
The Nautical Research Guild has published our world-renowned quarterly magazine, The Nautical Research Journal, since 1955. The pages of the Journal are full of articles by accomplished ship modelers who show you how they create those exquisite details on their models, and by maritime historians who show you the correct details to build. The Journal is available in both print and digital editions. Go to the NRG web site (www.thenrg.org) to download a complimentary digital copy of the Journal. The NRG also publishes plan sets, books and compilations of back issues of the Journal and the former Ships in Scale and Model Ship Builder magazines.


