


glbarlow
-
Posts
3,844 -
Joined
-
Last visited
Content Type
Profiles
Forums
Gallery
Events
Posts posted by glbarlow
-
-
On 8/30/2021 at 6:48 AM, Mldixon said:
stone on the end of the Dremel after dressing with a Small diamond file.
Very clever idea and execution. Well done.
-
There are not likely any video instructions but there are plenty of build logs including mine to search and review. They’ll give you lots of help. Take your time and read the logs as well as keep up your own, it’s the best way to ask questions and get answers here on the forum.
-
7 minutes ago, Gregory said:
supposed to be a compliment
No worries. There is more texture than shows in the photo. It’s why I use a brush for hull painting.
-
-
Clever jig. The planking looks great. Almost home on the hull.
-
Nice work on the shrouds, they can be tricky little things.
-
-
4 minutes ago, whitejamest said:
the finish was so nice.
It’s not obvious in the photo but for the hull I like seeing the subtlety of the brush strokes.
-
Of course it’s Derek like in its amazing quality, well done as always.
if I may offer a lesson I learned from Chuck: In lining your belts you went to far up the bow with the curve from midship, meaning the width of the planks at the stem should have been wider starting at the first one. That would have eliminated the drop planks.
As you said it won’t matter once you paint it, it will look beautifully smooth and crisp as it already now does.
Superb craftsmanship as is your hallmark. -
-
2 hours ago, Gregory said:
how the planking lines disappeared,
IRL the planking lines are distinct for the boxwood. As for the white I’d prefer to call it clean and clear, not sure what else i can say to your comment.
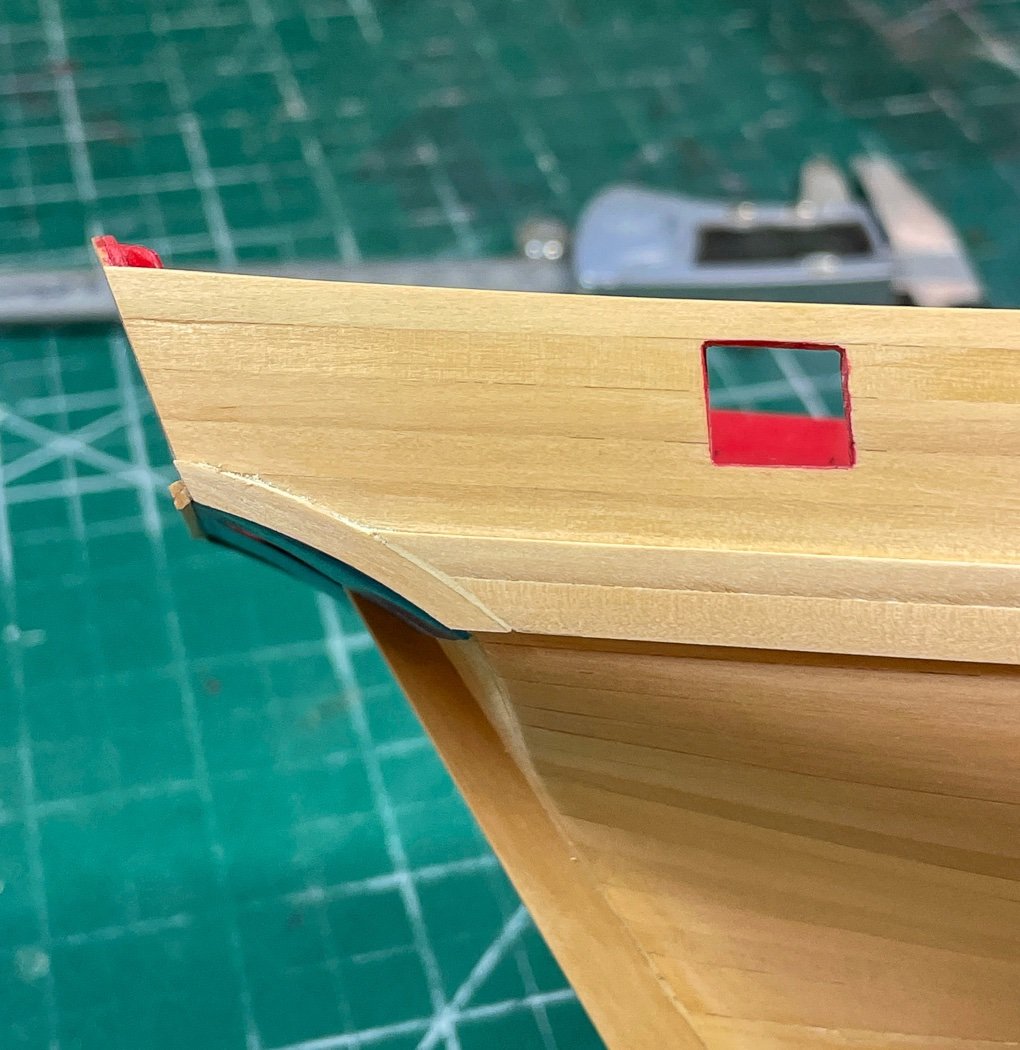
Note The top half of the section above the wales has been sanded in prep for next step of hull decoration.

- JpR62, CaptnBirdseye, Rustyj and 4 others
-
 7
7
-
-
Big steps, I’m happy you’re all in on your now full time job. We are all the better for it. I’m sure the fishing models will make nice Christmas gifts. The post may refuse to deliver much larger and heavier models 😂🤣
Will first run buyers need the revised manual or is it mostly edits?
- thibaultron, Canute and mtaylor
-
3
-
Well done, such neat work.
-
Well done, another great reference log for when I start mine.
- scrubbyj427 and FrankWouts
-
2
-
-
-
Well done, a great reference of when I start my Winnie next month.
-
Lower Hull Complete
Next up was the rudder.
I did some subtle shaping - rounding off the leading edge then feathering front to back and top to bottom. Basically I followed the same approach I did with Cheerful - I think it gives the rudder a nice, and realistic, look.
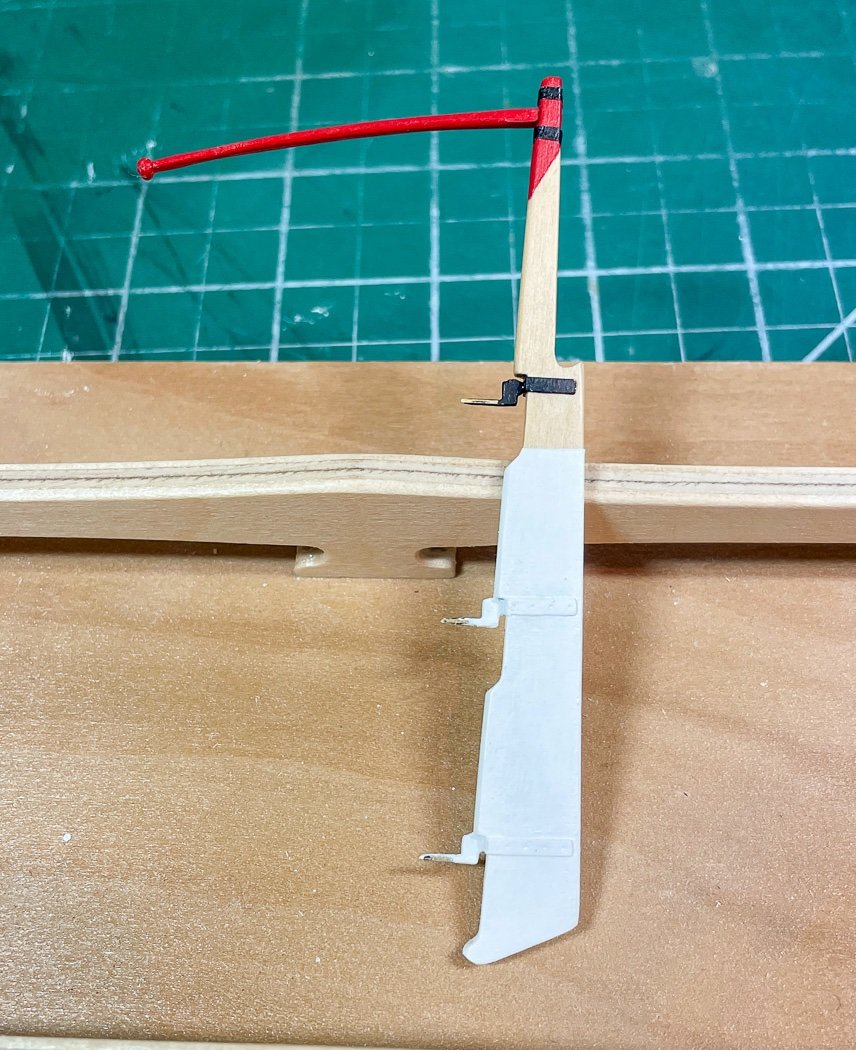
I’m impressed with Chris’ use of PE to simulate the pintles and gudgeons. Normally I toss kit brass in favor of thinner black card or black masking tape (used on the top of the rudder), in this case the brass was so thin and the design so clever I used it, installed it looks quite nice. It got a couple more coats of white after this photo.
Then it's time to paint.
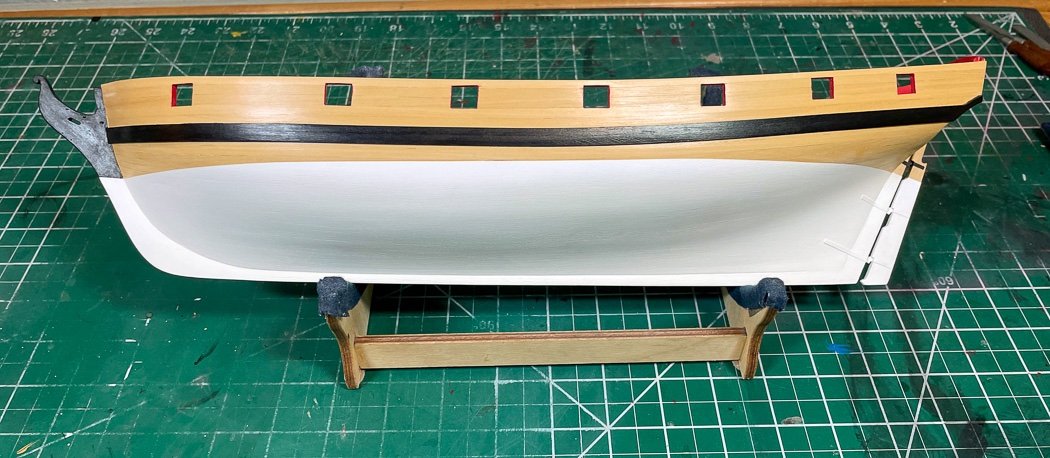

Here’s the semi-finished hull. I didn’t take any photos of the process of painting it (by brush). It basically involved lots of Tamiya tape, multiple coats of Admiralty Paints Matt White, and lots of re-taping, a little scraping and touch up to ensure a clean line. I also very lightly sanded the top edge of the white to blend it in to the hull. I’m pleased with the look, the white accents the boxwood and black wales nicely I think.
Once dried overnight I added a coat of WOP to seal it all up. I’ve probably mentioned this before, when I say add a coat of WOP it means applying it with a clean cloth (not brushes) and wiping it off about as fast as I wipe it on. What’s left is whatever is absorbed into the wood and lightly covering paint, leaving a near matte finish, no glossy looks for me.
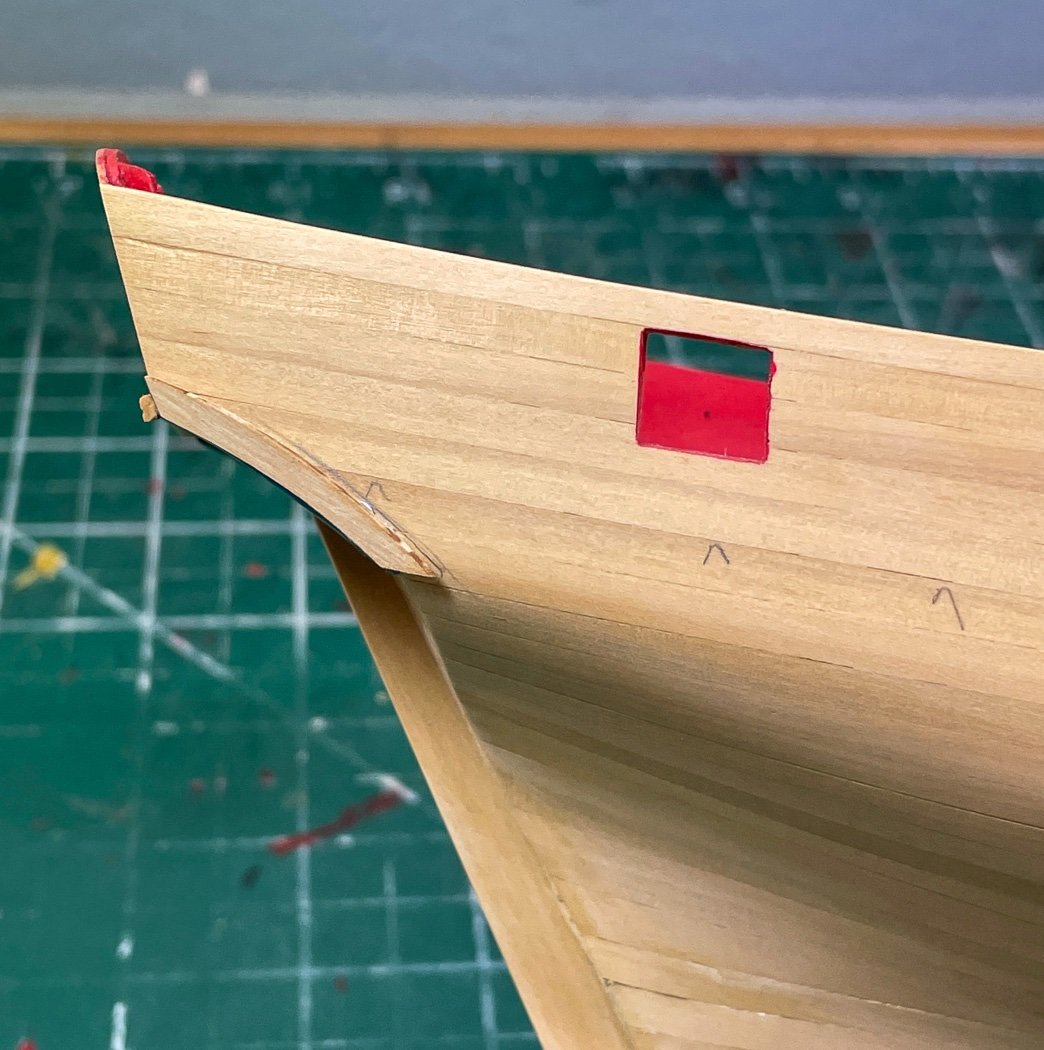
I painted the stem black to cover up the repairs, it is the same color as the wales, my work light is glaring off the still wet WOP in the top photo.
Now to add the rest of the upper hull trim.
-
9 hours ago, Bob Cleek said:
sheets run from the belaying pin to their blocks aloft with a figure eight stopper knot in the bitter end
I rigged Pegasus, as Bob describes, to include every rope including those for the sails based on the research I did at the time. It looks great and a model I’m proud of. It does take a lot of work managing the complexity of all those ropes in tight quarters, the end result is worth it.
I had a nice build log here but it was lost in the 2013 crash, only the gallery photos survive. I think it’s a great idea, go for it.
-
That looks great. Nice even butt joints too. Well done!
-
17 hours ago, SpyGlass said:
Do you really need to paint
4 hours ago, DelF said:gave you a very neat result.
14 hours ago, BobG said:That boxwood is gorgeous.
I really appreciate the comments. My standards for myself are too high I guess, the damage and repairs to the stem plus using lower grade planks on the bottom necessitated painting it white, it already has the first coat. I’ll probably regret it later. -
Glad you did the test and it works out.
I may have to make the Thickness Sander my next toy...I mean tool... The minor variations in plank thickness become a bigger deal when planking, especially single planking. Good call on that.
-
Next up were the wales, pretty straightforward, so much so I forgot to take a photo. I lined up a 3mm plank with the top of the king plank followed by a 4mm plank below it as per the instructions. As I did with the planking, and maybe a little more important here, I beveled the inside top edge of the lower 4mm plank, testing and sanding as needed to get a tight fit with the 3 mm plank above.
Except I didn’t entirely follow the instructions. The fashion piece per the instructions is added later in the build by removing enough of the wale for it to fit. I chose instead to use some blue putty to temporarily hold the fashion piece in place long enough to draw a line along the bow facing curve after lining up the stern facing to match the counter.
I then cut the wale planks to that line and installed the three pieces as a unit, to me this is easier than cutting away the wales later. I filled any gaps, easy to do since it will be painted black, and sanded it all down. There are boom crutches added later to meet the top of the fashion pieces completing the stern, those I’ll fit and add later.
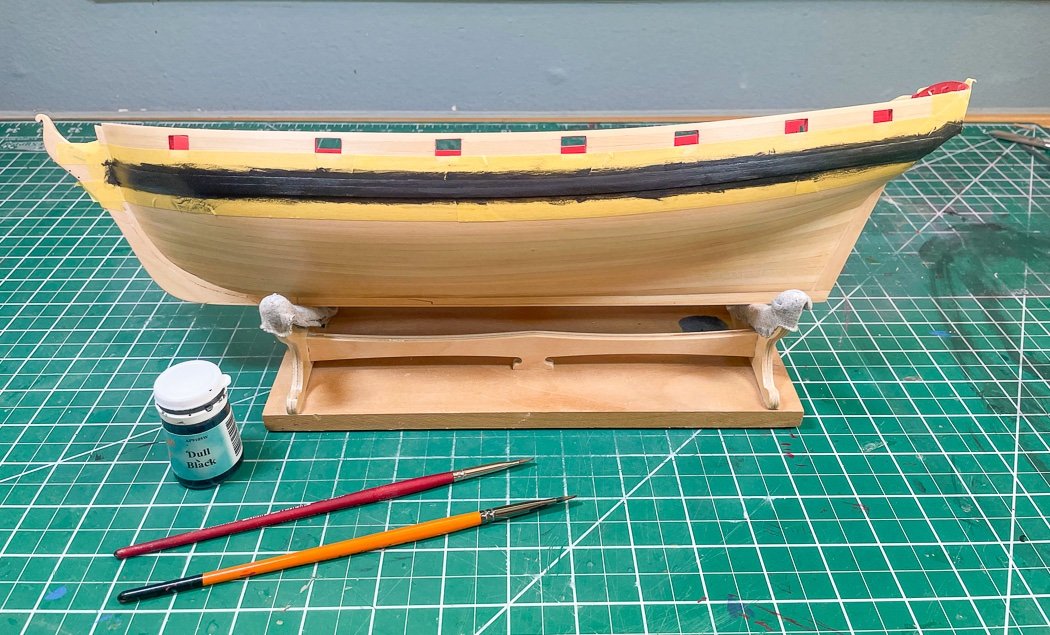
There is nothing better than Tamiya tape for masking. Done right there is little concern about paint running where you don’t want it to go. I chose Admiralty Paints Dull Black for the wales. I did invest in an air compressor and air brush which I’ll use for some things, but I still really prefer brush painting for most of the work, I like the look. Plus I know how to handle a brush, the air brush might end up painting a lot more than the ship in my untrained hands, plus so much masking...
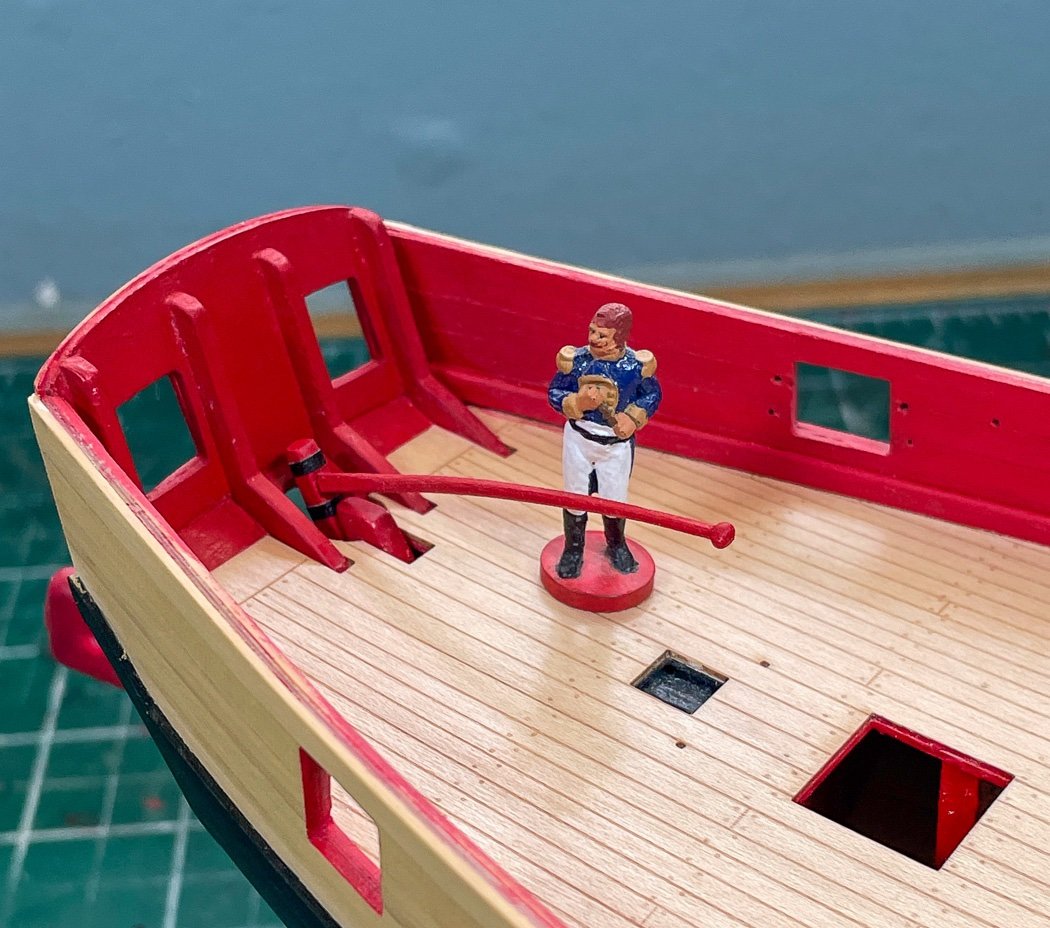
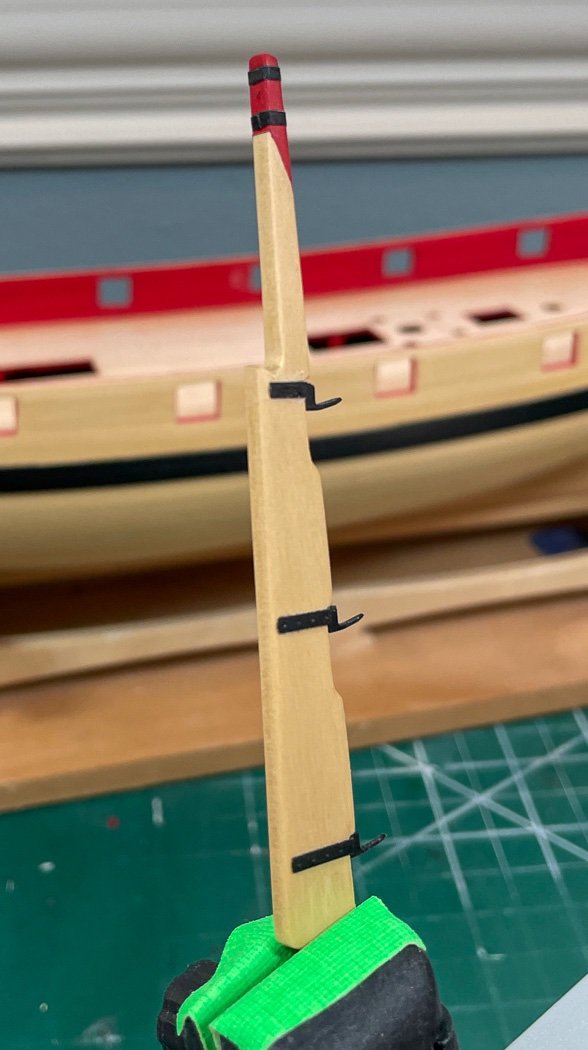
In between paint coats on the wales I finished up the rudder and tiller. The provided two piece tiller seemed a bit thick and straight to me so I rounded and thinned it on the lathe then gave it a light curve using my bending station. In this case I didn’t touch it with the iron, just held it close and let the steam do the heating - it is pretty fragile and I didn’t want to over-do it. Admiral Cochrane, visiting Flirt from his sister ship Speedy seemed to approve of the test-fitted modification.
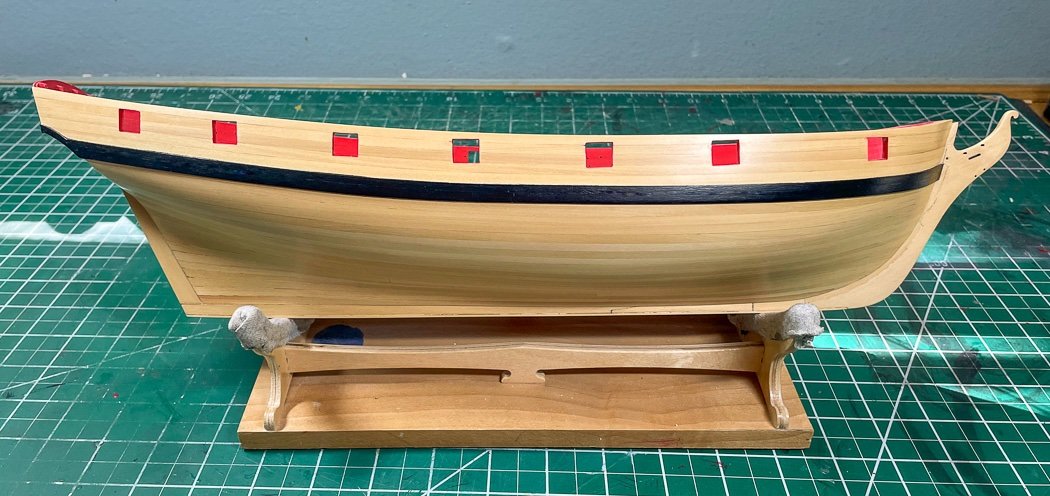
Following another coat of WOP the wales are complete. I like adding WOP as I go, the boxwood drinks it in almost as fast as I put it on. One of the many benefits is it makes painting easier. After the WOP dries (overnight generally) I buff it out with a soft cotton cloth and lightly sand any surface being painted with 400 grit paper. The WOP gives the paint a nicely primed surface, much like a painter uses Gesso on canvas before the first stroke. The paint isn’t absorbed by the wood and the paint has a nice finish once dry.
Another benefit is it makes removing any mis-applied paint easier. I use my smallest mini-chisel or dental scrapers to gently scrape it off. It’s important not to attempt this until the paint has dried an hour or more, don’t wipe or scrape it while it’s wet. I’m scraping it off the coats of WOP, not the wood itself so I don’t damage the wood in the process - a little touch up with the WOP and I’m back to even.
While I’m really tempted to not paint the lower hull white I’m kinda compelled to because of the damage I did and the resulting repairs to the stem, so it’s likely good bye to the pretty boxwood and the decent job I did planking.
As always, thanks for the likes and comments - they are always appreciated.
- PRS, doxidad, Ryland Craze and 13 others
-
16


HMS Sphinx 1775 by Glenn-UK - Vanguard Models - 1:64
in - Kit build logs for subjects built from 1751 - 1800
Posted · Edited by glbarlow
A thin line applicator like I’ve shown in my log helps manage the flow and amount of CA used and keeps it off your fingers. Plus it takes very little CA to hold the plank. I run the applicator behind the plank as I press down and wind up with very little on my fingers or on on the plank. I’d be careful with acetone on the wood, you might first try gentle scraping first (one of the many uses for my dental scrapers). The Chuck method of edge bending is a big help since the plank is already formed to fit.
As you said though, ultimately it comes with practice. Congratulations on finishing the planking,
I hope you don’t mind a little more input but I suspect you’ll have paint runs with your taping as it is. Tamiya tape will stretch and conform to curves. I use a 6mm size to run as a single strip as much as I can, overlaying only where there is a straight line. Then a put 10mm tape above that less concerned with the line just to prevent paint going where I don’t want it, the 6mm tape curves more easily. Every overlay, especially short pieces, is an opportunity for a paint leak, paint build up, or a less than smooth line. Just a thought having recently painted Flirt’s hull.