


WBlakeny
-
Posts
252 -
Joined
-
Last visited
Content Type
Profiles
Forums
Gallery
Events
Posts posted by WBlakeny
-
-
Thank you all.
I'm now in the process of sanding, sanding... and sanding.
Pictures will follow soon.
- popeye the sailor, mtaylor and Canute
-
 3
3
-
Unbelievable that this is made from card. Wow! Those planks are laid so beautiful.
-
Indeed, i'm a fan of your work! Beautiful!
- mtaylor, ChrisLBren and Mirabell61
-
3
-
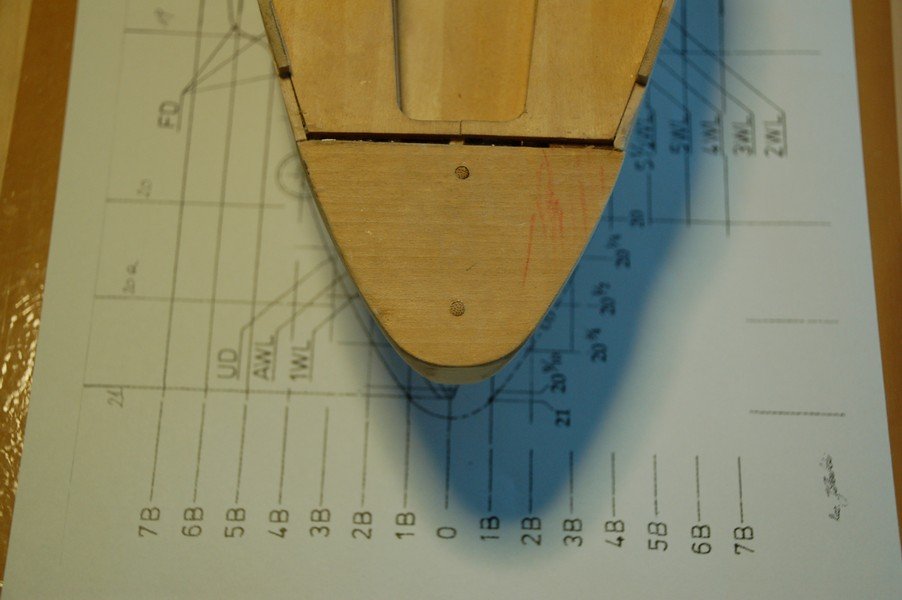
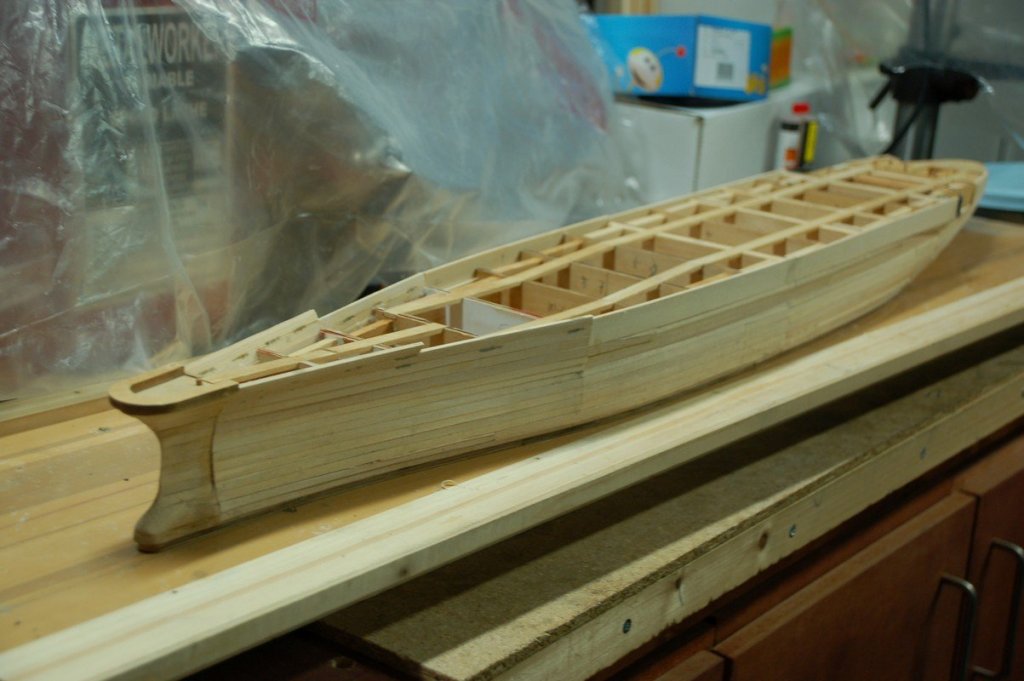
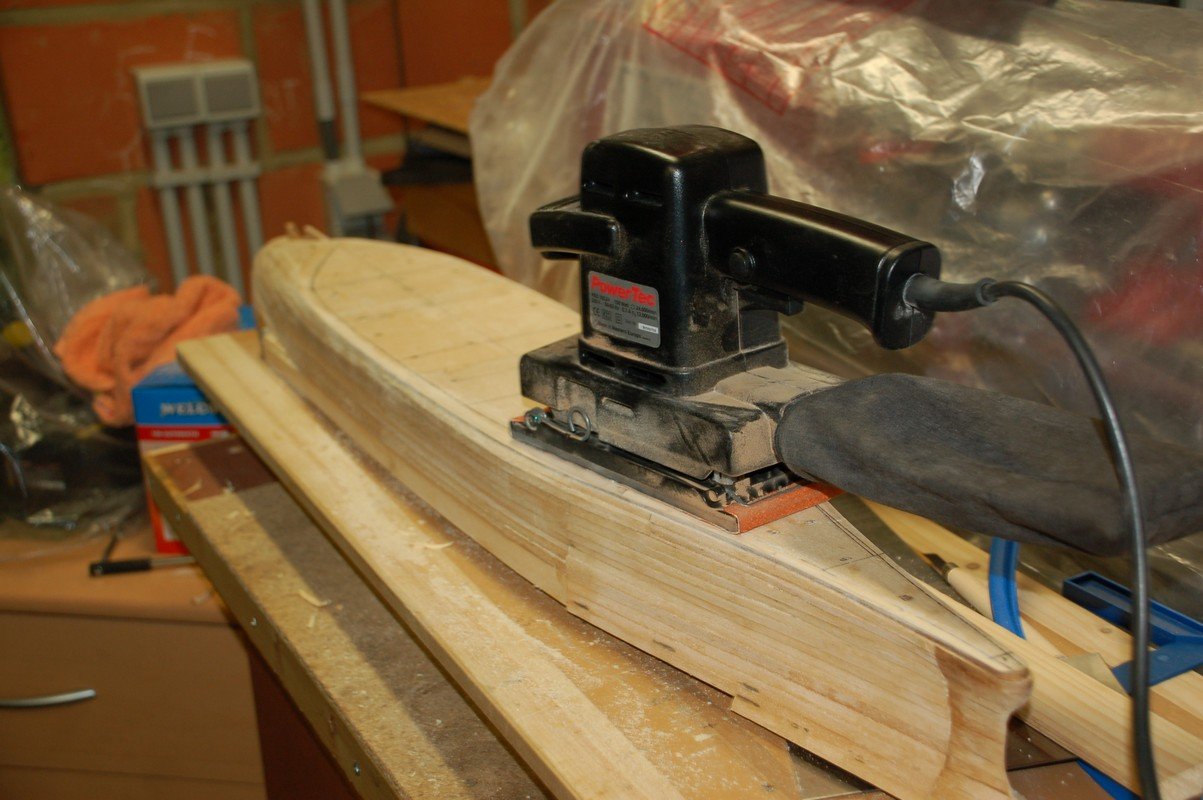
I had already removed the planking and filed off a bit of the bulkheads so that the planking runs smooth till the new stern.
Then redid the planking till the new stern.
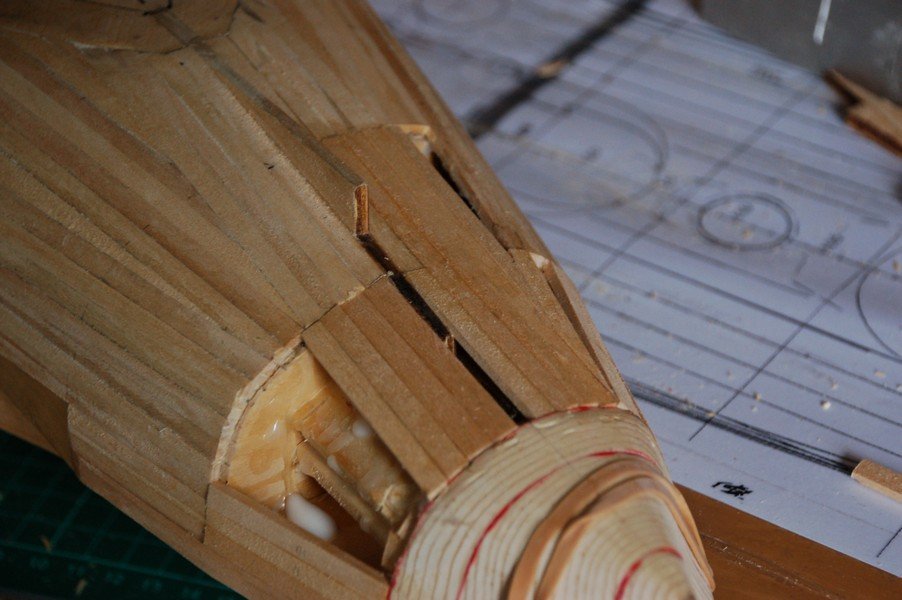
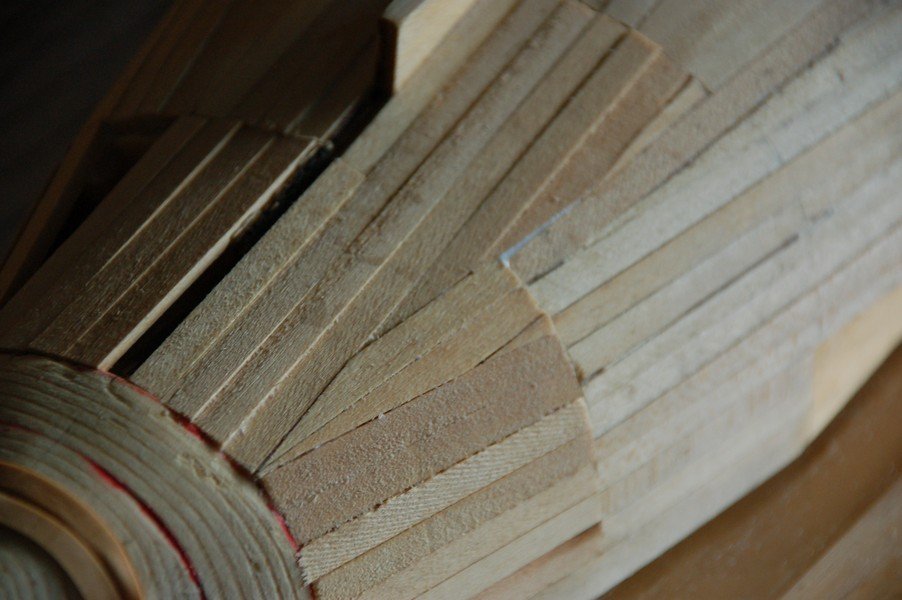
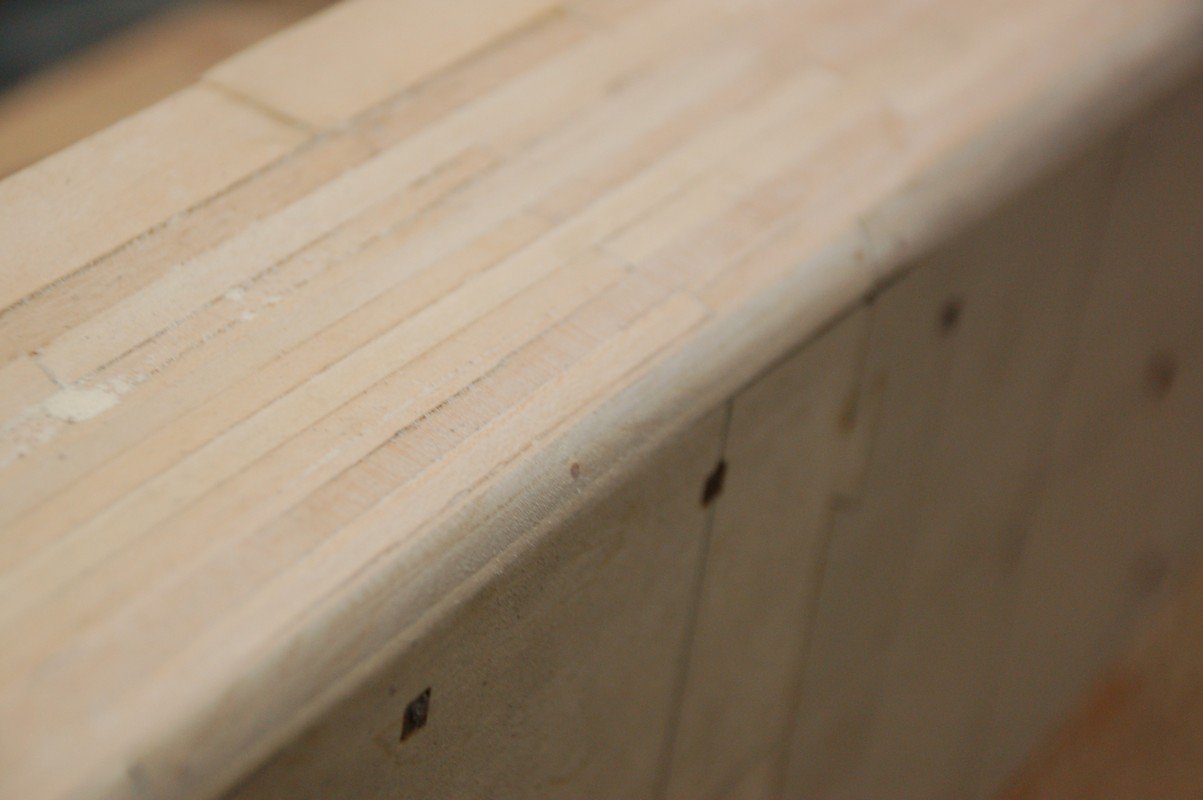
Afterwards sanded it all smooth.
And final result so far :
I'm happy with the result. I'm glad i took the risk of changing the stern. Who'll say what is the right stern, but now i'm following the new AOTS book and i'll stick to that.
-
Looks real promising.
I'd like to follow your build.
- mtaylor and aviaamator
-
2
-
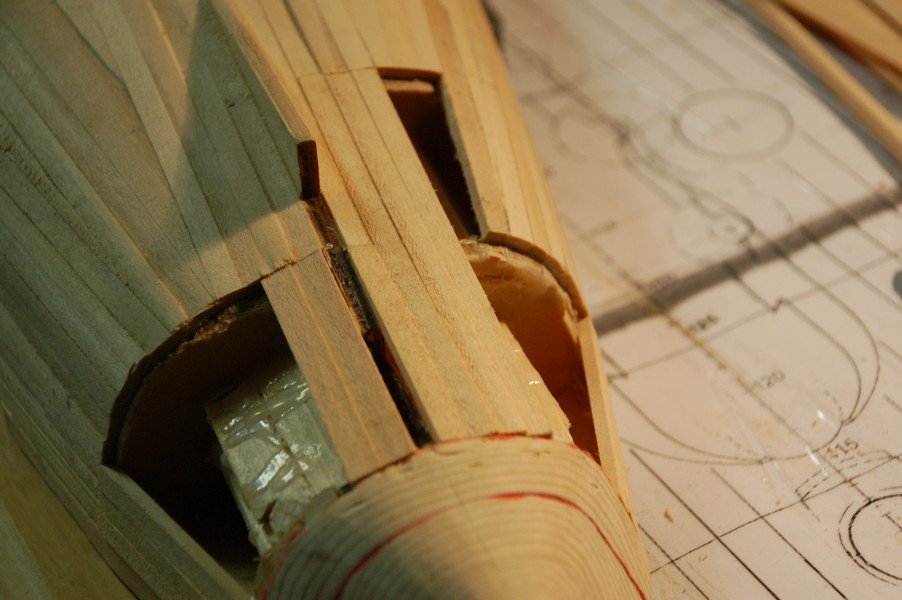
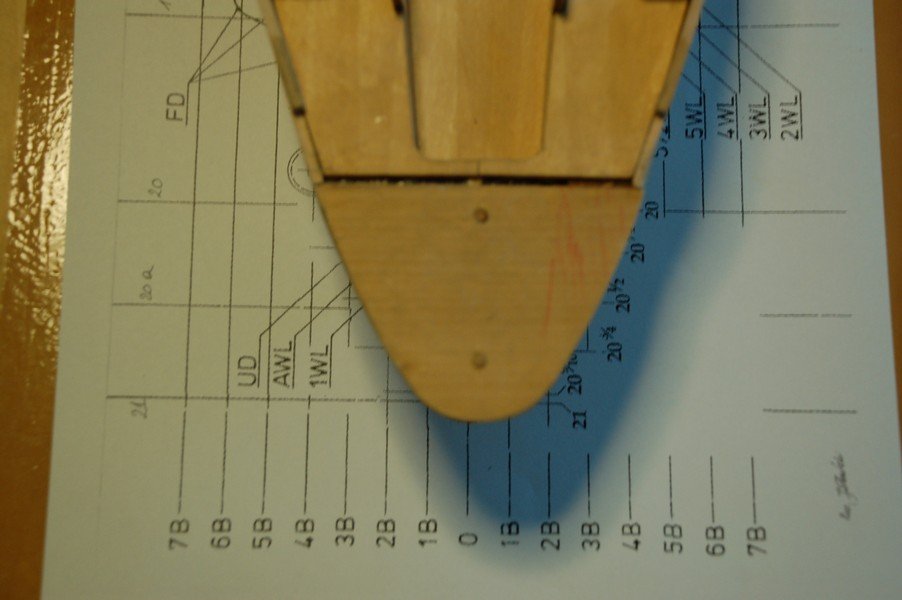
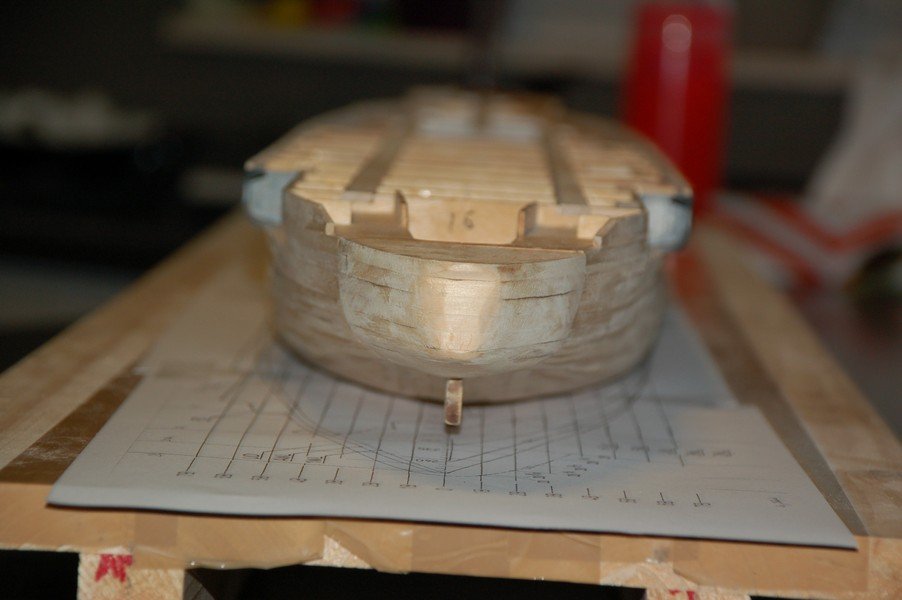
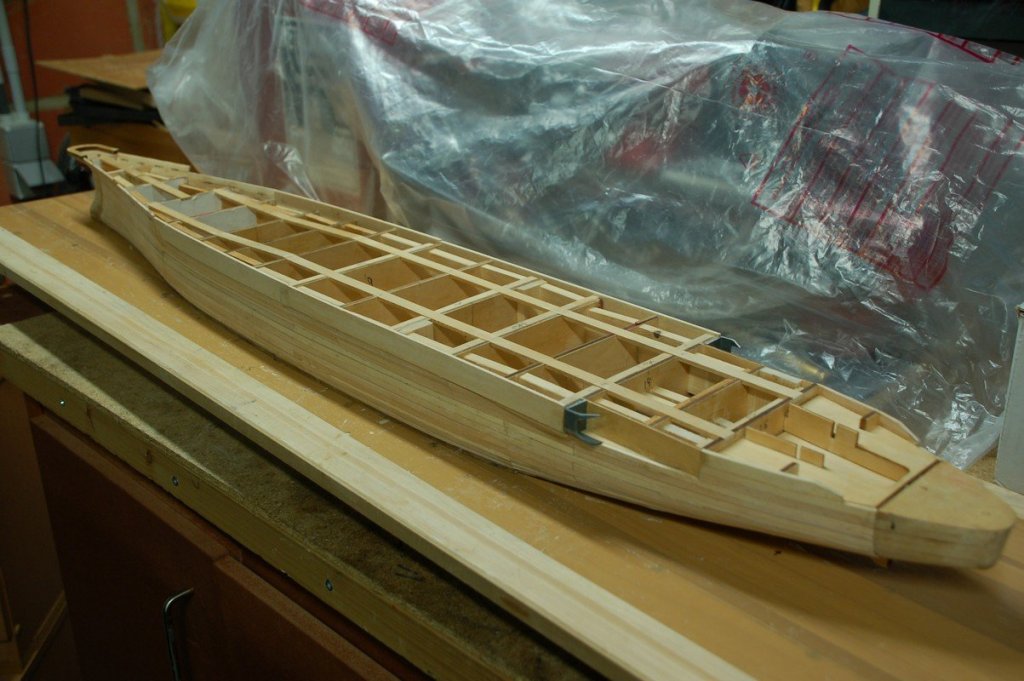
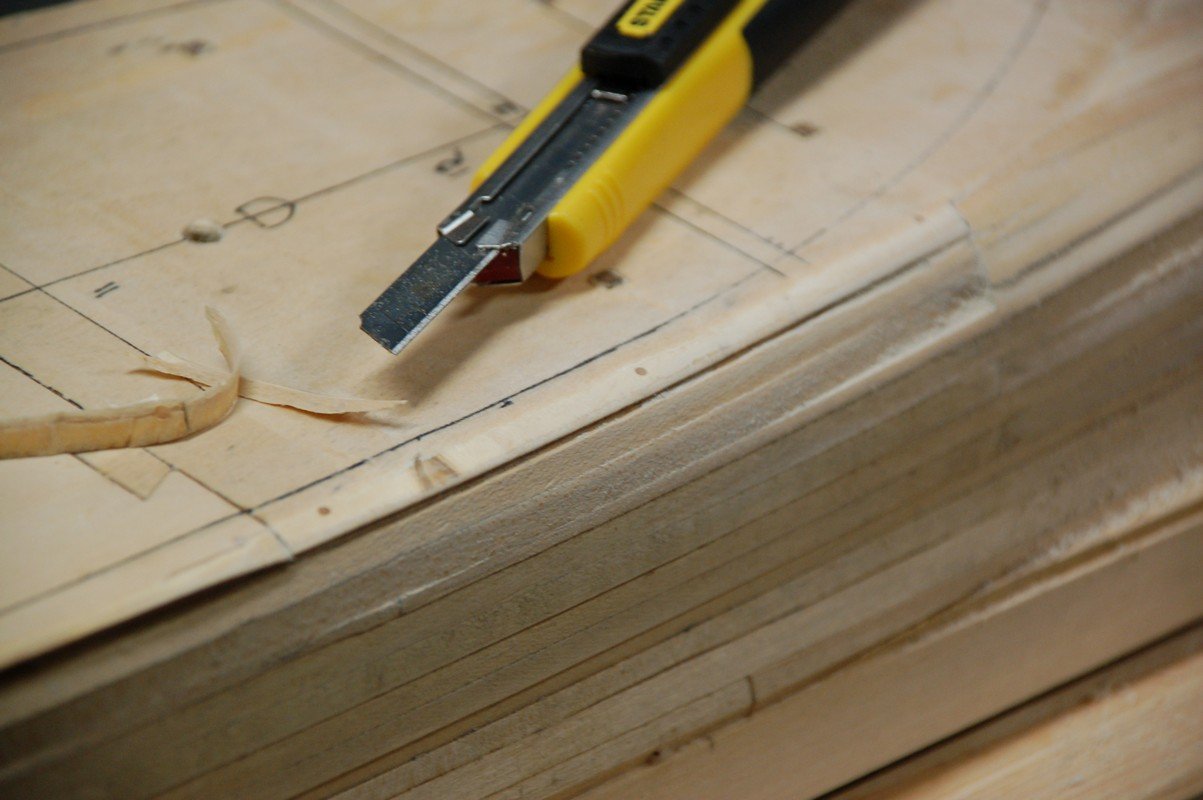
Time to replace the stern on the model.
Carefully, using a small saw, i removed the old stern.

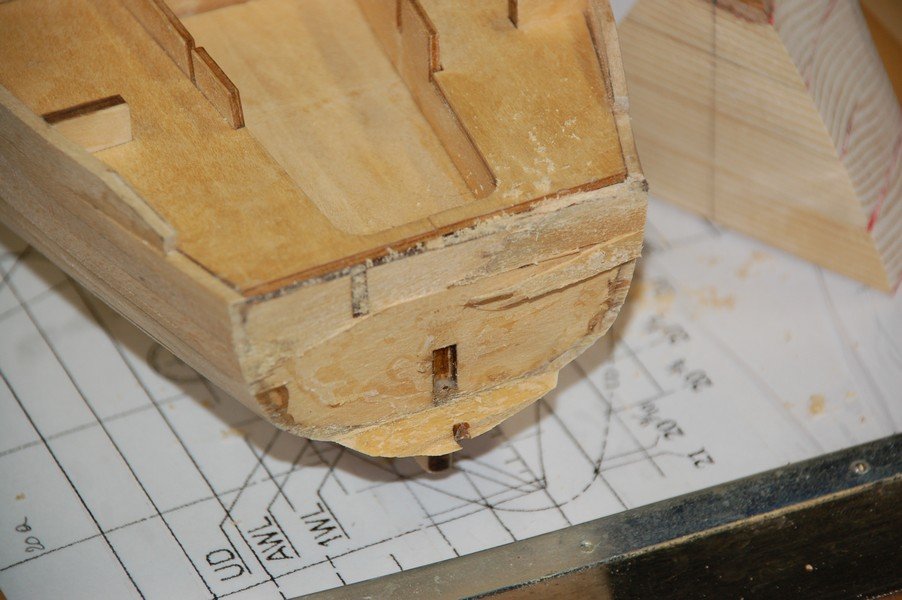
After cleaning it all up and sanding it smooth, i glued the new stern in its place.
If you look at the sides, it shows clearly where the planking of the hull must be changed.
- Baker, Canute, popeye the sailor and 6 others
-
9
-
-
Wow, this is amazing, thank you for the links!
- Canute, popeye the sailor and mtaylor
-
3
-
-
Hello guys, i'm just back from a holiday. Not much time spend on my Yamato.
Just spend some quality time with the admiral and the kids
")
")
I hope to be able to continue work on her this week.
-
-
I'm speechless, this is no longer a shipmodel but a work of art.
- mtaylor and John Allen
-
2
-
-
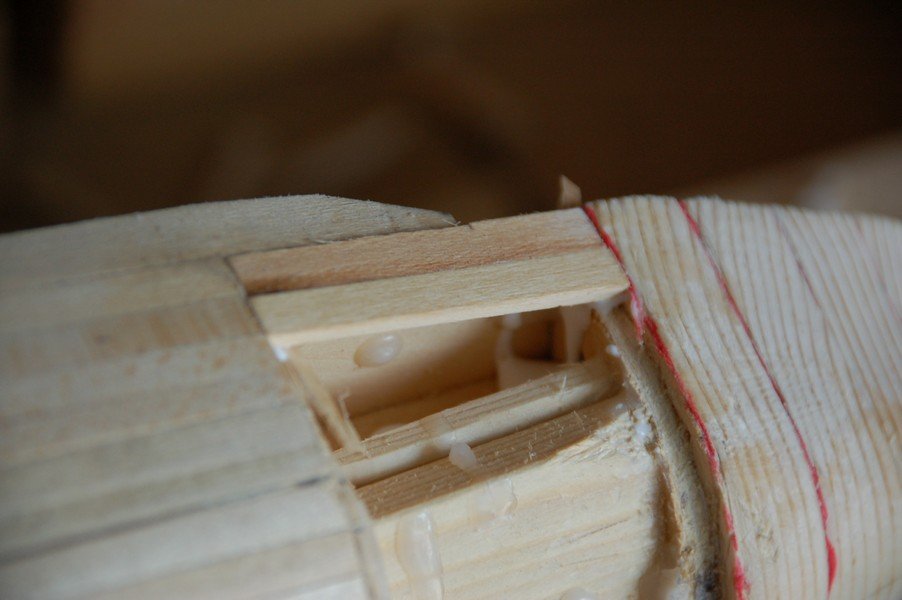
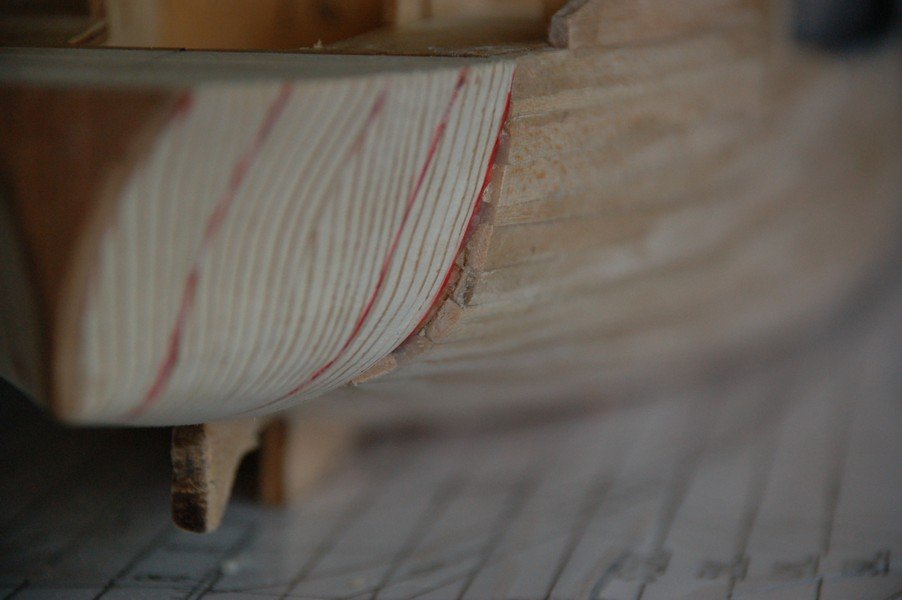
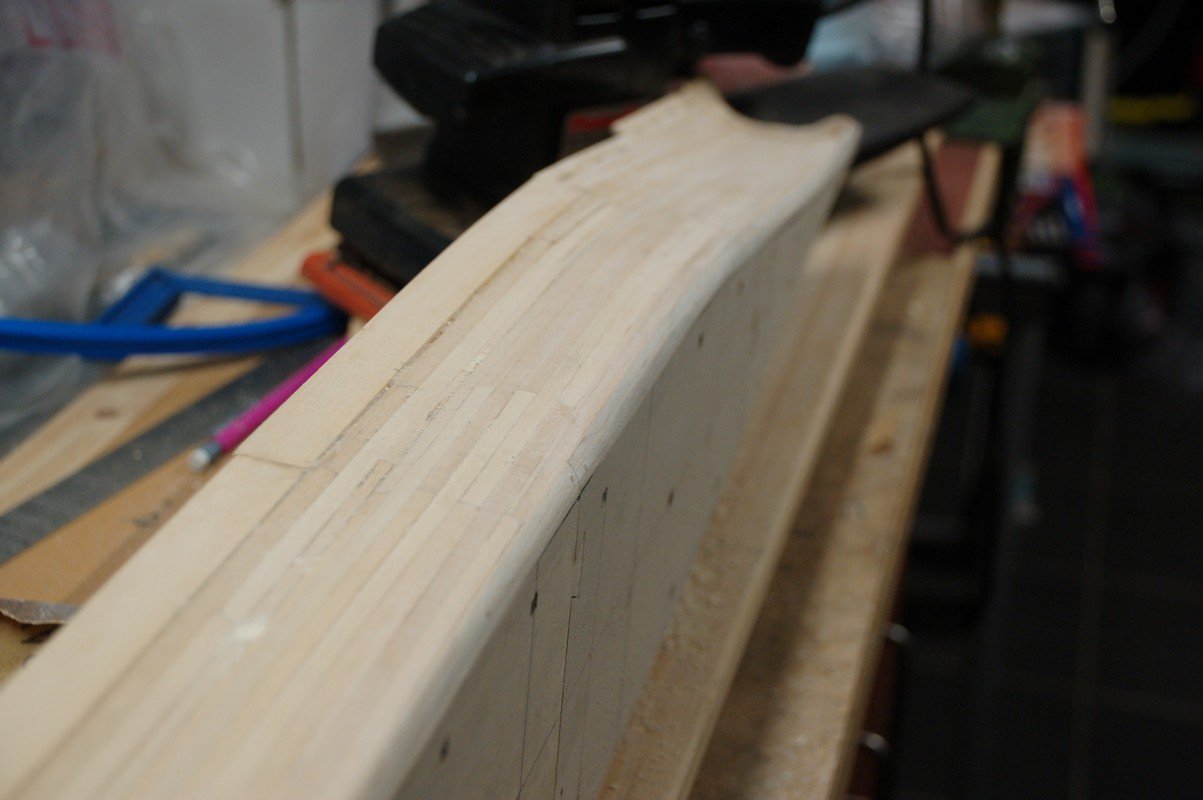
I gave it much thought but i'm gonna take the plunge and change the stern.
A bit further in the book of Janusz Skulski there are drawings of the rudder. It's also changed since the older version of his book and says it's based on the original Japanese drawings.
And since that shape of rudder was never going to be possible with the old stern on my ship, i decided to go for it. I hope it'll work out in the end, we'll see.
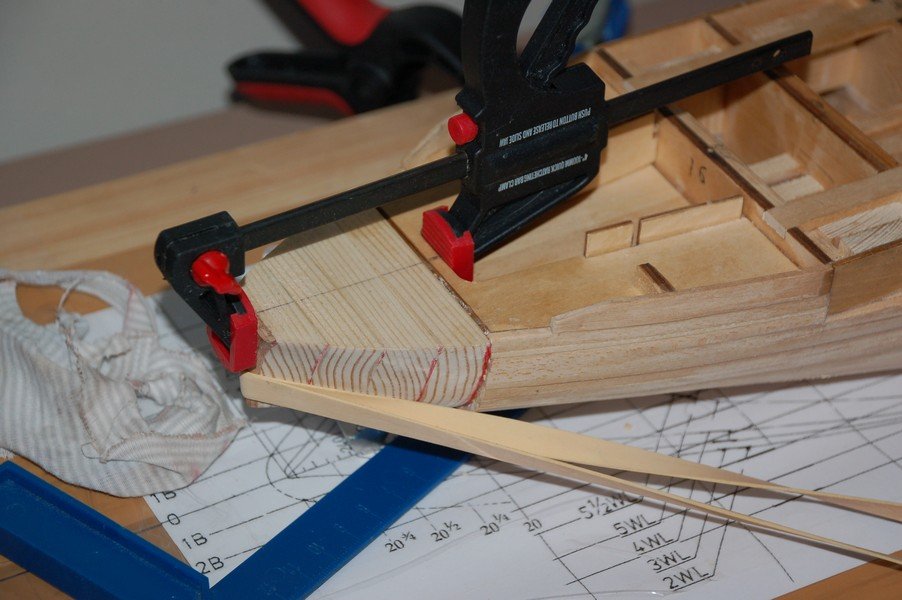
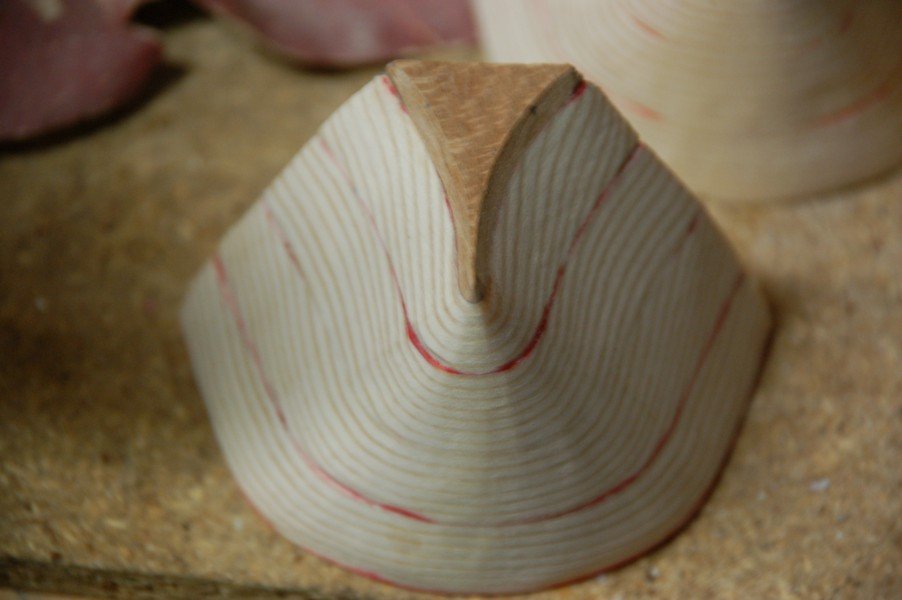
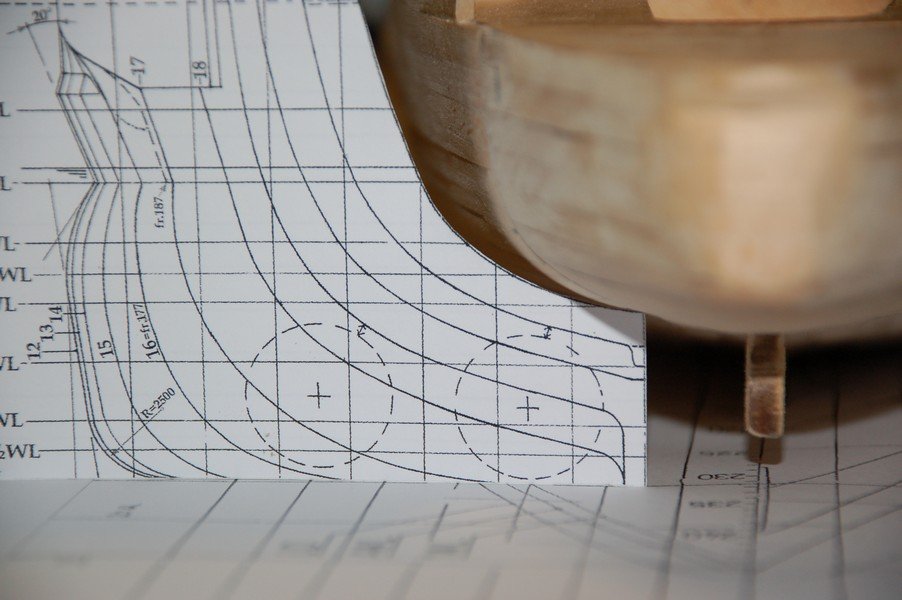
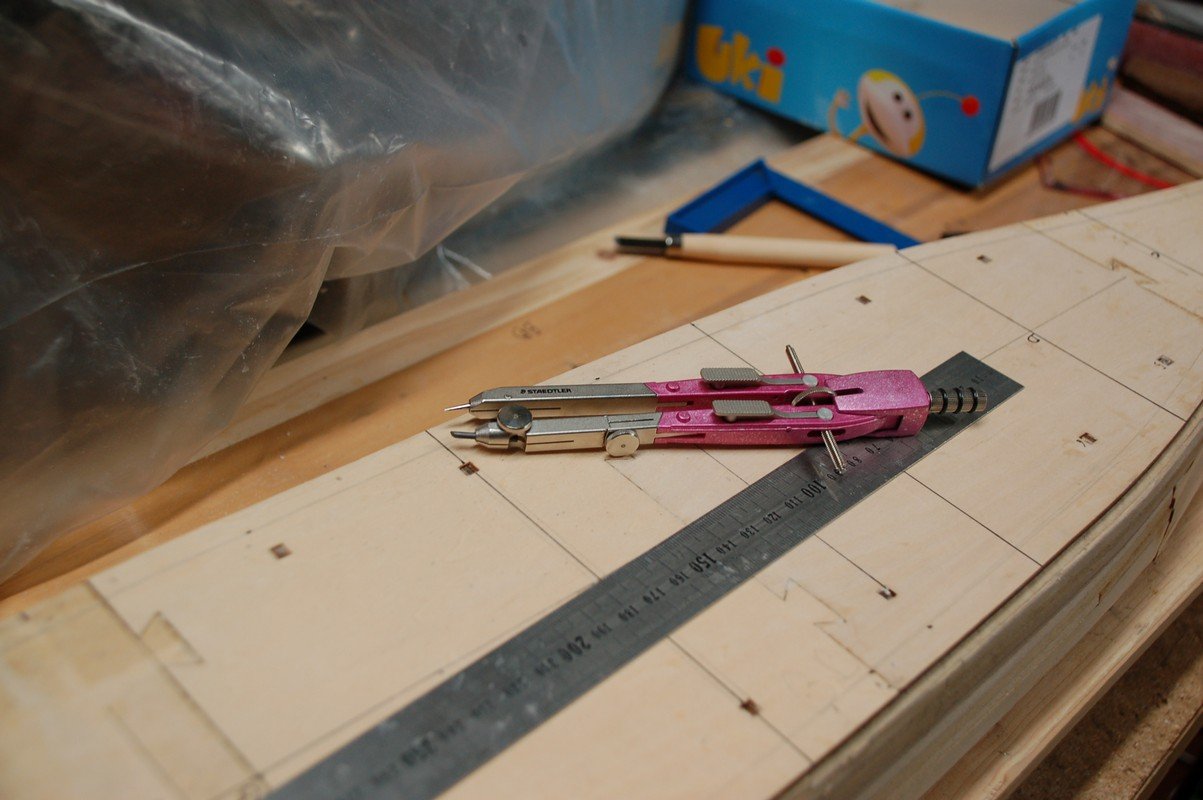
I've taken the dimensions of the plans which i had enlarged. There are 2 different dimensions for the stern.
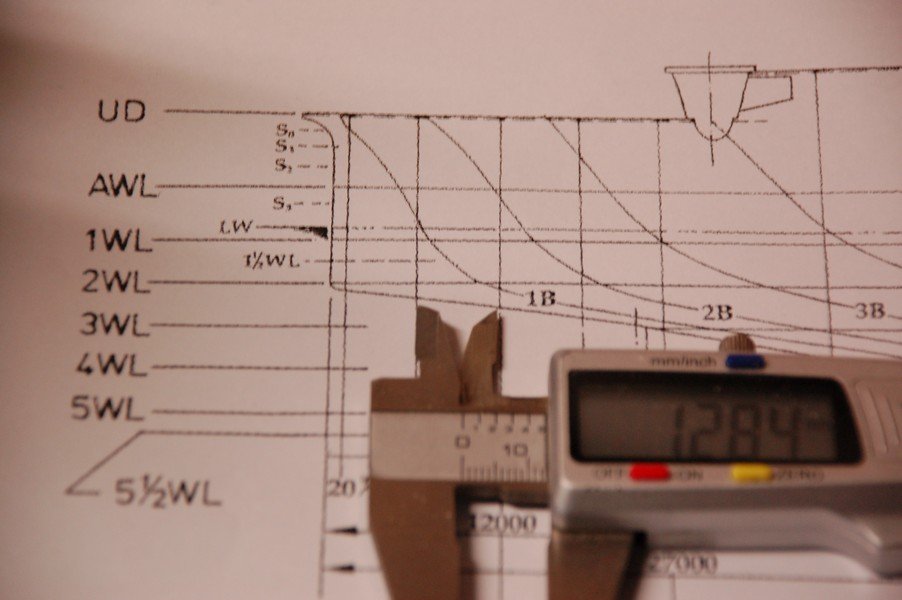
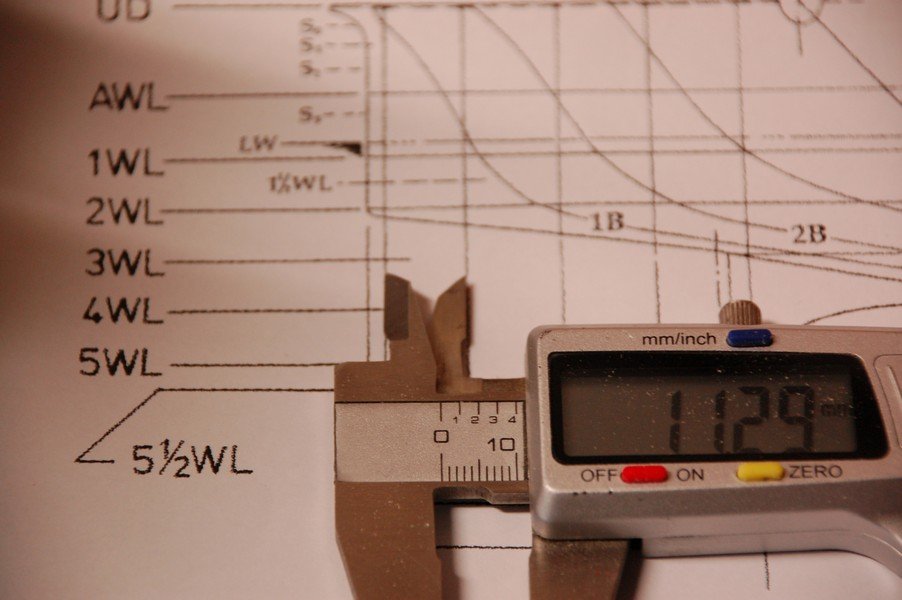
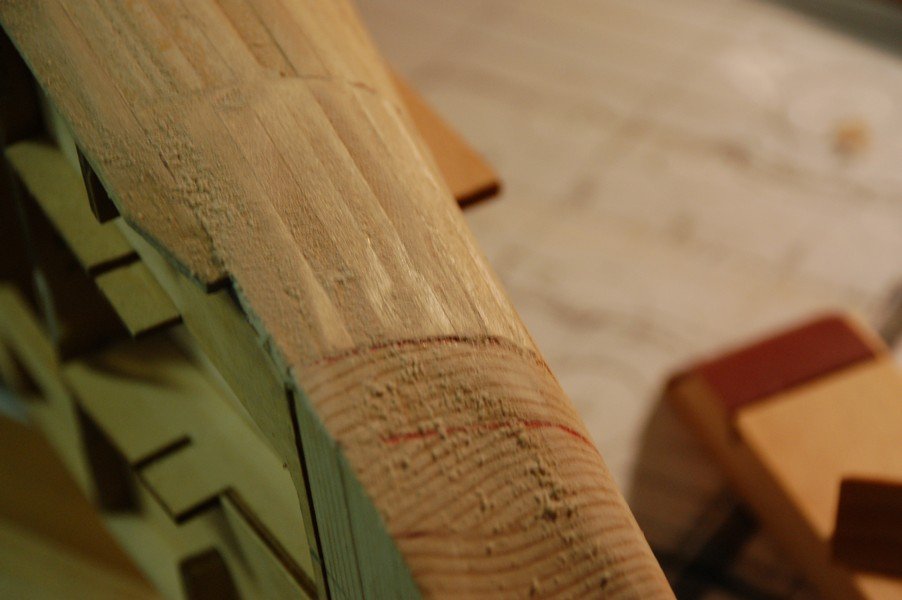
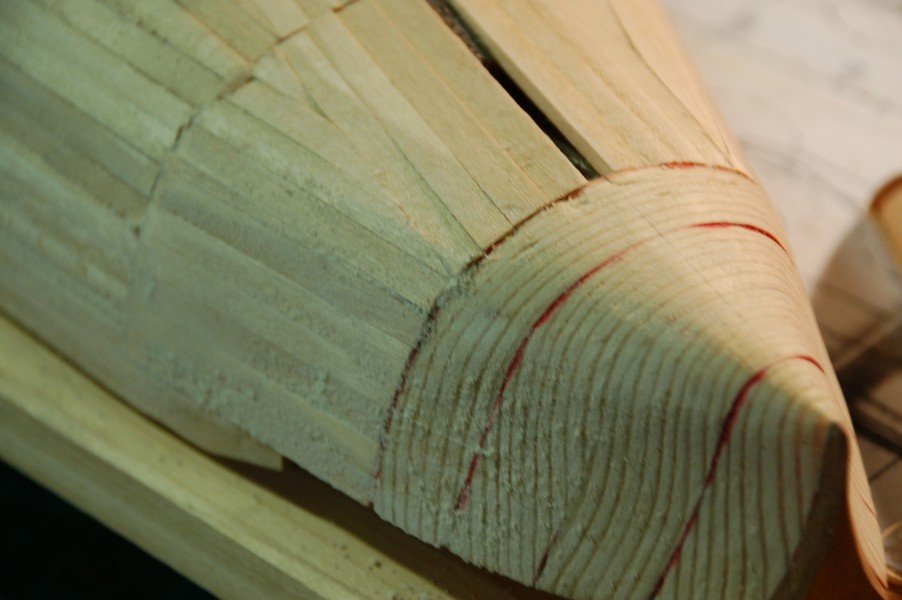
First I've had to prepare a piece of pine to the correct dimensions.


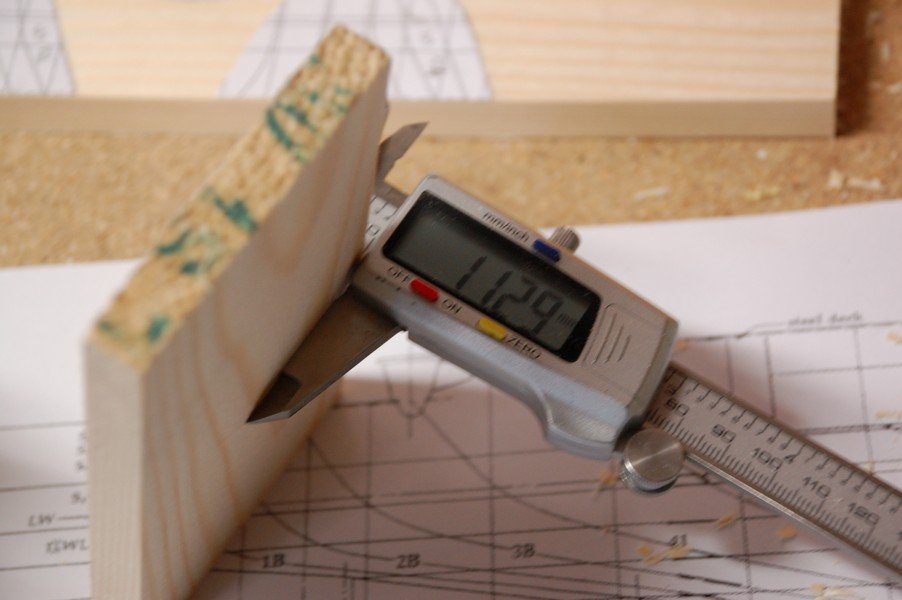
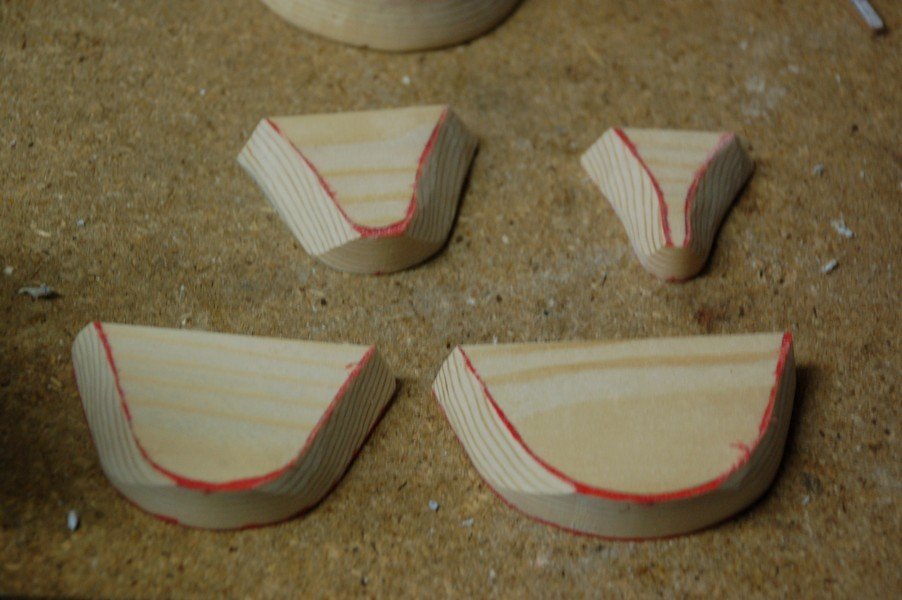
With the scroll saw i obtained the needed profiles to form the stern.
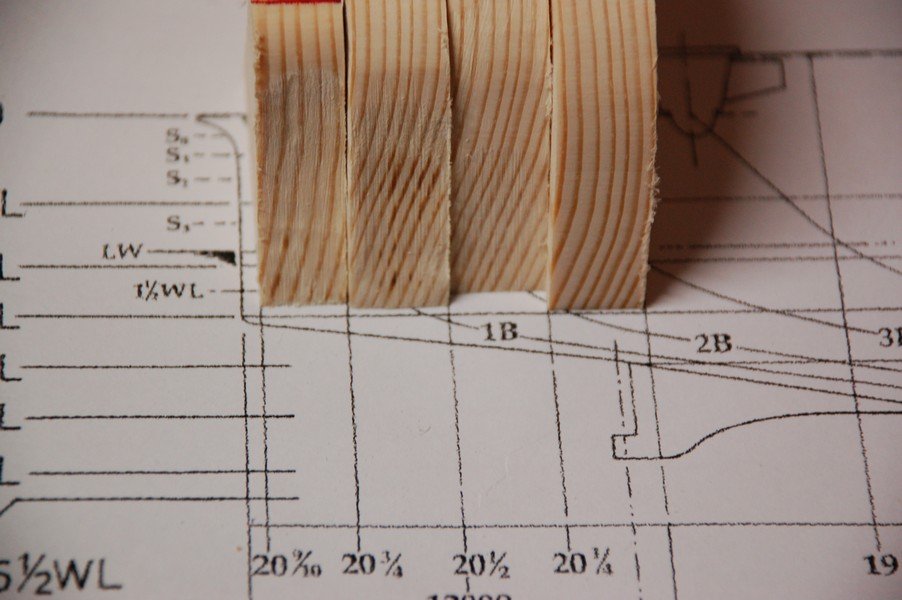
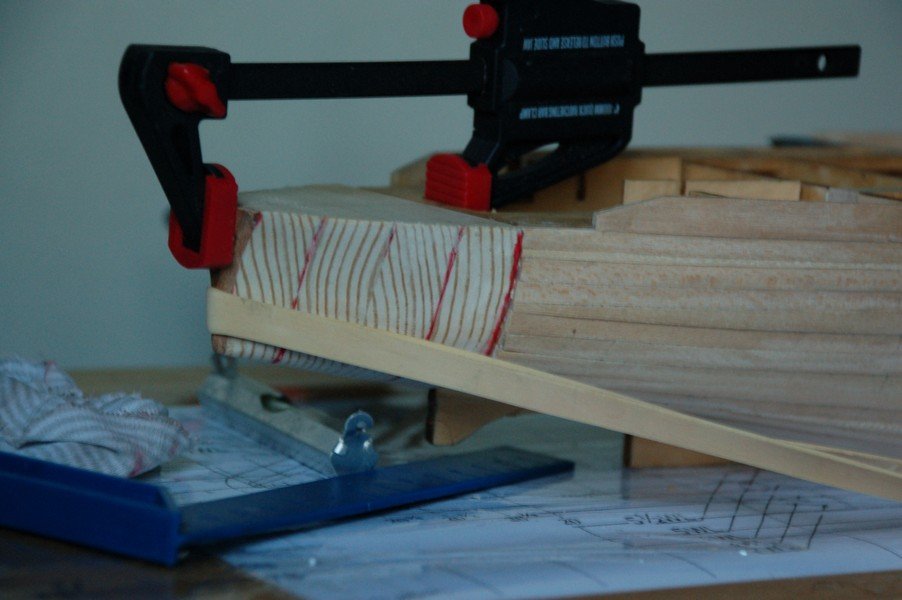
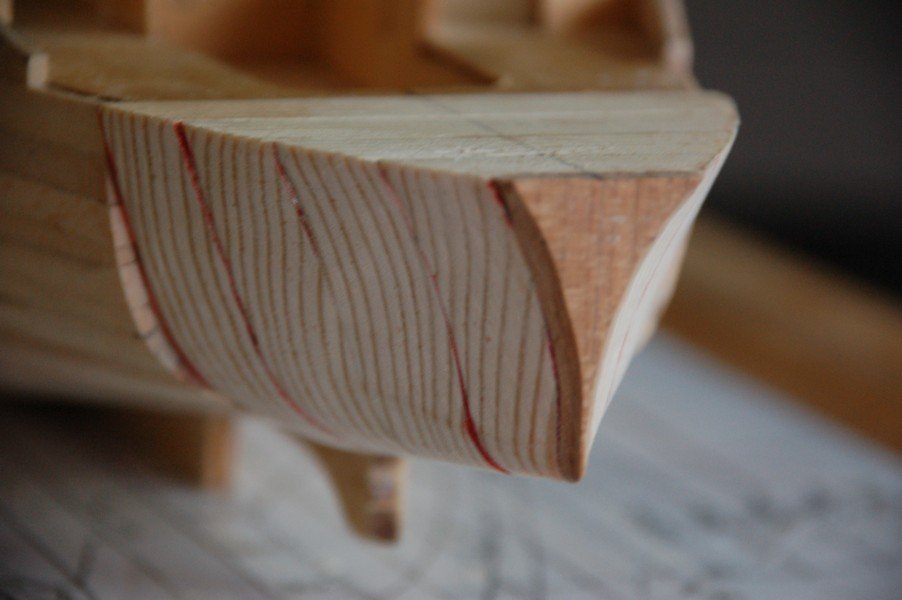
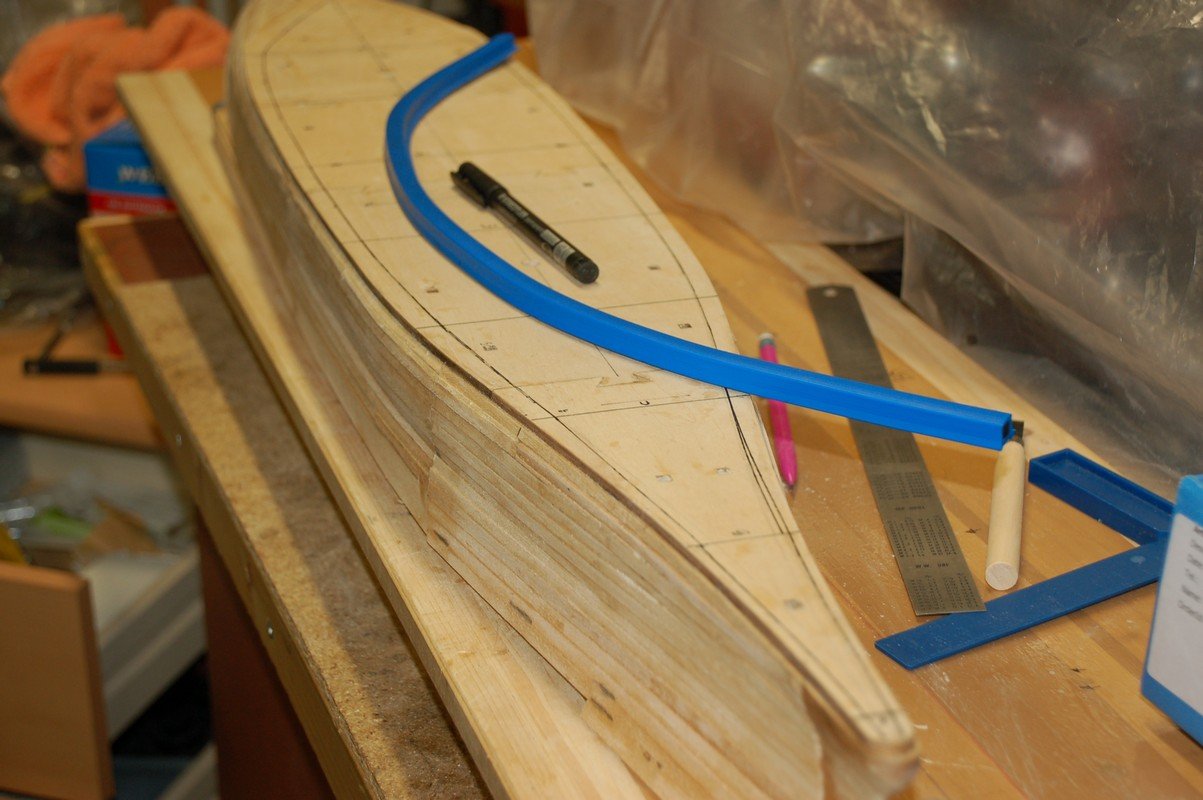
Using a red marker i colored the wood which had to go, so i have an indication as where is still have to remove wood.
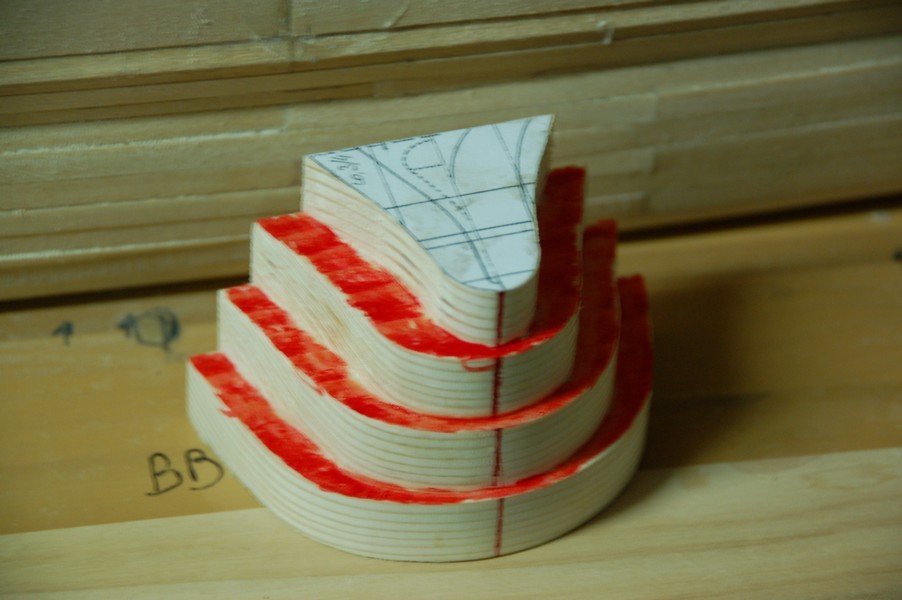
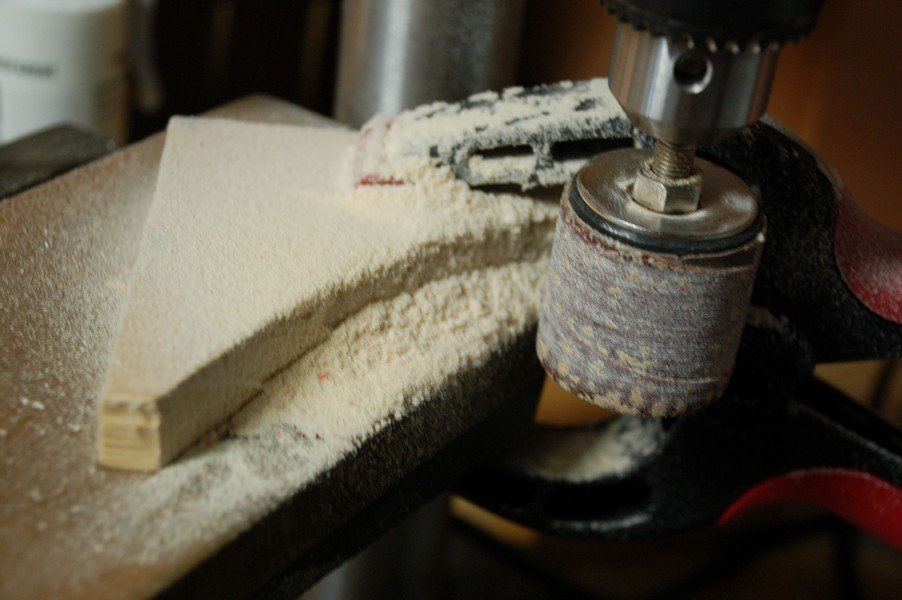
A lot of wood dust was the result.
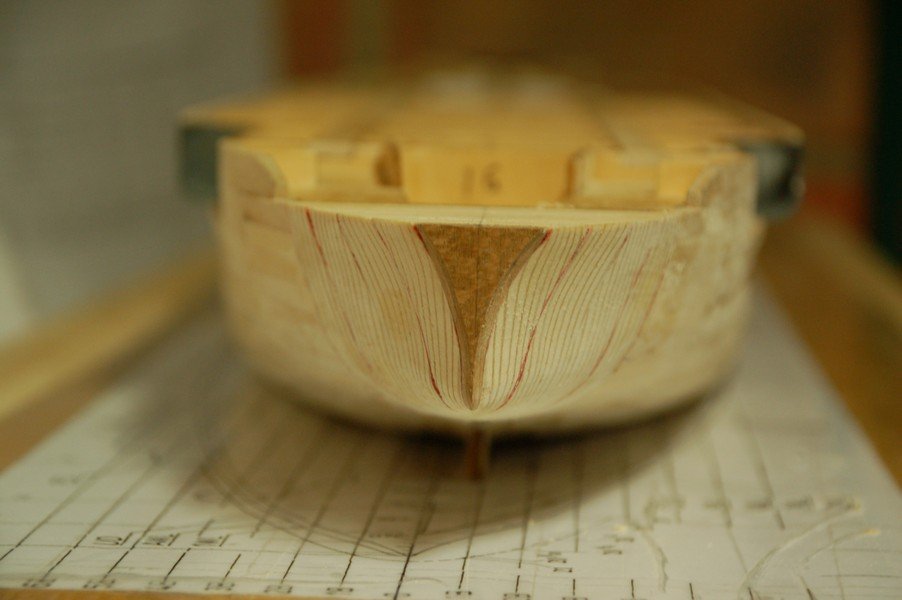
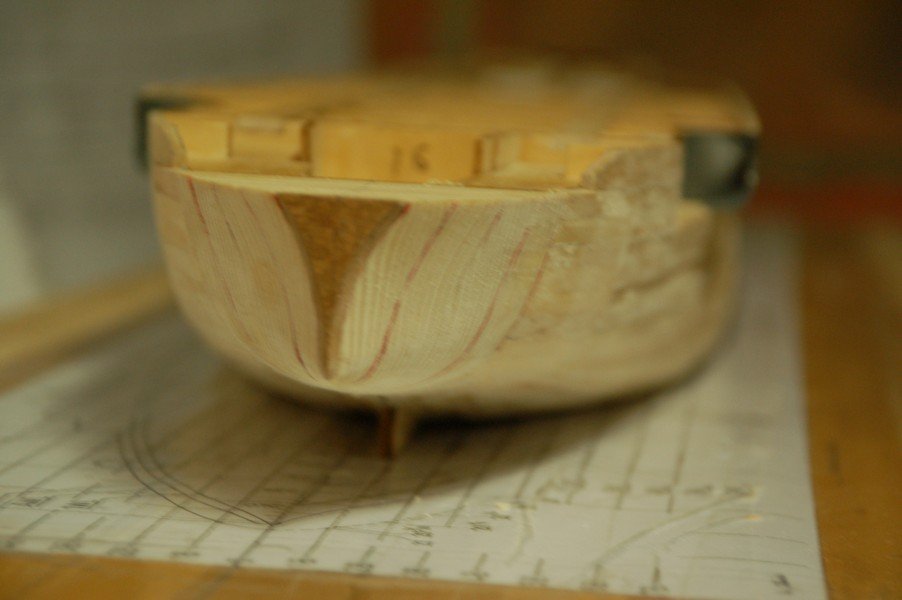
Unfortunately my first attempt was a failure, i had lost the curve at deck level. I had to redo all the steps.
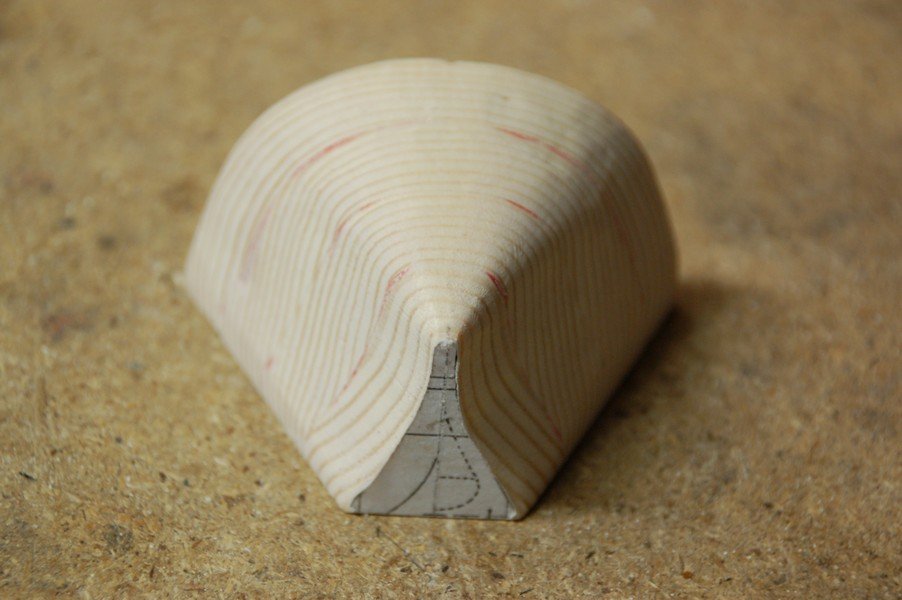
My second attempt was spot on!
- catopower, RGL, Ryland Craze and 13 others
-
16
-
Congratulations on this master piece, beautiful build!
-
Congratulations on a beautiful model! Your sails are truly a masterpiece.
How where they made?
-
-
-
It's a this point in my build that I received my new copy of the new Yamato book by Janusz Skulski.
I already was using the old version.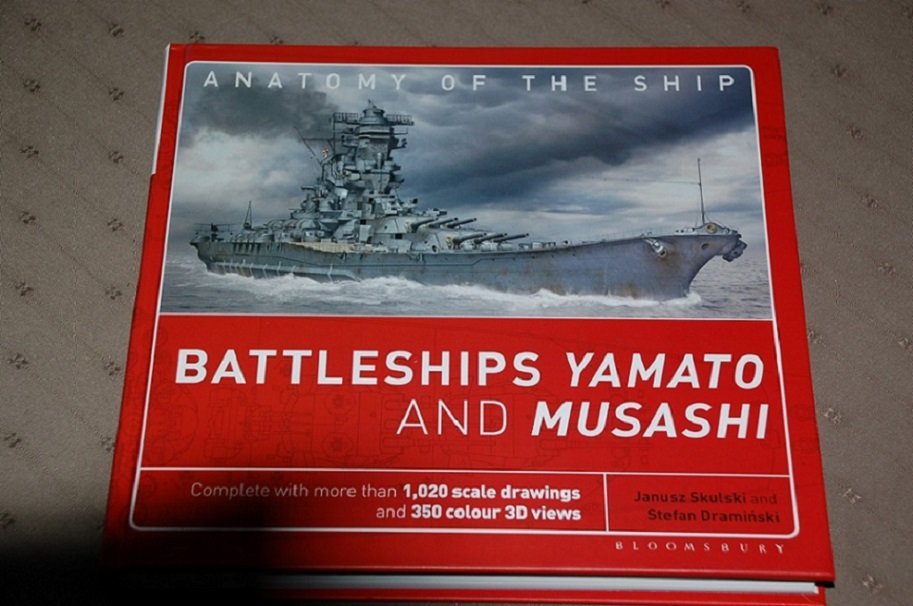
Much too my surprise, i noticed that the stern was completely altered versus the old version.
It's described in the book, that the stern was build in the fashion like the old Japanese battle ships.
Unfortunately, the book does not tell on what it was based to alter the stern so dramatically.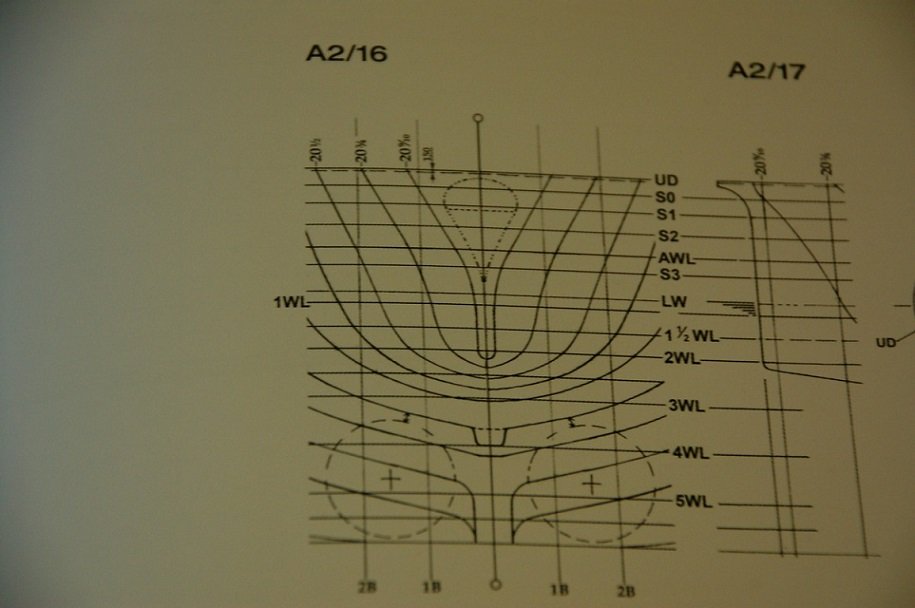
It's here that my build log is now to date.
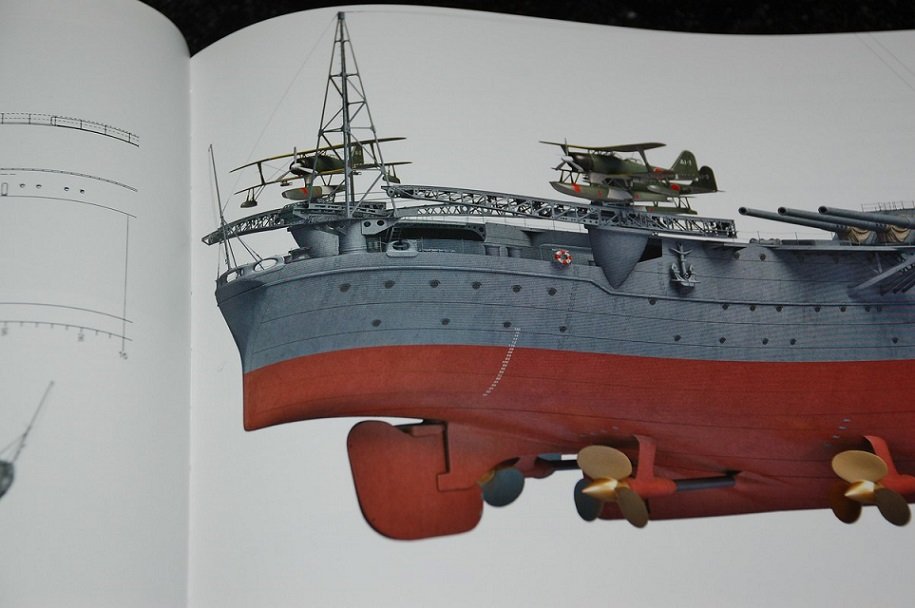
So now I've made some photocopies at work which i enlarged to the scale 1/250.
I also copied the body plan.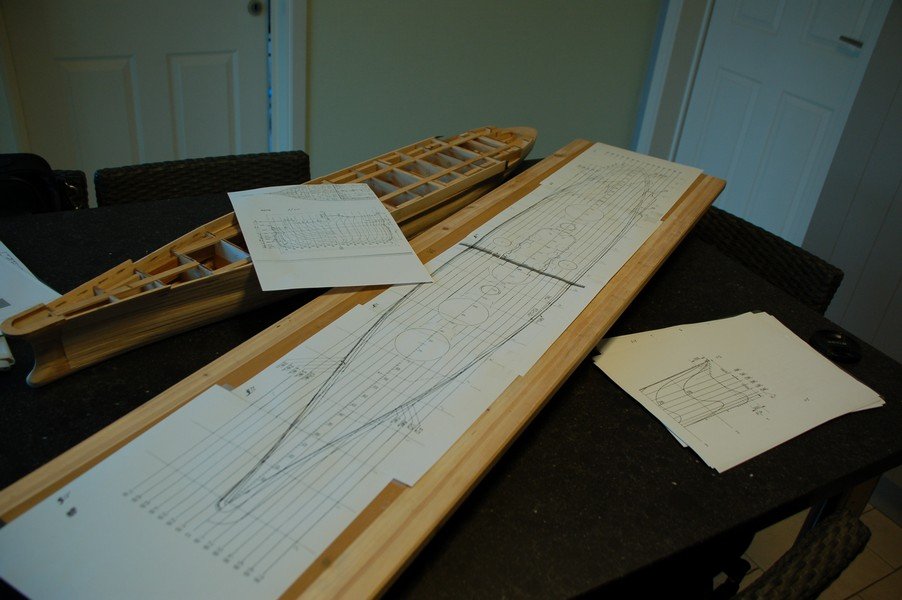
When i put my Yamato on the plan, it corresponds. Even at the stern, so that means that the deck at the stern is still correct.
But it's the lines beneath that have completely changed.
Now i don't know what to do, should i stick to the old plan, or do I alter the stern?
Decisions, decisions, decisions....
- Ryland Craze, cog, hexnut and 9 others
-
12
-
-
I'm a great admirer of your ability and patience to do the research about those magnificent french ships. Of yours and Hubac's for that matter.
I'll gladly follow along in this project of yours.
- yancovitch, Barbossa, CédricL and 2 others
-
5
-
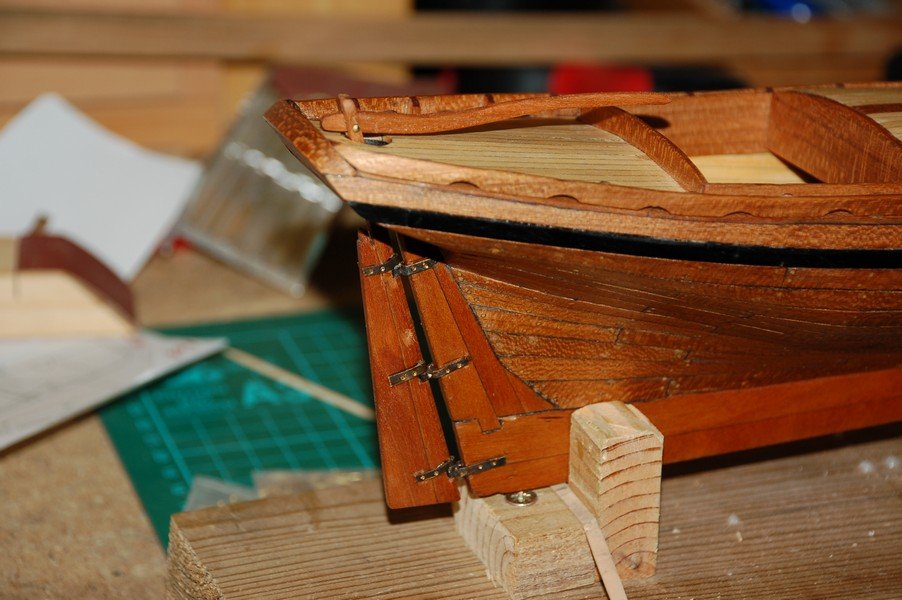
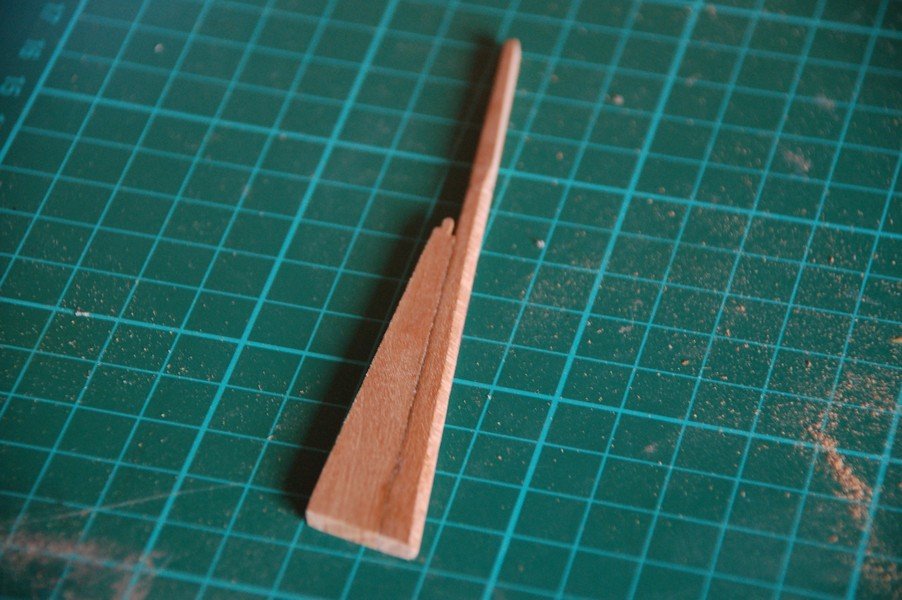
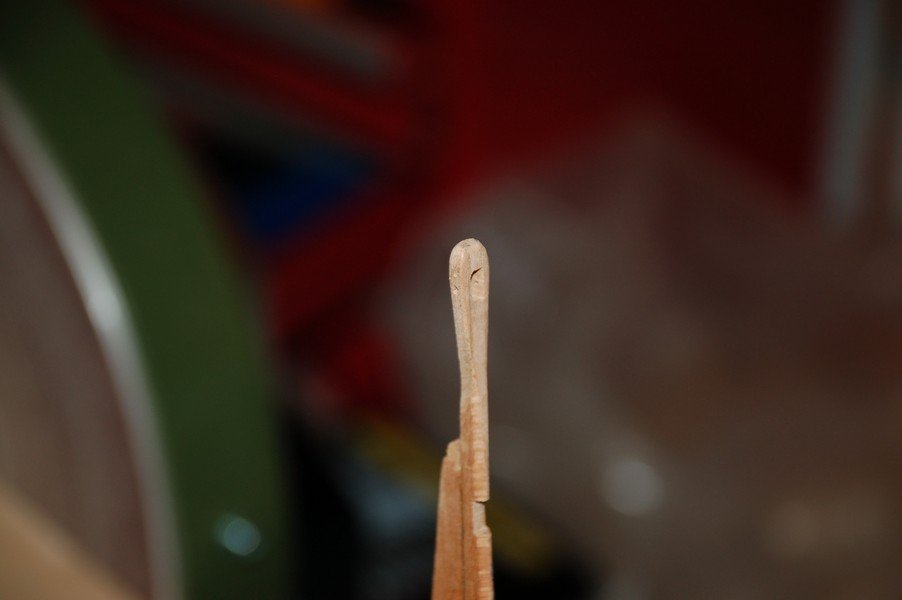
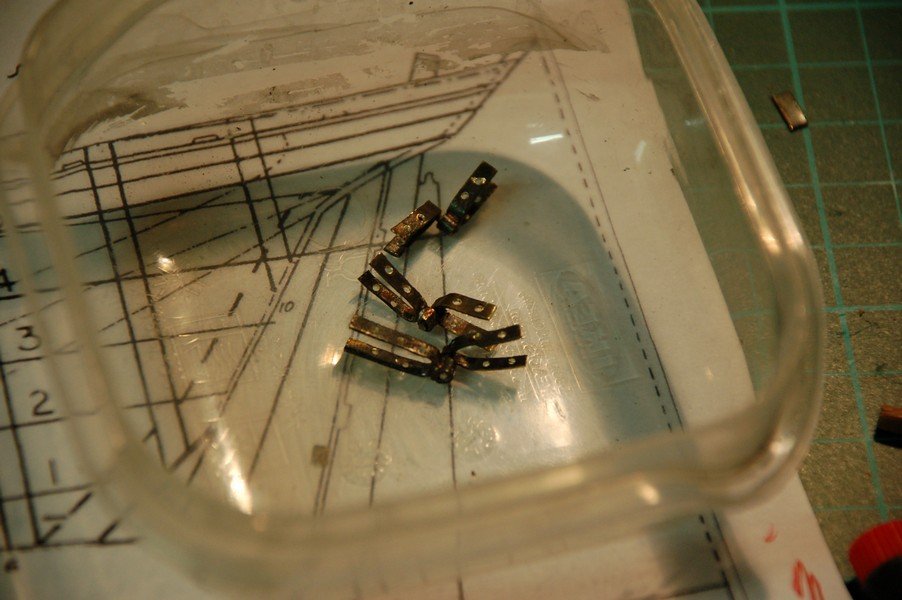
Continuation on the rudder.
The rudder is now complete, with the pintles epoxied on their place.

And finally putting it all together. I have now a working rudder on my little boat.
- Mark Pearse, Barbossa, GrandpaPhil and 3 others
-
6
-
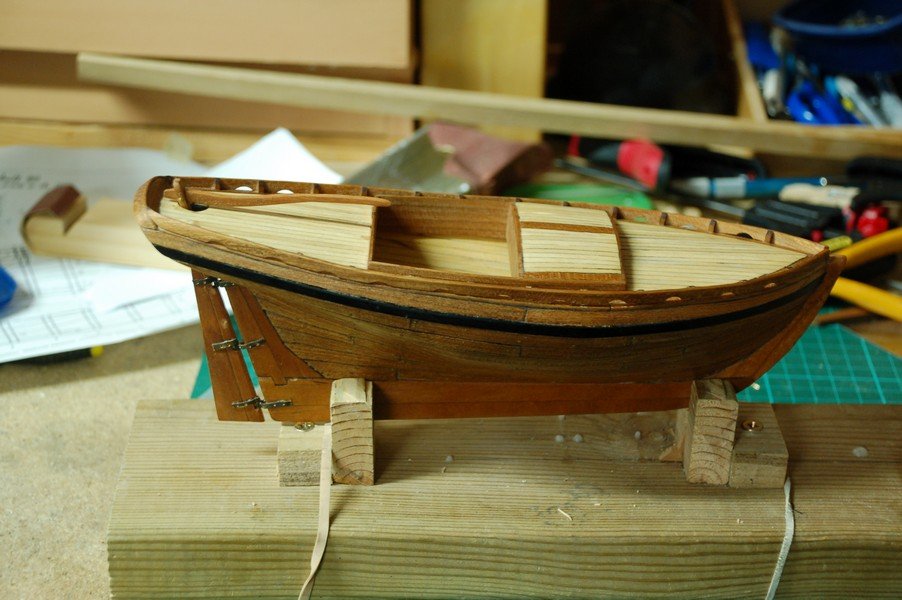
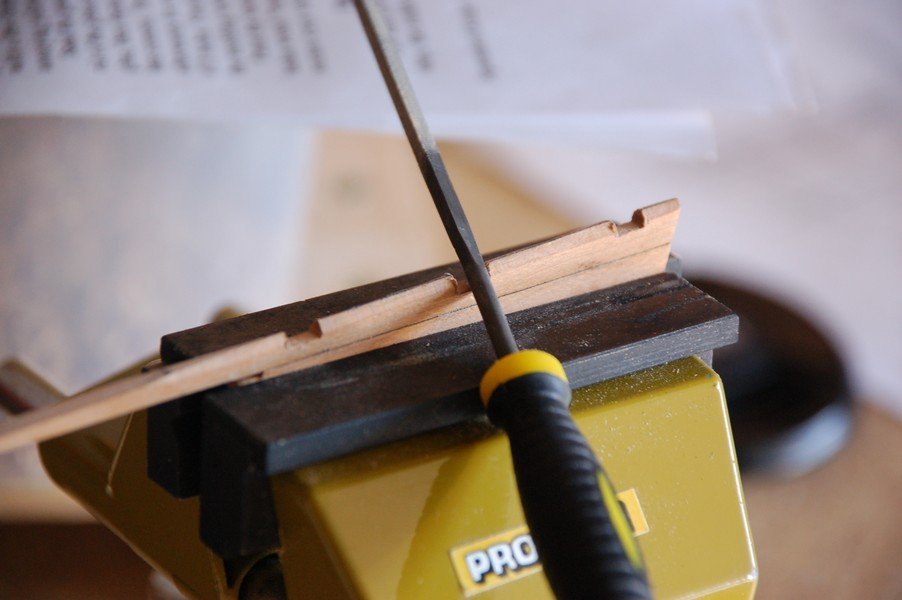
Continued working on the rudder.
First i glued the parts.
Then I made the recesses for the pintles.
The rudder is too small on the top to receive the tiller. So i added a piece of cherry wood on each side.
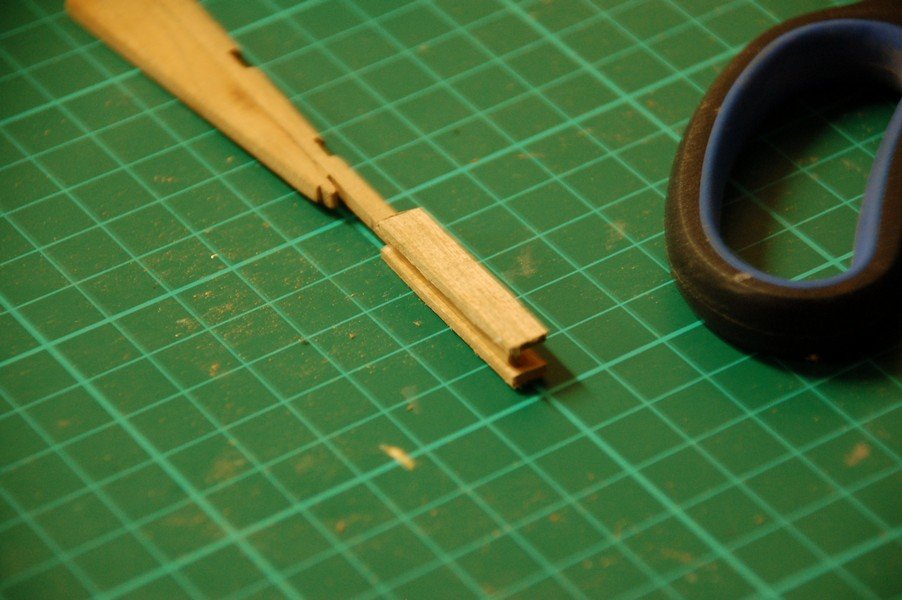
Afterwards when the glue dried, i sanded the whole thing and prepared it to receive the tiller.
Then up to the tiller.
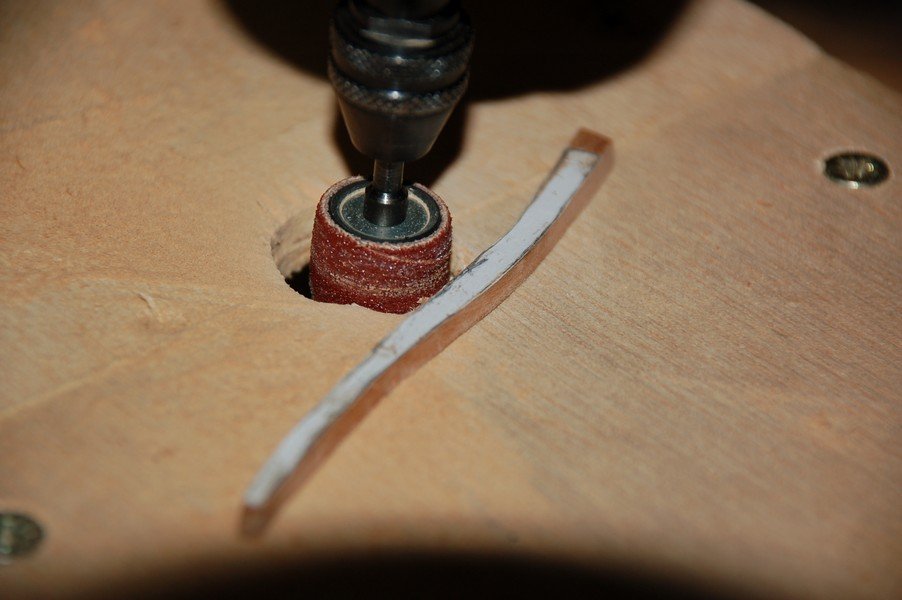
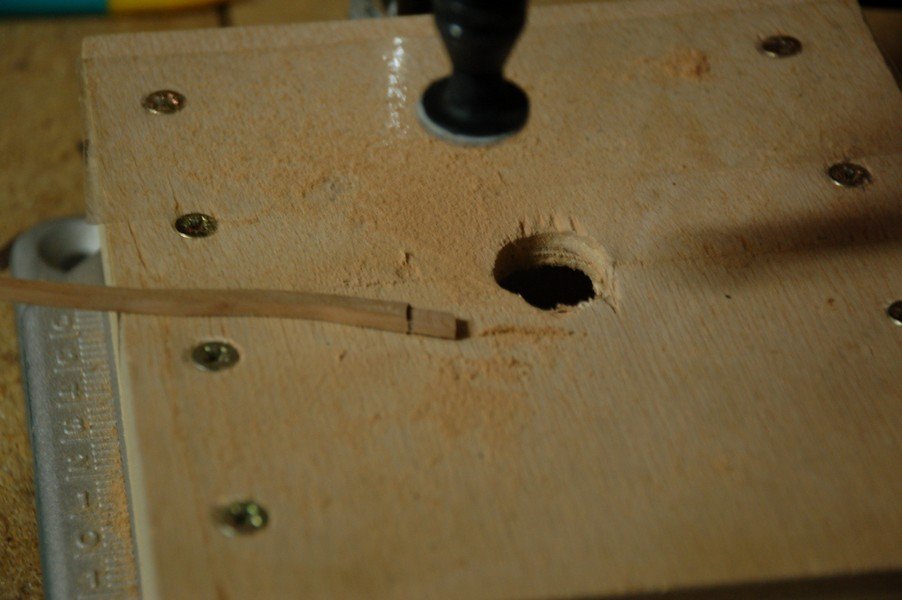
And finally i've drilled the wholes in the pintles and gudgeons.
-
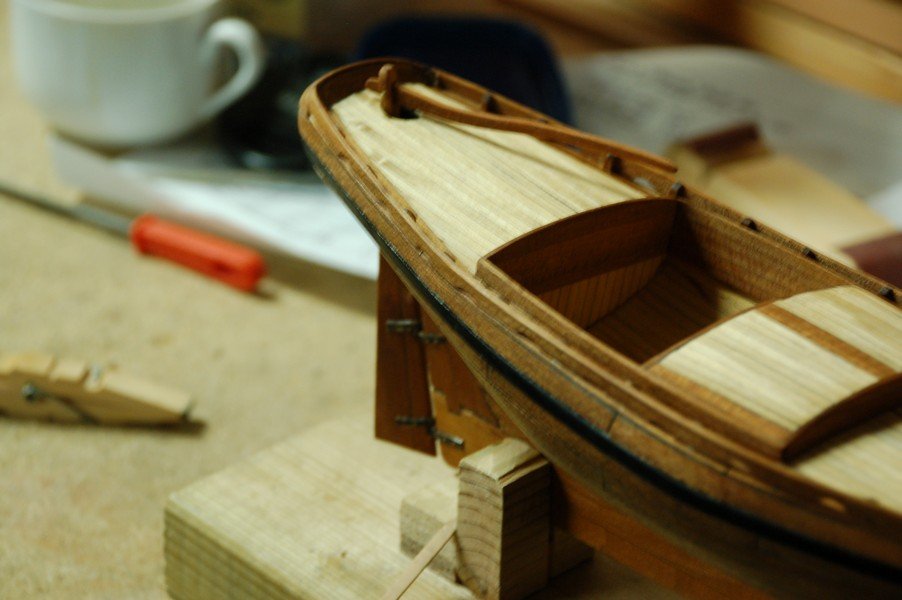
YES, she's all planked! She turned into a ship.
I also glued the boat deck structure (the metal pieces).
- RGL, Old Collingwood, Barbossa and 8 others
-
11


De Zeven Provinciën 1665 by YankeeD - Scale 1:50 - according to drawings by Mr. O. Blom - First wooden scratch ship build
in - Build logs for subjects built 1501 - 1750
Posted
What a beautiful planking, thank you for sharing with us.