


gil middleton
-
Posts
308 -
Joined
-
Last visited
Content Type
Profiles
Forums
Gallery
Events
Posts posted by gil middleton
-
-
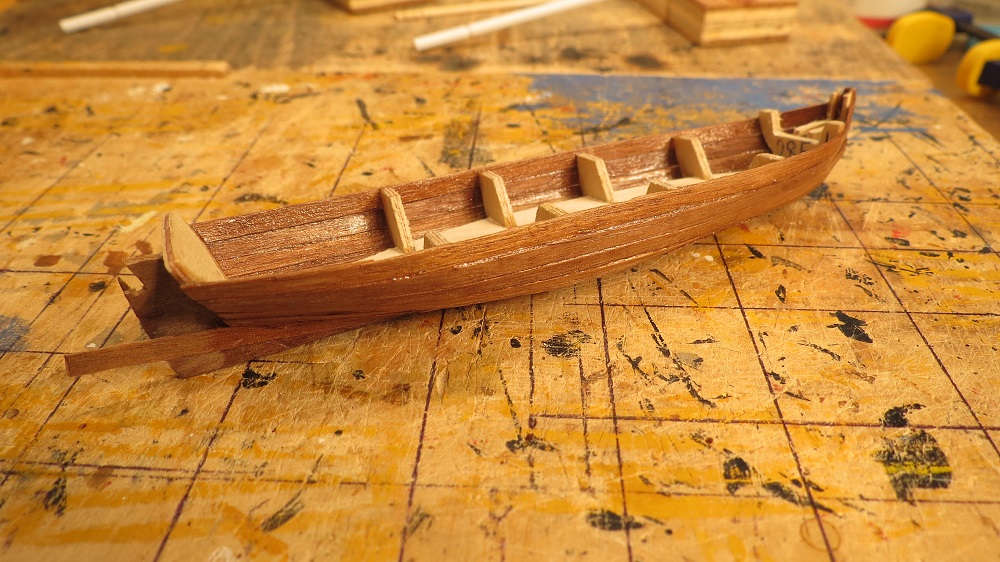
Thanks David. I was rather pleased with the hull shape. The uncertainty was that the pinnace would produce a boat with a narrow beam and too little freeboard. However, with a few shims and a wider transome, it turned out OK.
At my age, one tends to reflect on the state of ship modelling. With the advance of technology, we may soon buy our models in some form of thumb drive or DVD disc, take it to the color 3D printer and presto, a finished model. But, good luck with the rigging. It doesn't sound like much fun to me.
Cheers, Gil
-
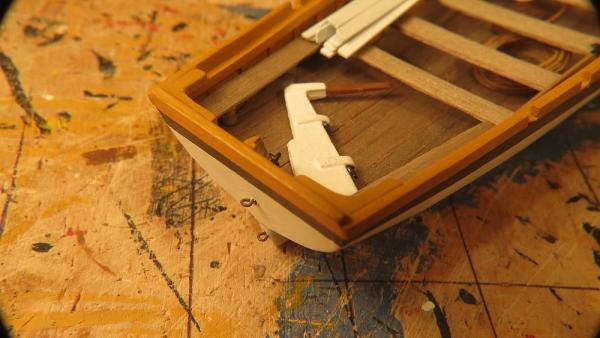
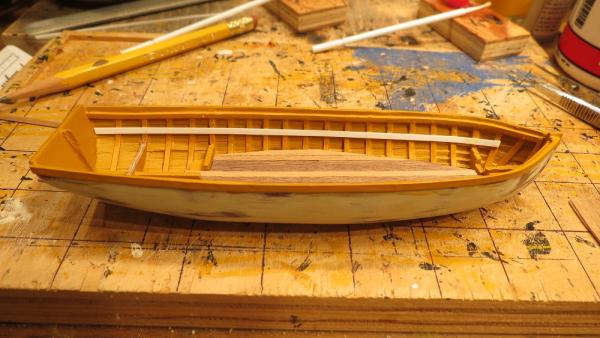
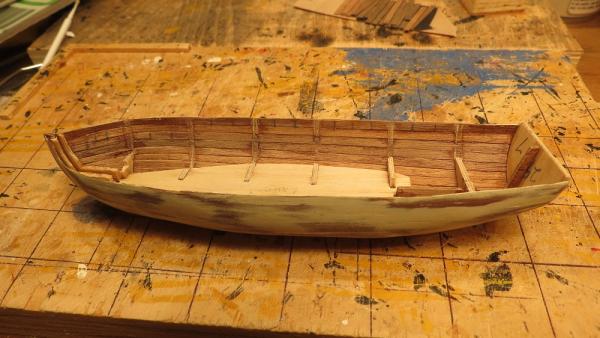
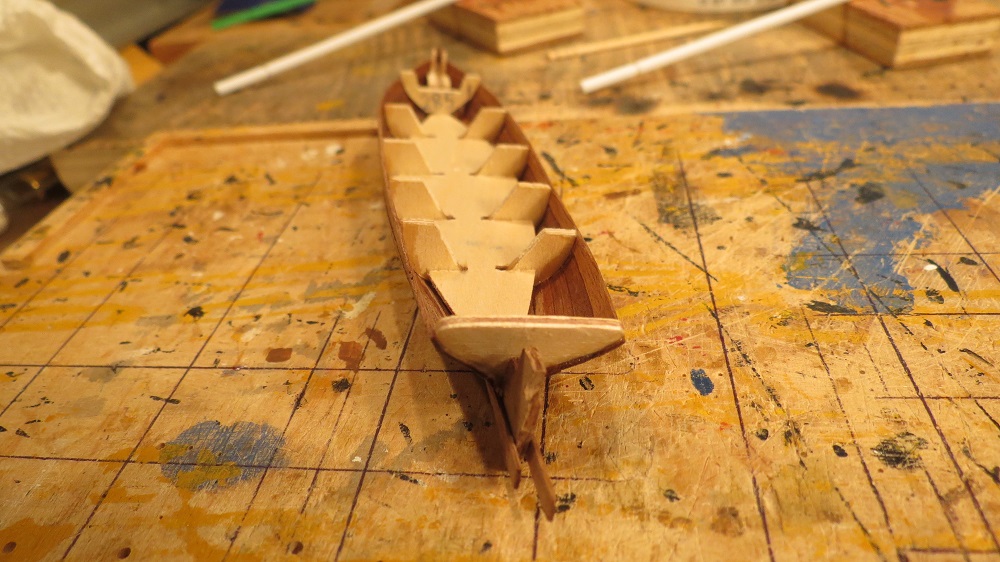
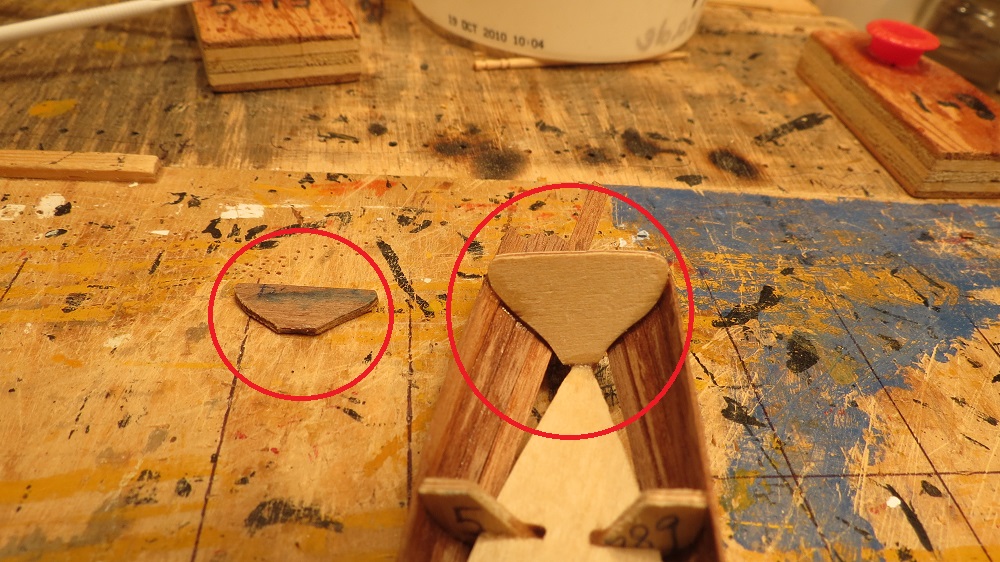
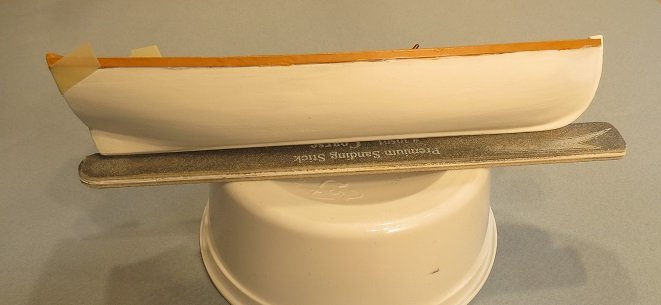
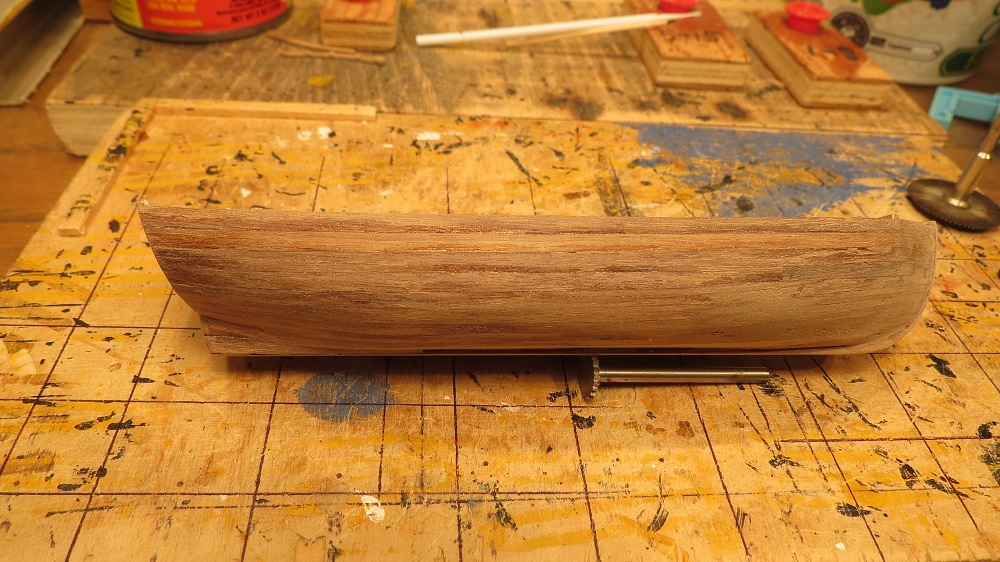
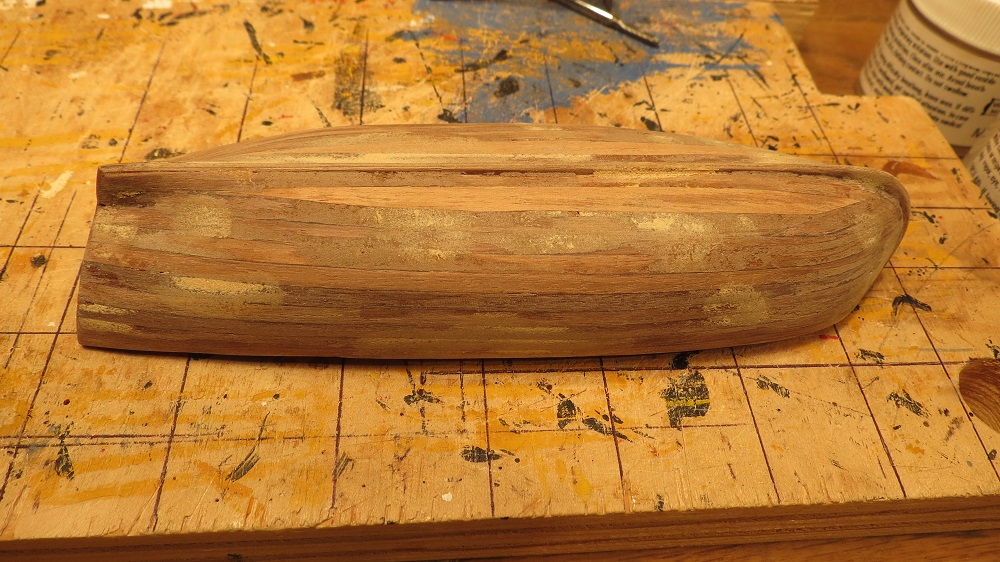
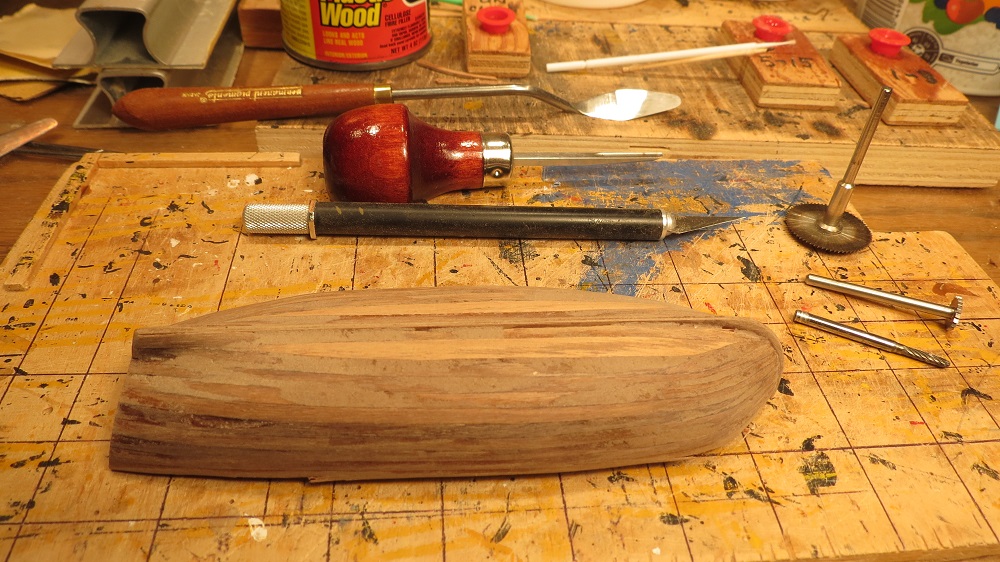
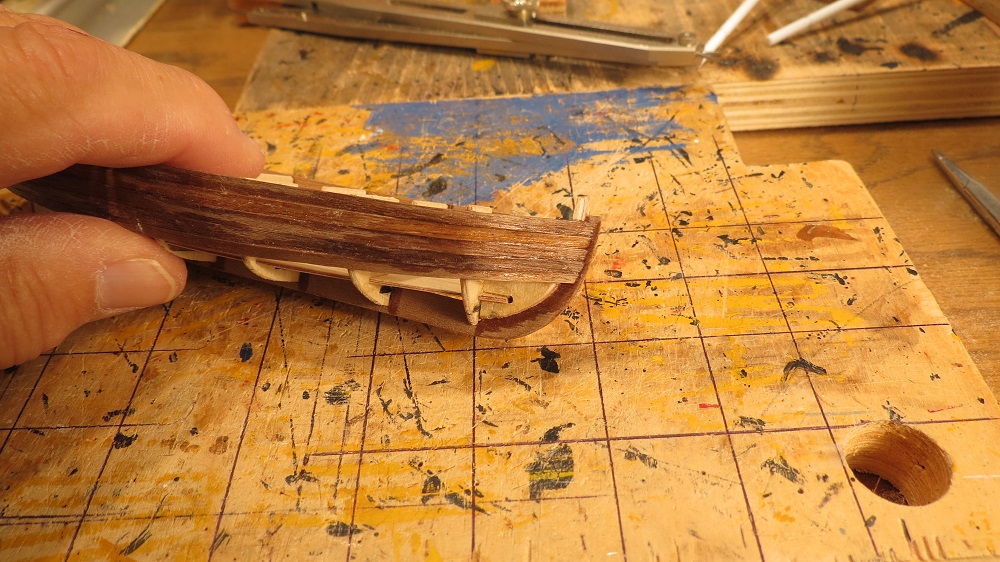
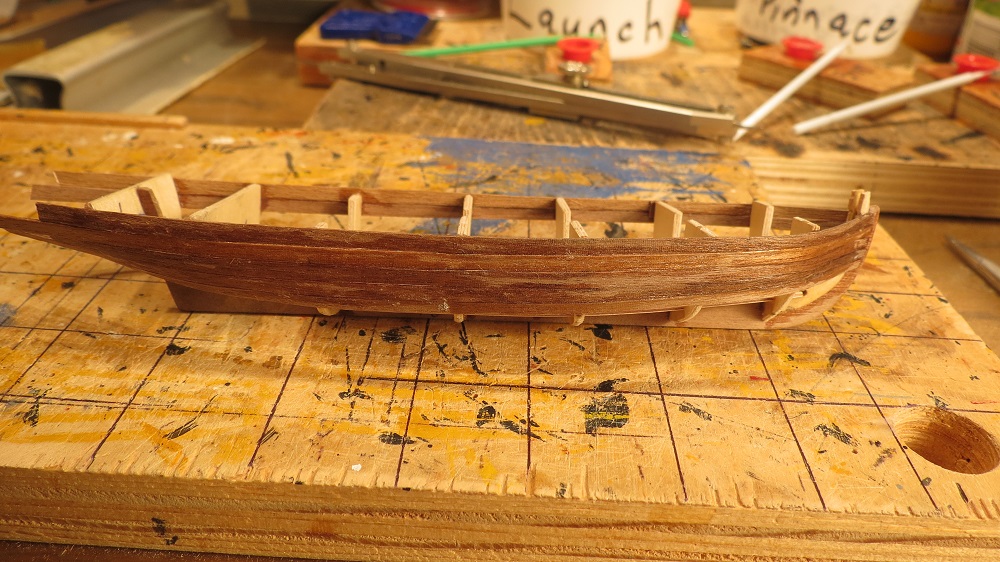
Planking is to the larger transome. Excess keel to be removed.
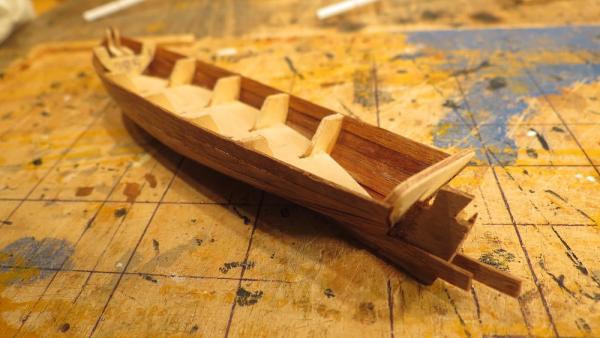
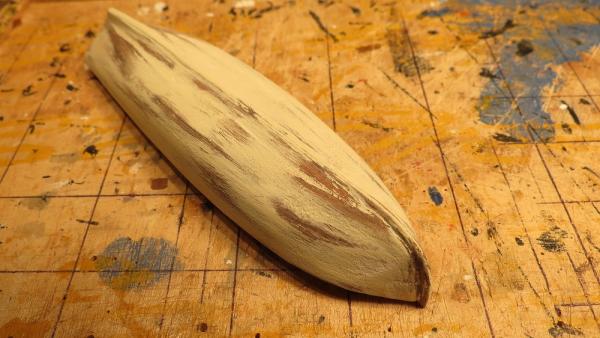
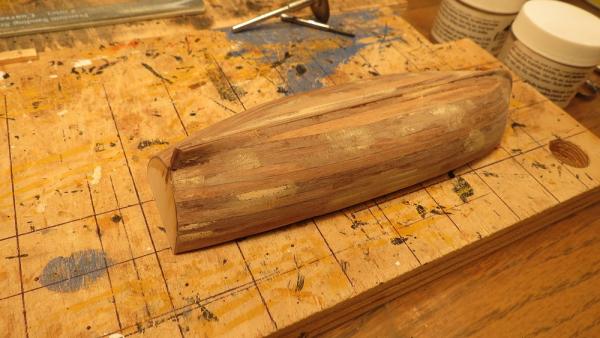
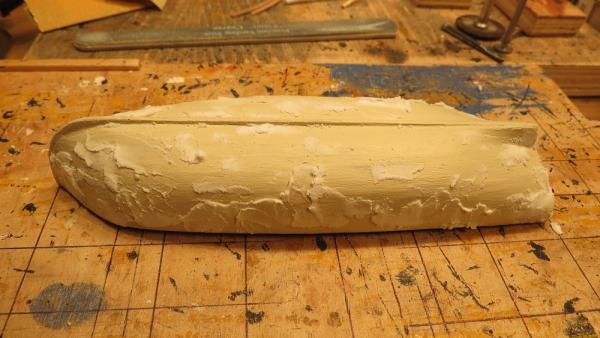
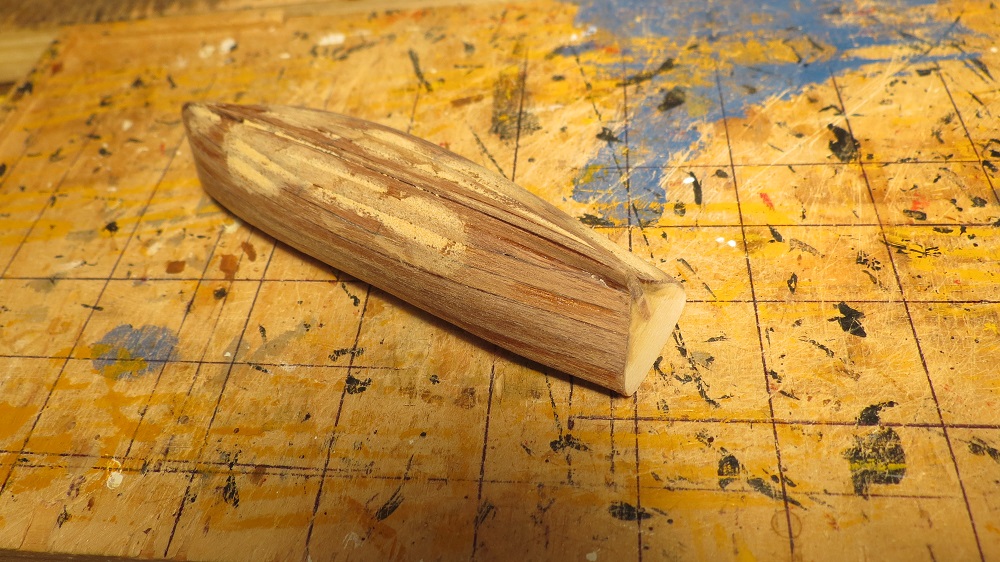
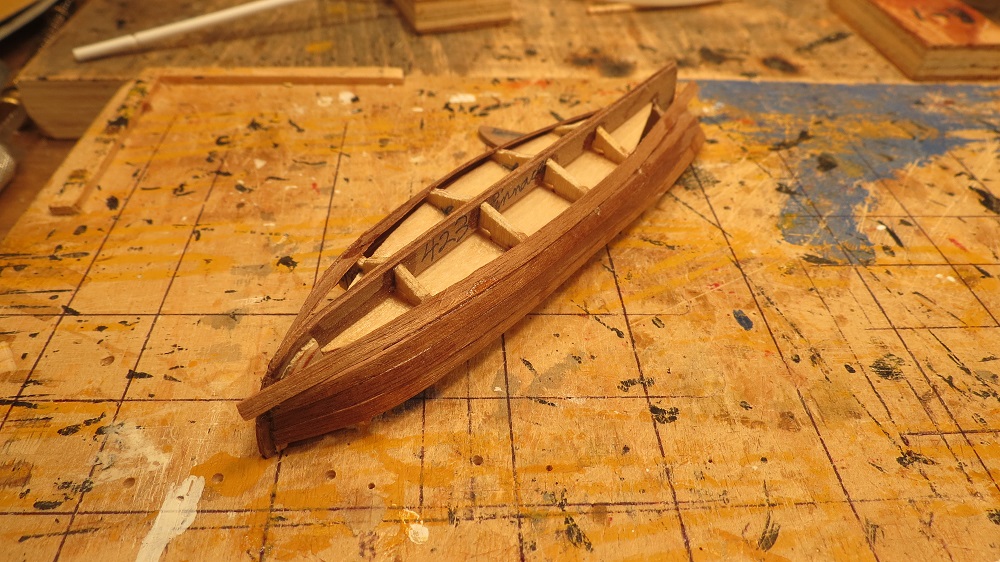
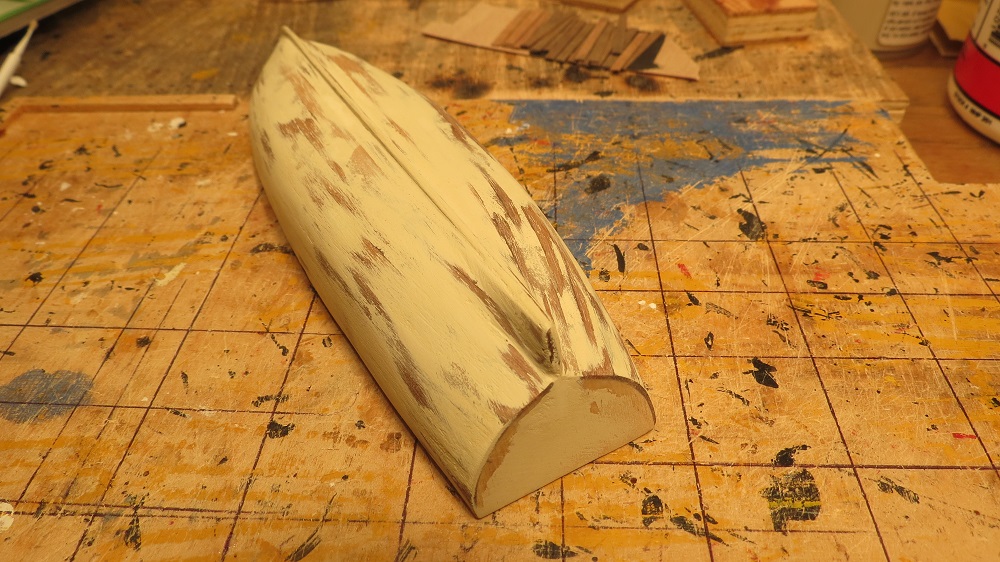
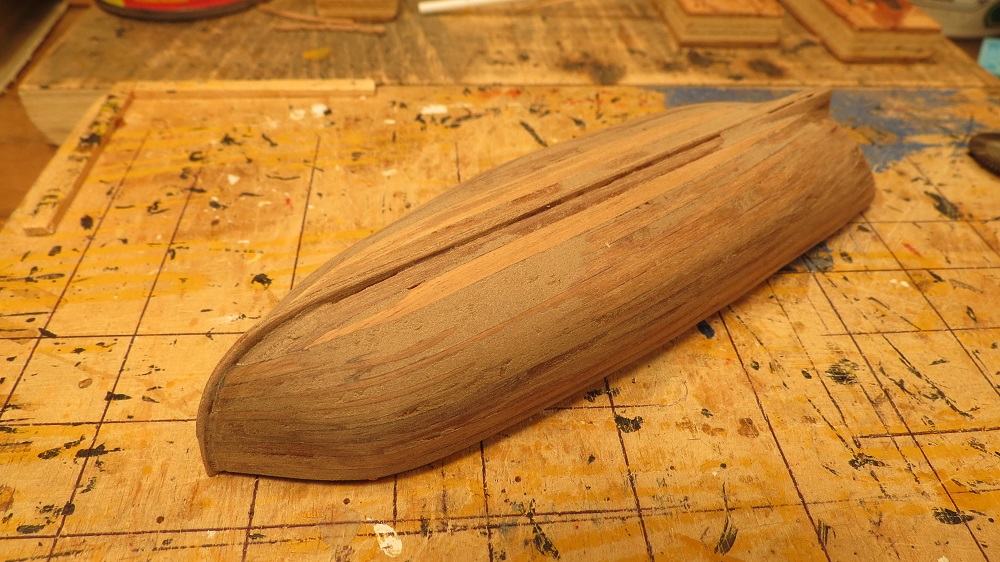
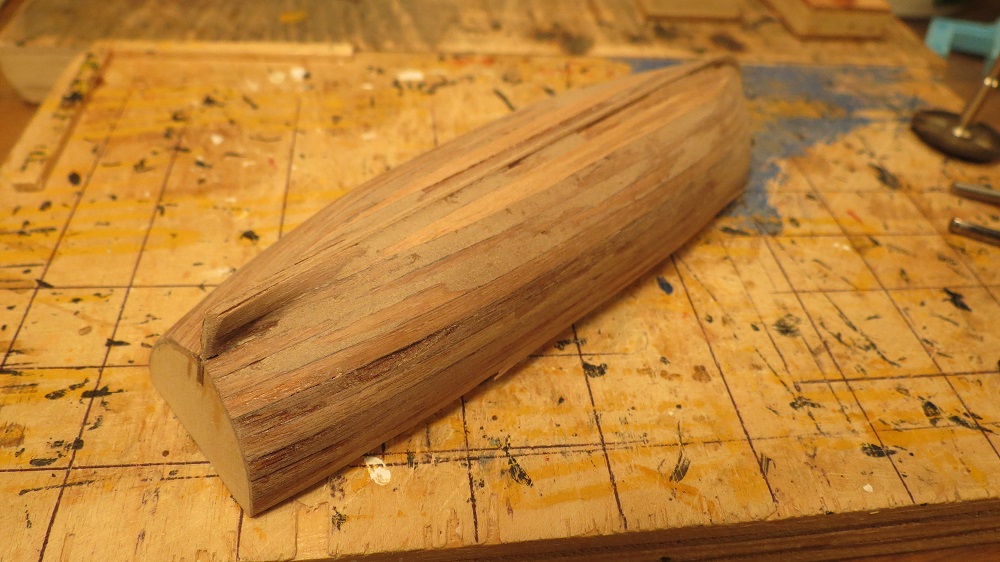
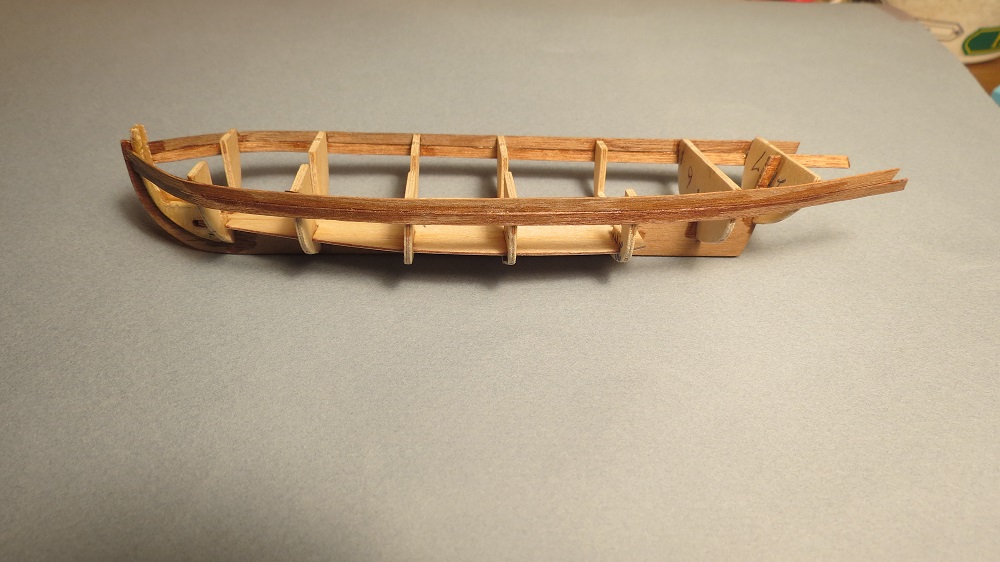
After rough sanding and filling.

Continuing with fairing the hull
-
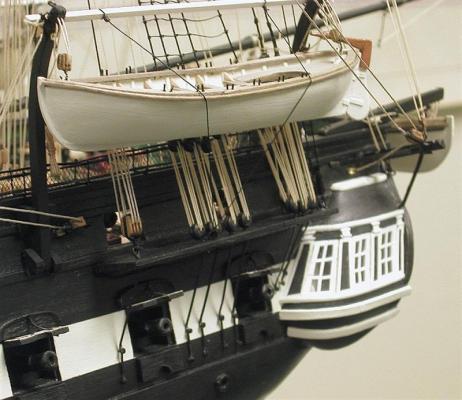
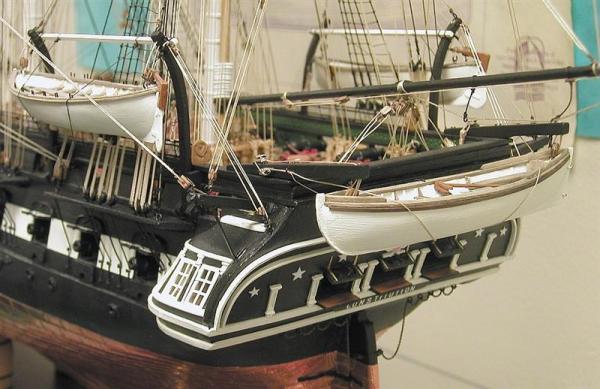
I plan to have one boat (the launch) on the upper deck skids, and one on the starboard davits. On the model, the davits are 3.9" apart, equivalent to approximately 23.4 feet. However, the small cutter or Jolly boat in the kit measures only the equivalent of 18 feet. Hence, I decided to build a 25 foot cutter as shown in McKay's drawings in McGowan's book, HMS Victory, Her Construction, Career and Restoration.
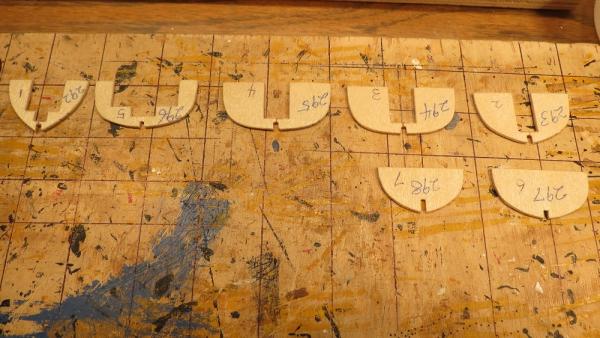
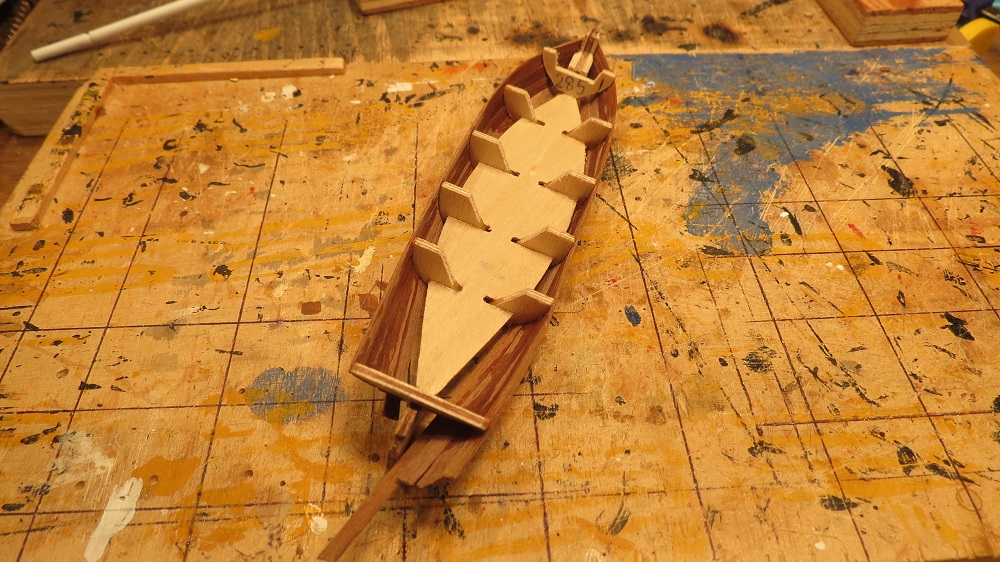
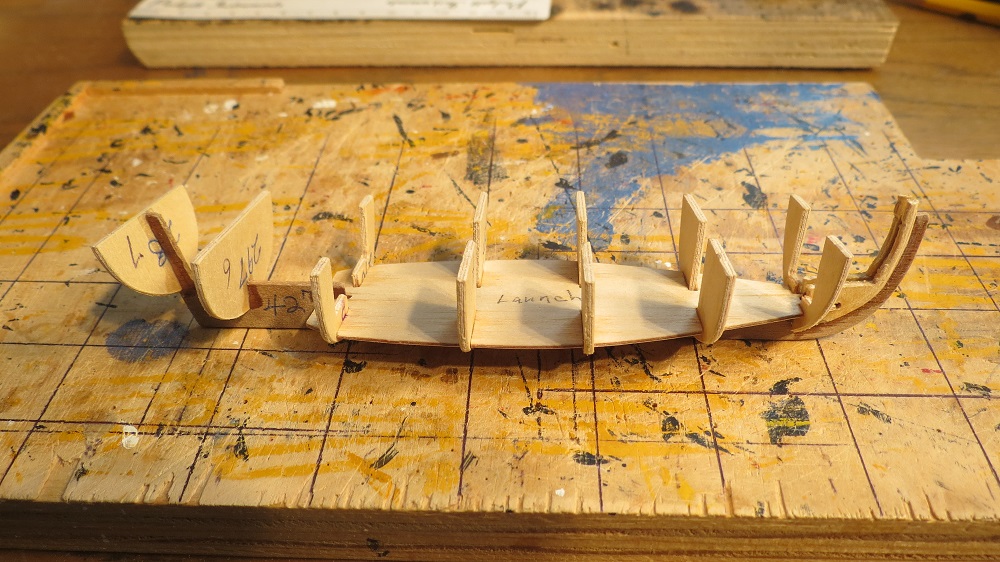
Since there are no parts for that size cutter in the kit, I decided to modify the pinnace (28 ') into a cutter (25').
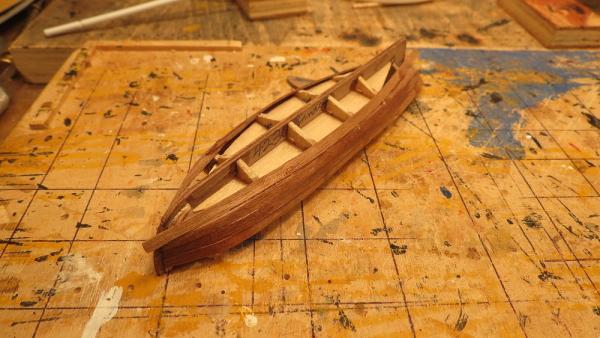
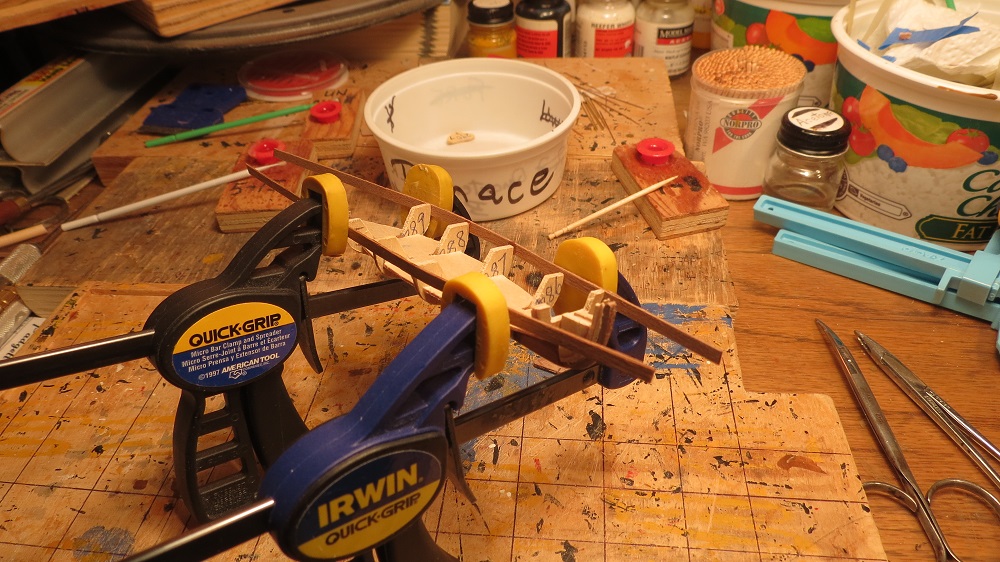
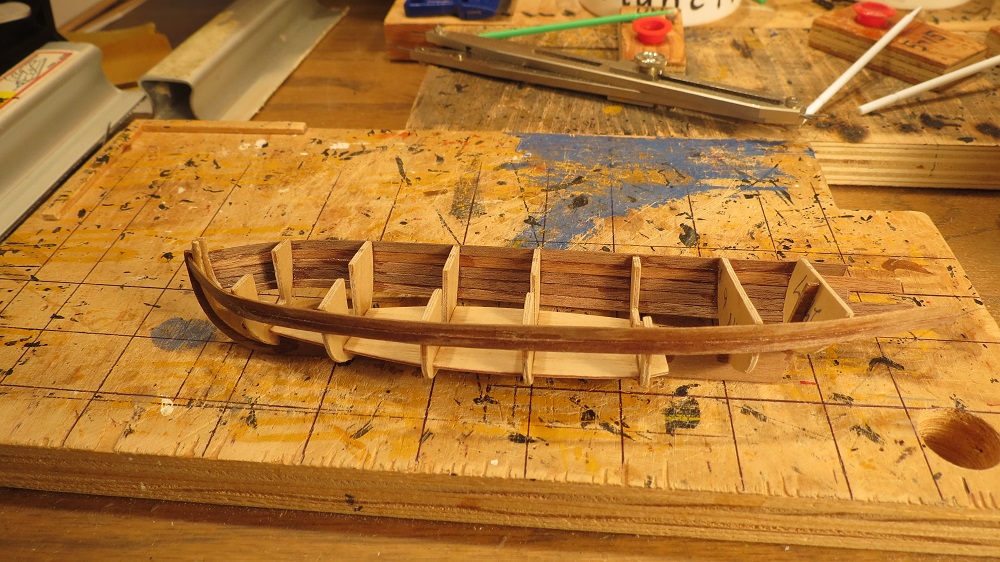
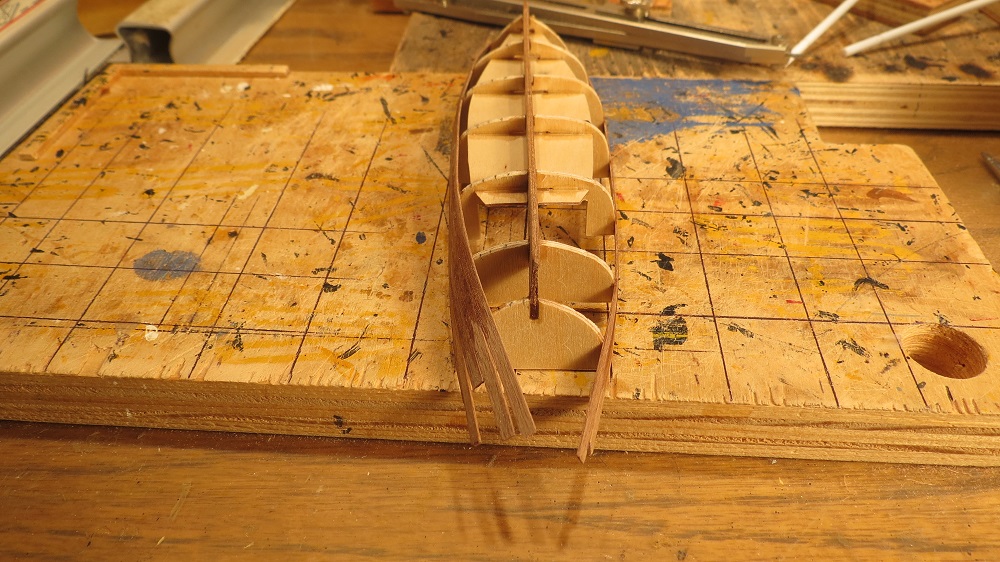
Starting planking using the pinnace keel and forward bulkheads.


A new larger transome was fashioned for the cutter. The pinnace transome circled at left.
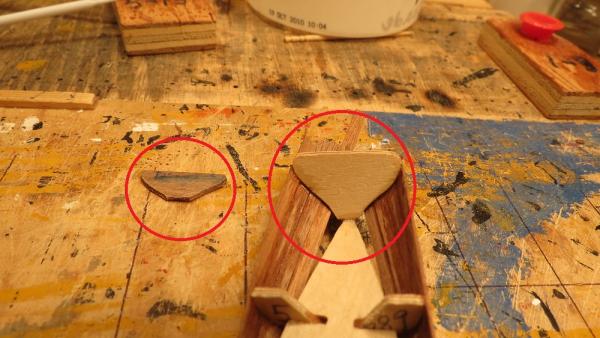
The portion of the pinnace keel to be removed is highlighted.
-
Happy New Year Jerry. I'm facing the same delemma that you did, the Victory is almost finished, and what then? However, I'm having too much fun building the small boats to quit now. From one old geezer to another, all the best. Gil
-
Many thanks Popeye. Computers seem to get old rather fast. Let's hope our models have more staying power. And a Happy New Year to you and your family. Cheers, Gil
-
Edwin and Lawrence, Thanks for your more than kind remarks. Our computer crashed (terminal) over the holidays, and after a decent burial, I'm just getting up to speed with the new one. Too late to wish you a merry Christmas, but all the best for the new year.
Lawrence, your beautiful "Victory" finished with a flourish. Sails, sailors and hammocks!! Mine will feel a bit naked without those touches, but the point of interest is that each model is different and has it's own character. Congratulations. I thoroughly enjoyed our posts.
Gil
-
-
-
-
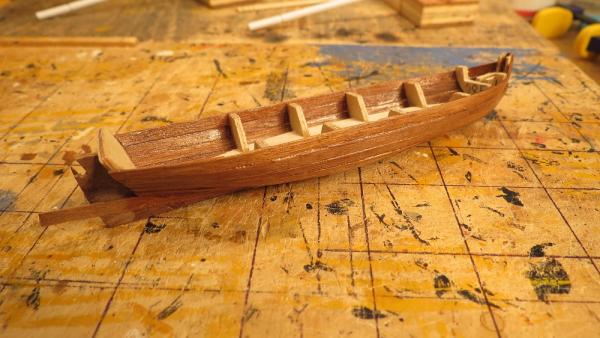
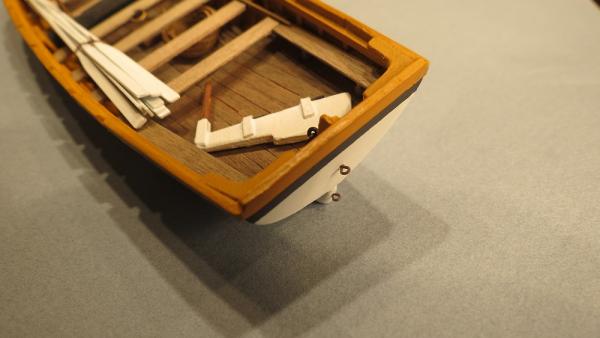
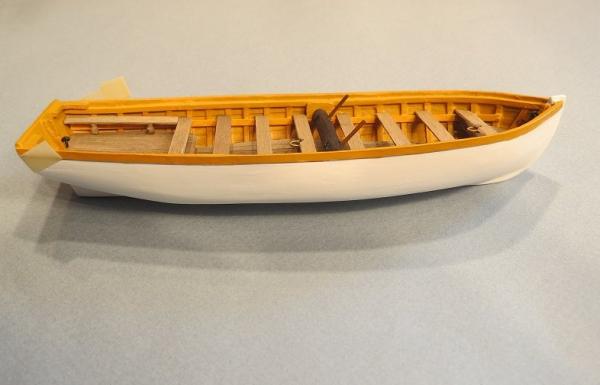
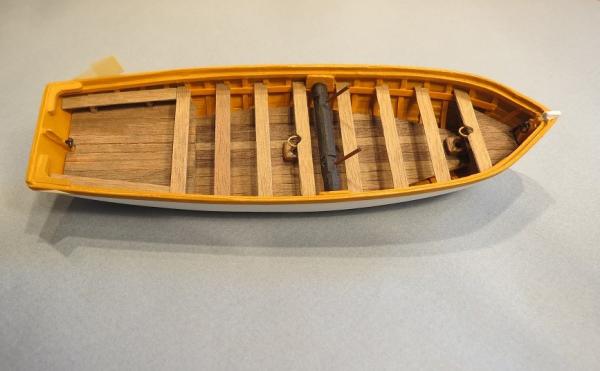
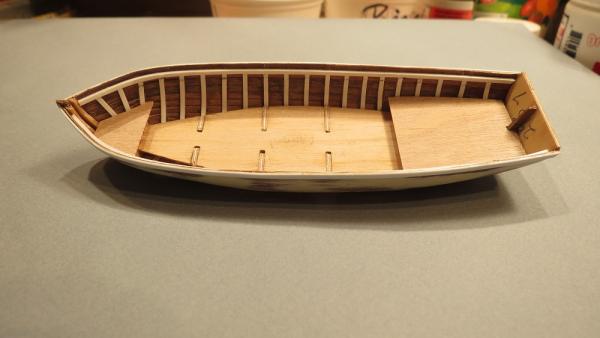
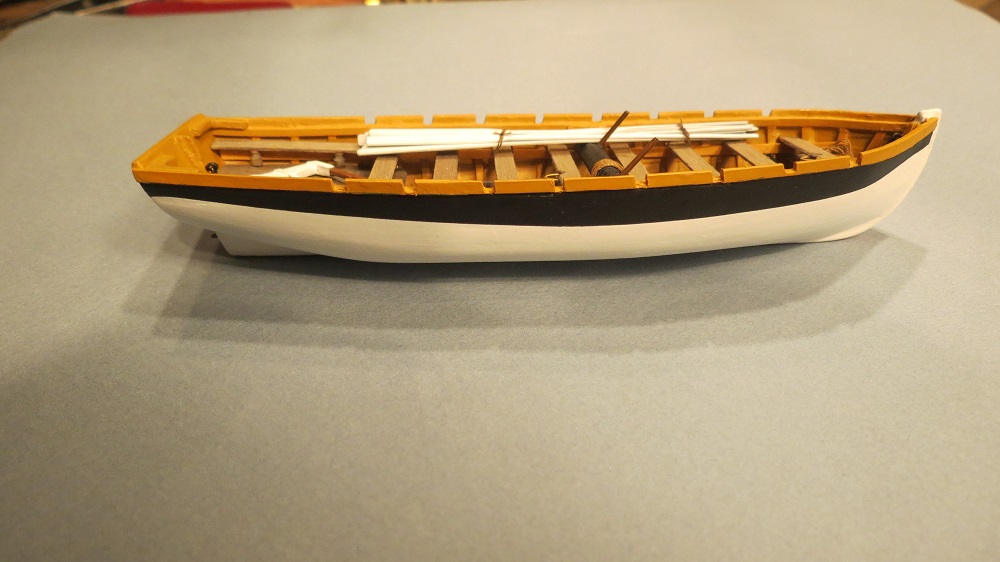
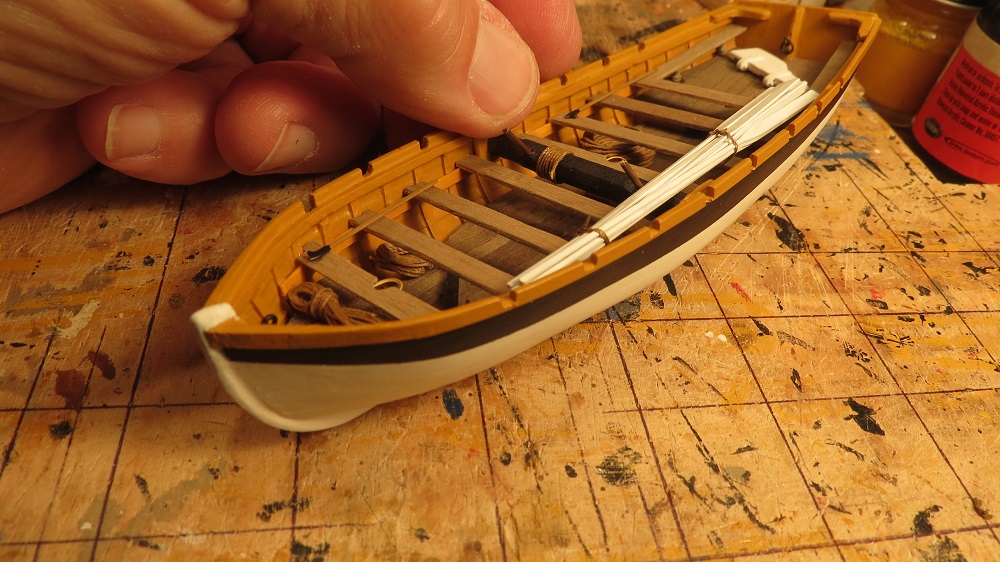
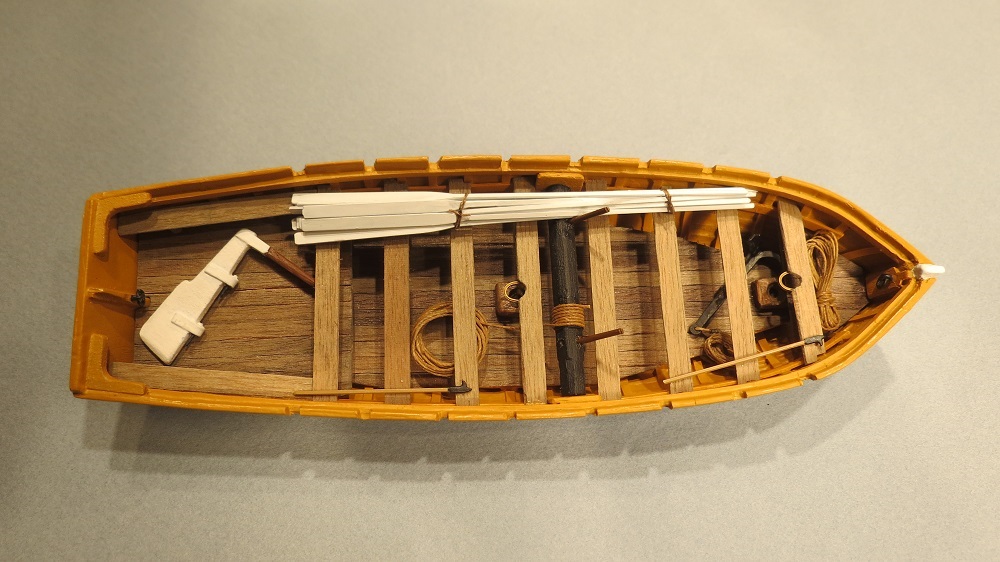
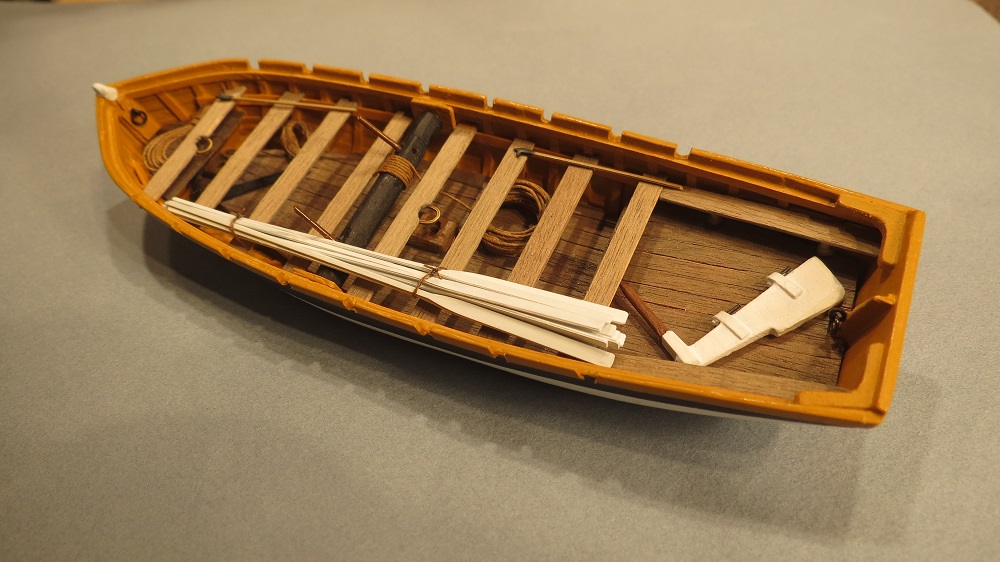
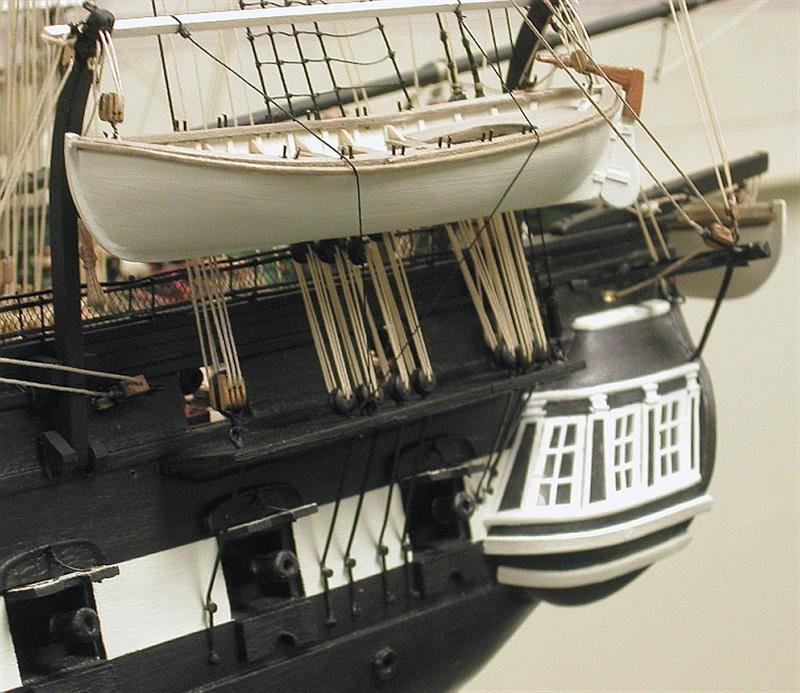
Winding down on the Launch, which will likely be the only boat on the skids, which will allow a clear view of the upper gun deck. Progress includes painting, cutting in oarlocks in the wash strake and fashioning the rudder with pintles.

And the painting.
- VonHoldinghausen, dgbot, mtaylor and 14 others
-
 17
17
-
Jerry, I was concerned you would have nothing to do after your grand conpletion of the Victory. Concern no more. You're off at full speed into the Half Moon. Good luck with her. I'm still looking forward to seeing your Victory in her new home.
Many thanks Kevin and Joe. I know you guys follow lots of builds. It's nice to know you are keeping us on the straight and narrow.
Cheers, Gil
-
Floyd, Once a professor, always a professor.
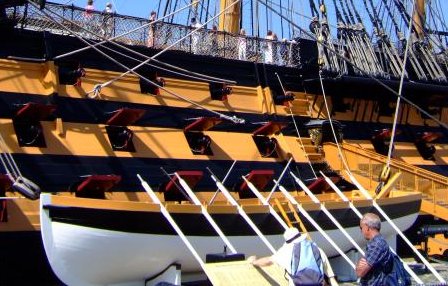
In building the launch, I'm tending to follow colors seen in photos of the ship.
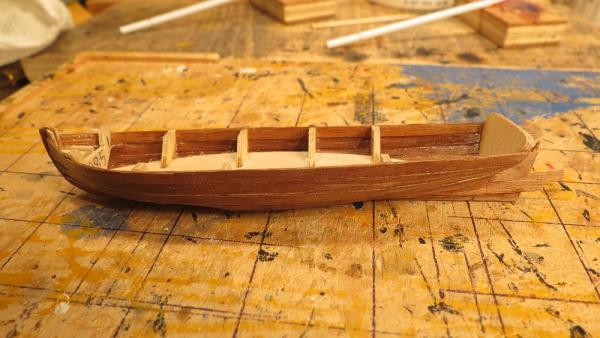
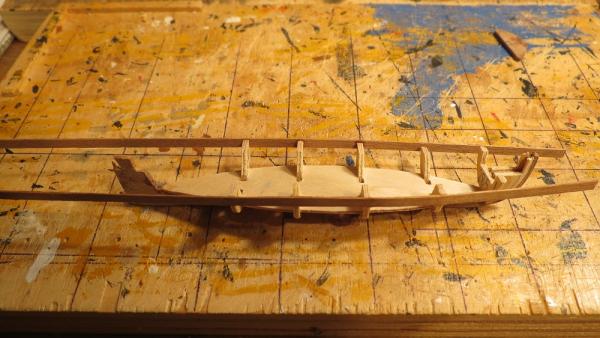
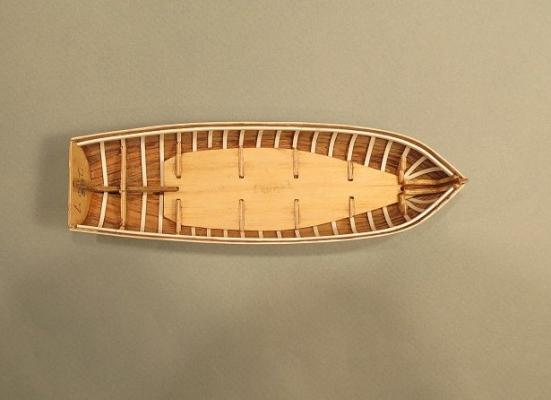
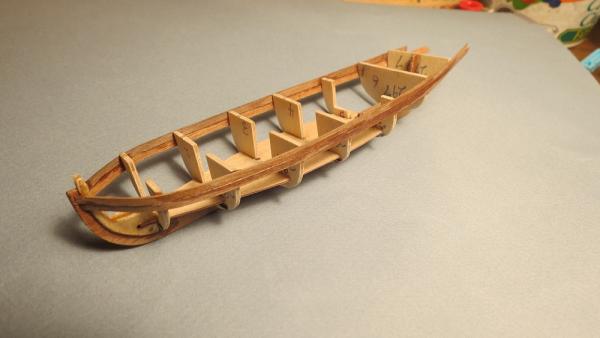
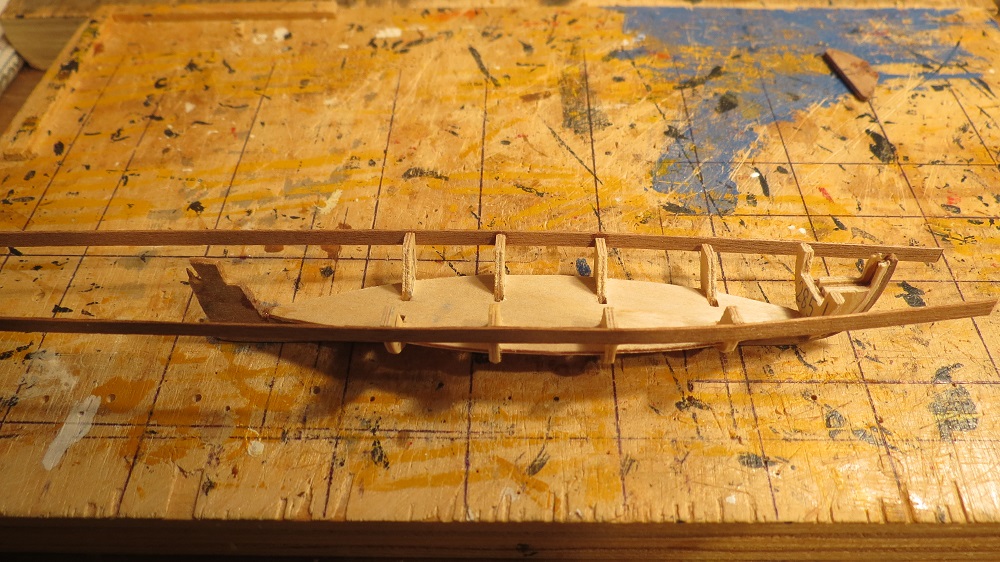
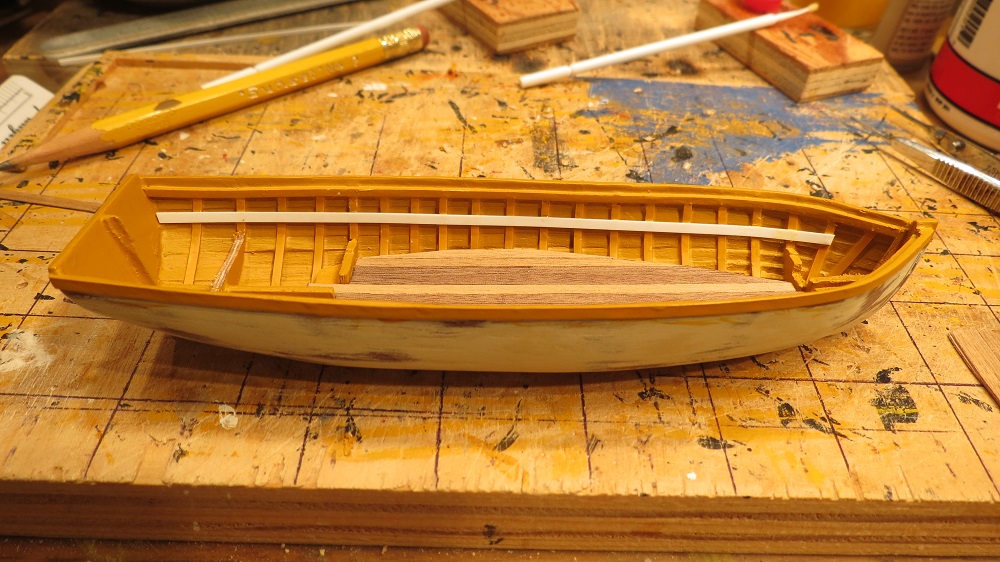
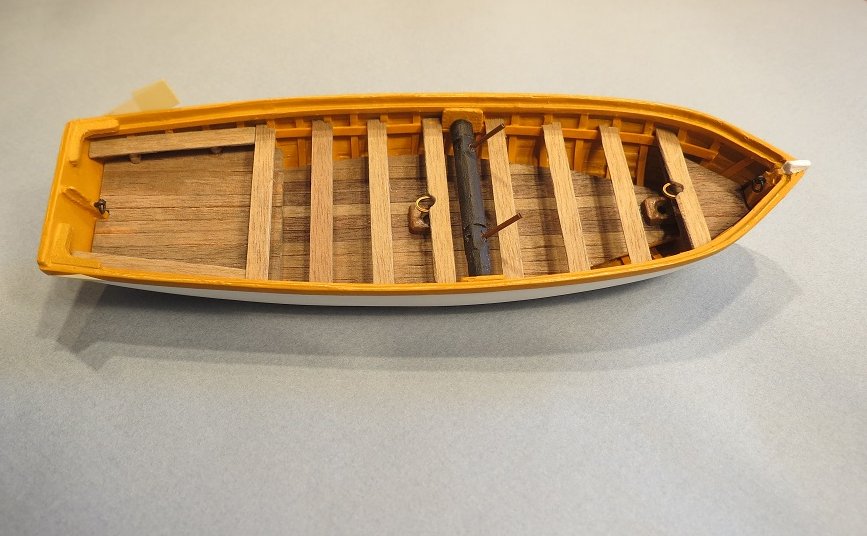
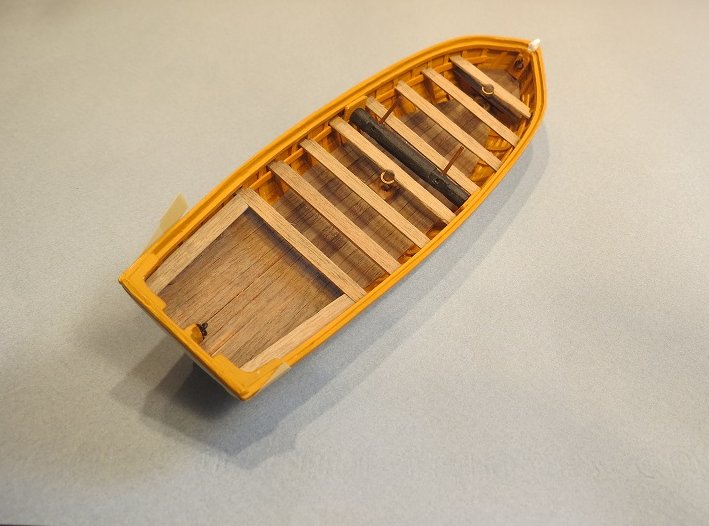
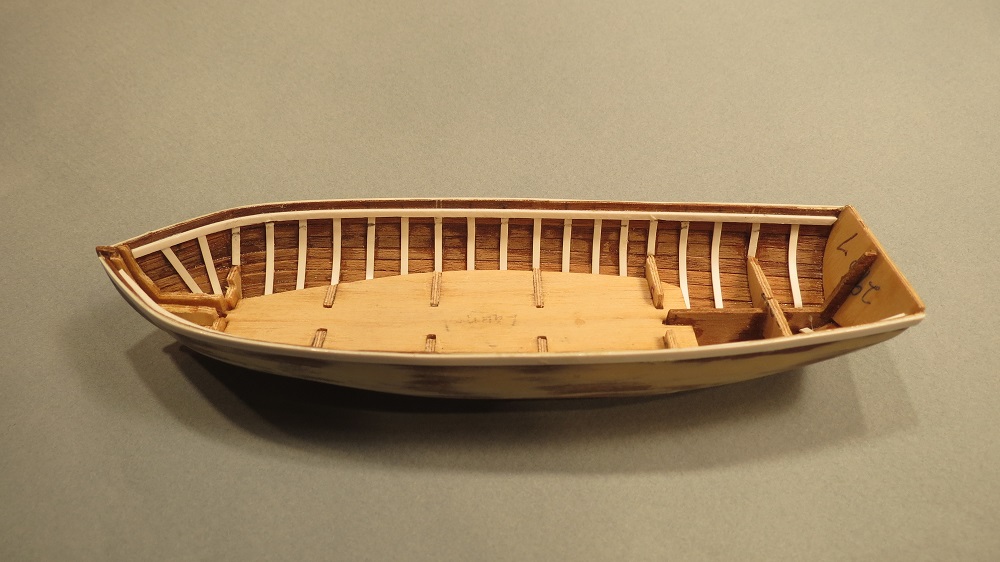
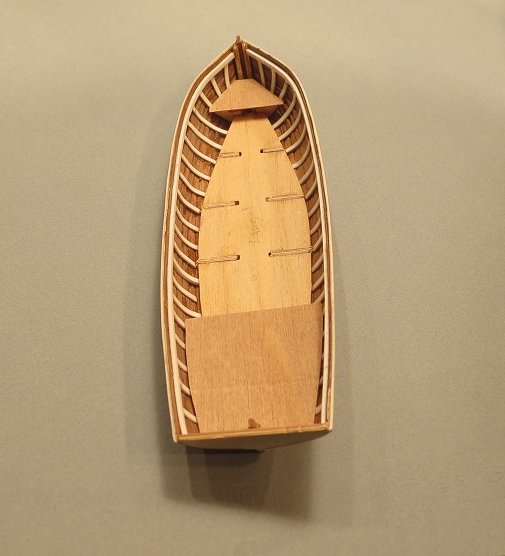
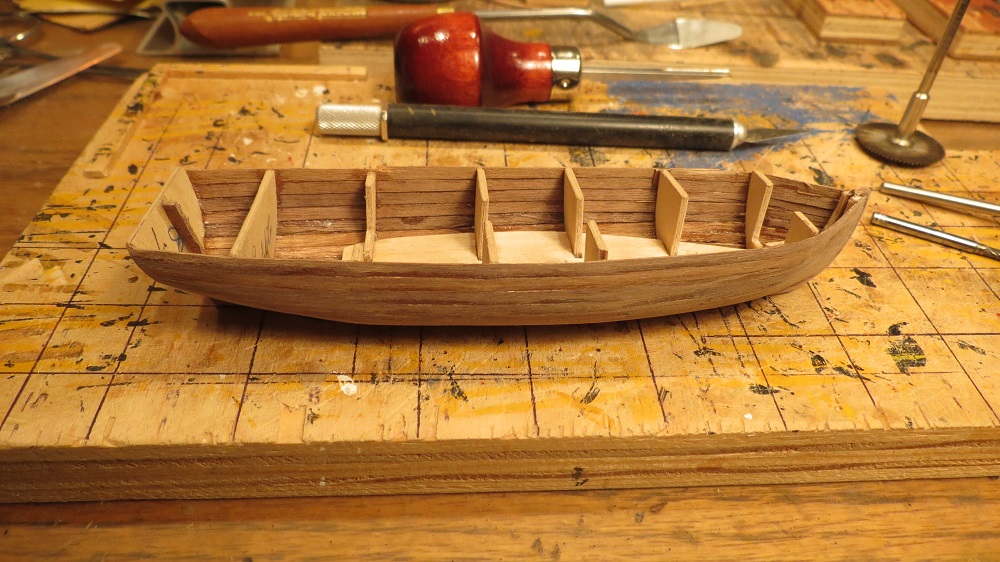
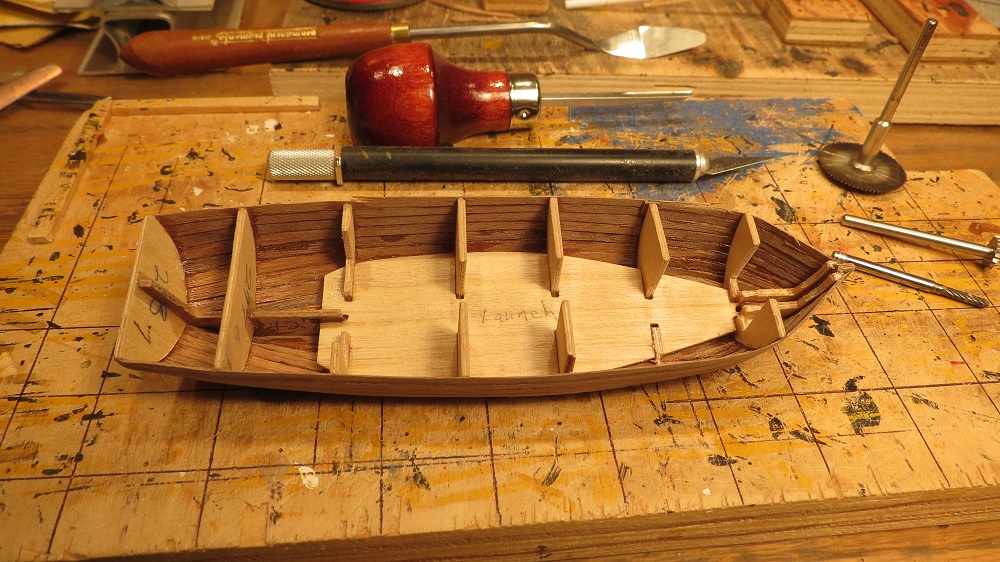
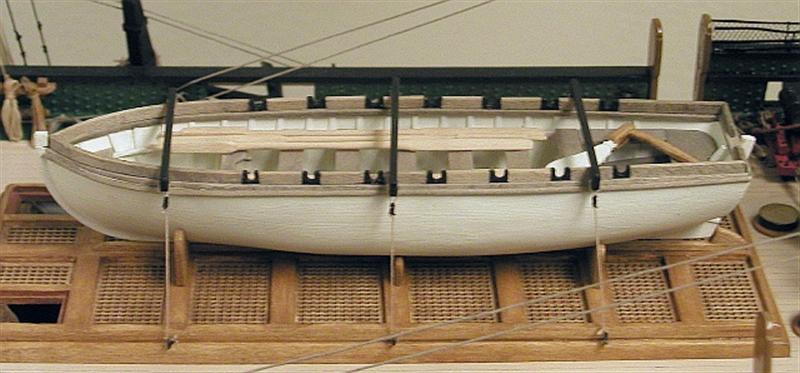
Floor boards added and rising planks to support the thwarts.
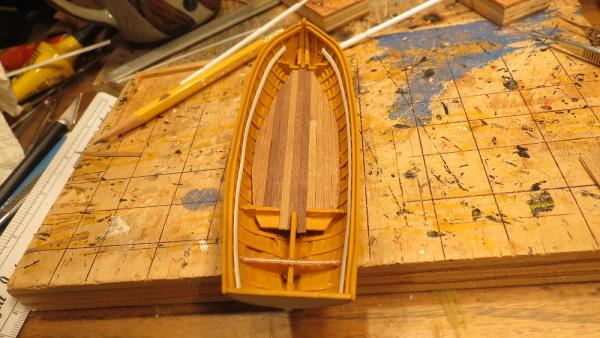
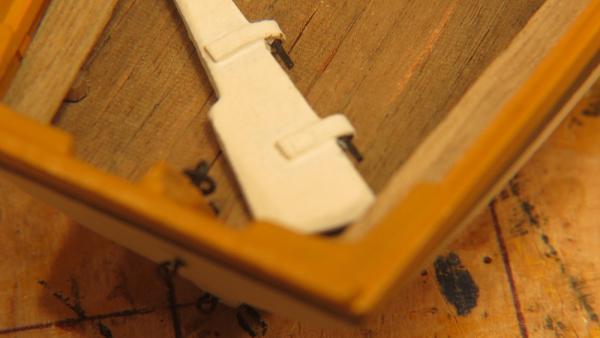
Floor boards, 3mm. walnut, weathered with "Weather-It". Thwarts, 4mm., also weathered. Mast supports and steps for the masts at the 1st and 5th thwarts. Horizontal windlass and lifting rings added.

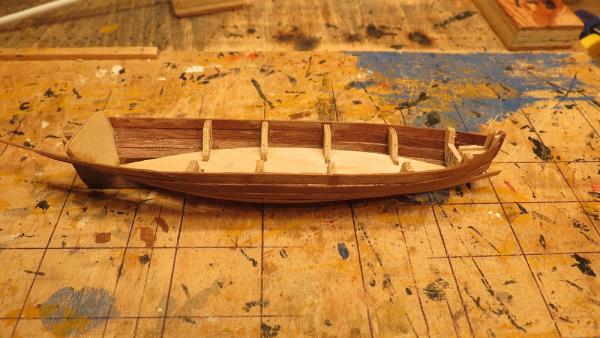
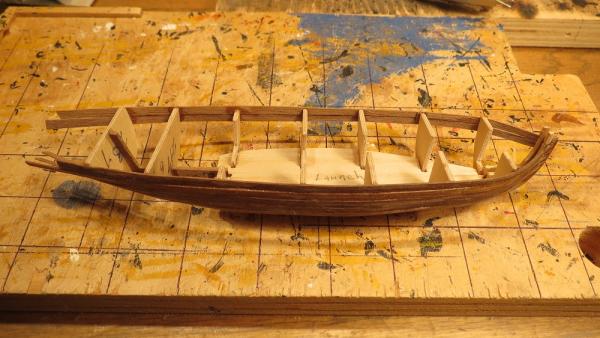
Exterior painting underway.


There is still detailing to do with painting, rudder and supports, etc.
If the computer holds up, I'll post another photo or two.
Cheers, Gil
-
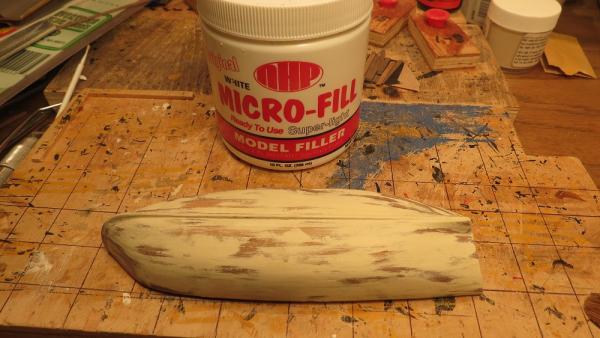
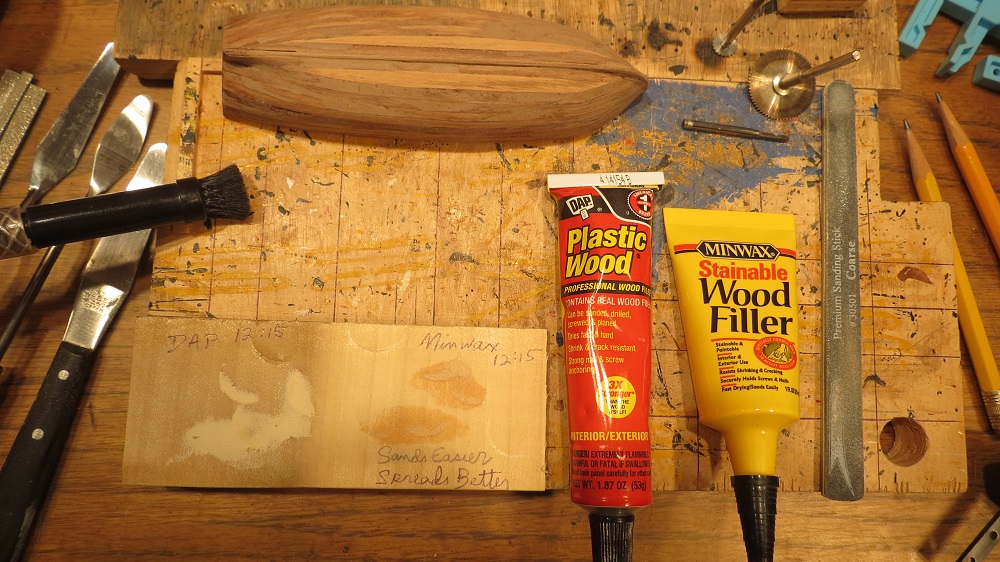
Hi Floyd, I can't remember where I got the Micro-Fill. I've had it for ten years, but unlike solvent based fillers, adding a bit of water and stirring each time it is opened keeps it soft for spreading.
For the planking, I simply measured the number of 3mm. planks needed midships and tapered the planks at the bow accordingly. At the bow, the planks were 2 - 2.5mm. with a plank tapered at each end inserted second plank from the keel. (Best seen in the photo after rough sanding). This worked since the boat will be painted. Were the boat to be varnished, compound tapering and stealers would be the drill.
I hope my professor (you) will forgive the shortcut. Cheers, Gil
-
Shihawk, Indeed it is with perhaps less forgiveness than the ship's hull.
I've done some painting, planked the floor boards and added thwarts. Will add photos when I've resolved the computer problems.
Cheers, Gil
-


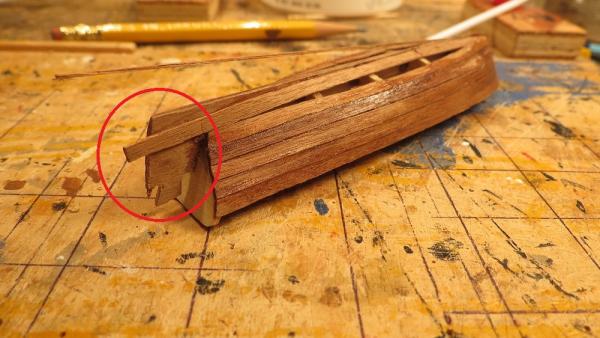
Ribs added using 0.5mm x 1.5mm styrene strips.
An outside plank (styrene) added to support cutting the oar locks. The upper plank saturated with fast C/A to prevent splitting.
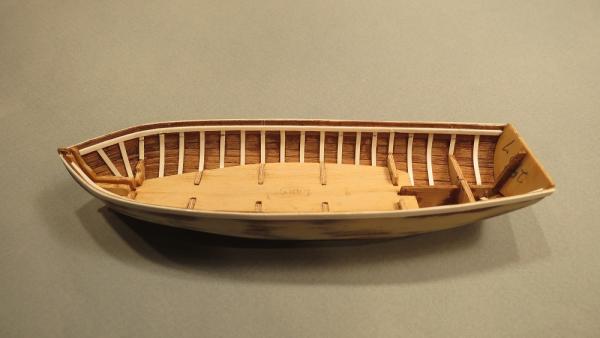
With template for deck planking. Also an inside reinforcement for the base of the oarlocks.


After a little work on the computer, I'll finish the launch. Thumbnail is the third photo. Cheers, Gil
-
Jerry, Thanks for the update. I'm trying to get as nice a result as you had. I love the finishing touches on your build. The flags look great. Cheers, Gil
The posting on the launch should be done by now but the computer thinks it is in charge. It's response to most commands is "Not Responding."
-
JoTika specified double planking, however after the first planking, I couldn't see the advantage in repeating the procedure. The only concern seemed to be damaging the planking when removing the bulkheads. However, with fast C/A applied between each row of planks, the hull was firm enough to sustain no damage.

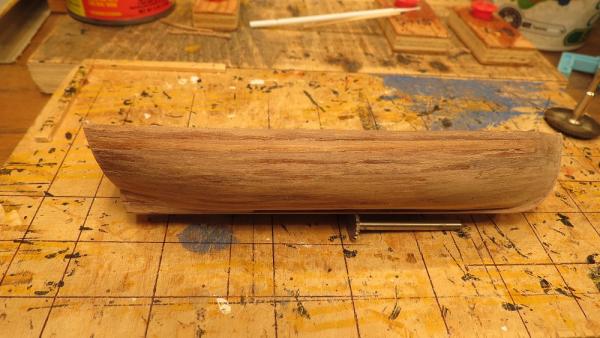
I did a trial run with Dap Plastic wood and Minwax Wood Filler. The Plastic Wood dried very quickly and required more sanding, while the Minwax was easier to apply and sanded more easily.

Minwax Wood Filler.


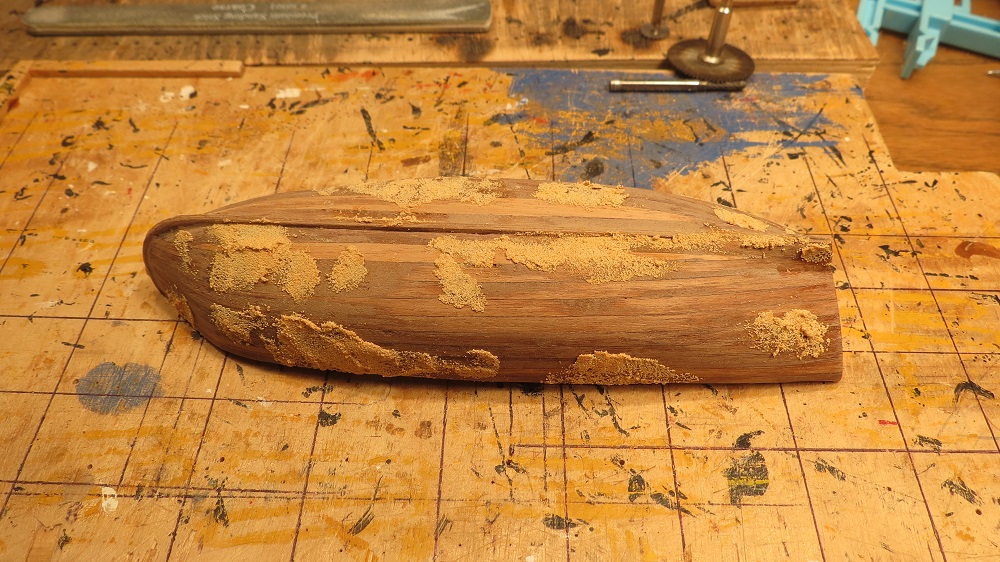
A second filling and sanding with Micro-fill.
-
-
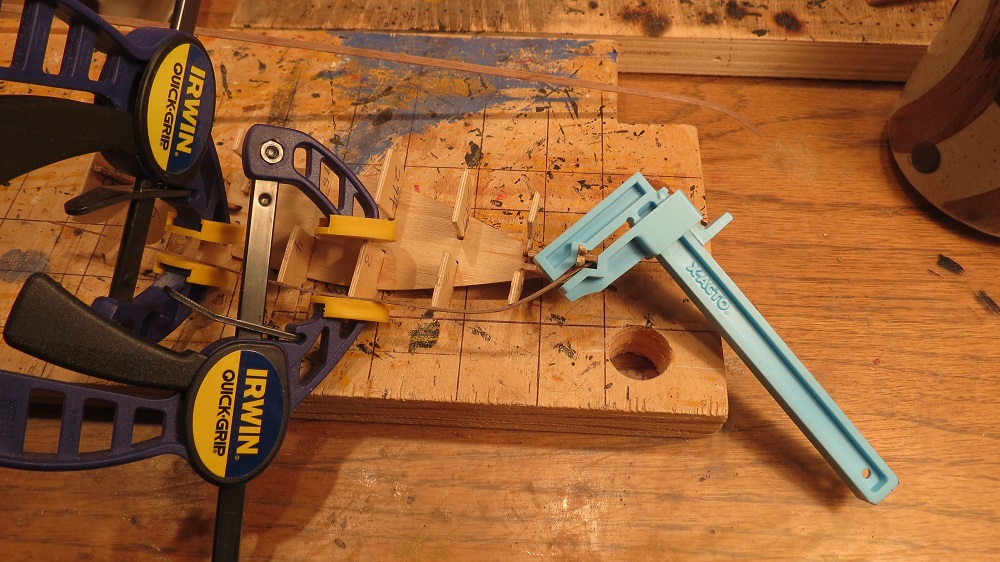
Planking the launch. Pre-bent planks.
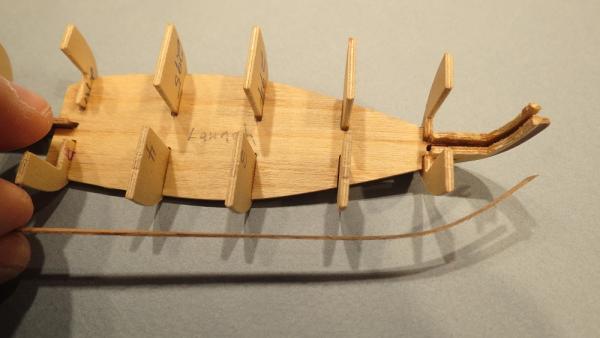

Lightly glued, since the bulkheads have to be removed later.


-
I've looked at Jerry's lovely ship's boats, and he even makes it look easy. Why is it that I always make things complicated?
There are a few pitfalls along the way (such as breaking the bulkheads) but these can be repaired and the results should be much the same.
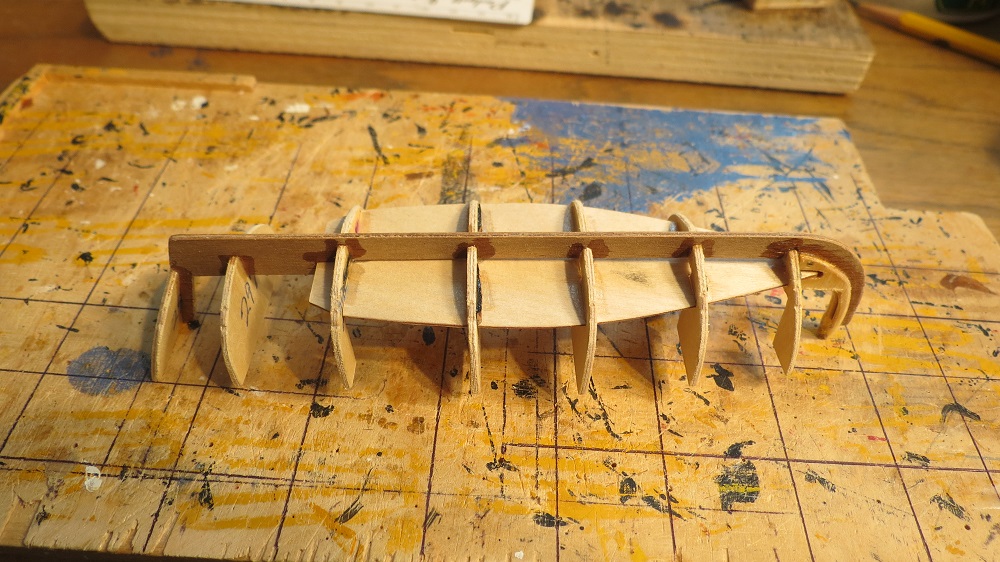
For the Launch, the bulkheads are placed and aligned.


Shaping and narrowing the planks at the bow by sanding
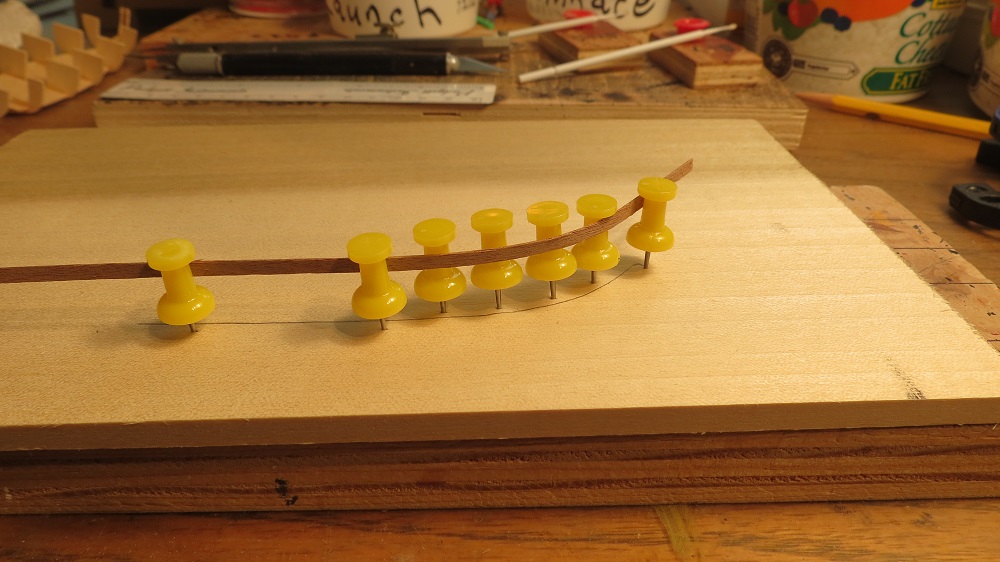
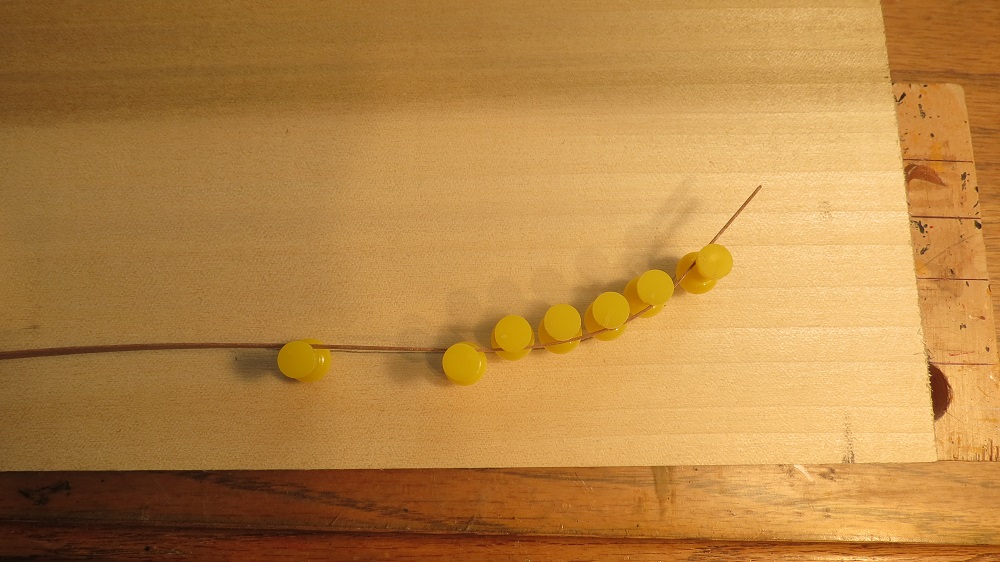
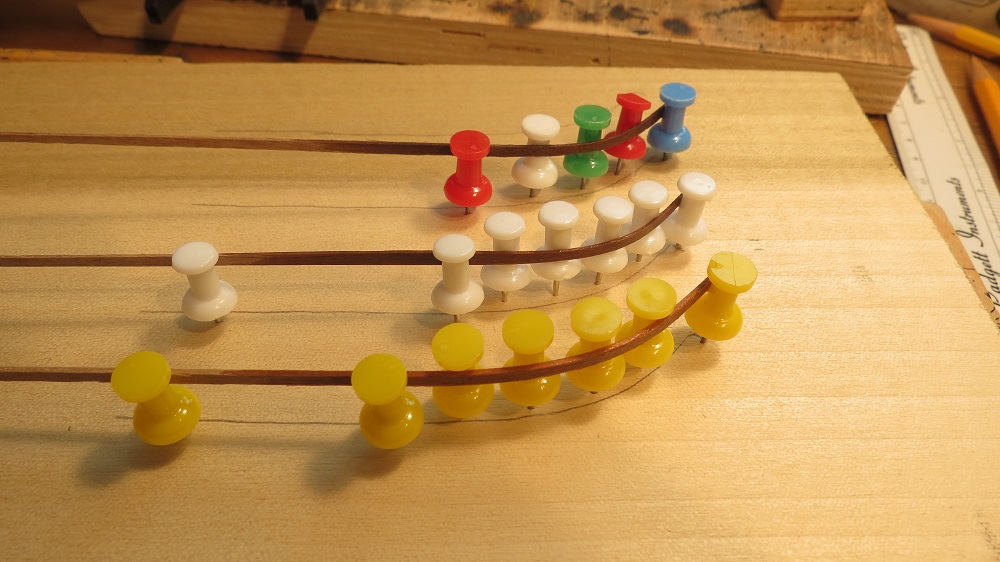
The 0.5mm x 3mm walnut planking supplied with the kit is rather rough and splits easily. Bending these around the first bulkhead dry tended to produce fractures or splitting of the planks. After soaking the planks, they tended to produce a sharp angle over the first bulkhead. I found preforming the planks by soaking and drying with a genlte curve gave better results.

- dafi, popeye the sailor, dgbot and 5 others
-
8
-
Sjors, You are more than kind in your remarks. Let me see if I have this correct. We publish a book for perhaps $10,000, sell 100 copies for $10 each and make $1,000. What am I missing? I learn just as much from our friends on MSW and we're having fun doing it. But thank you sir.
Nils, It's interesting that there are many on our web site with woodworking skills far beyond mine. But I believe every component of a ship model should convey it's function, which can be difficult if one has never been to sea. I enjoy rigging the model, perhaps dreaming of taking the ship (model) beyond the horizon. Love the sails on the Pegasus by the way.
Cheers, Gil
- Sjors, Mirabell61, mtaylor and 2 others
-
5
-
Jerry, Many thanks for your posting. I reviewed your log and hadn't thought of rigging lifting slings for the boats on the davits. My mind was stuck on bow and stern rings. Great idea. I'm following in your wake on the launch.
Jon, I've looked at your log on the "Rattlesnake" and you underestimate your skill level. You're ready for any model. The photos are from my previous model, USS Constitution (Model Shipways) before the Victory. I had it on the web site before the crash 2013 when all was lost. I'm gathering photographs to replace the log but the "Victory" takes preference on time.
John McKay has illustrated at least two books, The 100-Gun Ship Victory, John McKay and HMS Victory, Her Construction, Career and Restoration, Alan McGowan, illustrated by John McKay. Cheers, Gil
-
Having almost completed the "Victory" I've turned my attention to the ship's boats. I'll probably do the launch to have one boat on the skids, but would rather not have a full compliment of boats hiding the details on the gun deck. Another boat will be the cutter (or jolly boat) on the starboard davits. The problem is that the cutter is much shorter than the distance between the davits. One solution would be to build a 25 ft. cutter (as shown in McKay's drawings) using parts from other boats.
It's interesting to look at the different methods of building the ship's boats. Model Shipways USS Constitution uses cut outs of the hull stacked vertically or layered up followed by sanding to contour the hull (shown so beautifully in Bob Hunt's practicum). That is the method I used on the "Constitution" with what I thought were pleasing results.

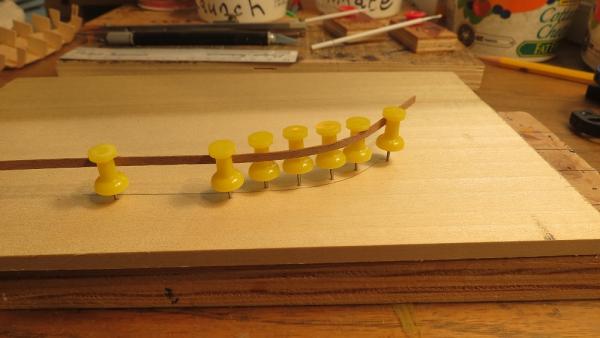
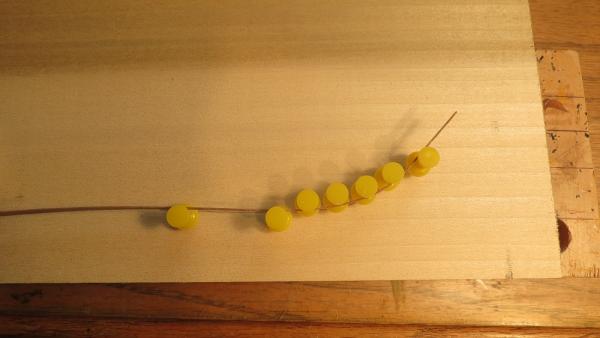
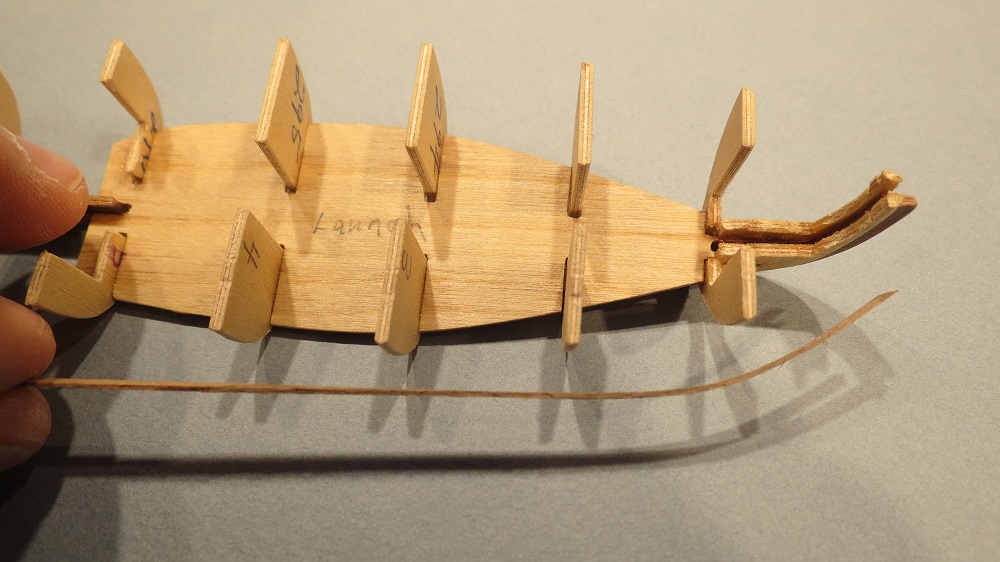
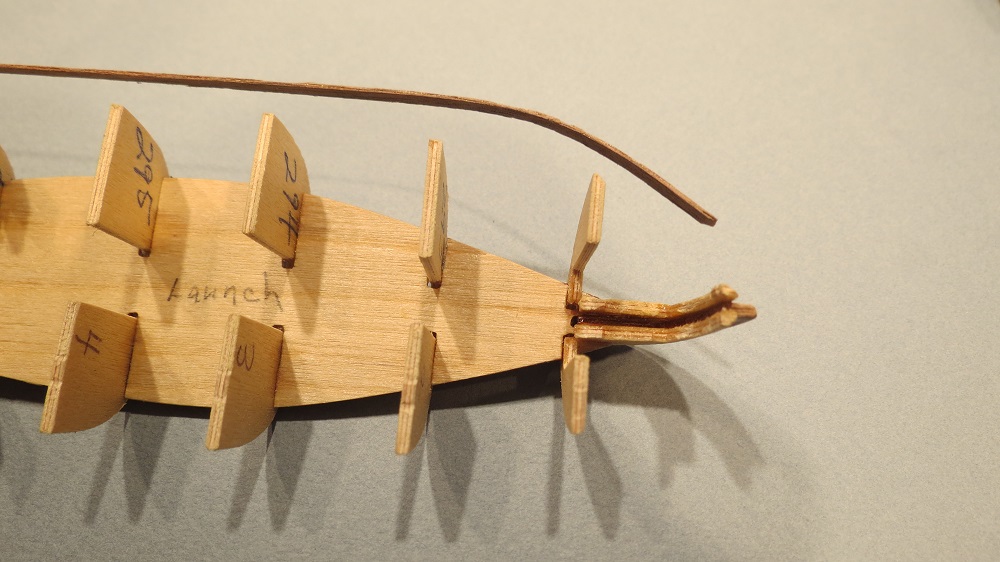
JoTika offers a keel and bulkheads to be planked similar to the main ship. One can see the immediate problem. Four of the bulkheads are fractured in the middle, even though I thought I was being gentle.
And of course there is scratch building, as seen in Grant Dale's extremely informative presentation showing problems and solutions, and lovely results.
Having read Antscherl's practicum, as well as other sources, each presents it's own challenges.
With no power tools other than a variable speed hand drill, and working in our den/office, I chose the simplest option. Use the materials supplied with the kit. I believe similar results can be achieved by any of the above methods.
Cheers, Gil
-


HMS Victory by gil middleton - FINISHED - Caldercraft - 1:72
in - Kit build logs for subjects built from 1751 - 1800
Posted
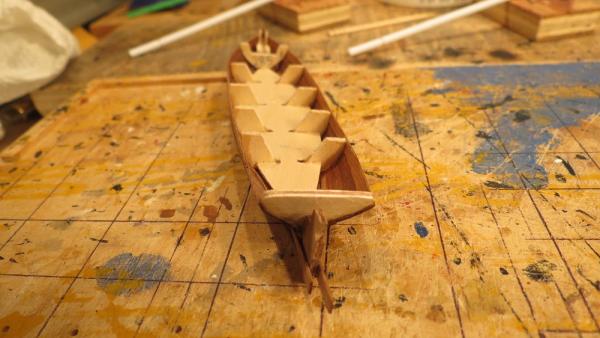
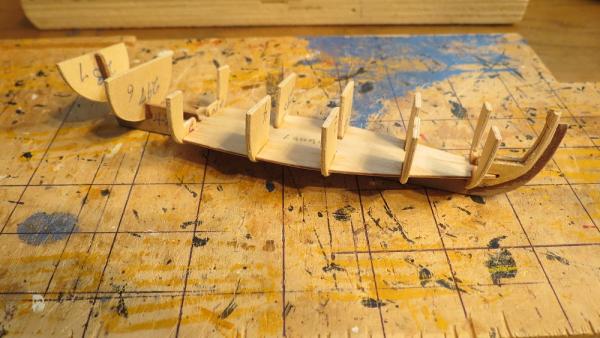
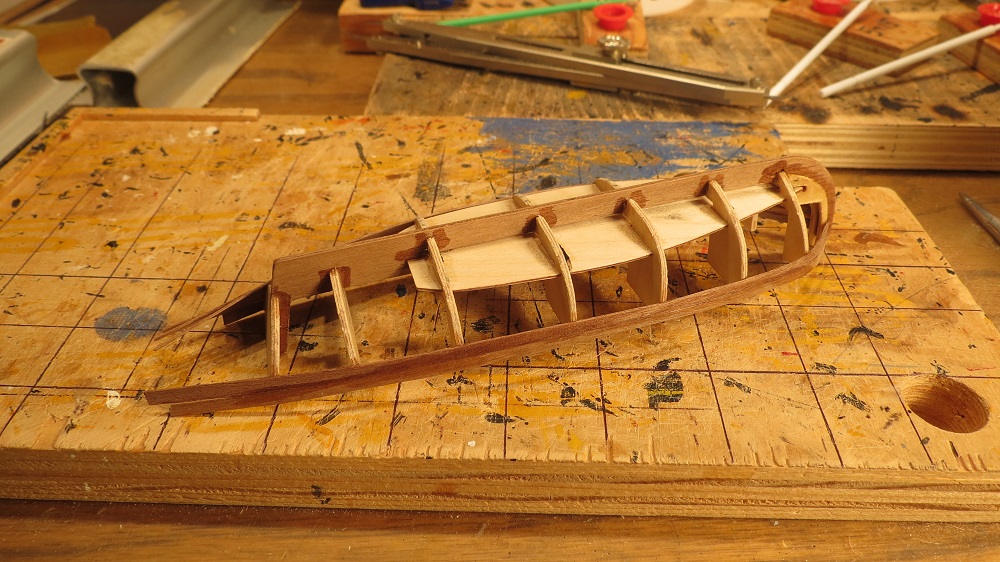
Continuing with the 25' cutter. Bulkheads have been trimmed and ribs added.
Gunwale and rising plank added.
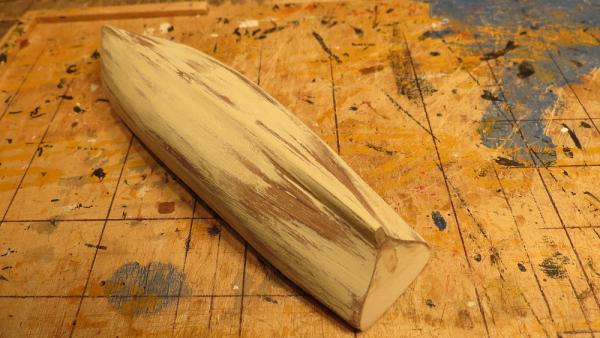
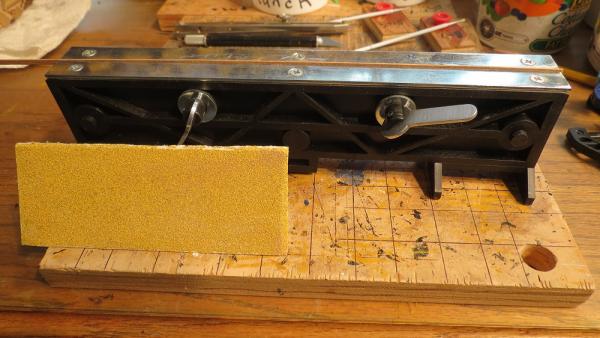
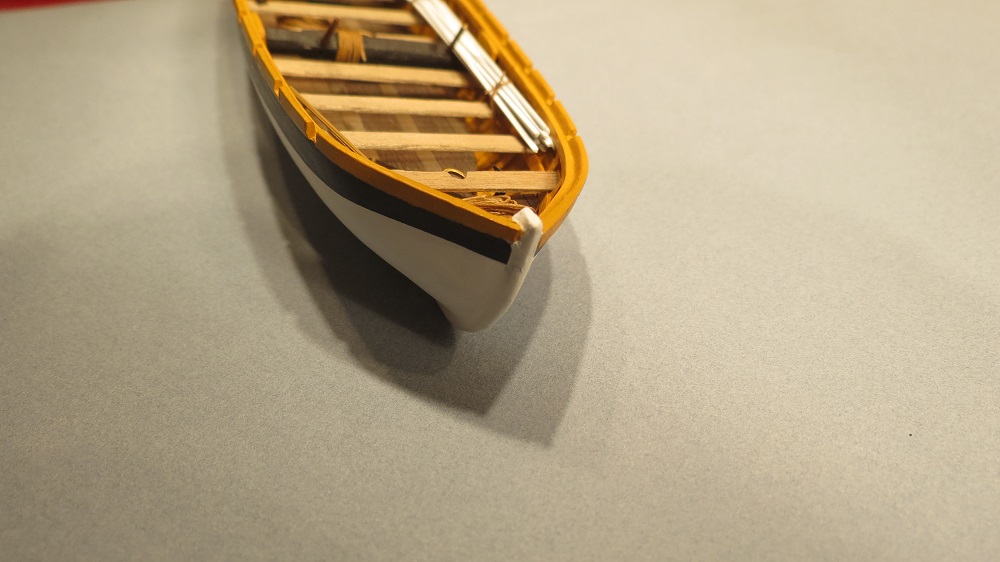
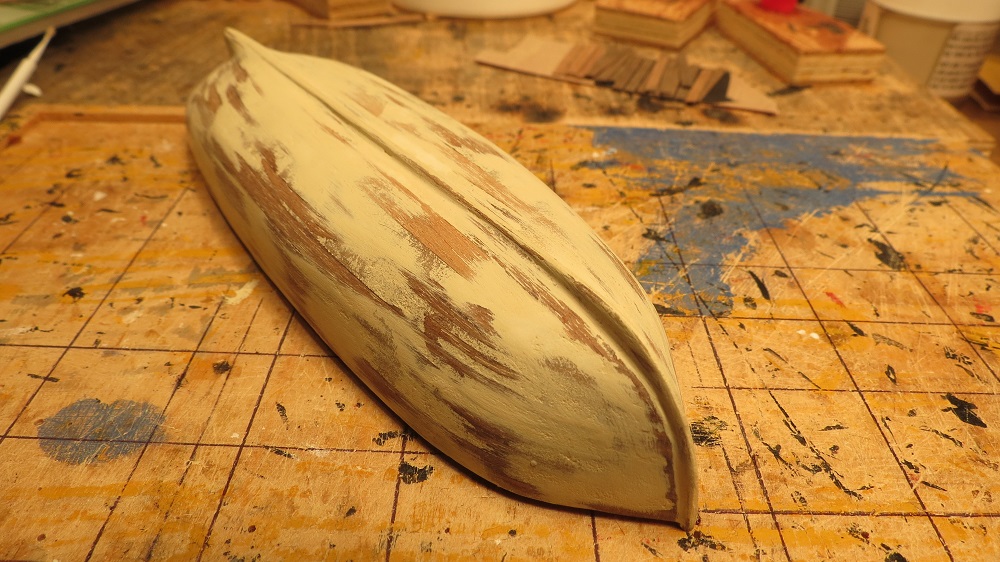
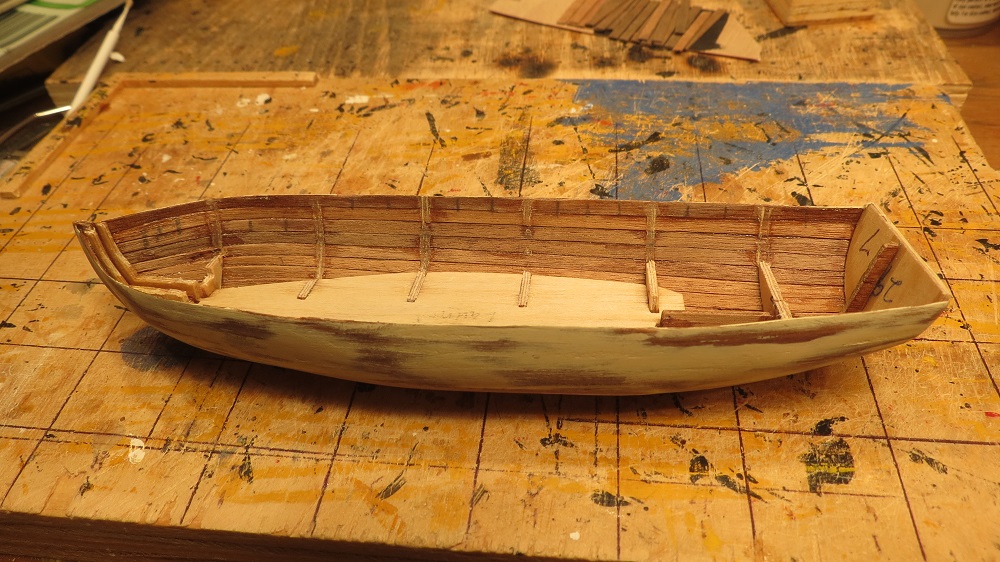
Final fairing, sanding and painting, sanding and painting, sanding and painting, painting, painting, painting, etc., etc
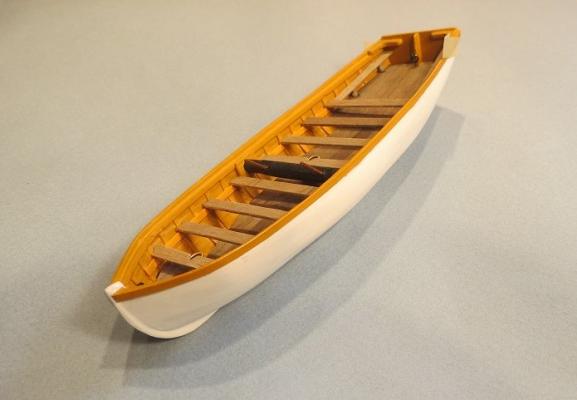
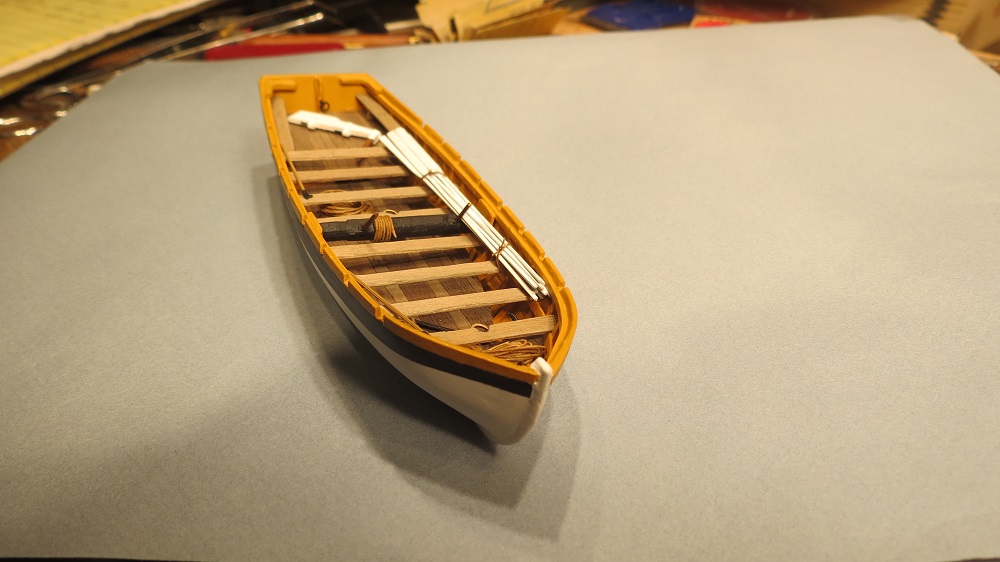
Weathered thwarts and floor boards (a bit too much), and comparison with the launch
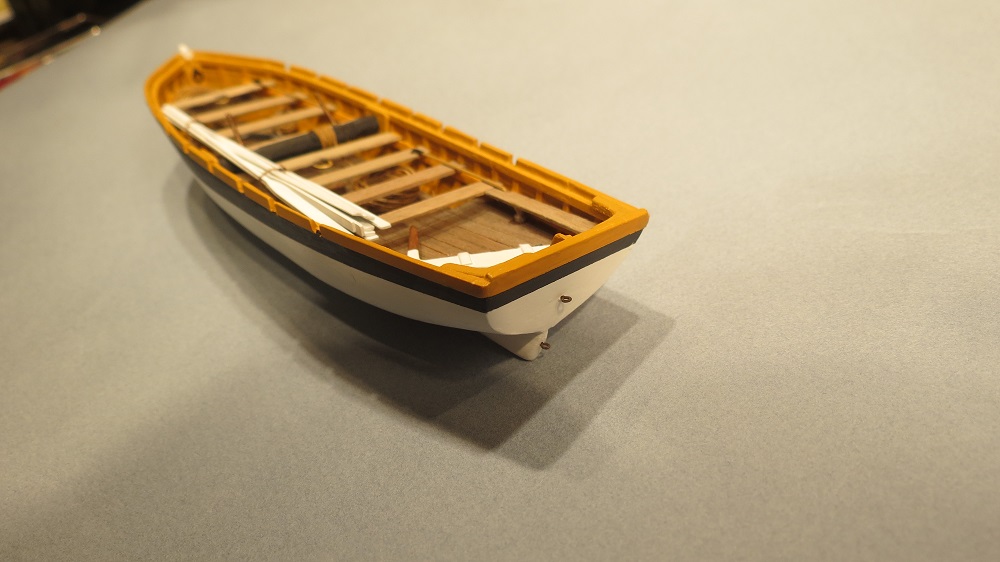
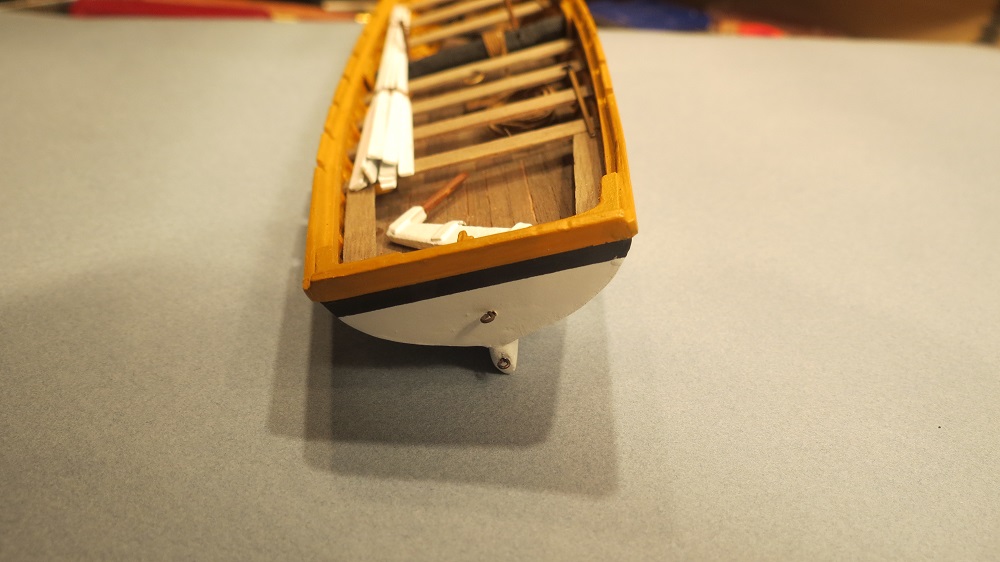
Still a number of details to be added, aft seating, rudder, lifting rings, thole pins, etc.