Bedford
-
Posts
1,190 -
Joined
-
Last visited
Content Type
Profiles
Forums
Gallery
Events
Everything posted by Bedford
-
 Yeah, decided to leave the rudder halyard as it is for a few reasons 1: The merest thought of making my own rope hasn't even begun to speculate about the slightest possibility of crossing my mind. 2: I like the way this stuff is lying 3: Without the closeup photo none of you over 45 would be able to see the twist anyway 4: It's pretty much the same colour as the rigging on the real boat
 -
9 degrees, cold. I laugh in your general direction! I lived in the lovely little city of Orange for 30 odd years and as long as the sun was out and it wasn't windy I would happily wear shorts and T shirt at 9 degrees, luxury!! Mind you anything over 26 and I'm ready to call it quits!
-
Yes a 3MT collet chuck and collets are on the shopping list as are those kinds of drill bits and small mill bits. I haven't invested in really small mills yet because a drill chuck won't be good enough for them
-
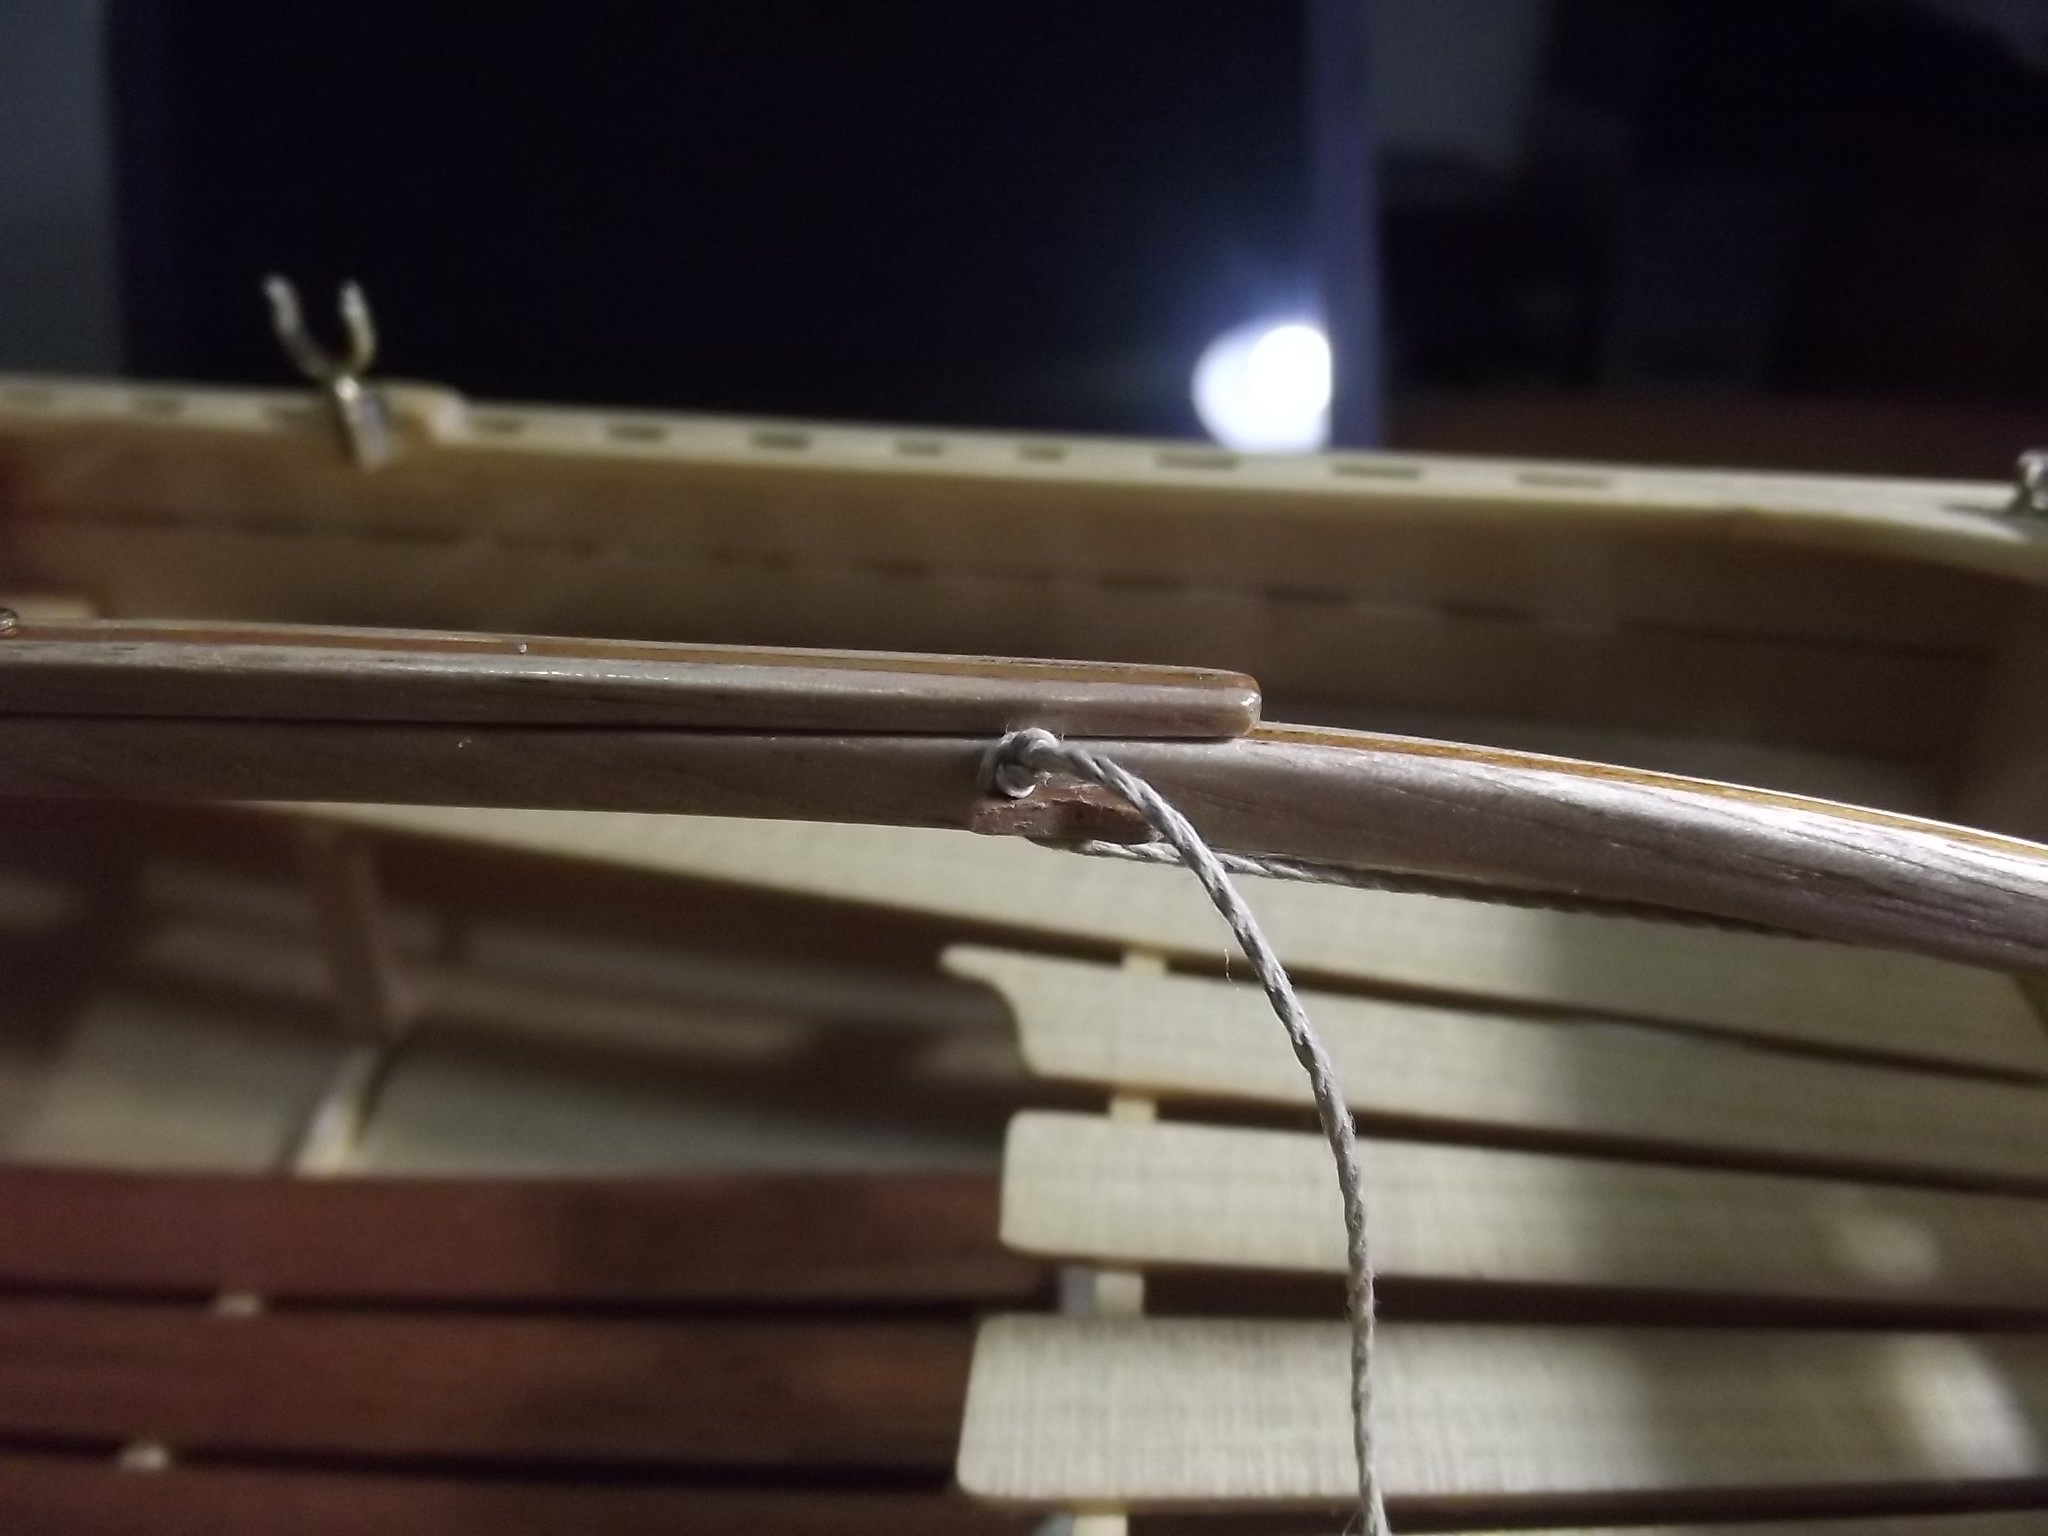
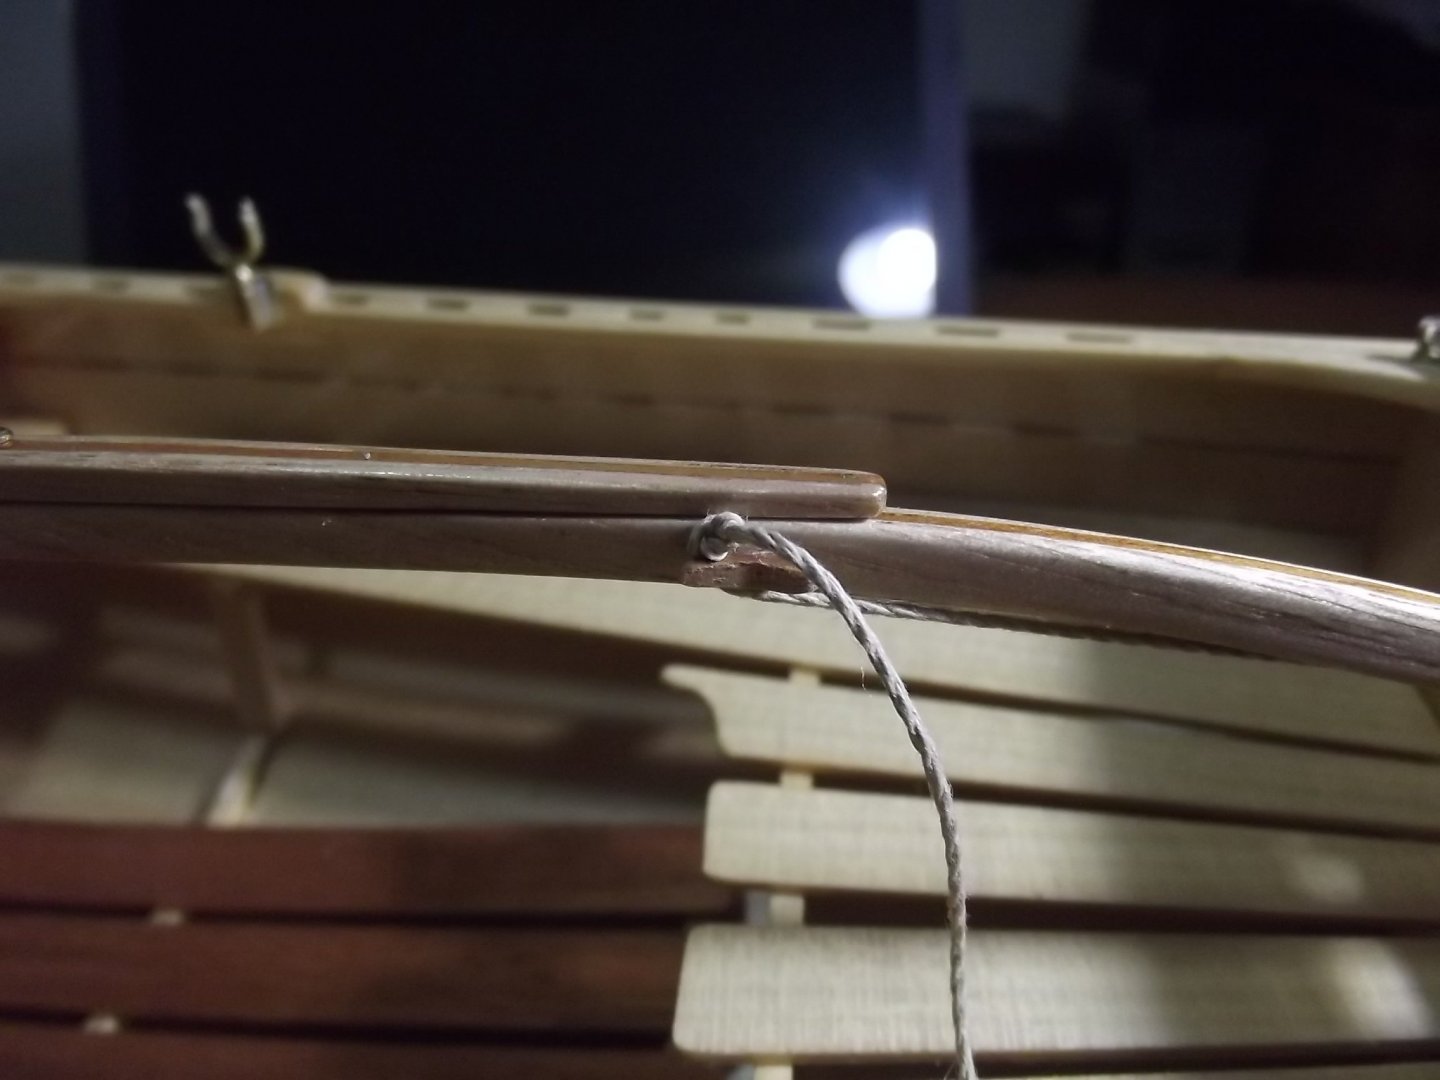
Never fear my friend, always appreciate input. Now that you mention it the strands do look a bit loose in the pic. My eyes aren't good enough to see it in the flesh. The upside of the loose twist is that the halyard is lying nicely, without the stiffness often displayed in scale rigging so I'll see how it goes. I'm going to upset you further by saying I've decided not to leather the boom and gaff yokes. I just can't see it working.
-
Now onto the shrouds and stay. I've been able to find affordable 1mm stainless wire so I've decided that if I can get the turnbuckles made I'll go with authentic, if not I'll go old school with rigging cord and dead eyes. First parts to make were the bodies of the turnbuckles and while turning 2mm diameter items between centres isn't an issue, the tailstock chuck (2MT) won't hold a 1mm brill bit to drill the through holes in the bodies for the screw ends so I had to turn the three bodies and part them off then place the mill chuck (3MT) in the headstock to hold the fitting while just starting a 1.6mm centre drill into each end and then I had to hold each of the bodies in the tailstock chuck and drill them with the 1mm drill in the headstock chuck which will hold it. I'll put some thought into how I'm going to make the screw ends and now that I have the 6 sided collet block I can make some little fake lock nuts and then work out whether I'll solder them together or use CA

-
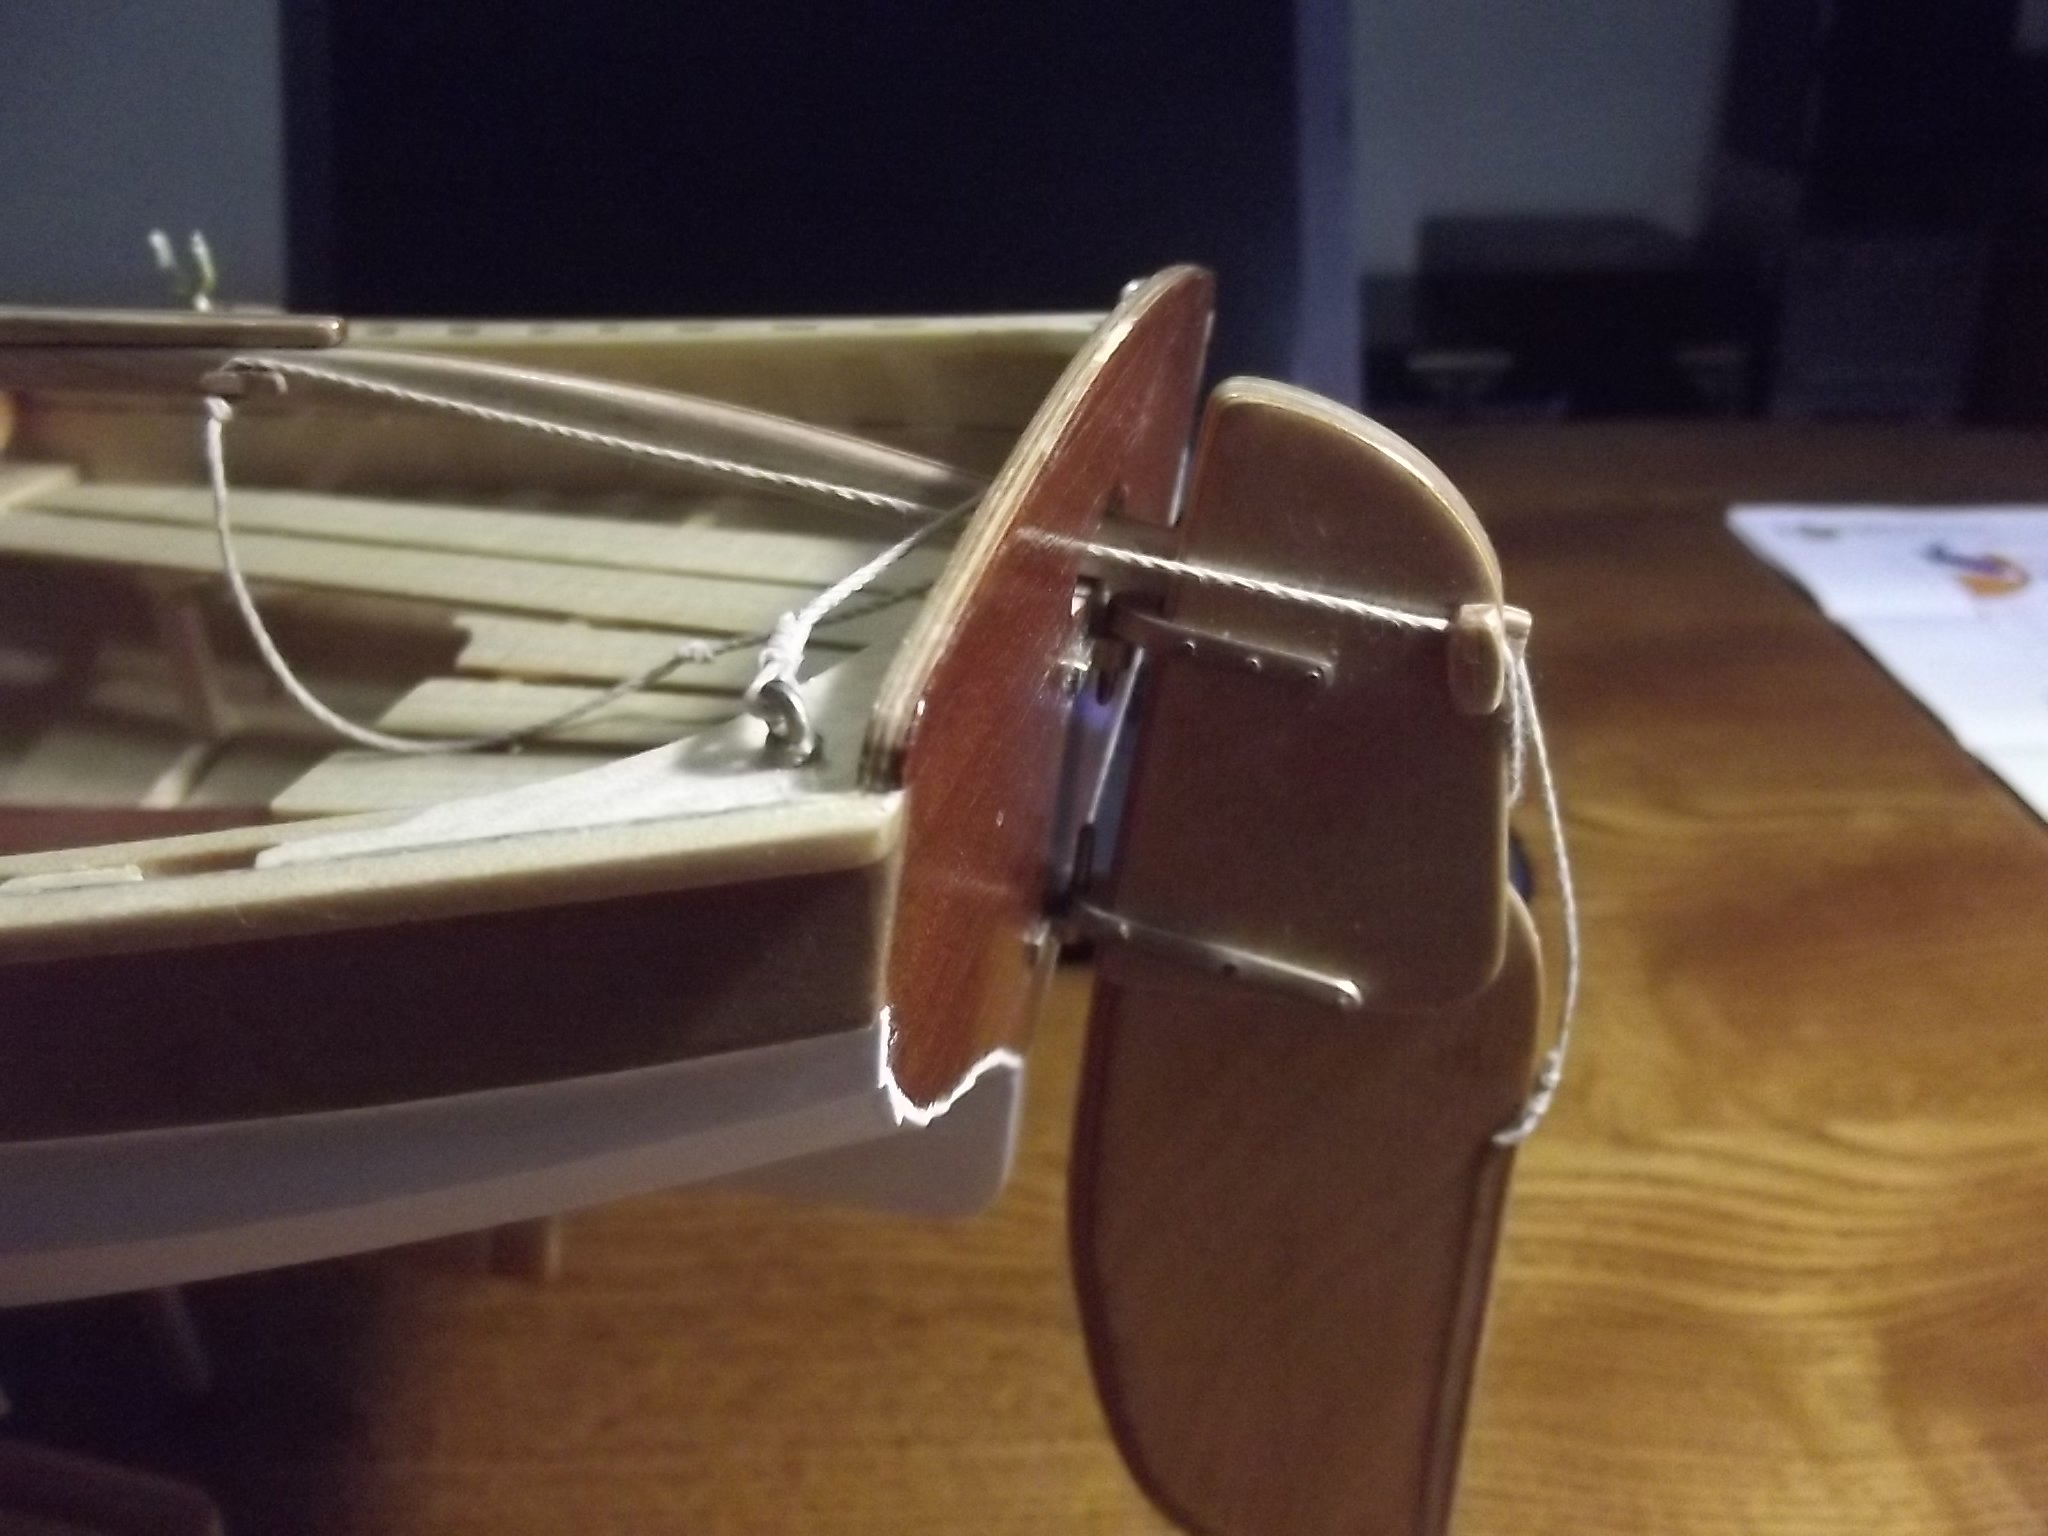
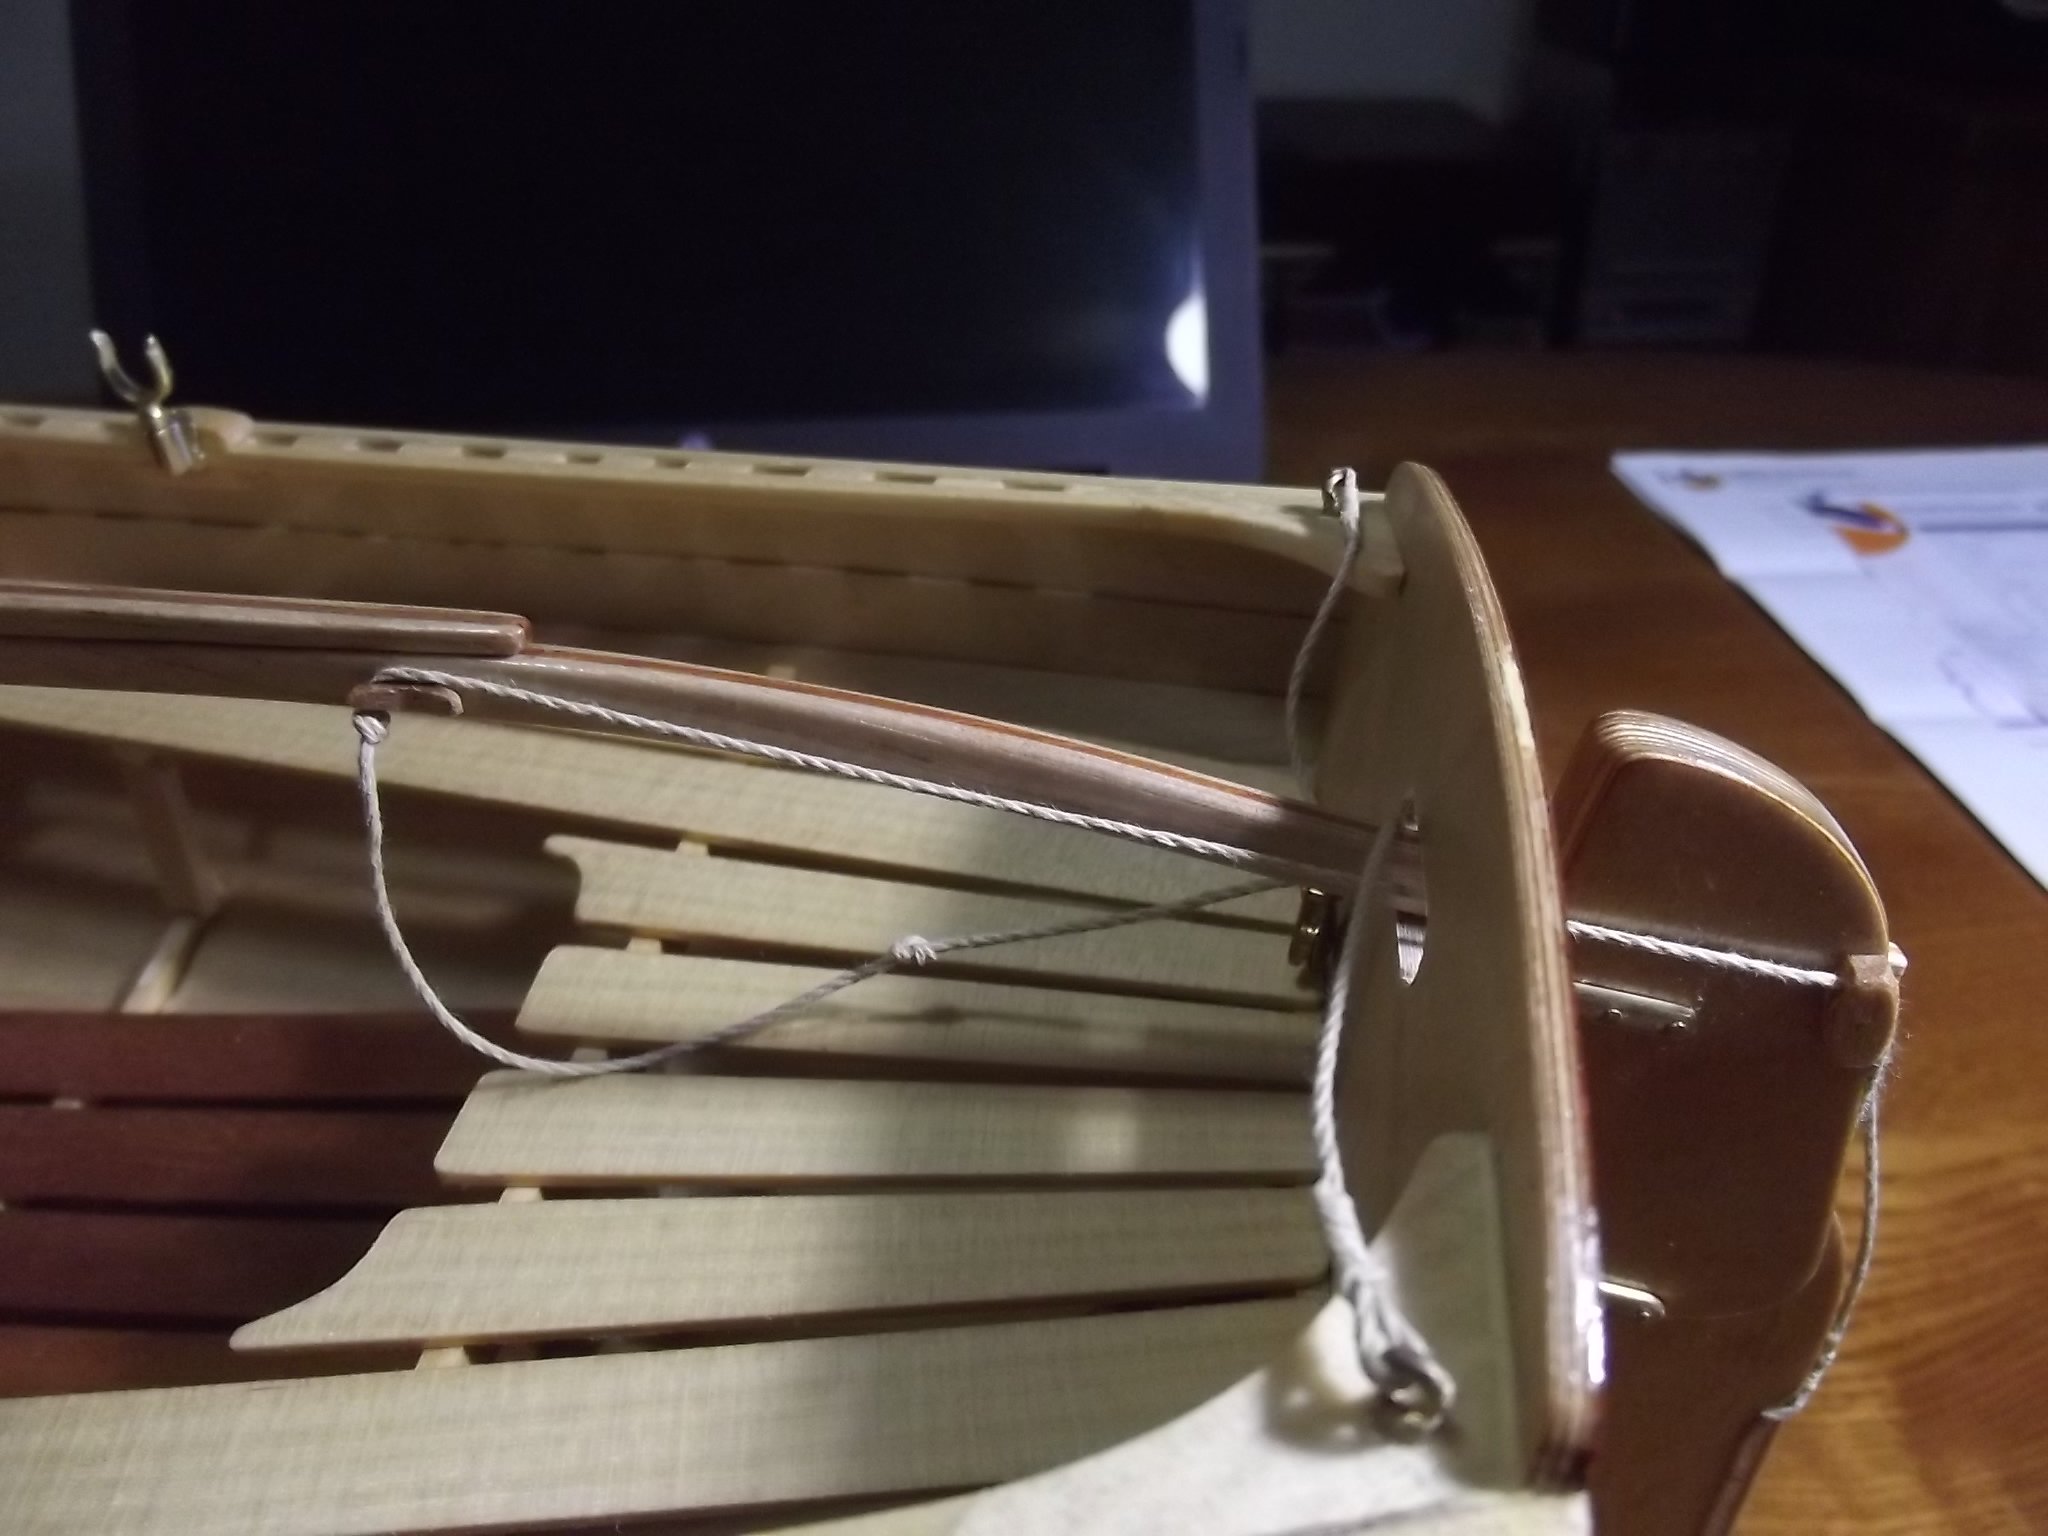
Well there has been lots of destructive storms and heavy rain now and while the fires have reduced in number and ferocity some are still going! Onto the build I've finished the rudder/tiller now using blocks I had left over from the schooner project, they're wood instead of tufnol but if I could have used wooden blocks on the real thing I would have, the spending had to have some limits.


-
You're the brass master!
-
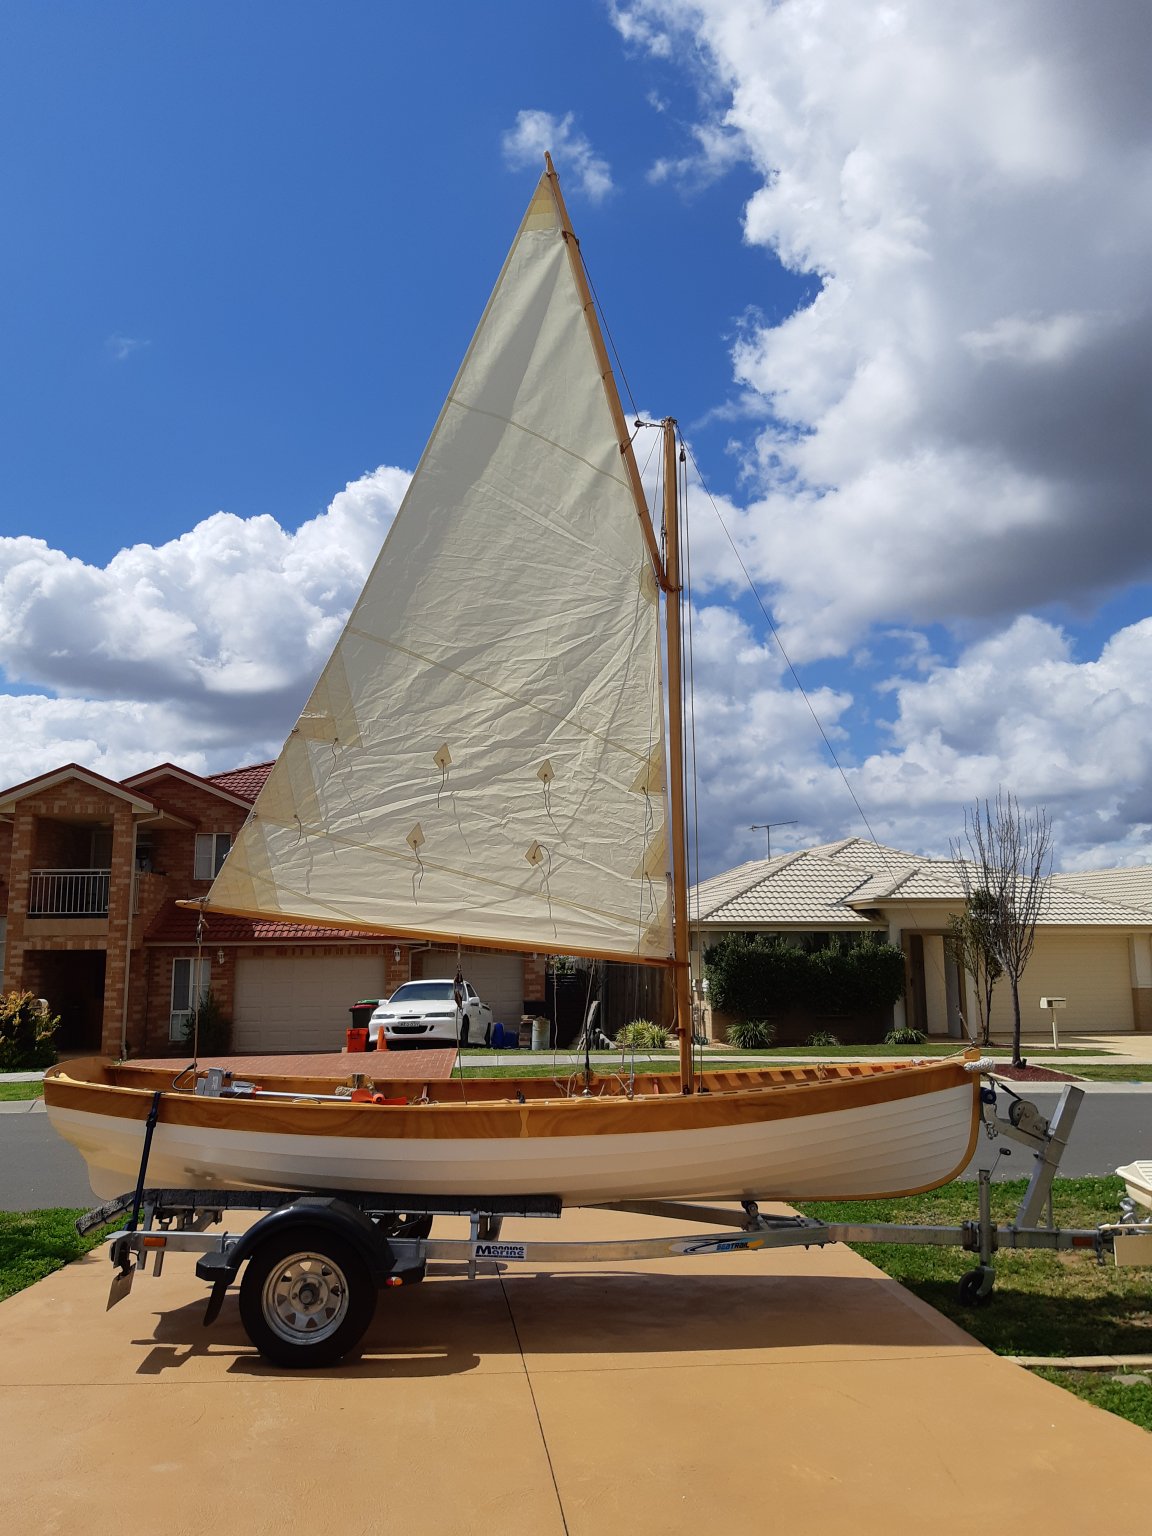
Looking good there my friend, I'm probably going to do sails for my dinghy too but fortunately my sails don't have a bolt rope to worry about. I think the new position of the gaff span is much better, if you look at the pic of my full sized boat you can see where the span is and how it relates to the mast, gaff and halyard. I should have posted this earlier in the conversation.

-
Michael, have you considered making up a scale bill of sale or papers showing the shipwright, you, and the completion date that you can stick in a cupboard or something in the interior that may be found in years to come. I met a modeller at ANMM years ago that had the pleasure of being part of a miniature camera probe deep into the bowels of some of the original admiralty models at a maritime museum in England and they found interesting things.
-
I've just read through this thread and I'll be following along. I don't think I'd have the patience for CAD as I'm a hands on person and I took the lines for my 1:8 dinghy straight from the plans for the full size version, warts and all, built to a fair line rather than a measurement. Don't get me wrong, I appreciate what you're doing which is why I'm tagging along. On the subject of wood supplies, business these days is all about minimum cost, minimum staff, minimum handling. You order two pieces and you get two pieces, you're lucky if the picker bothers to look and see if the sheet is in tact before packing it. I blame the accountants! Wood however is a natural product and is never uniform in colour or grain so the trick is to see it as the old ship builders did. It's a piece of material you are going to fashion into a boat, just do it and embrace the natural differences. On the subject of the shapes of the strakes I would imagine on that boat they would look really strange, you should have seen the shapes on my dinghy. I just had a look with the idea of scanning them to show you but the lines are too faint. Crazy shapes though. I'd suggest maybe take the cad lines and cut them from card and give them a try.
-
Mate, you dodged a bullet on the leathered blocks! Always a pleasure to watch your work.
-
The fires are settling down and there's good rain forecast but the are still heaps burning, none threatening me though.
-
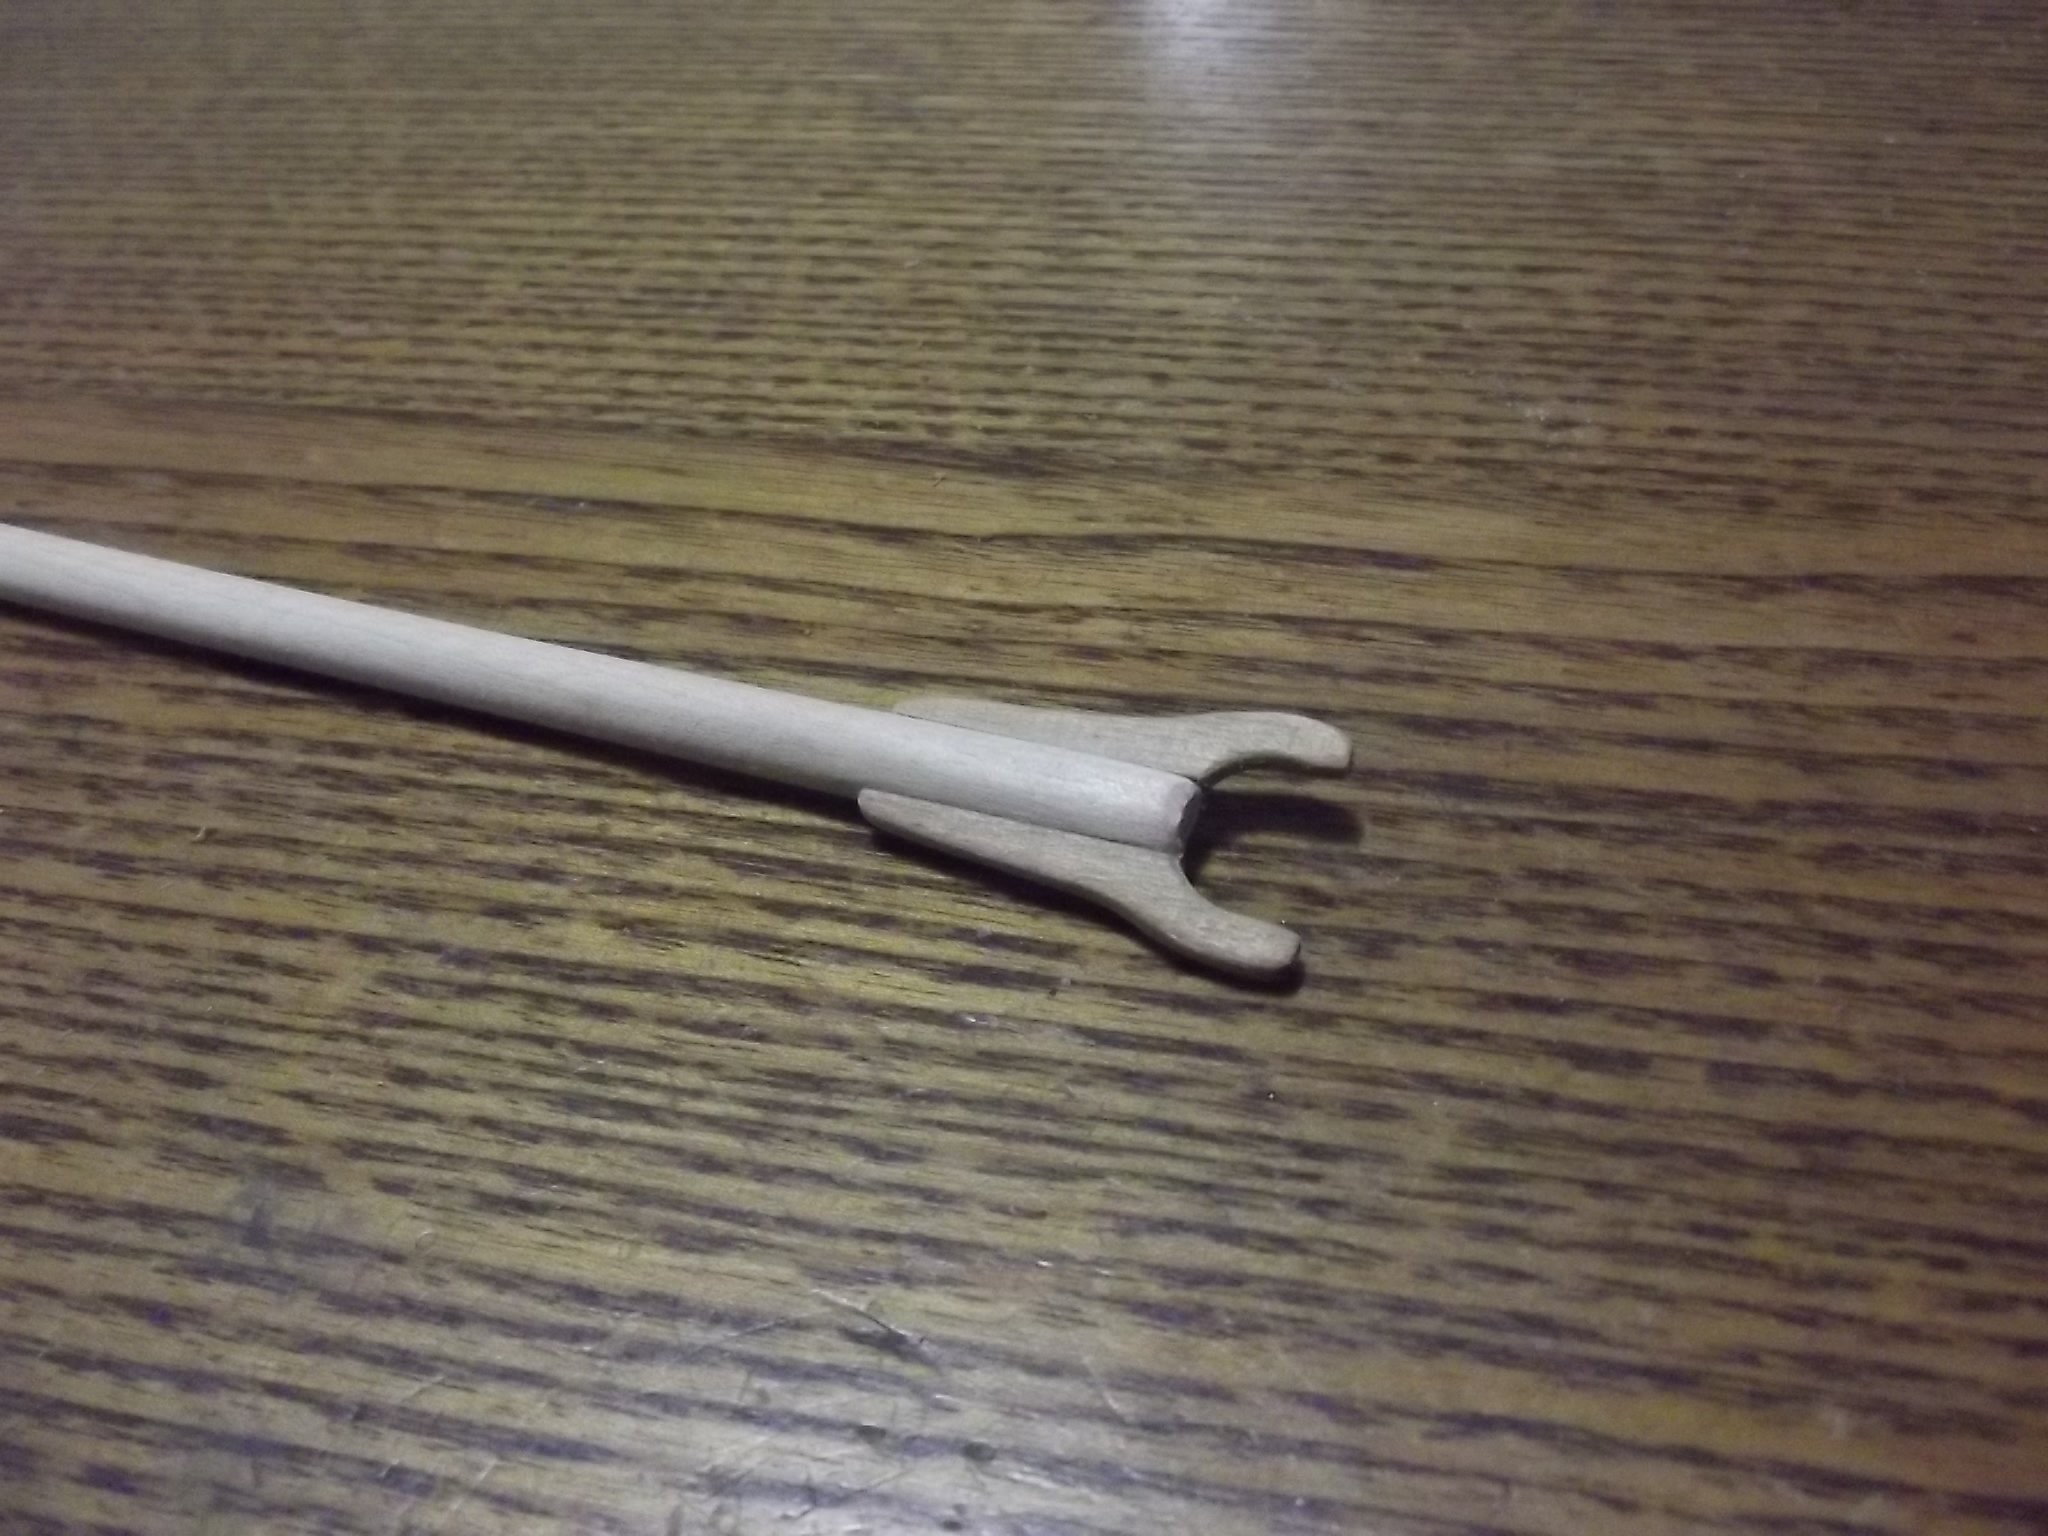
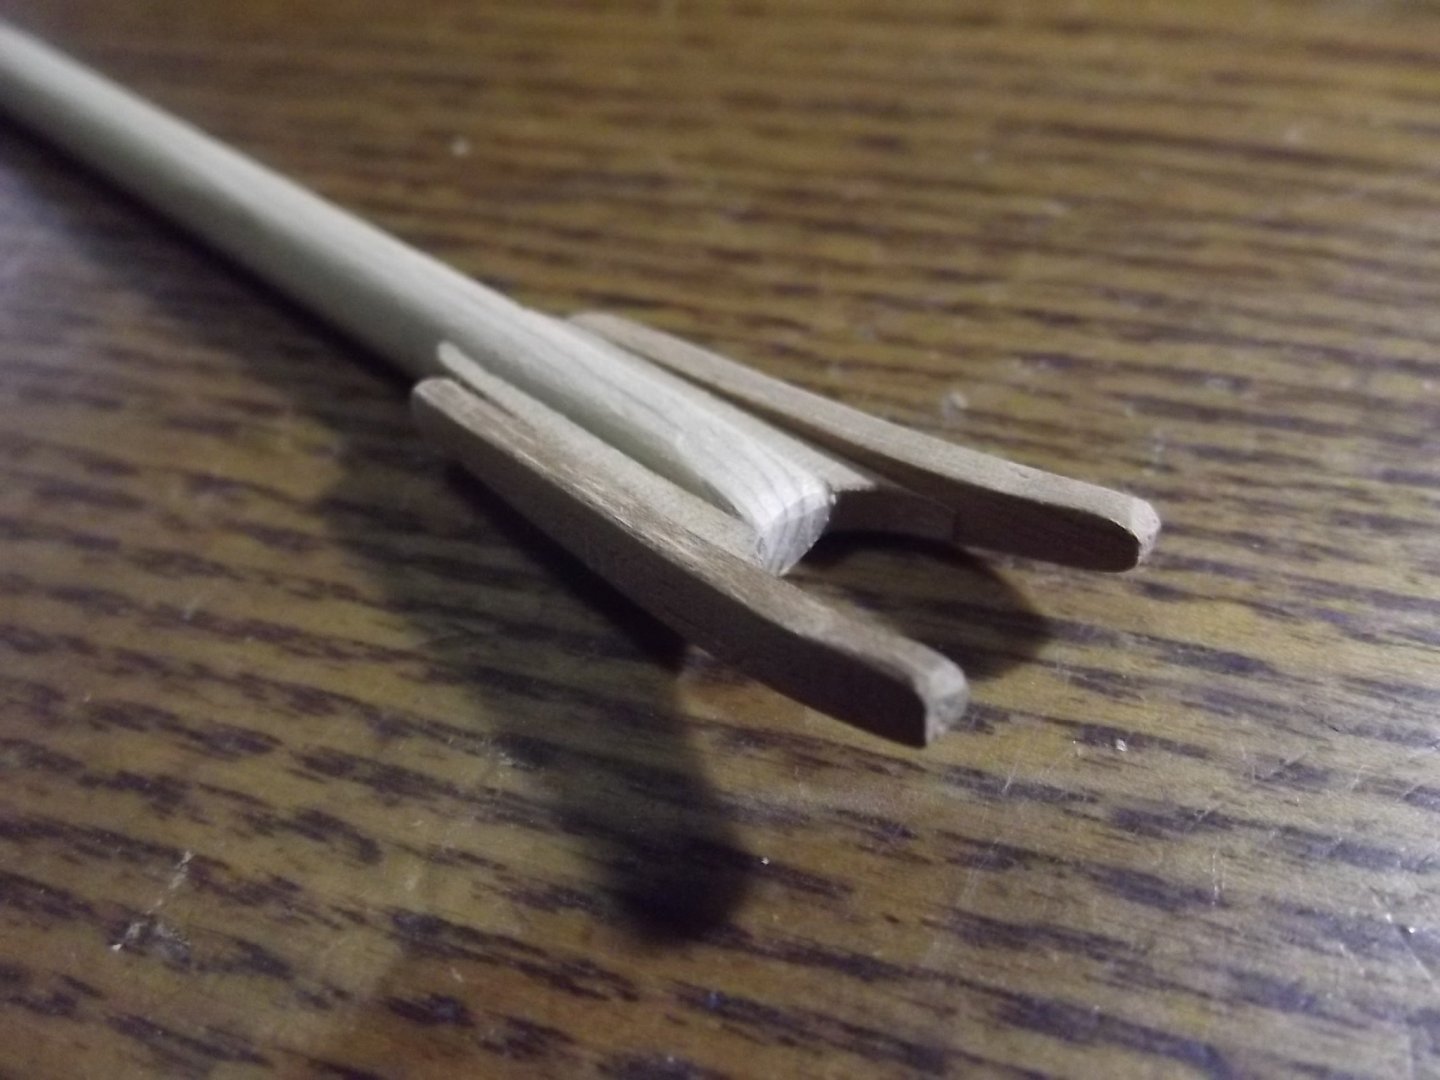
The gaff yoke is a little different to the boom yoke because of the angle of the gaff to the mast so I started the same way as the boom yoke but carved/sanded away most of the mahogany to get tapered sides to which I added the arms of the yoke in the same way I did on Miss Caroline. I'm really unsure of leathering these pieces due to their size. I may have to omit that detail but I'll give it some thought first.

-
Michael is correct, the plans for my Tammie Norrie show the span attached to the boom in similar positions to what Michael has drawn, the idea is that the gaff and sail are supported at the throat by the throat halyard and at even spacings along its length by the peak halyard via the span.
-
I can be added to the list of exacto razor saw owners as well, very handy tool which dates from circa 1980. Love the cabinetry Michael, my son the carpenter would be impressed!
-
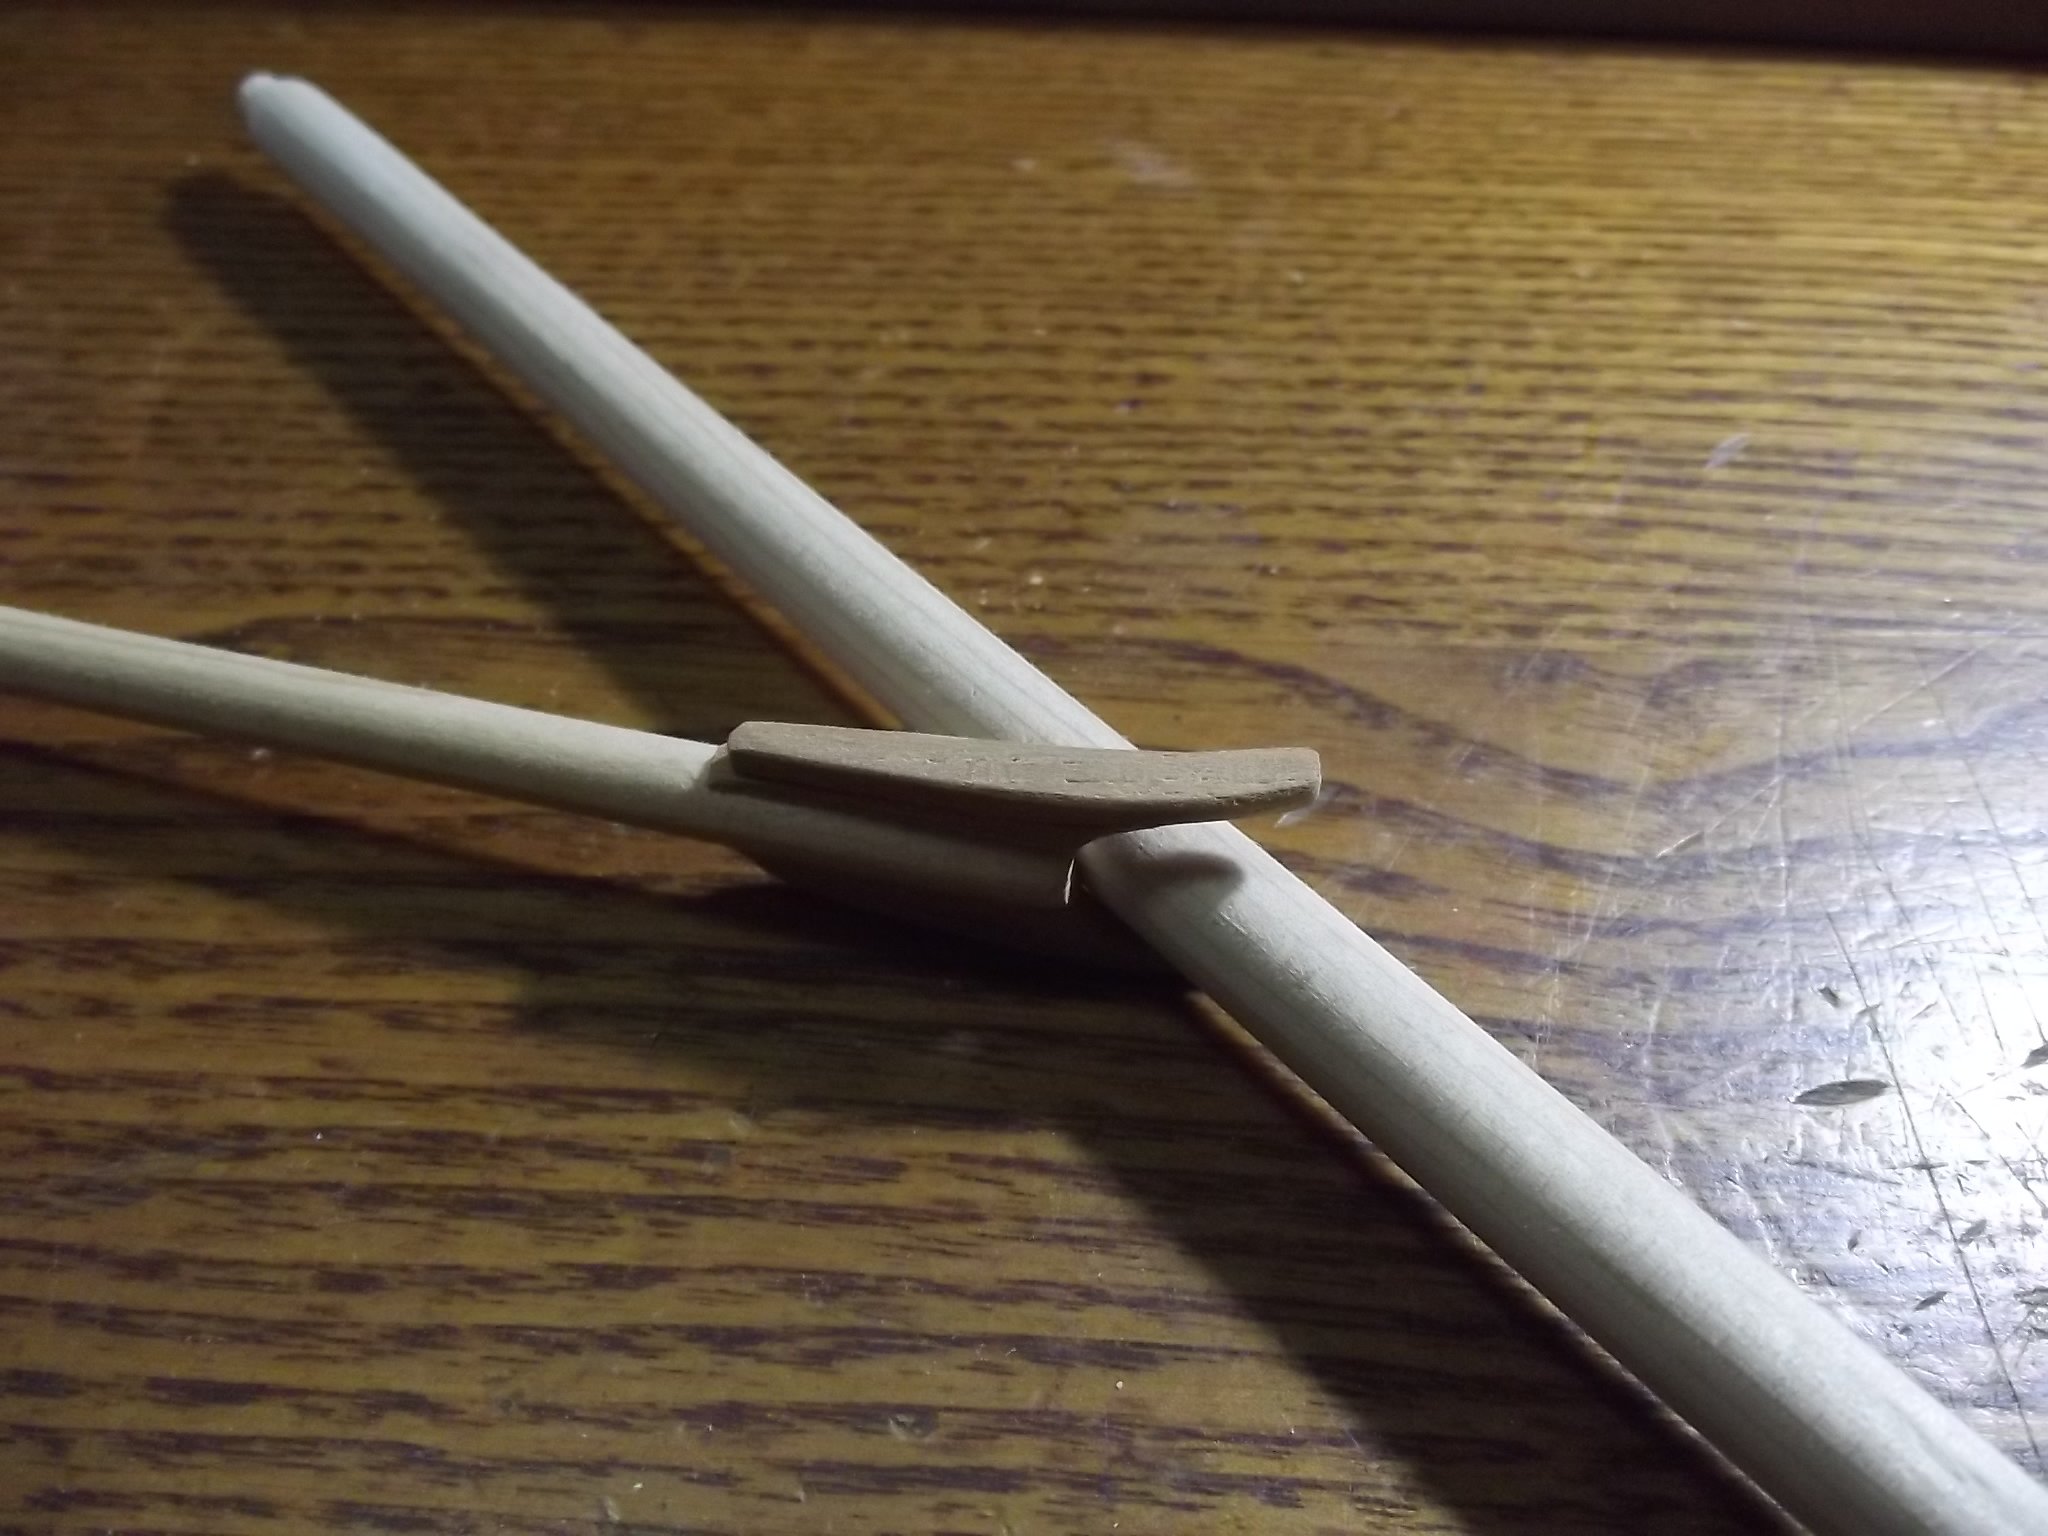
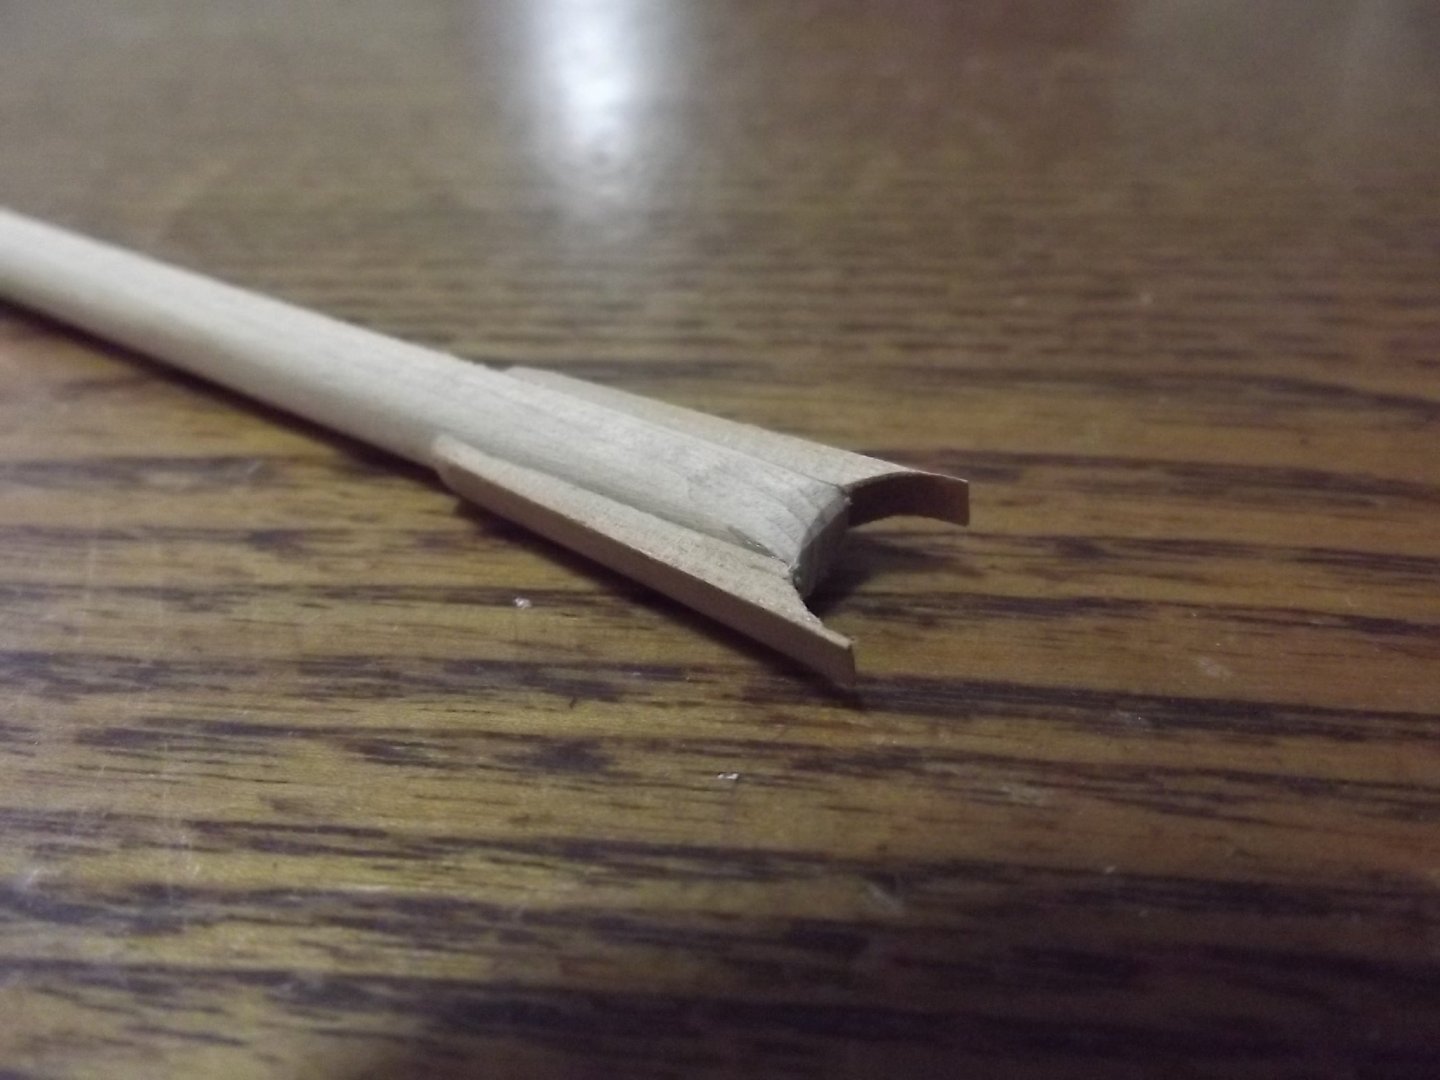
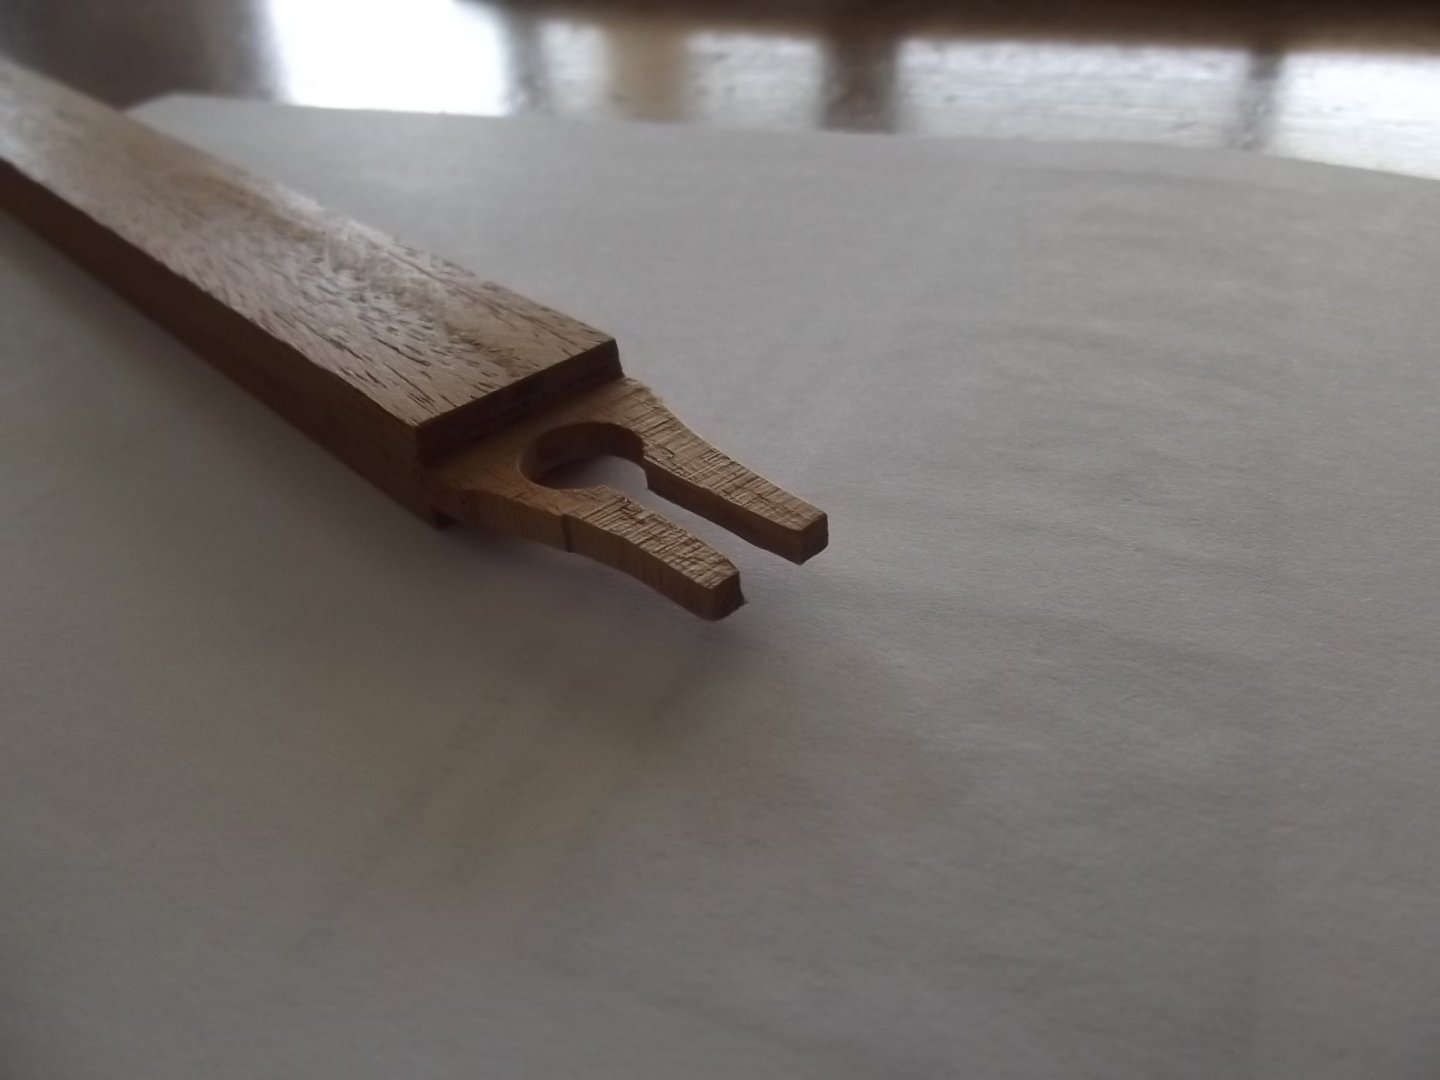
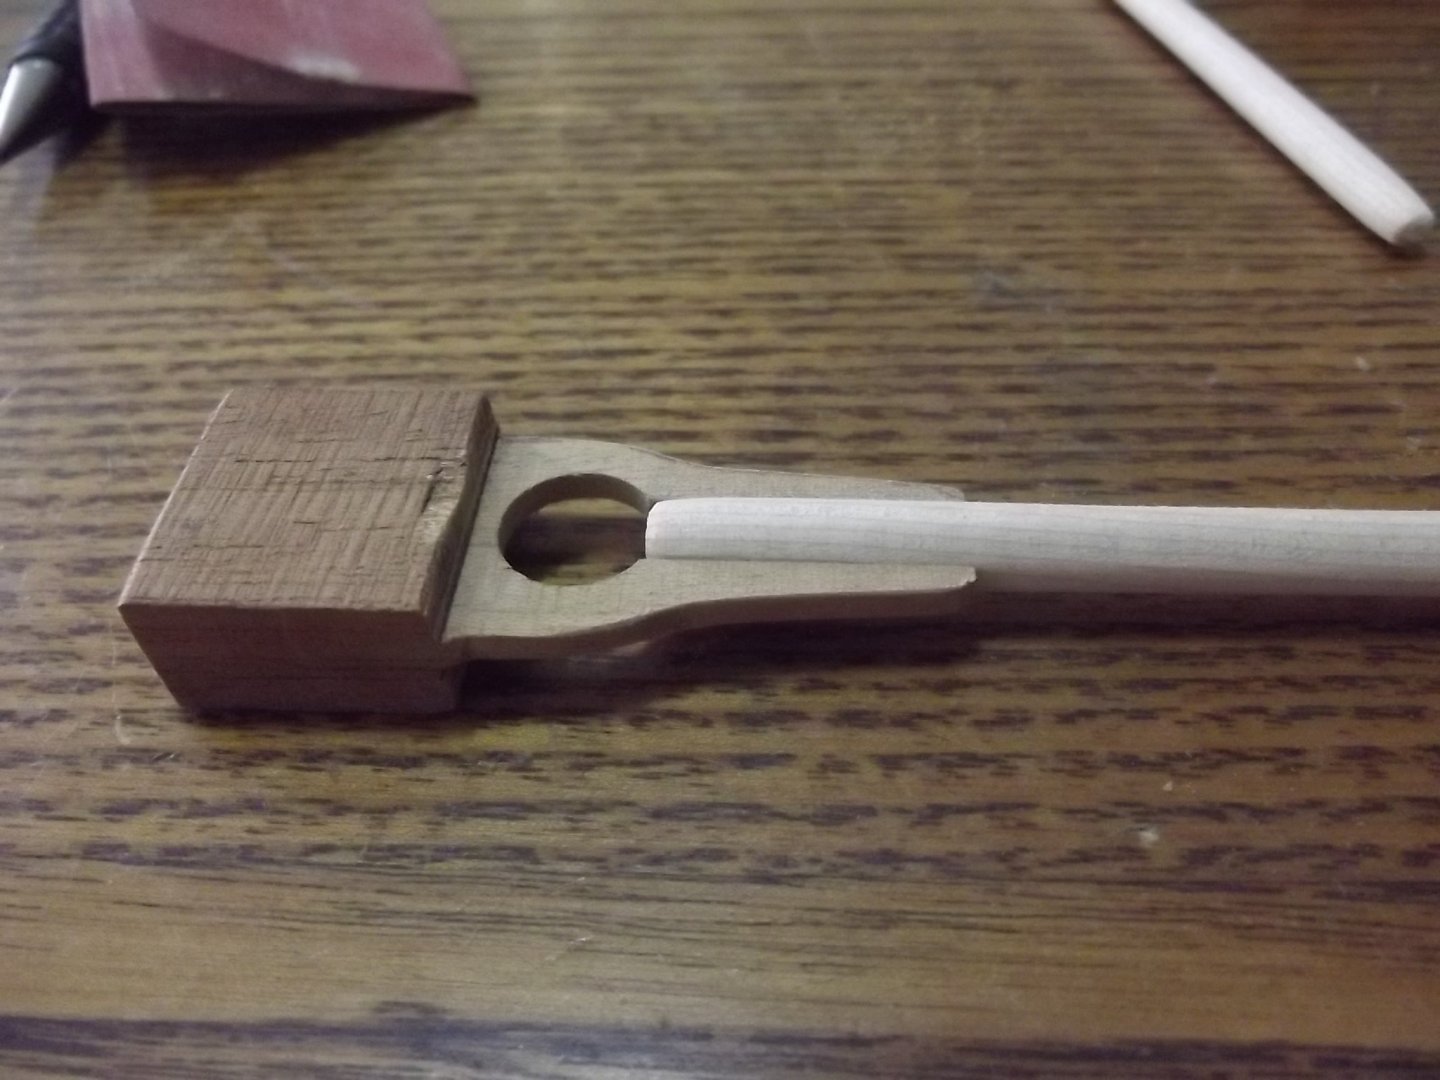
Christmas has been and gone, family and friends have been and gone and I can't really go anywhere because of the bushfires so it's back to the model (on that subject myself and my family are all in safe areas thankfully but yesterday was the first time in 10 weeks I have had a clear view to the Blue Mountains to the west of here, today the view was obscured by smoke again). I've shaped the boom and gaff and I've made the yoke for the boom. I combined the methods I used for the rowlocks and the oars and came up with a good way of doing it. I cross drilled a piece of mahogany in the mill vice to 10mm to form the jaws and then without moving the cross slide I reset the mahogany to the vertical so I could drill down the centre at 5.5mm thereby creating the lands for the boom with the contact surface curved to match the boom. I then sliced away each face of the mahogany to reveal the boom slot before sanding to shape and gluing the boom in.

-
Live steam Bagnall loco and other railway stuff
Bedford replied to michael mott's topic in Non-ship/categorised builds
Well I've just looked through this entire thread and as usual Michael, you've left me feeling extremely amateur in my machining abilities. Always a joy to see how you do things. -
Michael, I saw the loco and imagined something more common but then Iooked at Louisa and thought of course he would build a more obscure type, every man and his dog would want the flying dutchman or Britania. Very nice choice indeed!
-
Love a Herreshoff and looking forward to being entertained again by your work on it
- 230 replies
-
- 2
-

-
- buzzards bay
- herreshoff
- (and 1 more)
-
Happy new year to you and yours too Michael, yeah the stitching was reminiscent of some I've done before but a lot more fiddly The collet blocks etc are a pretty good investment!
-
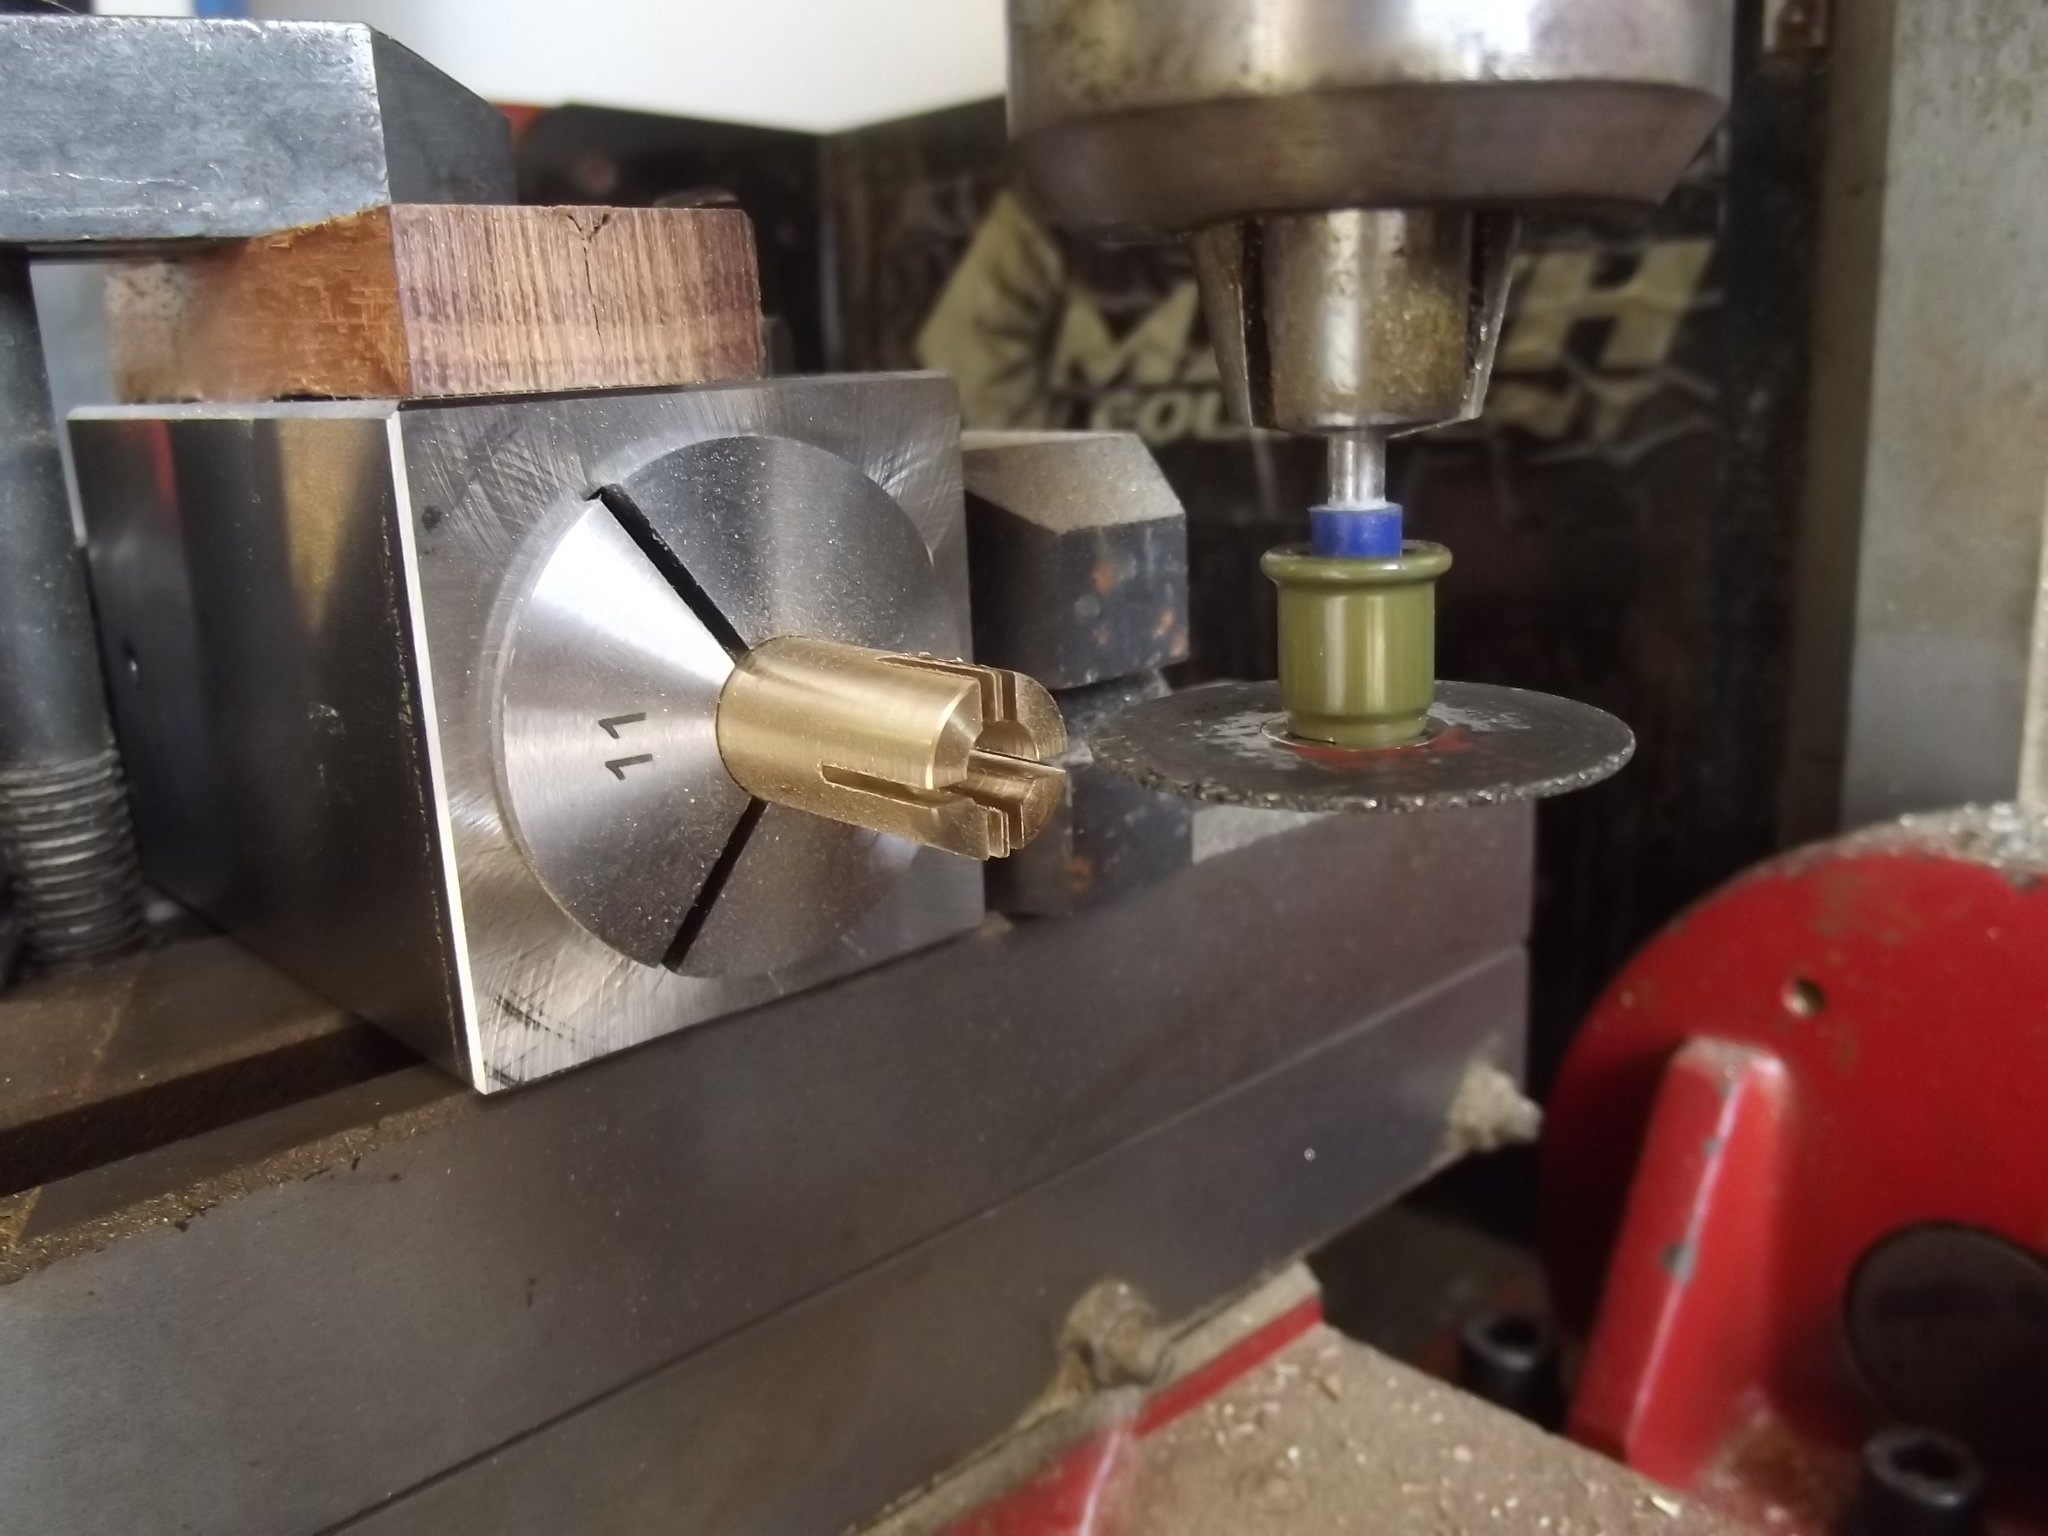
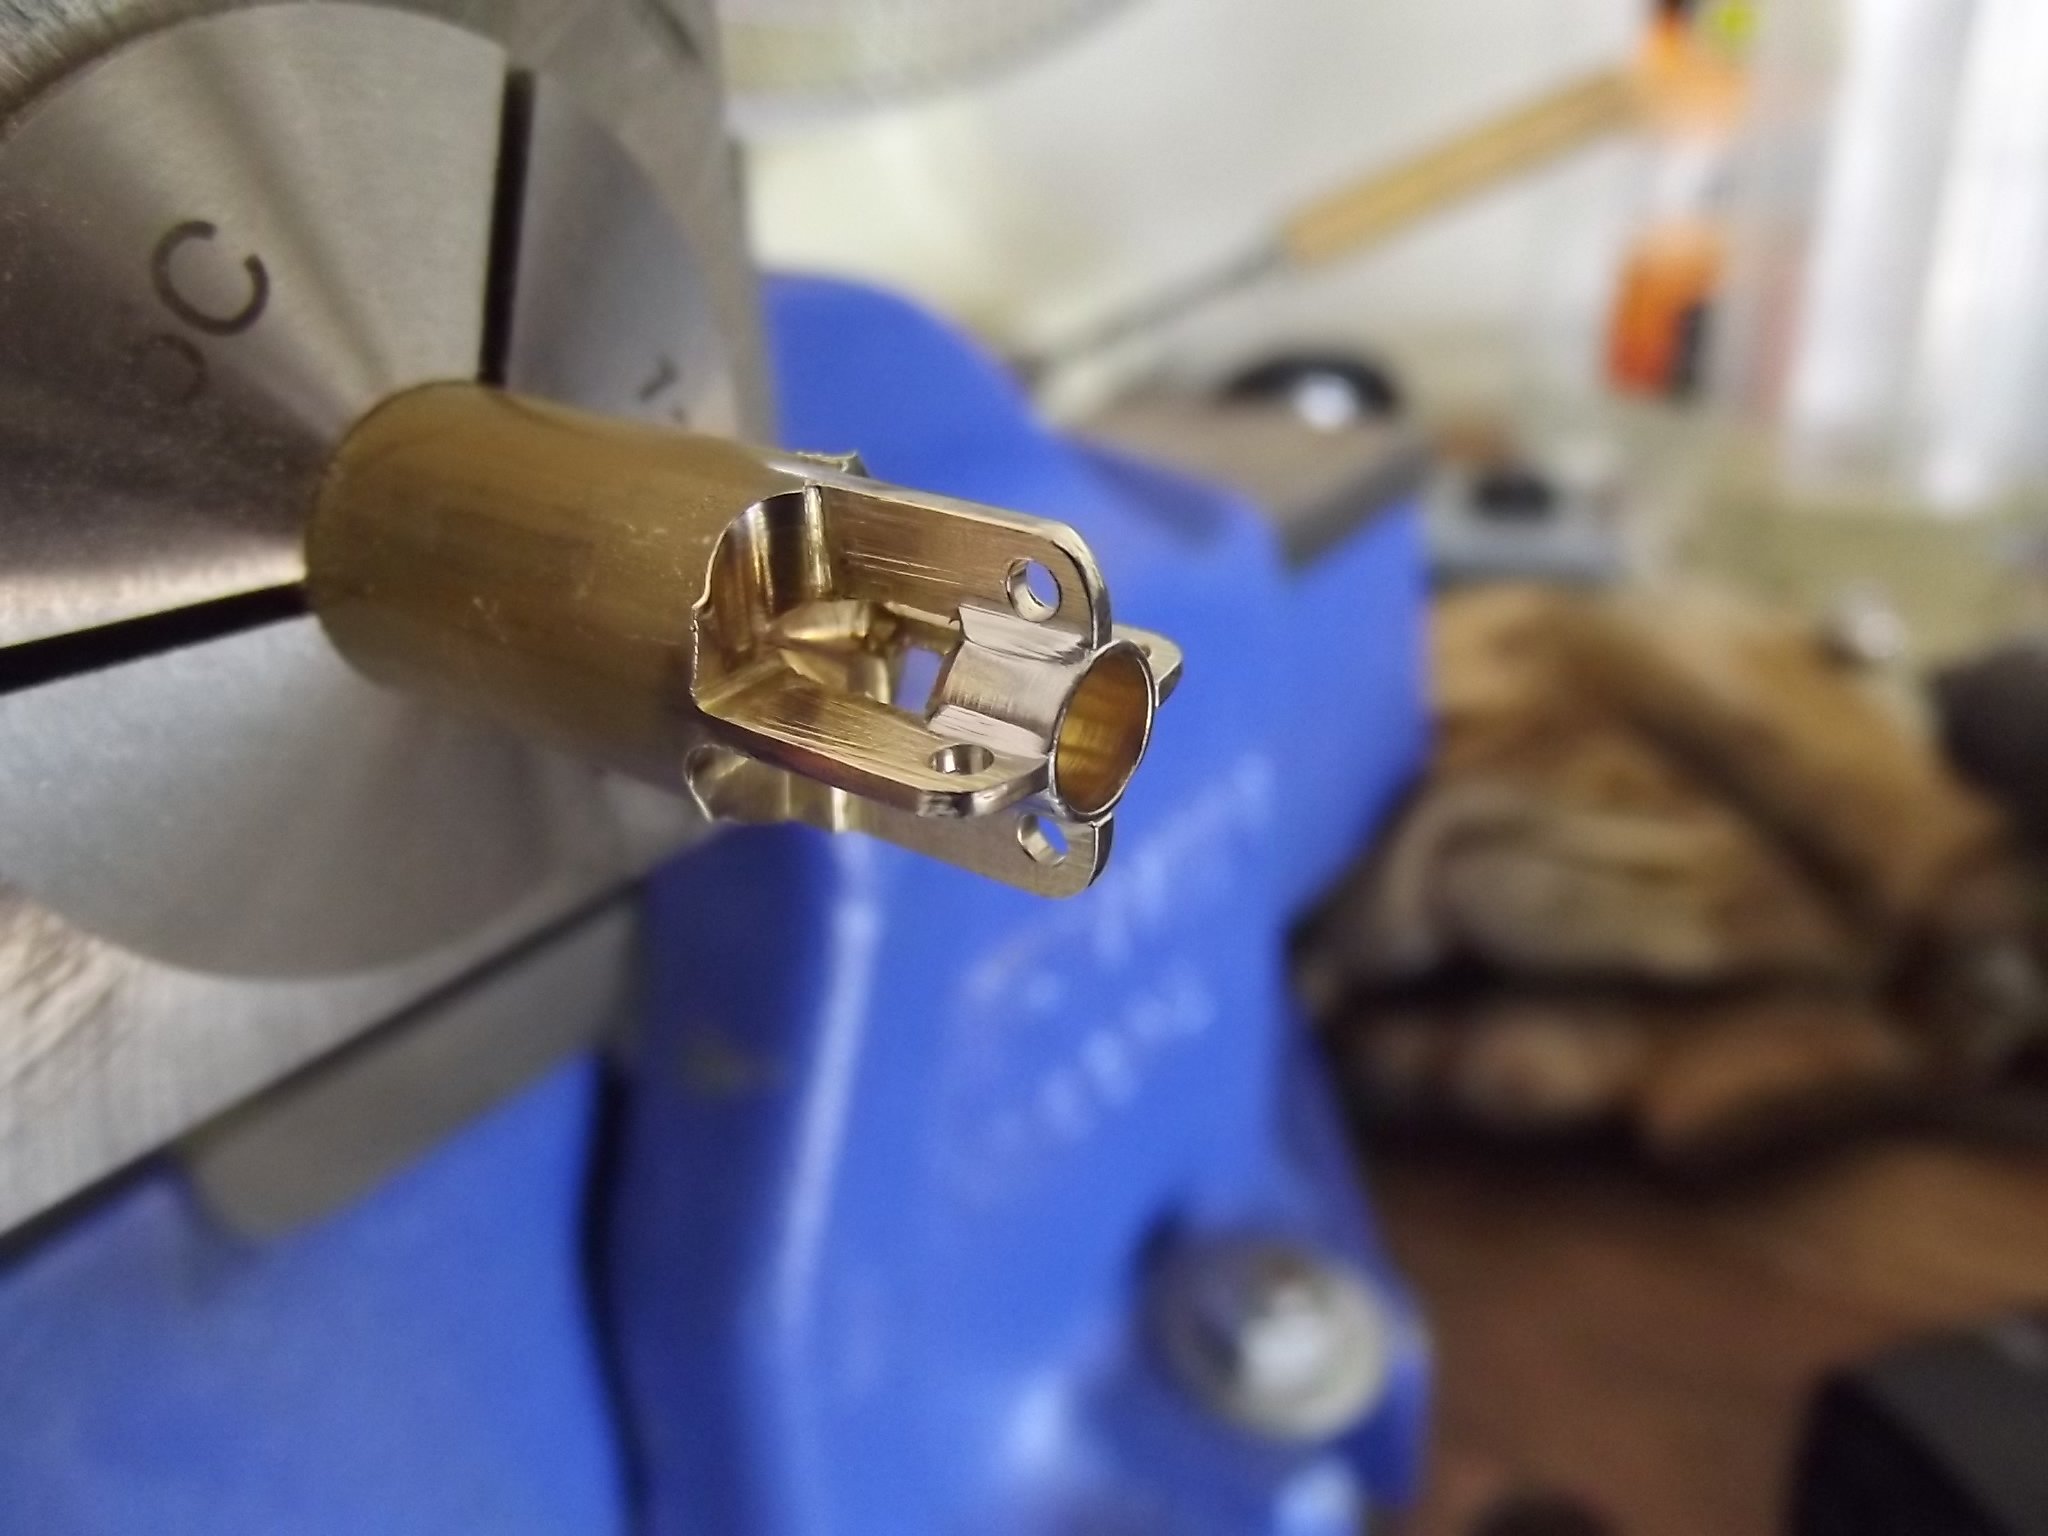
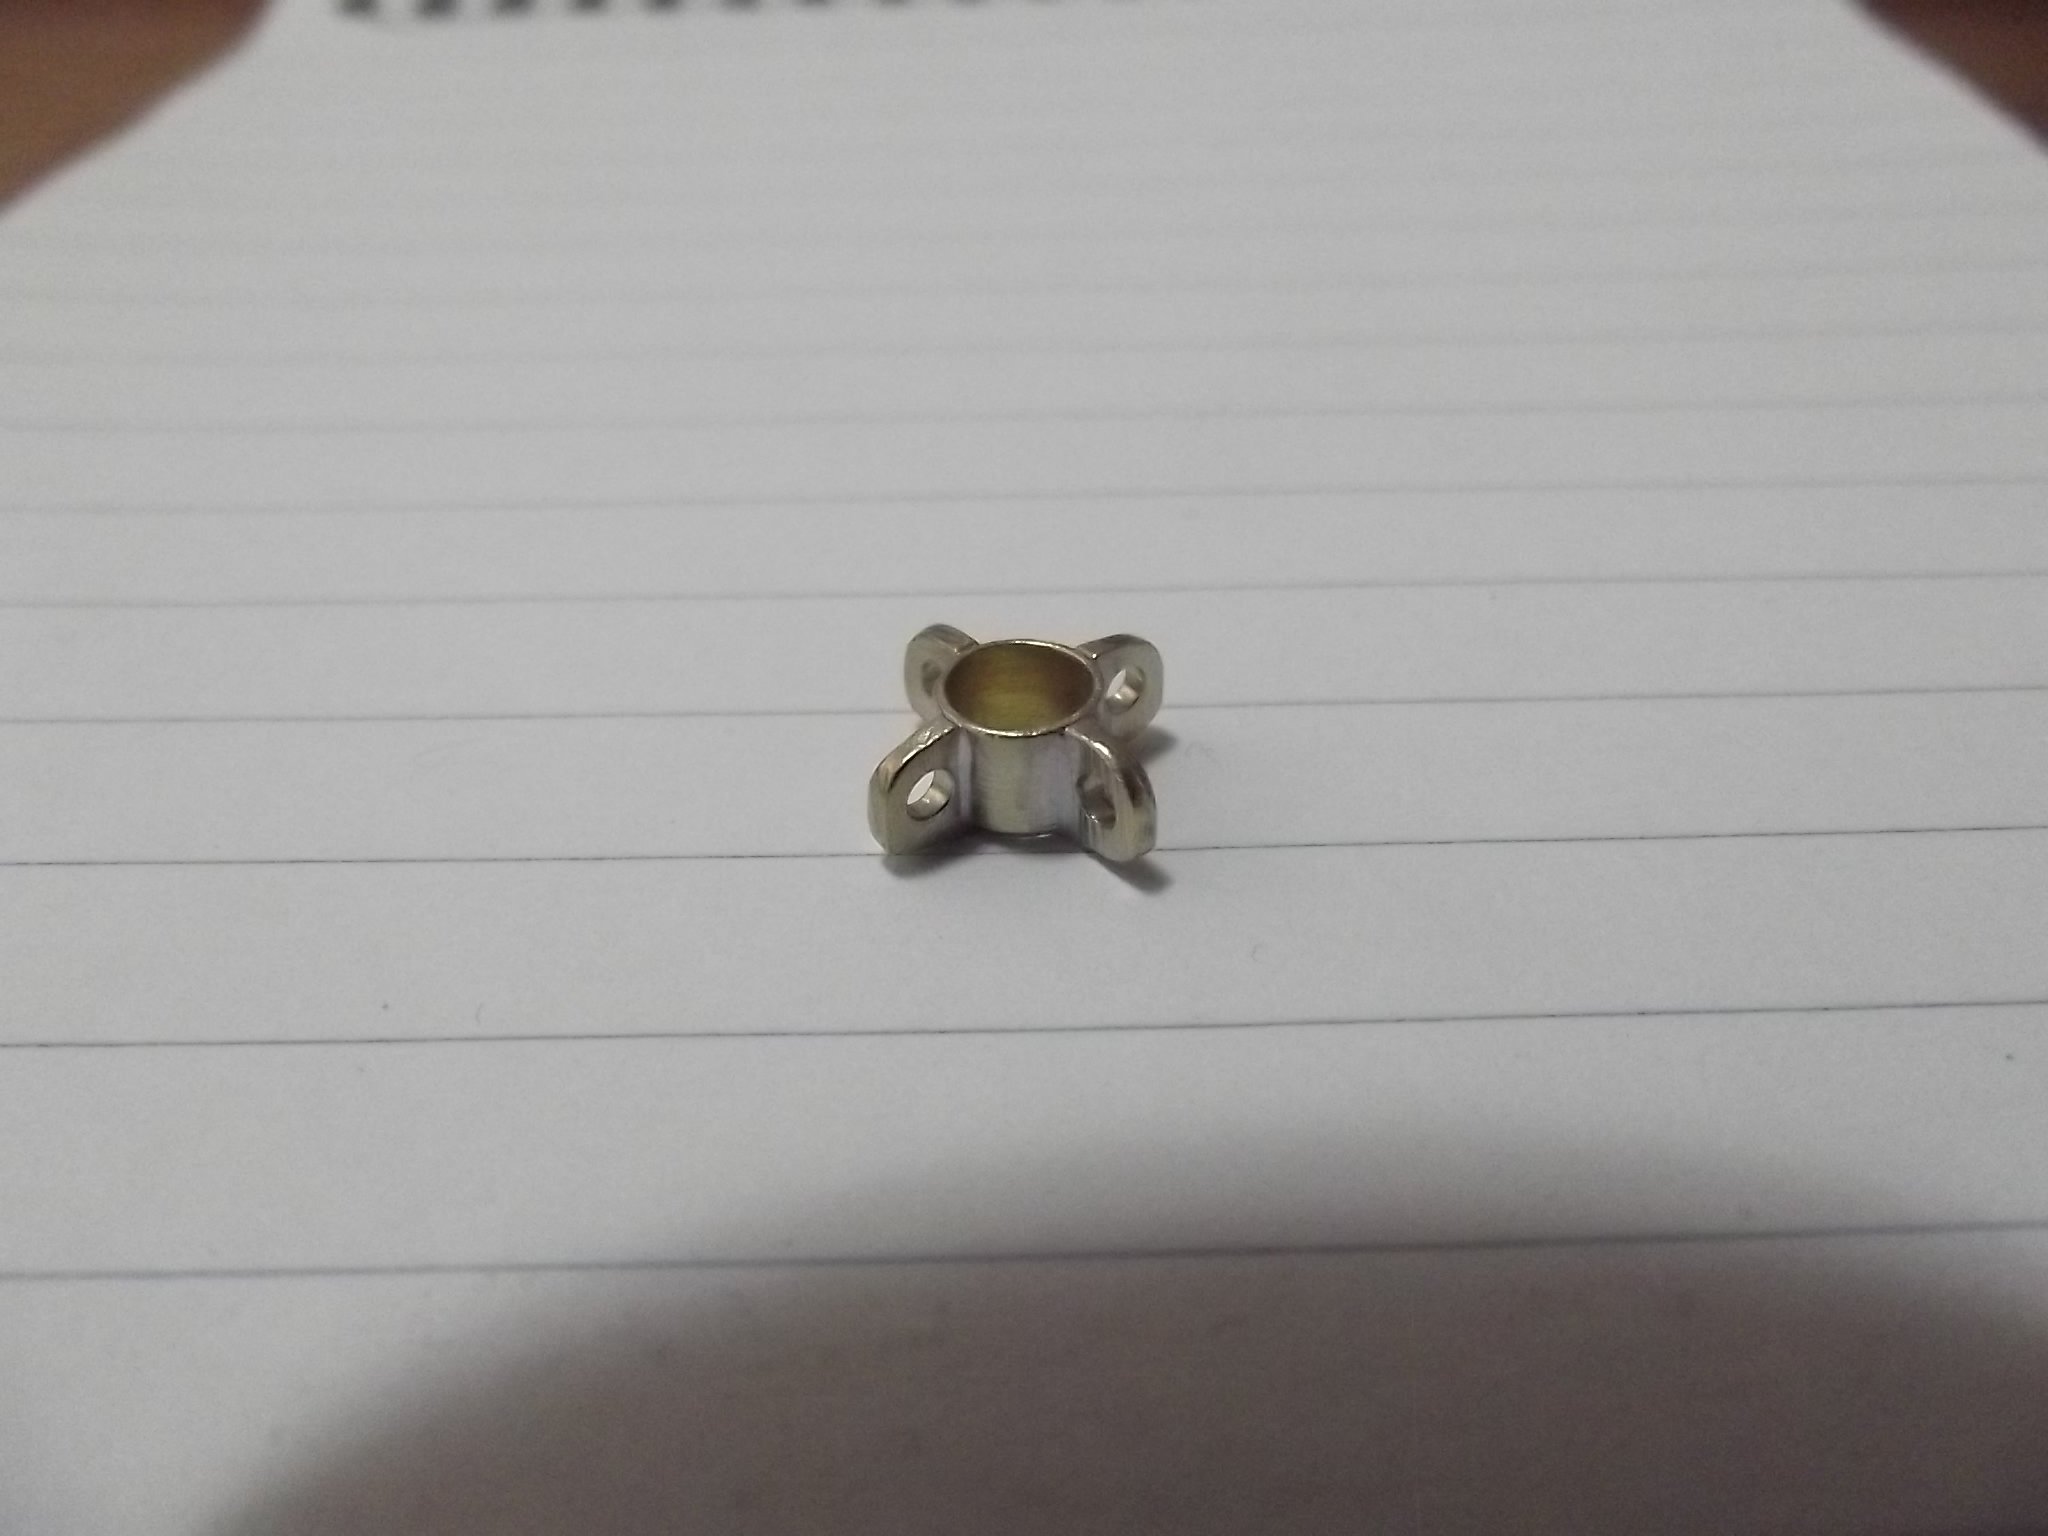
A little while ago Keith told me about ER collet blocks and I liked the sound of them so did some research and bought myself a Christmas present, I ended up getting 5C instead for a few reasons There is a machinery shop not too far from here that stocks them They were actually cheaper than the ER blocks Importantly the collet locking nut is on the rear and the O.D. of said nut is smaller than the block so the whole thing can rest flat on the mill table I am really enjoying the effortless repeatability they offer in either 4 or 6 planes. The first project was the 4 tab mast band. For more detail on how I make them here is a post I did on them a while back:-