HOLIDAY DONATION DRIVE - SUPPORT MSW - DO YOUR PART TO KEEP THIS GREAT FORUM GOING! (Only 13 donations so far - C'mon guys!)
×


Dziadeczek
-
Posts
644 -
Joined
-
Last visited
Content Type
Profiles
Forums
Gallery
Events
Everything posted by Dziadeczek
-

-
I hope this is only the first (of two) layer of planking. Hopefully the 2nd layer will cover the hefty mistakes you've made in spiling.
- 158 replies
-
- 1
-

-
- San Felipe
- Panart
- (and 1 more)
-
I don't know about Spanish frigates, but this is the situation on the "Surprise" in San Diego.

-
I am not sure about the availability of the Byrnes's saw anymore, since Jim's passing. I personally don't own his saw, I have a Proxxon saw (which is OK for my purposes), but I think that the quality of the machines you mentioned goes in reverse to your sequence, the best is Jim's saw, than goes the Proxxon and the Microlux (which I was told, is basicaly a Proxxon, but with a different motor, slightly weaker one). Also, you should remember, that Jim's saw can only do a right angle cuts, while the Proxxon can do angled cuts as well as 90 degs cuts - you can tip the blade. For shipmodeling, this feature is not used frequently, but when you need it, YOU NEED IT! I am sure, others will add their opinions to mine and perhaps contradict me a bit as well... That's the beauty of this forum! 😀
-
For brass strips I use a guillotine (like the one used for photography). I cut them from a larger brass sheet, I obtained earlier for photoetching, and have some left over.
- 3,618 replies
-
- 2
-
-
- young america
- clipper
- (and 1 more)
-
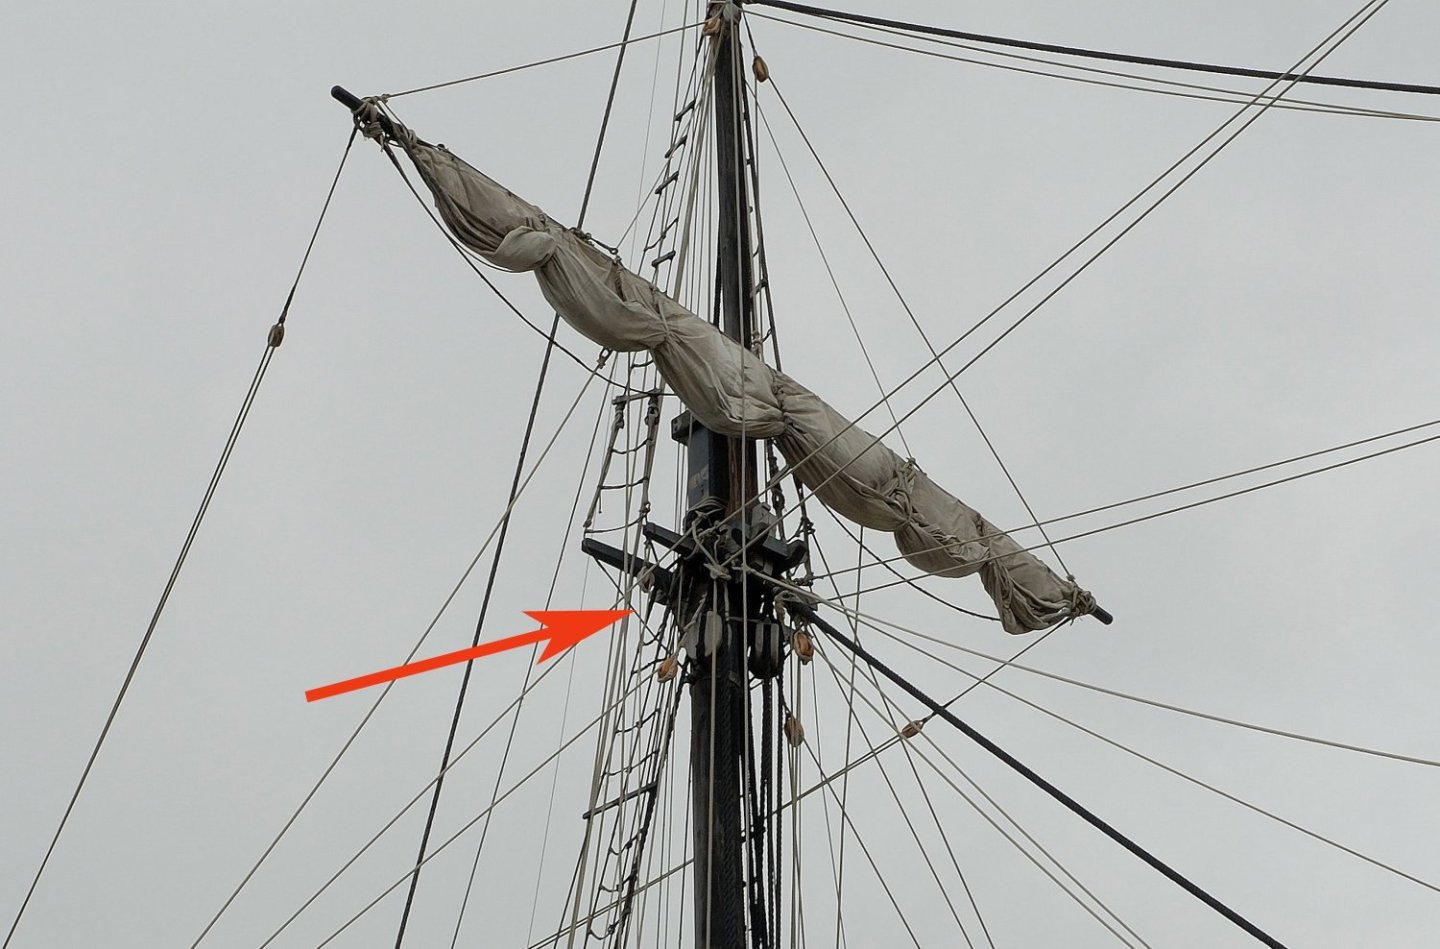
I found something like this online: Main Gaff Rigging - The Suburban Ship Modeler Would it help? (Sorry for intruding into your conversation). 😕
-
Hull - pear (if available) or cherry, deck - holly, beech (for texture).
-
Focus Stacking
Dziadeczek replied to Dennis P Finegan's topic in Photographing your work. How to do this.
Dziadeczek, are you running a build log anywhere? I ended up here because of your ‘at a glance’ entry and I’m keen to have a closer look at your sails! Kevin, I answered you privately. -
Years ago I learnt a neat trick from the now defunct Seaways' "Ships in scale" list, on how to finetune your small table saw (if the fence/blade is adjustable), like the PREAC saw or similar. I believe this was posted by Phil Krol. This should be done with the saw disconnected from power. First raise the blade to its maximum height. Then bring the fence close to the blade. Place a strip of paper in between the blade and the fence in the place where the blade rises (during the operation of the saw) from underneath the table - this place is further away from the operator. Place another strip of paper between the blade and the fence - closer to you, where the blade goes down under the table (where the actual cutting is done). Bring the fence tightly close to the blade, so that the strip closer to you, (where the blade goes down under the table) cannot be removed without tearing it. The other strip should be however removed quite easily, no tearing necessary. Obviously, in this setup, the fence and the blade ARE NOT perfectly paralel! The extra tiny space between the blade and the fence further away from you prevents kickbacks and allows cutting done more easily, without burning the blade's edge next to the fence.
-
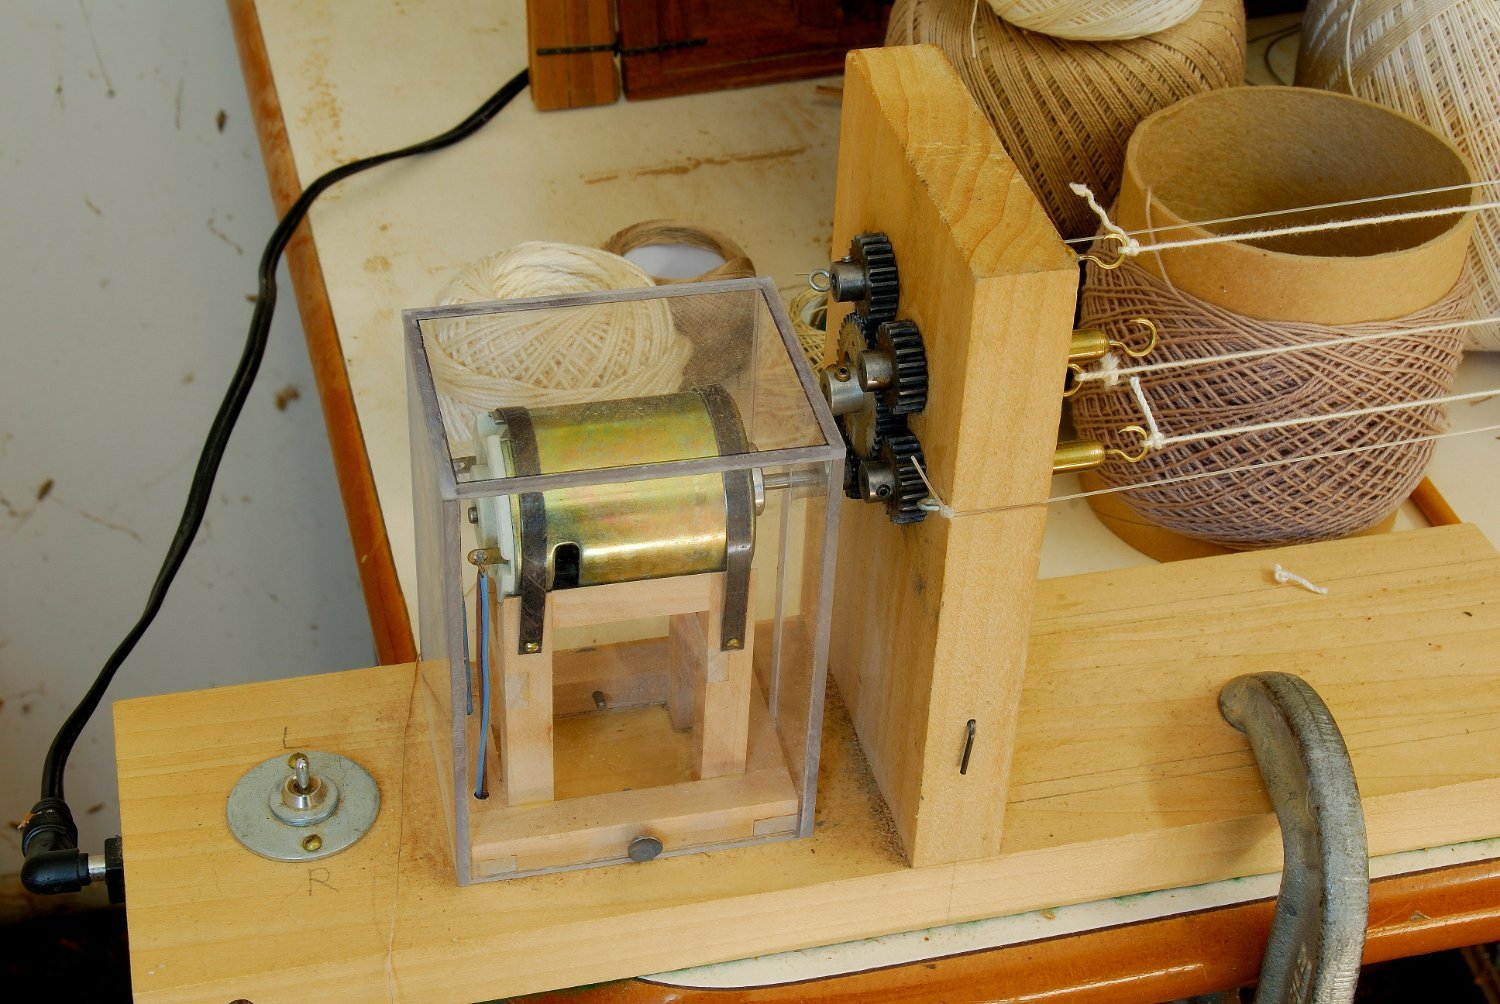
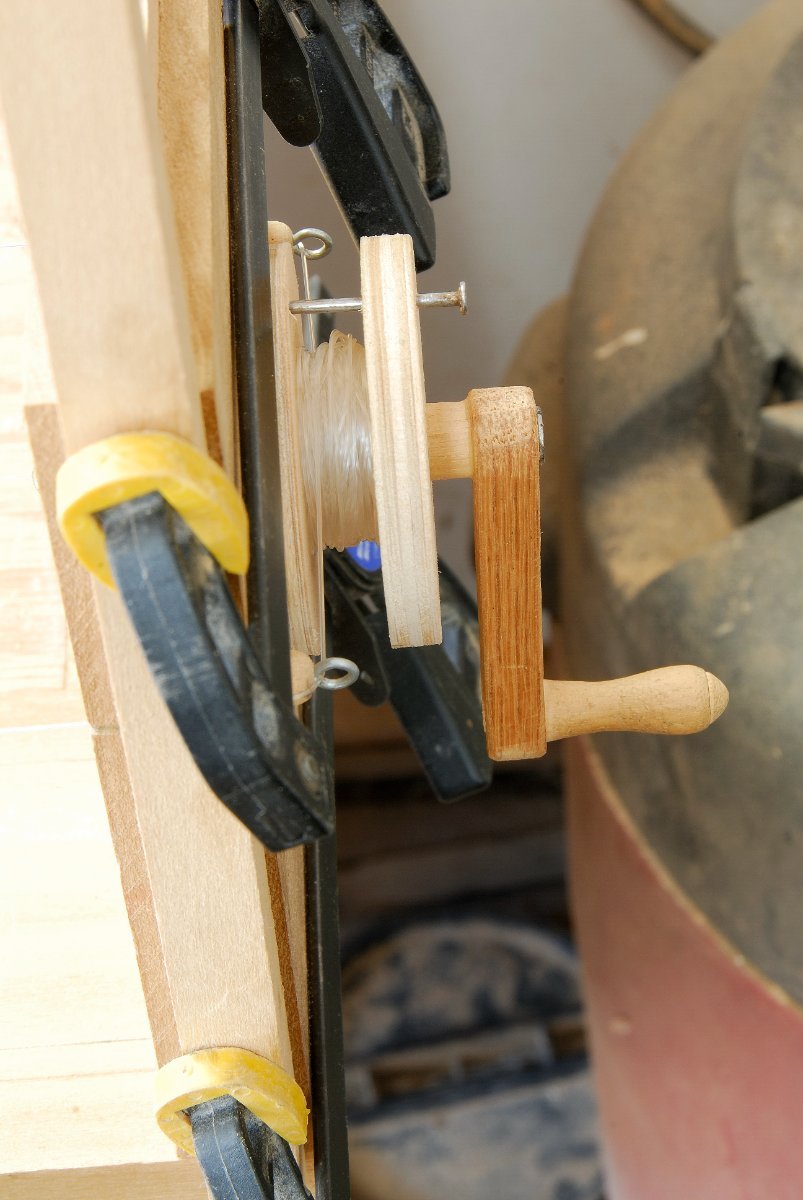
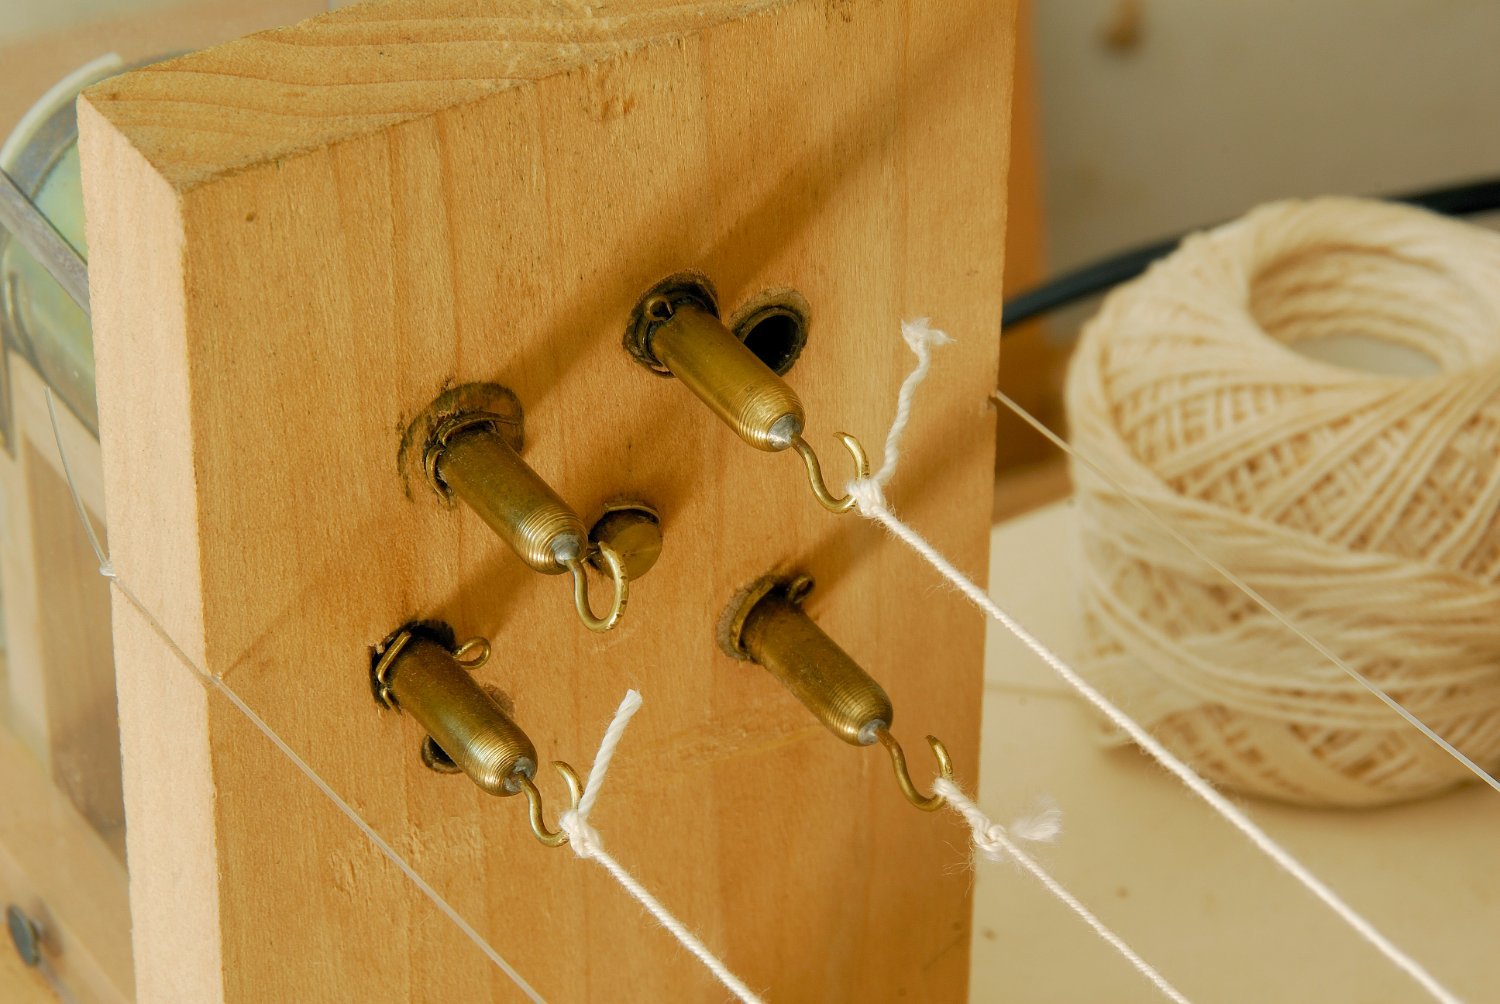
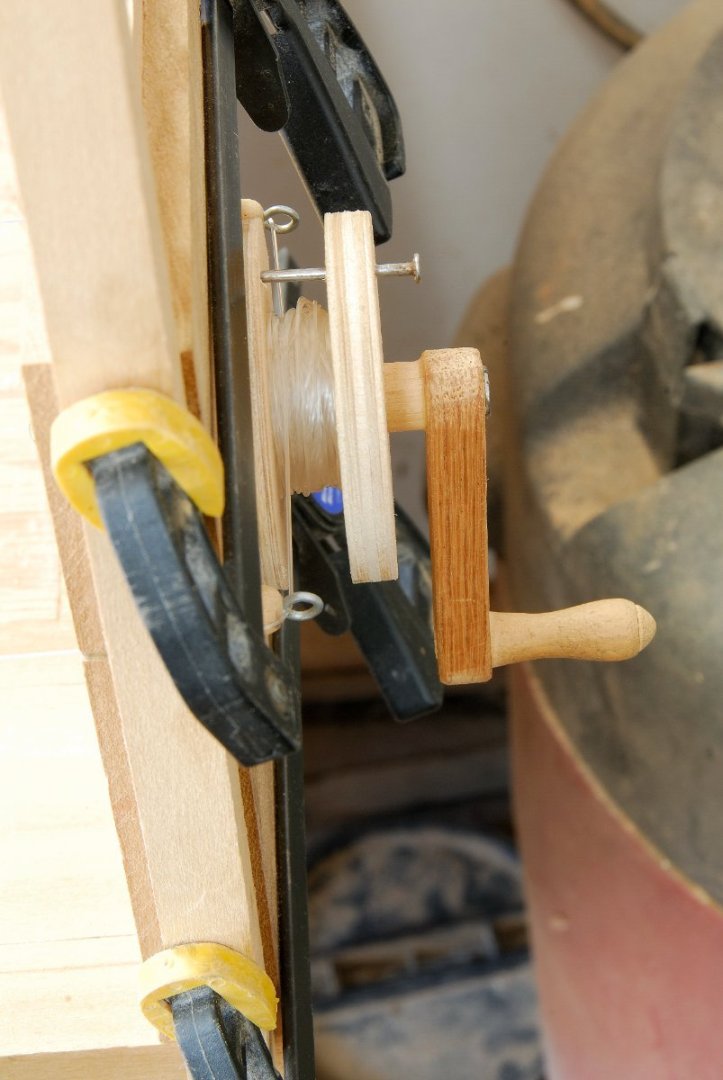
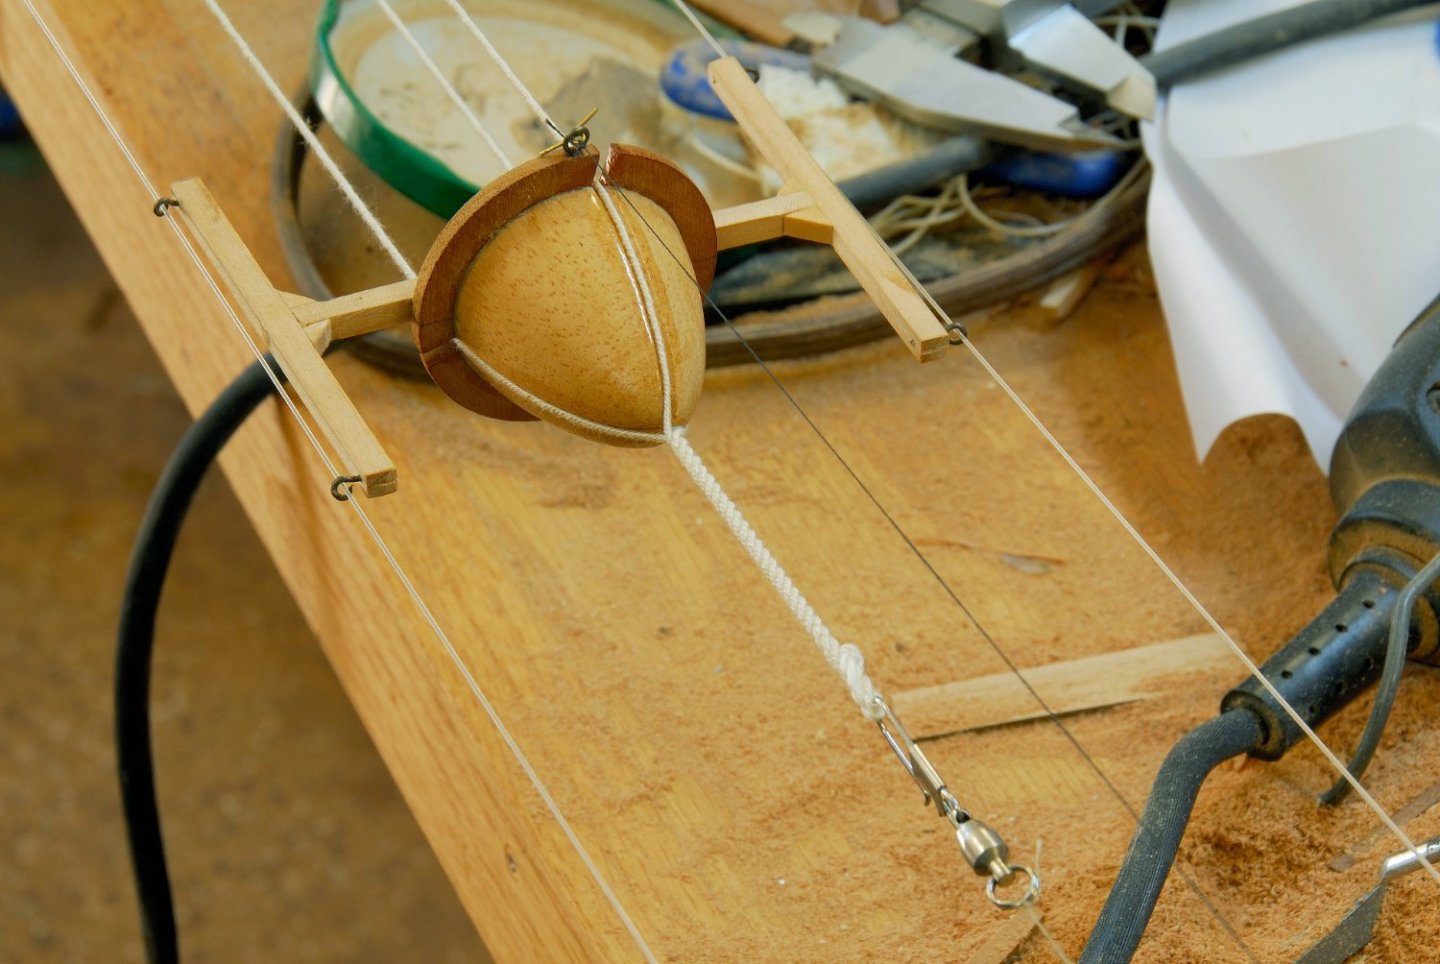
I have this type of a ropewalk I built long time ago. I use it all the time and it never fails me. It is simple to build and to operate. It is powered by a small 12 Volt DC reversible motor. To avoid constantly moving from center to center to check and correct (if necessary) the process, I have a cable (~15 ft.) connected to a remote trigger push button. One other difference I employed, is the double fishing line stretched between centers, a cone is travelling (sliding) on. This allows me to twist quite long ropes, at least ~ 25-30 feet, If I need those. Also, the distance between centers can be adjusted gradually by winding the excess of this fishing line rails onto a spool behind the static center, unlike the version with a cart and fixed length rails on which it travels (I assume, the idea borrowed from model railroading).


-
Amazon has some very good looking "surgical" grade (and inexpensive) tweezers. Google it. I am going to get me a pair too. Thomas
-
Ibex planes are great. I use my 8 mm one for shaving the edges of planks (for spiling) for planking the hulls. I got mine (used) years ago for cheap (about 5 or 8 bucks, I remember) on one of the ship models exhibits from one of the exhibitors. You can get them used on Ebay or similar, very good, perhaps all you need is to sharpen the blade a bit, if necessary.
-
Planking Book?
Dziadeczek replied to BWDChris's topic in Building, Framing, Planking and plating a ships hull and deck
I once learnt how to plank from Jim Roberts' brochure "Planking the Built-up Ship Model". -
first time rigging - tools and books suggestions
Dziadeczek replied to Frank Burroughs's topic in Masting, rigging and sails
If you are asking about traditional rigging tools, it is easy to make your own, using a couple of large needles and fixing them into wooden dowels, or even a couple of handles from old brushes. See the attachment. I am just in the middle of rigging of my French 74 gun ship model (1:48), [geez, what a pain! 😬], and constantly using my three DIY rigging tools - I find them indispensable!
-
Awesome!!! What scale is the lion in? (Judging by the size of your hand holding it, I am guessing it might be in 1:24 or even 1:12...) Wow! 👍
-
Sander thickness The Hog
Dziadeczek replied to AlainB's topic in Modeling tools and Workshop Equipment
I have the Vanda Lay thickness sander for more than 20 years now. It still works like when it was new, I only from time-to-time exchange sandpaper. Mine is attached to a handheld drill, instead of a separate motor. -
Focus Stacking
Dziadeczek replied to Dennis P Finegan's topic in Photographing your work. How to do this.
I don't know if you guys are aware that there is a free and very simple focus stacking program online. Focus stacking online - free online focus stacking software Only two steps required. -
Help with these clamps
Dziadeczek replied to Some Idea's topic in Modeling tools and Workshop Equipment
-
Richard, you have to click on the link I gave in the previous post - where it says "At a Glance..." and scroll down there to post # 89. I don't have my own build here.
-
I am not sure about your article, but I am building all three boats for my French 74 gun ship 1:48 (right now finishing the third one - a cutter), pretty closely following the advice in a chapter from the book on modeling by B. Frolich. They are all built on wooden plugs (carved from a soft basswood piece according to the profiles given and triple painted with polyurethane to make them smooth and shiny) and then mounting on them all individual ribs, the keel, sternpost and stem, and planking with individual planks. Meticulous work. I am making mine from cherry. Here is my second boat finished - a barge. Post # 89. But, you have to have a small precise table saw to be able to precisely cut all pieces. I have an old PREAC.
-
I "painted" them to the canvas with diluted white glue (Elmer's) and a small brush, and gently "persuaded" them to hung down until glue dried. Once glue is dried, it is invisible. My model is in 1:48 scale.
-
Gun Port Hatches
Dziadeczek replied to acaron41120's topic in Building, Framing, Planking and plating a ships hull and deck
A while ago somebody (I don't remember his name) has posted this image of the HMS Victory (along many others)...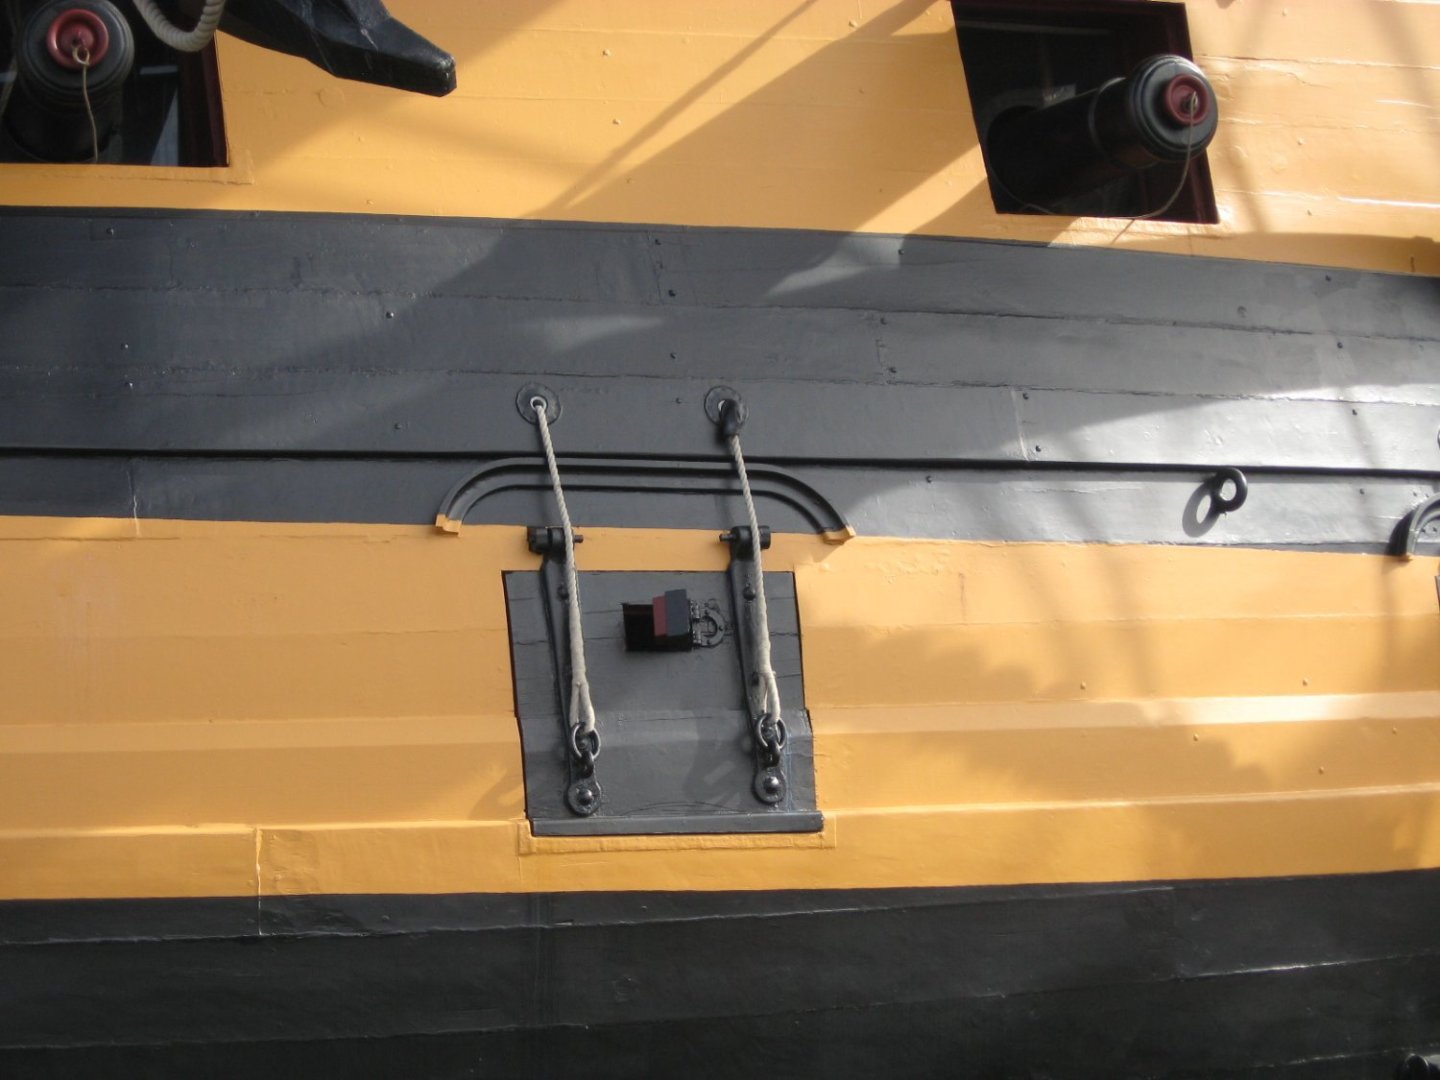
-
Check this (post nr. #4). Also see this : Gebhard Kammerlander shows edge bending from ~ 3:15 onwards.