Dziadeczek
-
Posts
657 -
Joined
-
Last visited
Content Type
Profiles
Forums
Gallery
Events
Everything posted by Dziadeczek
-
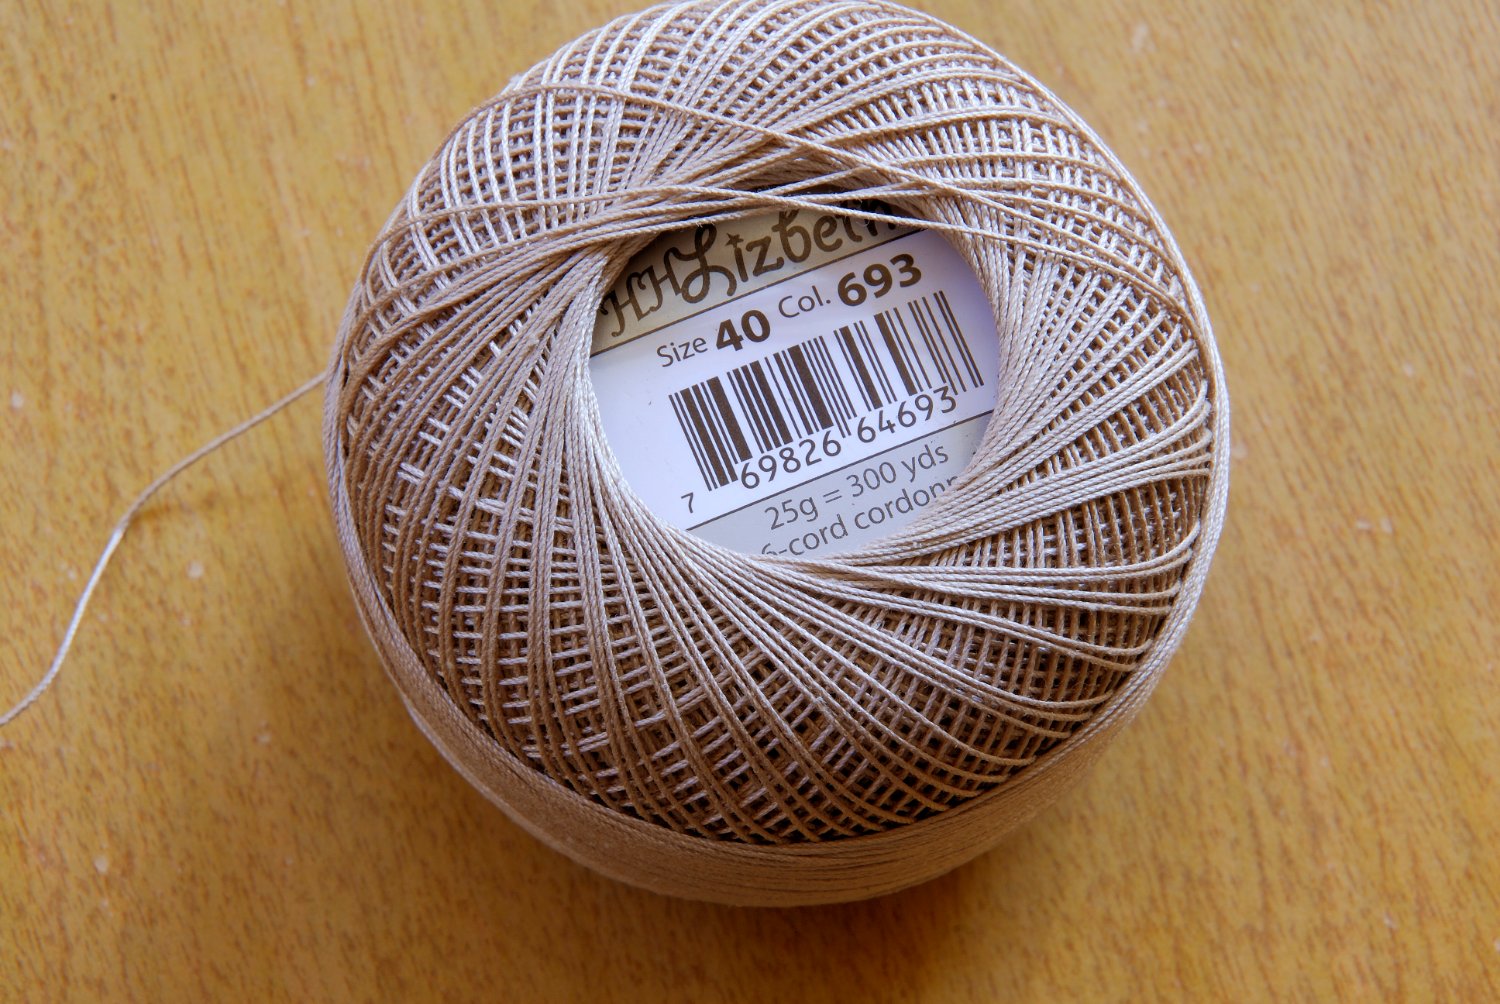
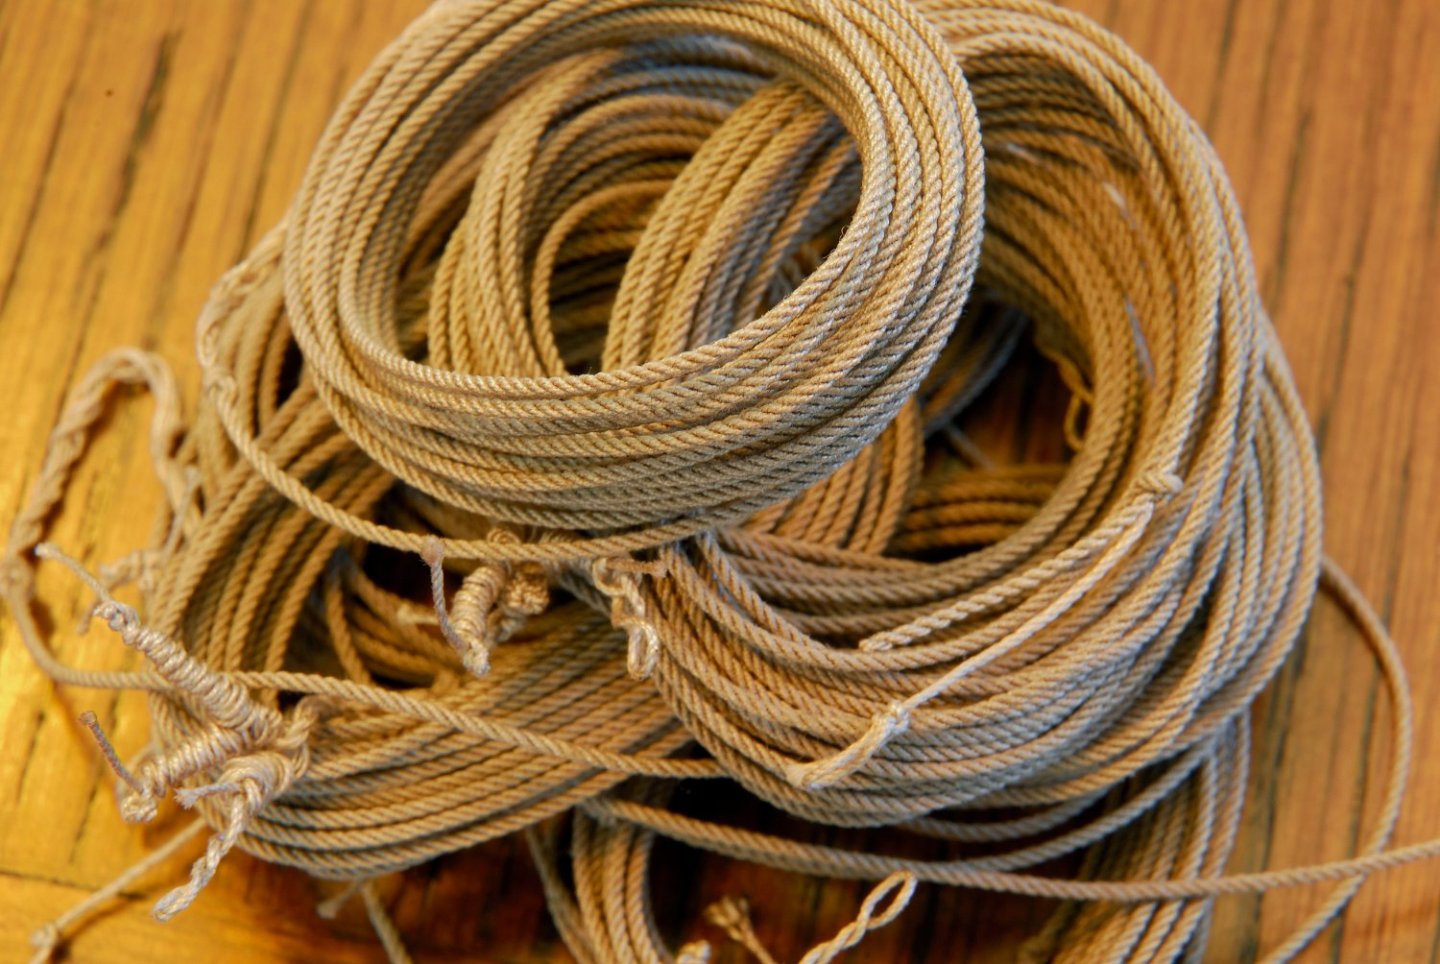
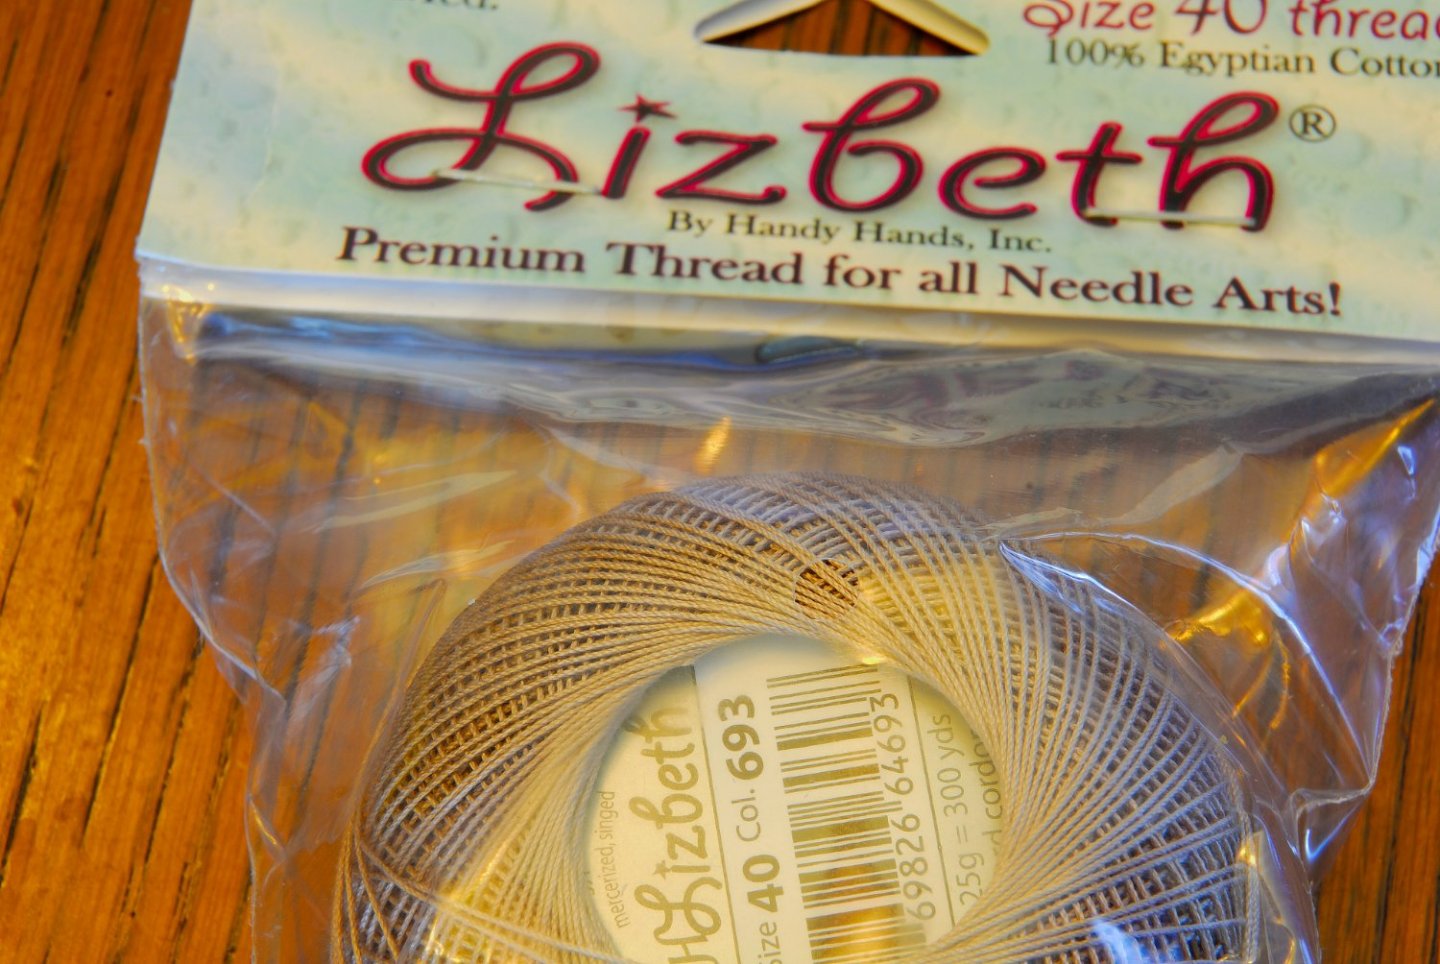
Perhaps some of the small vendors that make ropes, advertised here, might have what you need. Otherwise, I strongly encourage you to make your own ropes on a ropewalk, using commercially made thread, either polyester or cotton. That way, you can adjust the type of thread and/or its thickness to what you need. (besides, it is fun!) Now that DMC and Anchor threads are gone, I have recently had pretty good luck with cotton thread known as Lizbeth (available online), which is Egyptian cotton, traditionally one of the best, it comes in several thicknesses and colours and is already factory presinged, so you don't end up with fuzzy ropes. I make my ropes from this thread on my ropewalk. The thread is all factory right-hand twisted, so if you make your own ropes from it, they 'll all come left-hand twisted, otherwise, if you want them to be R-hand twisted, you'll first have to untwist factory given R-hand twist, turning in the opposite direction and continue your R-hand twist on your ropes thereafter. The question is, can you use this thread straight out of the spool? (after all, it already comes R-hand twisted, like most ropes on a ship). Well, the factory made twist on this thread is a bit too loose, you want your ropes look like natural ropes, just smaller. So, it is much better to twist your own ropes from this thread, with tighter twist, rather than using it straight from the spool. In the end, you' ll decide...

-

Does Shipyard Make a 1/96 HMS Bellona?
Dziadeczek replied to GrandpaPhil's topic in Card and Paper Models
Where do you find those pdf files from Shipyard? -
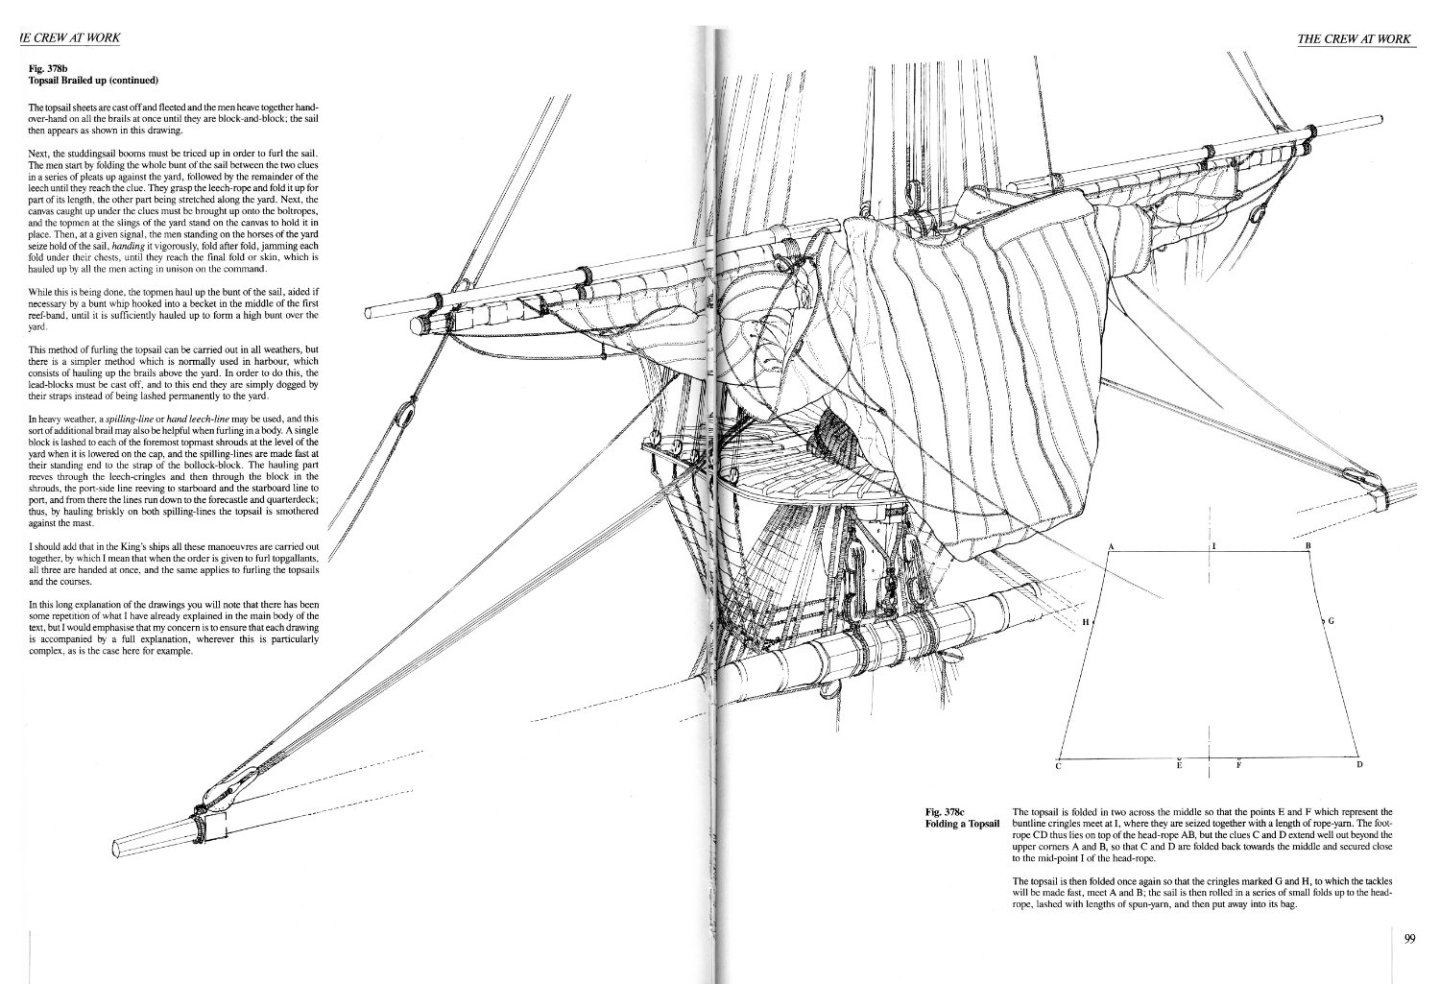
This is how J. Boudriot shows furling up sails in French ships of XVIII c. Hope this helps. Thomas
-
Hi, I too am building a model with sails attached. Very tedious and time consuming work! See the link below (post # 80): However I used thin cotton fabric - beige muslin, instead of silkspan, because I wanted to actually sew my sails and model all details on them, and with silkspan it would have been nearly impossible due to the thinness of a material. I show a sail configuration, known as "brailled up", that is only partially raised sails, instead of fully furled. I thought that fully furled sails would look too invisible, thightly wrapped up on the yards. On the other hand, fully unfurled sails would obscure some details on the decks and masts. So, I chose a compromise. Far from being an expert on this topic, I think I partially succedded with this detail, but I accept it, it is good enough for me... I think that the particular locations of all blocks, deadeyes and other details of running rigging, were on both, forward and aft sides of the sail, depending on the type of a ship, the time period and nationality of the vessel. These things varied considerably. See detailed instruction of your particular vessel. I am lucky that Mr. Boudriot was soo nice to include those details in his books, so I rely on him. Happy modeling! Thomas
-
Introduction - André Dethioux
Dziadeczek replied to Wonko the Sane's topic in New member Introductions
Awesome models!!! I used to live and work in S. Africa, in Natal, not too far from Pietermaritzburg and Ixopo. Worked as a medical officer in one of the Catholic missions. Sweet memories...! Greetings, Thomas -
I have some left over supplies of great boxwood blocks made by Lloyd Warner (unfortunately he doesn't make them anymore), which I am using for my French 74 gun ship model. Some of them, especially the smallest ones (2 mm), have holes that are a bit too small for my ropes. I enlarge them by gently drilling them with an appropriate drill bit held in the pin vise. The original hole will provide a guide for the bigger one. After I pass the rope through the new hole ( I stiffen the end of the rope with PVA glue to facilitate passing it through the hole), the bigger hole will be invisible in the block, covered by rope.
-
Hi Matiz. An awesome model you built. Wasn't it however already built in the past and you are showing us old pics? On the French forum you presented this model finished several years ago. (I was hugely inspired by your model while building my own version of the Boudriot's 74 guns ship in 1:48. Excellent work!!! Congratulations!!!) Thanks again, Thomas
-
If you have troubles locating an appropriate scraper, you can use a piece of broken glass (its sharper edge), just be careful not to cut your fingers during scraping (shaving) - for protection wrap the held edge of the glass with duct tape.
-
At about 3:15 min. into the video, he starts edge bending with his hot bending iron (you can use an ordinary soldering iron with a heat control).
-
Uploading pictures
Dziadeczek replied to wernerweiss's topic in Photographing your work. How to do this.
If you use Windows 10, it has a free, already factory preloaded program, (Microsoft Office Picture Manager), where you can click on "Picture" and than select "Rotate and Flip", and finally "Save".
-
You can easily adapt an ordinary soldering iron for plank bending (if you have difficulties locating such a specialty tool). Than yu can build a heat control from a household dimmer (not the digital one!). I learnt this one from my old stained glass class ages ago.
-
I am building the French 74 guns ship of 1780, following the four volumes by Jean Boudriot (the third volume talks about rigging). This source is quite good, although there are a few mistakes here and there Jean did not manage to avoid. But they are minor. I am currently modeling yards, sails and all the running rigging associated with them. Very tedious and time consuming work! In addition, I have Francis Jonet's "Fitting and rigging a 74-gun model ship", which complements Jean's books, especially the pictorial part of it. I am not sure if the monograph on the Gross Ventre is adequate on this topic, but generally those books from Ancre seem to be quite good, detailed and reliable. Certainly good enough to build a model.
-
I get it. Thanks!
-
Fabulous, as always!!! 😲 Isn't there a double strop on the right block D' of the tackle, you have shown on your drawing?
-
Wow! Your father must be a genius! Building such a yacht at the age of seven? Barely in the early grammar school years and already getting into such a task??? Unbelievable!!!
-
You'll have to shape this piece from a bigger piece of wood, if heat bending doesn't work.
-
What's wrong with Artesania Latina Constellation?
Dziadeczek replied to Antti's topic in Wood ship model kits
I have a question for our more knowledgeable members. What's the difference between a corvette and a sloop-of-war? (I have a couple of old magazine articles, where they name the "Constellation" in Baltimore, as a sloop-of-war.) As far as I know, these are two different names (classes) of ships for the same thing and they are used interchangeably. I might be wrong on it, though. -
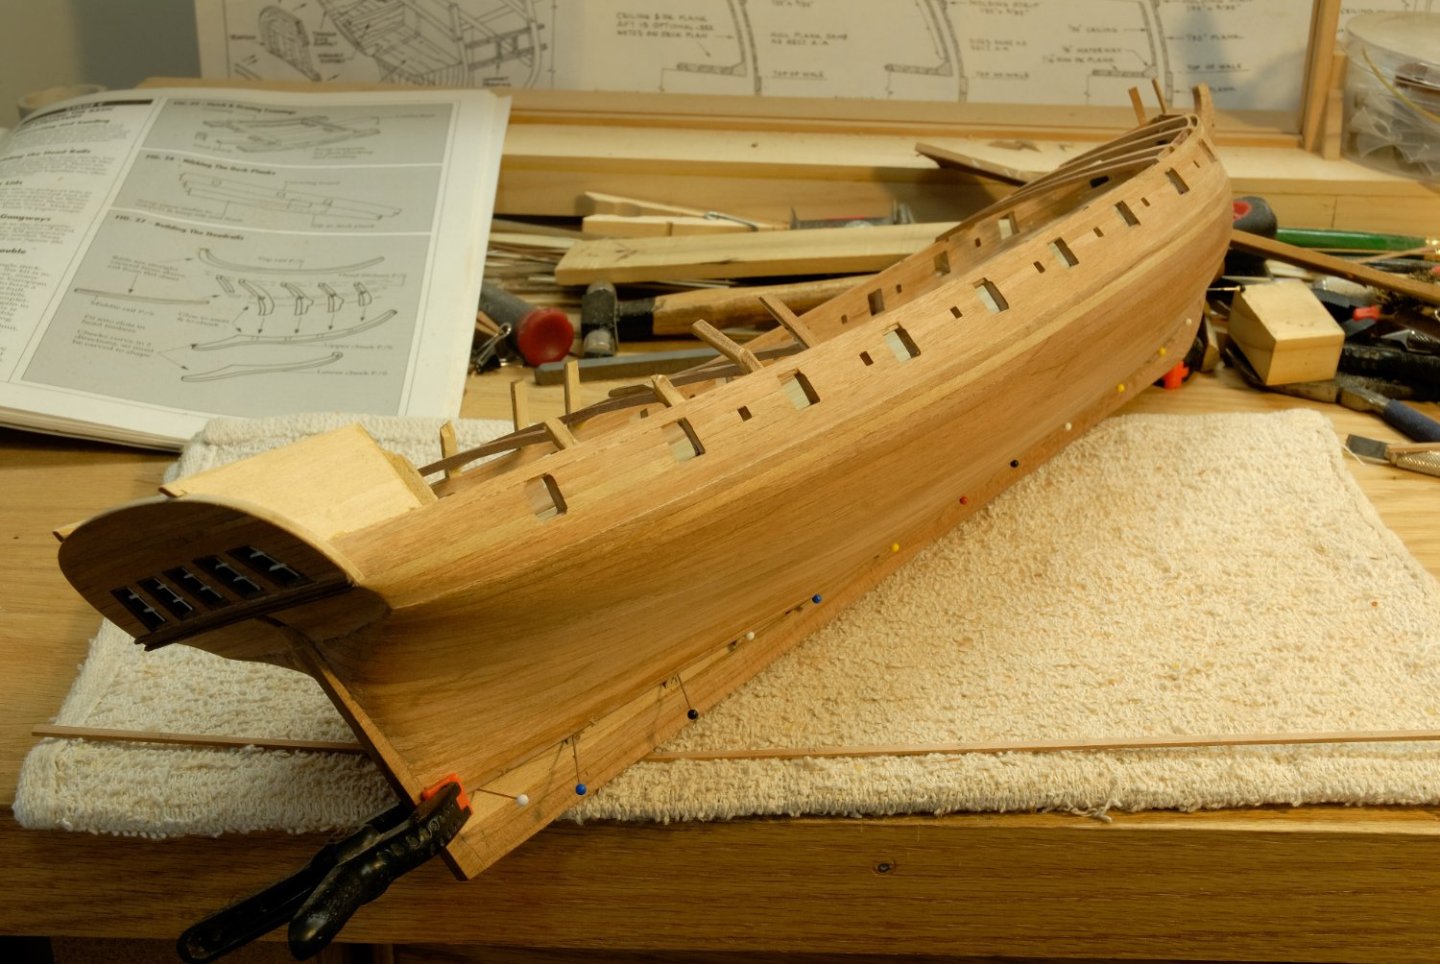
I generally plank only once, am too lazy to double plank the same thing. What for, anyway? After preliminary shaping (spiling) and heat prebending wetted planks off the model, I first place a plank dry (without glue) on the hull and make sure it fits there perfectly. Then I apply small bead (drop) of glue (Titebond or white Elmer's glue) to the edges of all bulkheads where the plank will be laying on and a thin layer along one of its edges, and place it there. I use ordinary tailor's steel pins and gently tap each one with a small jewelry hammer (3 or 4 taps will suffice) but not through the plank but rather along its lower edge, into the bulkhead. ( I plank from the wale down, towards the keel, one plank on each side) to keep it there while the glue dries. The pins exort enough pressure to keep the plank in place, tightly agains bulkheads. That way, after the plank's glue dries, and I remove the pins, there will be NO sign (holes) from them. Procede with each plank like this and, after pins removal, do the same with subsequent plank until you cover the entire hull. Here is an old pic showing the process during the construction of my MS Rattlesnake model.
-
Awesome model! Exceptional workmanship! Congratulations!!!
-
Planking Help Needed
Dziadeczek replied to JDillon's topic in Building, Framing, Planking and plating a ships hull and deck
You can easily draw such a "pyramid" by yourself. Take a sheet of paper and along one edge draw a vertical line and mark on it a series of equal points, say, every half inch or so. In the middle of an opposite edge of this paper make a point half way on the sheet. Connect this point with all points marked on the vertical line, and voila! You have this pyramid... -
Tapering tool/jig and planer.
Dziadeczek replied to Ulises Victoria's topic in Modeling tools and Workshop Equipment
I think this tool is just a waste of money and an overkill. A mini plane made of ebony? Why? To increase its price? Comparable mini wood plane you should be able to get online for a few dollars (perhaps up to 10 today). From a few pieces of wood scraps in your workshop you should be able to make yourself a simple jig to shape (shave) your planks. See post nr. 27 at the bottom of this link, where I showed this simple jig. Easy peasy... -
You can do oils on top of acrylics, but you cannot do acrylics on top of oils! According to an old artists/painters' principle: "fat on lean OK, but NEVER lean on fat! " (meaning oil paints are fat, but acrylics are lean (thinned with water).
- 399 replies
-
- 2
-

-
- cutty sark
- revell
- (and 2 more)