HOLIDAY DONATION DRIVE - SUPPORT MSW - DO YOUR PART TO KEEP THIS GREAT FORUM GOING! (Only 53 donations so far out of 49,000 members - C'mon guys!)
×


ianmajor
-
Posts
784 -
Joined
-
Last visited
Content Type
Profiles
Forums
Gallery
Events
Everything posted by ianmajor
-
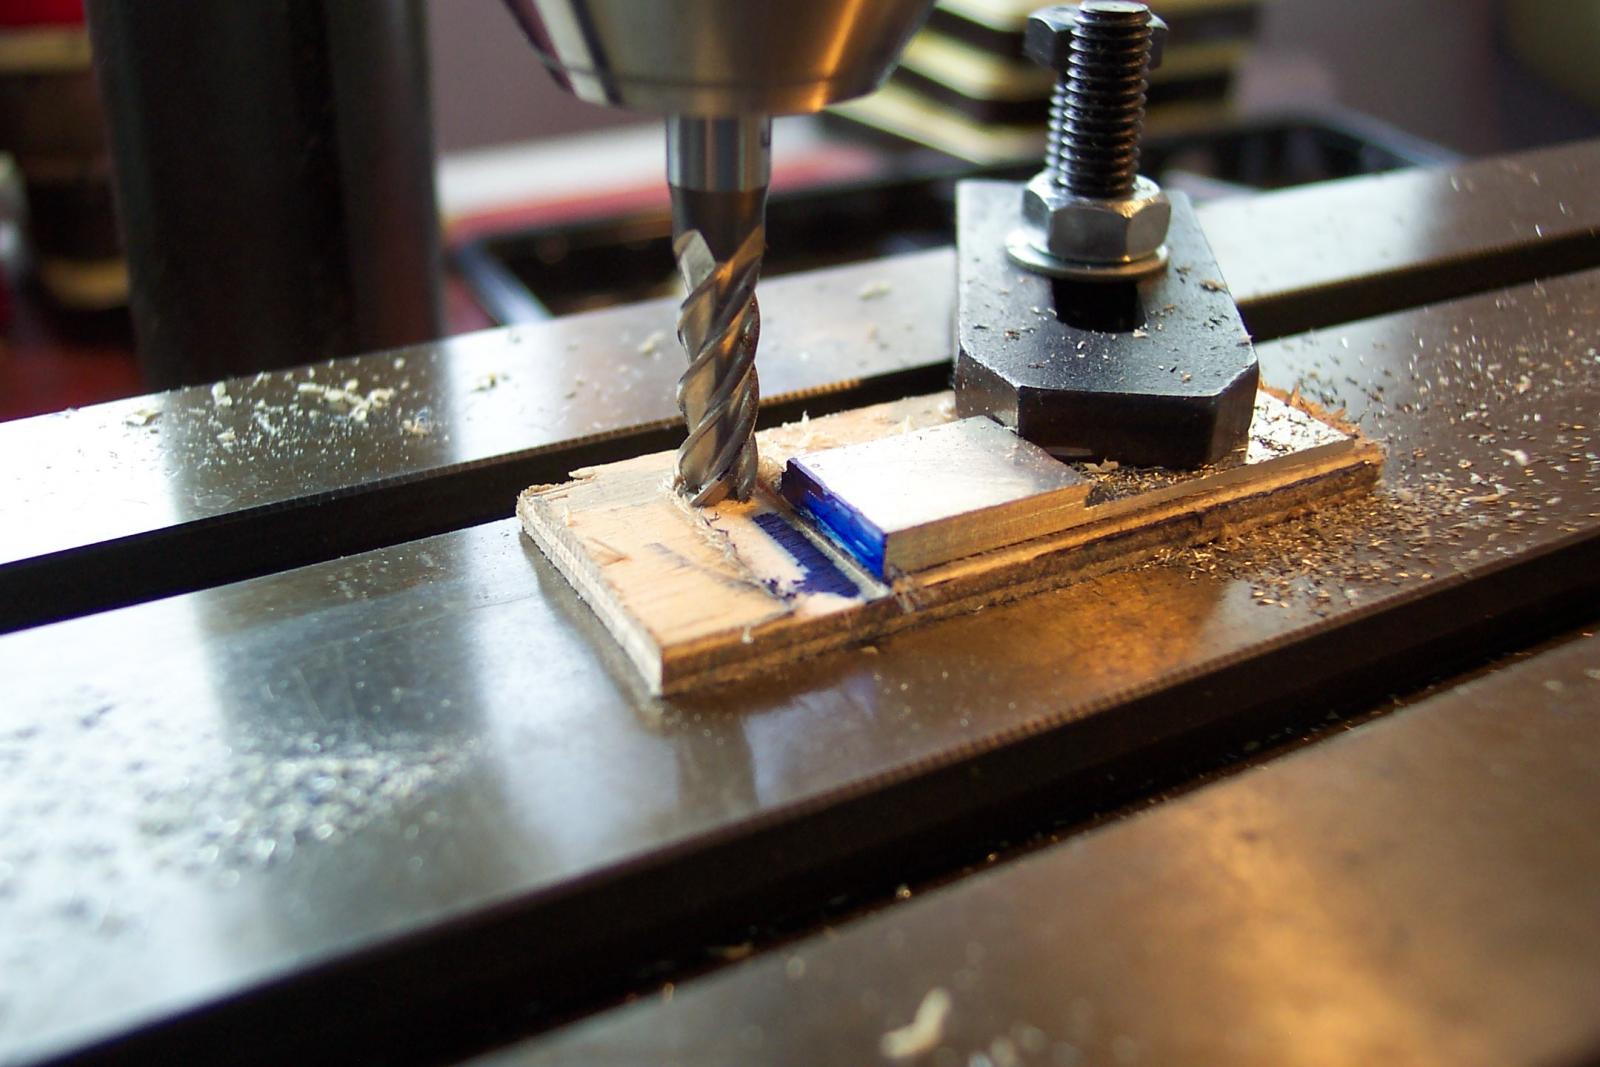
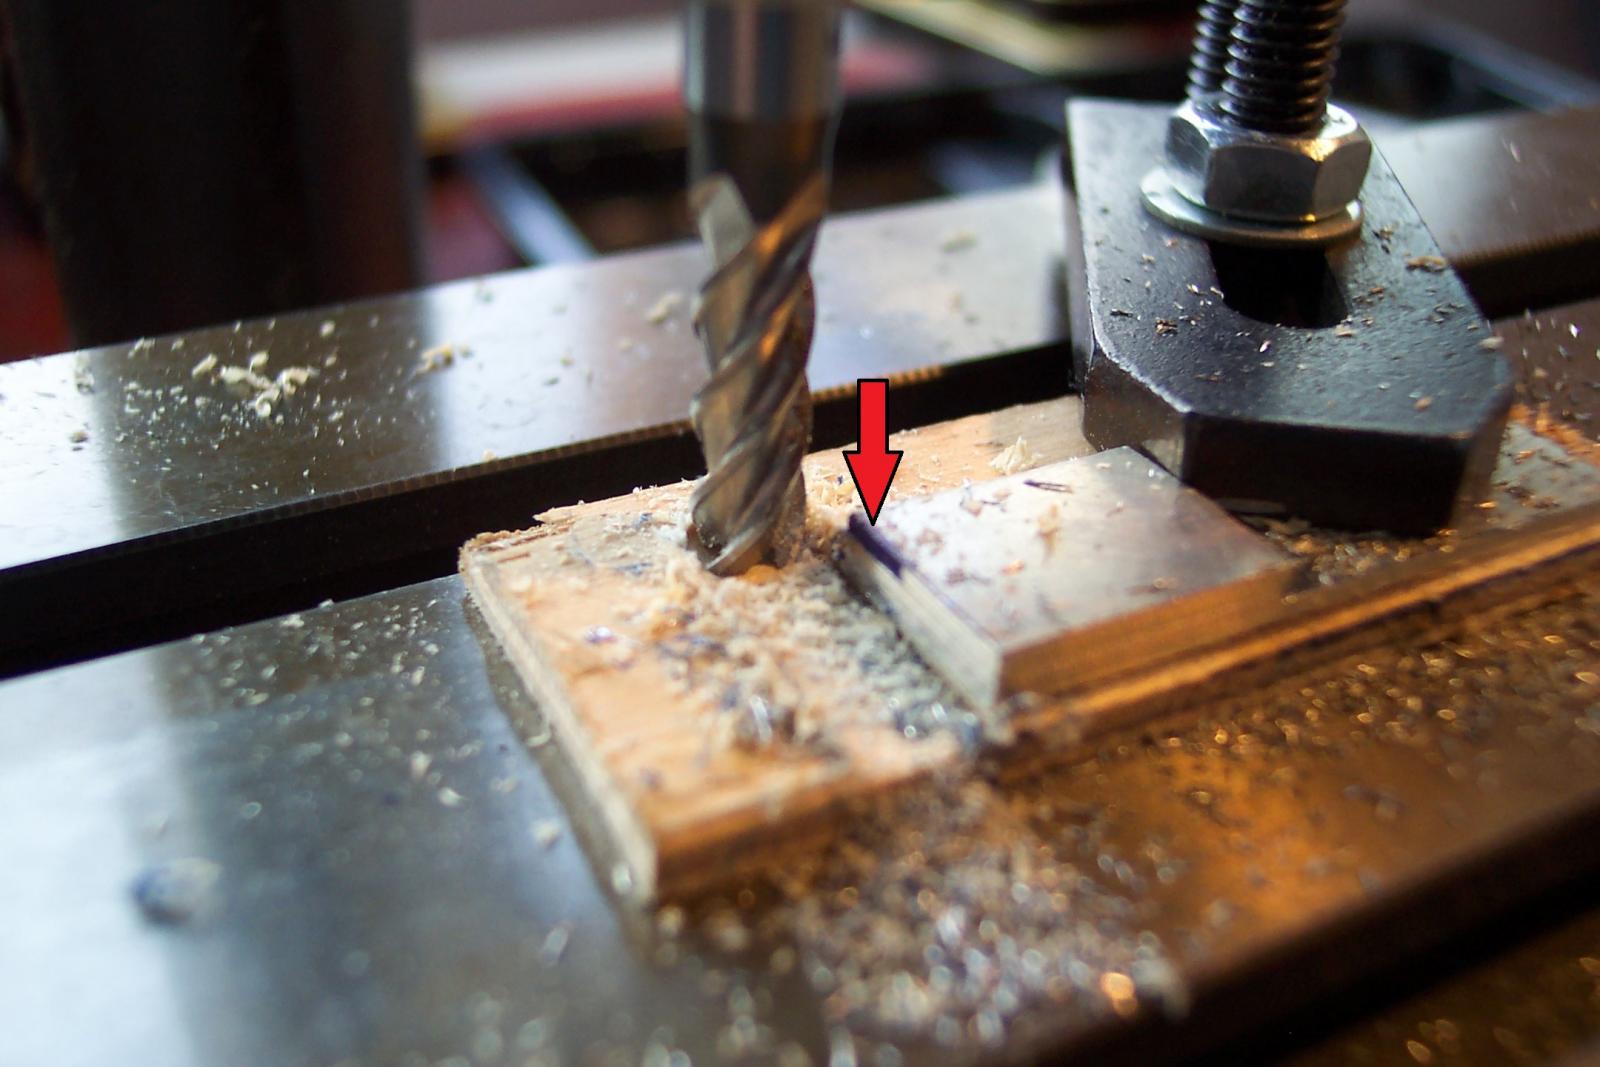
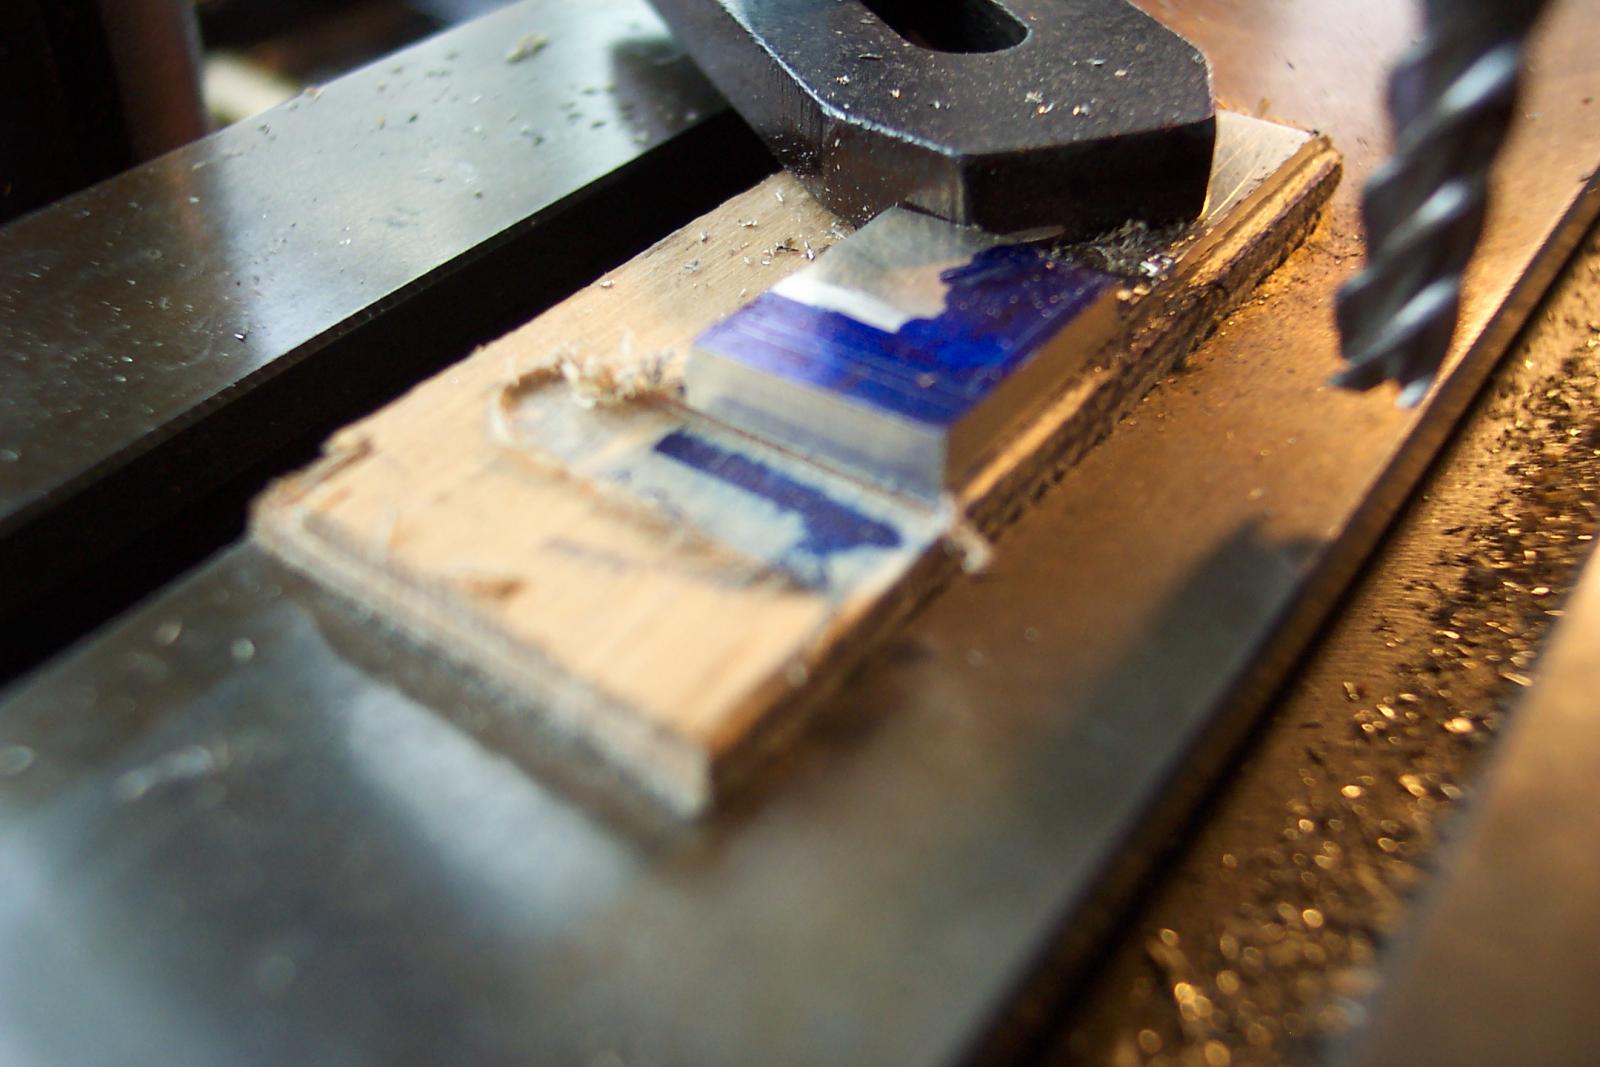
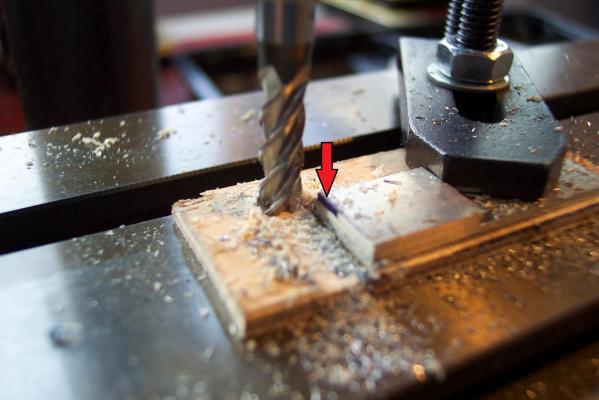
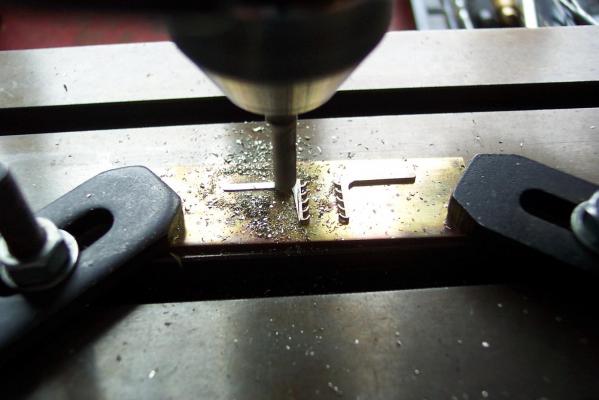
 Well - the fat brackets started to bug me. So I decide to make a couple of slimmer replacements. ("Oh no - he is at it again" as my wife and daughter would say) Rather than saw the parts out with piercing saw followed by filing (as previous) I used the milling machine throughout. To enable the parts to be clamped to the miller's table I cut two pieces of 1mm thick N/S slightly longer than the finished items. I also cut another piece about three times as long. The three pieces were soldered together as a stack with their ends lined up. I made these pieces 10mm wide to give machining room. The long piece is sacrificial and is there to support the other parts as the are machined plus give extra length for clamping. The stack was clamped to the milling table as close to square with the table as possible. The edges start off quite rough so I usually run my permanent marker along the edges so that when I file or mill I can tell when the hollows have completely gone. The next photo shows the three pieces clamped in place and the end marked ready for milling. (The side has already been done). The first pass of the file/milling bit takes off the the high parts along with their colouring leaving the depressed areas still marked. In the next photo the red arrow indicates the coloured mark left after a milling pass due to a depressed area. I then milled one side and one end square. Without moving the work piece I coated the top side with blue then marked the outline of the bracket. The next photo shows the markings, all made with the Jennys. The "fingers" will be milled from the nearest end of the work piece.
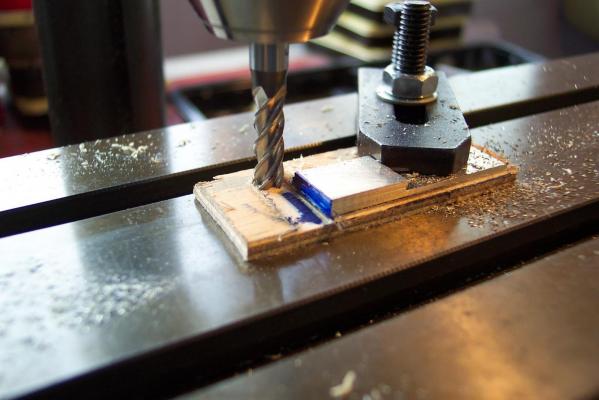

-
Beautiful carving.
-
Stunning work.
-
Frederica, I see from Vasileios' log you have him squeezed in one end of the workshop with his Victory!
-
Vaselios, Another husband and wife team. Sadly none of family share my interests (or foibles). I see you are using a laser to line things up. A good idea.
-
Piet, Excellent. Now I know who to turn to when I am struggling to solder aluminium parts on a model.
-
Hamilton, She is looking lovely. The items such as chair backs in the some of the photos highlight the scale at which you are working and what delicate work is required.
-
Giovanni, That is impressive work. I think it will need two men to lift it when it is finished.
-
Dafi, I could produce better results with etched components. As you say one of the problems with etched parts is they can be rather 2 dimensional. Also my experience of etched brass kits over the last 25 years is that they use only one or perhaps a few thicknesses of material (for very practical production reasons). So the best results are produced by a combination of etched and scratch built parts. Where the etched parts would star would be around the doors and strip work containing bolt detail on a stove. Robert, Perhaps our flues could wave to each other as they pass in the night! Actually the way this stove has a grip on me I suspect it has an evil spirit like the Picture of Dorian Gray. So, as with the picture, perhaps it is best if it does lurk in a dark corner somewhere.
-
Gosh guys - you are embarrassing me with your kind words. Mike, Well......it will be going under the fore deck, and if I add the panneling behind it that should be there............! How is your lovely Badger doing? Are the girls letting to get in to the shipyard yet? ZyXuz, Your Racehorse puts my efforts in to the shade, and when you start your Unicorn I think I will hide mine. Ferit, I haven't got any burnt grease on it, plenty of finger grease though, will that do? BE, I am sure you could make a stove similar if not better than mine if you set your mind to it - going on your other work, such as Pegasus, that is. I keep refering back to your Pegasus log when working on my deck furniture. I will be consulting it even more frequently when I go up in to the masting and rigging. I am starting to look at the chain pumps. I like the idea of having one with the cover off - so I have given thought on how to make the chain and wheel. That should probably send me finally around the bend! Ucho, Thank you for your kind words. When I meet up with friends in MSW who come from the countries that were once Yugoslavia, it takes me back to the two years that I worked there. Our group were in such diverse places as Zadar, Zenica and Bor (and several others) - happy days. Daniel, Thanks for looking in. Happy to show the steps. If I had three hands and a better camera I would show more! I am still looking at the fat brackets. I am about to go in to the workshop to try to produce some thinner ones. This may all end up in tears. Meanwhile Daniel, how about a nice etched brass kit for one of these stoves from you? It would go a treat. Hello Wacko, I will try to keep the pictures coming - hopefully some better quality ones.
-
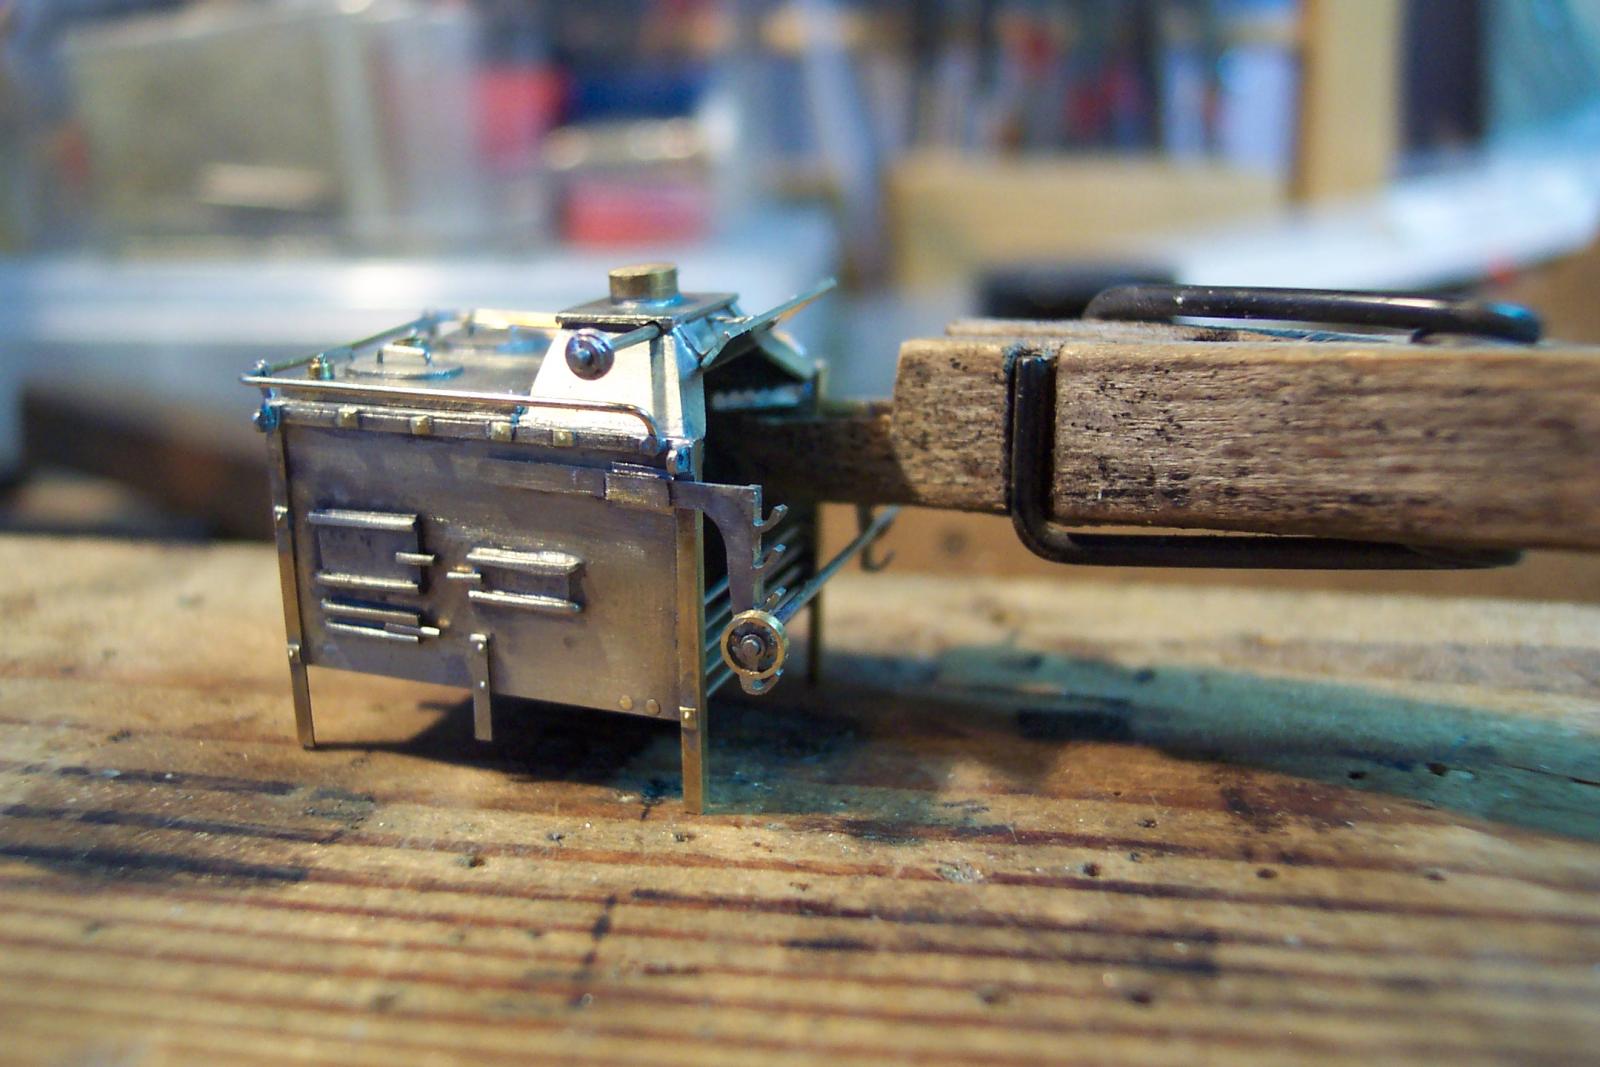
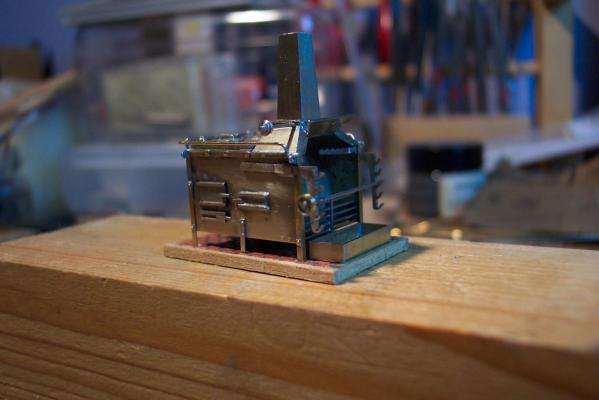
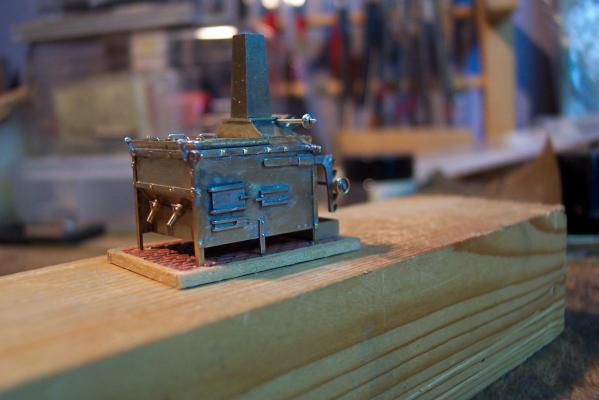
A couple of photos showing the brackets in place with the two pulleys temporarily fitted - the lifting rings need to be finished before permanently fixing these. After looking at the above photos I decided the horizontal part of the brackets looked a bit fat. So I checked their measurements. They should be 1mm deep - I have somehow managed to miss the fact that I made them 1.25mm deep. 0.25mm doesn't sound much, but on this item it is a 25% error. Sadly they are well soldered in place so it would be difficult to change them now. Note to self - check your measurements more carefully as you work in future.
-
The two parts were now seperated and soldered, facing each other, on a piece of scrap brass. This was clamped on to the mill and each part was milled in to their final "L" cross section. I cut a 3mm wide strip of 0.1mm thick brass. Parts made from this were soldered on to the front and back of each bracket to represent the clamps that hold them to the stove. One of the brackets was fixed in place. The other was then held in place with a modified clothes peg. The lower pulley and its spindle were temporarily put in place and the second bracket adjusted so that the shaft and the grate bars were parallel. Once all was parallel I soldered on the second bracket.

-
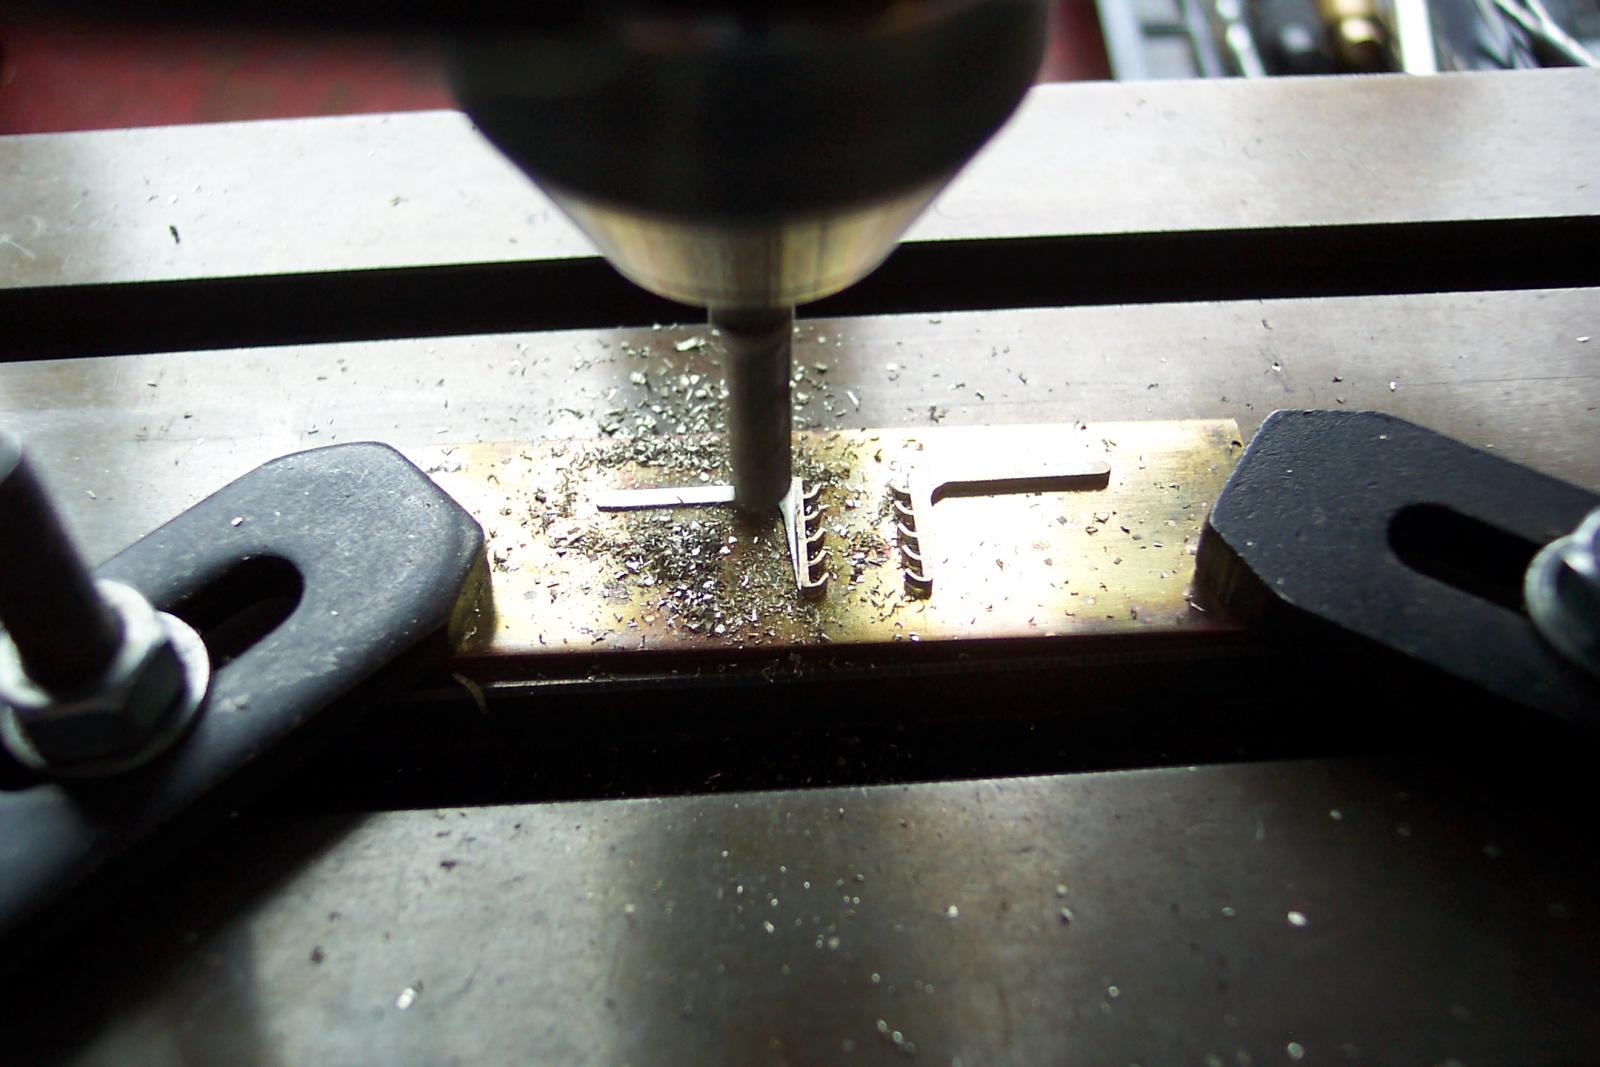
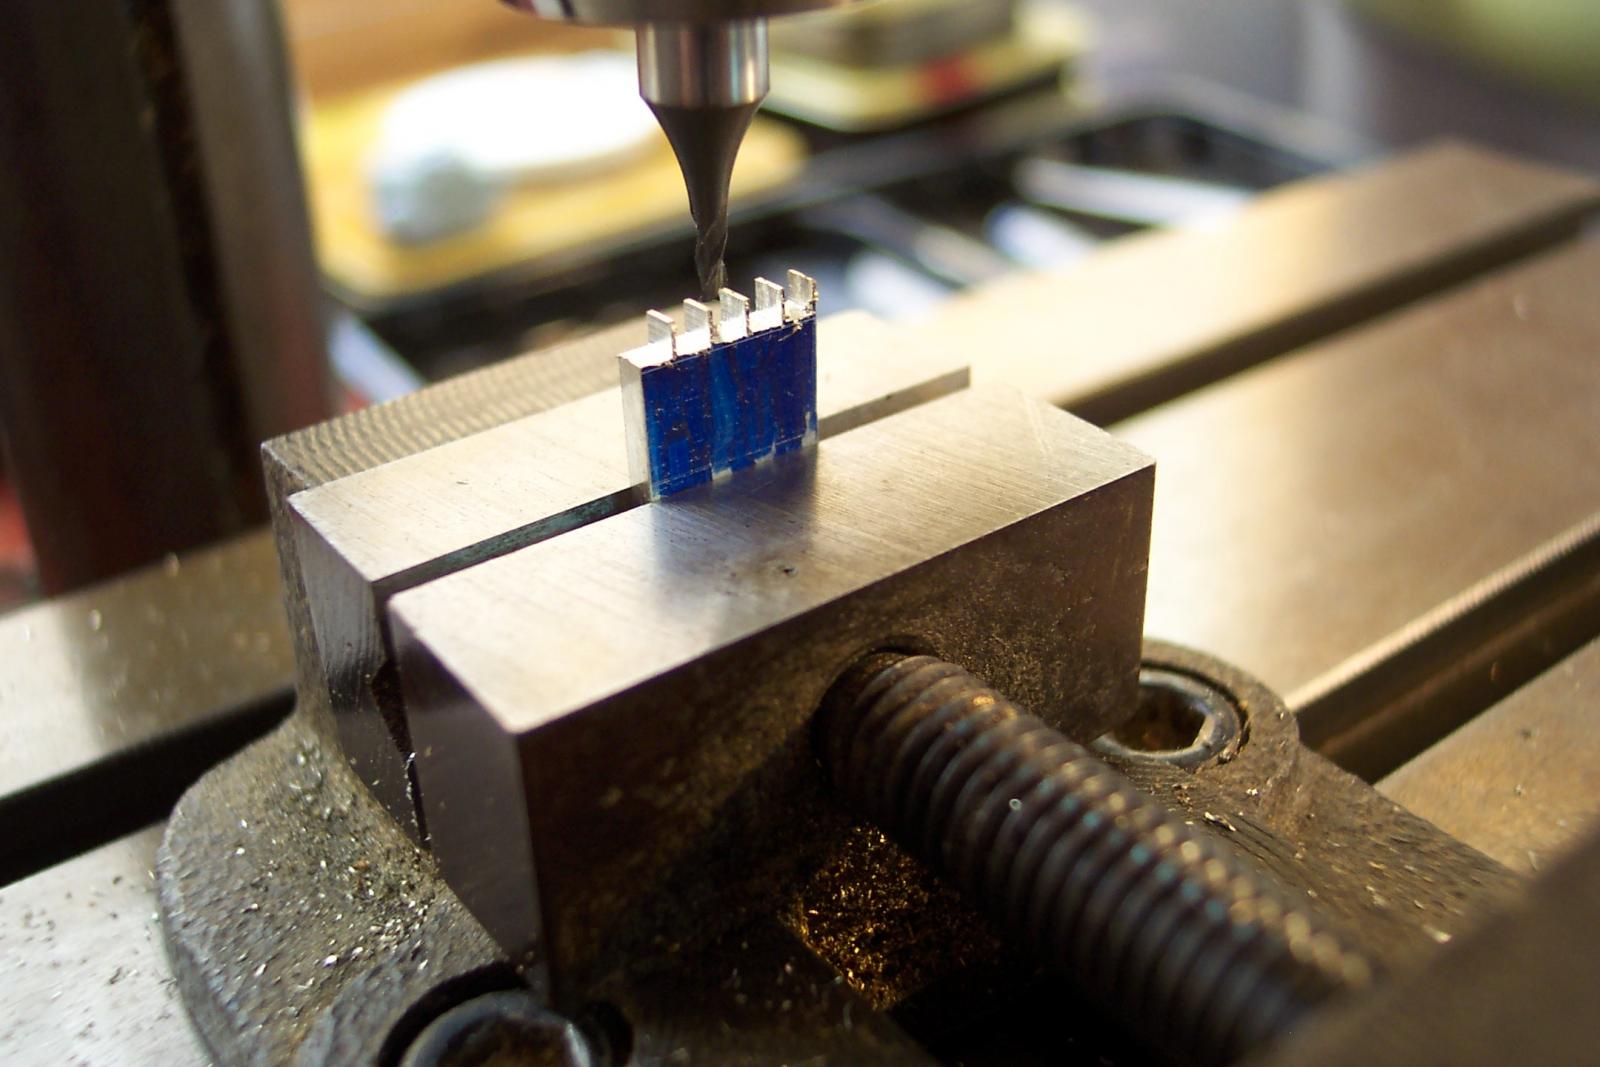
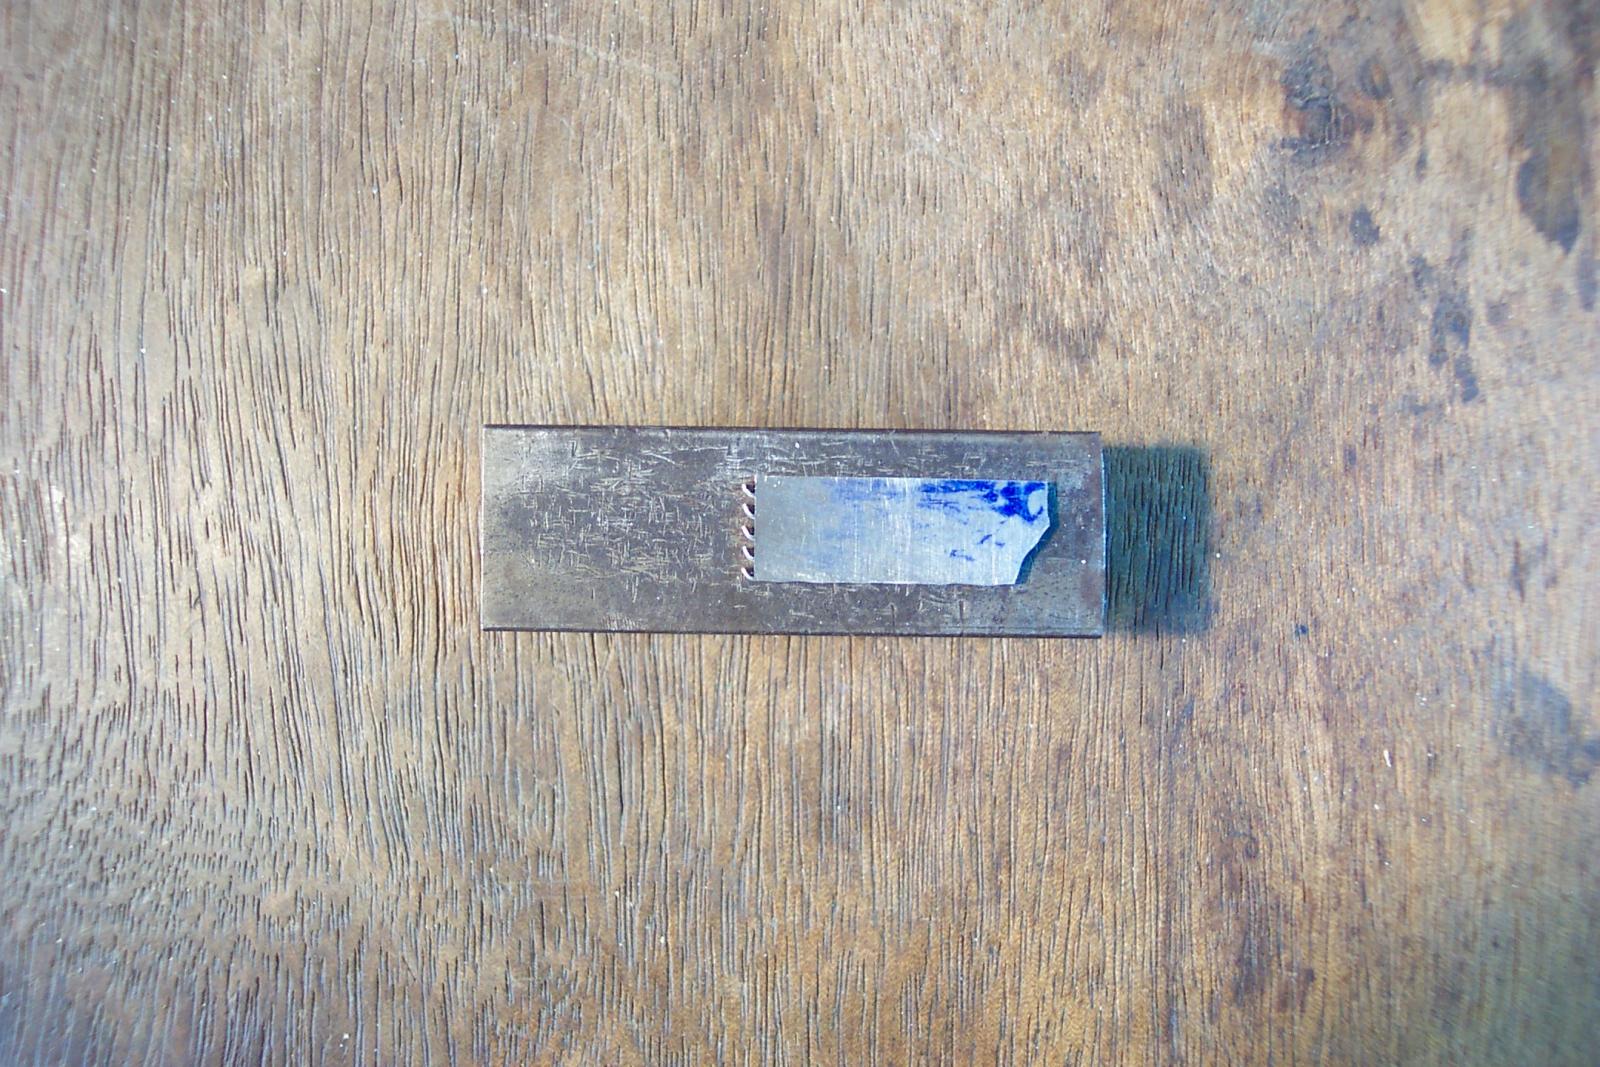
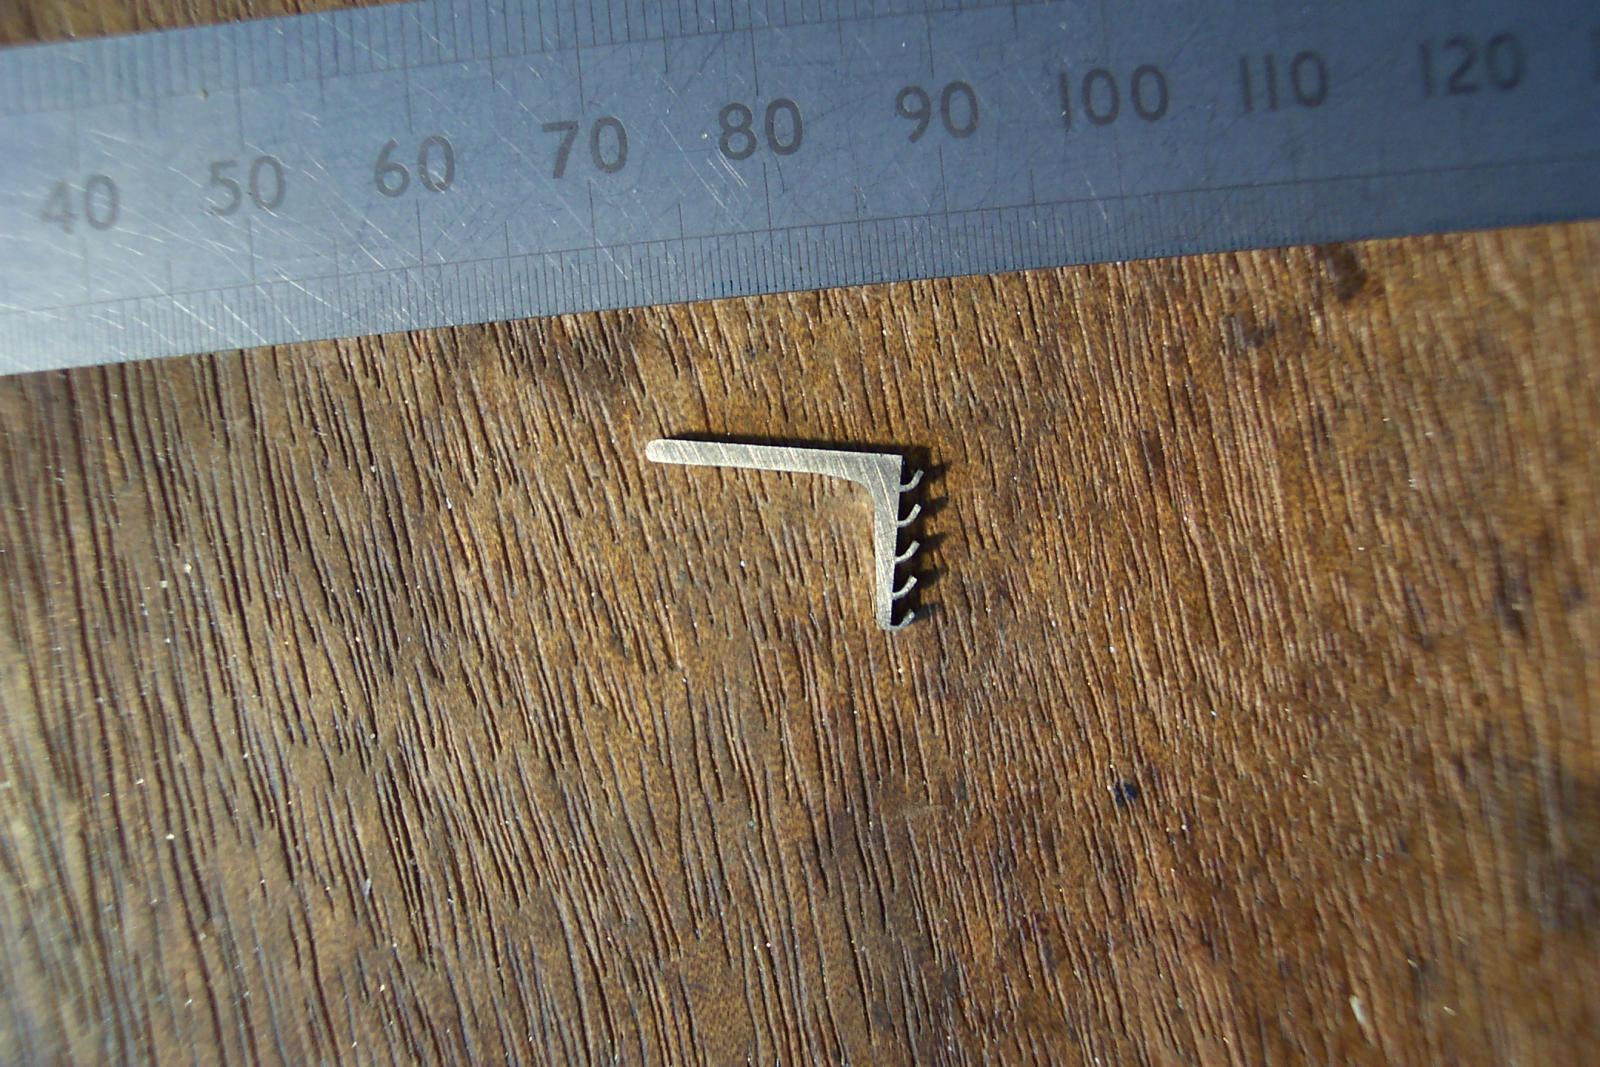
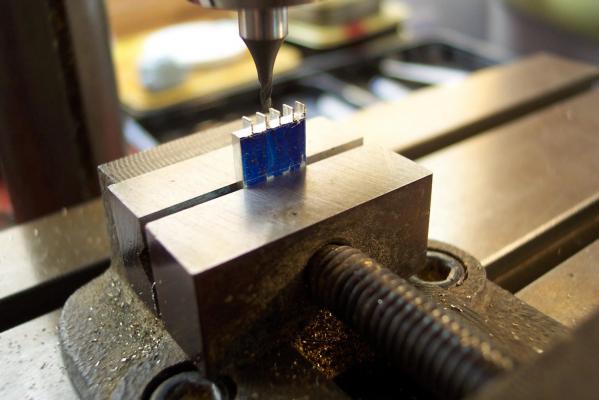
Time to do the rotisserie brackets. Examination of the plans and the pictures indicate that the brackets are actually "L" shaped when viewed from above. So I decided to replicate this. The advantage is that part of the brackets going down the side of the stove will be quite thin and the front of the brackets will be wider. This gives a nice thickness of material from which to make the hooks on which the rotisserie shaft sits. So I started by cutting a 9mm wide strip of 1mm thick N/S. I cut this in two and soldered the two parts together so that I could cut the elevation shape of the two parts in one go. A filed one long side so that it was straight, then filed one end square - this would be the top corner of the brackets. I put the work piece in the mill vice with the trued end horizontal. Then using a 1.5mm bit I cut 2mm deep slots at 2mm intervals. This left a set of five fingers 2mm long by 0.5mm wide. I then milled the left side of each of these fingers down to 0.2mm wide. In retrospect it would have been better to reduce them to 0.1mm but I chickened out. The next photo shews the machined part still in the mill vice. I then transferred the workpiece to the bench vice and gently tweeked the fingers over. This is where their being 0.1mm would have made life easier - I could have got a better curve to them. I decided against anealing since I didn't want the two parts to move or seperate - I also didn't want to risk burning the little fingers with the blow torch. My tweeking left a couple of fingers slightly higher then the others so I place a thick piece of brass across the ends of all the fingers and gave it a gentle top with a small hammer. This brought them all in to line. The next photo shews the result. Next I marked out the piece to the final elevation shape and cut it out.


-
Ferit, For you - anything!
-
Piet, Your model is looking superb. Nice progress. The photos of the prototype are again fascinating. The frames for the ballast look so fragile.
-
Paul, I love the workshop. Most of all I am overwhelmed by the photo of Scharnhorst on the trestles. It is awe inspiring.
-
Mark, Thanks for your kind words. It is seeing the great work by others on this forum, including your Licorne, that encourages me to try harder with my efforts. I am a very average modeler so hopefully this log will allow others to see that a reasonably detailed brass stove can be produced fairly easily. Thanks also for the sympathy. There is no one to moderate me in the workshop now when I rage at myself for doing stupid things - I fear I am now causing the paint to blister on the woodwork. Hamilton, Thanks as ever for your kind words. Sorry I haven't got the taters and pheasant sorted out (yet?) but I am working on a kettle so at least we could have a nice English cup of tea. I look forward to seeing your "Crows feet" (no I am not trying to be offensive ) on your Blandford. Now that is a challenge at 1:100 scale. Some of your latest photos flag up how small the detail is in that scale. Very impressive. The rotisserie brackets for the stove are partially completed. The hooks on the front are done. Actually when I look at the detail on the stove, then look at the rest of the Unicorn I fear the I am breaking the model makers cardinal rule by not having a consistent level of detail throughout the model. Still - once it is installed under the fore deck probably nobody will see it! Not to worry - it has been great fun to make.
-
Frederica, I will join the audience for this build. By the way, I wish I could keep my workbench as tidy as yours.
-
Piet, Nice progress on the model. The full size photos are interesting. The rivet detail only seems to be prominent around the edge of the bow.
-
Ferit, I think in modelling there is an element competition - it makes us all strive to produce better results. The most important thing in this forum is that it is a friendly constructive competition. Problem is you beat me every time.
-
John, Thanks for looking in. A lathe is a good starting point since as well as turning it is possible to do some milling activities as well.
-
Ferit, I am sure that Berlin will not be the last - at least I hope not. It is great fun playing the "Coral guess the scale" game. I have had hours of fun with that.
-
Ferit, Good point. I am half expecting someone to point out that the Unicorn actually had the older brick built stove and that this type of stove is not suitable.
-
Jack, I am glad all went well with the operation. Giving your eyes a rest is most important. I will wait patiently for your next update to the model.