HOLIDAY DONATION DRIVE - SUPPORT MSW - DO YOUR PART TO KEEP THIS GREAT FORUM GOING! (Only 53 donations so far out of 49,000 members - C'mon guys!)
×


ianmajor
-
Posts
784 -
Joined
-
Last visited
Content Type
Profiles
Forums
Gallery
Events
Everything posted by ianmajor
-
 Ah - the great man himself on view. It is always interesting to see other people's thinking (your drawings) and workshop environment. Gives me additional ideas for myself. And of course the ship is looking fabulous.
- 78 replies
-
- 1
-

-
- santa maria
- nao
- (and 1 more)
-
ROYAL CAROLINE 1749 by Doris - 1:40 - CARD
ianmajor replied to DORIS's topic in - Build logs for subjects built 1501 - 1750
Gosh Doris, those ships look beautiful together. They take my breath away.- 883 replies
-
- 1
-
-
- royal caroline
- ship of the line
- (and 1 more)
-
Ferit, Those detail photographs show up your work beautifully. Everything looks in full harmony with the rest of the ship. I feel as though I could almost climb on board.
-
Daniel, Soon - just bring enough pastry for me as well. This stove cries out for a set of your etched parts to make better detail.
-
Ferit and Mark, Thanks for the kind words. It is a shame my woodwork will never match my metal work since wood makes up the majority of the ship. Mark I was in the middle of admiring your Licorne at the same time that you were inputting to this log.
-
Mike, Thanks for looking in. I will be blackening the metal using Birchwood-Casey Brass Black which will be applied neat using a cotton bud. I have used this on soldered locomotive frames which produced good results. I think if there is too much solder about it can produce a brown tinge. I am currently working on making scale nuts (1mm square with an embossed centre) to try to improve the framework on the stove. Not sure how that will turn out. It is certainly making me go cross eyed.
-
Hamilton, Have a good trip. If Blandford sprouts a pair of wings we will know that your dad has been helping you out.
-
Great work Hamilton. Love the capstan and gallows. It inspires me to improve my capstan which is a bit basic.
-
Juan, Beautiful work. The rigging is developing very nicely.
-
Intro to Card Models Part VIII: Building V108 - Miscellaneous Bits
ianmajor replied to ccoyle's topic in Card and Paper Models
Chris, As ever your log is very informative and interesting. This is producing a superb model. Love the reflection of the ship in the glass in the first photo of posting number 10 - could almost be on water. -
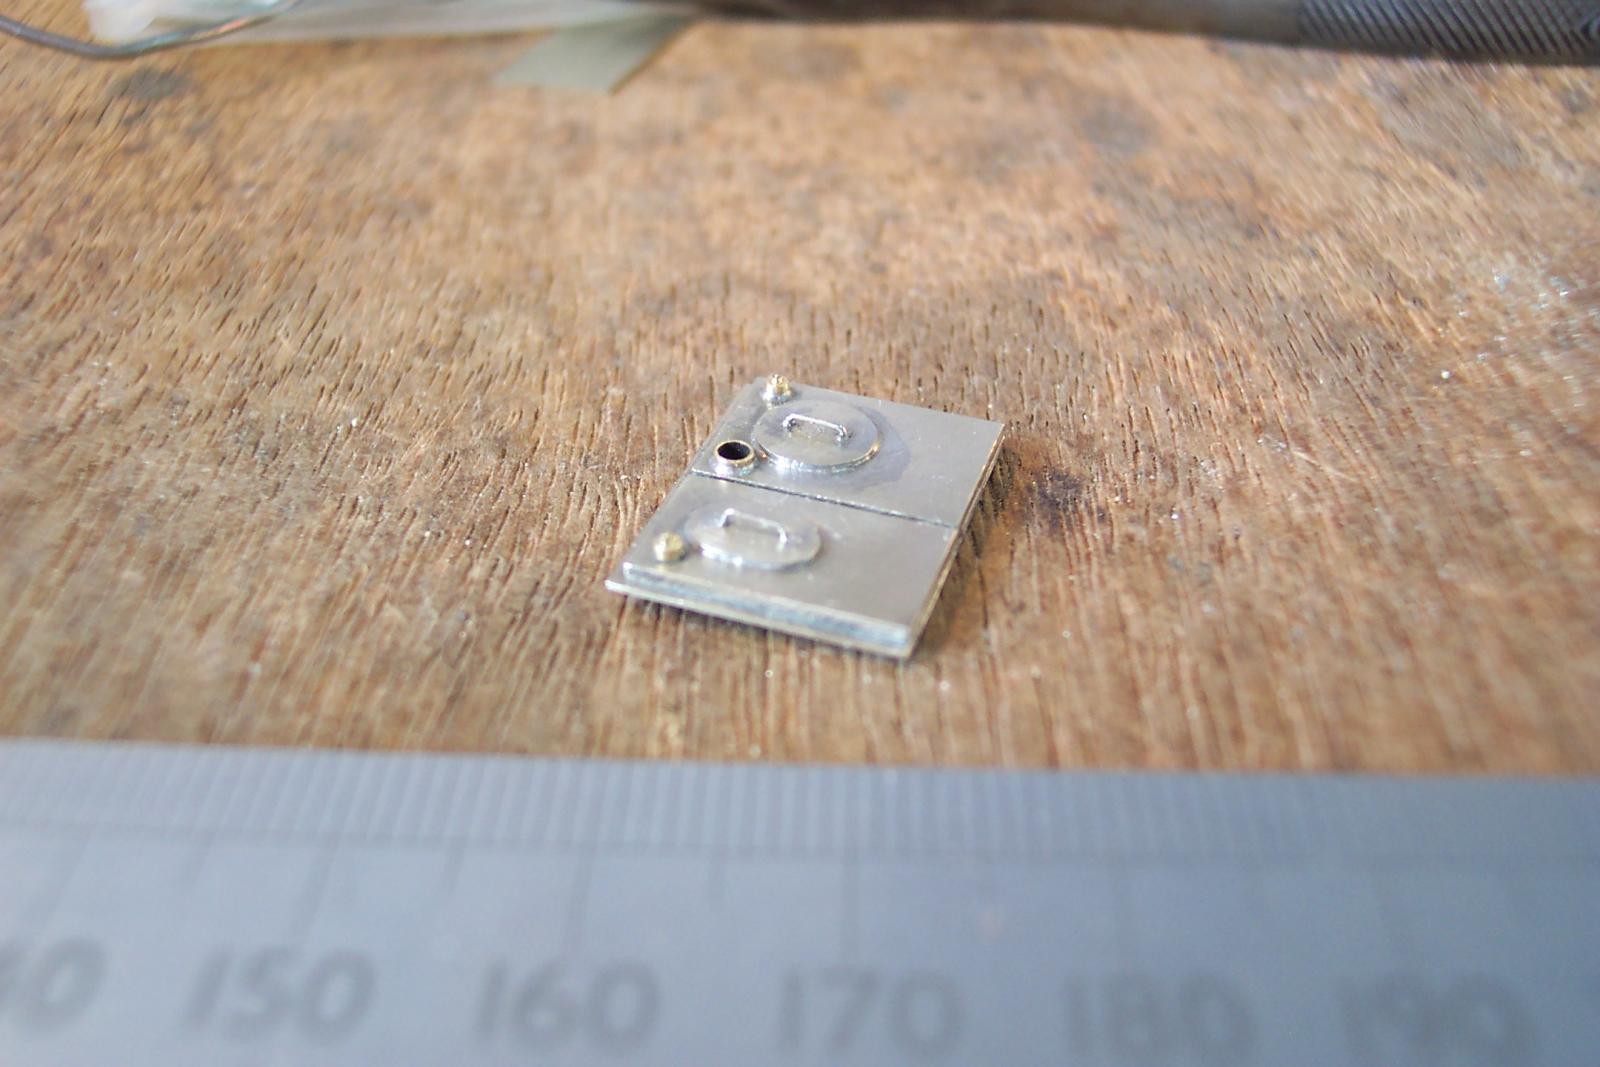
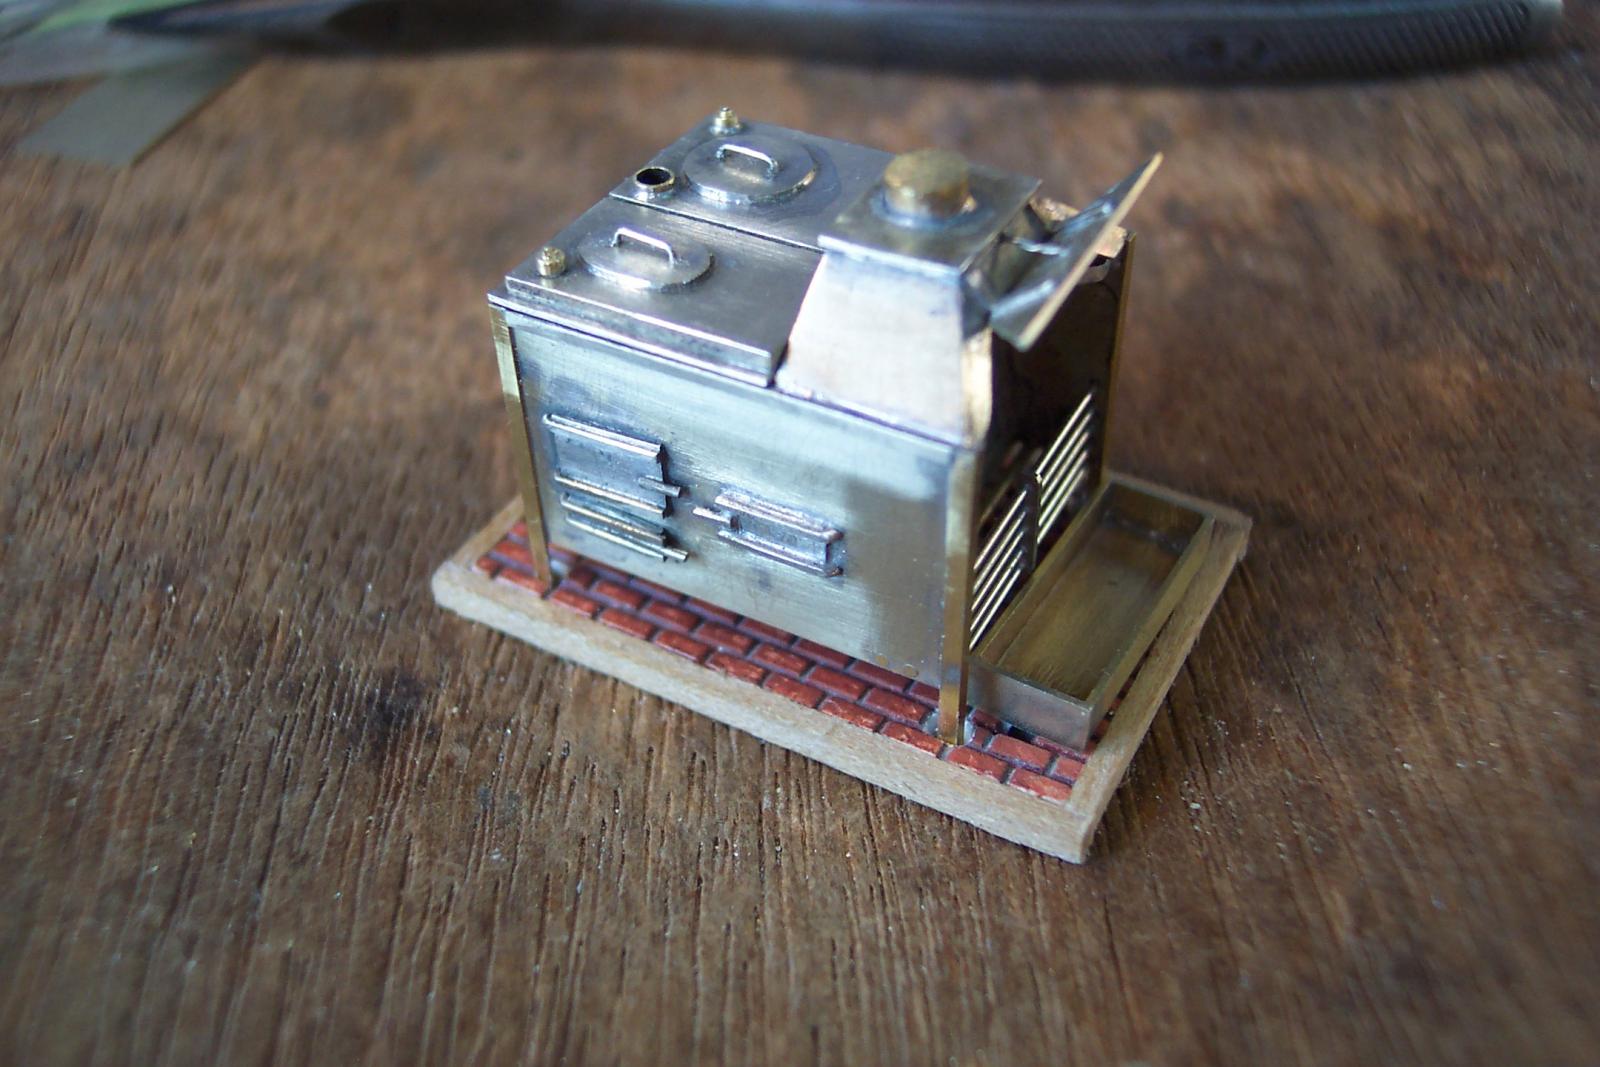
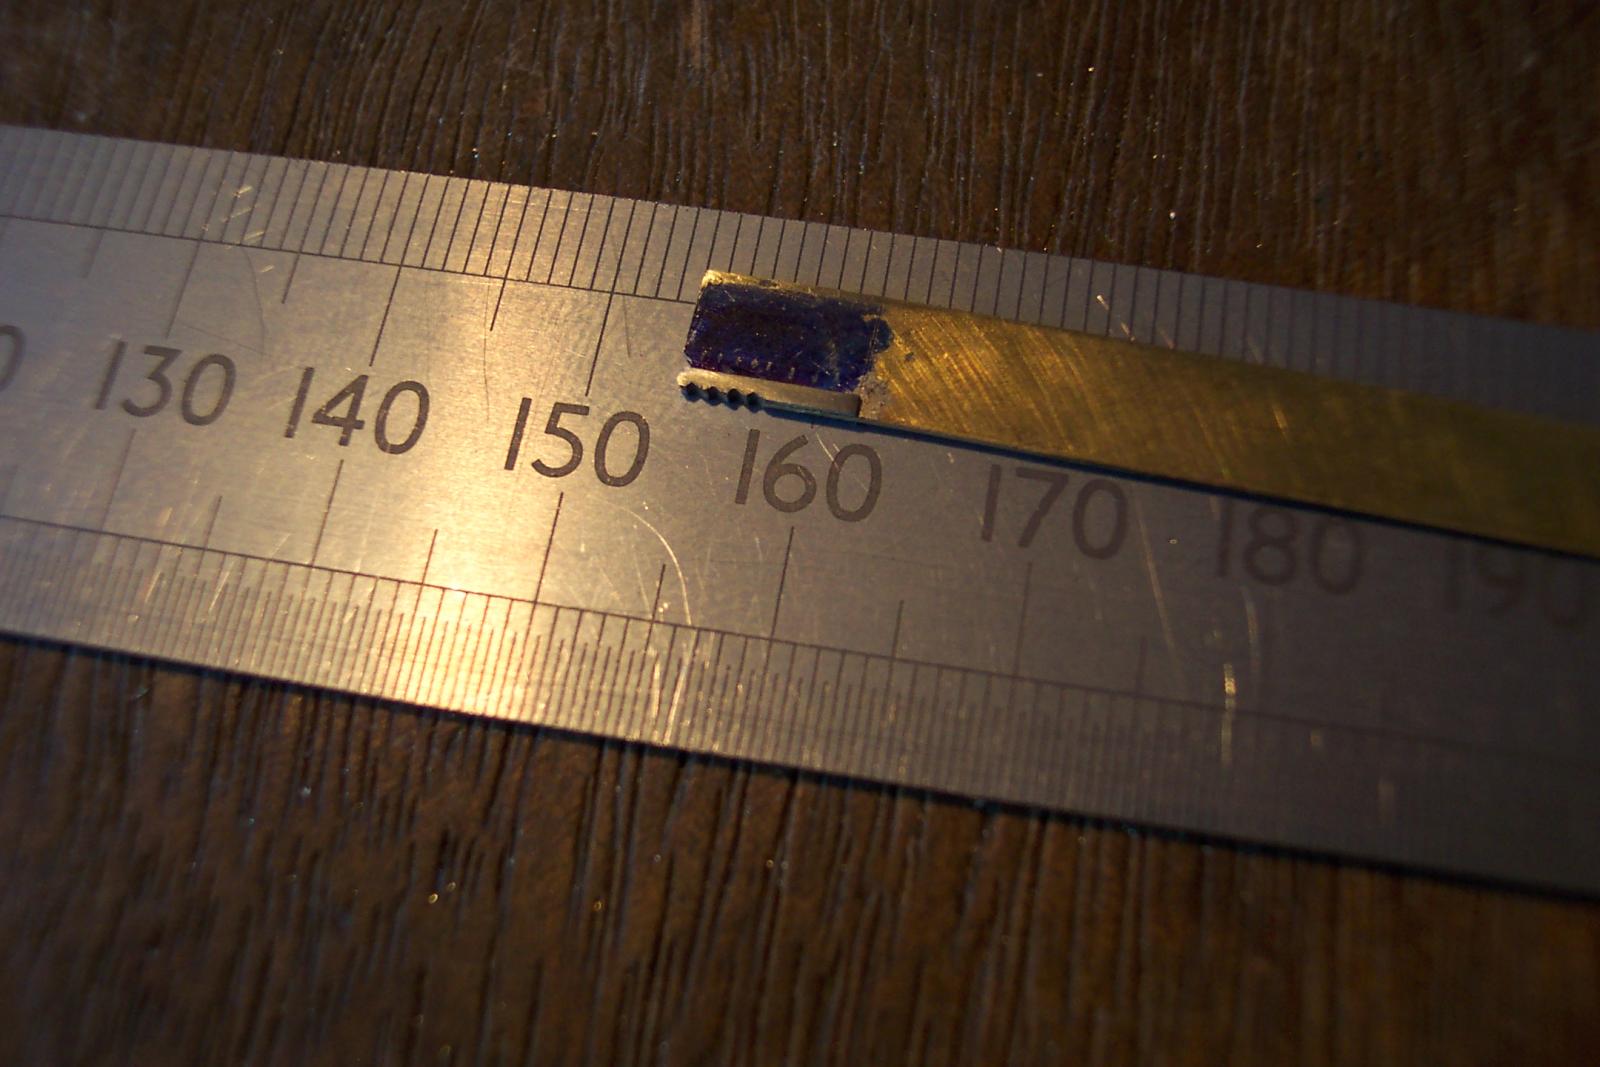
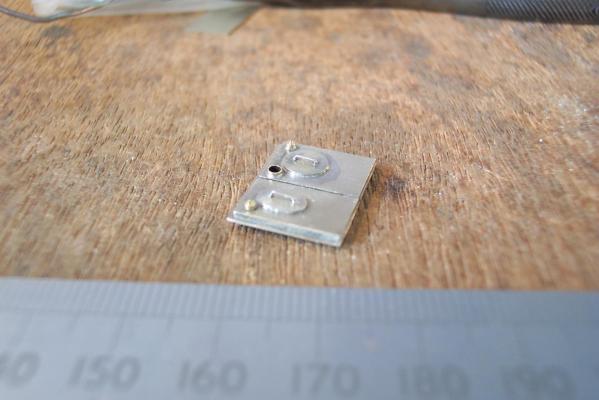
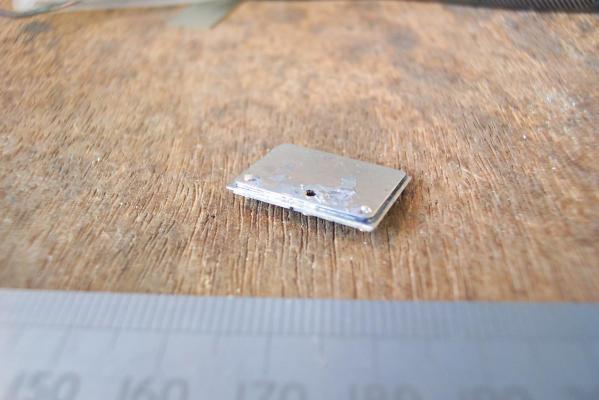
So....next up on the stove are the tops of the boilers. The tops of the boilers were made from two rectangles of 1mm thick N/S. One was 7.5 x 13.5mm the other was 9.5 x 13.5mm. The two rectangles were carefully positioned to give equal gaps around the sides but none at the back. A piece of 0.5mm scrap brass was used as a temporary spacer between them to maintain the correct gap as I soldered them up. The lids were made from 0.5mm N/S cut and filed to shape with 0.4mm holes drilled for the handles. The lids were soldered in place and the 0.4mm holes redrilled through the lids and then through the main part of the top. It started well but the tip of one bit snapped off in one of the holes. I think the bit snatched as it was passing from one layer to the next. There was no way I could get the broken tip out. Fortunately there was sufficient hole for the 0.3mm handle to be soldered in place. This meant I had to solder the handles in from the front rather than behind - which means more cleaning up of excess solder after the job was done. There are two items which I thick are the caps over the holes where the boilers were filled with water. These were simple turning jobs from 2mm diameter brass rod. A hole was drilled in each corner at the front of the boilers and these were soldered in. The last item is a short length of 2mm brass tube which is where I will attach a still. Photo 1 shows the top of the stove detailed as above before permanent attachment to the rest of the stove. Photo 2 shows the underside of the top showing the thick plate that fits inside the sides of the stove. Photo 3 shows the detailed stove top in place - though not permanently fixed in place just yet.

-
Hamilton, Thanks for dropping in. I am doing battle with the boilers at the moment. I hope to have some progress on that in the next few days. I am starting to look at the chain pumps - can I model them with the top off and the chains exposed?......that would be interesting. I am probably just putting off the opening up of the waist area as long as possible. I was interested in your experiments with etched brass vegetation for ship's decoration. It got me thinking - Maplin's sell ferric chloride and resist paint for etching circuit boards. I might experiment with some for parts for the ship. Hum.......
-
Piet, I agree with Mark. Even without the model construction detail this is a fascinating and instructive log. The information on the prototype that you have published, along with other info that your postings pull in are very interesting. Previously I thought that I knew a fair bit about submarines - I now know that I was wrong in that belief!
-
Mark, I have considered using dots of some form of glue but I intend to chemically blacken the stove rather than paint it. I am not sure how the glue would respond to this. Could always do an experiment. The stove was bolted rather than riveted together (for ease of repair in case of damage in action). Looking at the photos of the replica stove on the Victory they were large square headed bolts so I am going experiment with small cubes of metal. In the mean time I am putting this off whilst I do the boiler detail. I have made the 2 boiler tops but they look too narrow so I think a rework is needed.
-
Darryl, Love it. Your techniques in "distressed" painting are familiar to me through my model railway activities though I have never managed to achieve this standard.
-
Hello Darryl, This will be an interesting build of a fascinating prototype. The 1:160 model is lovely. I guessed the railway interest from "Rail and Tie" - though in the UK that would be "Rail and Sleeper".
-
I love your carving. I am also impressed that you find the carving "pretty straight forward". I have not managed to carve wood figures successfully yet! Great work all round.
-
Before getting in to the boiler detail I have been trying to decide whether stoves at this time would or could have been fitted with a condenser. The plans that I am using shew a short open pipe on the top of the boiler where the condenser would be fitted. If there was no condenser I can not believe that the boiler would have been left with an opening that would spew steam around the crew under the foredeck. Thus far I can't find reference to condensers being used before about 1770. Some of the condensers were free standing and did not use the stove. So I am scratching my head on that one for now. Any one got any thoughts? Whilst researching this I stumbled across an interesting discussion on ship's ventilation at http://forum.sailingnavies.com/viewtopic.php?f=9&t=579&sid=f26fa2ac9e9093de8f7d256519a09b46. Now the understanding that I got from reading up on the Brodie Stove was that pipework from it could carry heat to the rest of the ship to dry it. From this discussion it would appear I had the wrong end of the stick. The pipework connected to the stove was used to draw damp/foul air away by convection. This air came out in to the stove flue - the effect of the flue being to drive the air out. Oh well I am still learning.
-
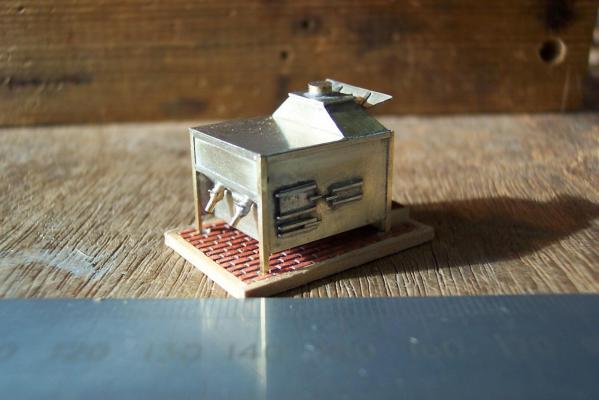
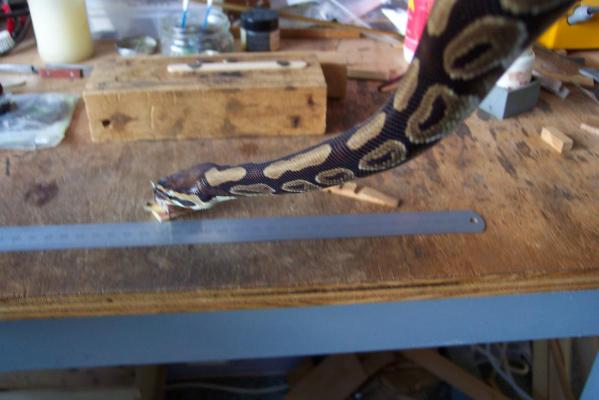
I have started work on the boiler tops. Thus far I have made the top to the actual stove body on which the boiler detail will be added. This consists of a thick piece of N/S that fits between the stove sides, end and back of the grate. To this I have soldered a piece of 0.3mm N/S sheet that overlaps the sides and ends. This gives a solid base to the boiler detail without having thick edges on show. The stove top is not permanently fixed in place yet. I will have this part on the bench to make detailing easier then fix it in place one the detail is complete. The next photo shews the top of the stove temporarily in place. I share my workshop with my youngest son's pet snake. It was time to clean it out. Periodically I photograph it to record its growth which I duly did this time. I was intending to photo it around my wrist but it took an interest in my workbench and made a lunge for it. This was nearly the end of the stove!
-
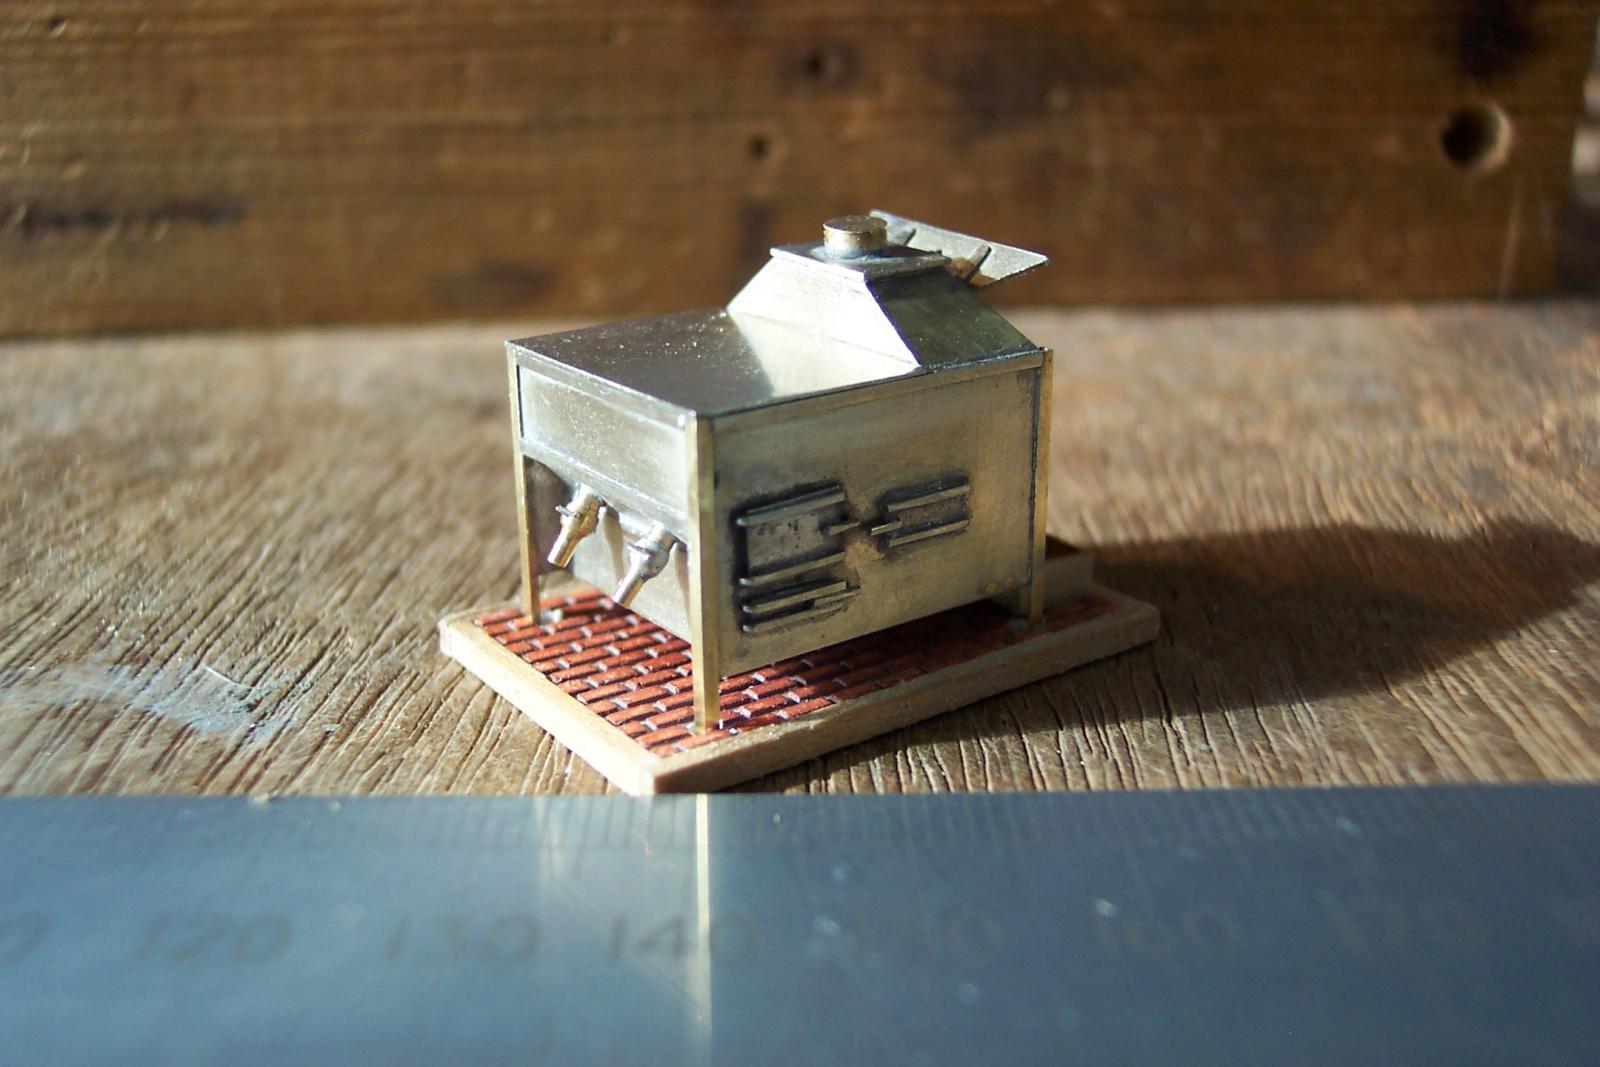
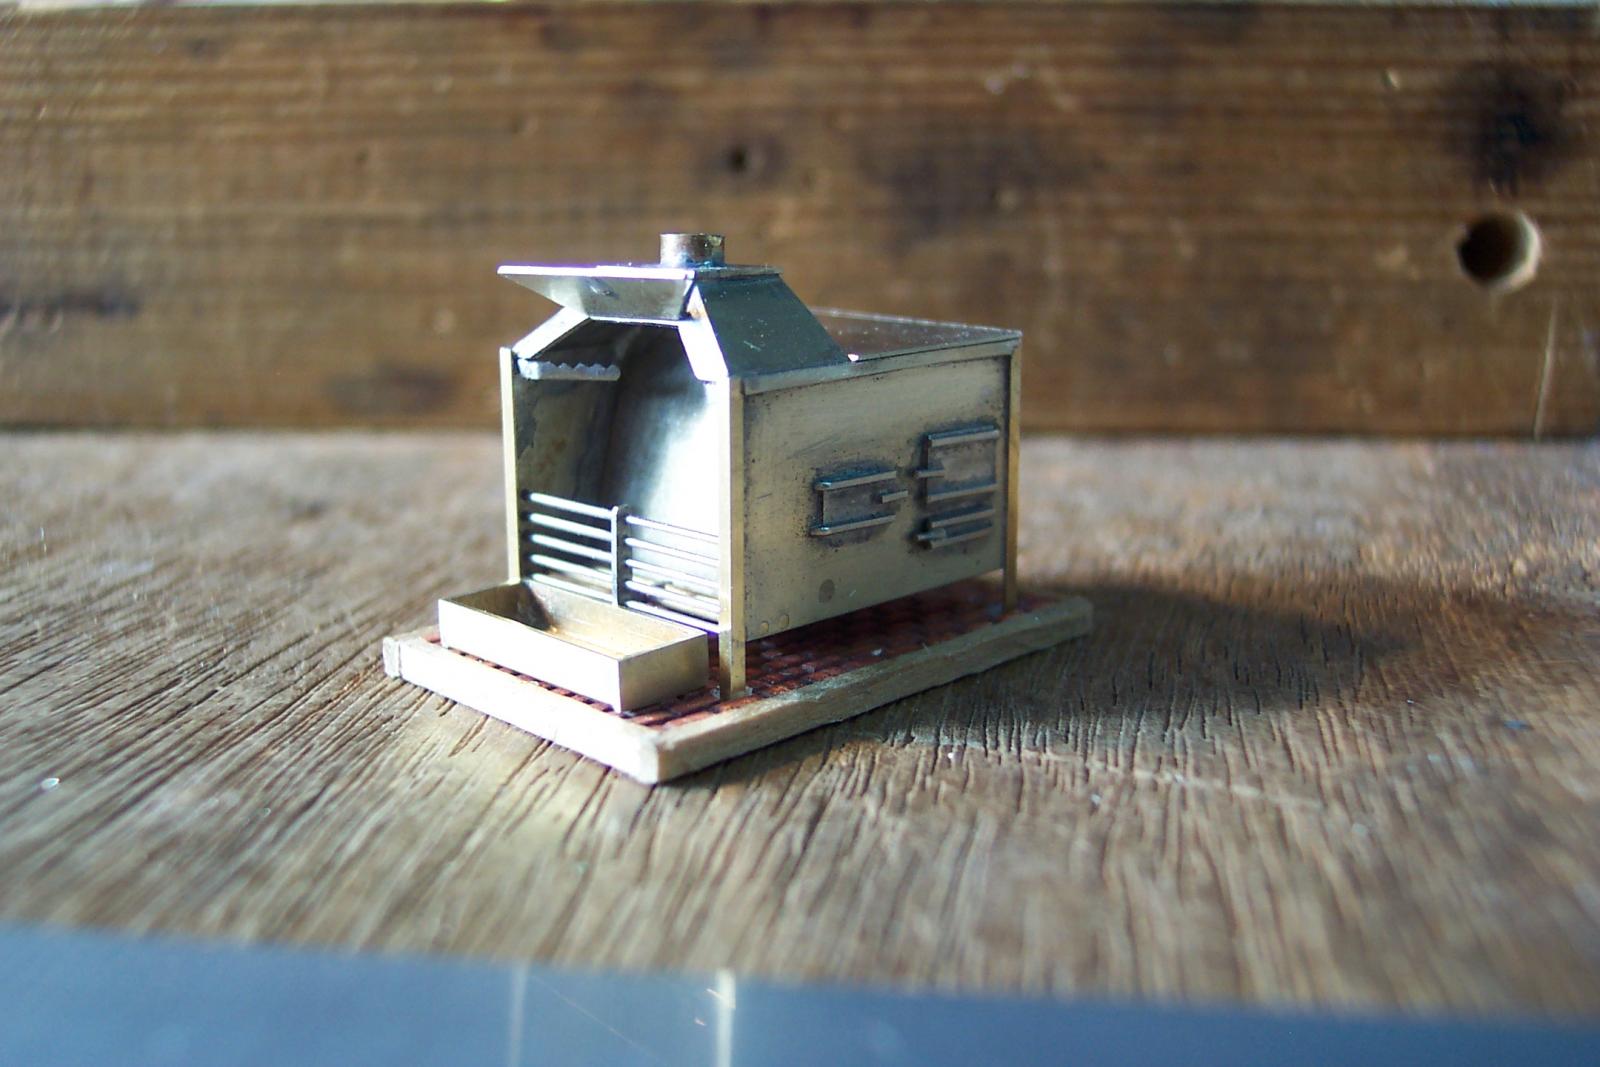
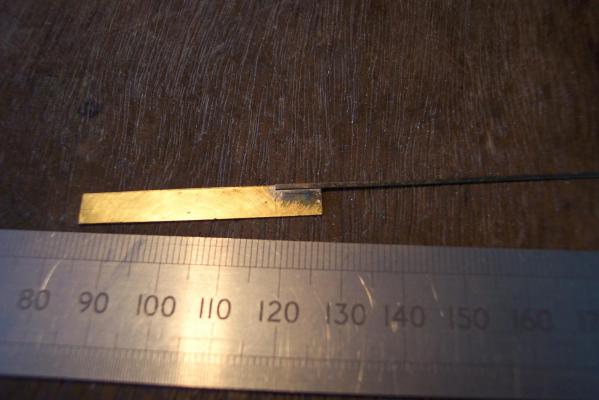
A bit more progress on the stove. I tried embossing the 1mm angle to represent bolt heads but this distorted the angle so that was a non starter. I could have milled some more 1mm angle but made it thicker then use ferric chloride to etch the bolt heads but decided against it this time. The 1mm x 0.3 strip embossed OK but there was no point doing the strip and not the angle. So they are without simulated bolt heads at the moment. I cut four lengths of the 1mm brass angle to represent the corner legs and soldered them on. I made them over long by about 3mm so that they could be "planted" in to holes in the base. In between the angle I soldered on the 1mm x 0.3mm strip as per the plans. The next photo shews these items in place. I have drilled four holes in the brick base and the legs are temporarily fitted in to these. The legs in the middle of each side will be fitted nearer to the end of construction since they will be quite delicate. Also shewn in the picture is one of a pair of pan/kettle supports (the other is out of sight) which supported utensils over the fire. They are very fiddly to hold so to make these I soldered some lengths of 1mm strip either side of a piece of scrap brass. These parts are mirror images of each other so they can filed together as a pair - the other one is on the back of the scrap brass. Having filed them to shape I heated up the scrap tapped it on the bench and off came two ready tinned parts. No extra solder was needed to fix them to the stove - they just needed folding to shape. Again these were items that would have been more easily fitted prior to the grate rails.


-
Piet, It gets better and better. As you say - back to the Unicorn - and stop thinking. Hum - I wonder how she would look with torpedo tubes?
-
Piet, Good to hear that you are still firing on all four cylinders. I spend a lot of time looking at plans rather modelling - in my case, since I haven't been got at by doctors, I put it down to old age and a wandering mind. I am looking forward to the next phase of your build.
-
Piet, I looks more impressive as time goes on. All the best at the Quack's (I mean doctor's).
-
Piet, It never occurred to me that submarines had on board dingys! Nice progress.
-
Intro to Card Models Part VII: Building V108 - Armament
ianmajor replied to ccoyle's topic in Card and Paper Models
Chris, Excellent stuff - thanks. You must have the eyes of the proverbial s*** house rat to be able to work on those tubes.