Old Collingwood
-
Posts
12,104 -
Joined
-
Last visited
Content Type
Profiles
Forums
Gallery
Events
Everything posted by Old Collingwood
-
 Some beauties there Craig - so many options and as complicated as you want to go - or space allows. OC.
 -
Those bands are really making her stand out Denis - lovely work mate. OC.
-
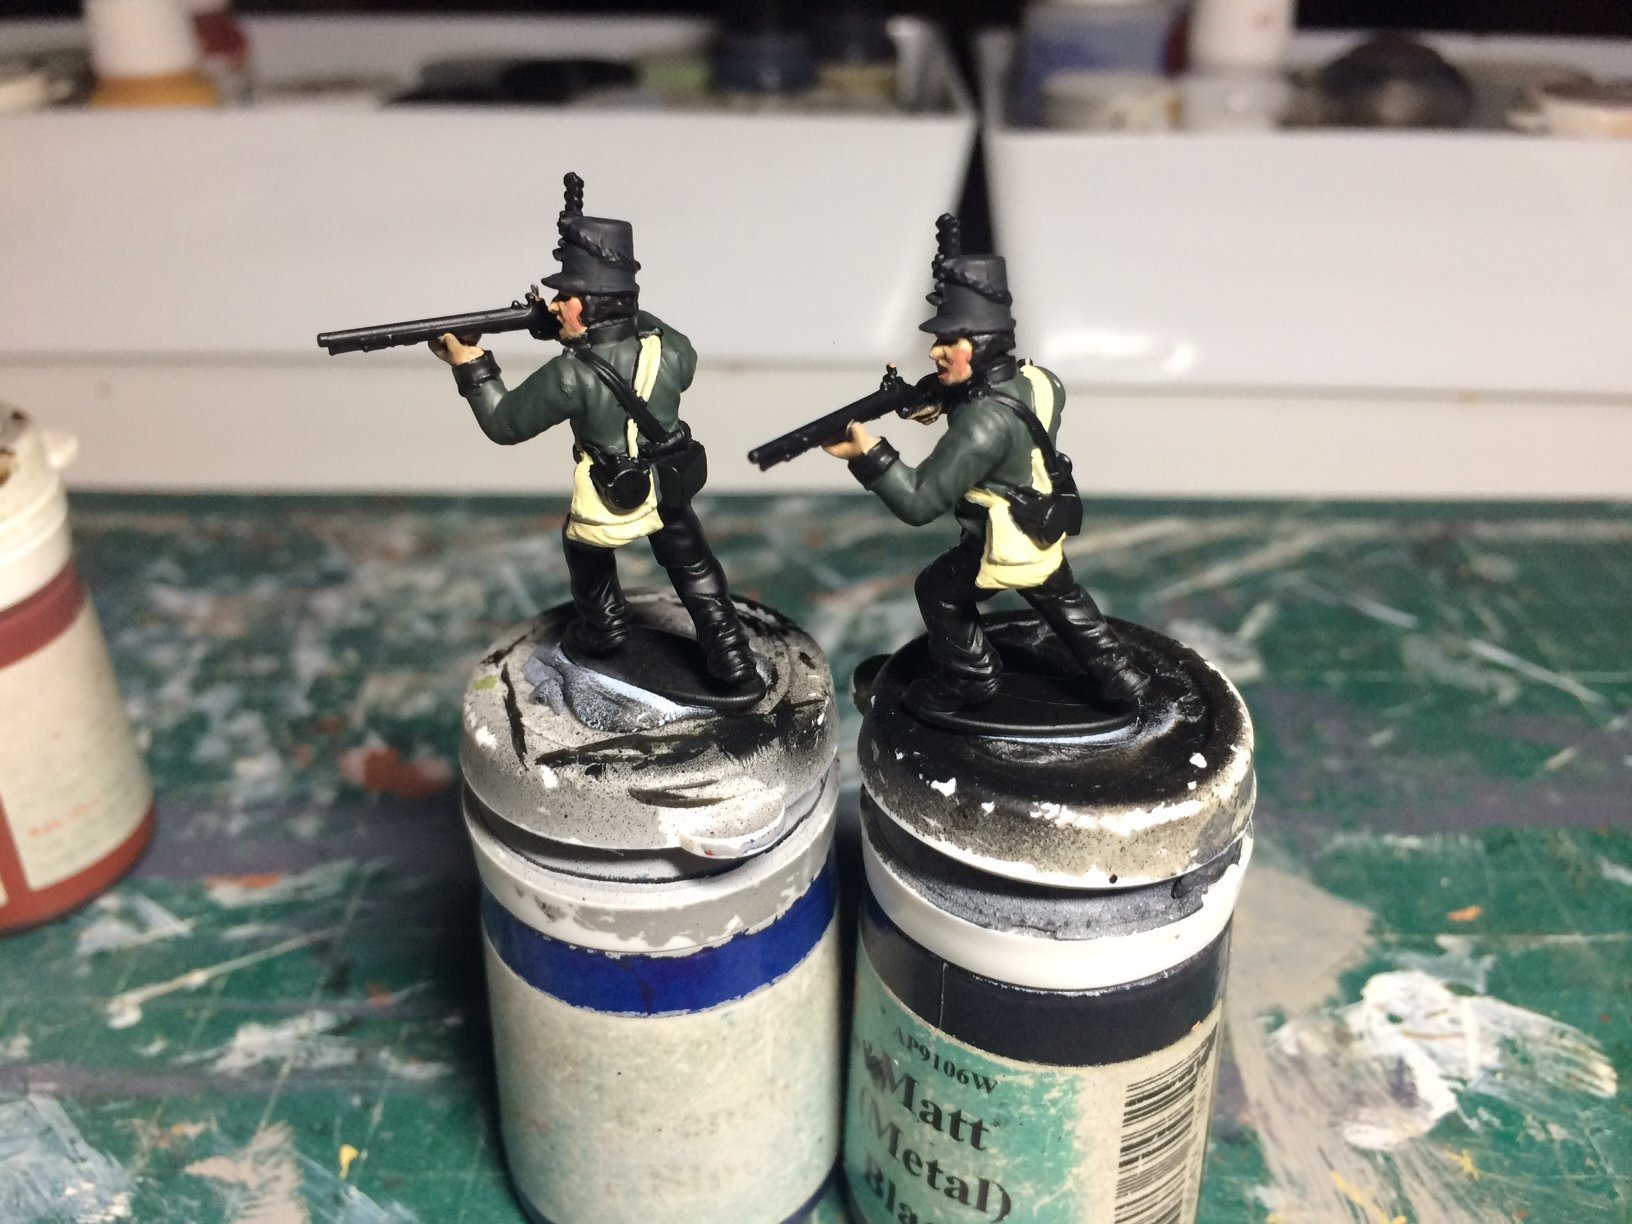
Evening all, I have a bit of progress with my build (needed to keep my mind active) What a way to start the day don't know if I mentioned but my brother had been poorly and had sent 3 months in hospital just after Christmas, ant way this morning we had a phone call to say my brother had gone missing and had not been seen or heard from in nearly Two days, so it was a case of ringing around different people even the police were involved, cut a long story short he was found walking the streets confused and dehydrated - the police took him to the nearest hospital where he still is being checked over. My understanding his he was possibly walking the streets through the night. My life is not dull - that's for certain. So back on with my build - the 2nd KGL had the shading and the slight pink details done to their faces and a wash to the hands, then the hats and Green jackets painted - then the haversacks and belts were painted. OC.

-
Thank you so much Denis - really appreciate you looking in and feedback. OC.
-
Thanks Ken, I was thinking similar but was in a rush to test it out. OC.
-
Thats looking so nice Mark - and looks like a lot of strength all those beams - loving this build mate. OC.
- 505 replies
-
- 4
-

-
- vanguard models
- Sphinx
- (and 1 more)
-
Just a quick observation - the roundhouses at the front are "Heads" for the ranking sailors to use, My understanding is they over hang a good way so anything done (so to speak) can drop straight down into the sea. OC.
-
Sorry to hear of the troubles with the front insignia - I hate it when things like that happen, if you are just not happy could you not just replace up to the front breakwater? but I guess it depends if the section would lift ok without further damage. OC.
-
Thank you Alan, I guess its that dexterity situation of getting used to fine adjutments and knowing how to control the flow. OC.
-
Thank you kindly for explaining all that - currently doing some reading up. OC.
-
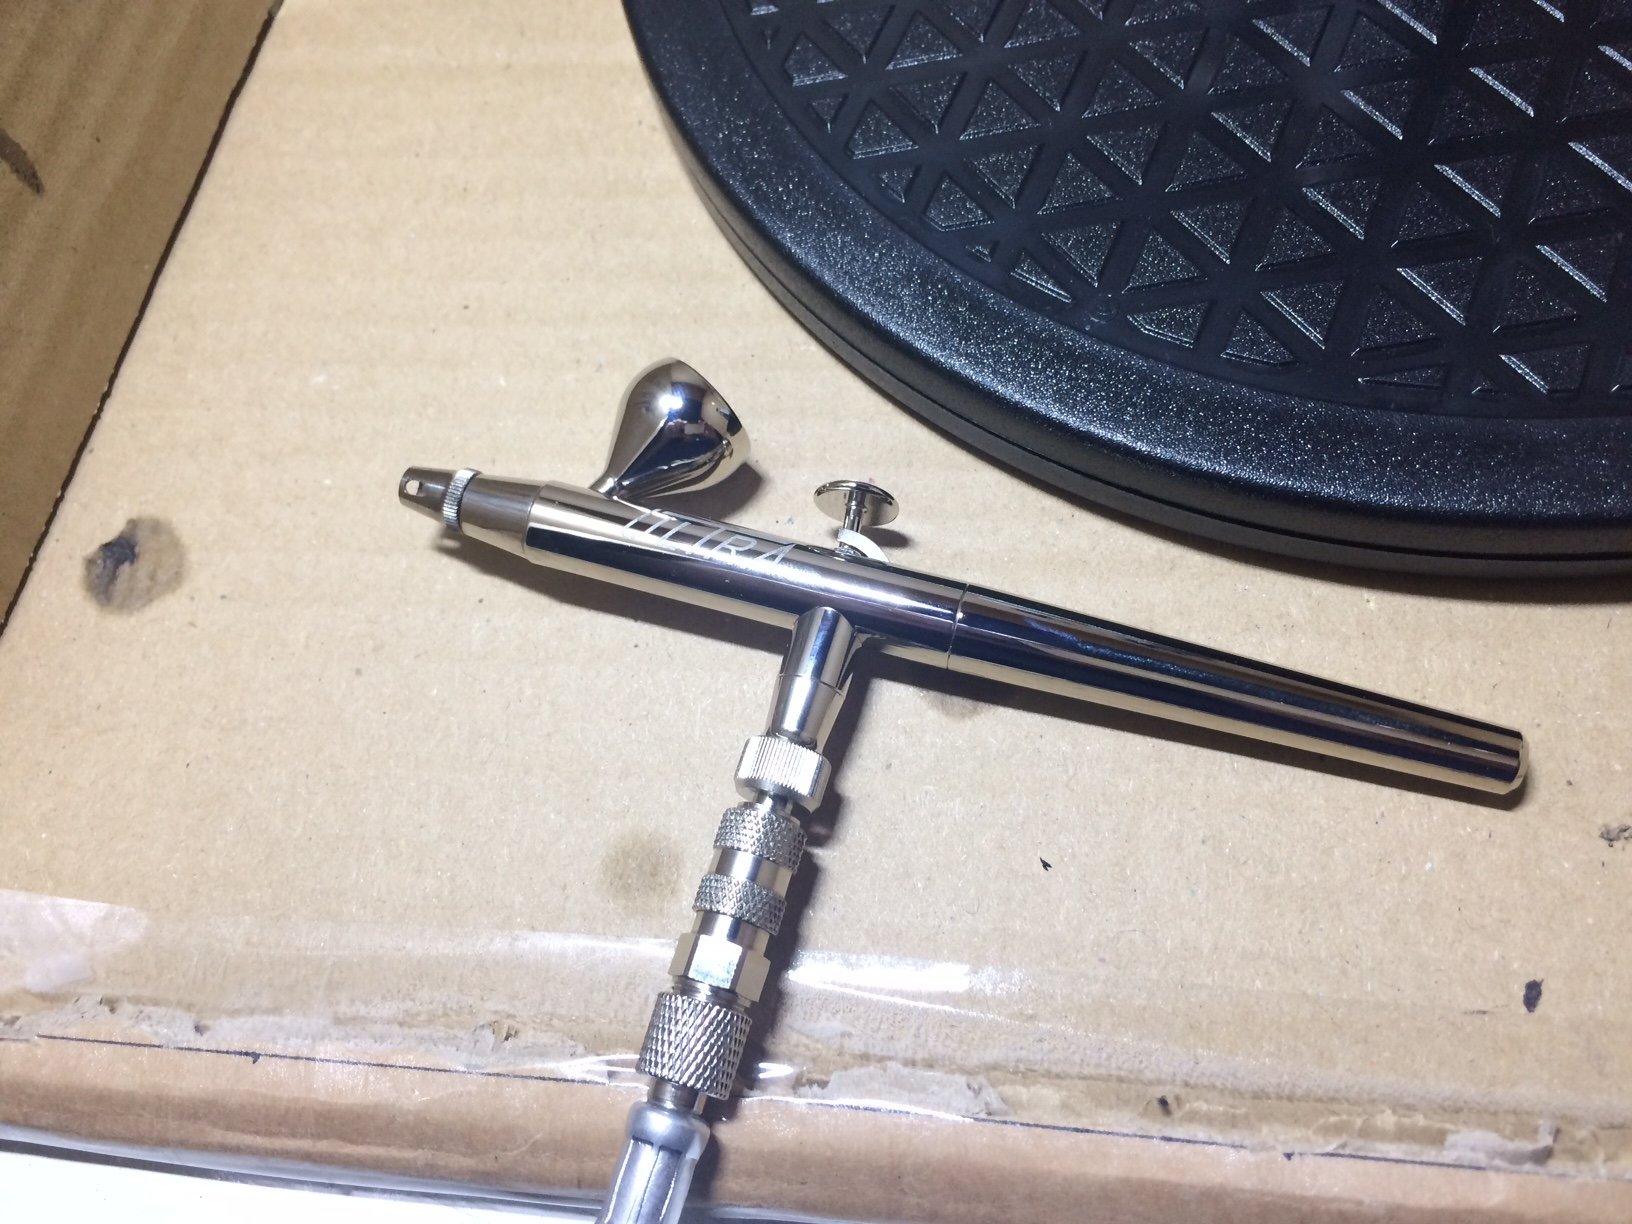
Thank you for the advice Craig (certainly a new experience for me) how about the compressor pressure - I set it to 1.5bar, is that about right for most acrylic paints used with it? OC.
-
Thank you kindly Edward. OC.
-
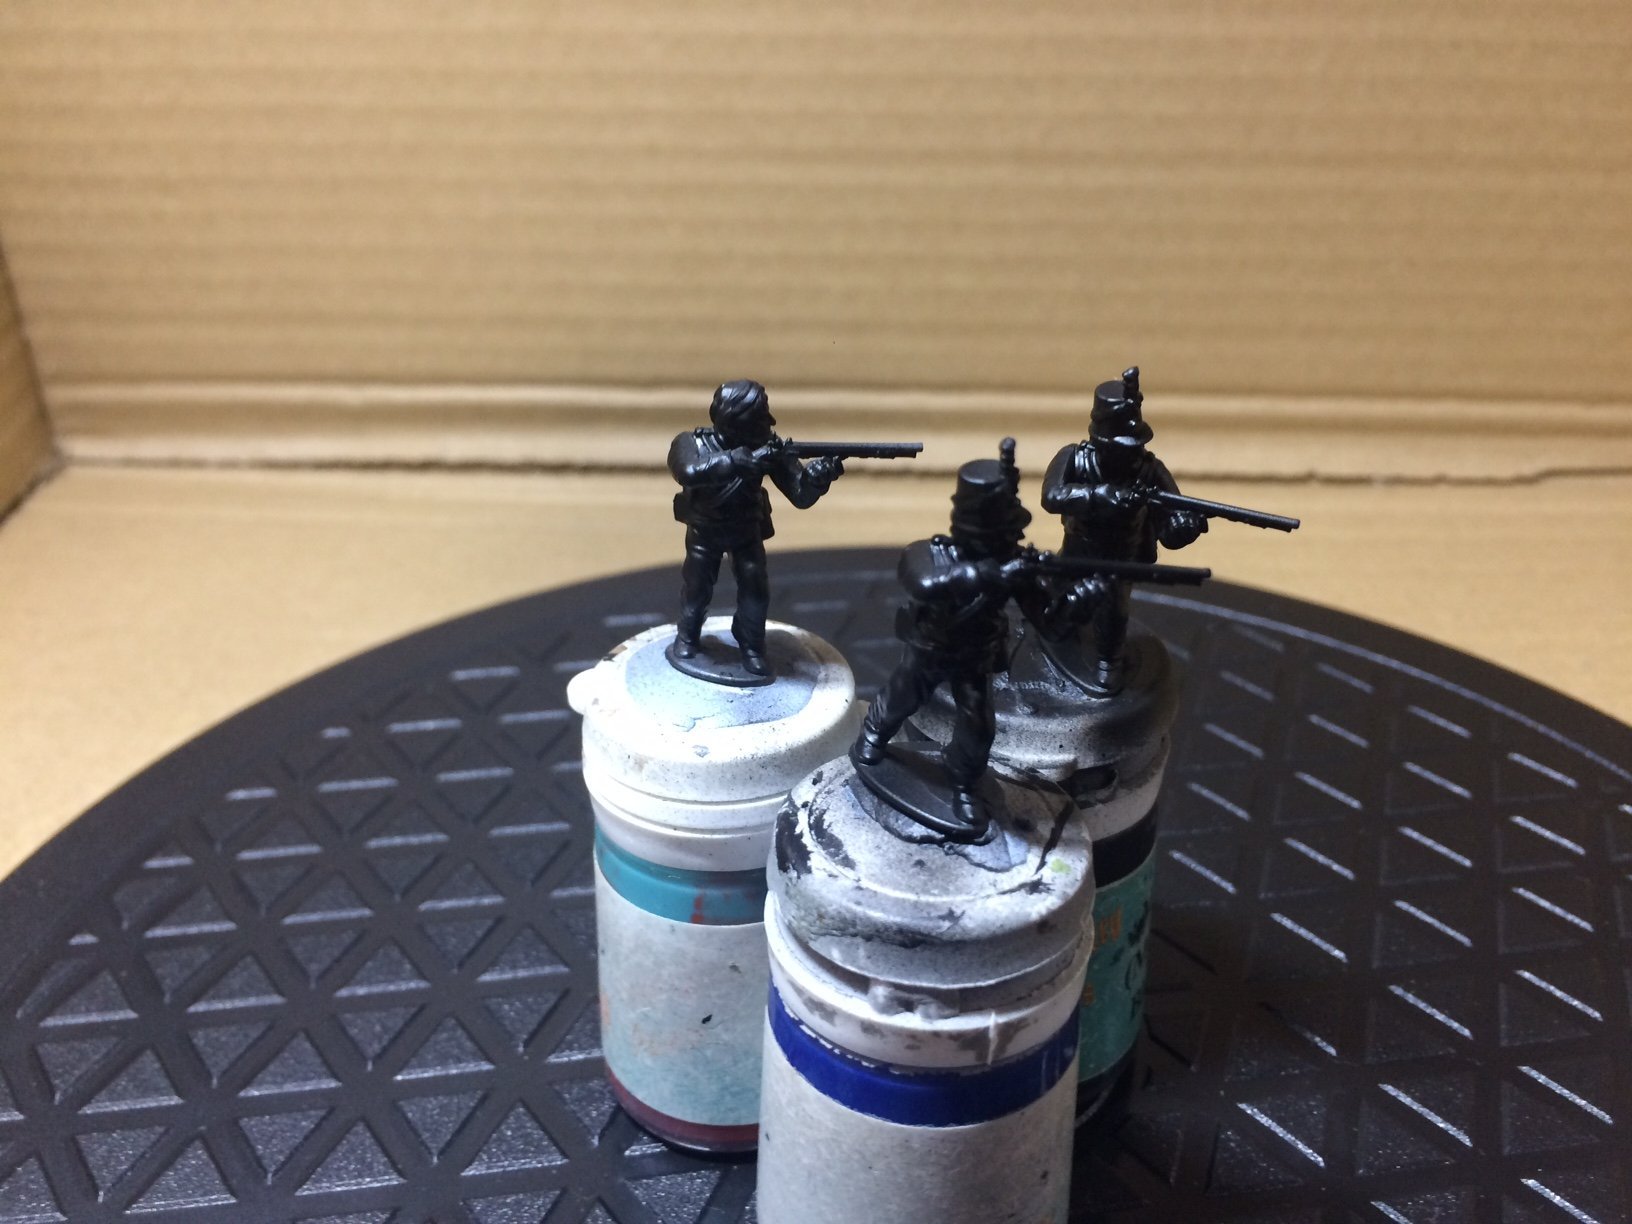
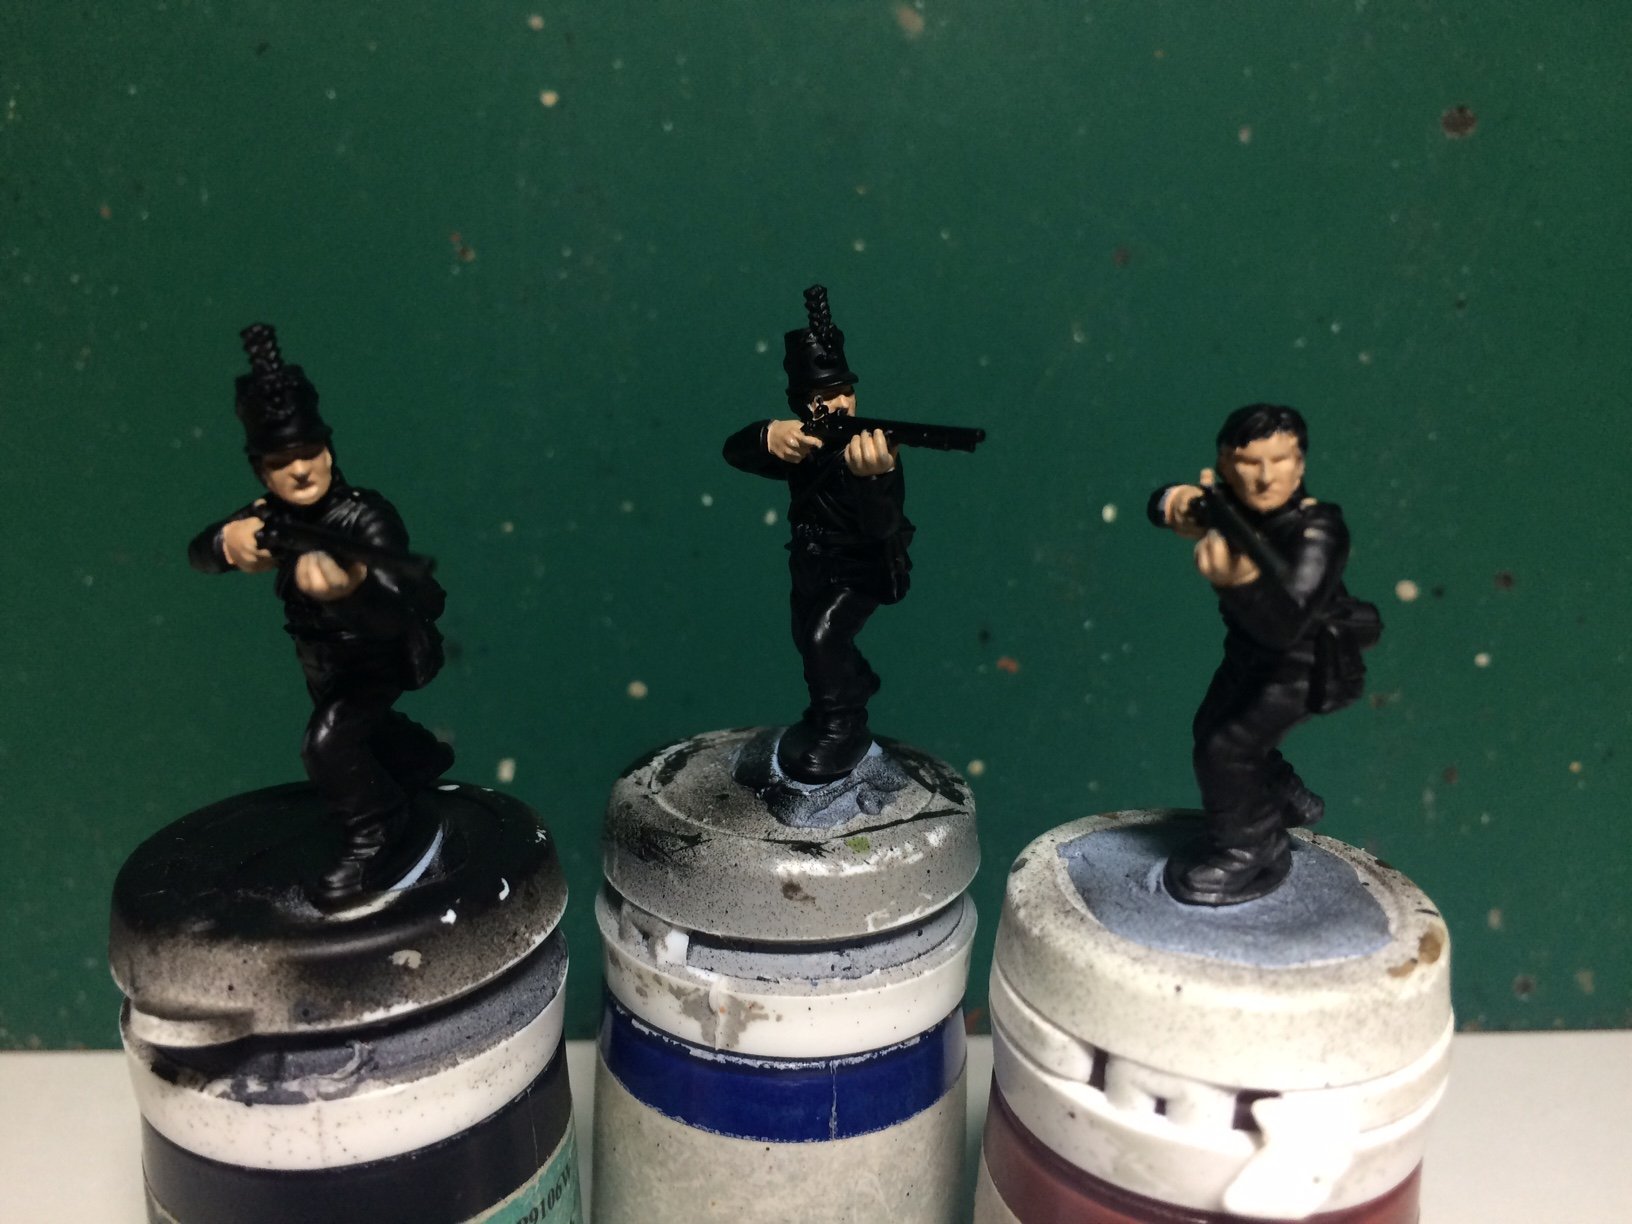
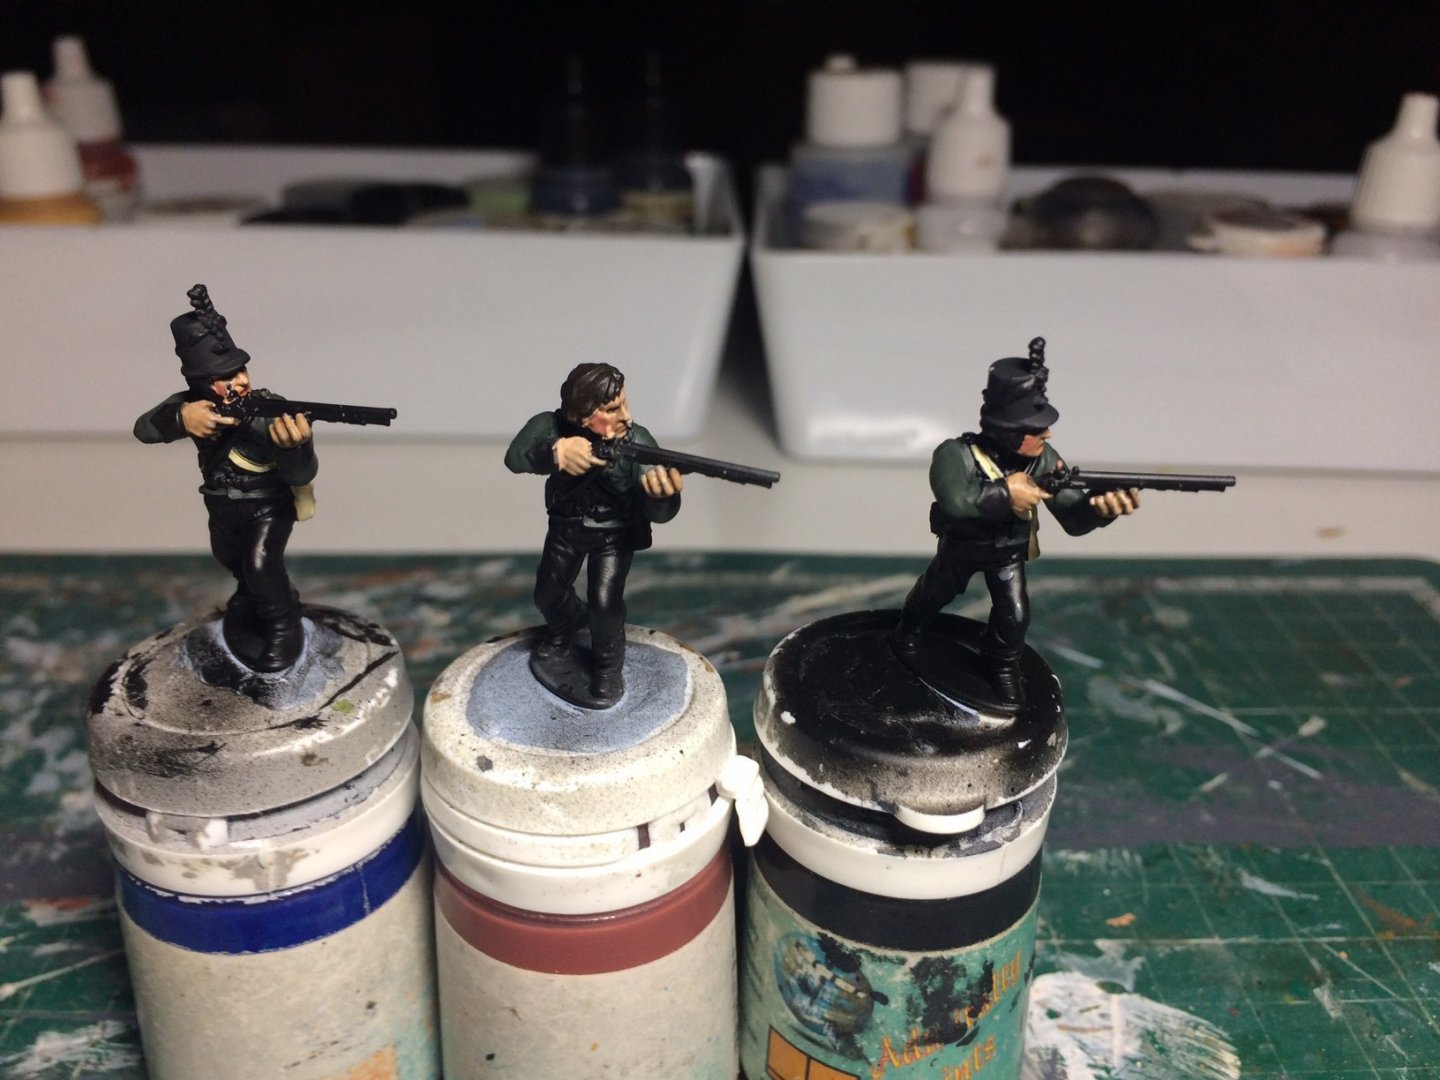
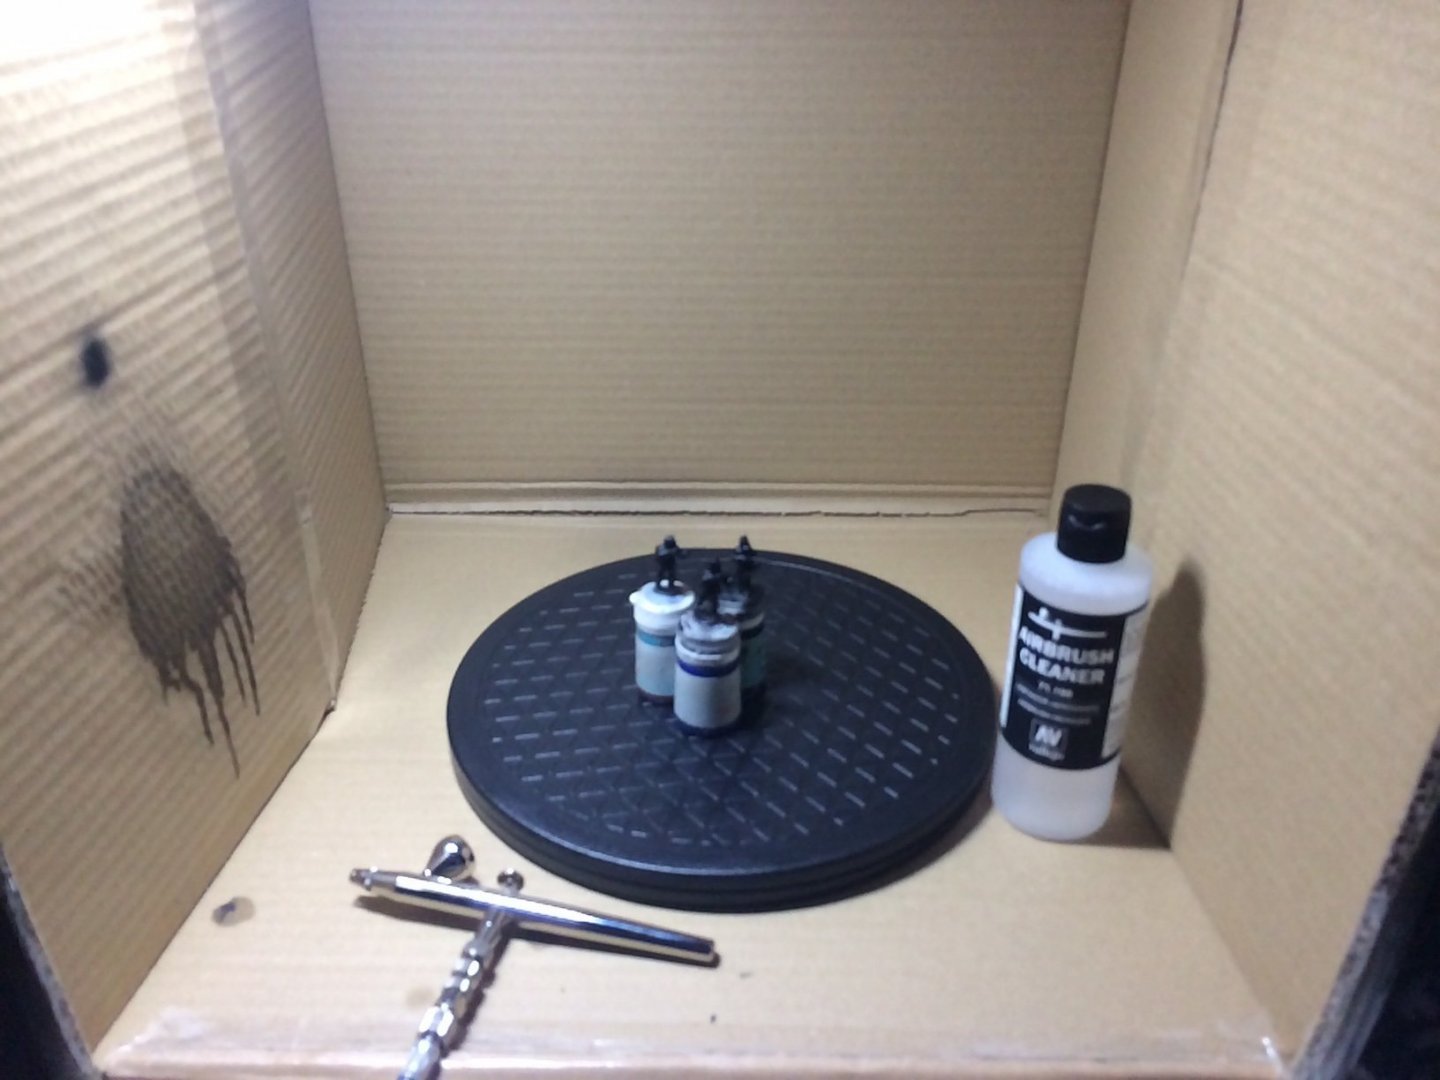
Evening all, Back on doing some figures - as I was going to try out my airbrush using the vallejo acrylic primer, my first job was to make my ultra expensive cardboard box spray booth, I went the technical route and used celotape and a sharp blade - so I cut a part roof out and frontage. I took my compressor out of its box - same with my airbrush (reminded me of a fancy fountain pan) I unwraped the airline conected one end to the compressor and went to attach the other to the airbrush "where is the coupler to screw in" "ah sussed it" found it with the spare filter bowl - then "hey pressto" it just pushes on with a click. I adjusted the pressure to aboit 1.5 turned it on "wow its quiet" I poored a bit of un diluted vallejo primer (next time perhaps it needs a bit of diluting)? as it dried very quick in the airbrush bowl (should I have stired it while using it)? anyway the trigger has a double action - down and front/back it was a bit fiddly to find a sweet spot so I just pressed it down and mainly fully back and sprayed away on Three of my KGL figures. No worries even first attempt the primer went on smooth and a nice thin layer - "very impressed". So I used my airbrush cleaner and blasted it thorugh several times till all the primer had gone and it was fully clean, carried on just blowing ar through it then to make sure it was clean. Anyway here is the result and my set up including my first brushed on pink layers for faces and hands - stage one of the skin laywers. OC.


-
Hey Mark, thats soon gone from a bunch of frames - nicely done my friend. OC.
- 505 replies
-
- 5
-
-
- vanguard models
- Sphinx
- (and 1 more)
-
Please show us more of your fine work. OC.
-
Like a flight deck of ghost planes, fiddly little things mate - when the paint is on them I bet it will make all the difference. OC.
-
Alan a couple of tricks (not sure if you have tried them already)? with the railings to get curves try rolling the handle of a paintbrush roughly the size you want over the PE railing, this generaly forms a curve, also with the Blue Tac - use the blob of Blue Tac rub it over where the residue is as it normaly peels it away onto itself. Looking good my friend. OC.
-
Looking forward to this - I know how difficult it can be to re-work models. OC.
-
Thank you Craig, I think that is a rather generous compliment - but thank you. OC.
-
The guy firing from the table is this guy - https://projecthougoumont.com/rifleman-friedrich-lindau-2nd-light-battalion-kgl/ OC.
-
Thank you so much Alan. OC.
-
I love it - so complimants the fine build. OC.