

Karleop
-
Posts
500 -
Joined
-
Last visited
Content Type
Profiles
Forums
Gallery
Events
Posts posted by Karleop
-
-
Hola :
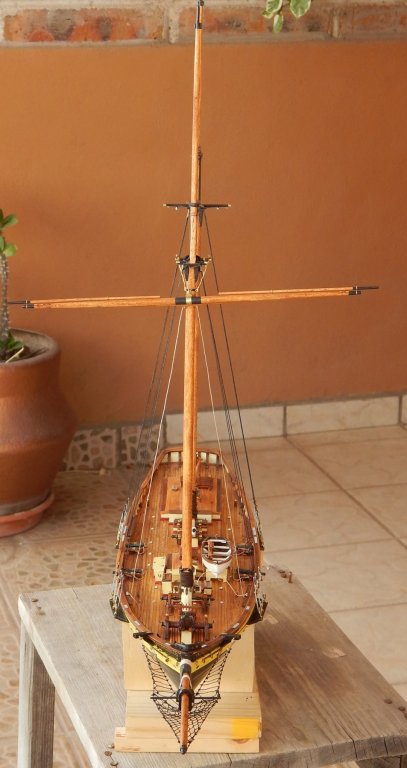
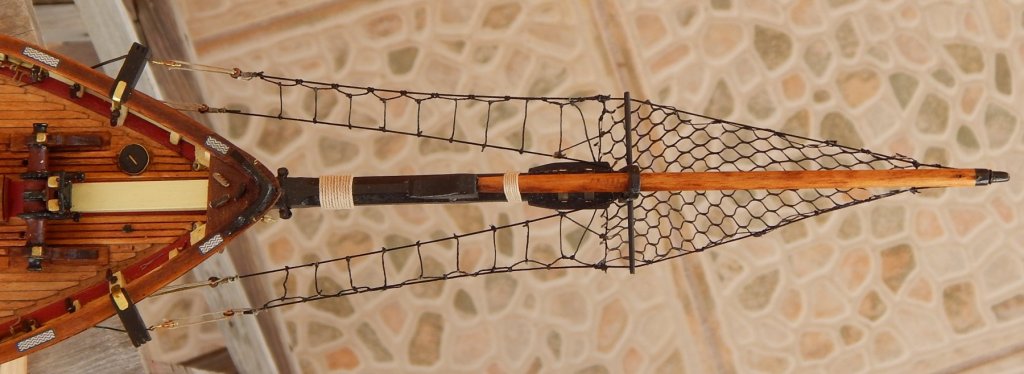
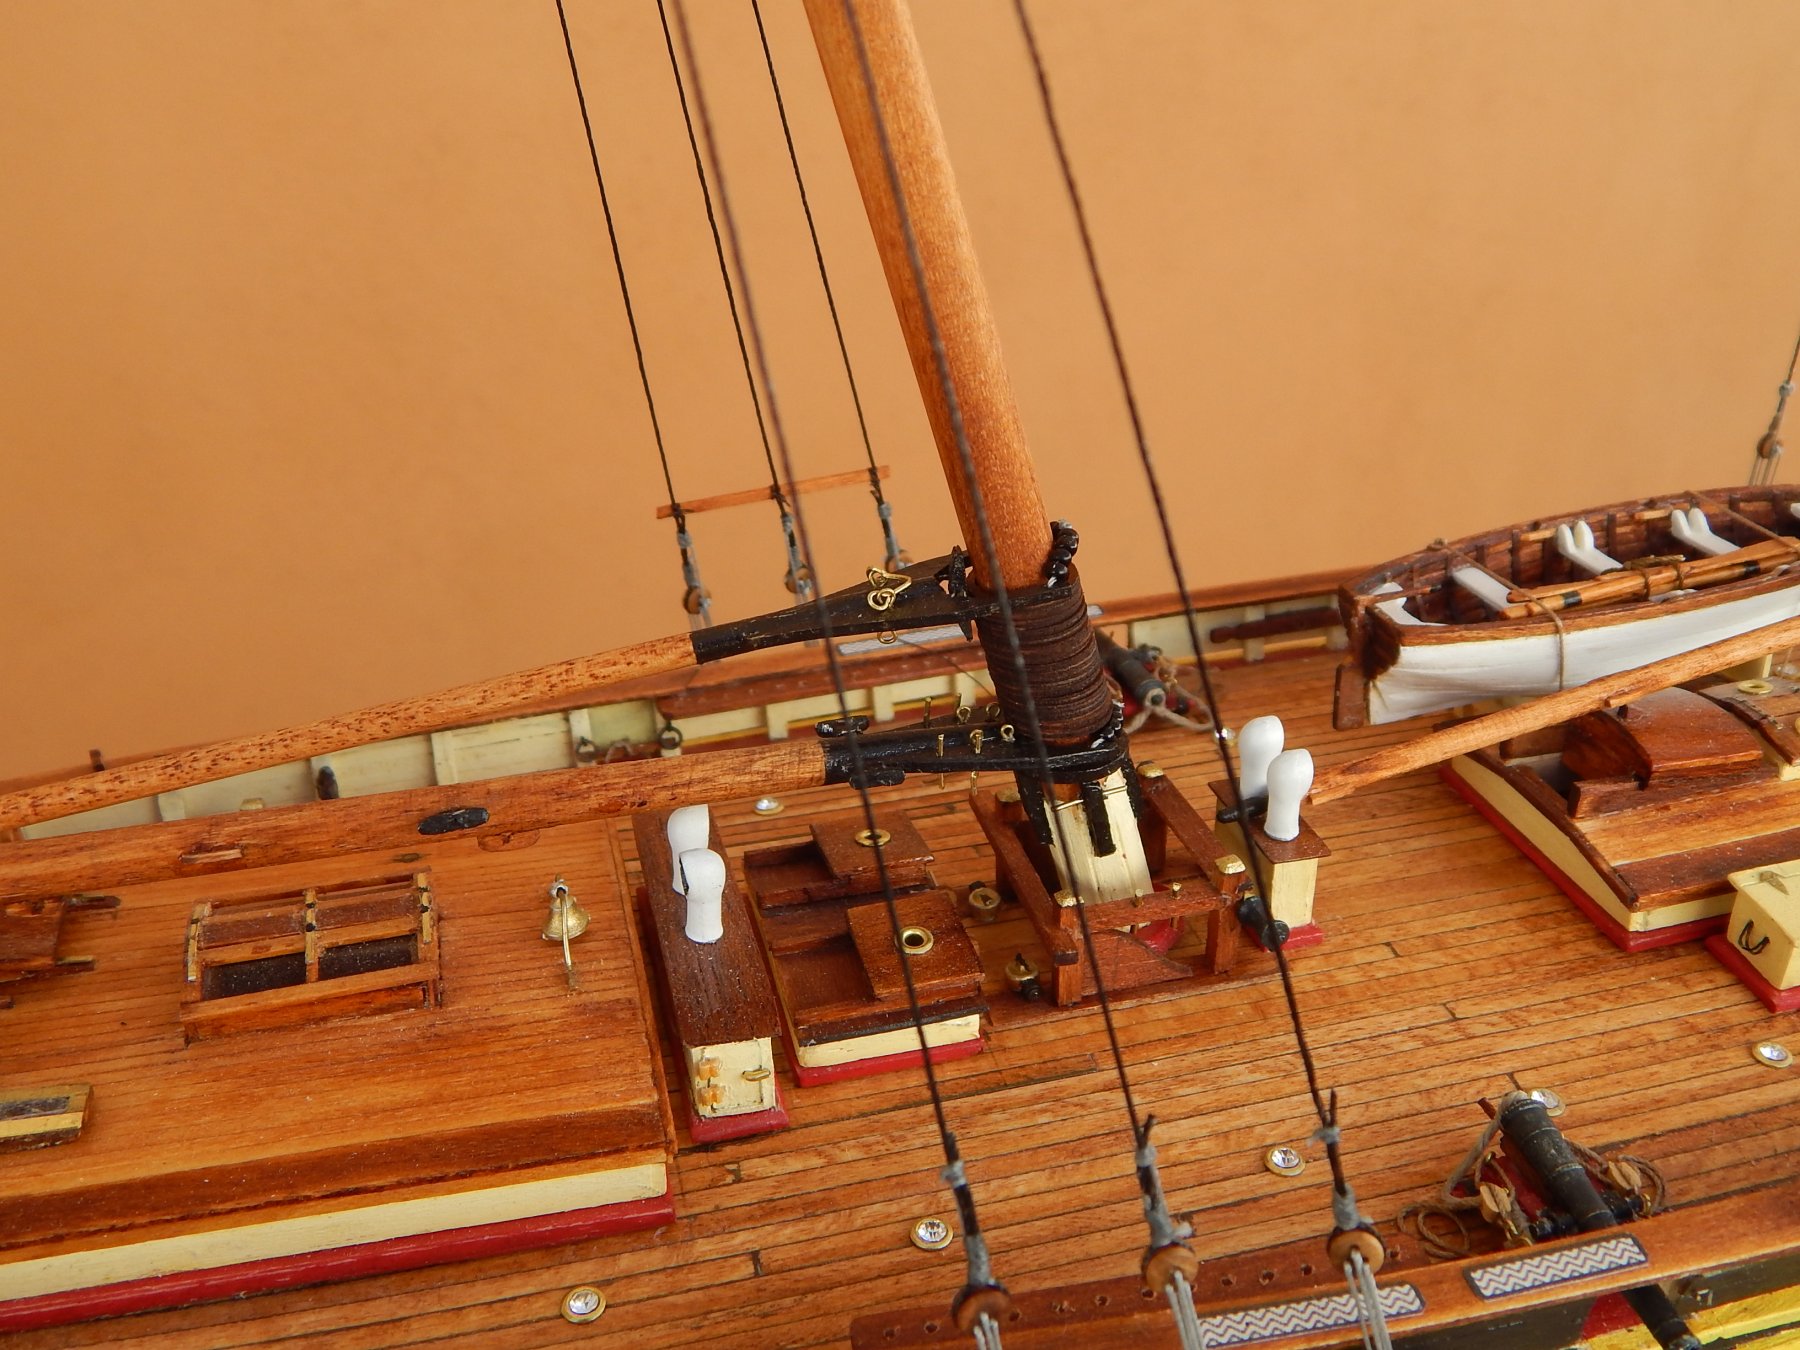
After almost 3 weeks I advanced a little:
1: fixing the masts and topmasts in their places taking care on the aligment
2: Installing the fore lower yard
3: Placing the booms on the masts
4: Begin the shrouds rigging and,
5: Initiate the bowsprit rigging including the protection net
Saludos, Karl


-
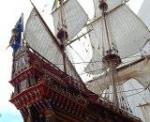
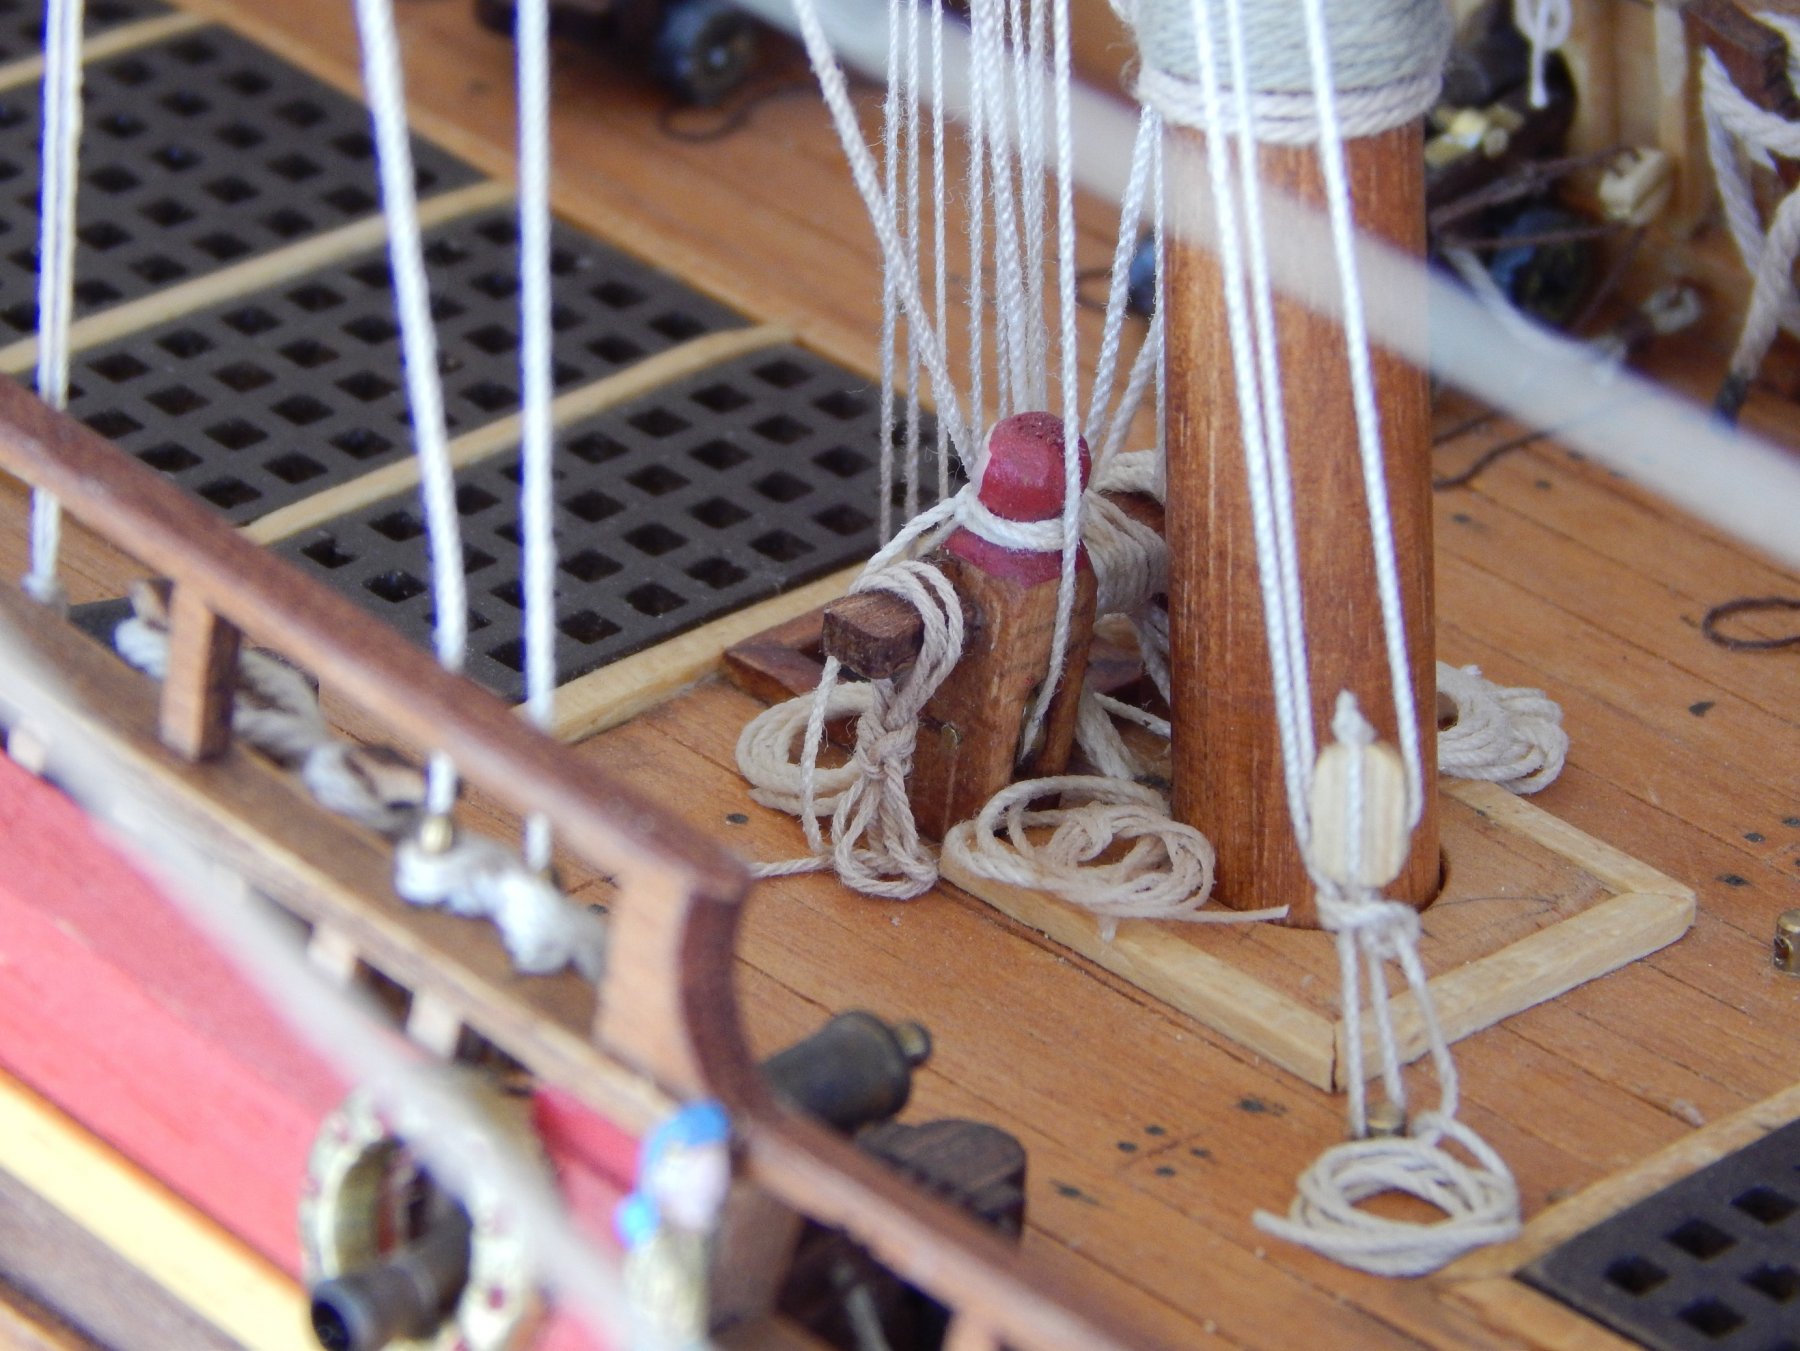
Hola Michael:
As in the picture of the museum in BB Vasa instructions there are not holes in the cross bits and the lines are only coiled on the cross. If you already made the new holes it will easy to omit them. Here a picture of my Vasa:
Saludos, Karl

- EJ_L, md1400cs, baskerbosse and 7 others
-
 10
10
-
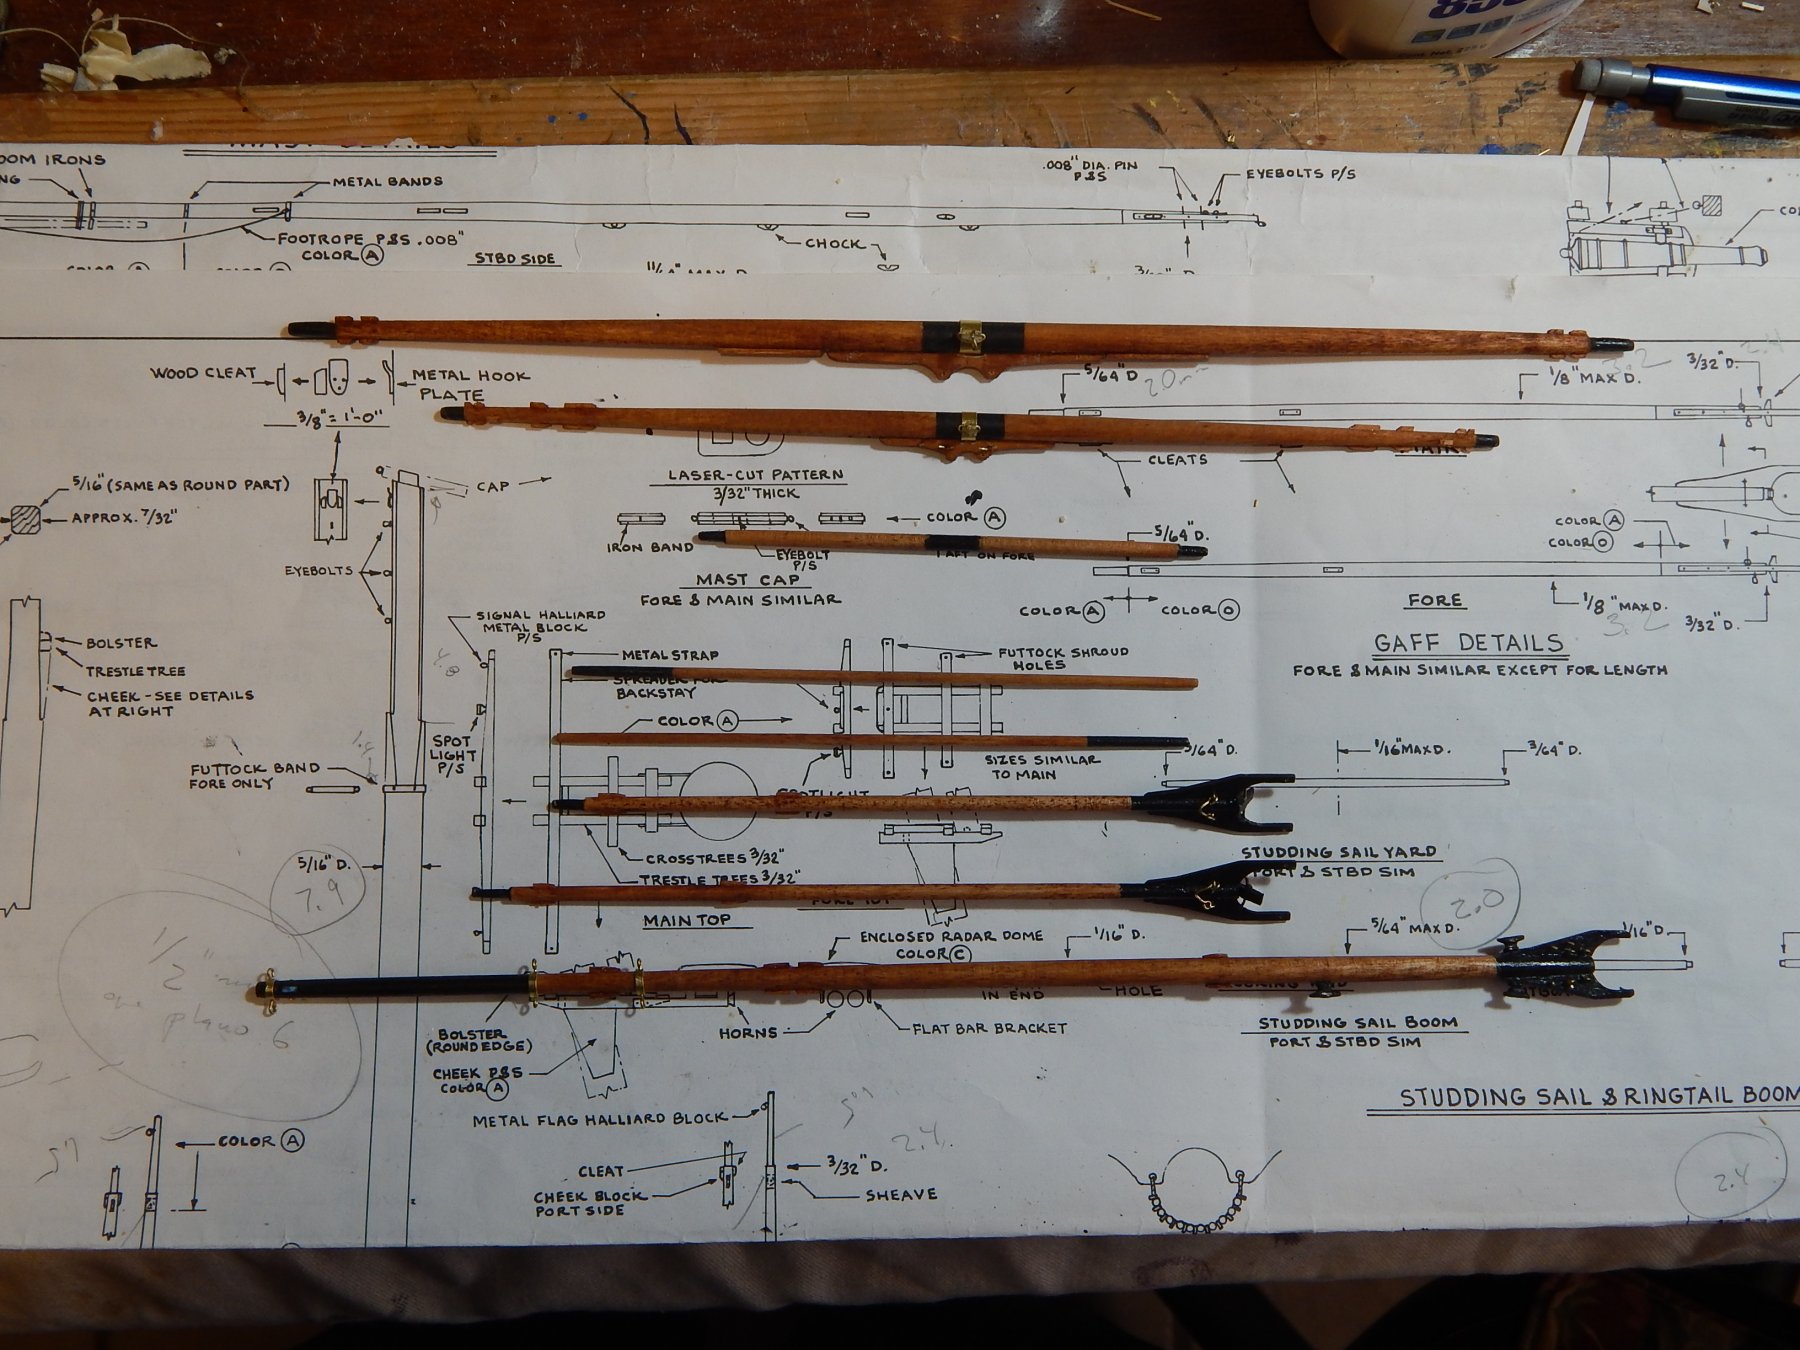
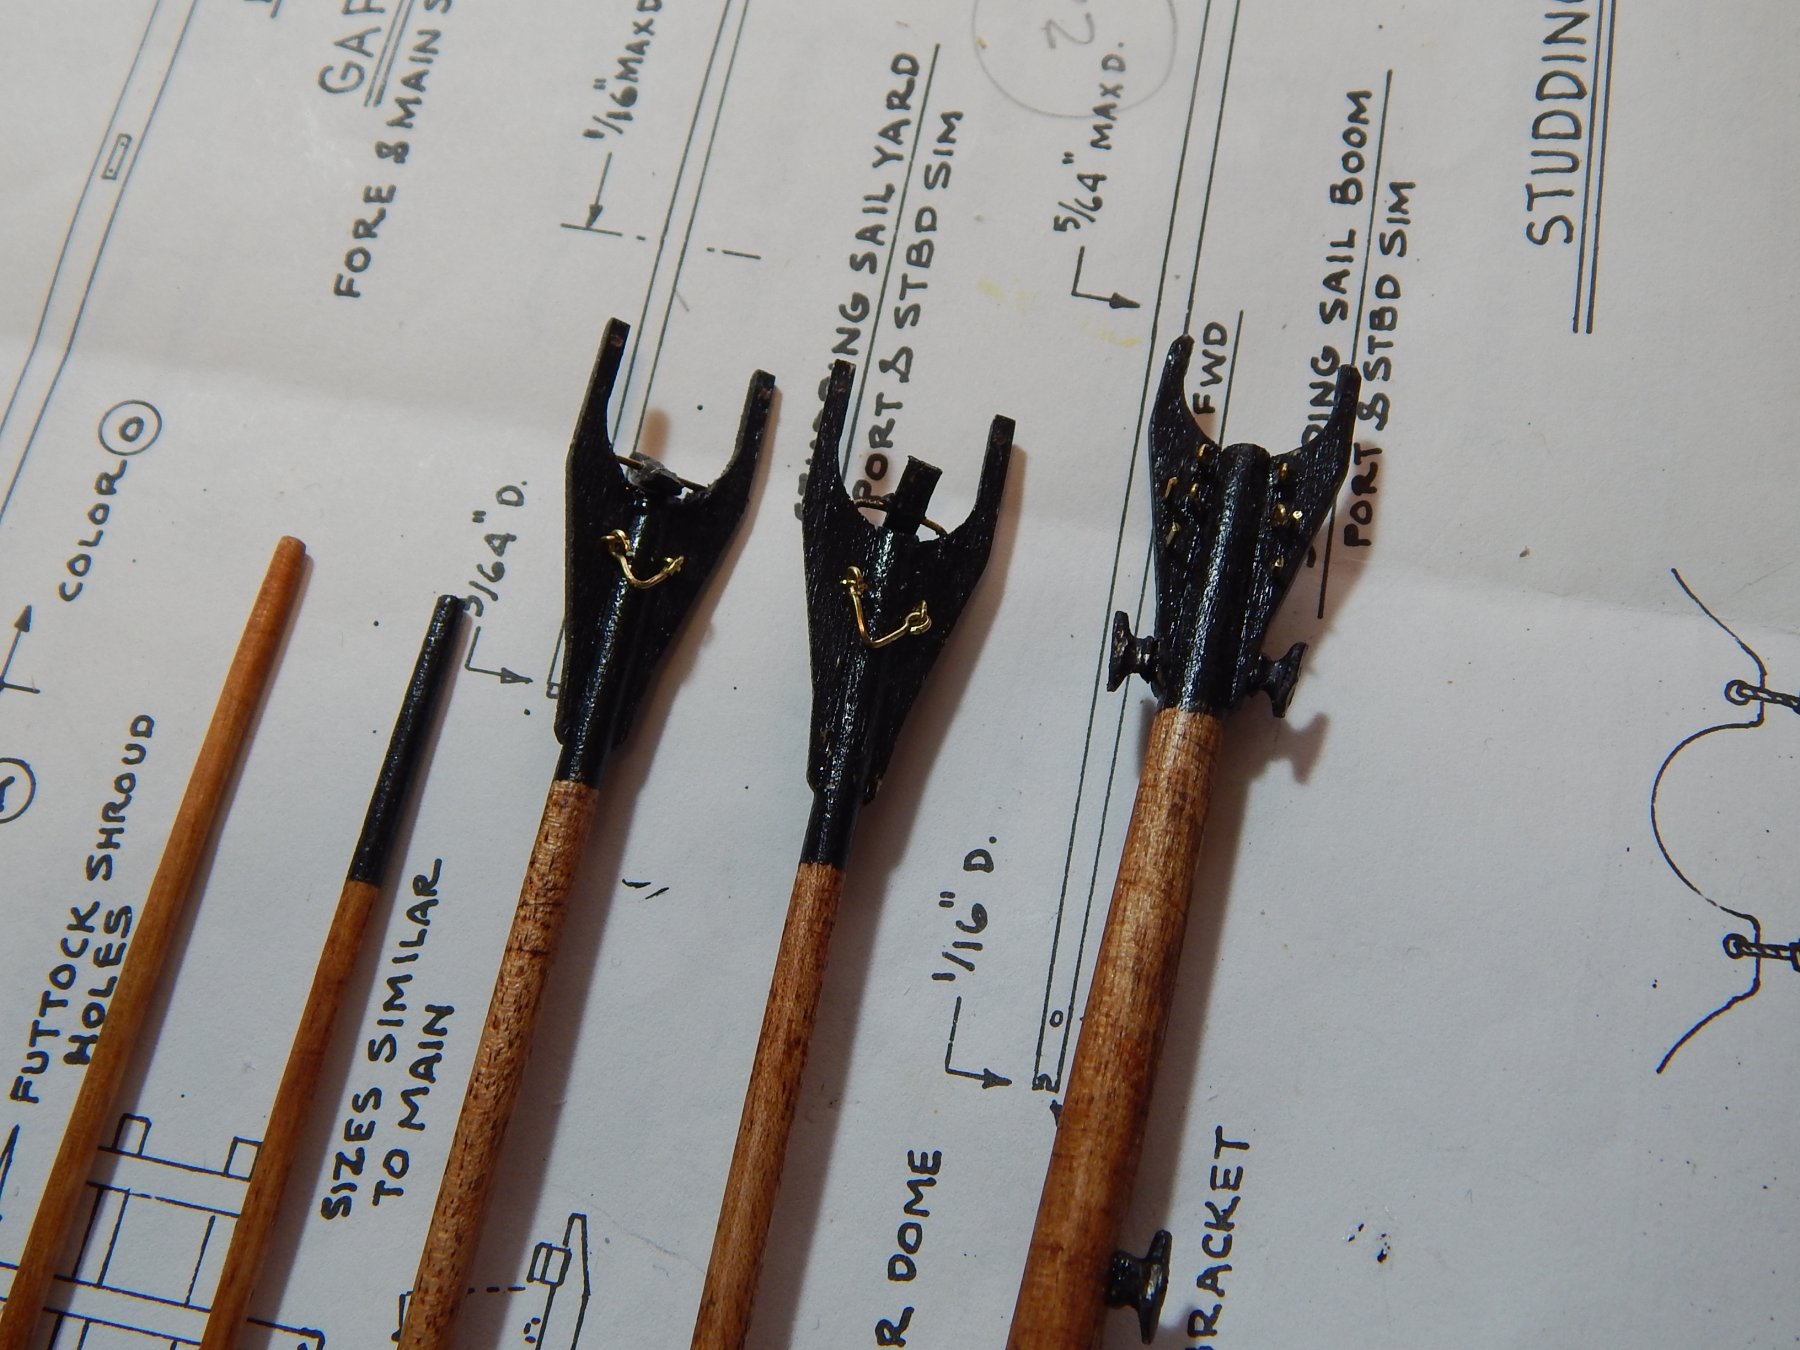
Hola:
Following with booms, yards and Gaffs. In some of these cases the instructions are not so clear and some of the materials needed are not provided (for example the "iron rings") and must to find out how to do them.
Now I must decide if include sails or not and in this case if if they will be furled or not

Saludos, Karl

-
-
Hola Michael:
very nice advances and don't worry about the grrrrrrrrrrs always happens and in your case are minor.
Saludos, Karl
- EJ_L and CaptainSteve
-
2
-
-
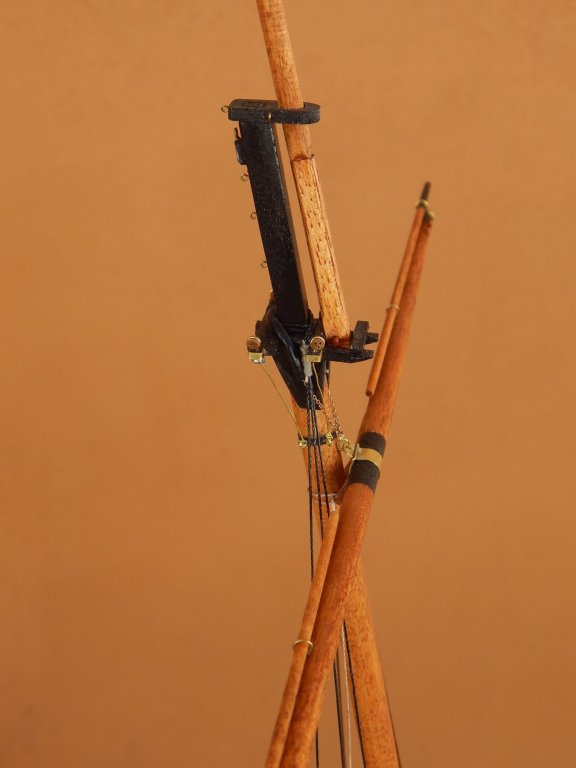
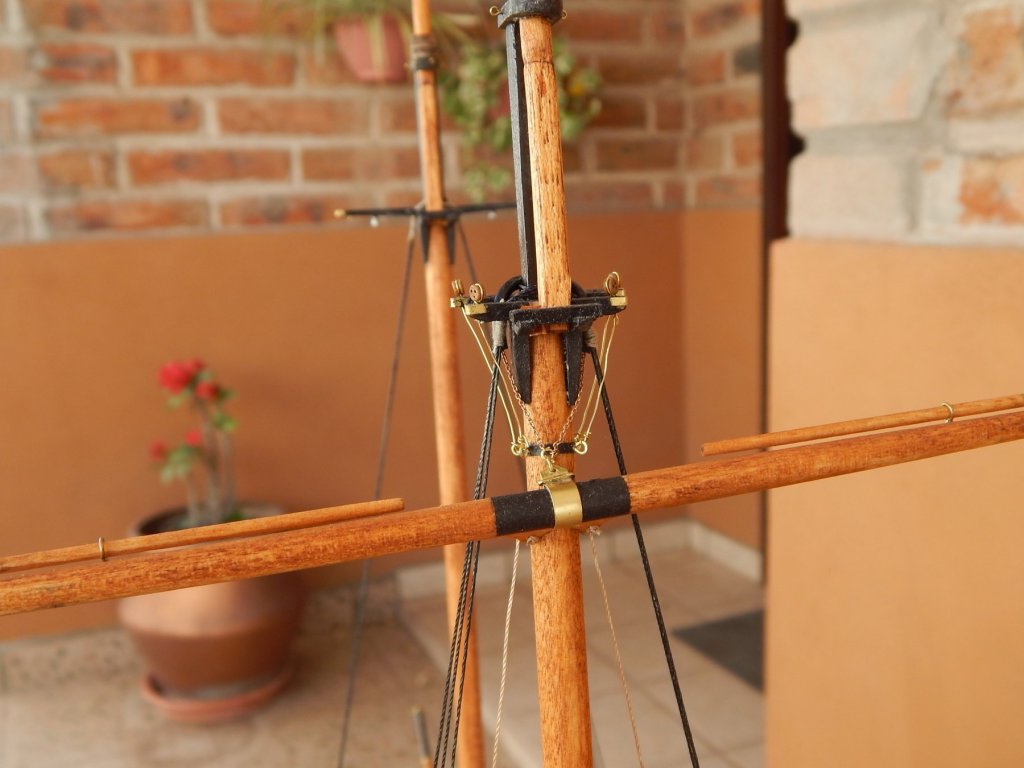
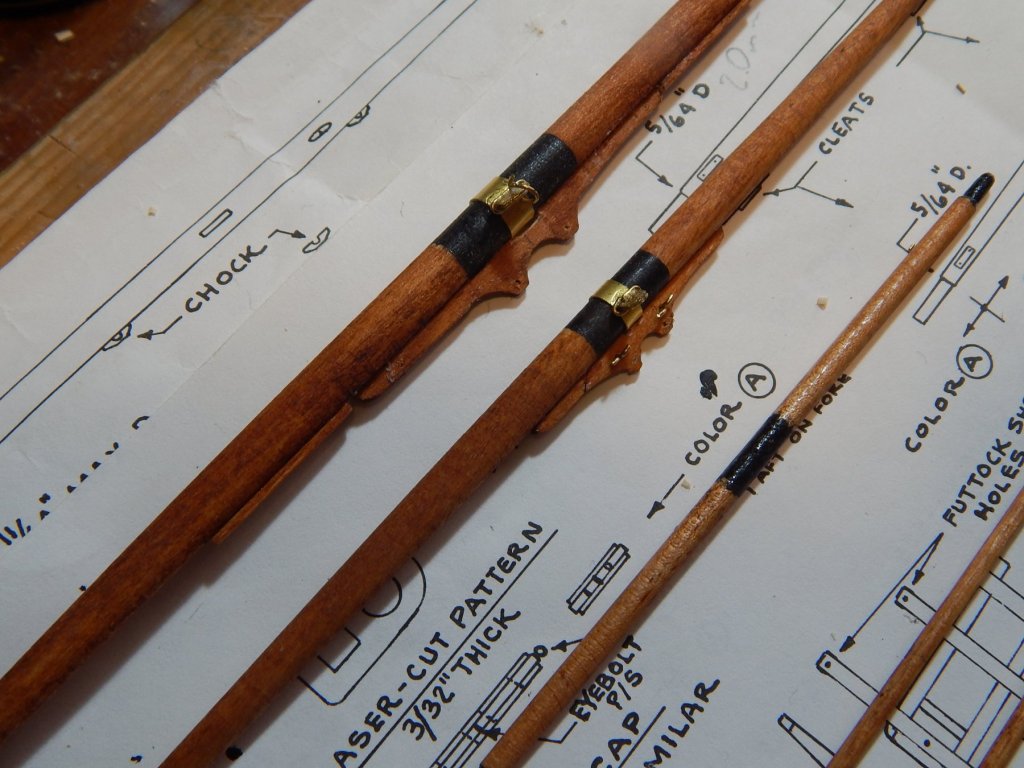
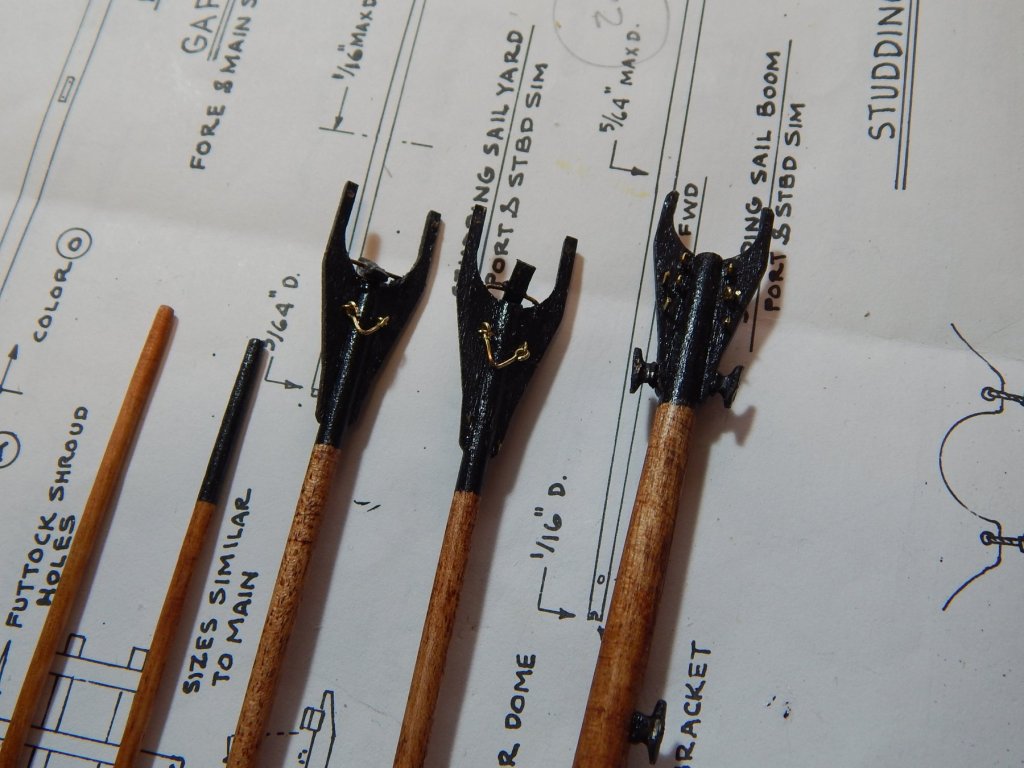
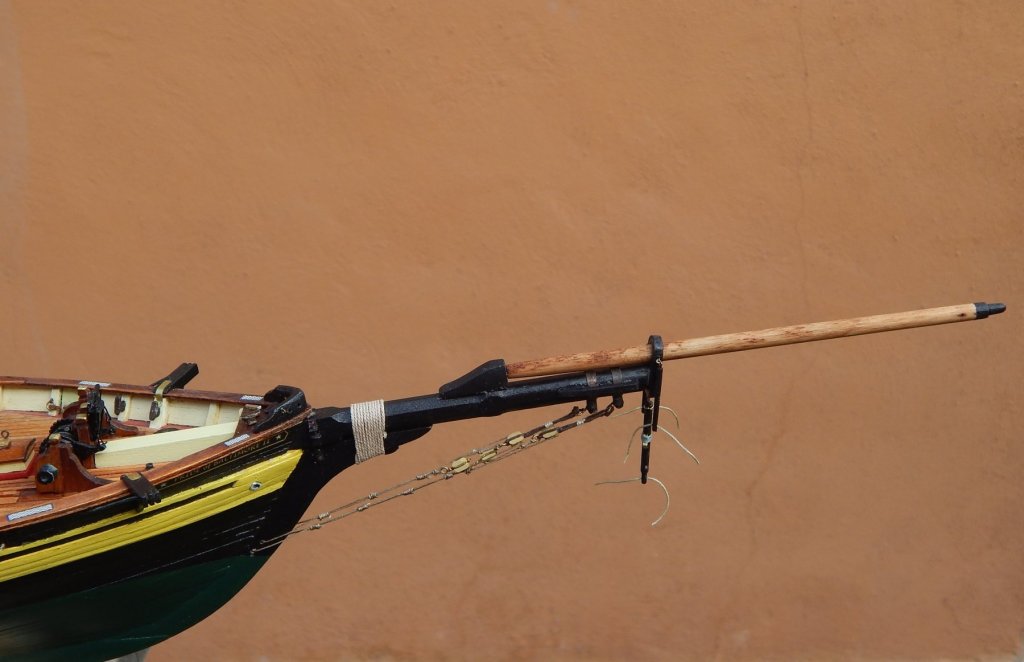
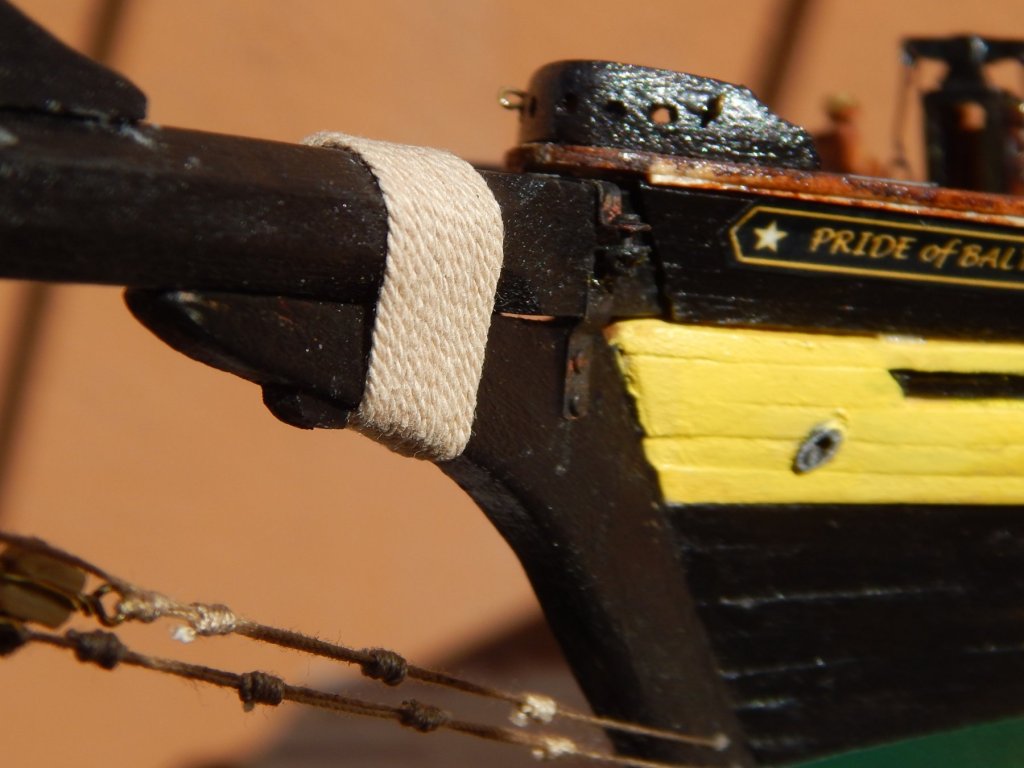
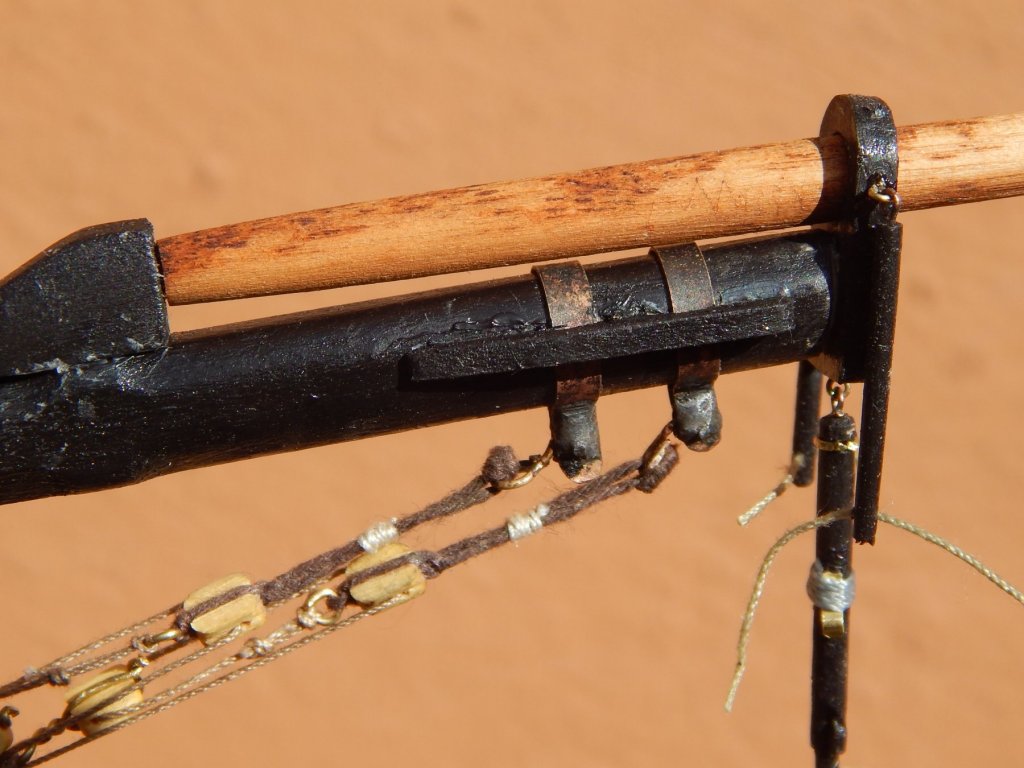
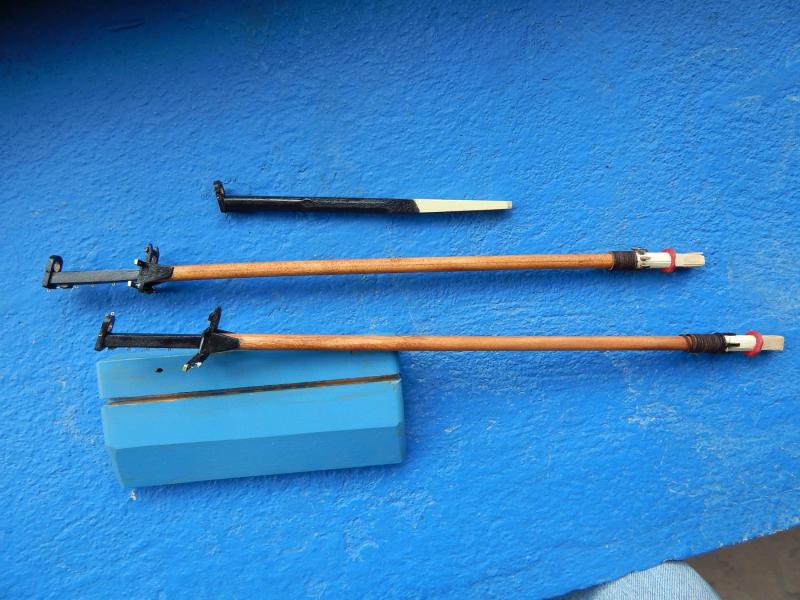
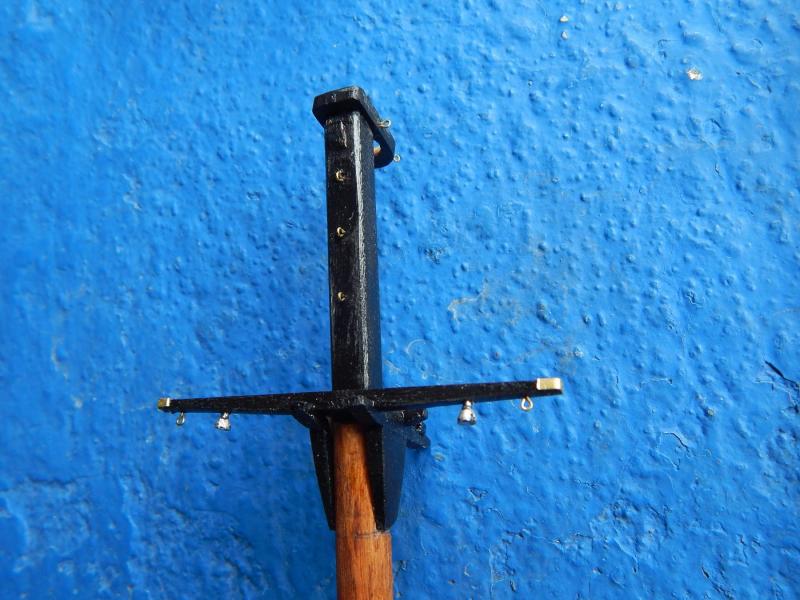
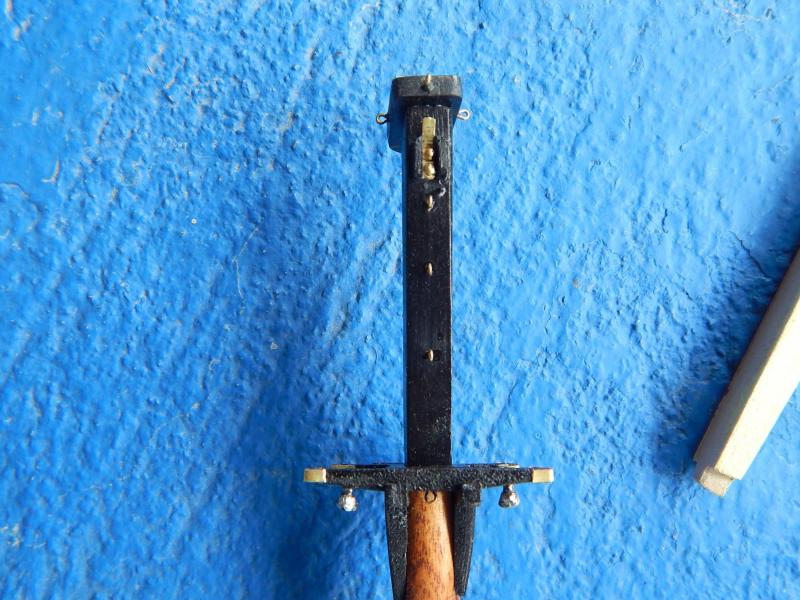
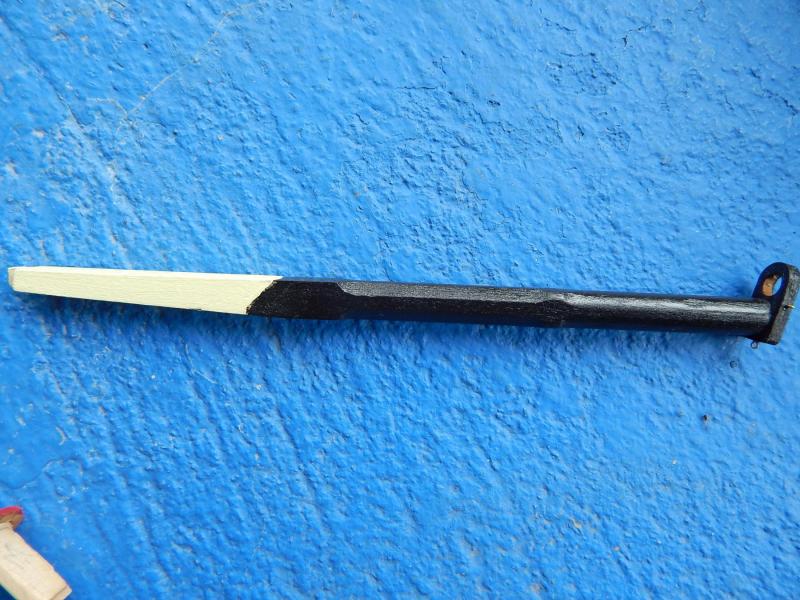
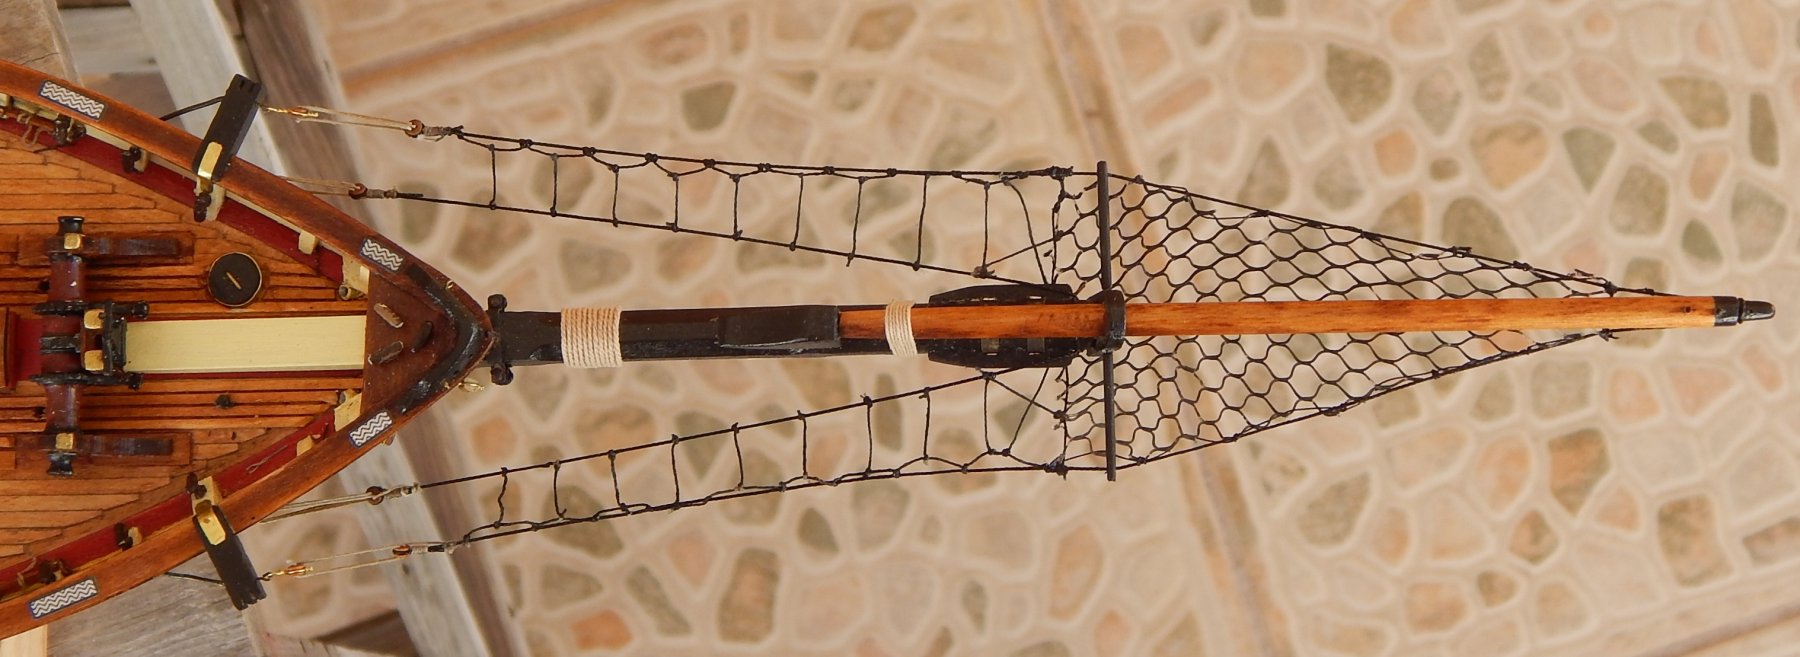
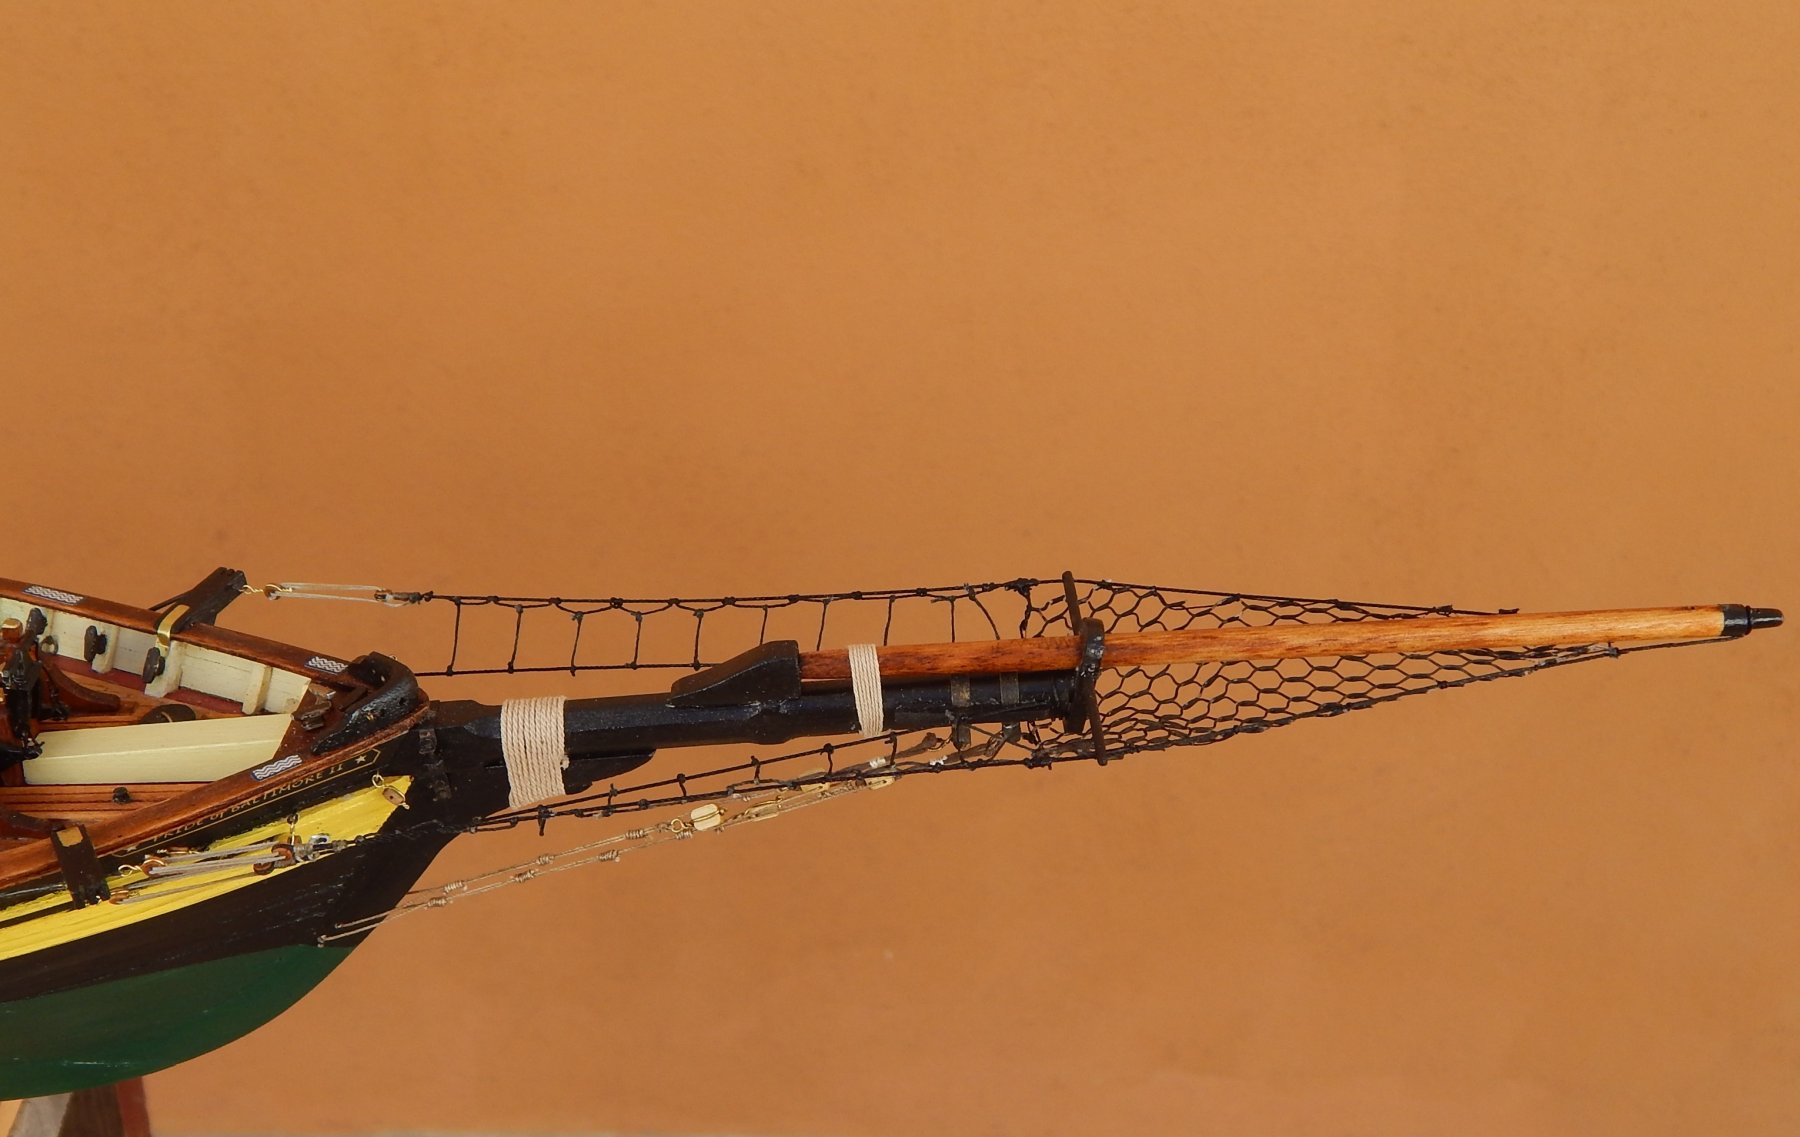
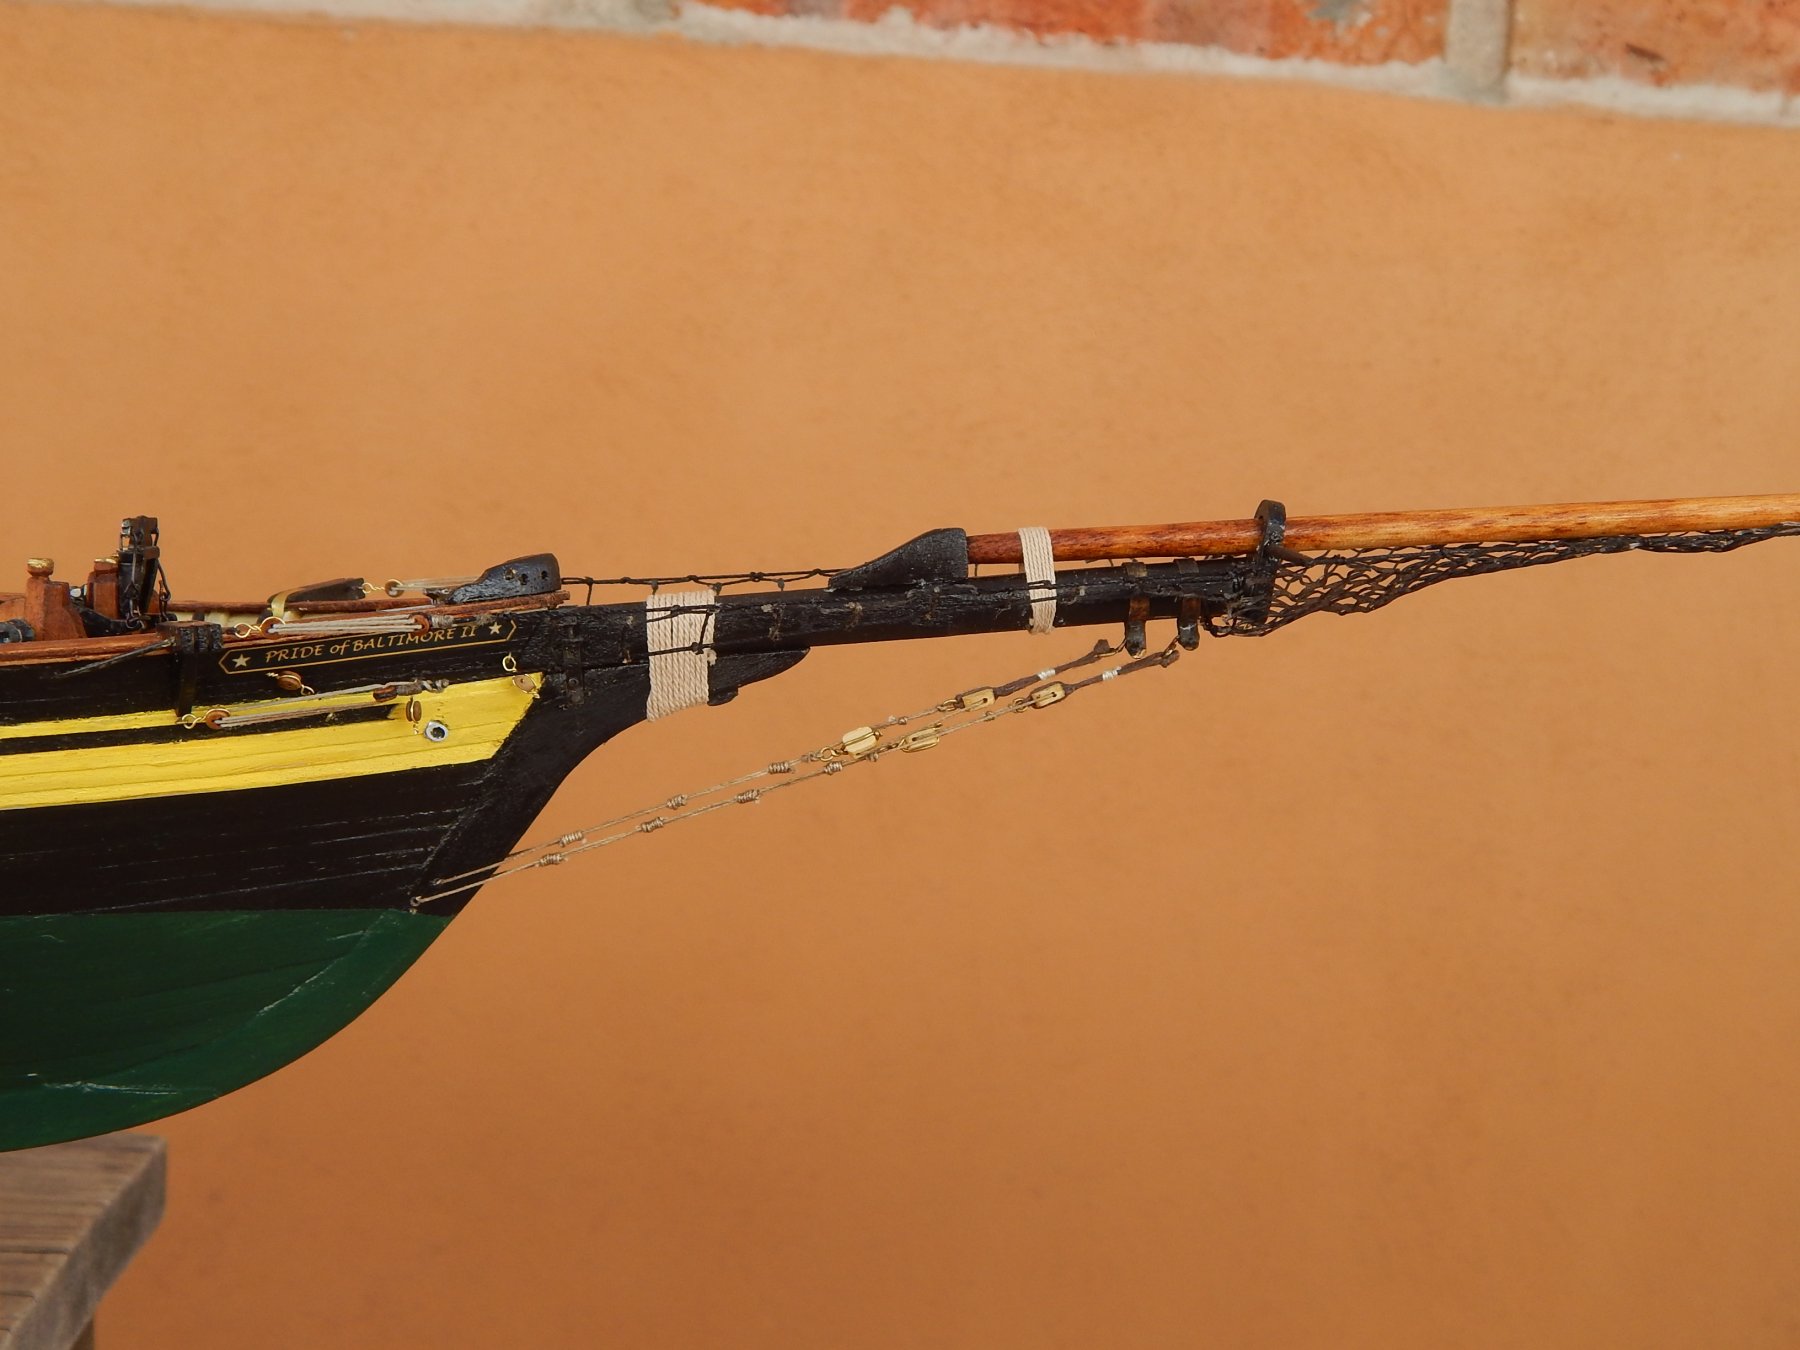
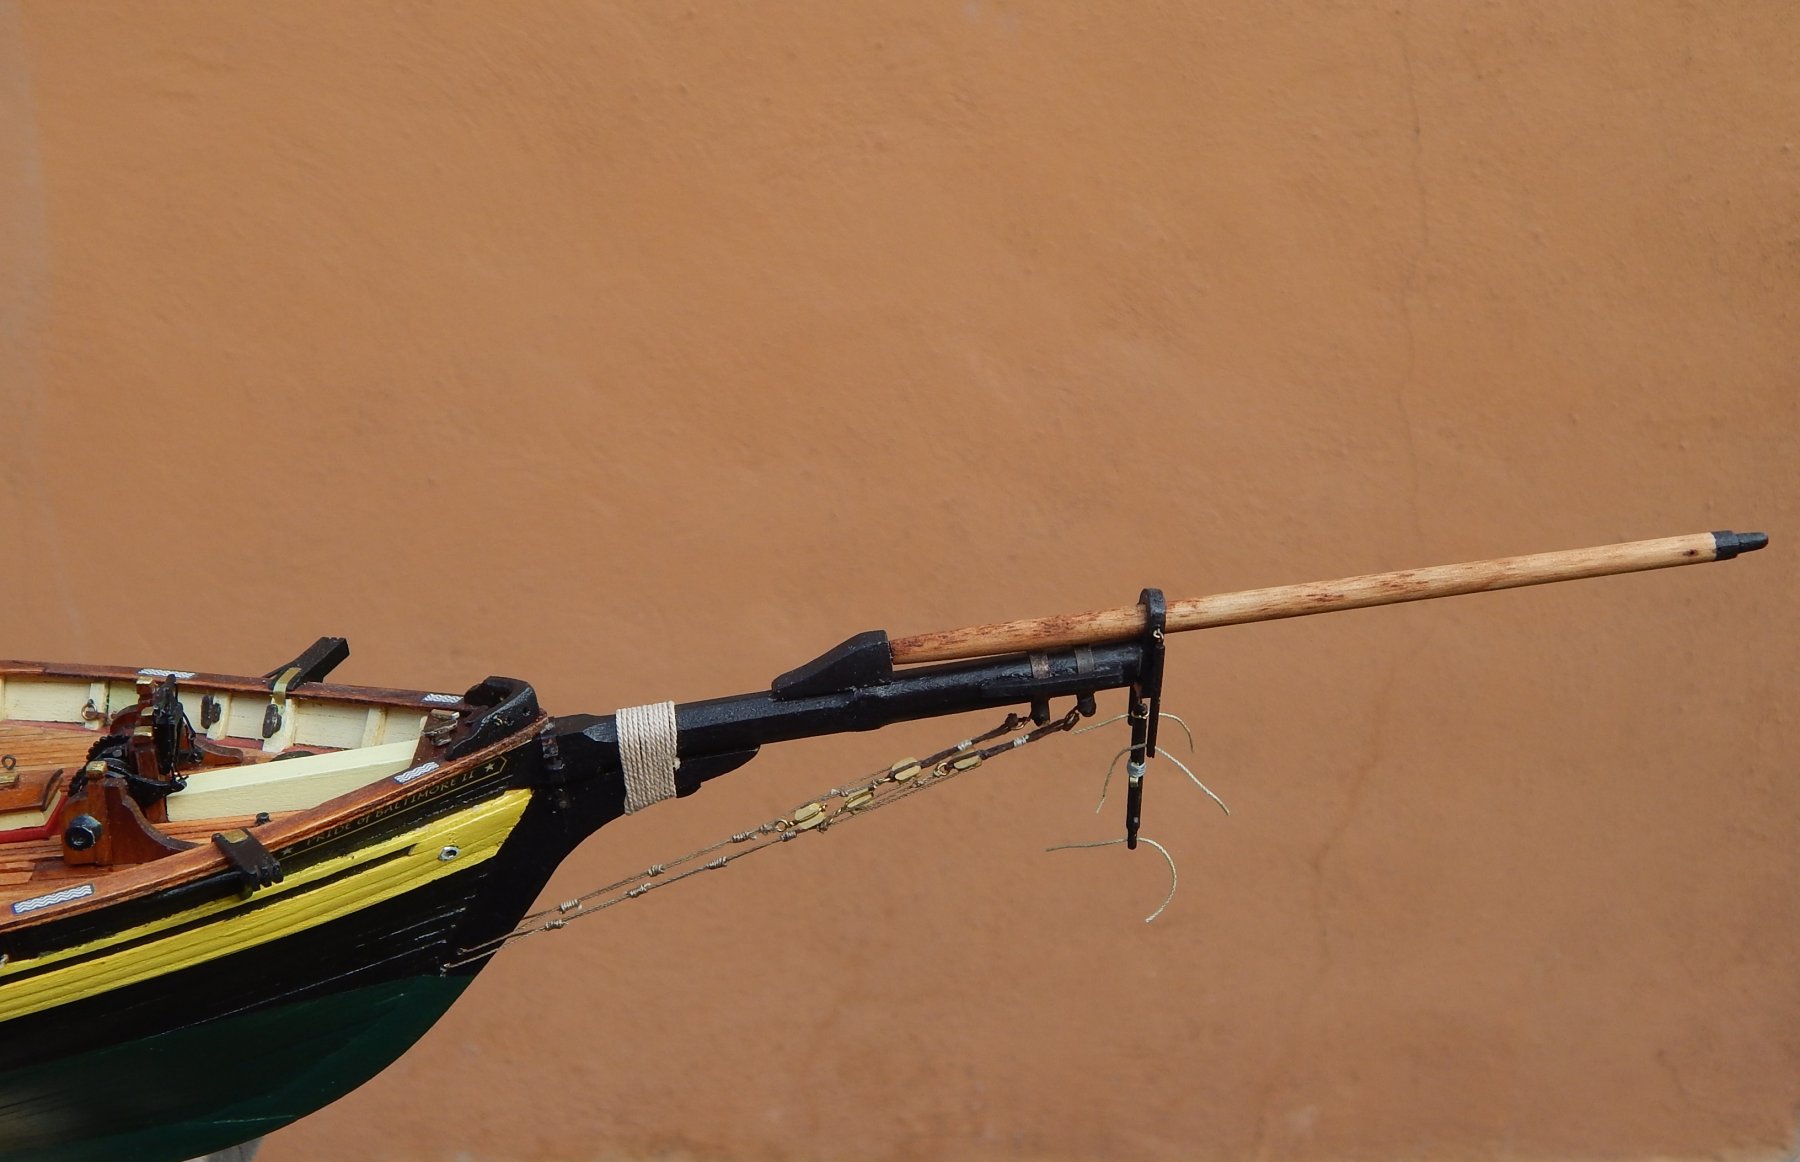
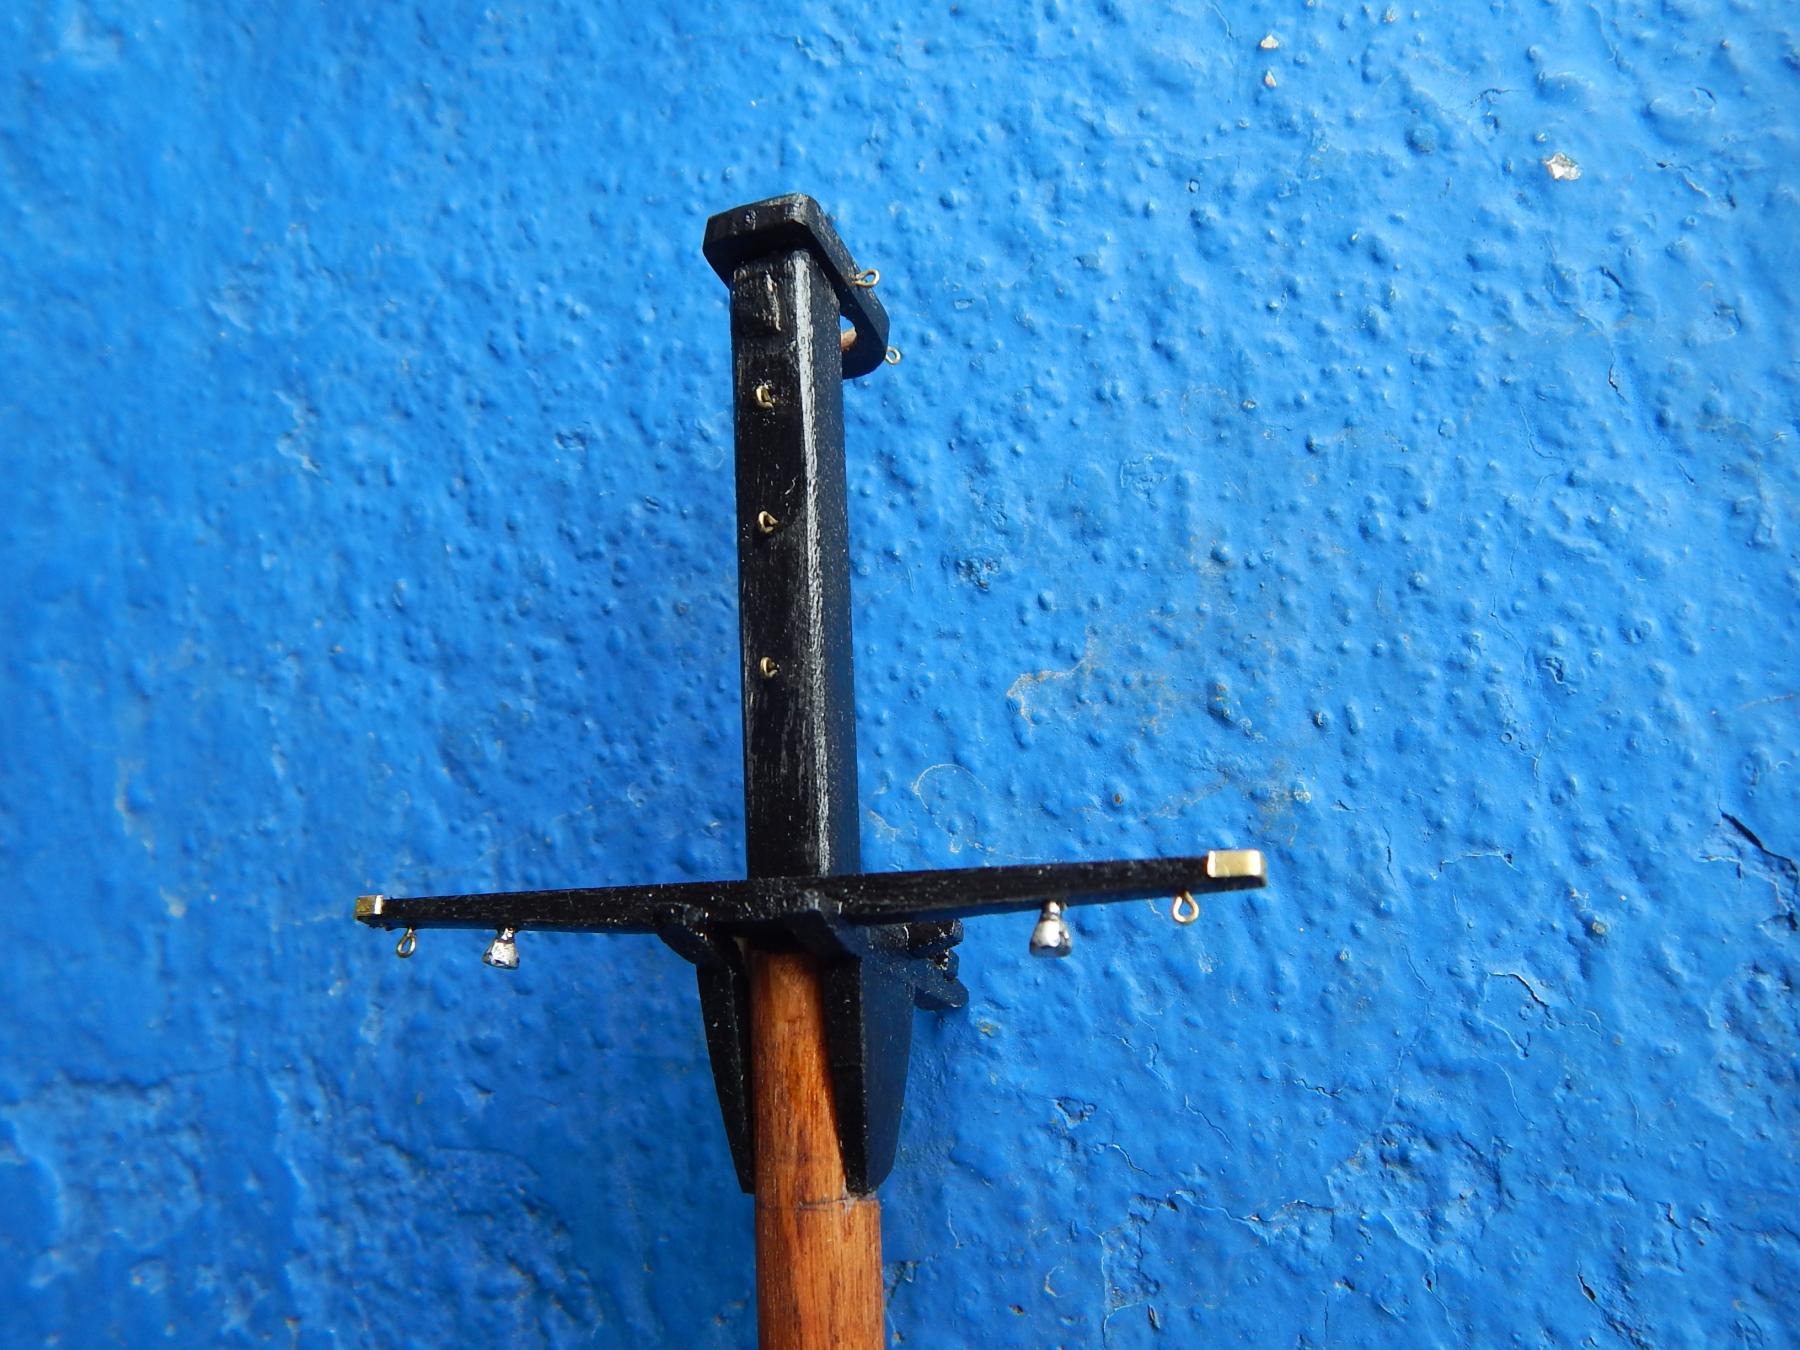
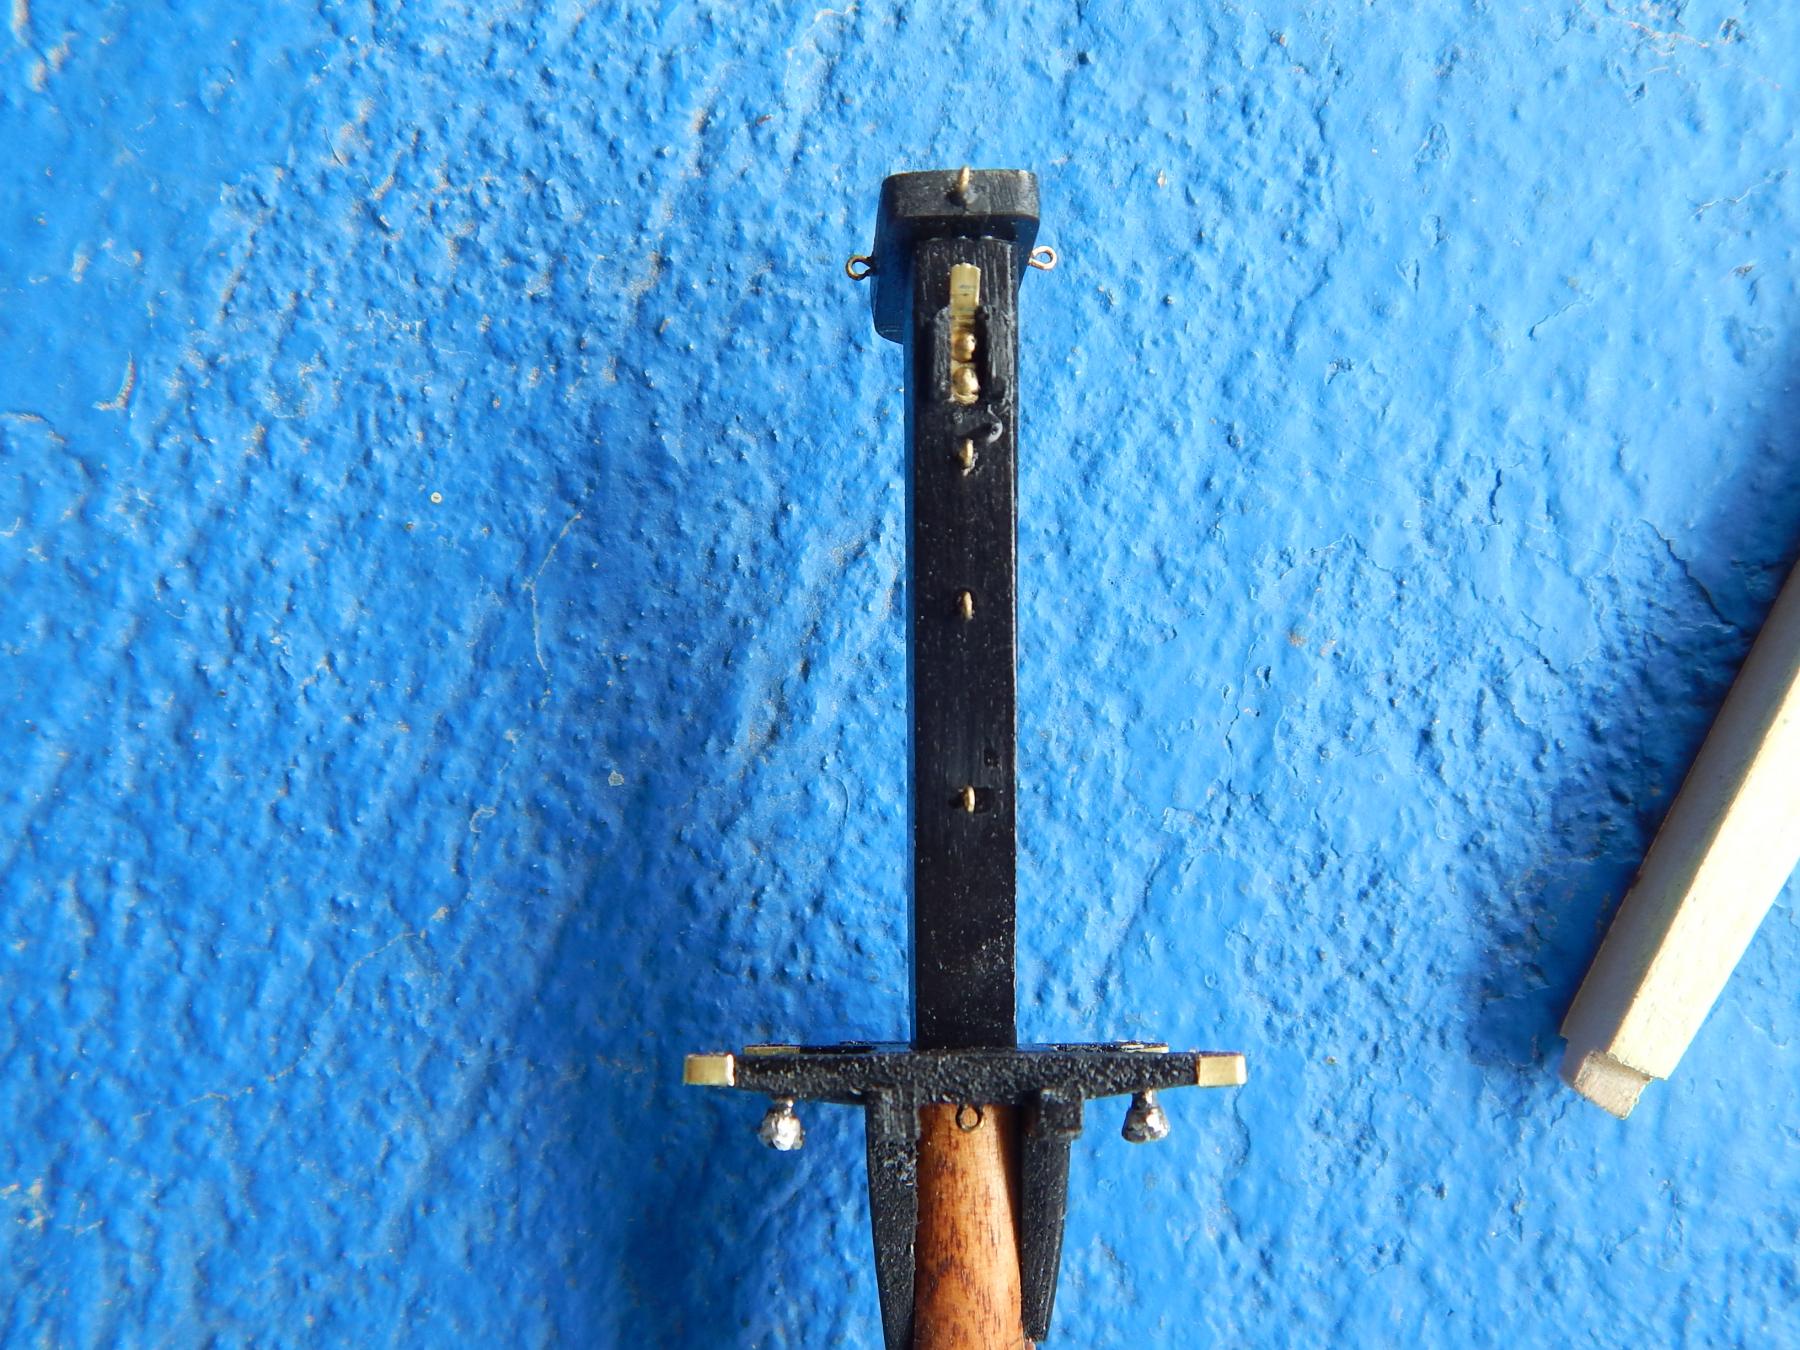
Hola:
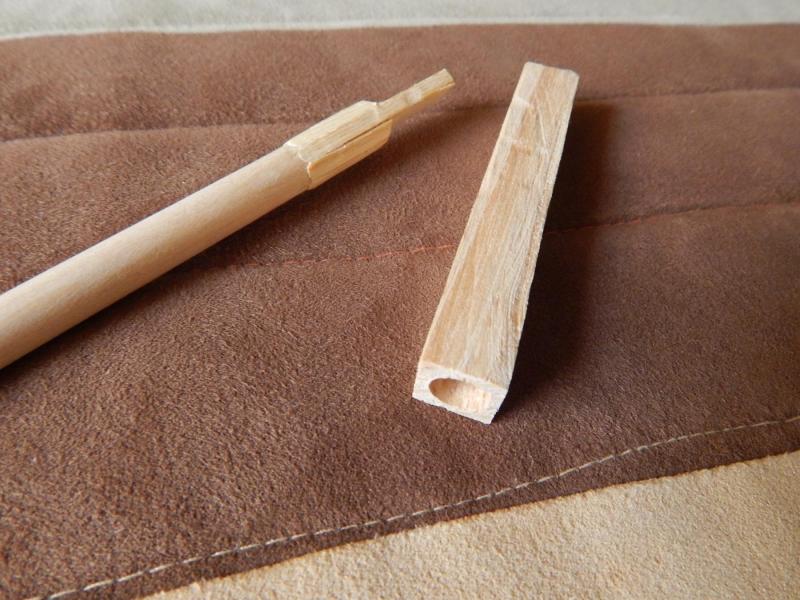
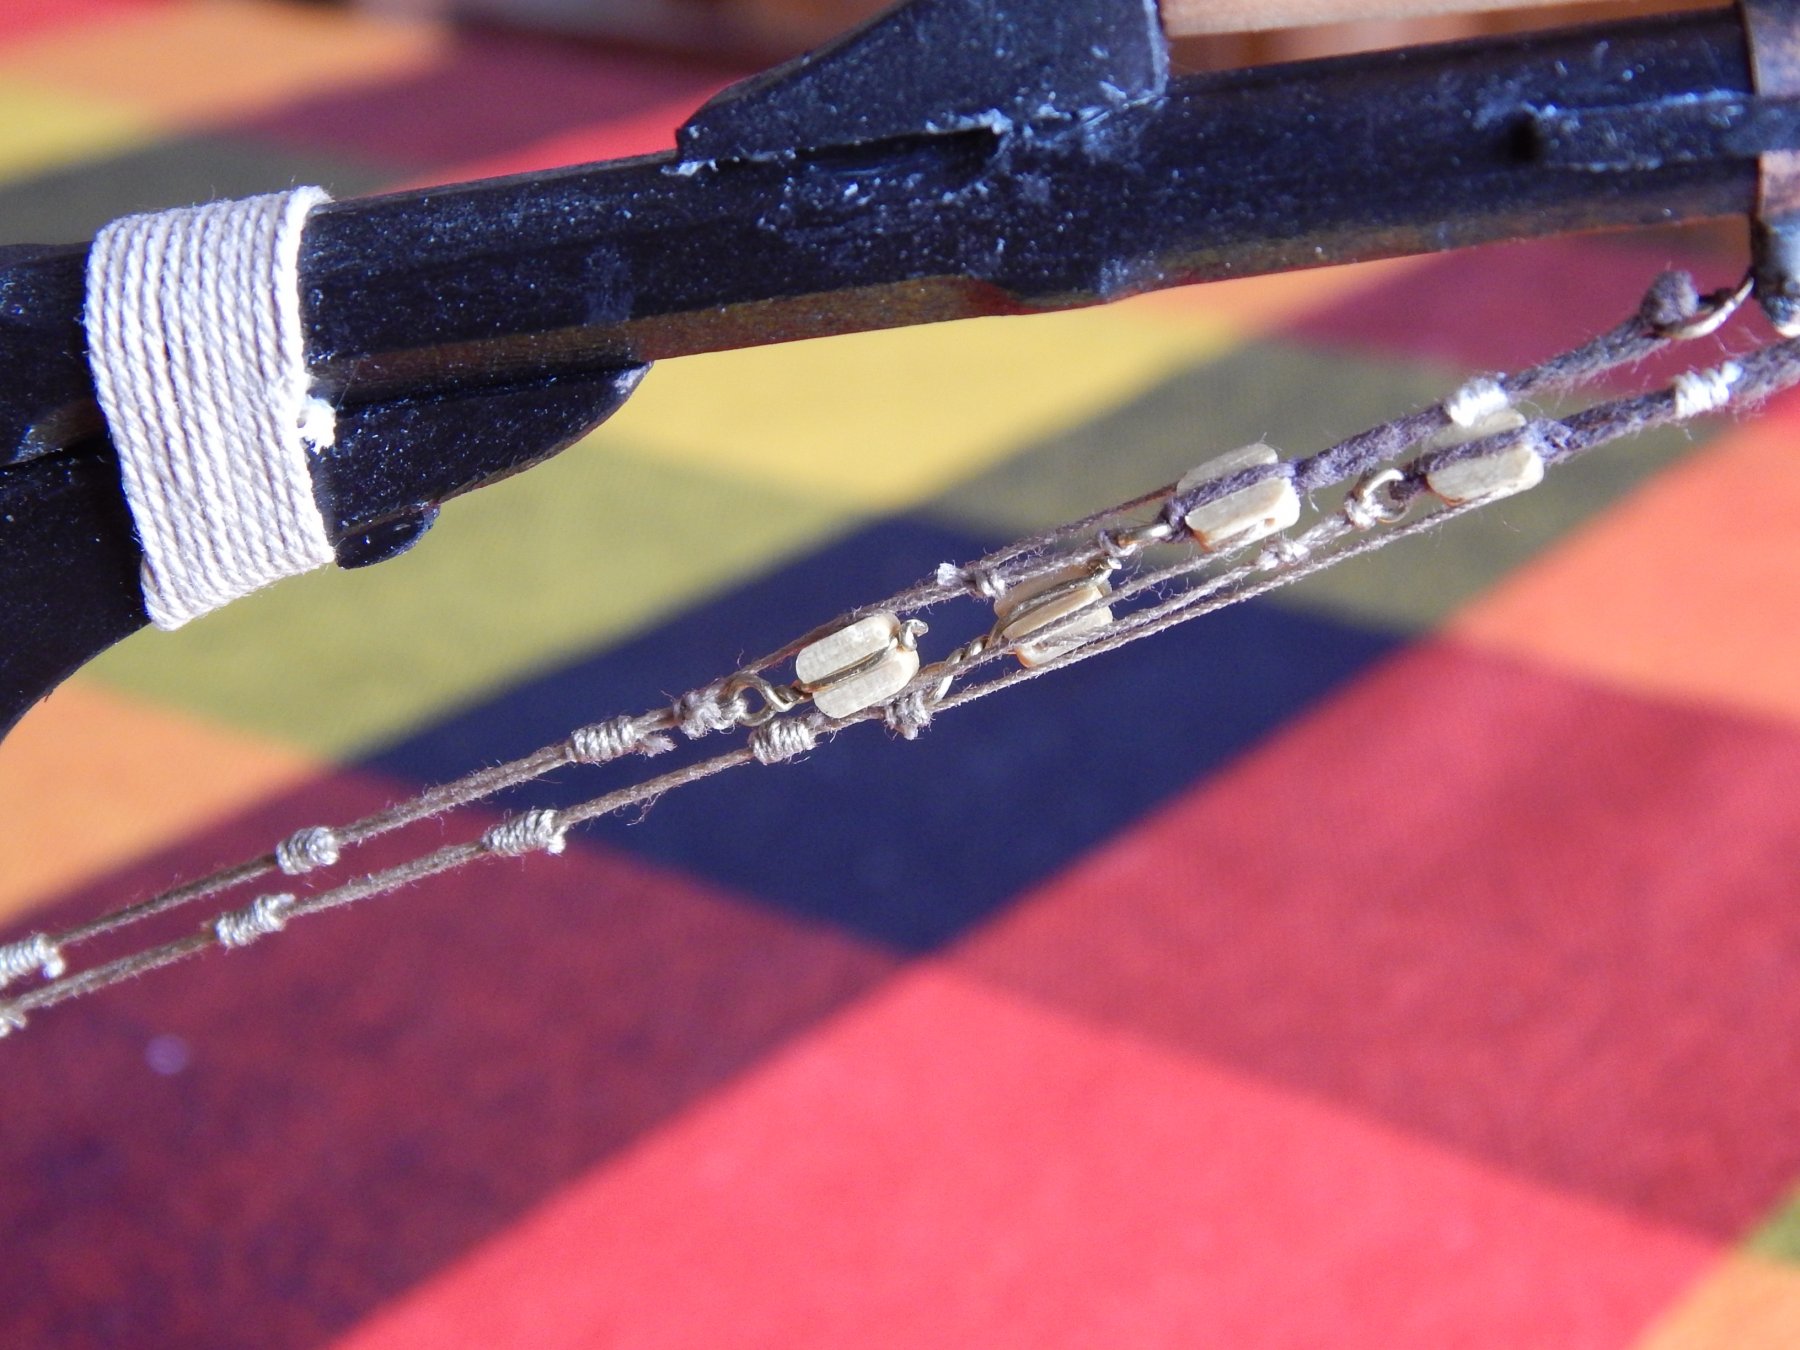
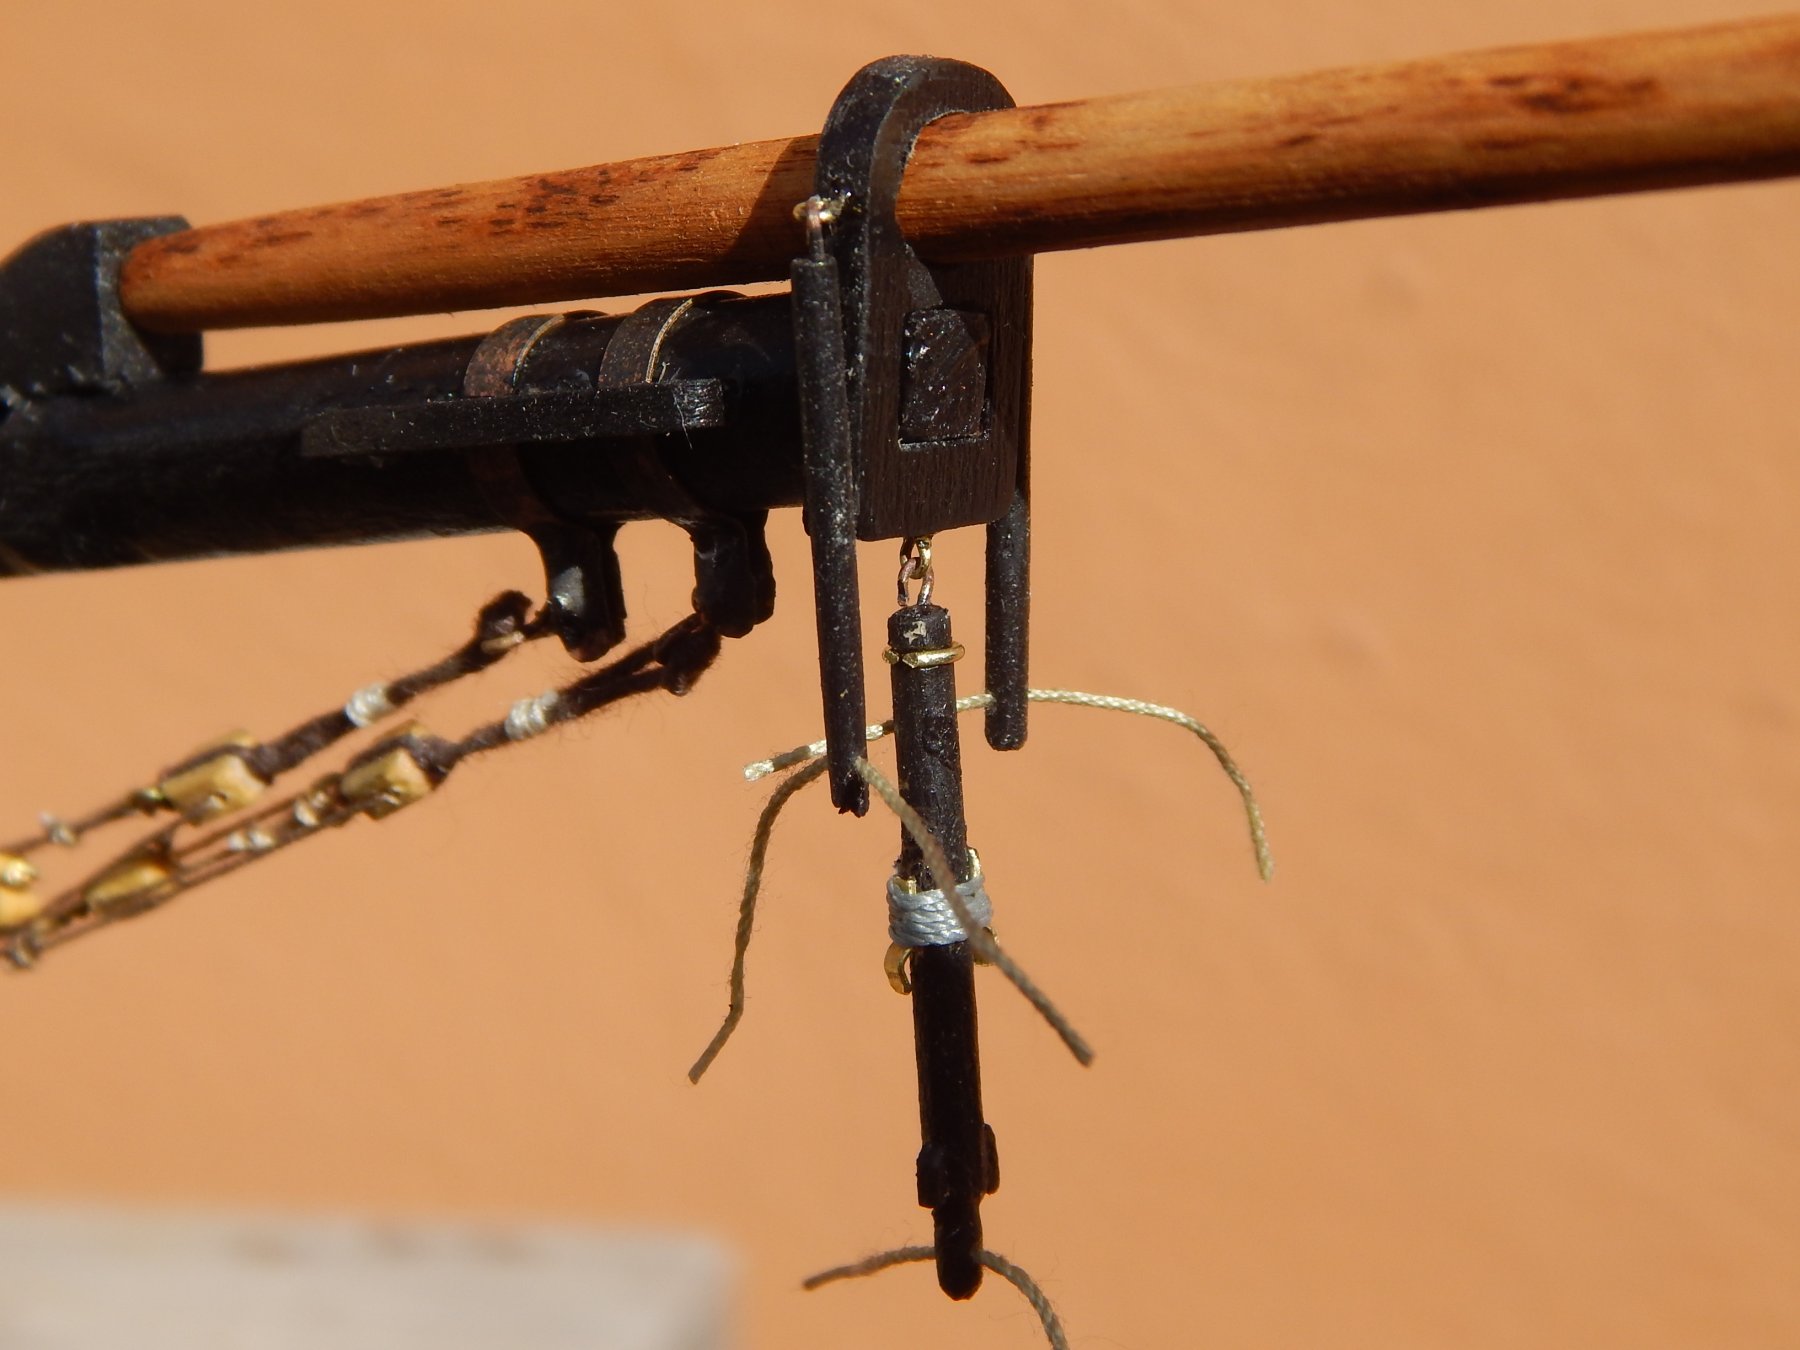
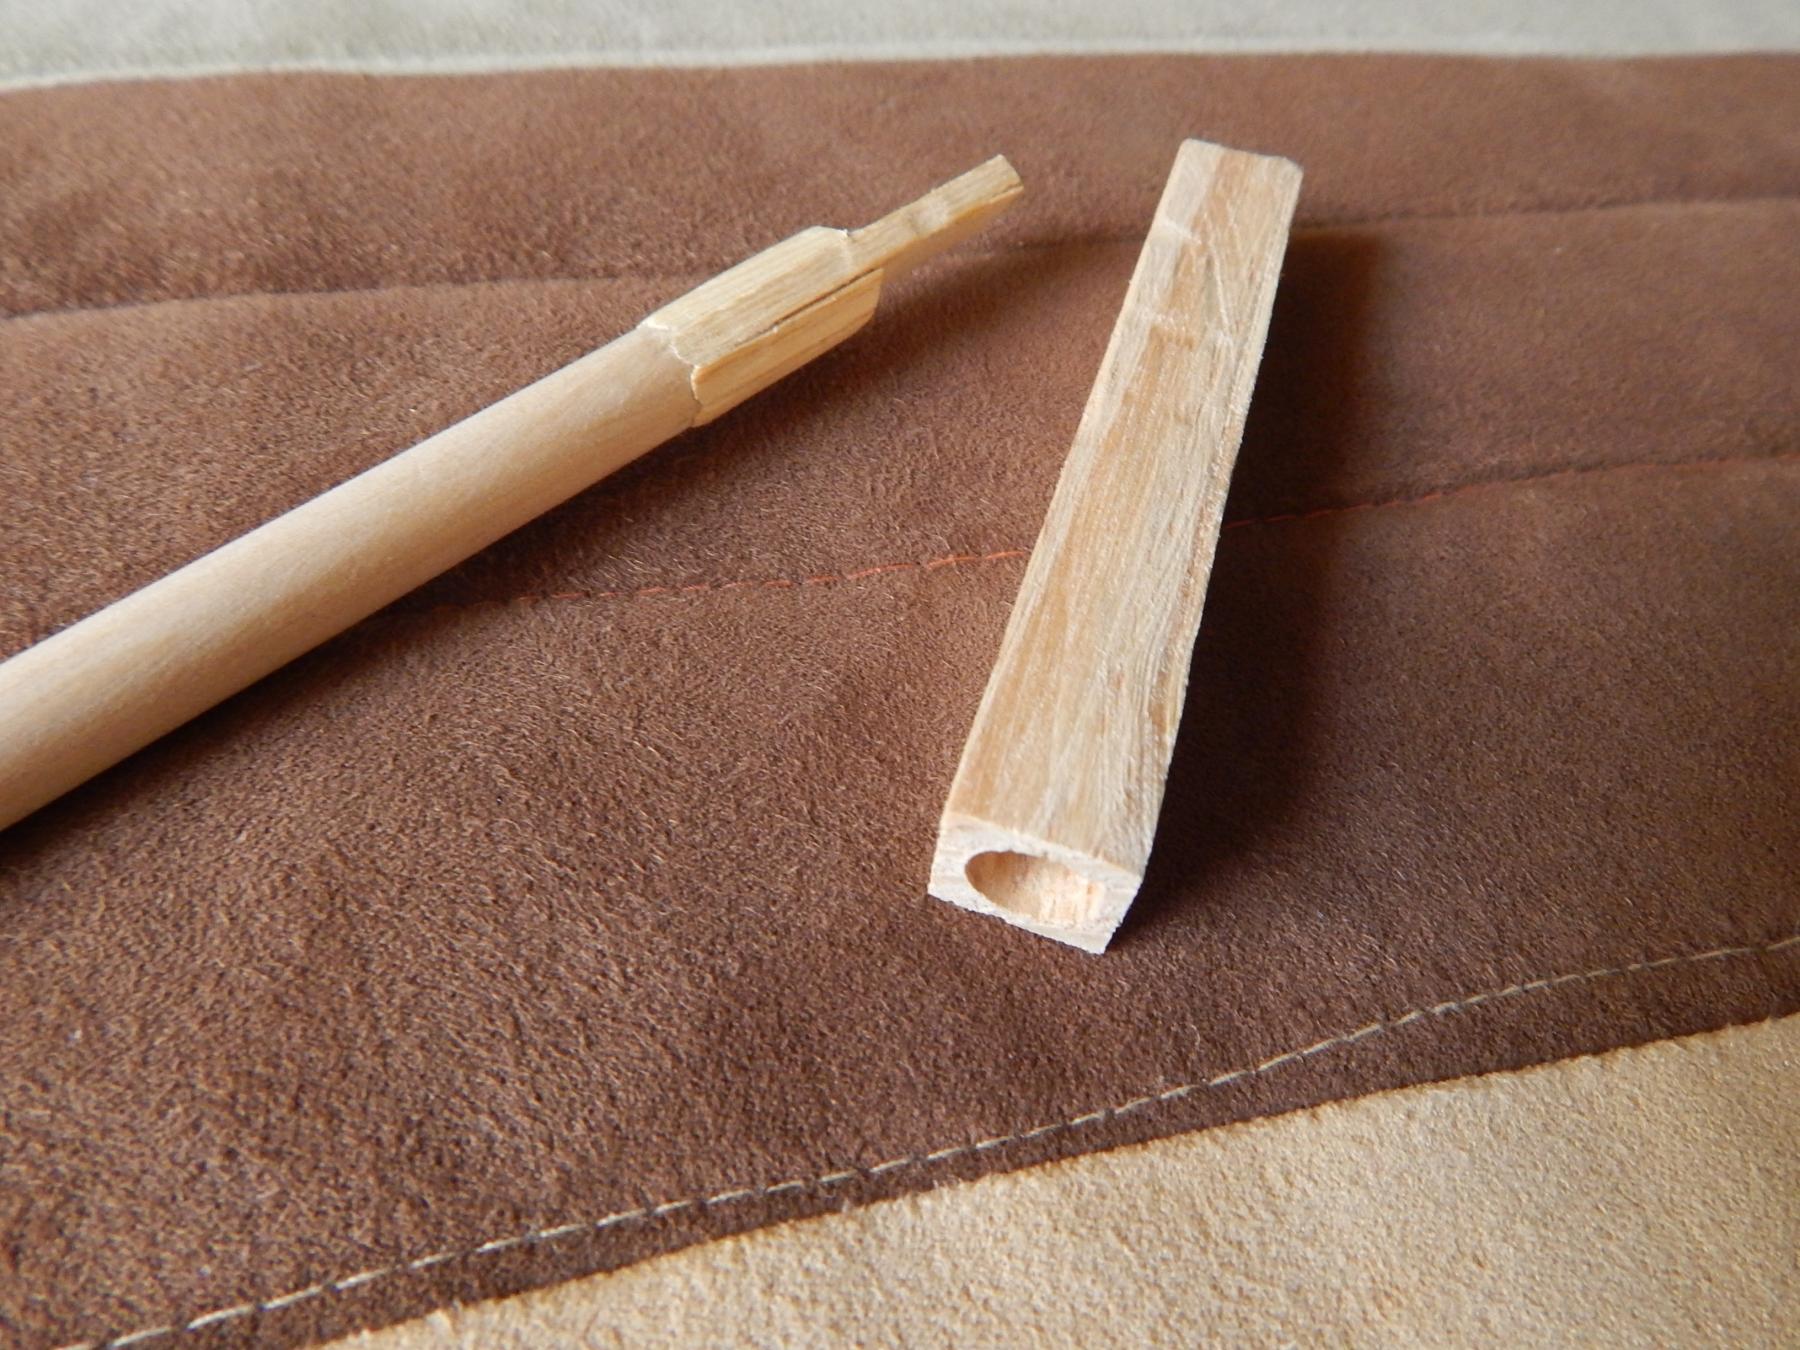
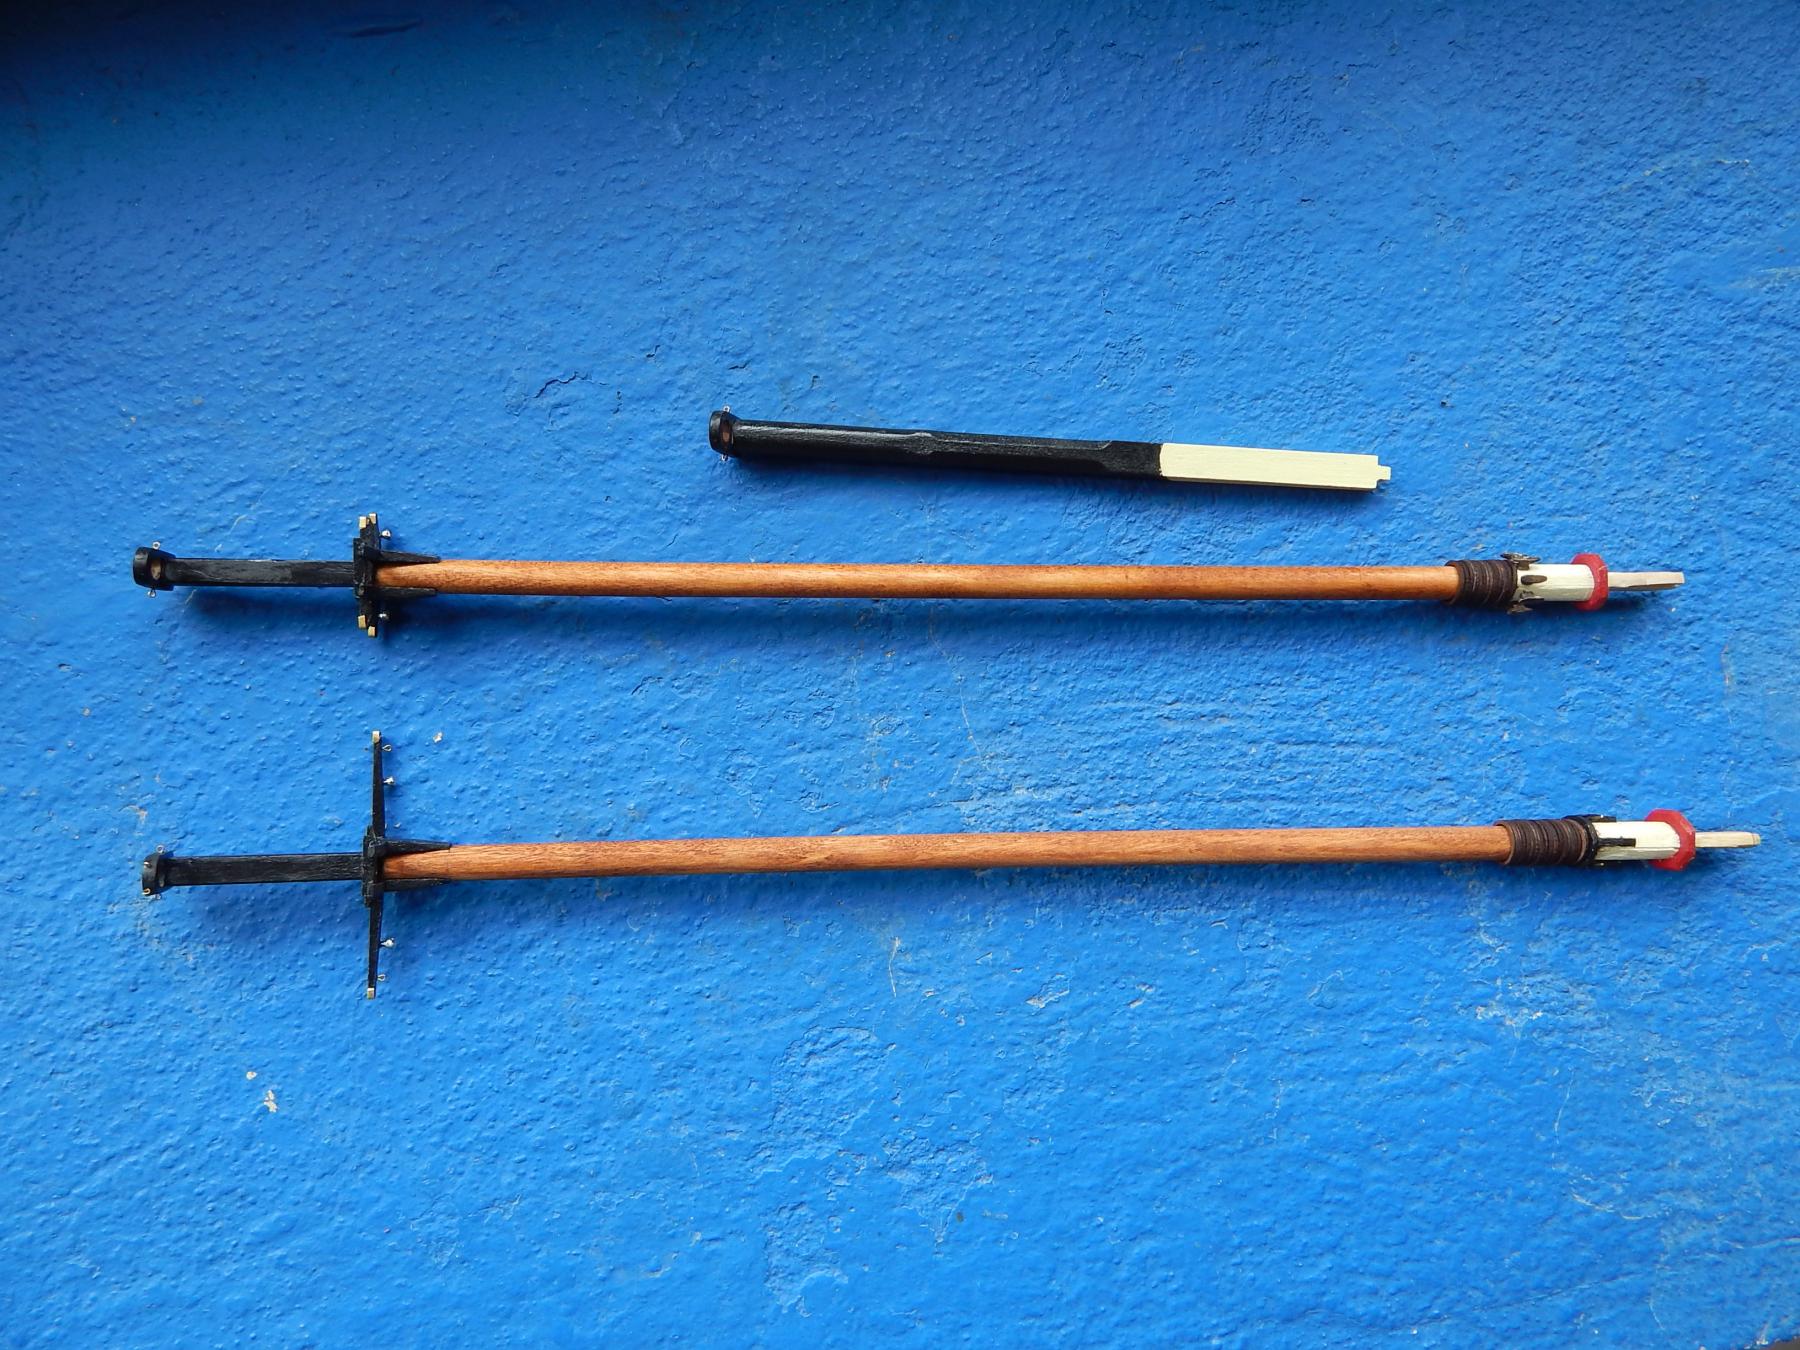
I have been a little slow but anyway the work that must be done with the bowsprit is more that it seems at first glance, specially because there are some metal pieces that must to be weld and bend in a precise way. Also there are pieces not included in the Kit and have to be done (metal and wood). For example: I made the Jibboom spreader thinning toothpicks and making very small holes instead of the notches that are mention in the instructions (I insert little pieces of thread to show them). Here some pictures of my advance.


- Nirvana, Tigersteve, md1400cs and 2 others
-
5
-
Thanks Ulises, good idea!!
Saludos
- Ulises Victoria and mtaylor
-
2
-
Hola Ulises:
Since the change in the MSW software I didn t see your log because the "Content I follow" disappeared and now there is only a "Managed followed content" and your log was not here.
You are doing an splendid work with the cannons. The eyebolts were not included in the Kit or why must you doing them? Also, the cannon wheels were included?
Saludos, Karl
-
-
-
-
Hi there!!
Although I have to finish small details of the deck, I start with the masts. As it was necessary to give them square and / or octagonal shape, opt to make a device that facilitates me to achieve greater accuracy. To reduce the thickness of the wood I use a Dremel placed on a base that has worked for me very well.
Here you can see the Dremel adjusted to serve various purposes
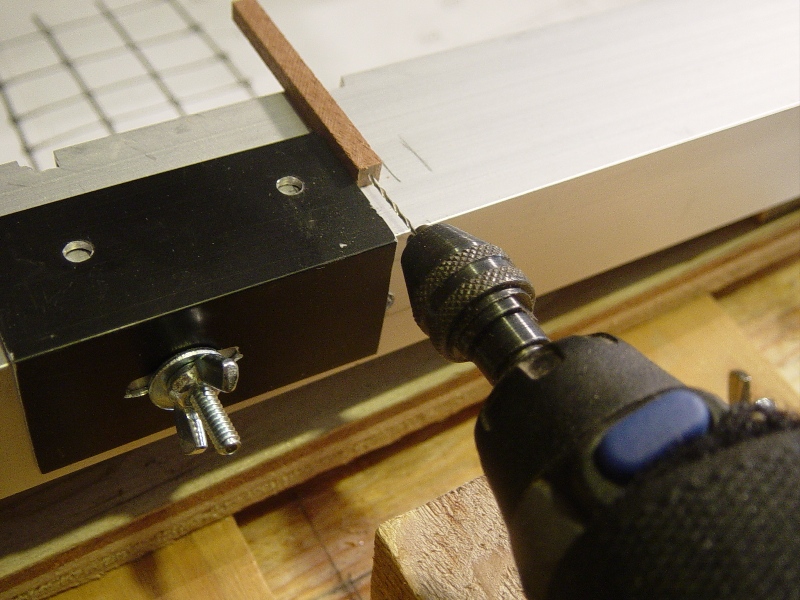
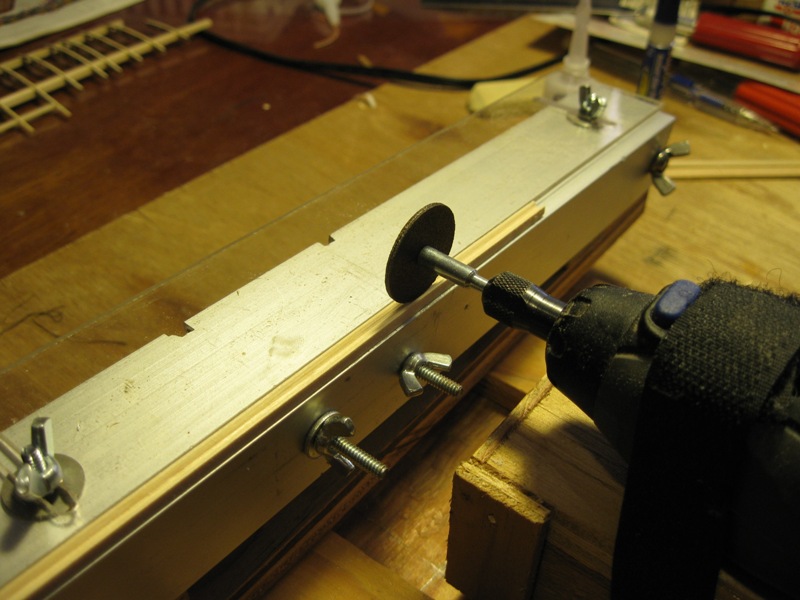
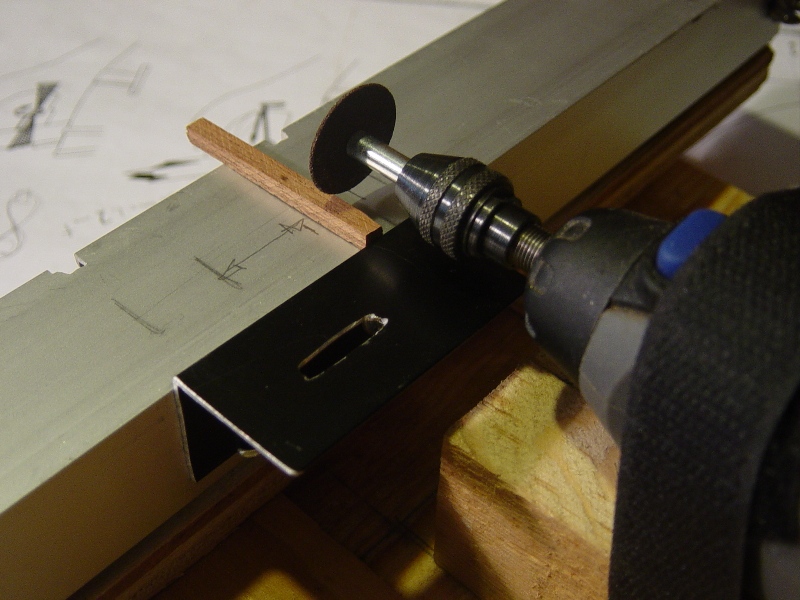
Here to show the jig and Dremel to get the square or octagon shape
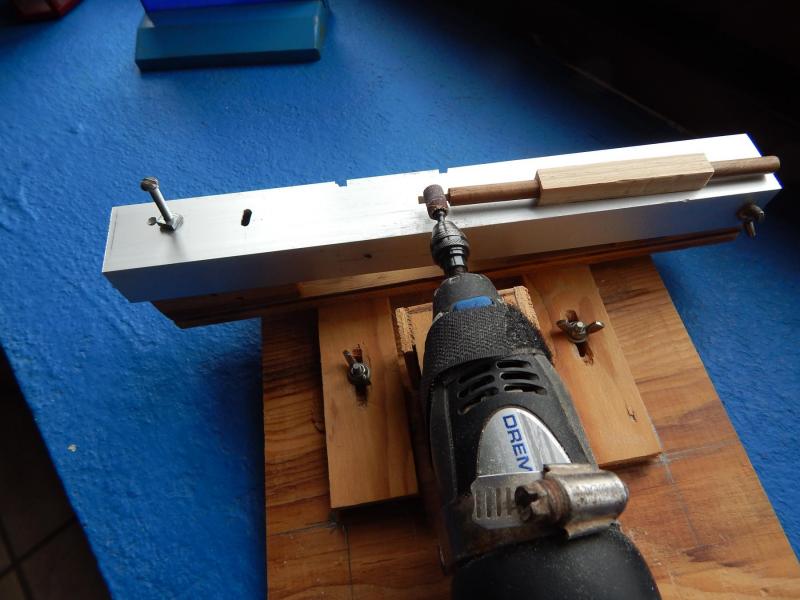
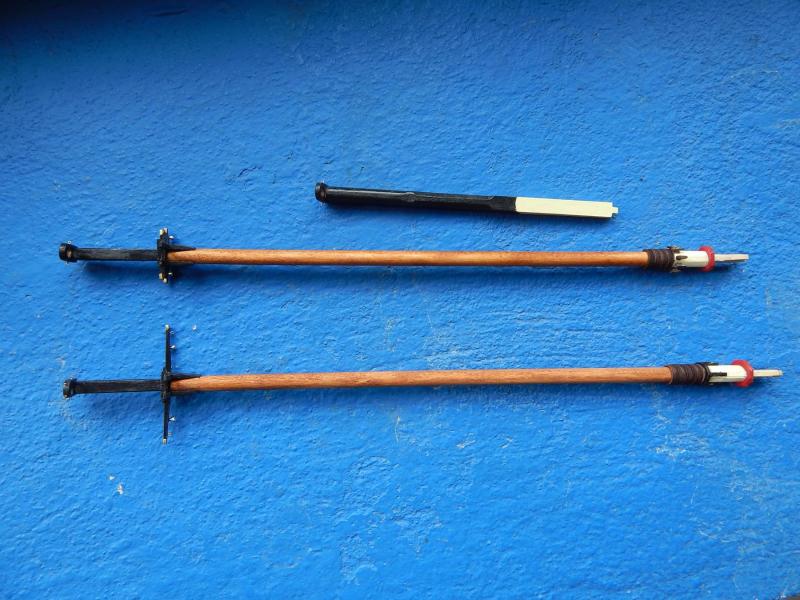
And my progress with the masts and bowsprit

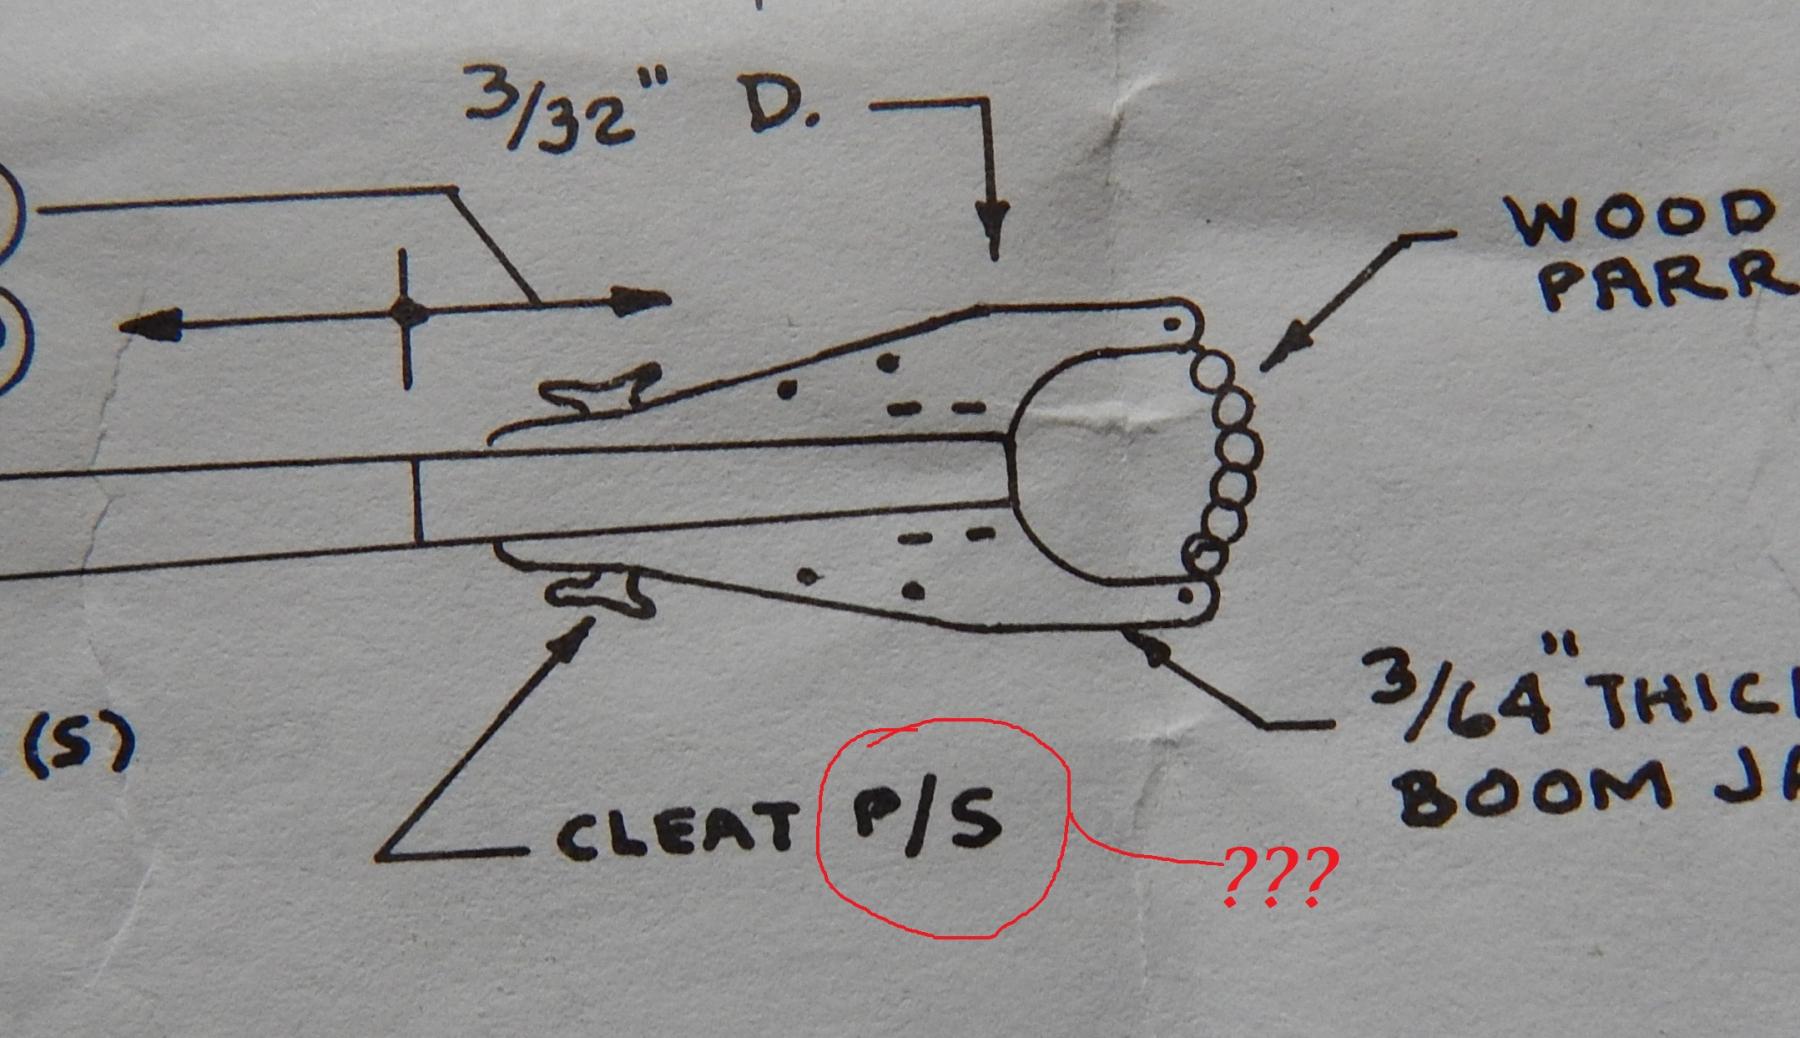
By the way, can someone help me what can be the meaning of p/s? It is shown in the blueprints several times:
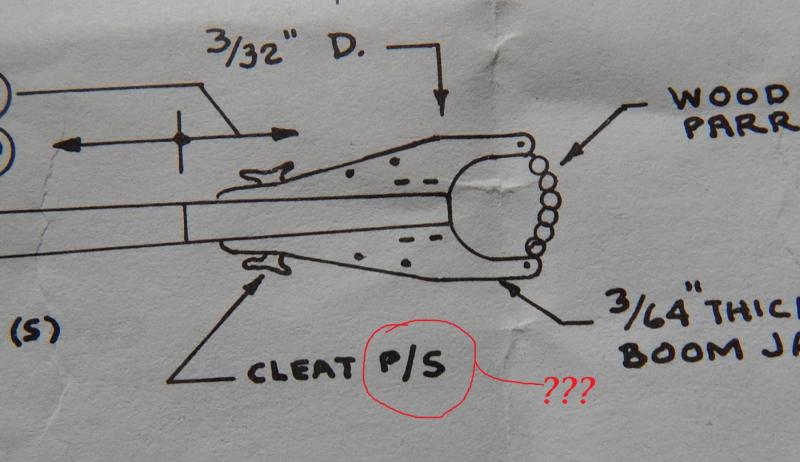
Saludos, Karl
- Tadeusz43, marktiedens, Nirvana and 1 other
-
4
-
Hola Gunther:
As Ulises said the main issue is the cost. You can see at the Syren Homepage that while for the US the shipment cost is 5.00 for mexico would come in 14.50 but also the shipping time can be much slower. The option is UPS or DHL but the cost is much more high.
Saludos, Karl
-
Karl, the Syren being refereed to is probably Syren Model Ship Company, a modern day chandler for us model shipwrights. Here's a link:
Muchas gracias Professor:
I didn´t know about this place, apparently they have very nice and quality things. The problem is that it is somewhat complicated and expensive to buy from Mexico.
Saludos, Karl
-
No, Gunther, unfortunately not.
 By the way when you mention Syren, is the Kit or a store?
Saludos, Karl
-
And... now you know why I immediately throw all the kit blocks in the garbage and use whatever size looks correct from Syren.

The deck is looking great with all the furniture on it Karl.
Hola Gunther:
Good for you that you can get the blocks from Syren, I tried to make them smaller but with no success, so my only solution was to add only one instead of the two according to the instructions.

Saludos, Karl
-
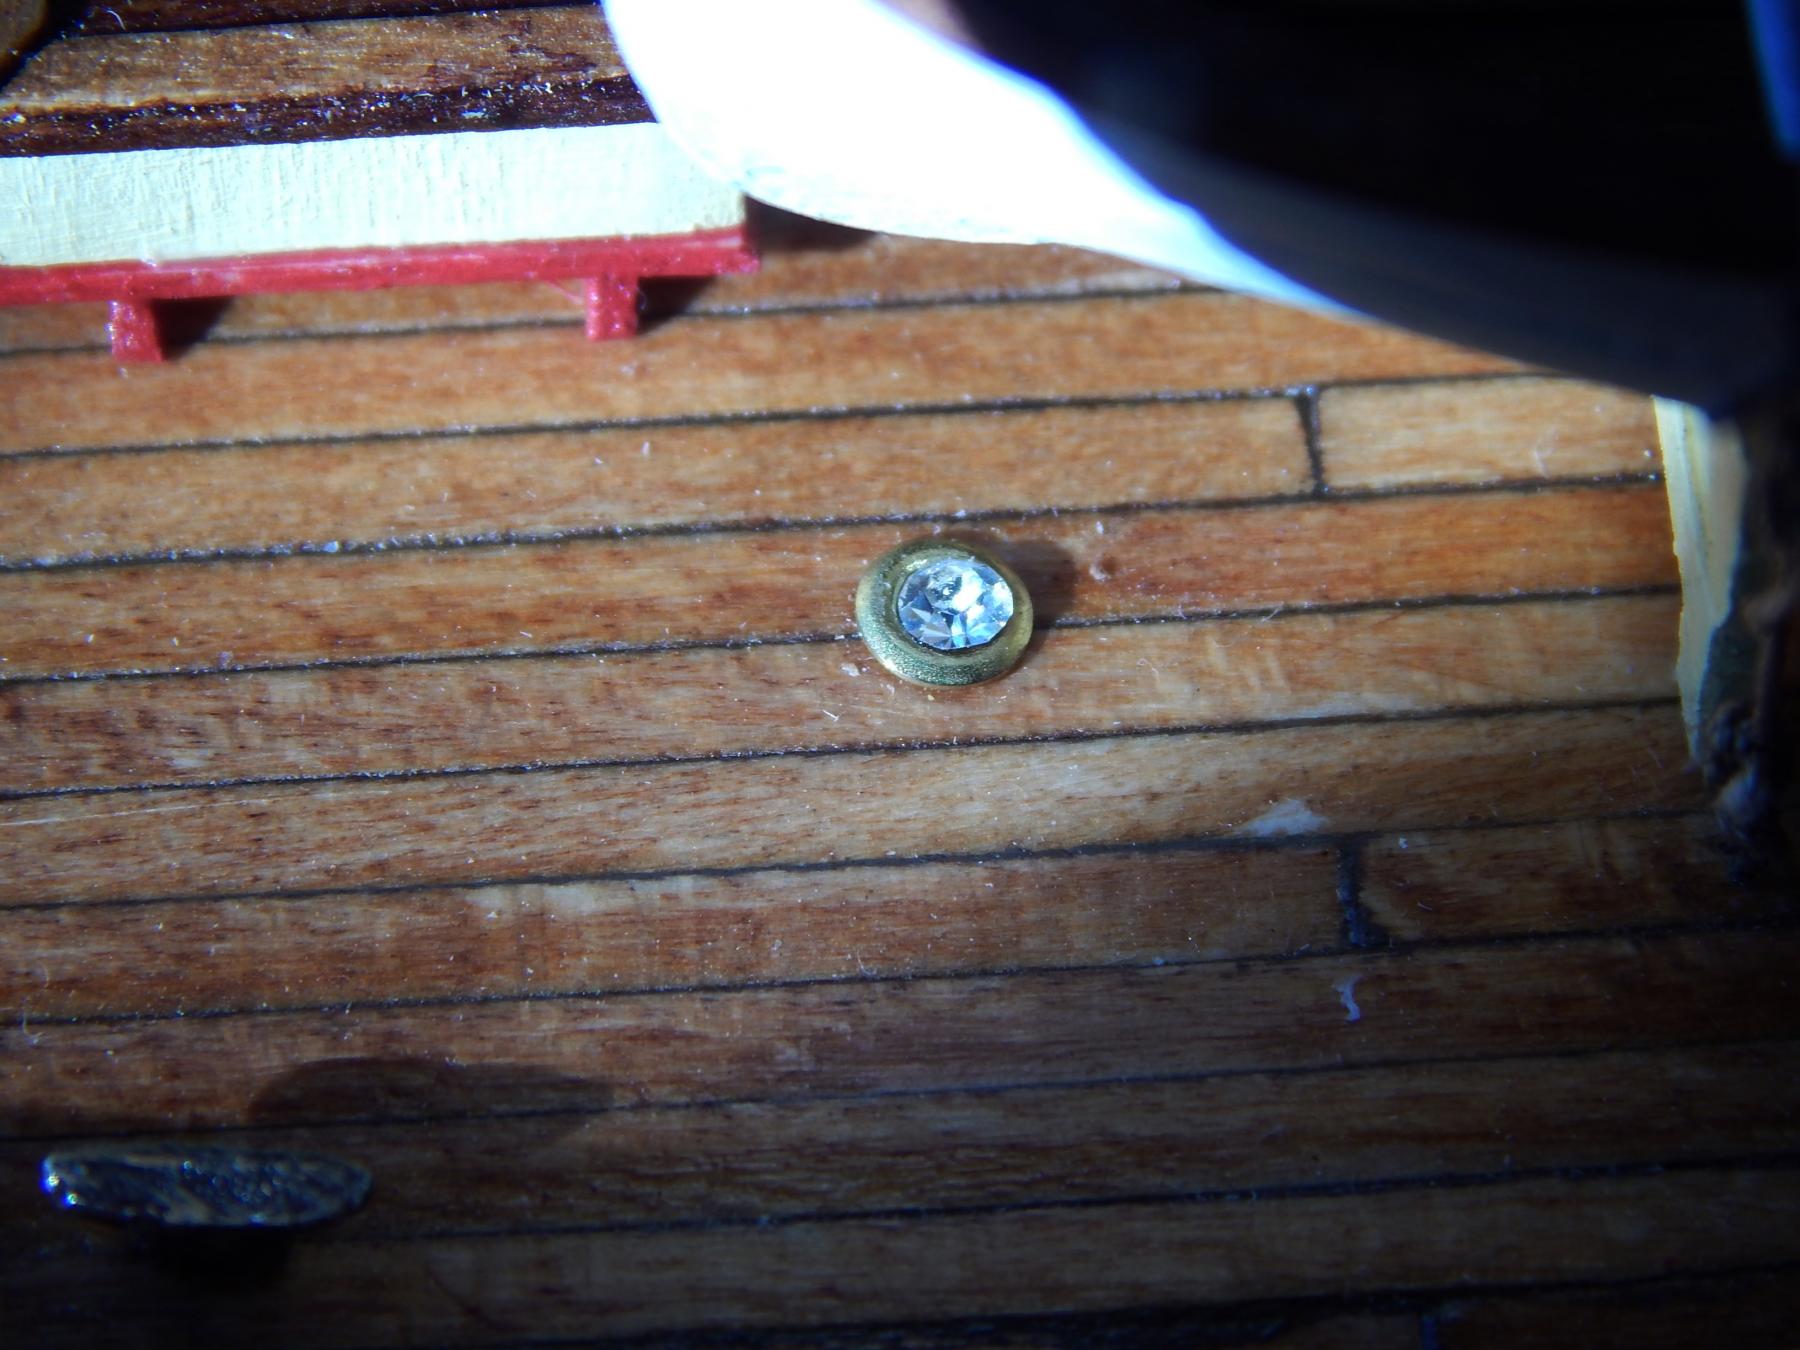
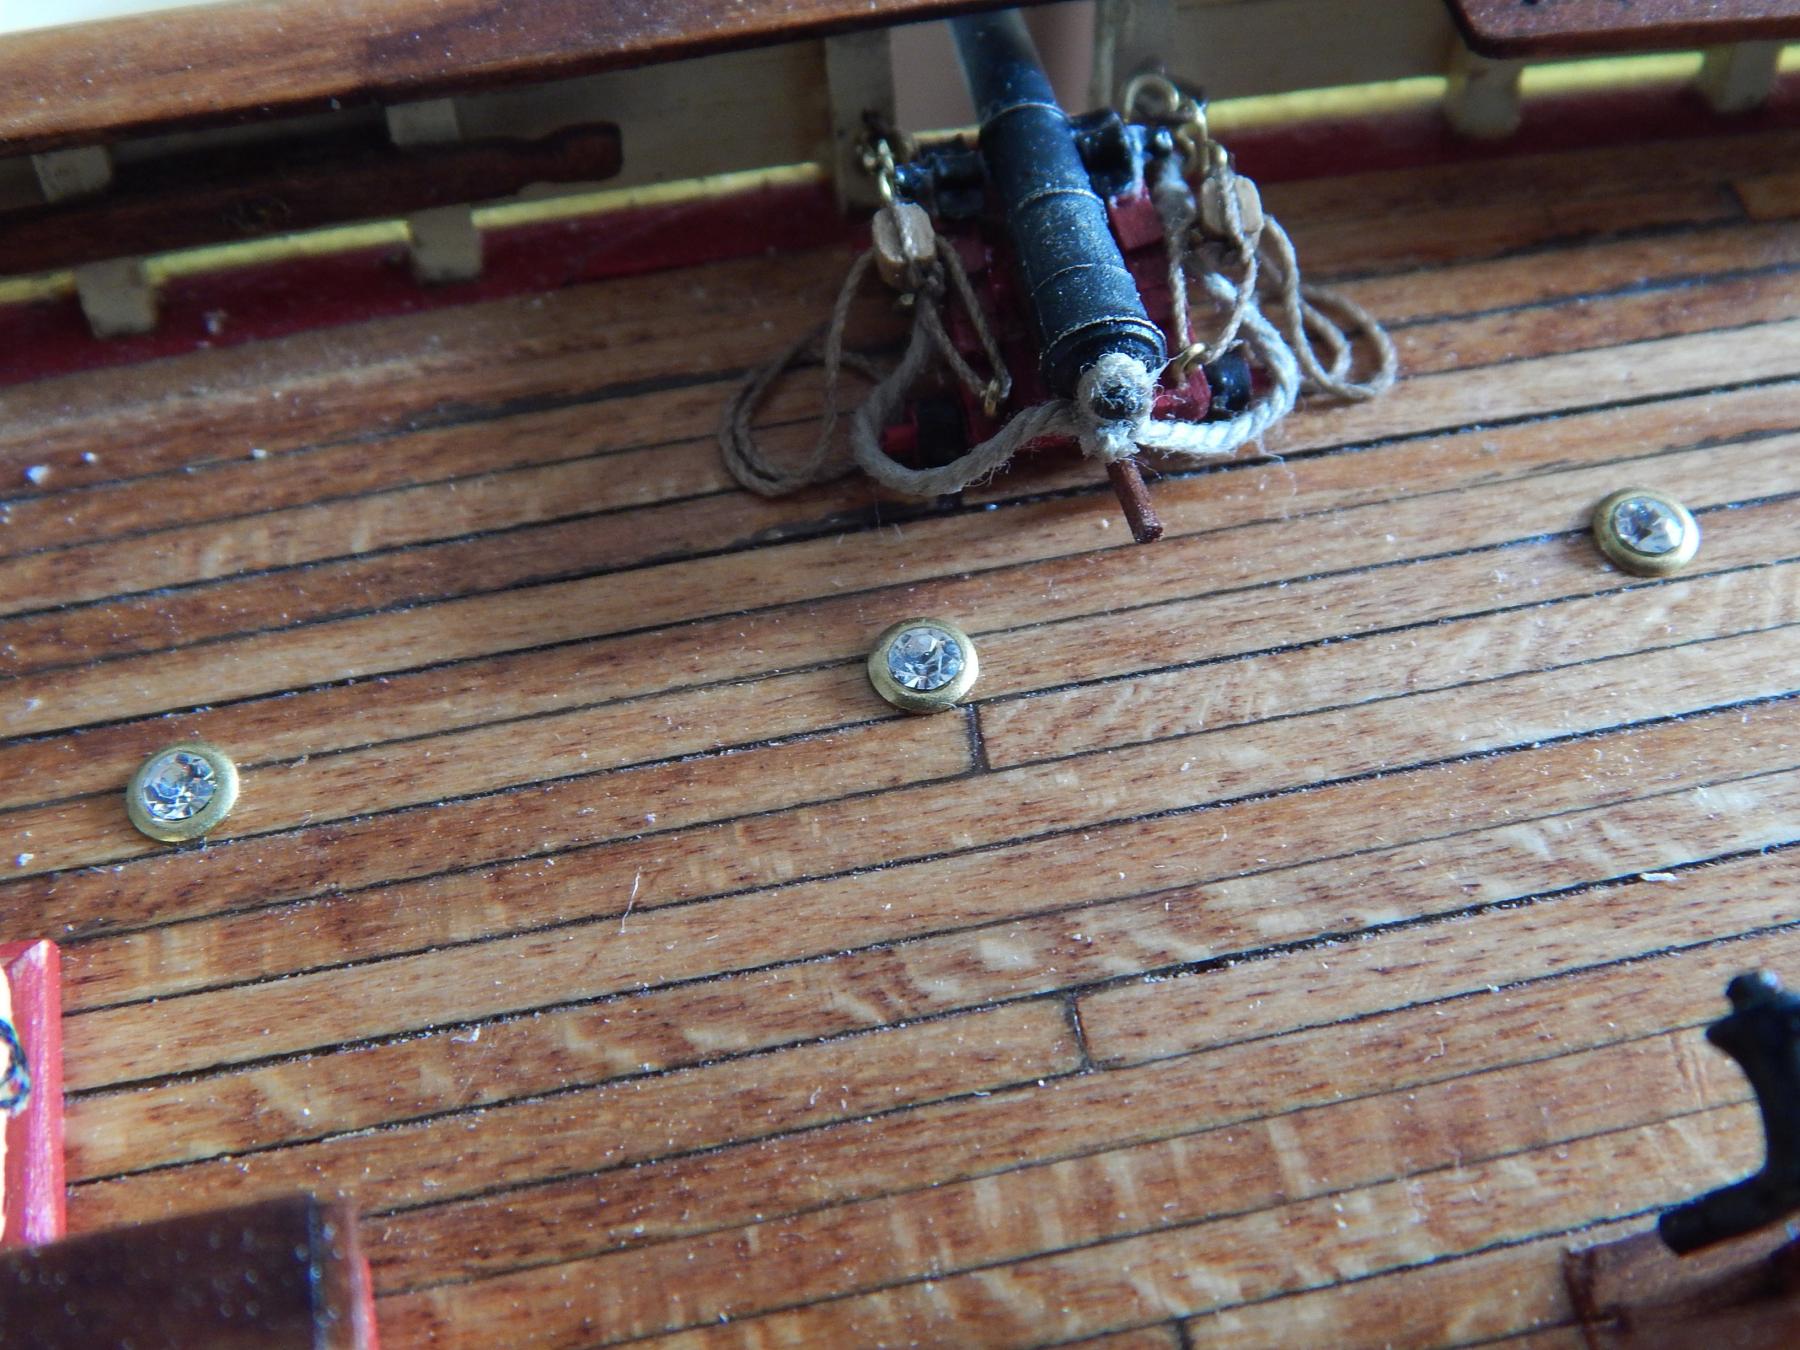
Marvelous job, Karl. Particularly impressive are the multiple light prisms for illumination of the deck below. (Were those kit pieces or did you fashion them? In either event, might you have a macro photo of one?) Well done build, mate.
Hola Professor:
The prisms are included in the kit, but I have also seen them at stores like Michael´s and are sold as Fake diamonds for jewelry. Here the photos you ask for:
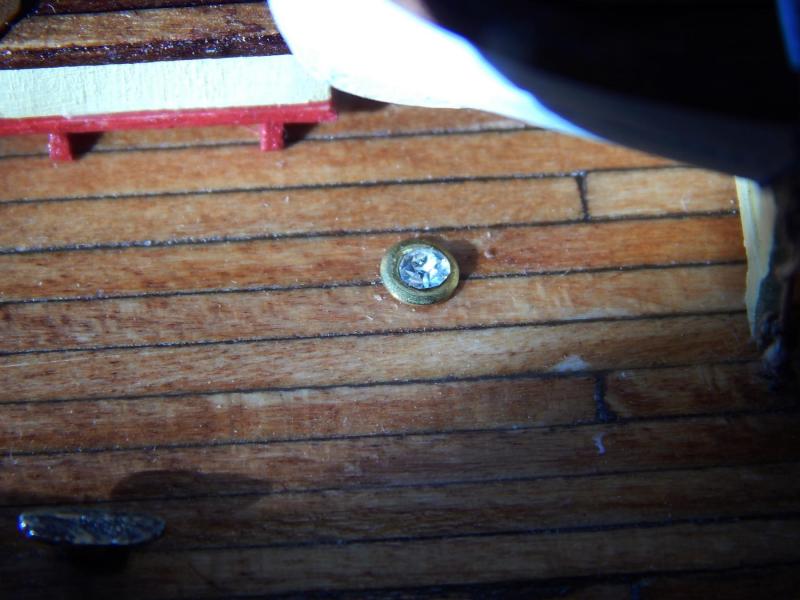

Saludos, Karl
- JerseyCity Frankie and russ
-
2
-
Steve and Janet:
Thanks for your nice comments they are very encouraging
Saludos, Karl
-
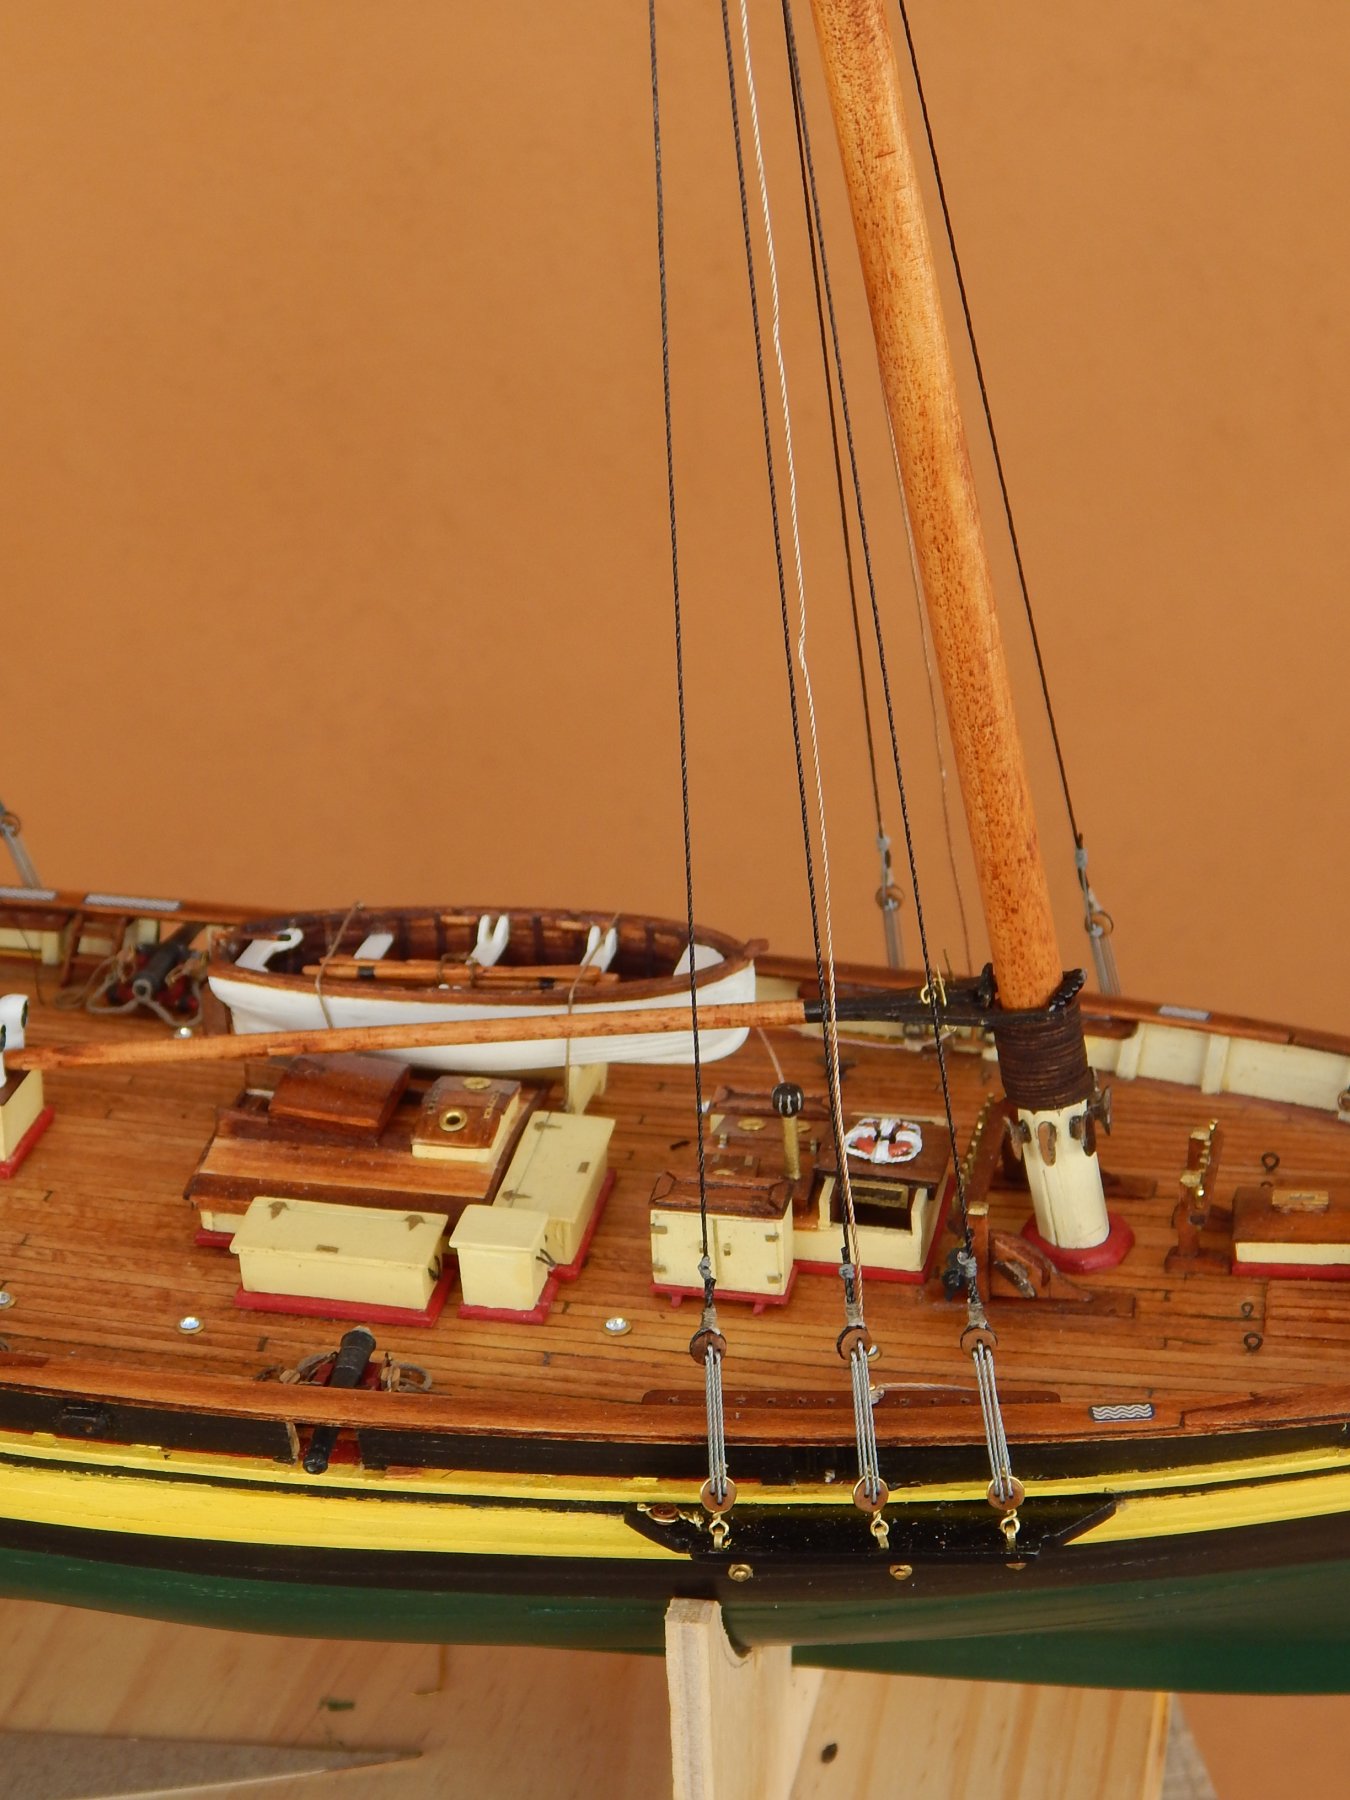
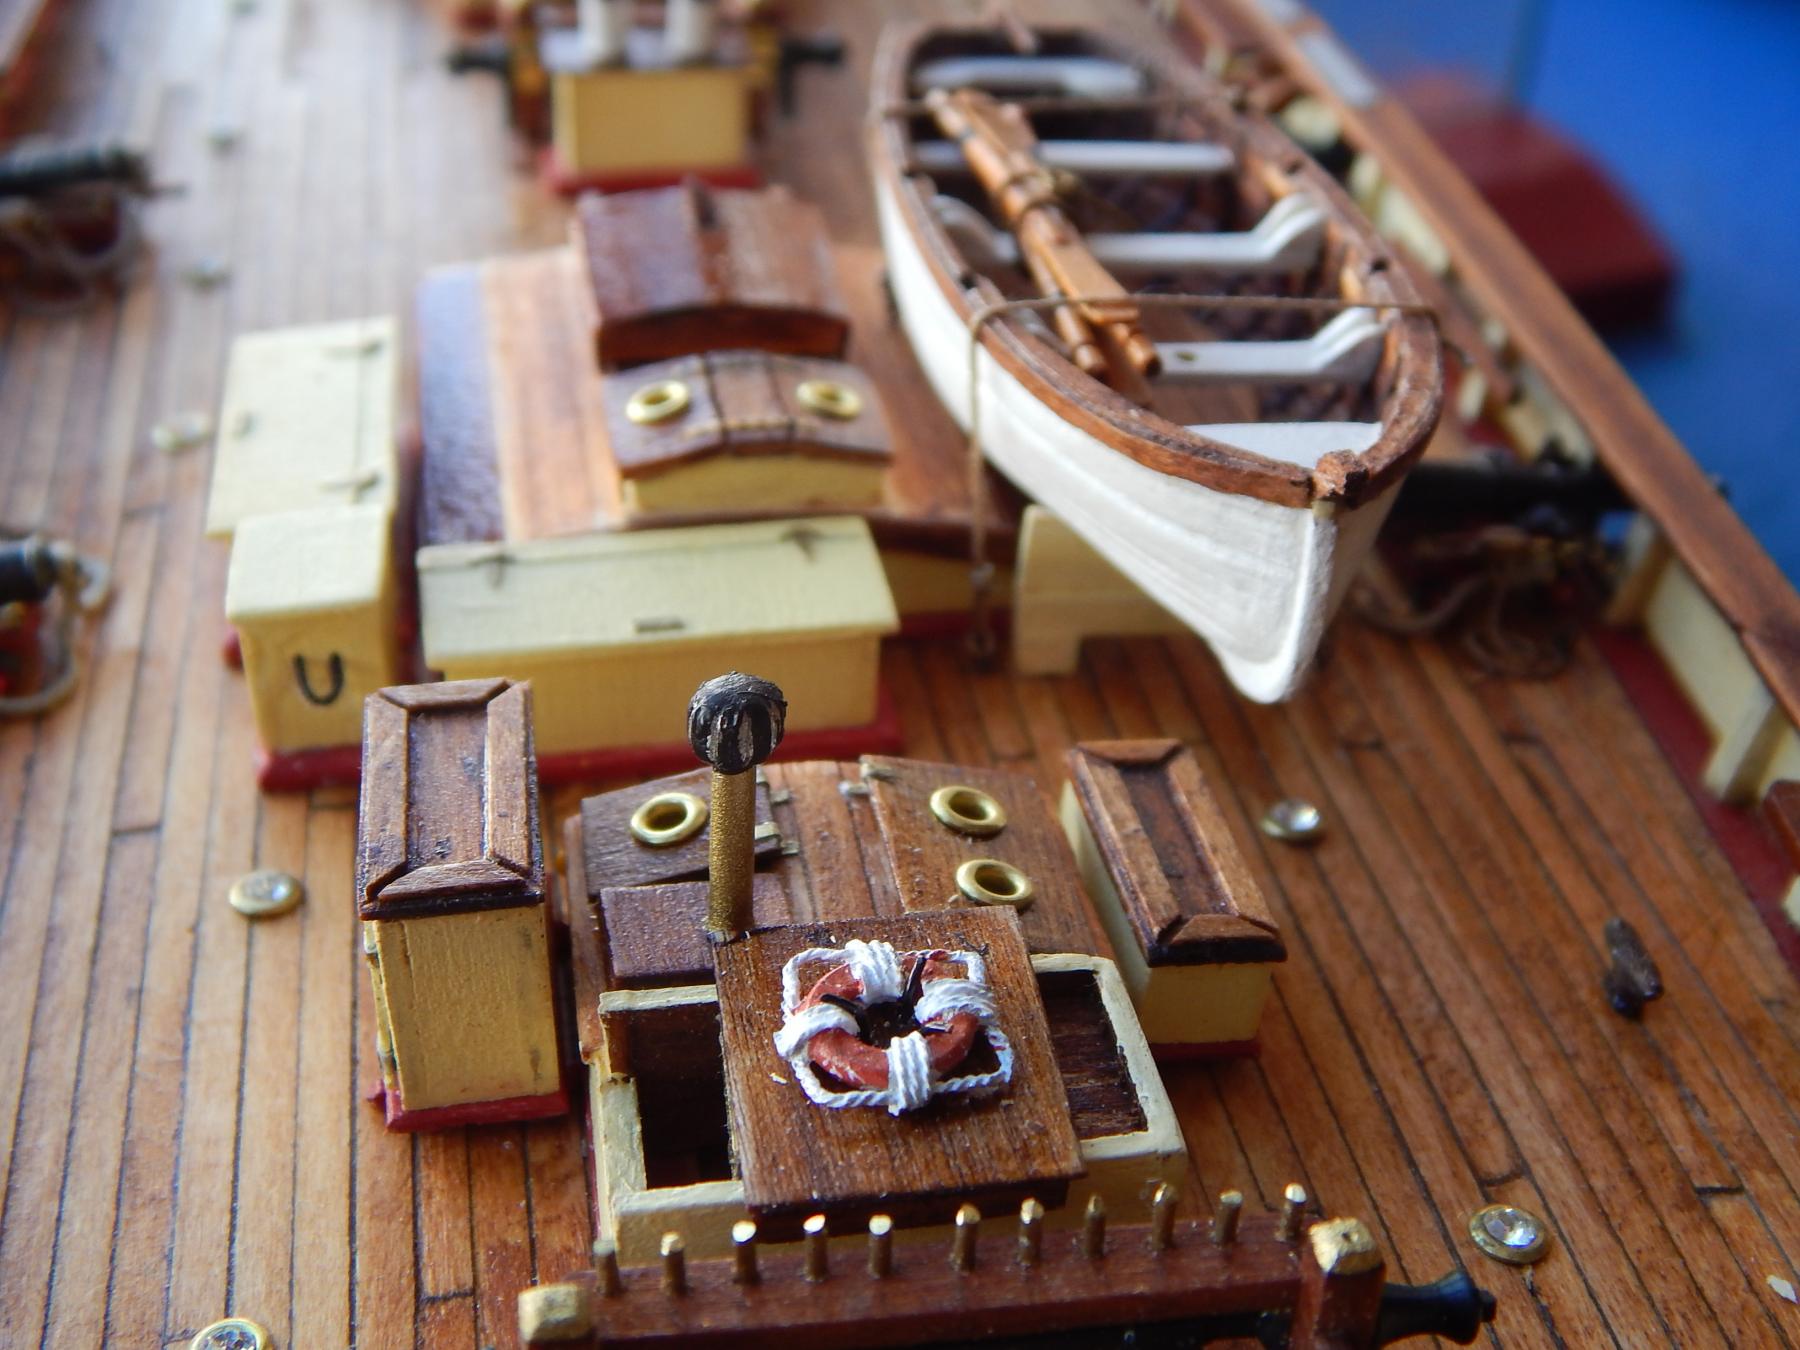
Hi everyone!!
After almost seven months, finally I finished all the deck furniture and glue them in their proper place. Here some pictures:
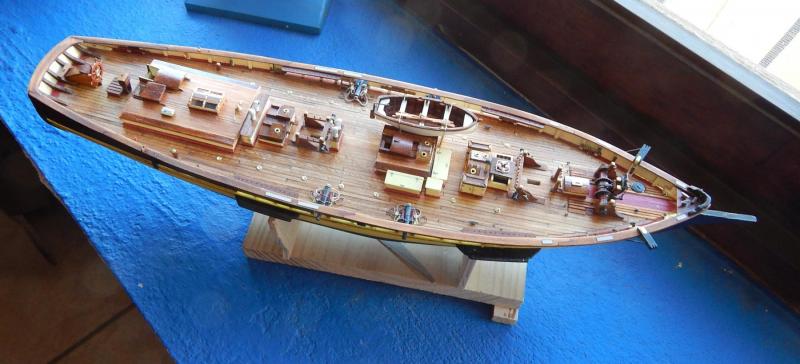

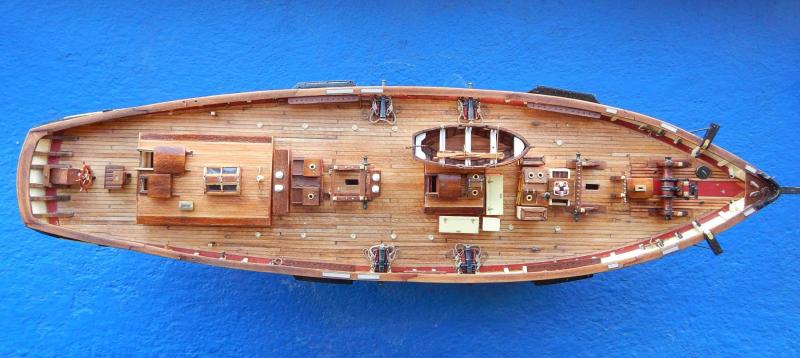
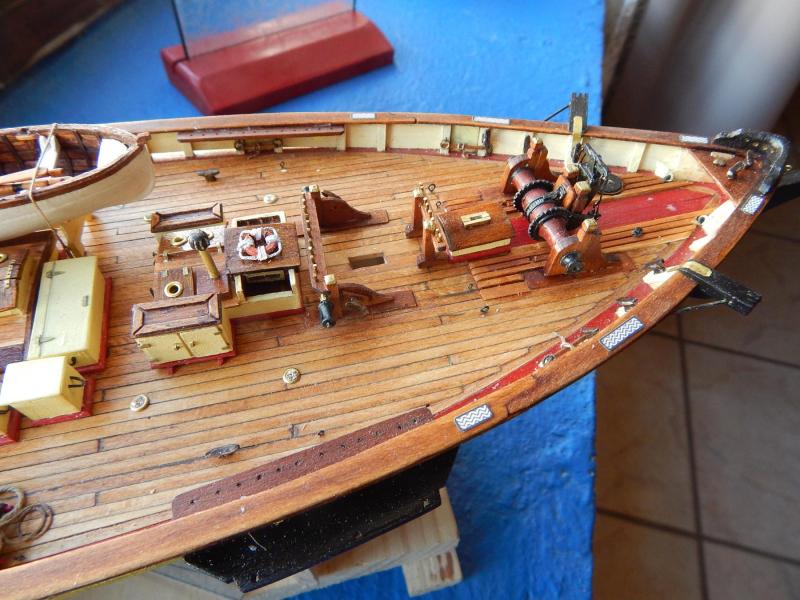
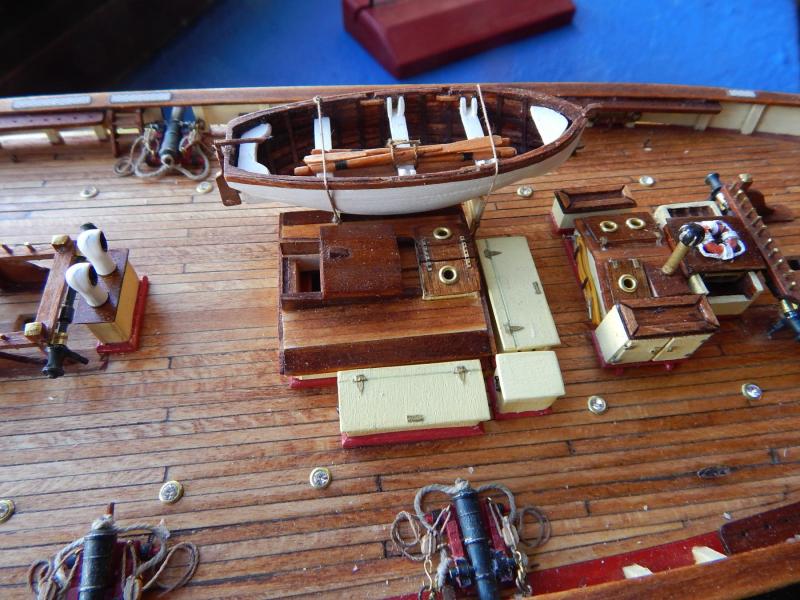
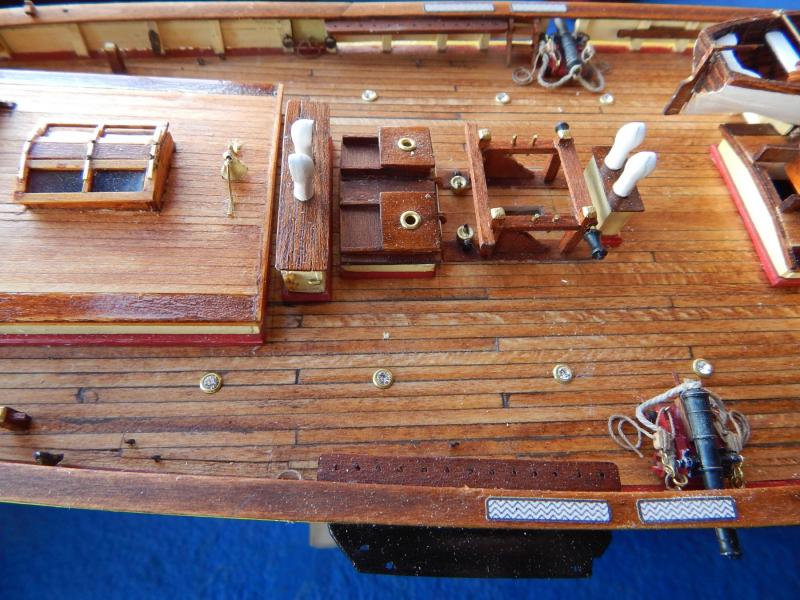
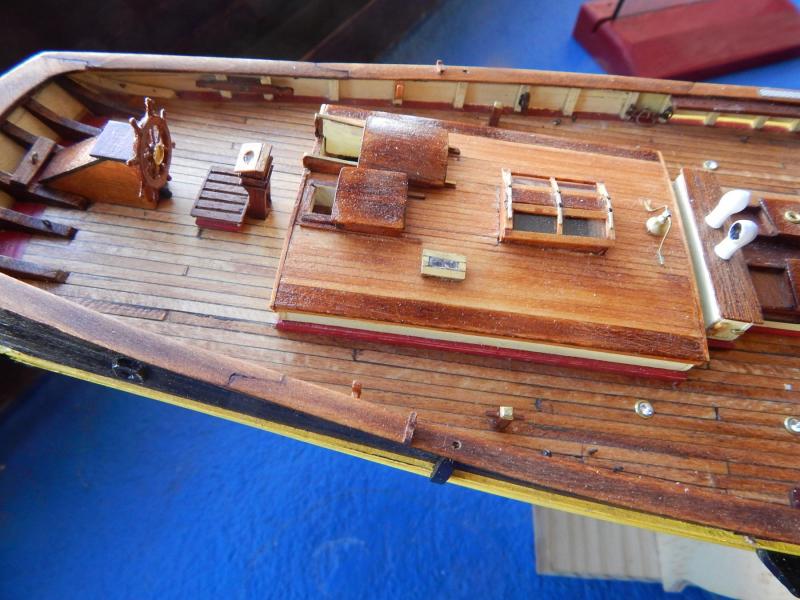
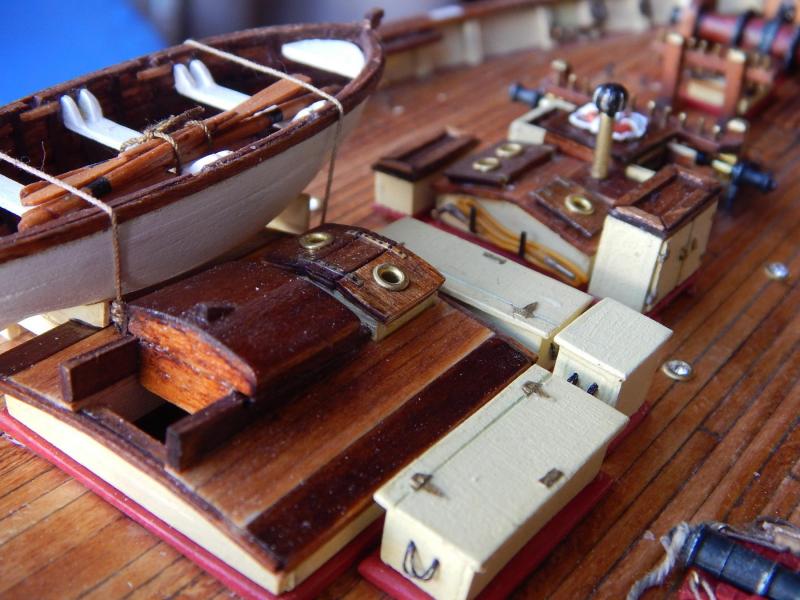

Next step, start with the masts.
Saludos, Karl
- MEDDO, marktiedens, russ and 2 others
-
5
-
Hola;
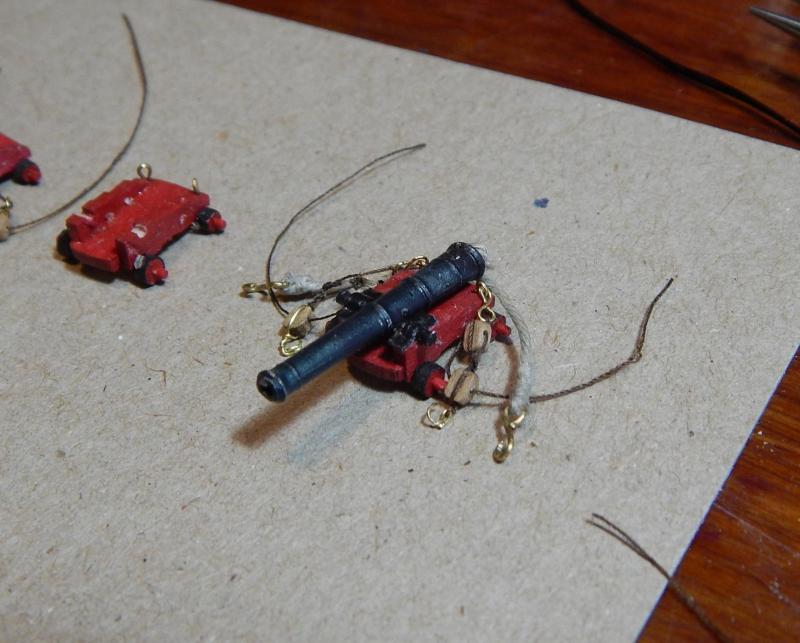
Following with the cannons and carriages, apparently the problem was solved changing the eyebolts but that was not so. I tried to accommodate the cannons in its place but they do not look good, the reason: the blocks are out of scale and are to big (the correct size would be less than 5/64 instead the ones provided 3/32). So, instead of two blocks per side I remove one of them to get more space. They are not as they must be but they look better.
Here with the two blocks:

Here with one block removed:
Here you can see the difference of both

Saludos, Karl
-
Hola Andy:
I also had several problems trying to do the box hinges, but finally I got good results doing them with little strips of paper that were previously painted with metallic bronze color. You can see the results in my post #61.
Saludos, Karl
-
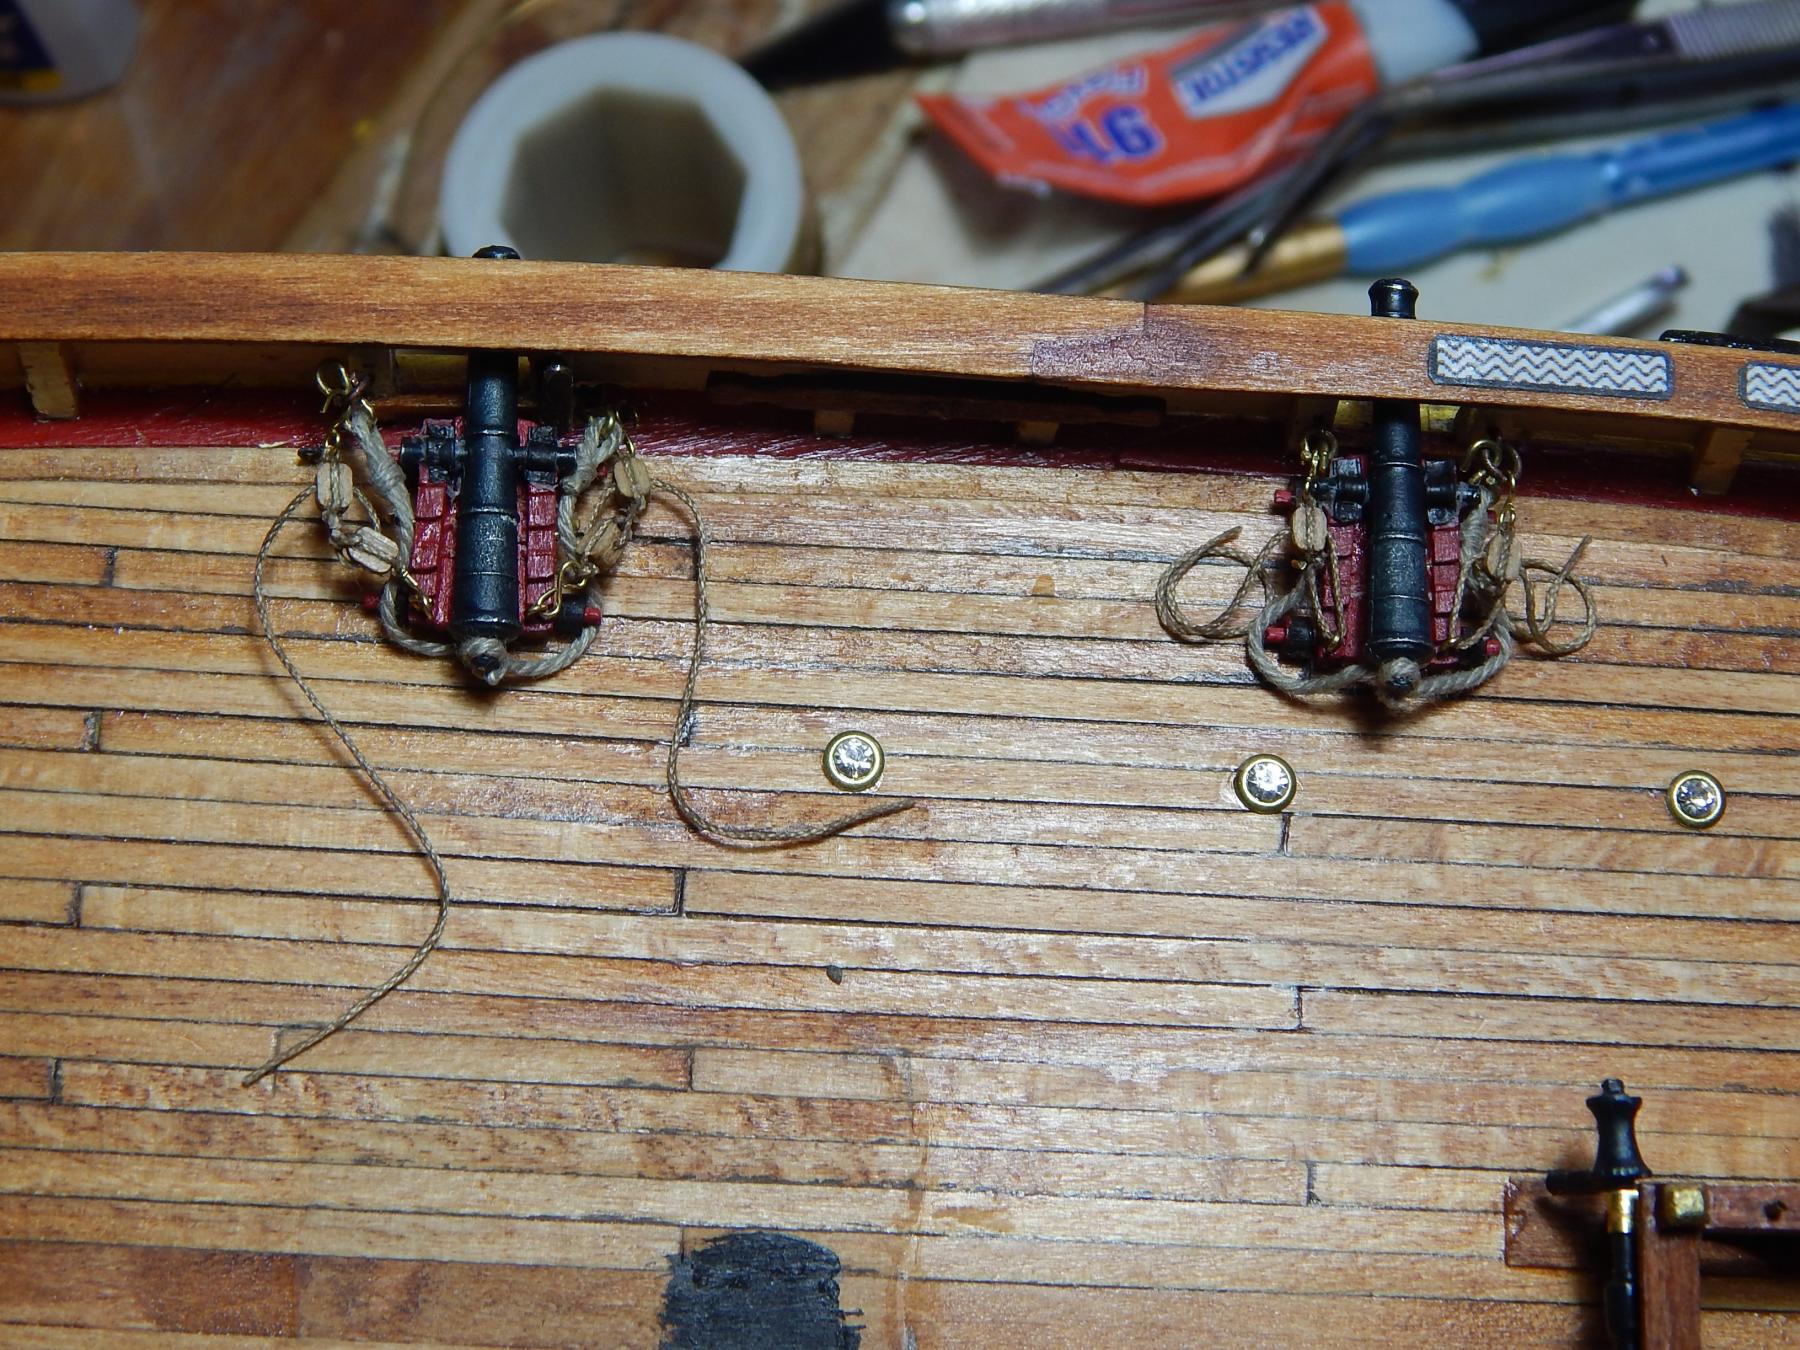
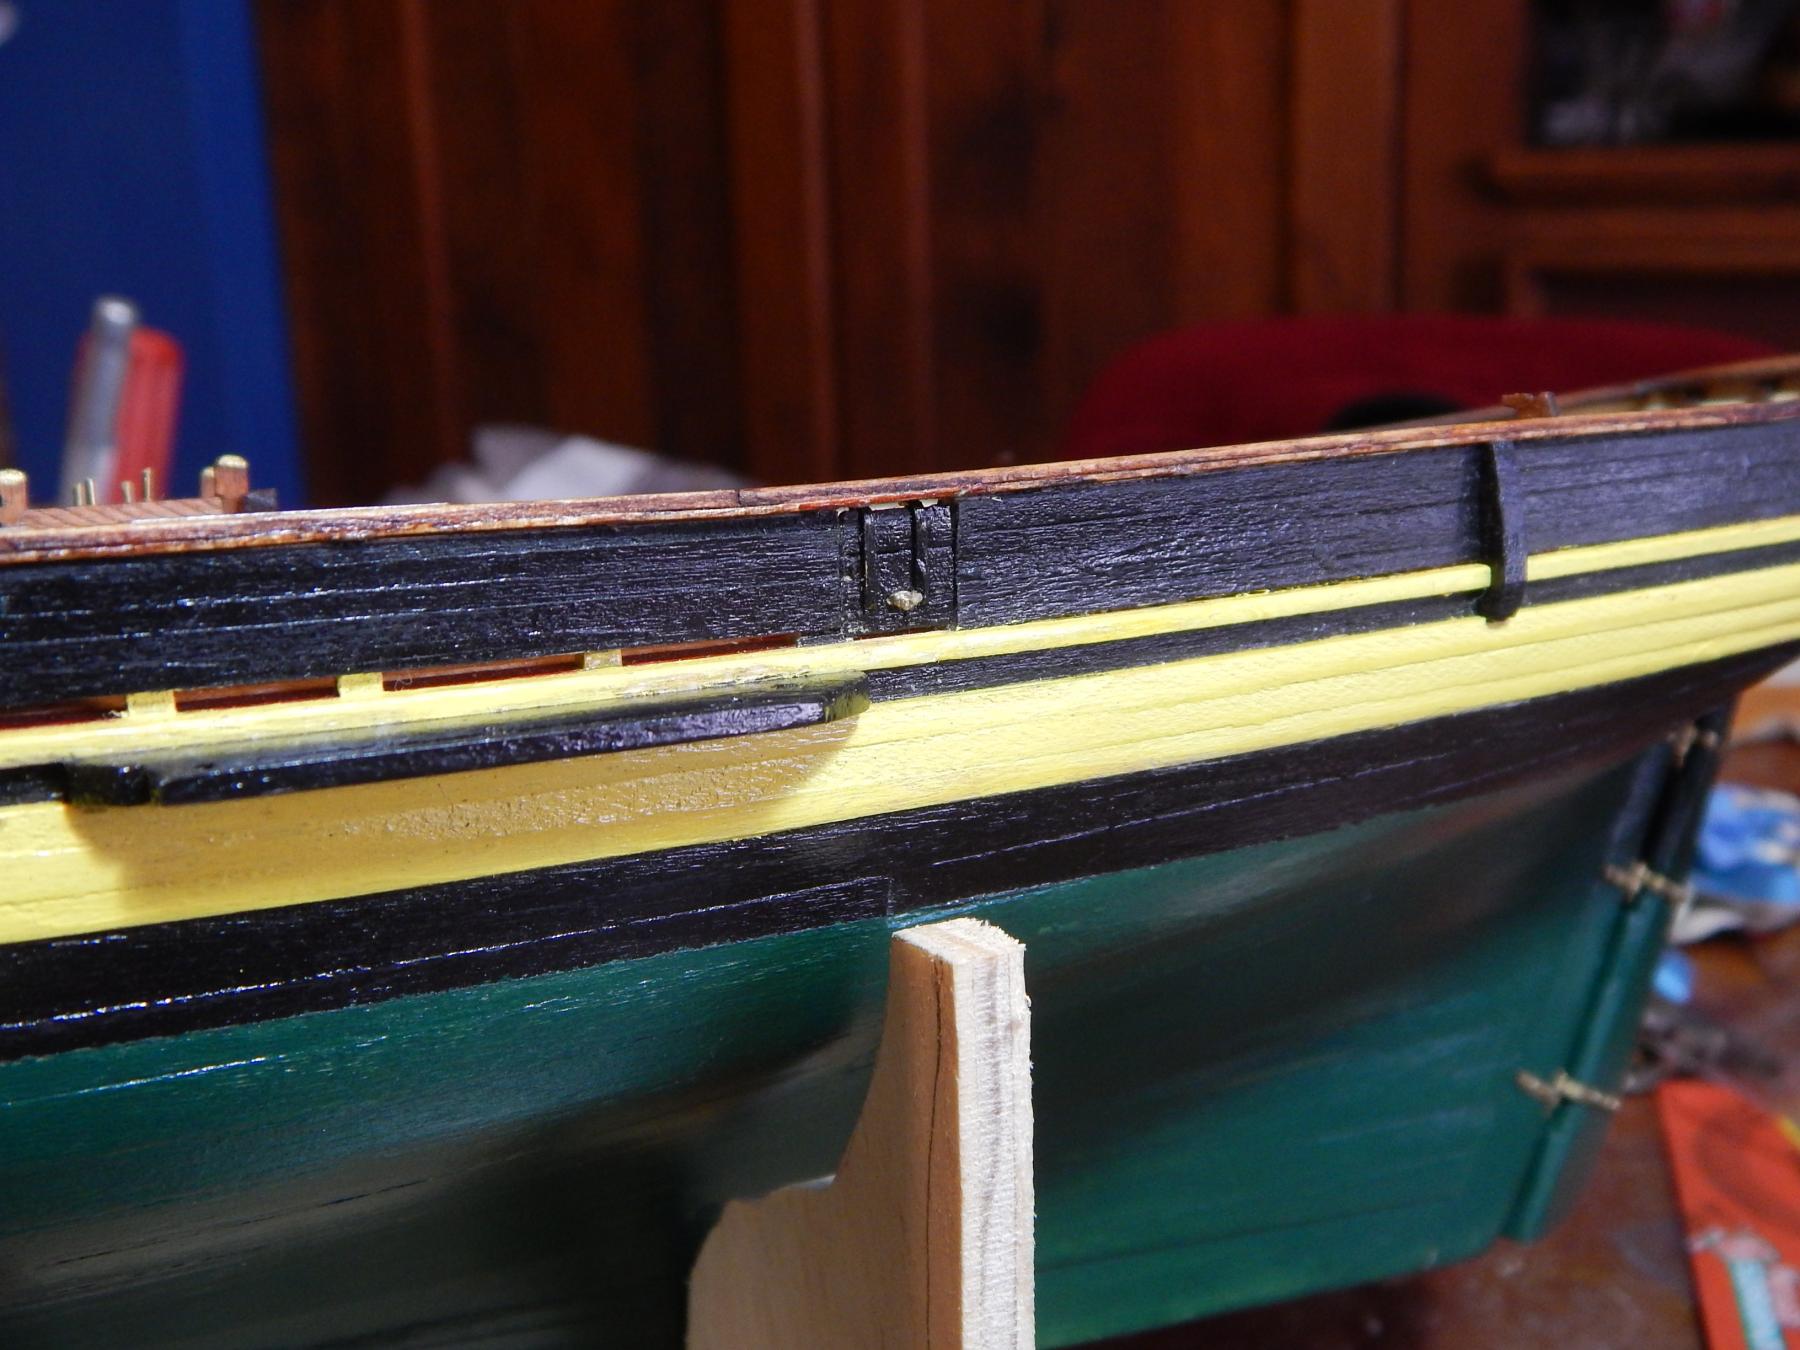
Hola:
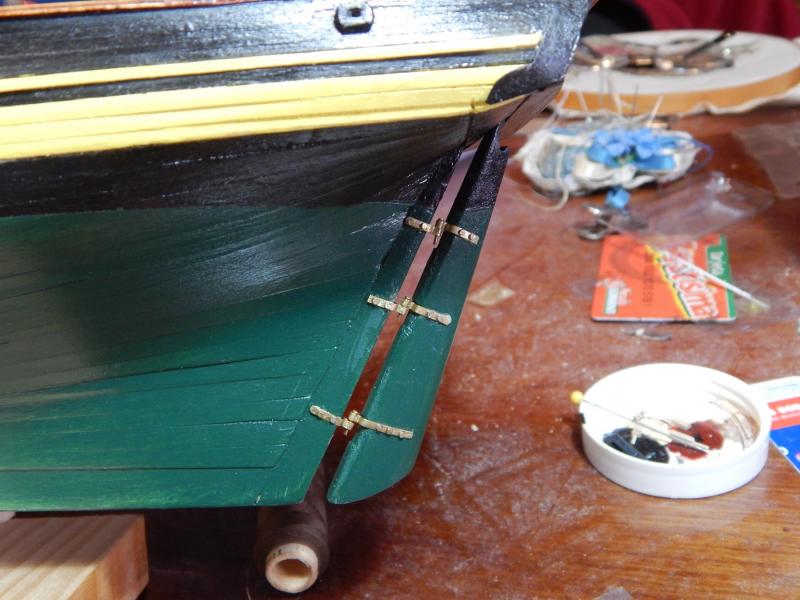
Continuing with the last steps of the deck I installed the Gunports lids that must remain closed:


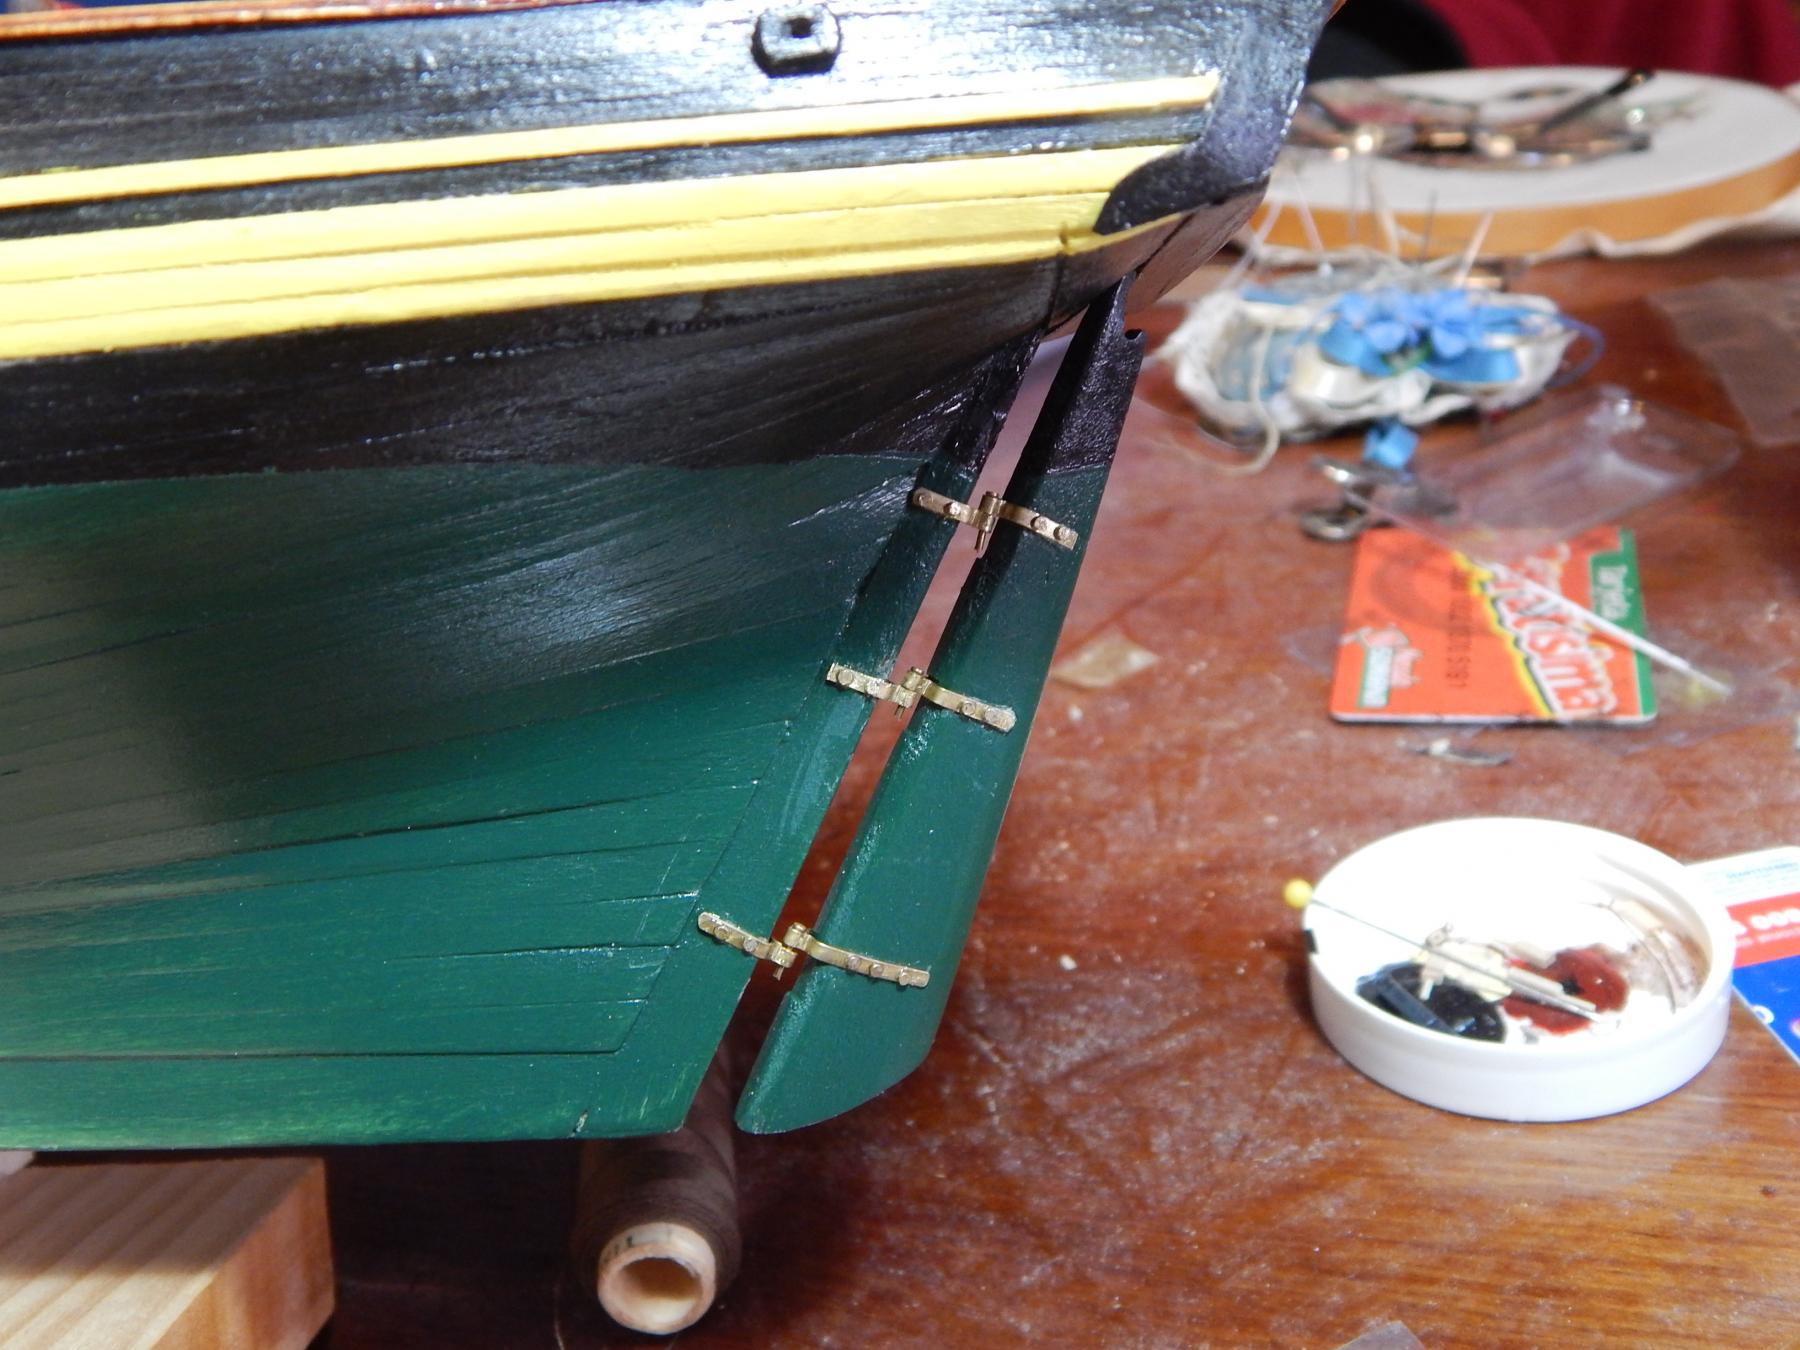
Also I fixed the rudder blade to the hull:
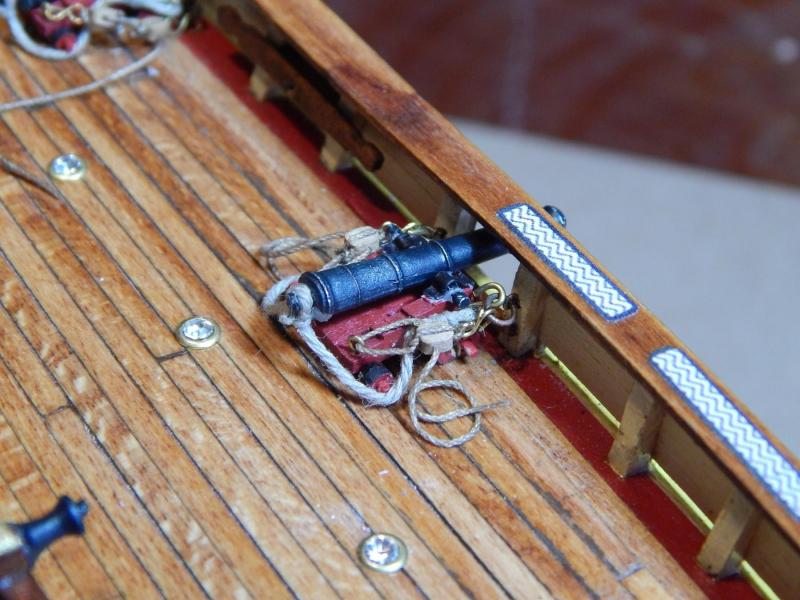
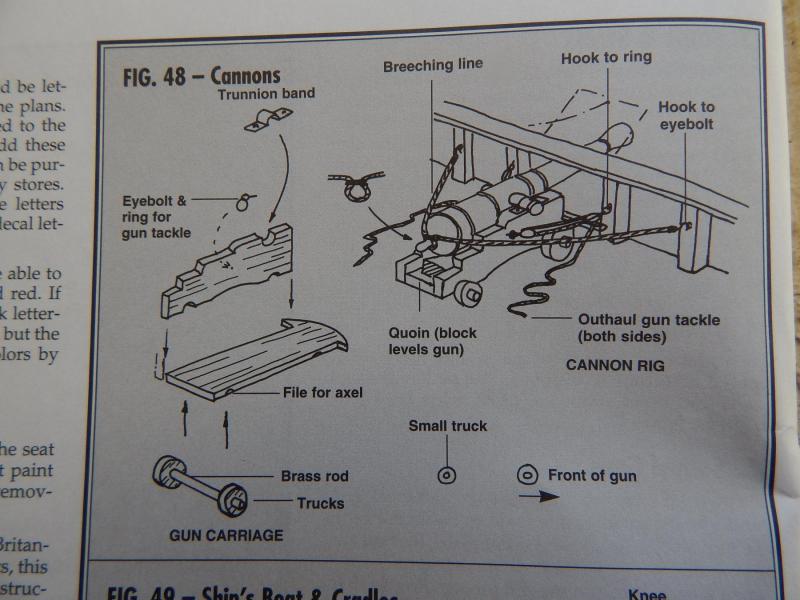
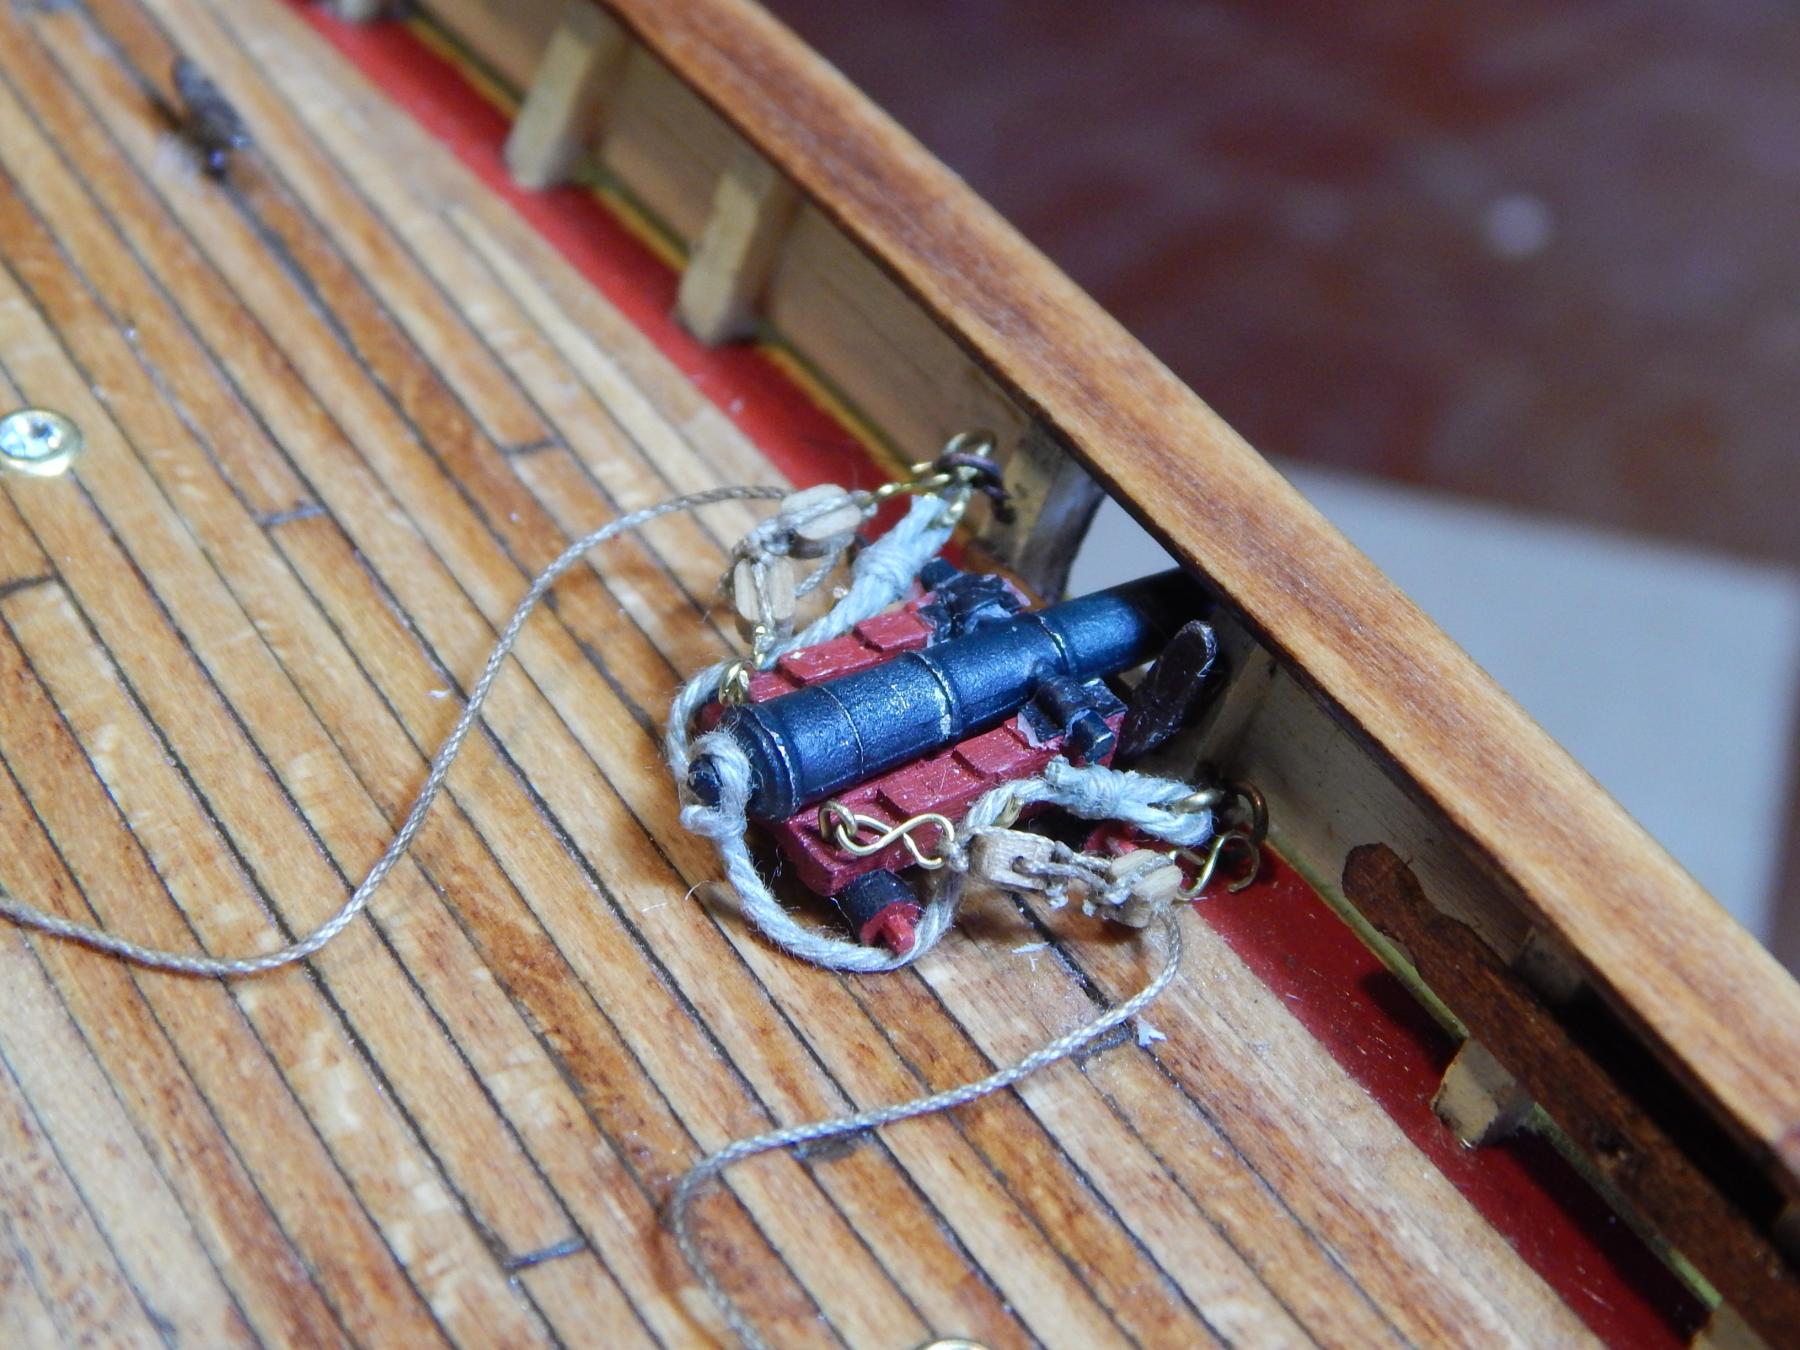
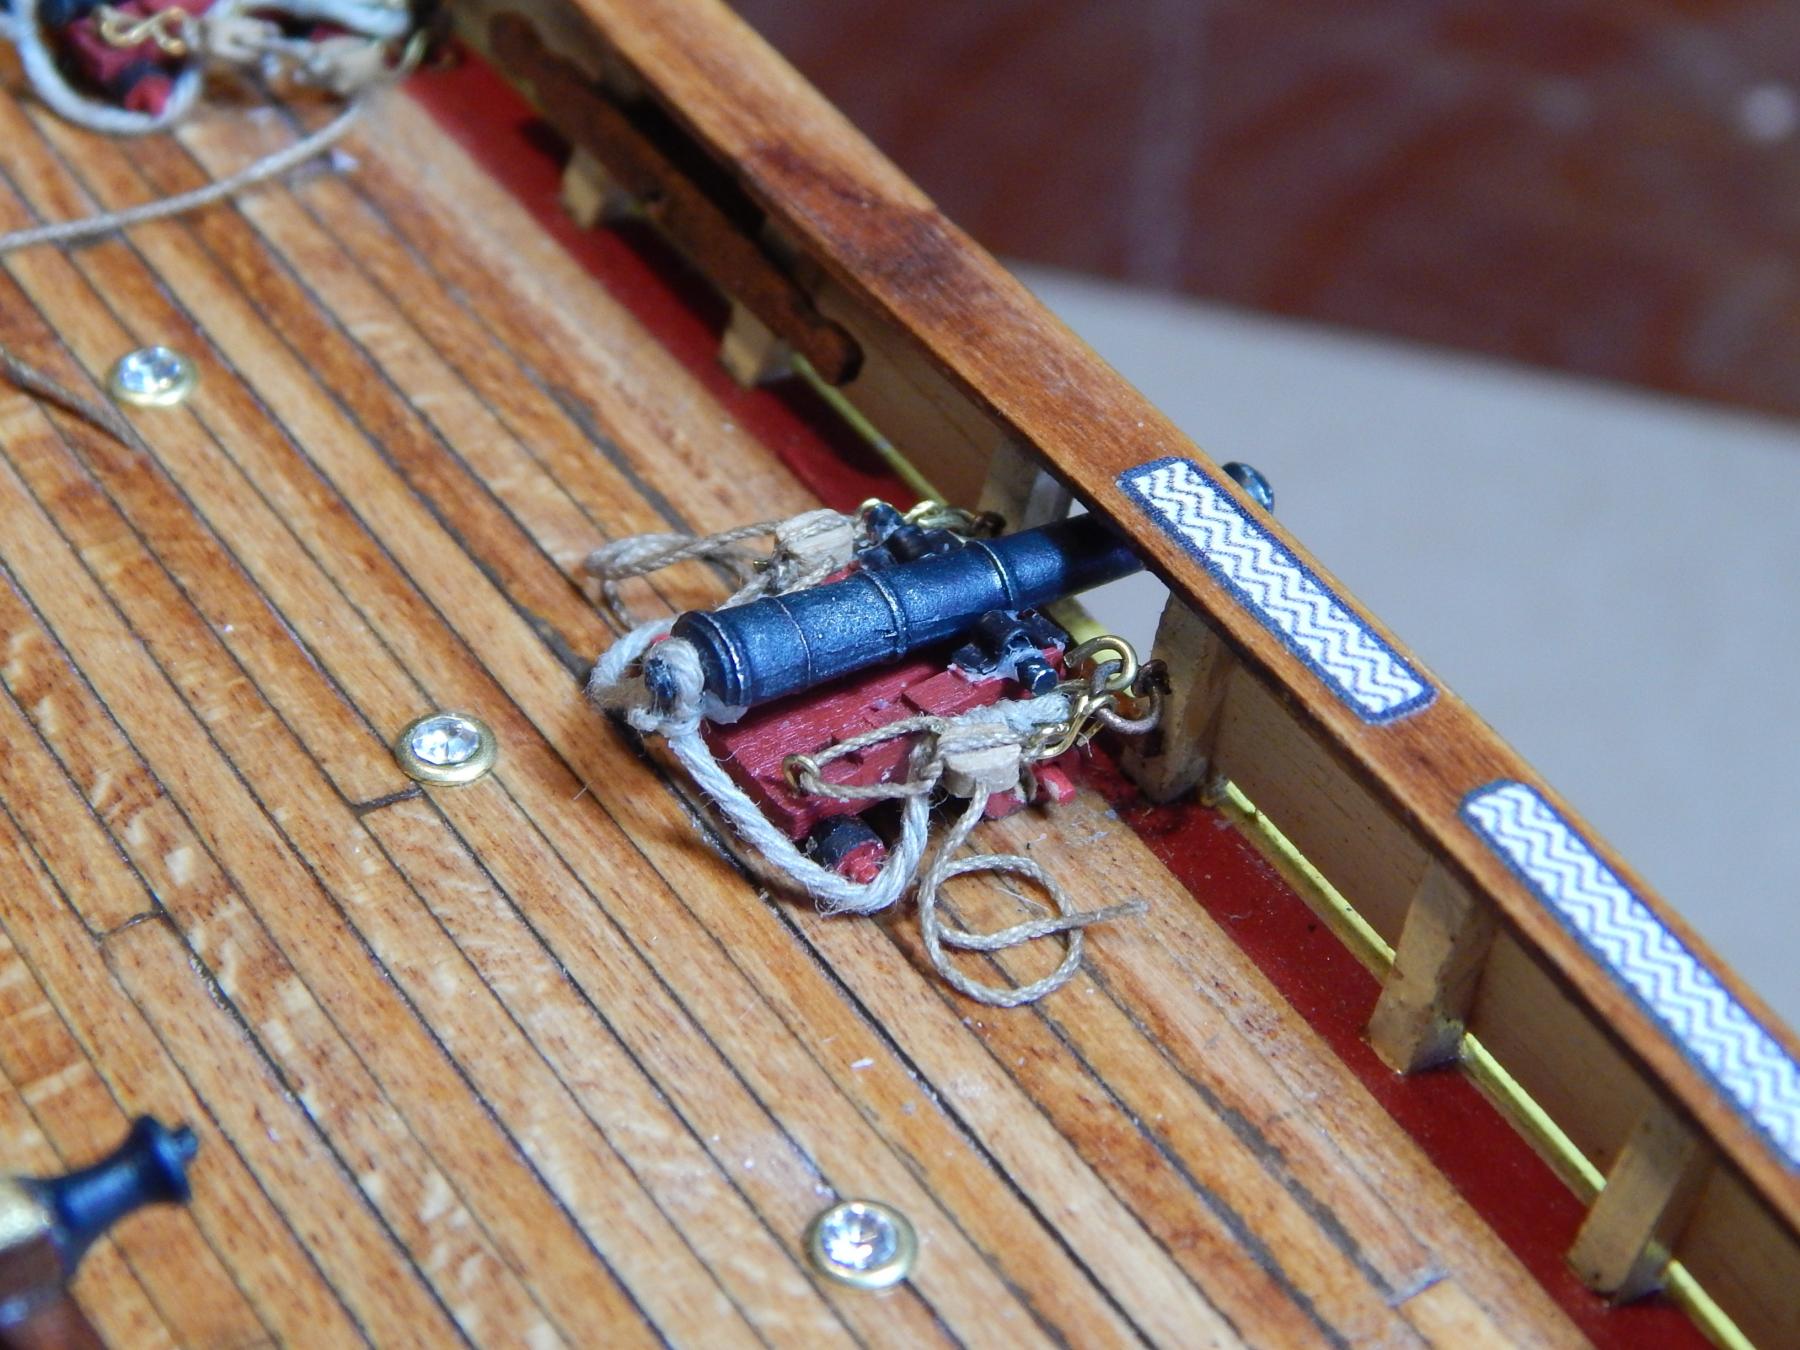
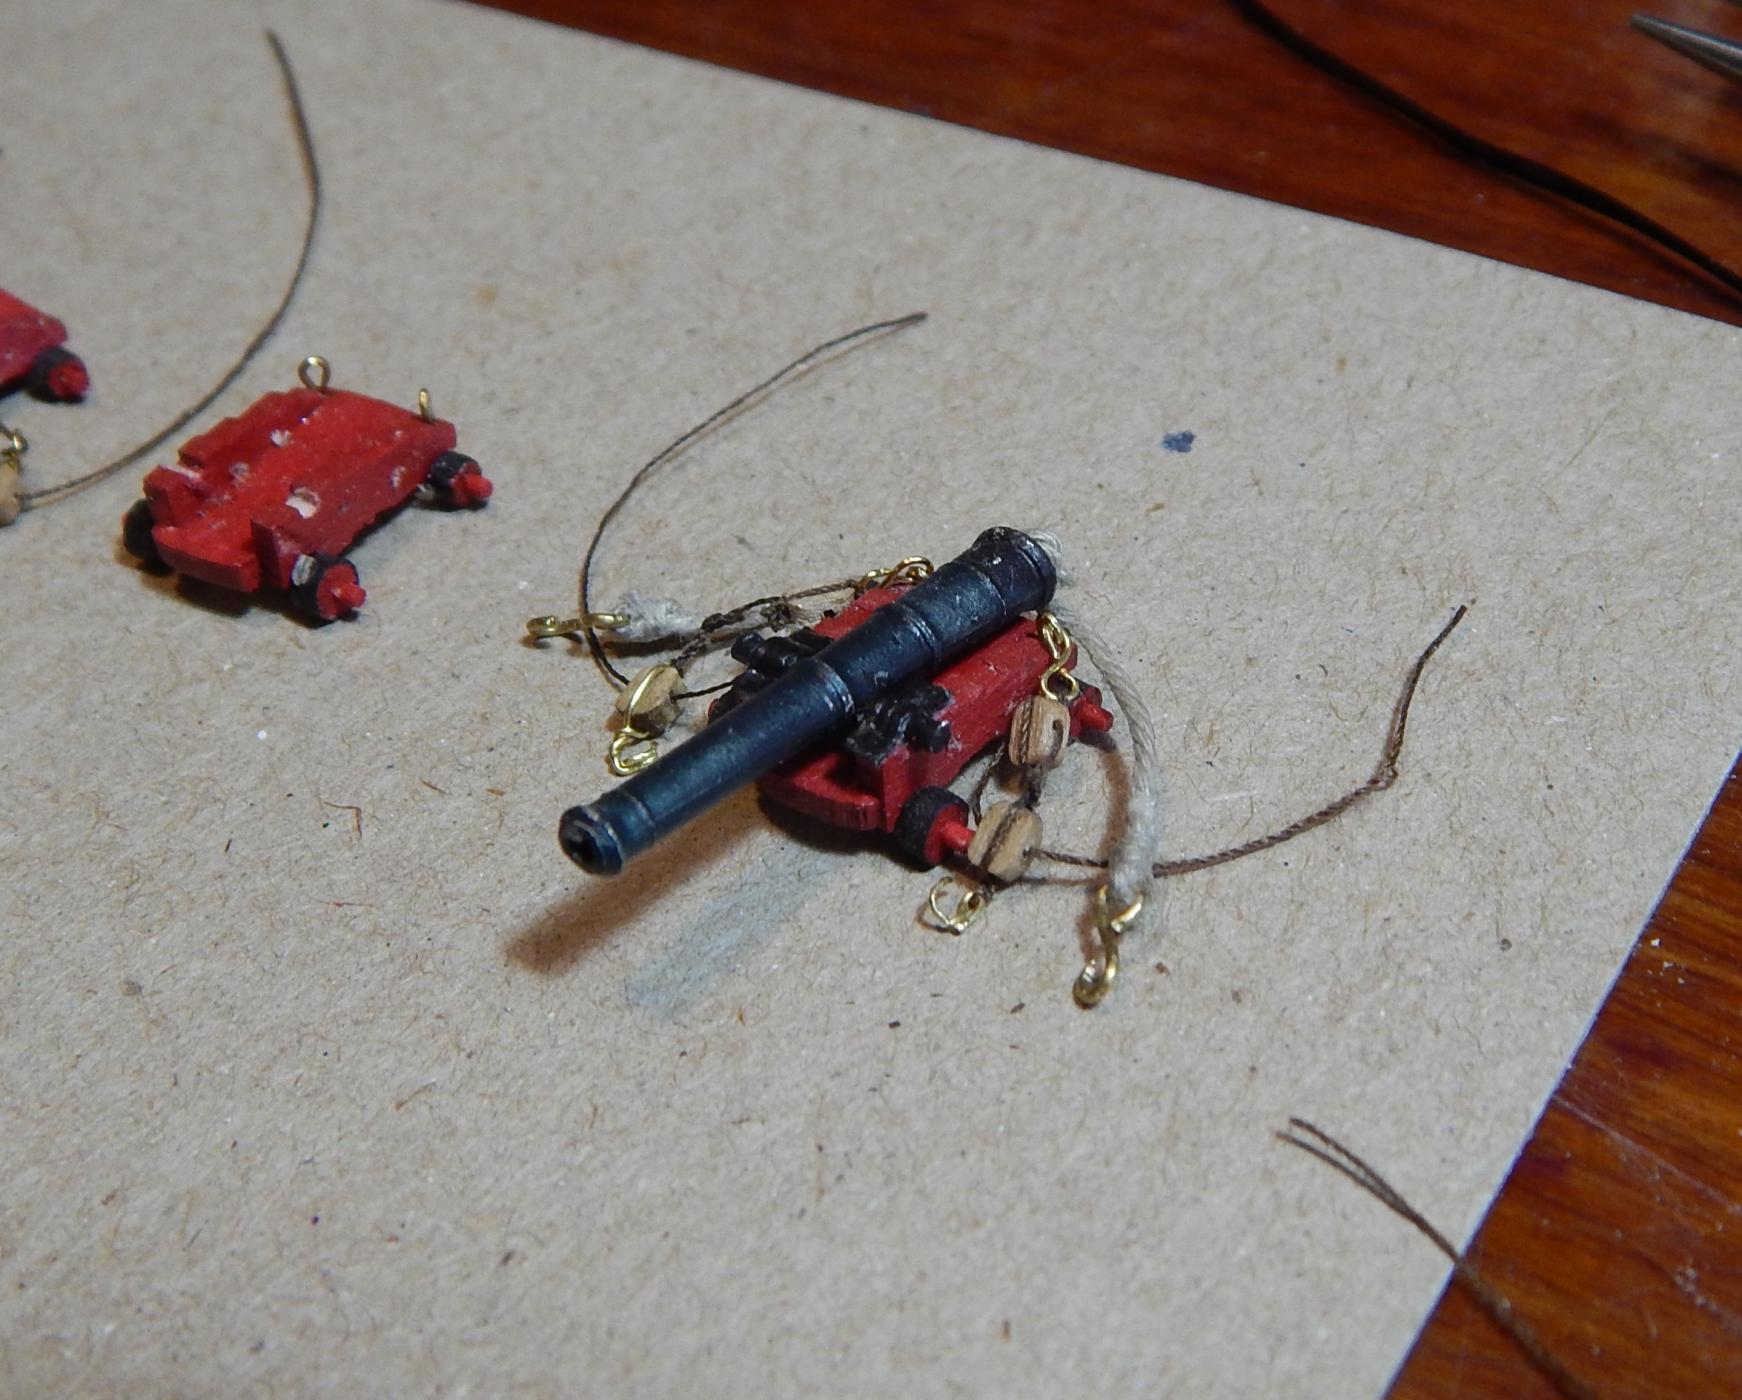
Special mention deserve the cannons and carriages: If you try to follow the instructions you are dealing with an impossible task mainly because the gun tackles are out of proportion (compared with the instructions drawing) and there is no way to accommodate both tackles in the space provided, additionally the eyebolt position on the carriage is in wrong place, instead of being at the center it must be put a little behind the smaller trucks and in a vertical position: All of these changes can be seen in the real picture of the ship.
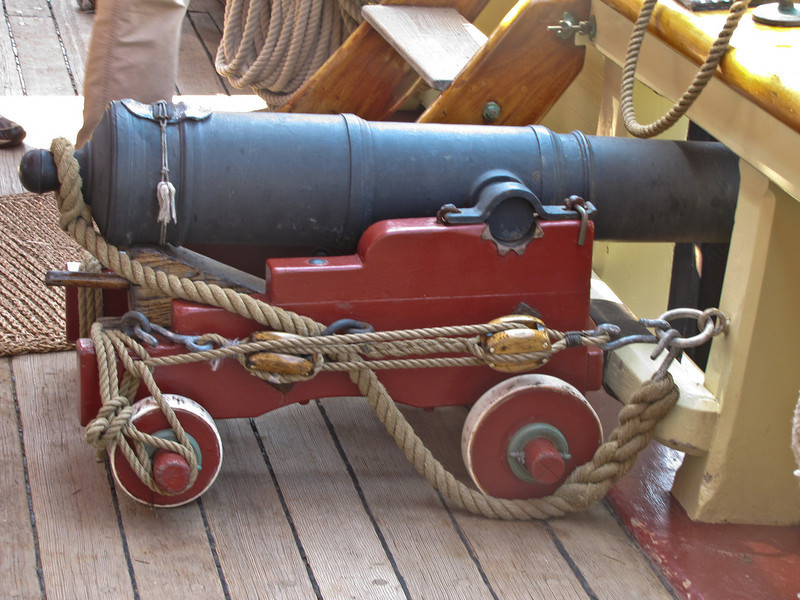
Here you can see the differences I talk about. The first two are according to the instructions and the other ones with the corrected position.
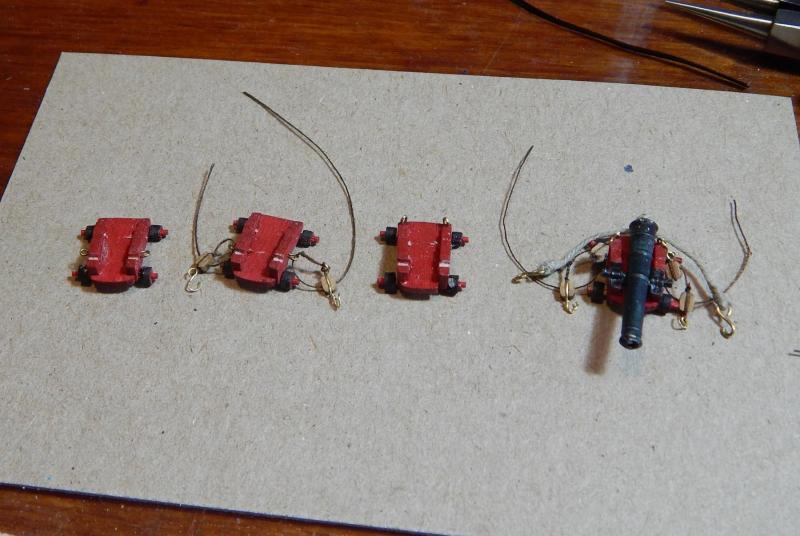
Final comment about the carriages: the brass rod provided to serve as the tackle rods are very thin and so I must to do them filing toothpicks to the right size.
Saludos, Karl
- marktiedens, russ and GrantGoodale
-
3
-
Professor:
Thank you very much for your kind words
Saludos, Karl


Royal Louis 1780 by Ulises Victoria - FINISHED - Mamoli - Scale 1/90 - French 126-gun ship
in - Kit build logs for subjects built from 1751 - 1800
Posted
Hola Ulises:
As I mention you before, we are deeply sorry about you lost your Mom, but you are right, life must go on.
Your idea of how to coil the ropes are clever and they see very nice.
Muchos saludos, Karl