scrubbyj427
-
Posts
1,729 -
Joined
-
Last visited
Content Type
Profiles
Forums
Gallery
Events
Everything posted by scrubbyj427
-
 Wow! …. Just brilliant.
 -
HMS Euryalus 1803 by rlb - 1:48 scale
scrubbyj427 replied to rlb's topic in - Build logs for subjects built 1801 - 1850
That looks great Ron, stellar chisel work!- 122 replies
-
- 5
-

-
- Euryalus
- Plank-on-frame
- (and 4 more)
-
Thank you Matt, slightly scientific but still relying on the old eye test. Thank you Fred, very much looking forward to you resuming work on your Winnie, your cheerful looks very good. Thank you Waldemar, much appreciated. Thank you Rusty, my cleaning frequency has slightly regressed to bi-weekly lol. Thank you Glenn, you’ll be there sooner than you think by the looks of it. I’ve been using your build as a “you should go back and re-do that part” or “why didn’t I do it that way” kind of guide. 😆
-
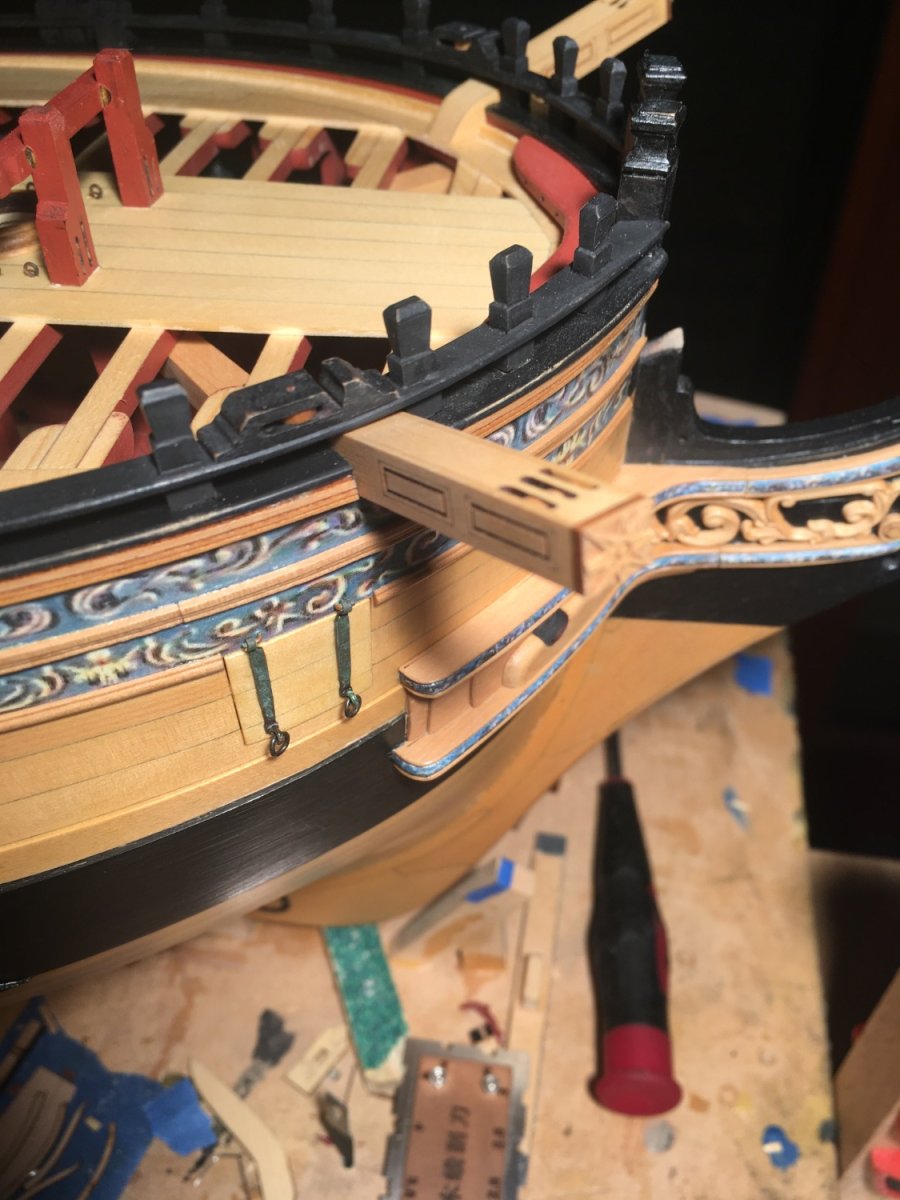
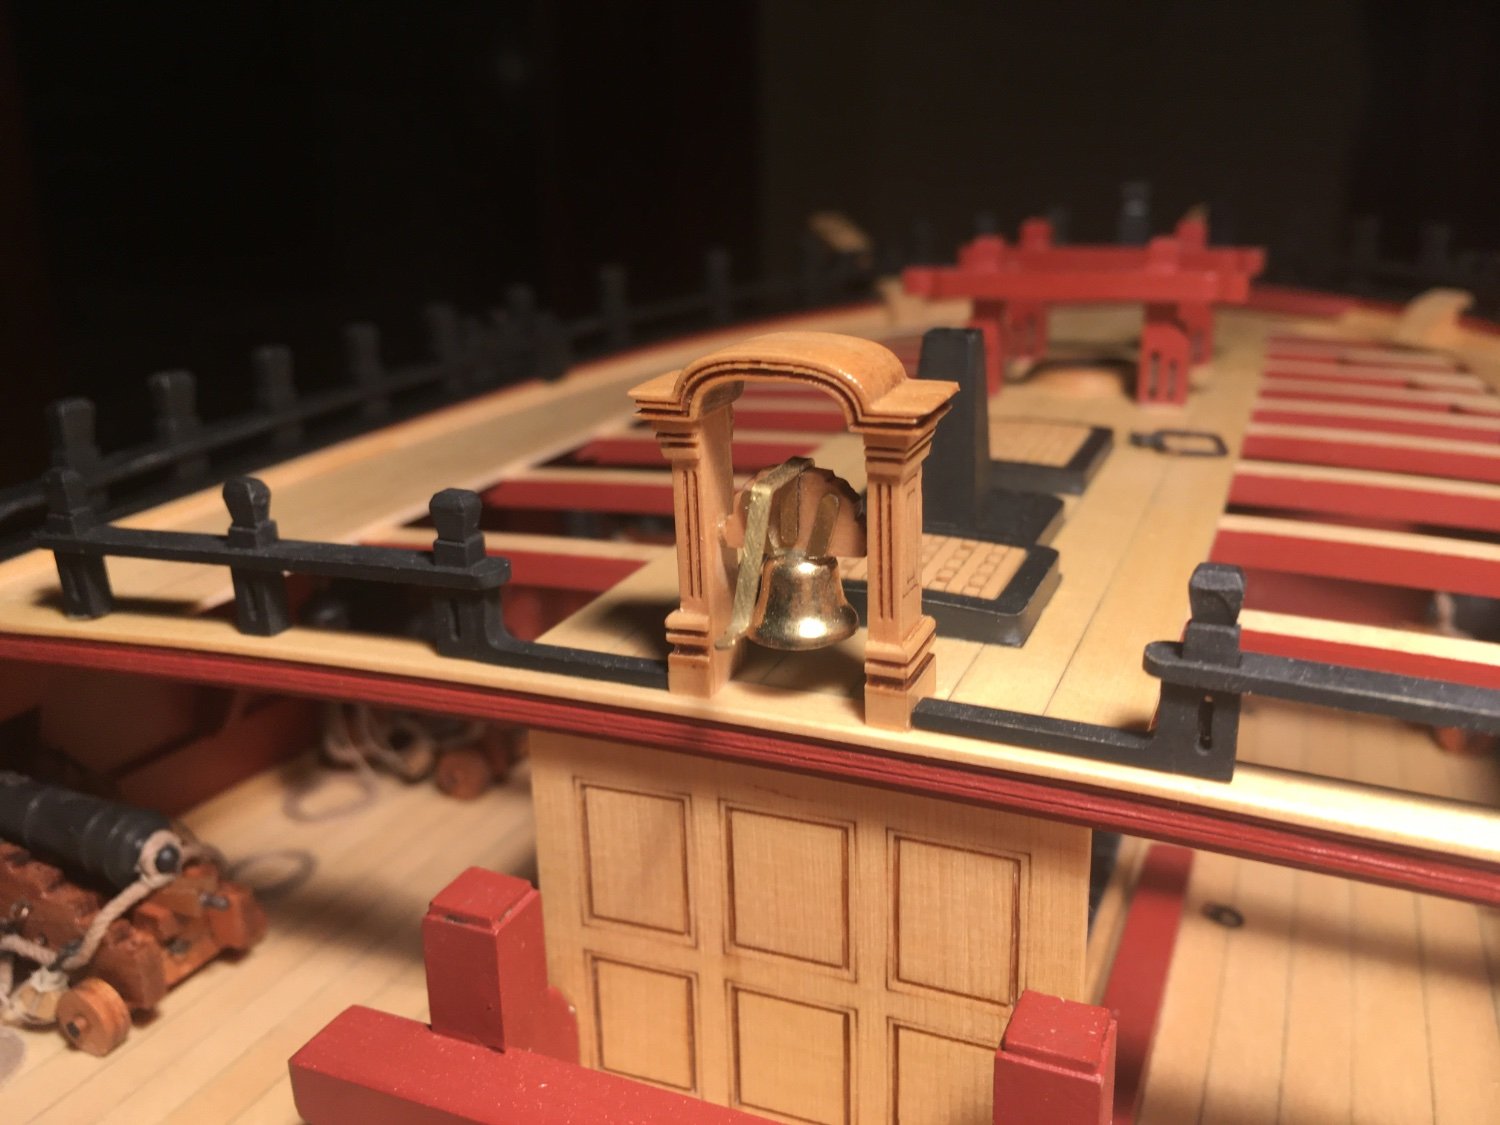
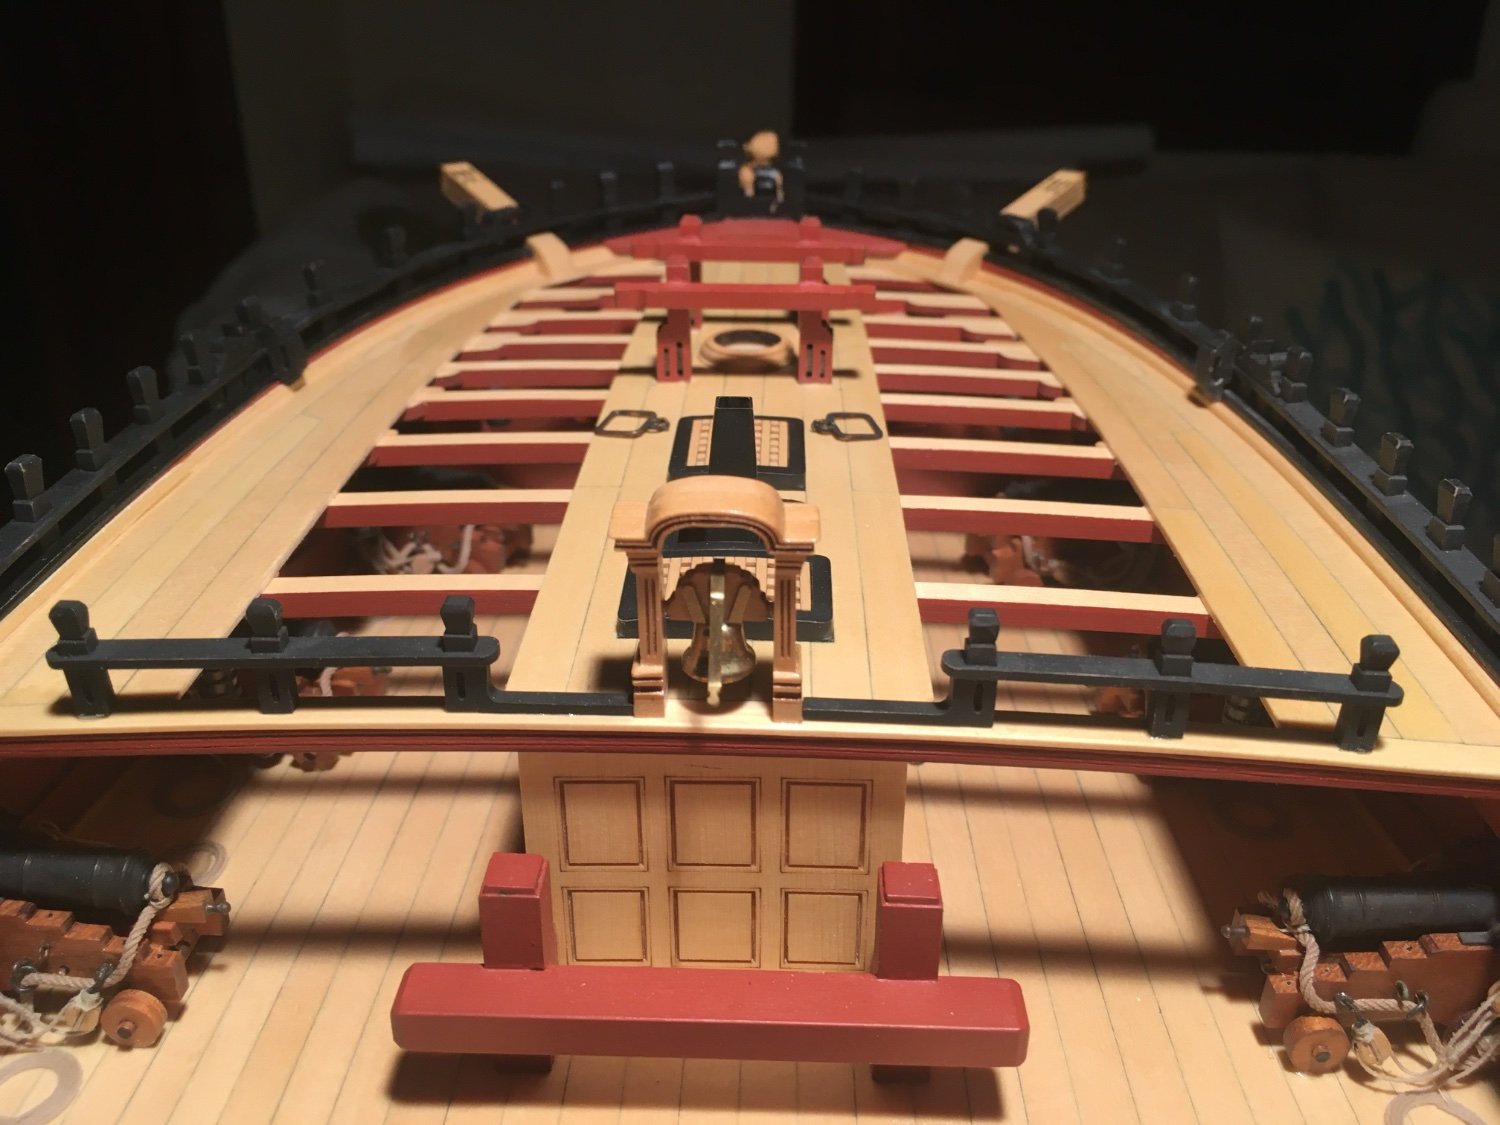
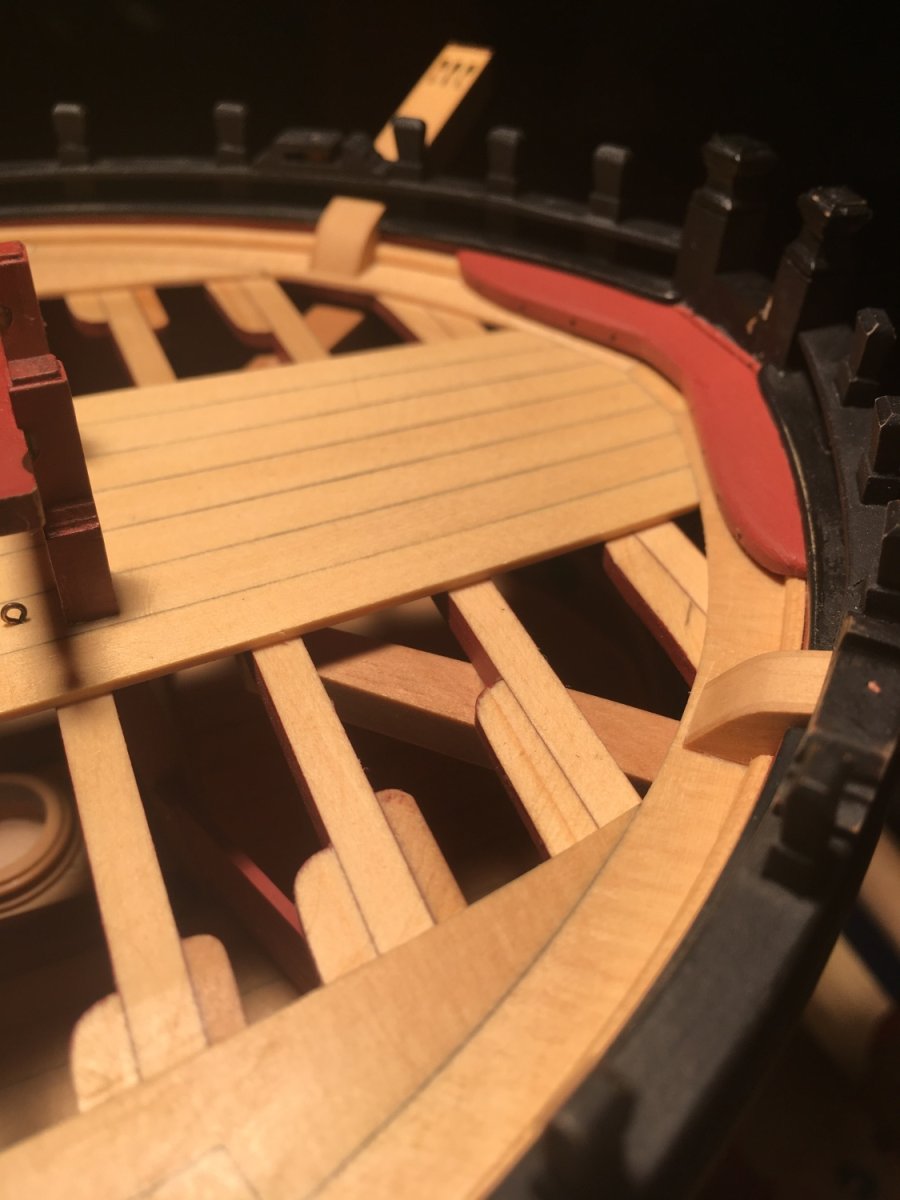
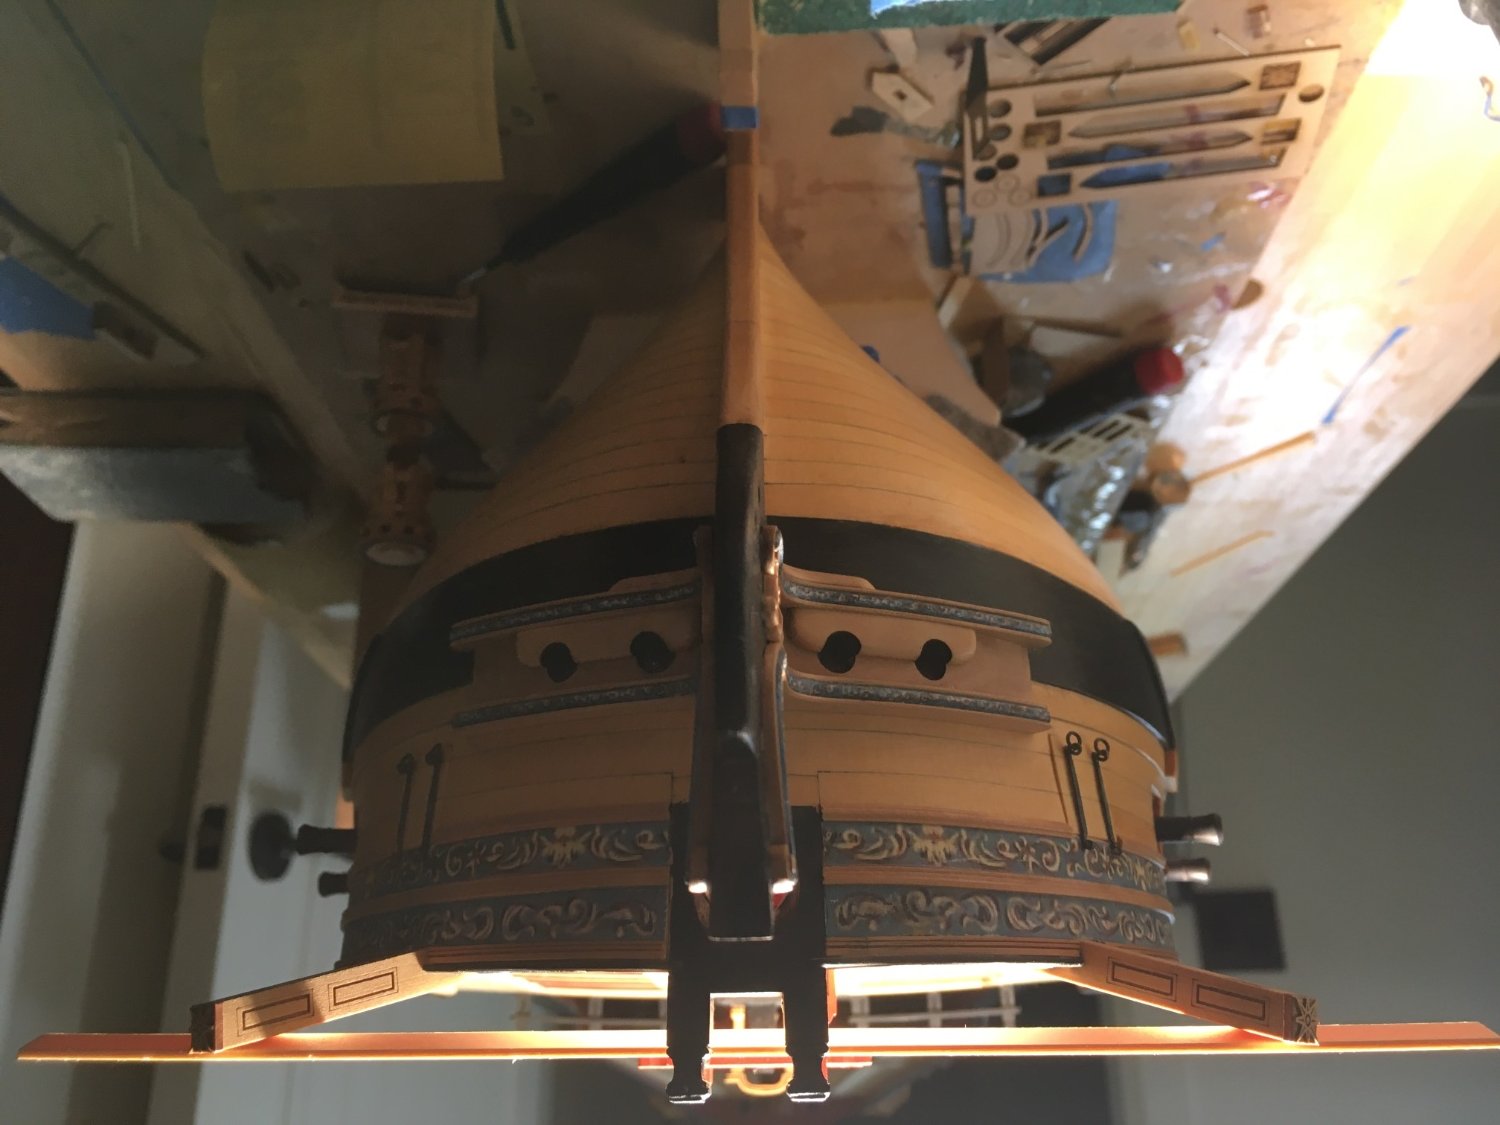
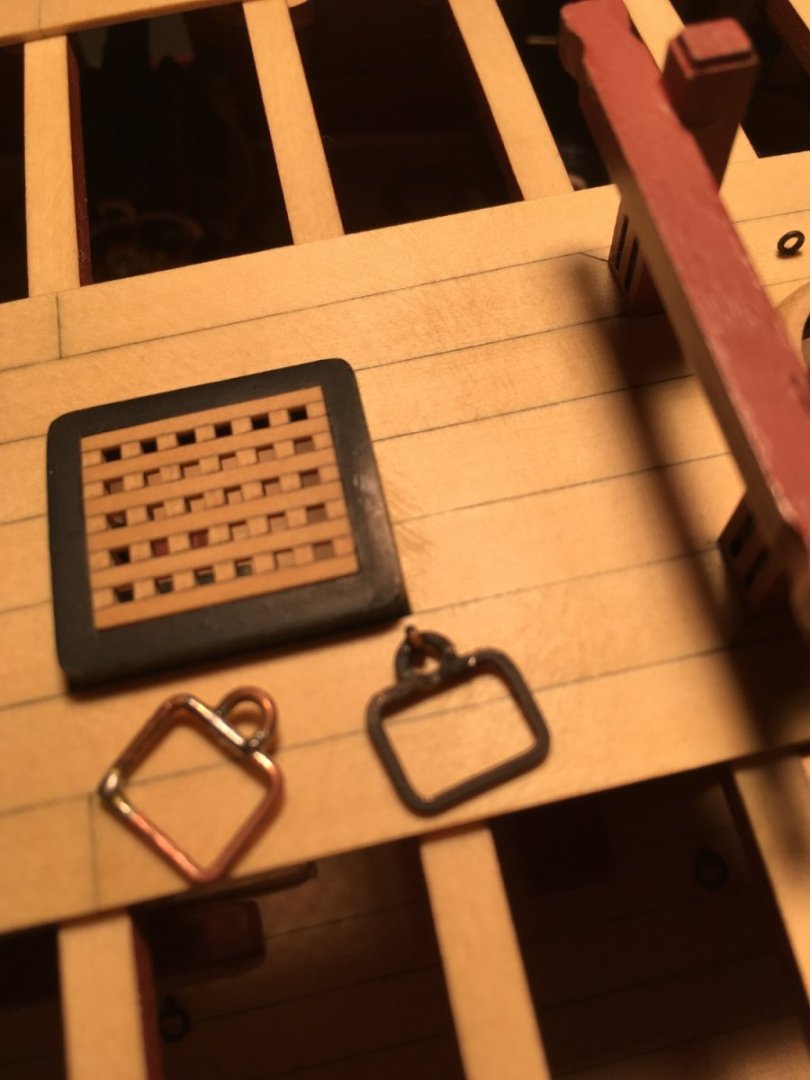
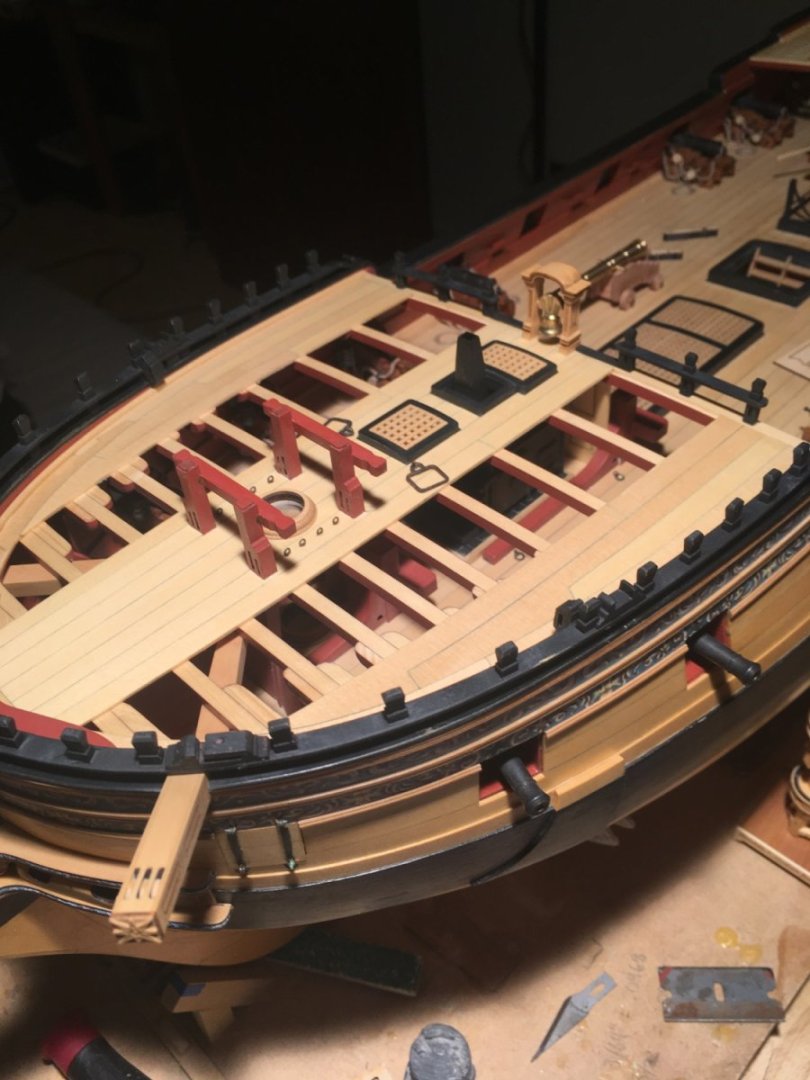
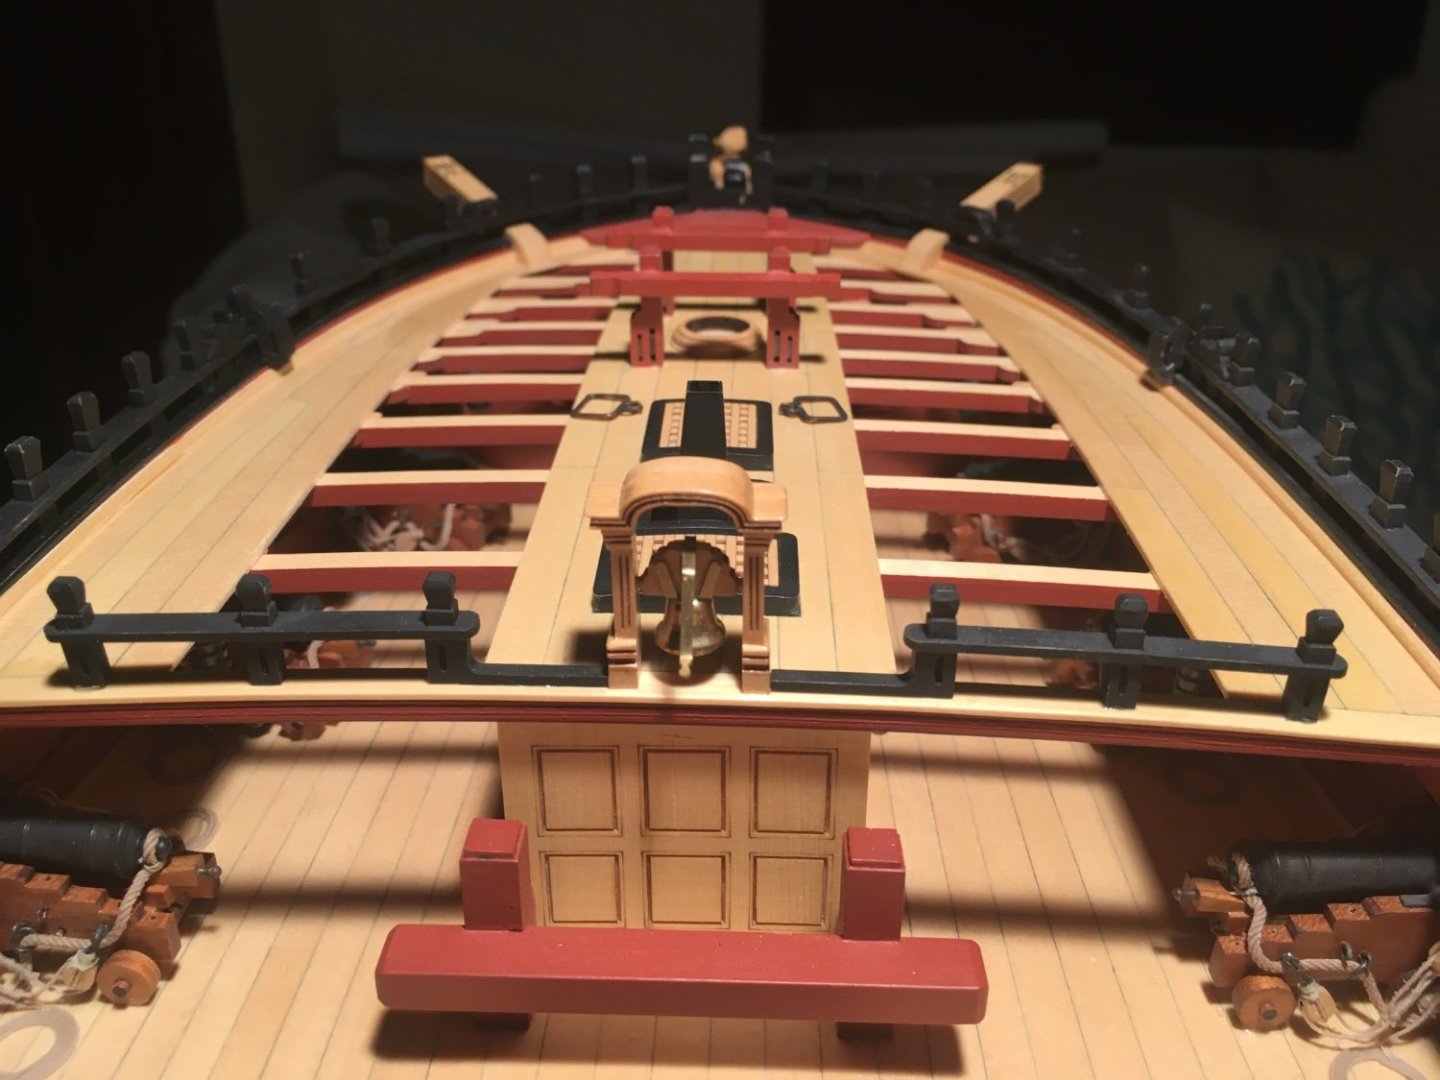
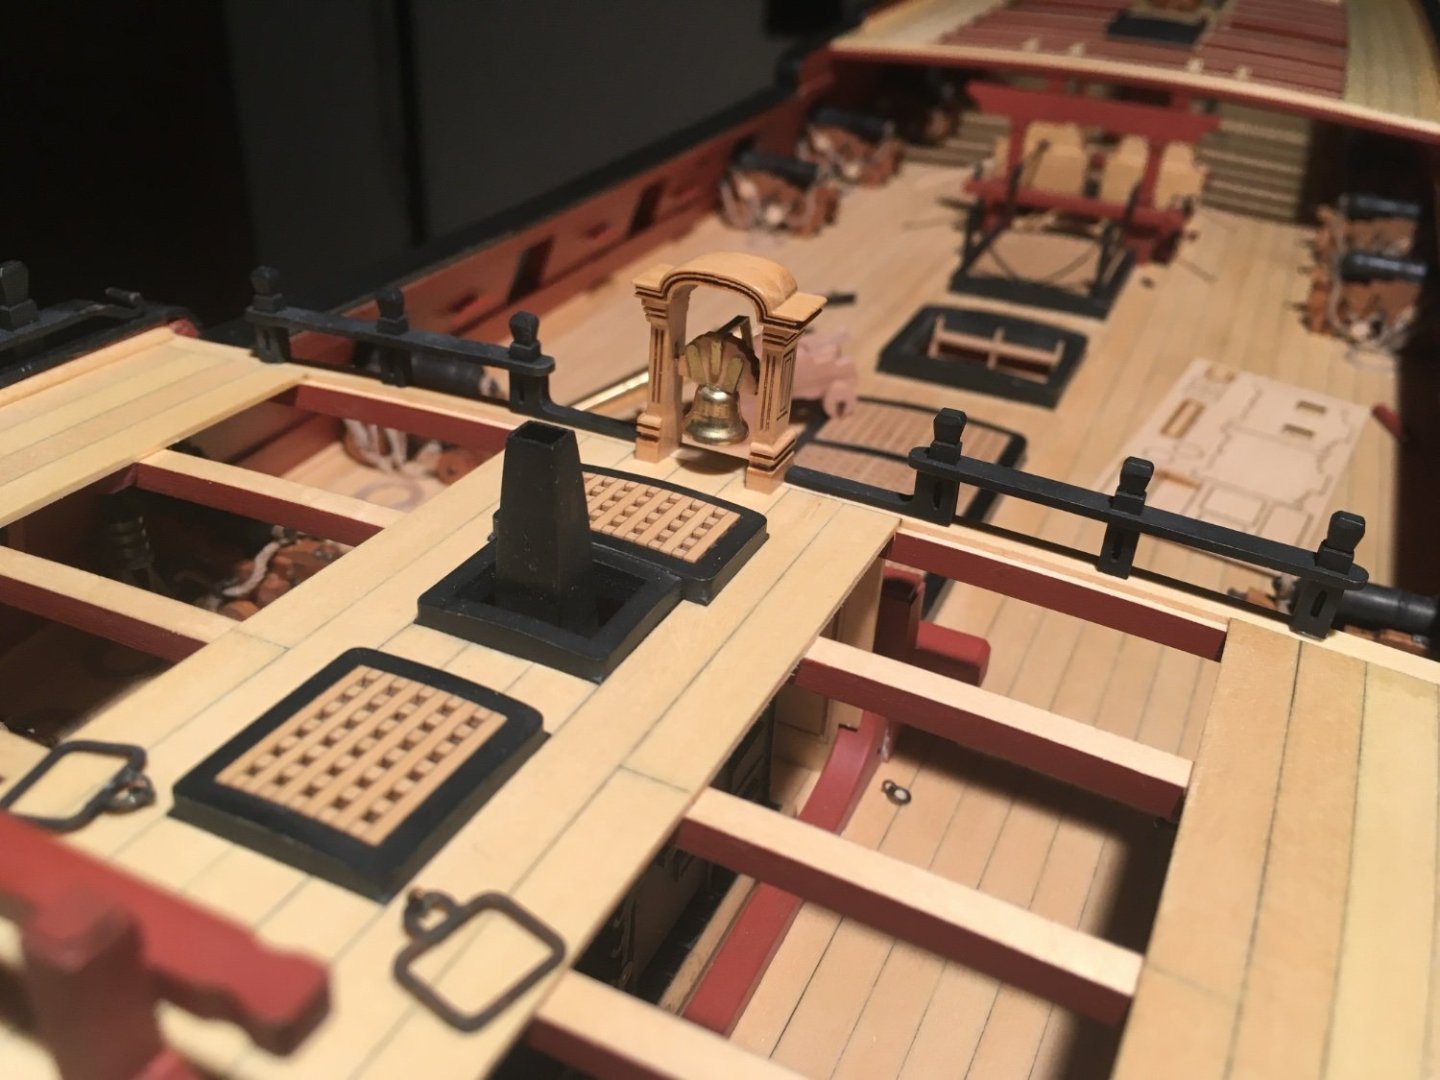
Completed chapter 9 a few days ago and already onto 10. Spent a lot of time on fitting things, lots or test/sand/repeat, until it fits right . The railing was kinda tricky due to the fact that my bow is slightly out of shape from not checking/correcting this very early on but I made it work and am happy with the results. I spent a lot of time of the cat heads and trying my best to make them look identical, I even laid a batten down across them to make sure they were at the same angle, this being off would drive me nuts. the spanshackles were made from round copper wire and soldered, filed and then filed/sanded to look flat. Took a lot of care to make sure the belfry fit right, so I actually took adhesive backed sandpaper and stuck it to the part of the deck at which it would be glued down and gently sanded the deck camber into the bottom, I think it worked well. I pinned it down, it’s a certainty I will probably knock it off otherwise. Thanks for checking in. JJ ps. Please excuse my filthy model, it is an absolute sanding dust ball!


-
Looks great Rusty! You’re almost there.
- 642 replies
-
- 1
-
-
- winchelsea
- Syren Ship Model Company
- (and 1 more)
-
Moving right along Matt. She’s looking good!
-
Wonderful work Fred! Your cheerful has turned out just excellent. I think your rigging looks very nice and clean, it brings the model to life very well.
- 113 replies
-
- 1
-
-
- Cheerful
- Syren Ship Model Company
- (and 1 more)
-
That looks really good Jim, she will probably fair out pretty easily.
-
Thank you Fred, practice makes perfect…. Or lots of imperfect leftovers… Thank you JP! Thanks Jim, I absolutely went crazy with it and just started ripping planks that I didn’t even need, just because it was fun and they looked so good. I can’t believe I didn’t get this sooner. I’m going to order a couple more so I never run out of them! Ha! Thank you Ron, your Euryalus is quite the build and is motivating me to jump into full POF.
-
Looks very clean and crisp, well done!
-
Thank you Edward. Sure thing Glenn, how many do you want? I’ve got lots of gently used ones that may work for you! lol Thank you Steve.
-
Nicely done Matt! You’re making great progress. Time for chapter 8! Get that for deck filled in…with guns…
-
Wow those look excellent!
-
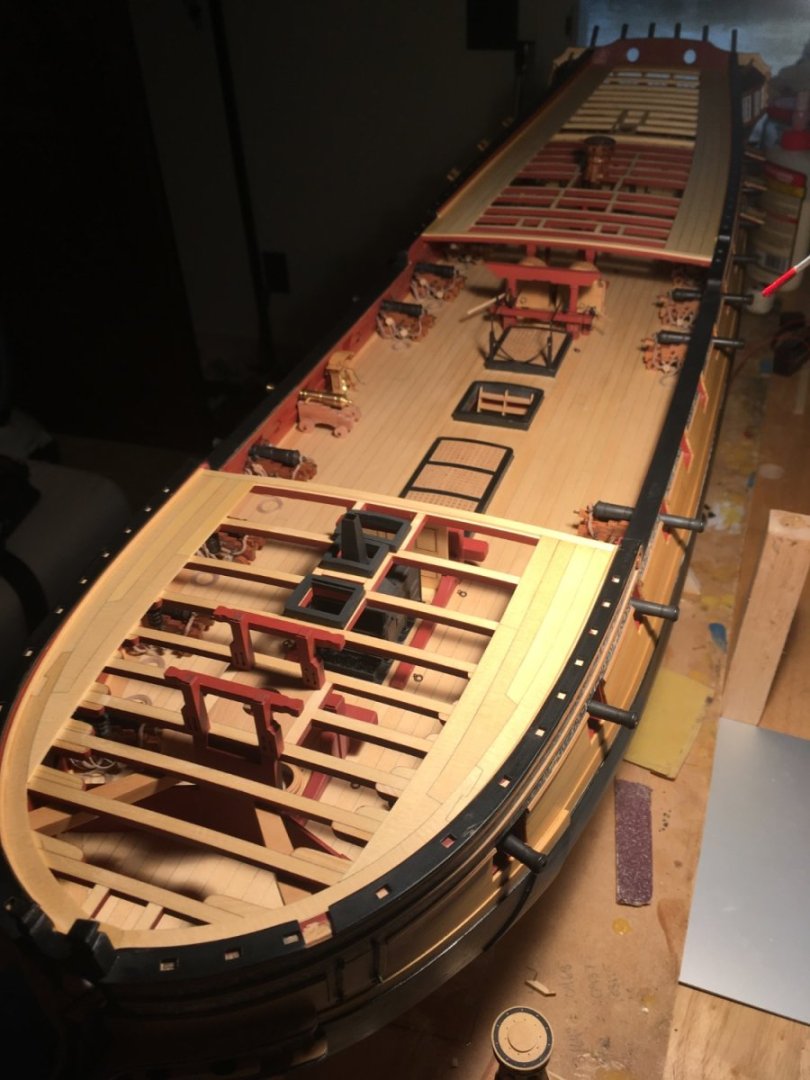
Small update. So I received my lumber supply from @Joe V at modelers sawmill, wonderful job on milling and sending me just what I needed, thank you Joe! i was able to finish the port QD as well as the bow planking. The Bow was quite a project and required a lot of patience as each plank is a mini project of its own but it was well worth the effort. One thing I noticed after applying WOP, depending on the grain direction, the plank appears to change its tone at different light angles as you can see below, some of my planks are obviously facing different directions but it’s not nearly as dramatic to the eye and not even possible to tell until poly is added… also note I just added WOP to the stbd side so it’s even more dramatic but it will settle down in 24hrs. But I’m happy with the results overall and the quality of the wood. I will begin planking the center of the foredeck today and hopefully finish in a few days. Oh I finally got a new slitting blade from Byrnes model machines, can you believe I’ve been cutting all my wood with a 36 tooth and sanding both sides smooth for all this time! Lol. Excited to bolt this thing on. JJ
-
I would disagree. I think you're doing a great job. I’m considering a CAF purchase after seeing your build progress.
- 322 replies
-
- 2
-
-
- enterprise
- caf
- (and 1 more)
-
Off to a great start Mike! This is going to be an impressive build.
-
I really need to up my tool game beyond sanding sticks and razor blades. Very impressive!
-
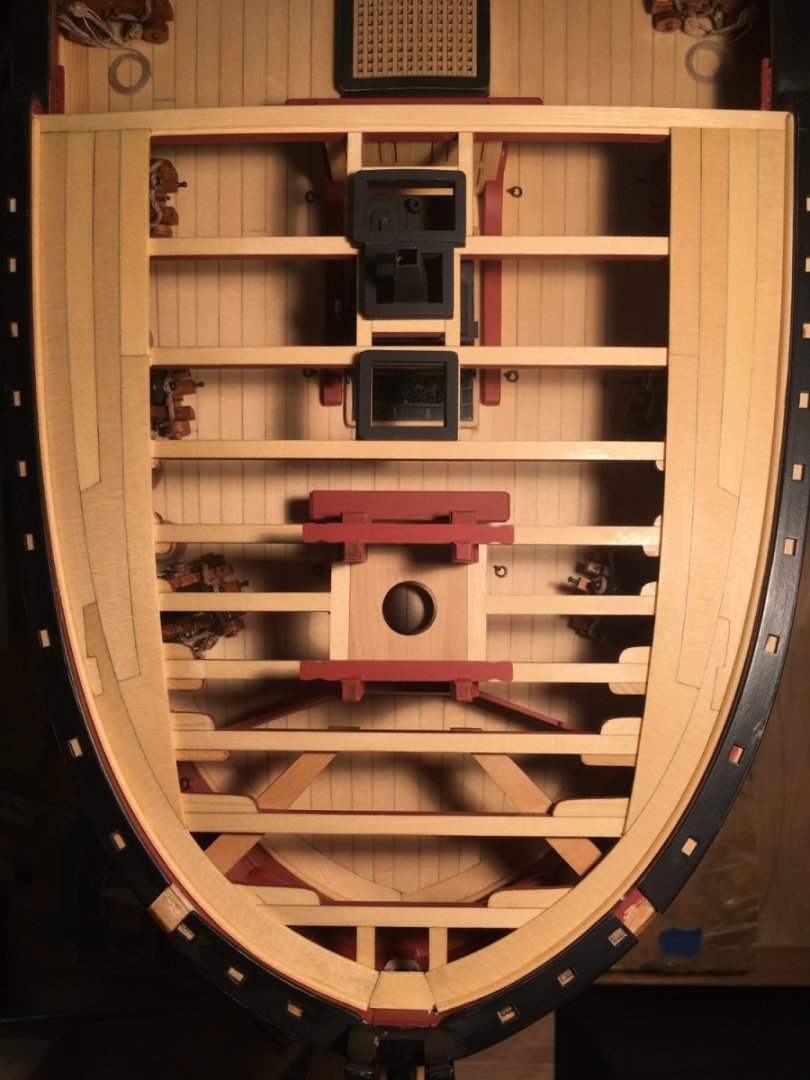
Smart move. I quickly realized that I should have done that. I made it work but it just would have been better to take care of it early on. it is nice that they remain open except for the four (2 at the bow and stern), its an offer of forgiveness for one’s gunport assembly sins! Lol.
-
Very nice comparison Ben! Both models look excellent! You’re moving along faster on two models than I am on one haha!
- 399 replies
-
- 3
-
-
- winchelsea
- Syren Ship Model Company
- (and 1 more)
-
Wow! what an amazing job on those bollard Timbers! I almost want to cut mine off and do them over again now! You’re off to a great start!
-
Kevin, Any plans to continue on Enterprize? Your progress to this point is great, the development of the lower decks is very nice.
- 322 replies
-
- 2
-
-
- enterprise
- caf
- (and 1 more)
-
Wow she looks excellent! Glad to see you back at it again! The stand you are building is very nice as well.
- 60 replies
-
- 1
-
-
- enterprize
- caf
- (and 1 more)
-
Looking good Edward! You are moving along indeed, you’ll be past me next! Haha. Gun ports are fun, I spent a lot of time trying to get them right. Next time I build gun ports I decided that I will do them during the planking process and use the same planks as I'm using on the hull so they match better. It looks like you’re off to a good start on your ports.
-
HMS Euryalus 1803 by rlb - 1:48 scale
scrubbyj427 replied to rlb's topic in - Build logs for subjects built 1801 - 1850
Very nice work!- 122 replies
-
- 3
-
-
- Euryalus
- Plank-on-frame
- (and 4 more)