scrubbyj427
-
Posts
1,733 -
Joined
-
Last visited
Content Type
Profiles
Forums
Gallery
Events
Everything posted by scrubbyj427
-
 Kevin, Any plans to continue on Enterprize? Your progress to this point is great, the development of the lower decks is very nice.
- 322 replies
-
- 2
-

-
- enterprise
- caf
- (and 1 more)
-
Wow she looks excellent! Glad to see you back at it again! The stand you are building is very nice as well.
- 60 replies
-
- 1
-
-
- enterprize
- caf
- (and 1 more)
-
Looking good Edward! You are moving along indeed, you’ll be past me next! Haha. Gun ports are fun, I spent a lot of time trying to get them right. Next time I build gun ports I decided that I will do them during the planking process and use the same planks as I'm using on the hull so they match better. It looks like you’re off to a good start on your ports.
-
HMS Euryalus 1803 by rlb - 1:48 scale
scrubbyj427 replied to rlb's topic in - Build logs for subjects built 1801 - 1850
Very nice work!- 122 replies
-
- 3
-
-
- Euryalus
- Plank-on-frame
- (and 4 more)
-
Lookin good Rusty. You’re almost there and I’ll have one less Winnie with updates too look forward to.
- 642 replies
-
- 2
-
-
- winchelsea
- Syren Ship Model Company
- (and 1 more)
-
Wow! Great photos of beautiful mountains. I’m moving there now! Glenn you should check out the alpinist on Netflix, it’s about Marc leclerc, a free solo climber who summits many mountains but one is cerro torre in Patagonia, in the winter and it’s absolutely incredible. now back to work!
- 840 replies
-
- 3
-

-
-
- winchelsea
- Syren Ship Model Company
- (and 1 more)
-
Very nice work Matthias, looks great! Hope you took care of those Mice! I know what a pain they can be.
-
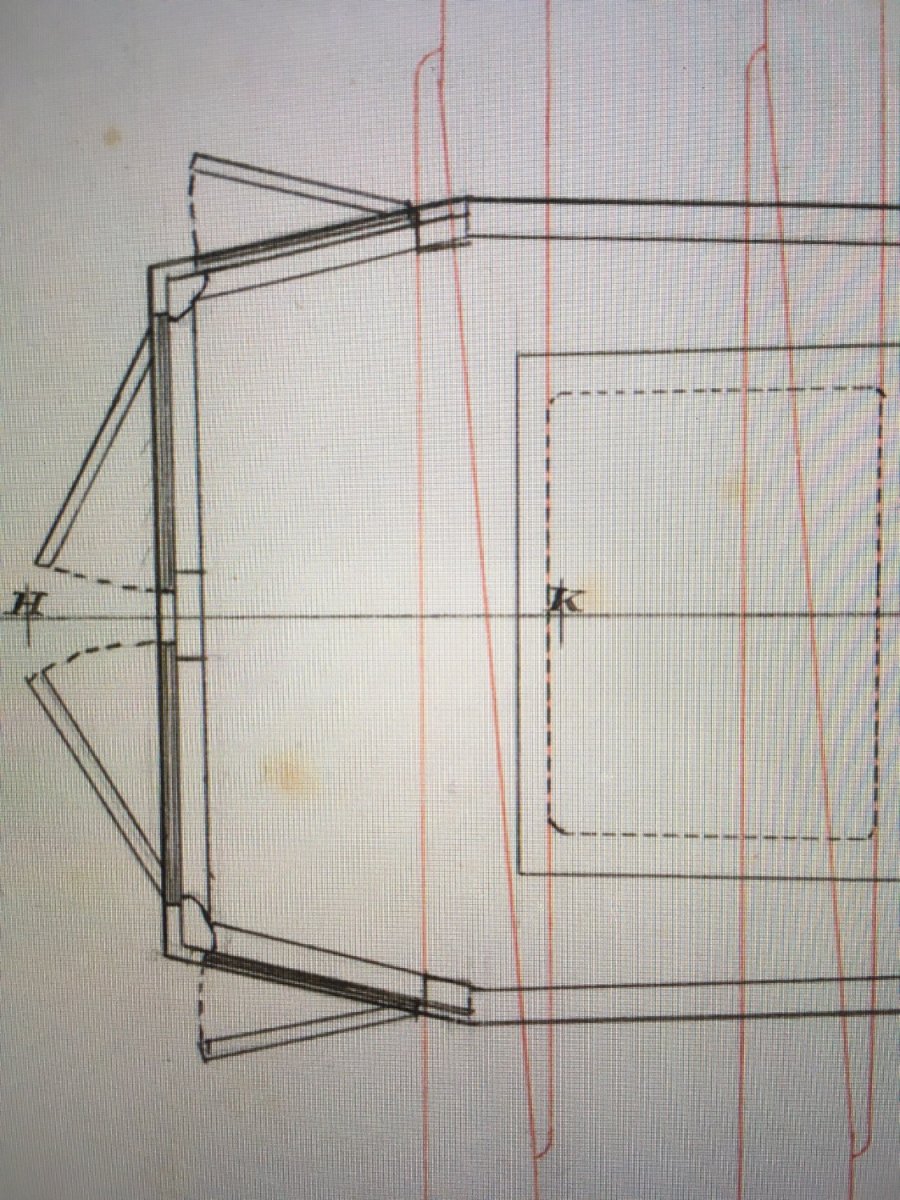
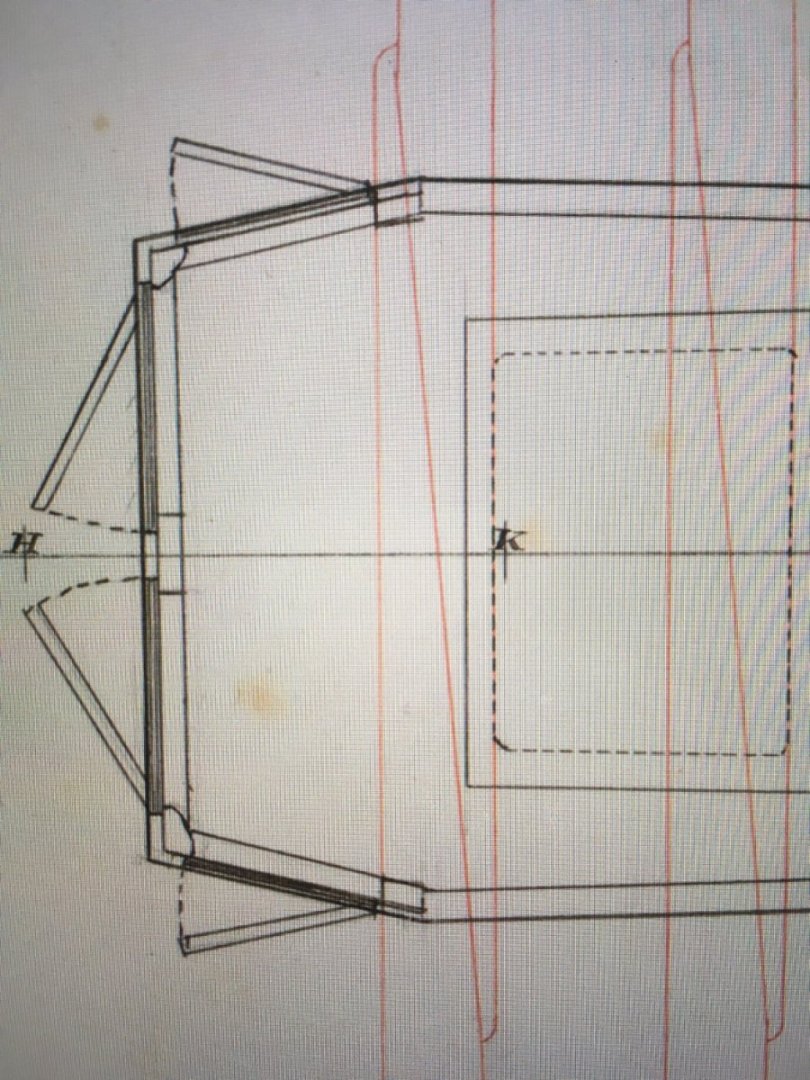
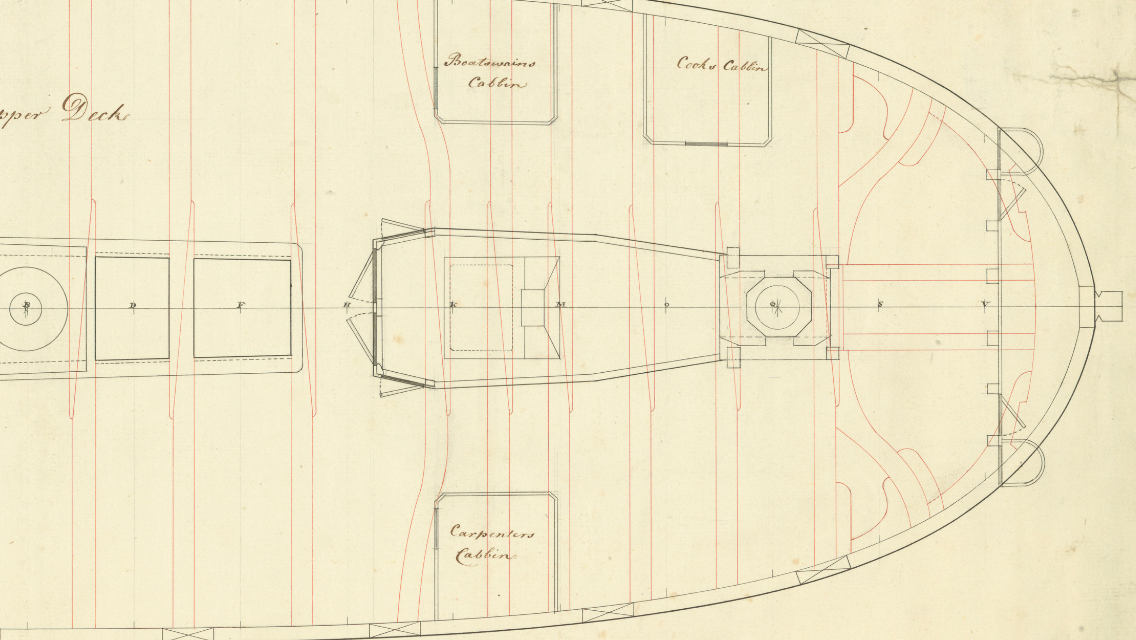
Siggi, apologies for the many posts but upon further inspection I believe Druxey’s observation to be correct on both our drawings. It appears that McKay also interpreted this drawing correctly on Leopard. A close up of the drawing shows where the bulkheads end and the battens are placed to contain the bricks or stones.
-
Siggi, this is what i came up with from the Portland class drawings, it appears that the front of the galley was open rather than showing a transverse bulkhead/wall. Your drawing shows it completely enclosed in the front with where your table is. Here you can see Leopard, from Winfields book, which was built 15/20 years after Portland and Bristol respectively, at a different yard, a semi enclosed galley but showing the perimeter of the enclosure. But this is not noted or shown in any of the early drawings.

-
Hi Siggi, the drawing is of Portland actually but Bristol is the only source for the deck layout. Bristol and Portland were built at the same yard, Portland being first in the class and Bristol second. From everything I could see in the drawings, both elevation and plan, that is how they made the galley. Of course a trip to Ontario to see the Bristol contemporary model would further confirm this.
-
Hi Siggi, the draft for Portland class (Bristol dated 1775), 50 guns shows this open space in front of the galley which I think you are describing.
-
Incredible! Love seeing this version of victory! Beautiful work!
-
The little bit of boxwood that I have worked with has turned out lovely with a good sanding and just WOP. I’m very tempted to do my next build in boxwood.
-
Thanks Glenn. I’m kinda stuck at this point because it also matches the gun deck so I guess I may be buying a lot of billets to get it right!😬
-
Thank you Chuck. the thought crossed my mind. I told Joe to send the lightest stuff possible and I sent photos of my 5/16” stock (from syren) with a white background to give perspective. Fingers crossed, the margins and three planks took oh around 8 hours. If the wood is too light I can darken it but if it’s already too dark then I’m ripping planks off!
-
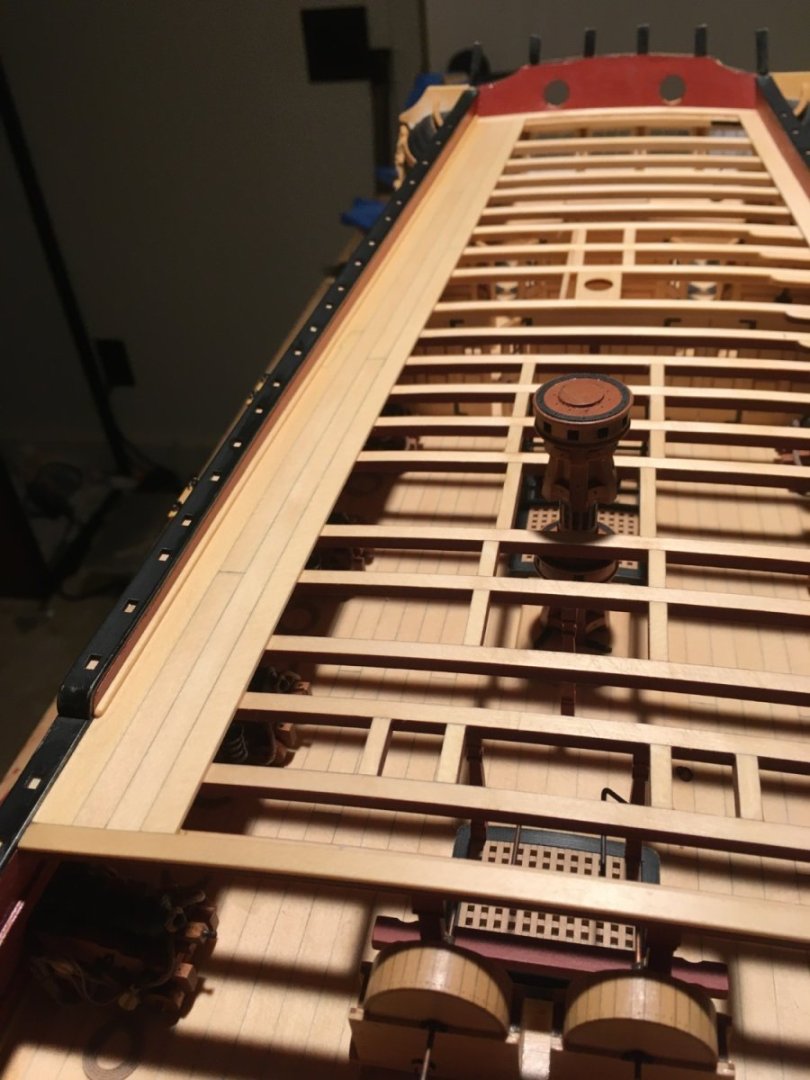
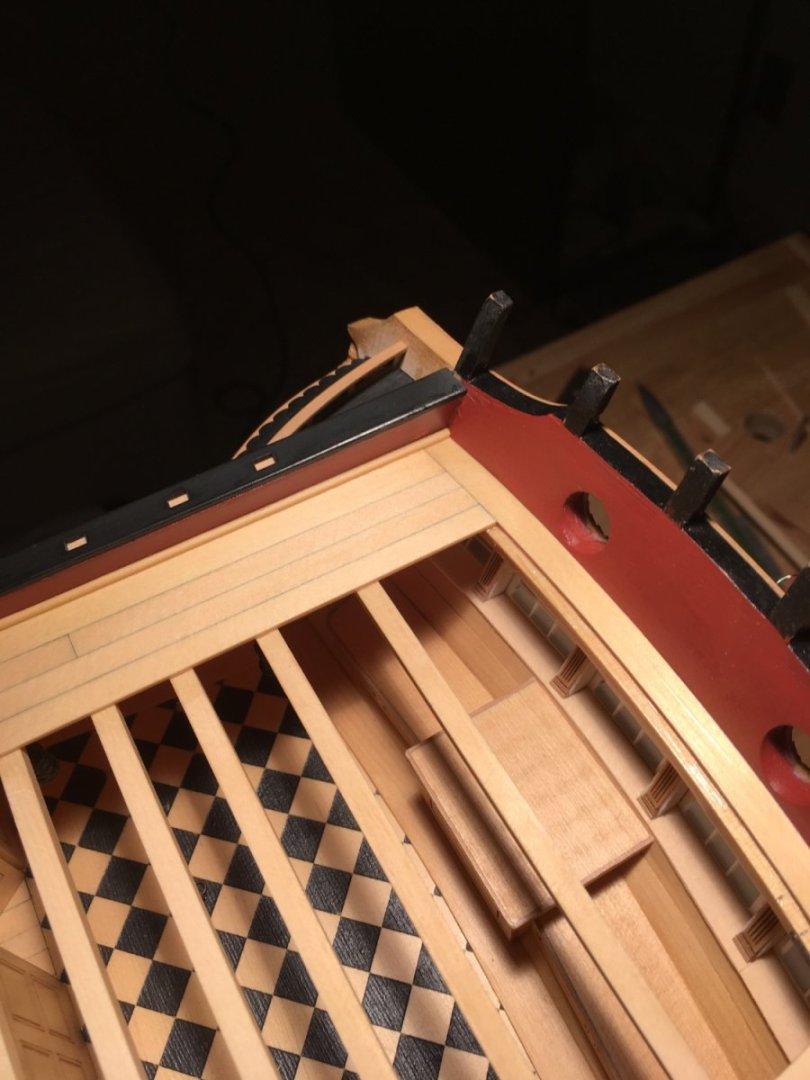
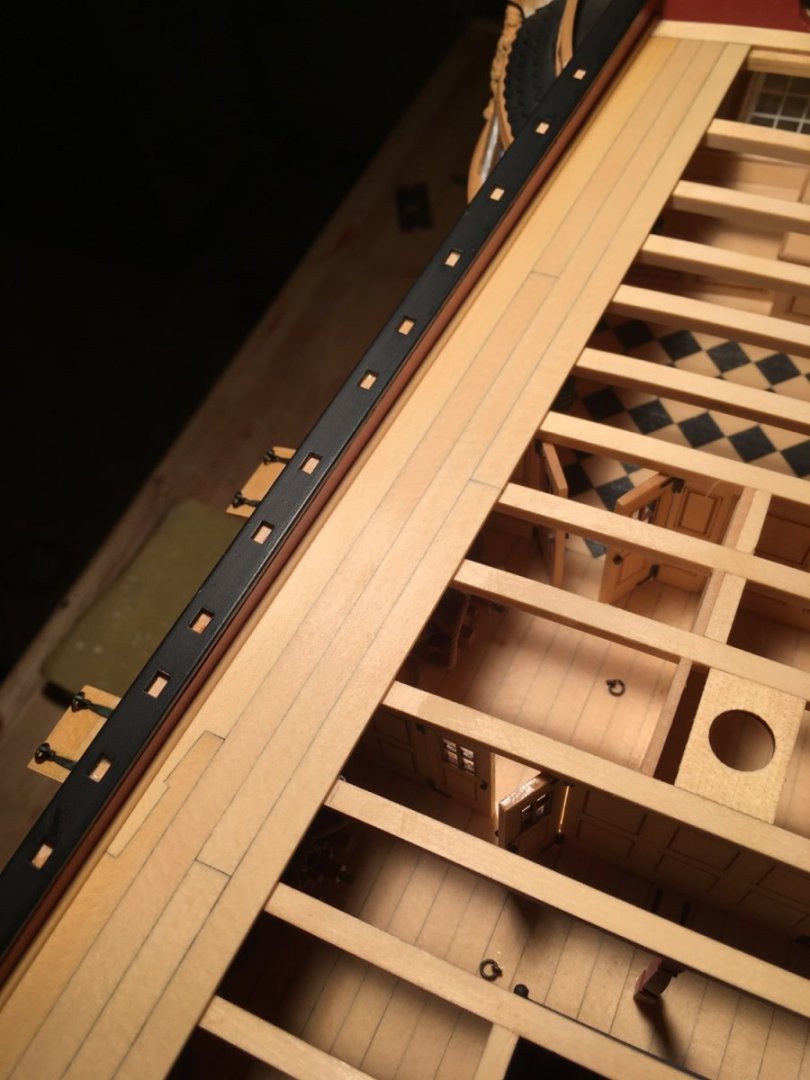
Small update… There’s always more guns to build! So I realized my lumber stash is lacking significantly so I wrote Joe at modelers sawmill and ordered some sheets of AYC so I can cut those curved margin planks and the forward curved planks for the bow, in the meantime I thought I would start on the aft deck and I got this far before I realized I was also out of 1/4” planking billets! Sent Joe another email and ordered plenty of those… at least there are always more guns to build to keep me busy while my AYC finds its way here. JJ

-
Great start to your planking adventure! Boxwood will look great.
-
Wow! Amazing results! That looks perfect. Well done Chuck. It appears that you are fairing frames as you go?
-
Looks very nice Gary! looking forward to seeing how you finish it off.
-
I would build it any way you release it. But I would want the main gun deck built completely without dummy barrels or anything hidden. Are there any photos of prototype models being built?
-
Definitely the right move. Winchelsea is not a model you want to mess around with, chasing errors made early on later in the build will haunt you.
-
Nicely done Edward! Perhaps you should have been a surgeon!
-
Incredible modeling! I would love to build this.
-
I think I will build her at some point, but like a lot of us, my ambitions far exceed my time!!
- 113 replies
-
- 1
-
-
- Cheerful
- Syren Ship Model Company
- (and 1 more)
-
She looks stunning Glenn, very nicely done.
- 840 replies
-
- 3
-
-
- winchelsea
- Syren Ship Model Company
- (and 1 more)