scrubbyj427
-
Posts
1,733 -
Joined
-
Last visited
Content Type
Profiles
Forums
Gallery
Events
Everything posted by scrubbyj427
-
 That really looks good Chuck, impossible to tell that is resin and not wood carved. Well done.
 -
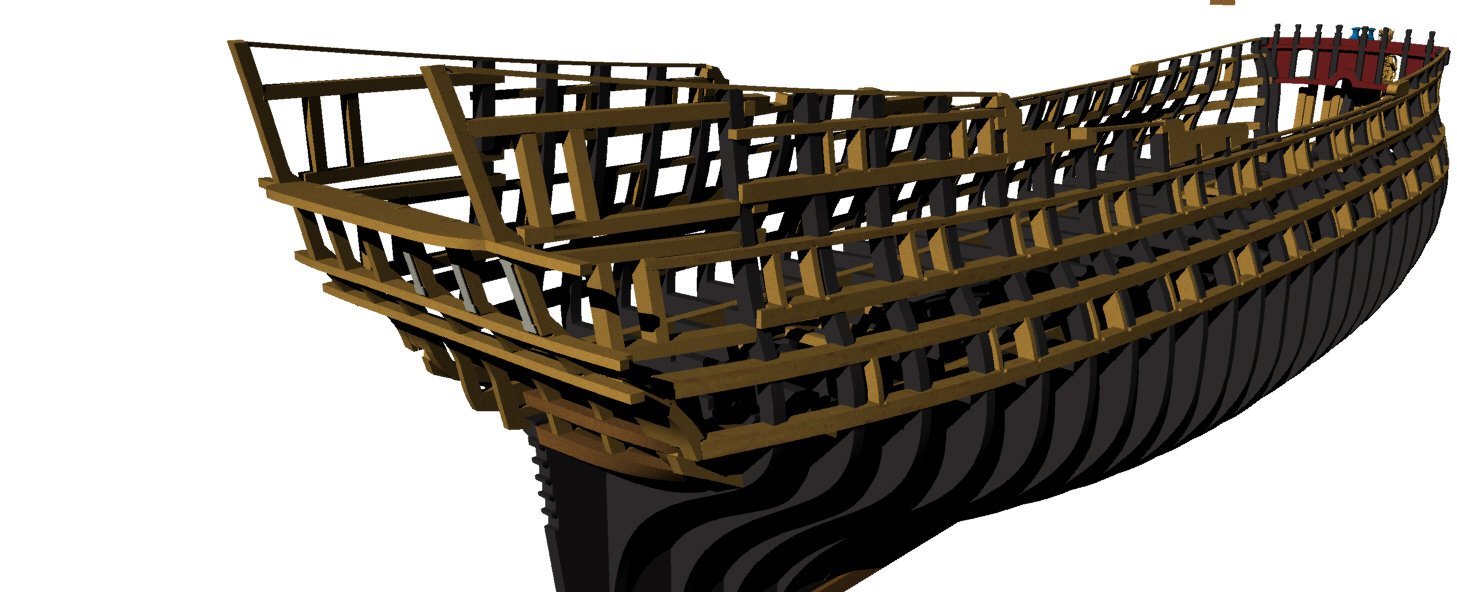
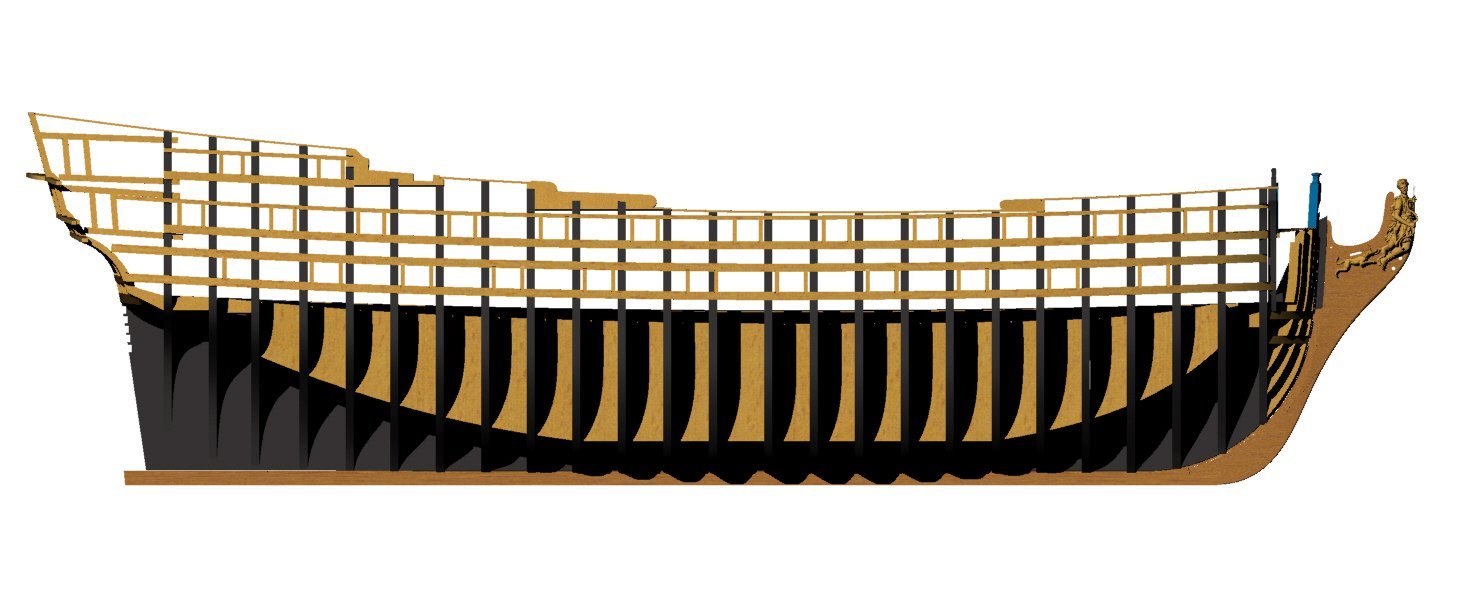
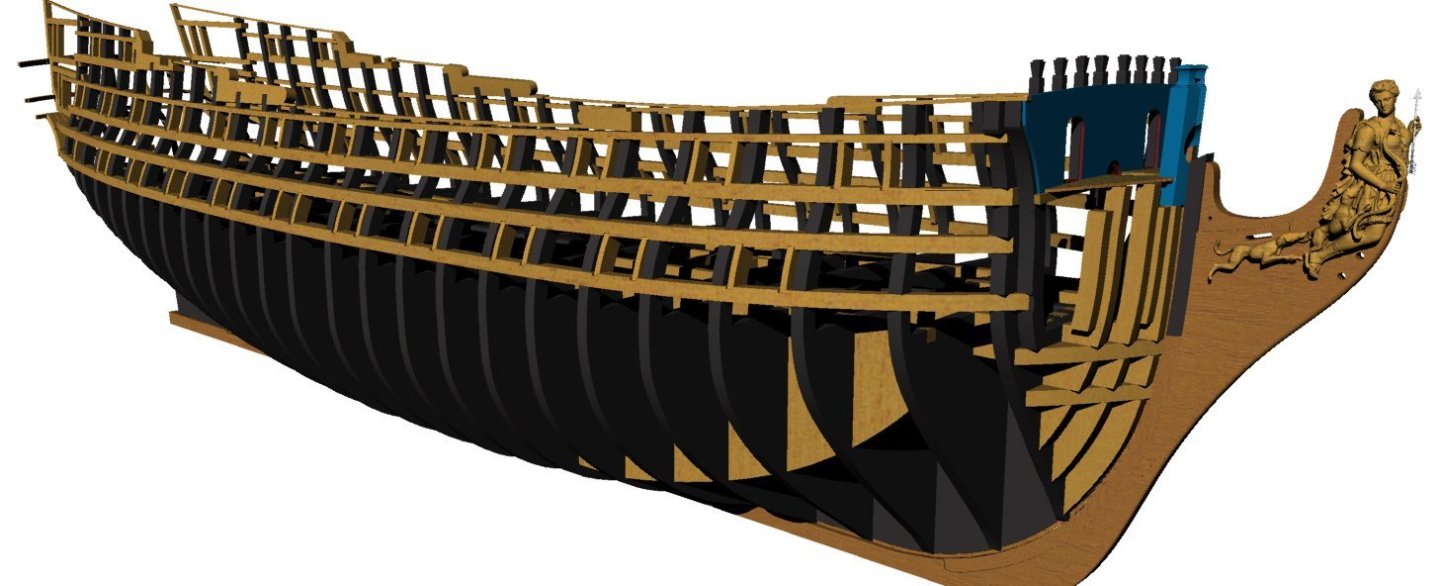
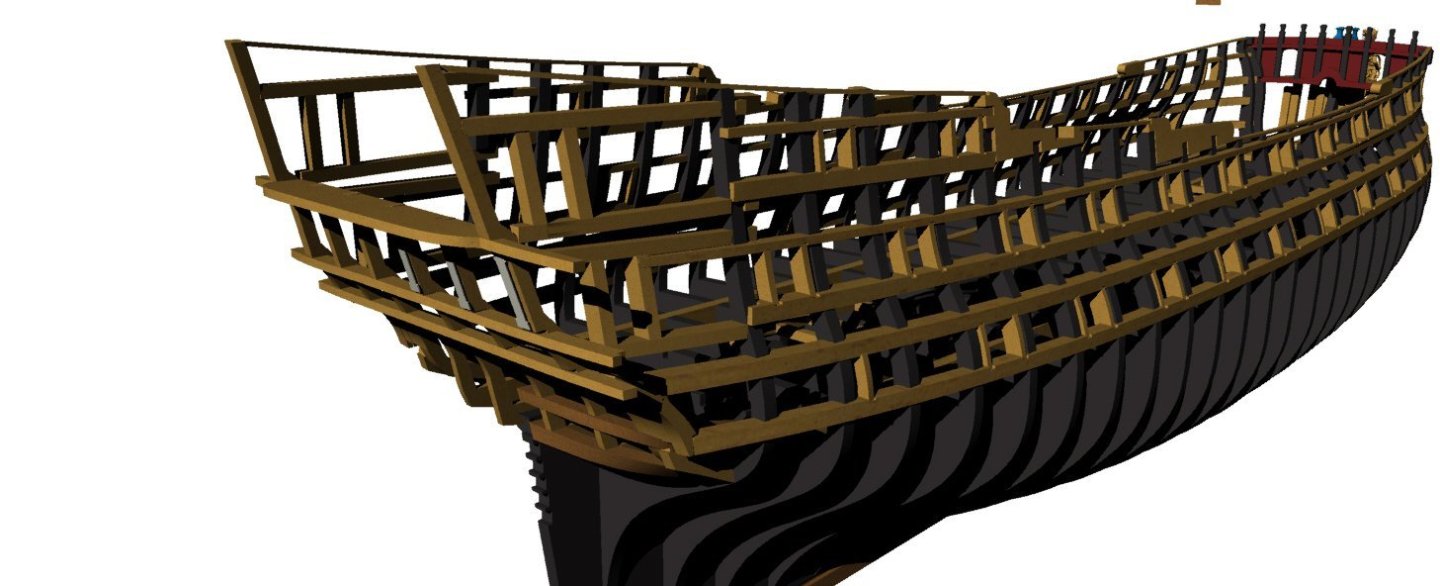
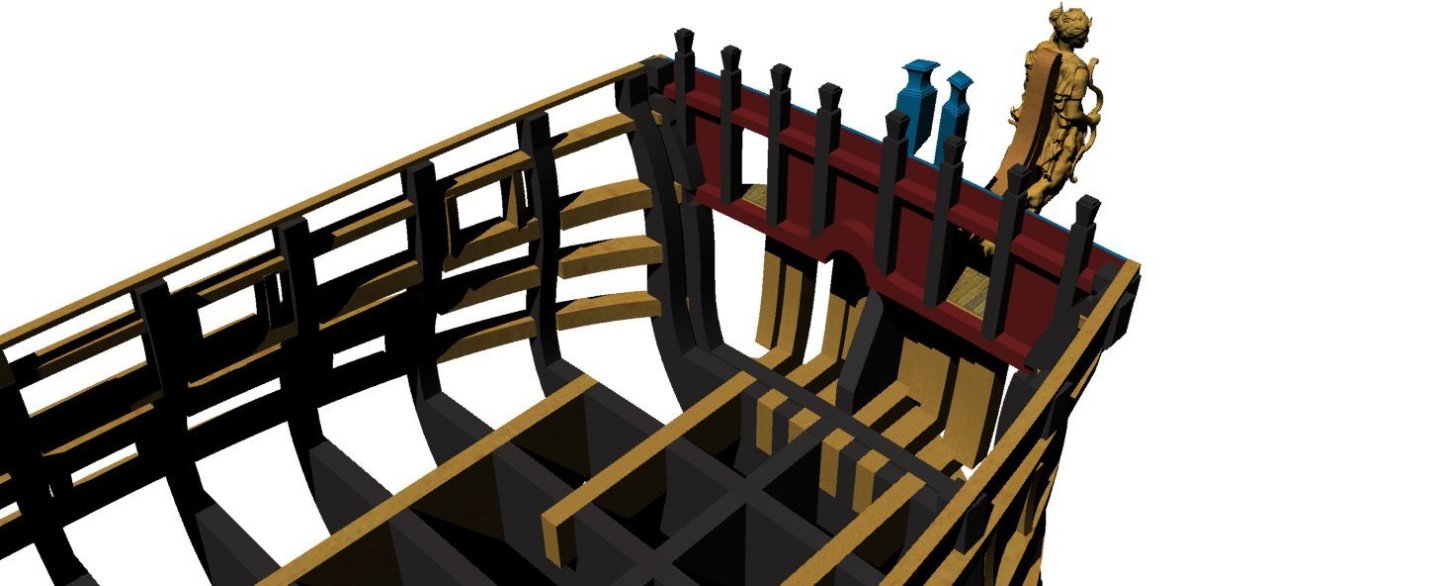
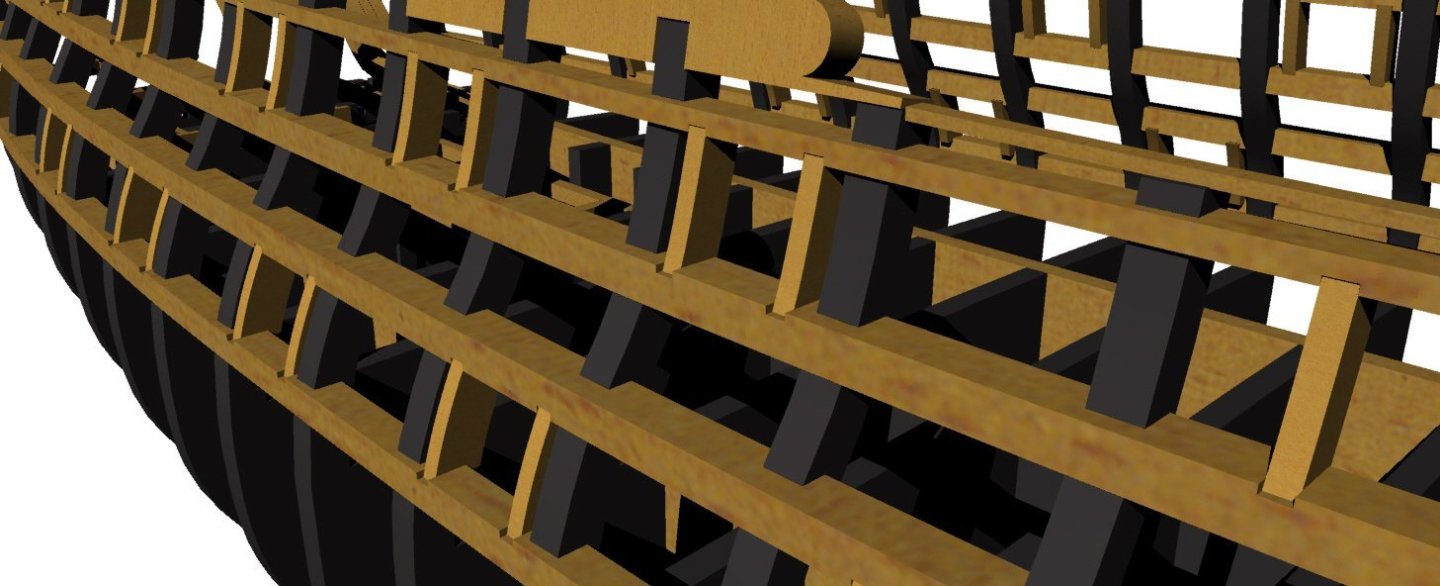
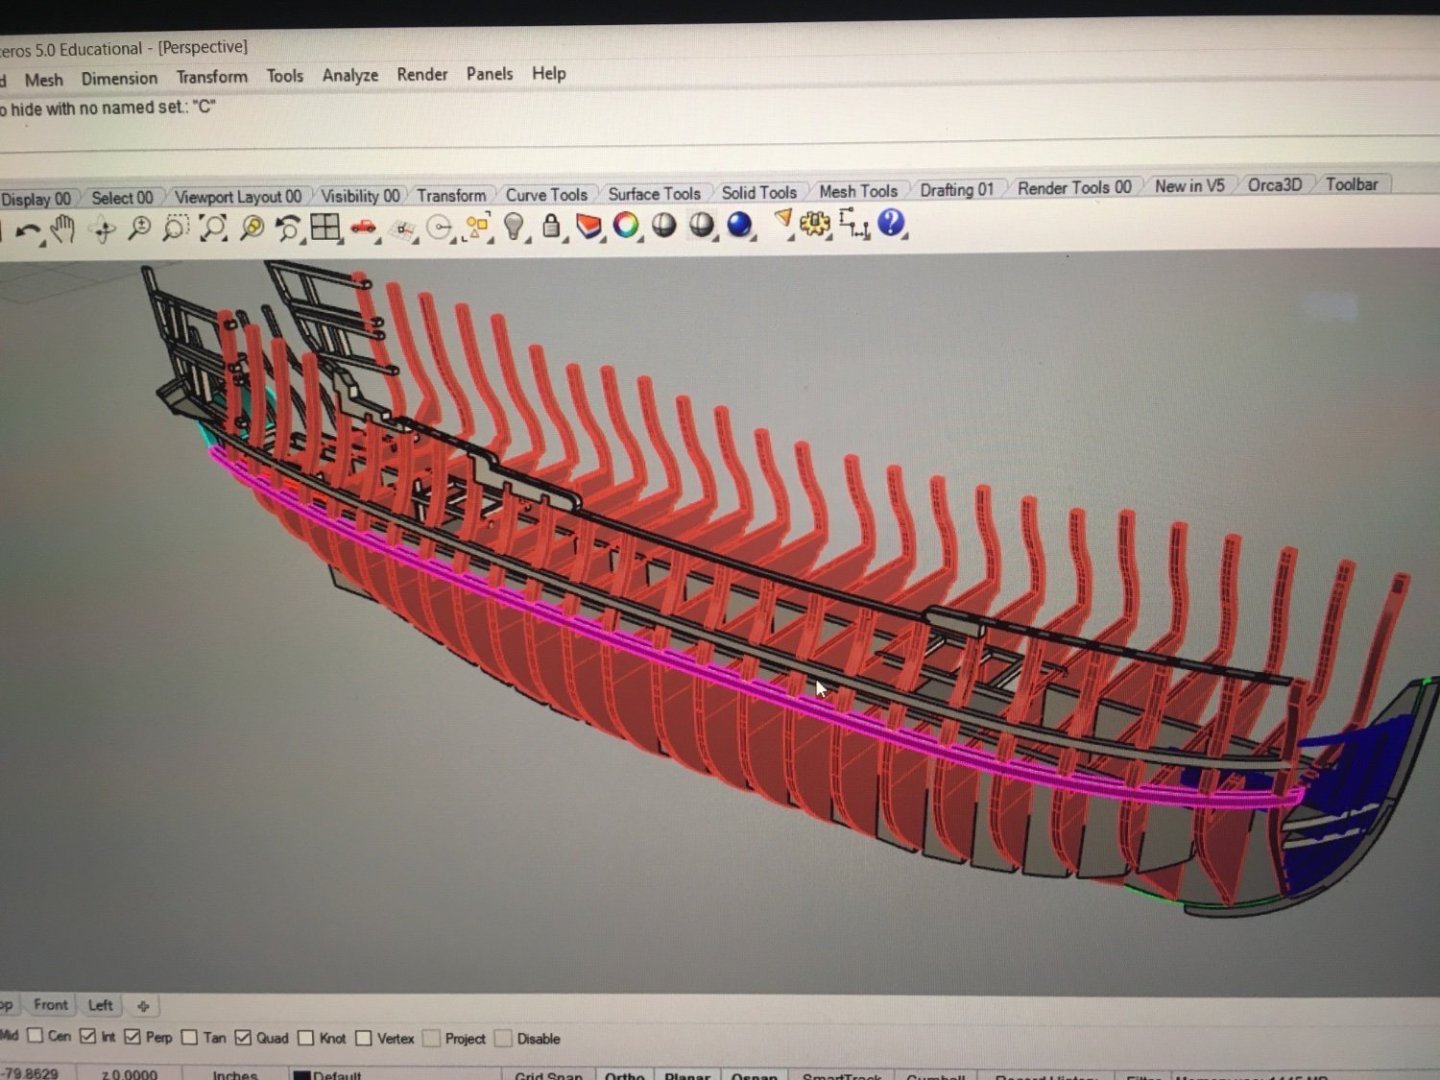
I have a few updates to the design of the structural assembly for the first part of the model, it is almost complete, I need to add a few things like the stern chaser port framing, some sheaves and tie in some of the structure in the stern. Otherwise this is pretty close to what I will begin assembling in September, this will lead into Planking and Q gallery assembly, I am well ahead in that aspect of the design and will probably begin test building that separately alongside the prototype build. Comments and questions are welcome. JJ


- 425 replies
-
- 20
-

-
Nice to see you back at it Fred! Looking forward to following this, It looks like you’re off to a great start. Bet that mast is pretty tall.
-
Are there any updates on volume 3?
-
Very impressive Frank! You have taken planking to another level. Looking forward to the whiskey plank.
-
Incredible work on the computer and the workbench! Beautifully executed!
-
Looks really good Glenn, I had the same issues with the char and I actually kind of like it, it’s almost like free weathering on the wheels. The laser does seem to char deeper depending the grain orientation. Overall I’d say your guns turned out perfect.
- 840 replies
-
- 3
-
-
- winchelsea
- Syren Ship Model Company
- (and 1 more)
-
Wow! That looks really good. Not much more planking and then topsides?
-
Looking really good Steve, you’re almost there.
- 99 replies
-
- 2
-
-
- winchelsea
- Syren Ship Model Company
- (and 1 more)
-
Looking good Glenn! Moving right along.
- 840 replies
-
- 3
-
-
- winchelsea
- Syren Ship Model Company
- (and 1 more)
-
HMS SUSSEX by KarenM - FINISHED - 1:48
scrubbyj427 replied to KarenM's topic in - Build logs for subjects built 1501 - 1750
Wow! What a stunning model! Incredible work! -
HMS SUSSEX by KarenM - FINISHED - 1:48
scrubbyj427 replied to KarenM's topic in - Build logs for subjects built 1501 - 1750
This is an incredible build! Amazing work! -
Thanks Glenn. There’s an incredible amount of work and investment that goes into this, lots of design and redesign and I haven’t even began physically building it yet aside from what I’ve shown. It really adds another layer of admiration to the Winchelsea project as well as others such as the work Chris produces. JJ
-
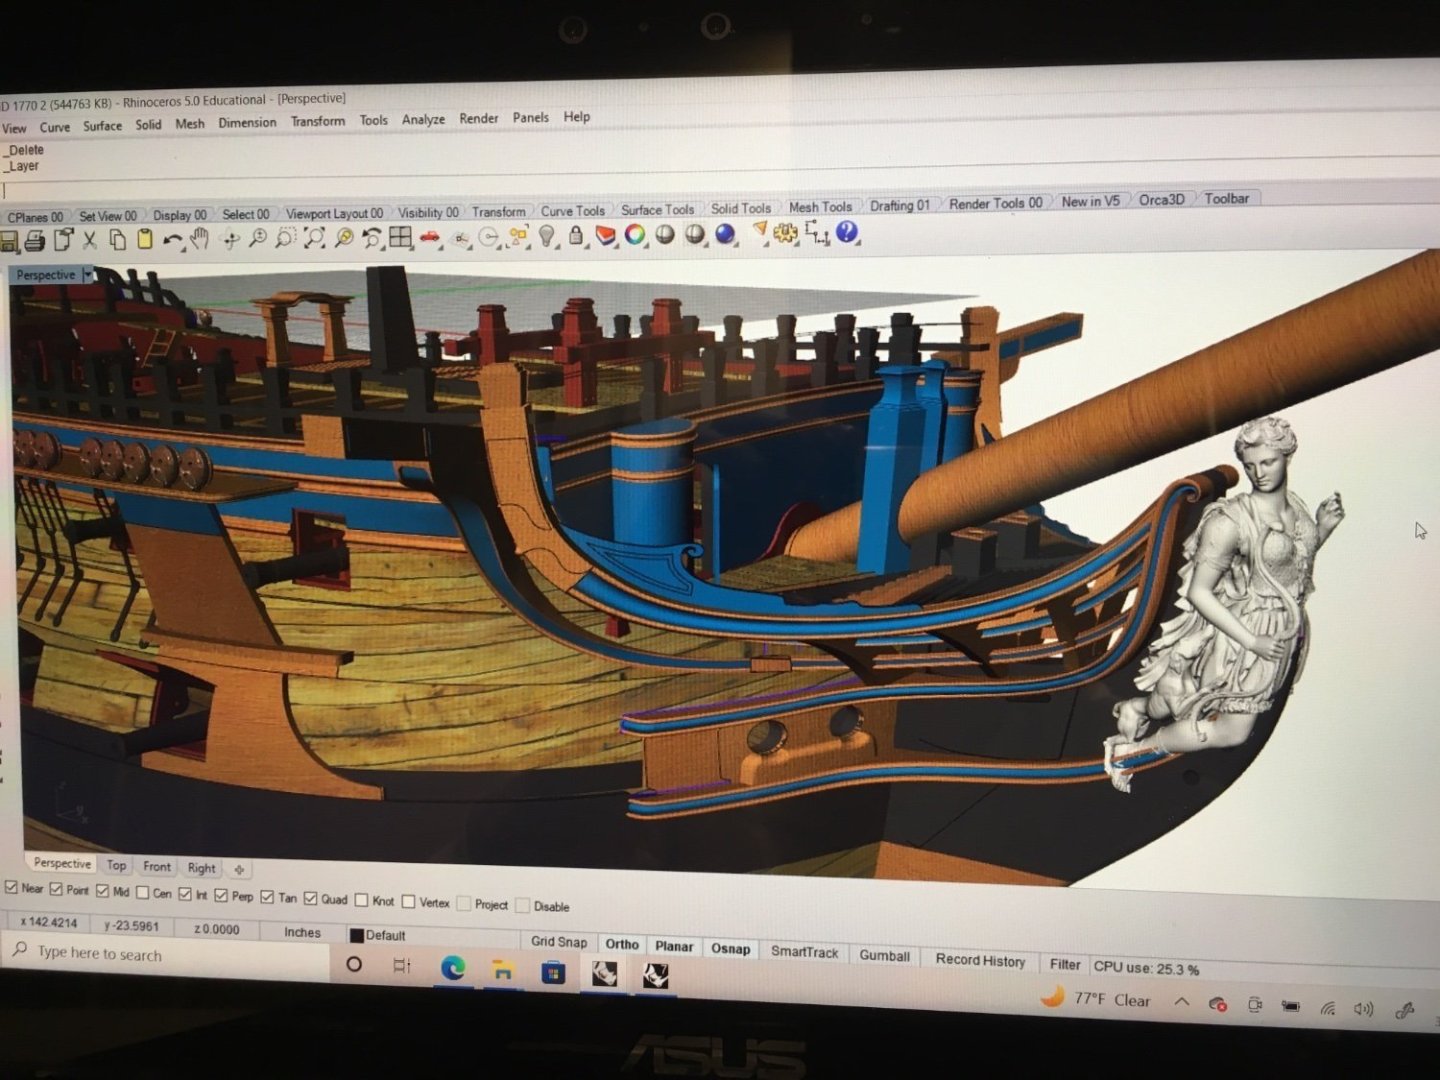
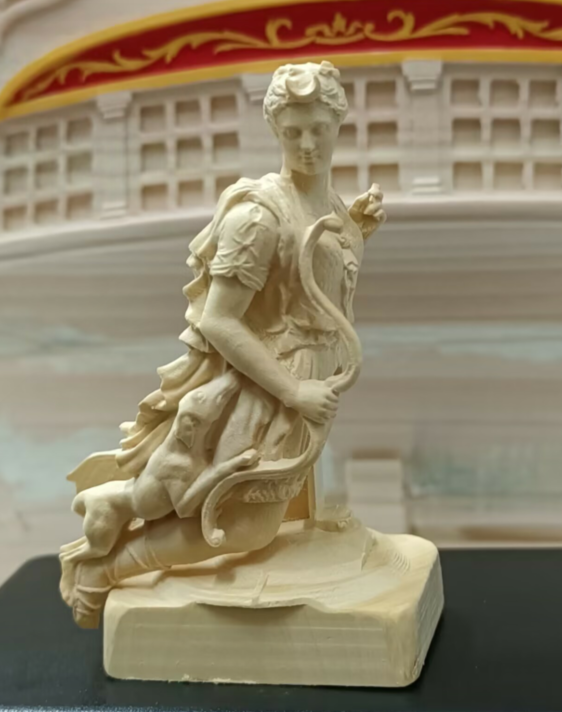
Hi Matt, the figurehead was produced exactly as the figurehead for the Winnie. I provided a 3D model of the knee to @Jack H along with the rough dimensions and paintings of the contemporary figurehead and Jack did the sculpting work in Zbrush. From there the file can be produced into a real wood sculpture with a CNC machine. Keep following this log for updates on all the stern carvings as they are in the works currently. I’m finishing up the initial structure design of the model right now. I hope to be building the actual prototype by September.
- 425 replies
-
- 15
-
-
Stick with model ships, I’d say you’re doing very well with this project.
-
Nice work on chapter 9! Looks really good Matt. I broke all the same pieces as well! They are very fragile and snap very easy.
-
Beautiful work! That looks so good with the pear(?) deck beams. Good luck with your move. JJ
-
Well done Matthias! That just looks so good with the gratings complete. Very nice execution. JJ
-
Thank you Don. I think you’ll like it out there. Bend is growing into a destination spot but still has a small town feel and great weather year round.
- 144 replies
-
- 2
-
-
- winchelsea
- Syren Ship Model Company
- (and 1 more)
-
Excellent work Don! Your Winchelsea has turned out just wonderful! Congratulations! Do you plan to build a nice display? I will look forward to following your cheerful progress! JJ
- 144 replies
-
- 1
-
-
- winchelsea
- Syren Ship Model Company
- (and 1 more)
-
Very nice progress Mike! She’s looking great!
-
Good luck Ben, glad to see I’m not the only one with a packed up Winnie model. Chuck is right, you will miss the snow!
- 399 replies
-
- 3
-
-
- winchelsea
- Syren Ship Model Company
- (and 1 more)
-
HMS SUSSEX 1693 by 8sillones
scrubbyj427 replied to 8sillones's topic in - Build logs for subjects built 1501 - 1750
Would love to see more of this.