HOLIDAY DONATION DRIVE - SUPPORT MSW - DO YOUR PART TO KEEP THIS GREAT FORUM GOING! (Only 24 donations so far out of 49,000 members - C'mon guys!)
×


Alex M
-
Posts
360 -
Joined
-
Last visited
Content Type
Profiles
Forums
Gallery
Events
Everything posted by Alex M
-
Hi Alexandru, independent of picture order it is incredible and precise work! Lovely pictures. Alexander
-
Hi Toni, absolutely precise workmanship! Amazing model! Alex
-
Hi Johann, nice to see your La Creole here! What a wonderful piece of work! Very fine model making you have show here! Alex
-
Thanks you Greg and Joe! I will not solder the joints, because I would not rig the Model. The little angled part is put in to hole driven in the channel, is covered by decorative moulding and not visible. Alexander
-
Hi Joss, that are really nice plans! According to tapering of keel, it tapers only fore and aft part, as described in Euryalus book. The fore piece of false keel looks really short. It may be, that the false keel has one piece less than main keel (5 in your case), so the fore piece may be longer Alexander
-
Hi Dave, thanks for warm words! Alexander
-
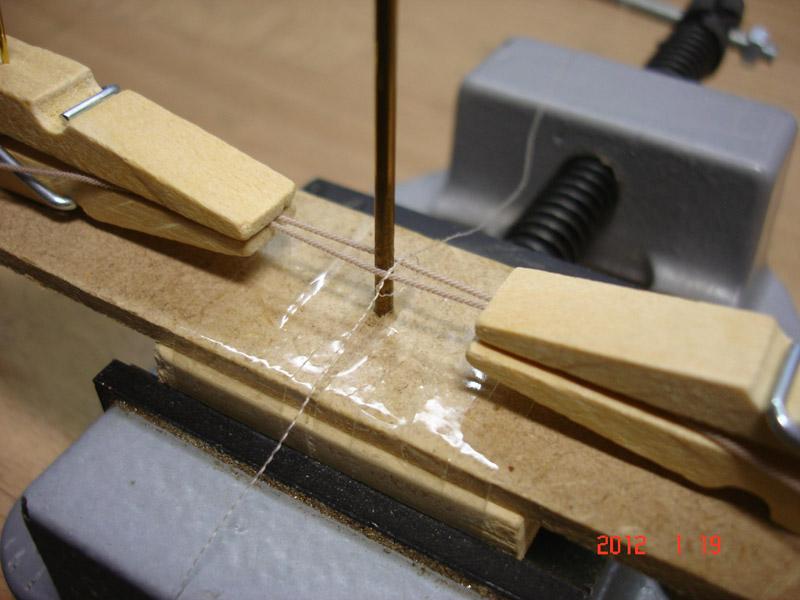
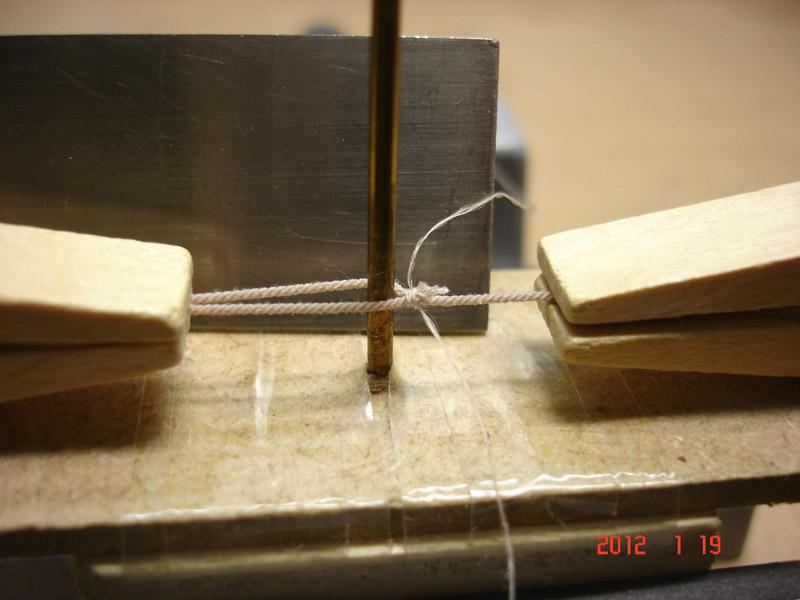
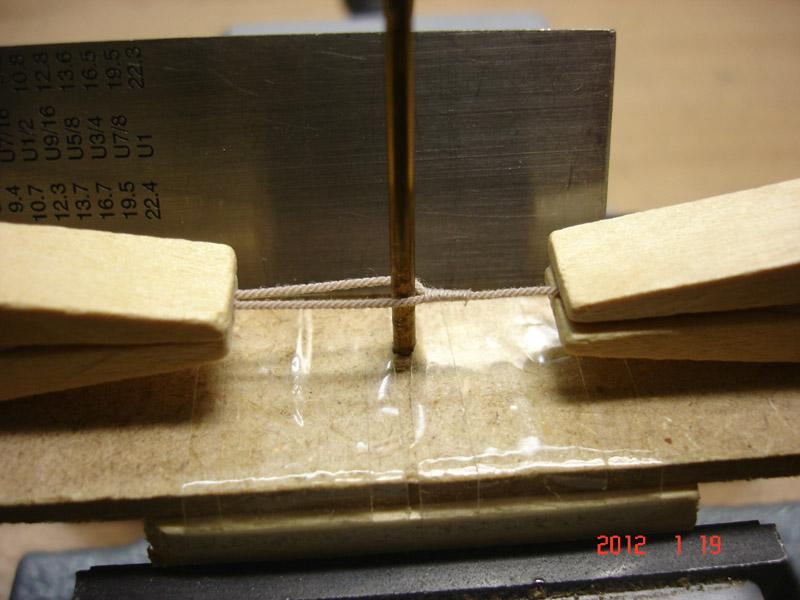
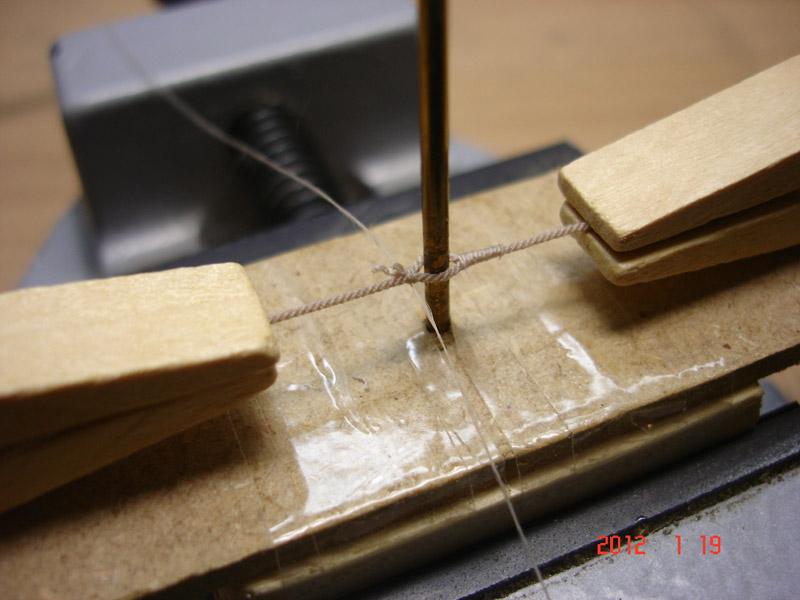
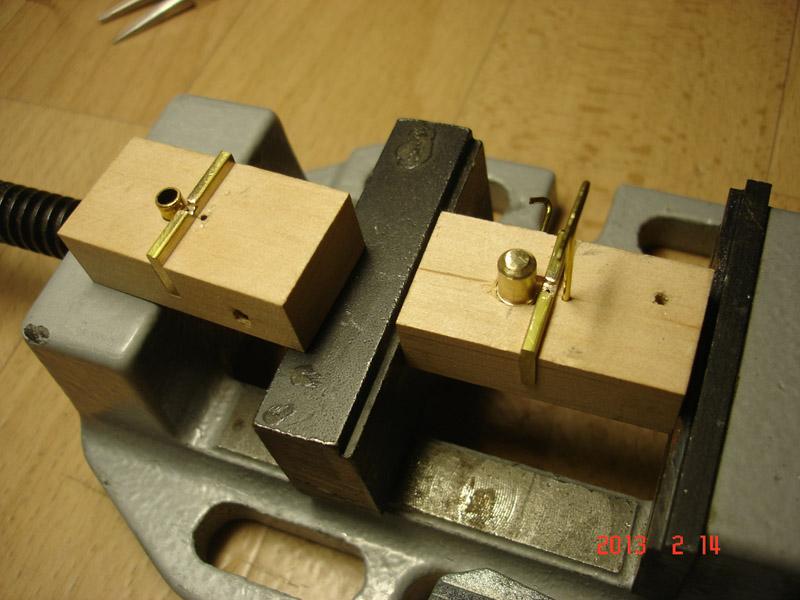
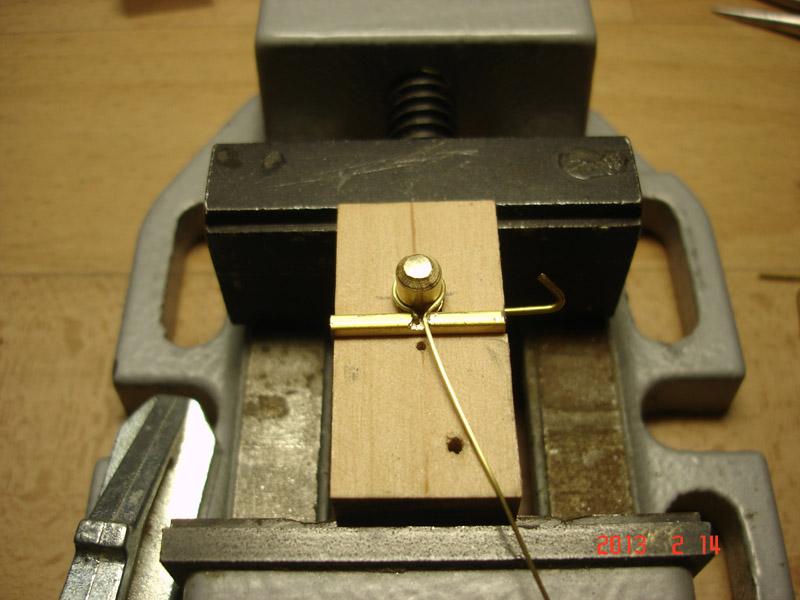
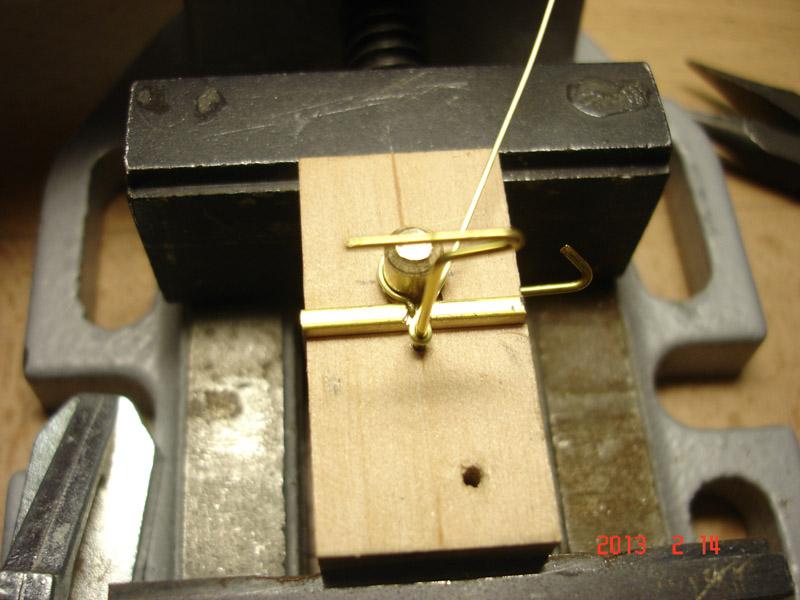
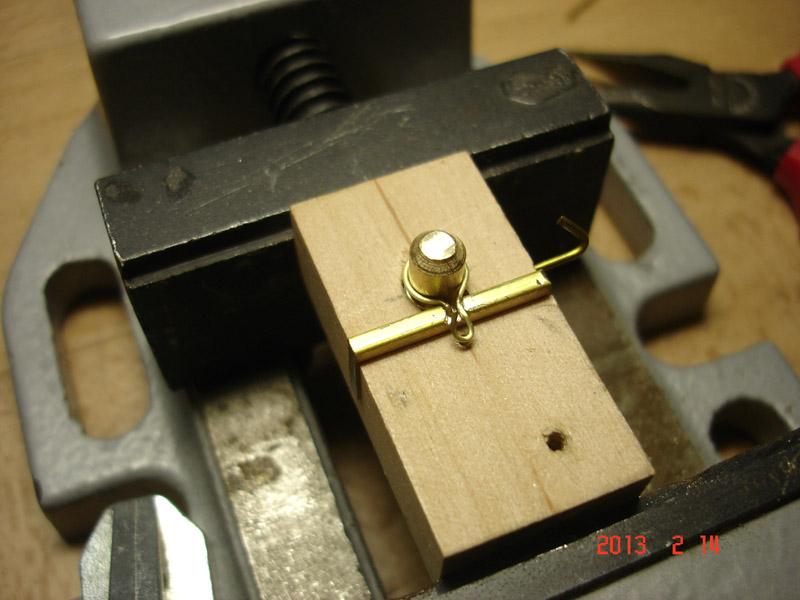
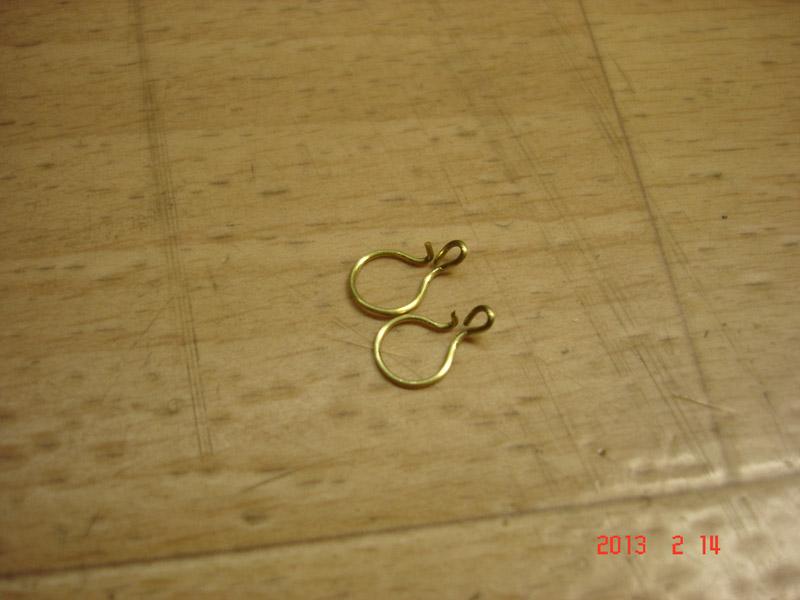
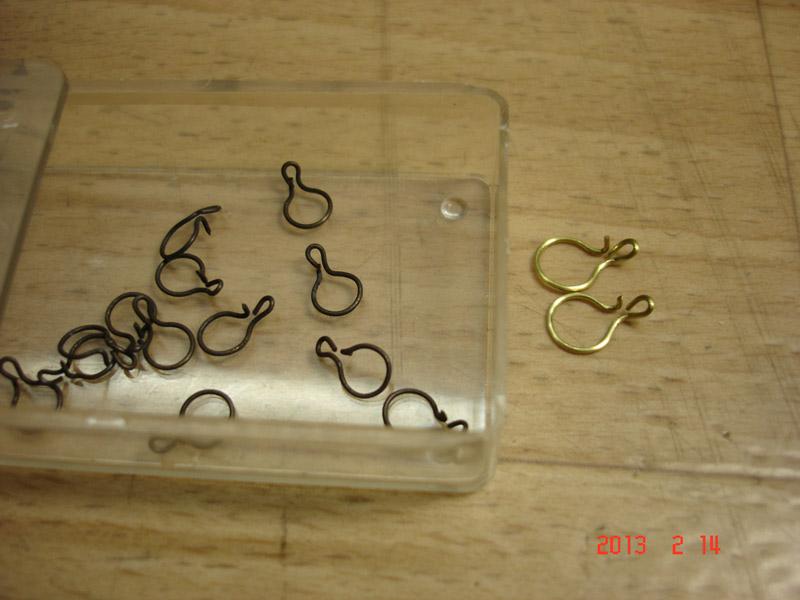
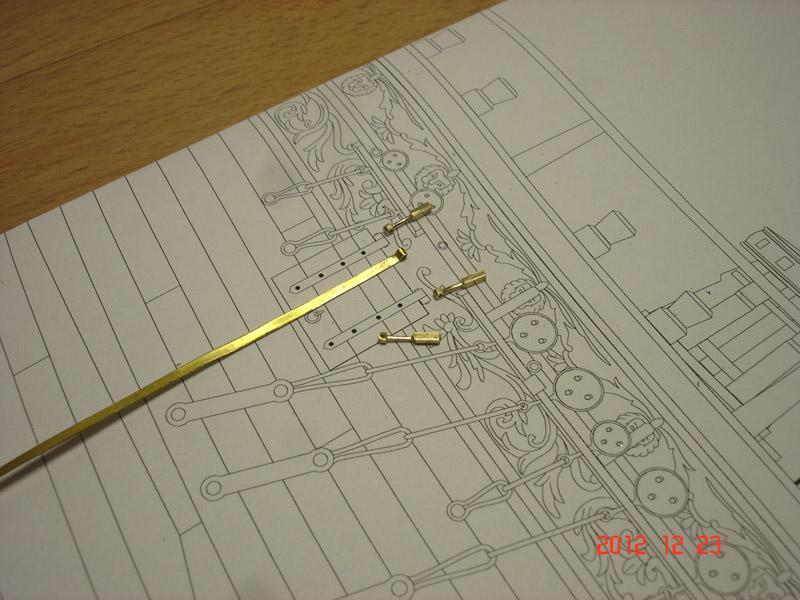
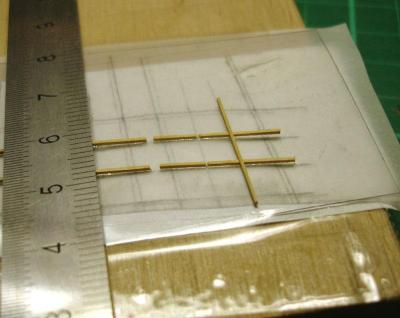
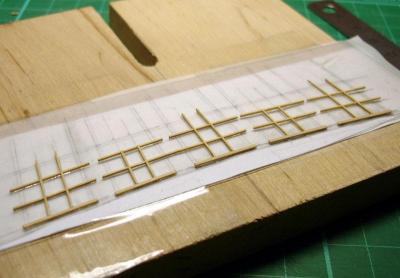
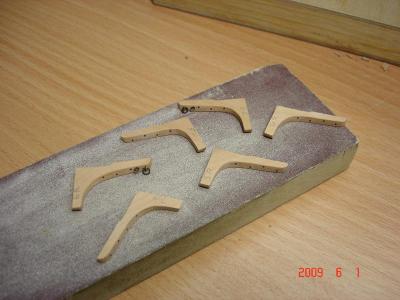
Hello, here the making of chain plates for deadeyes, step by step in images. To be continued, now in real time Alexander

-
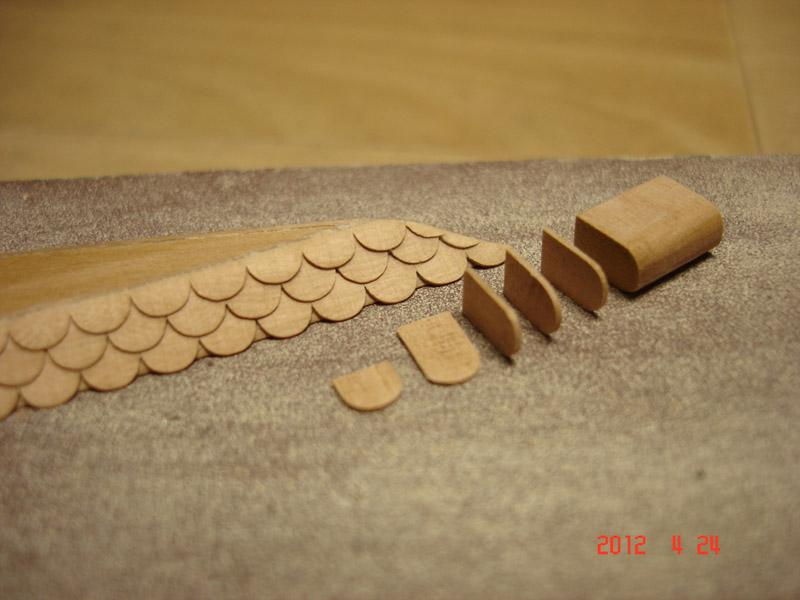
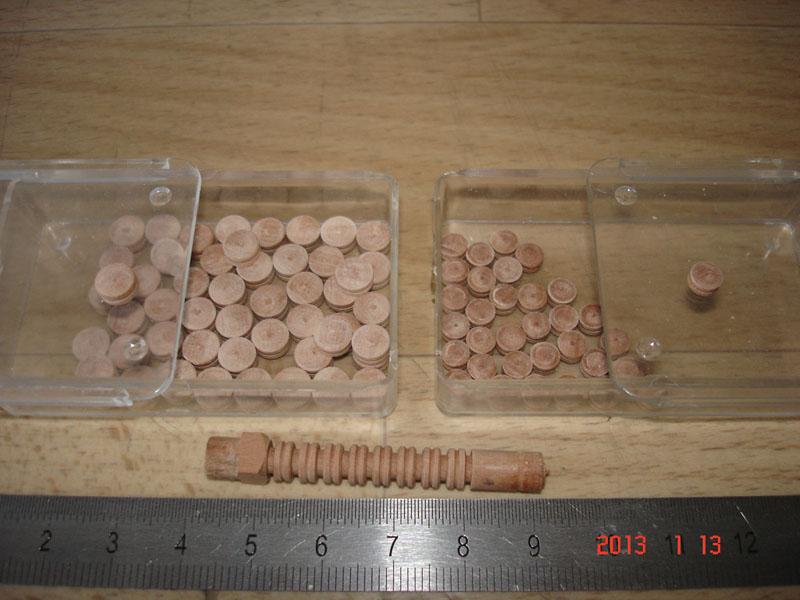
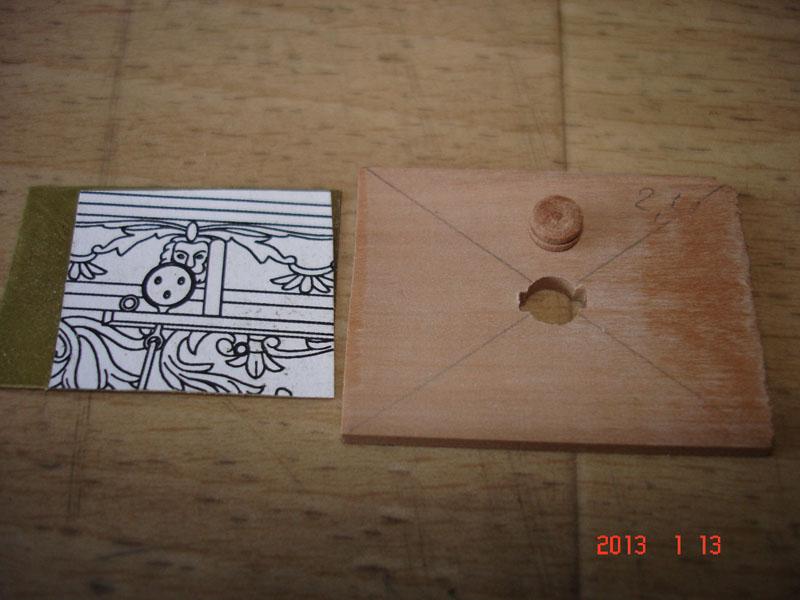
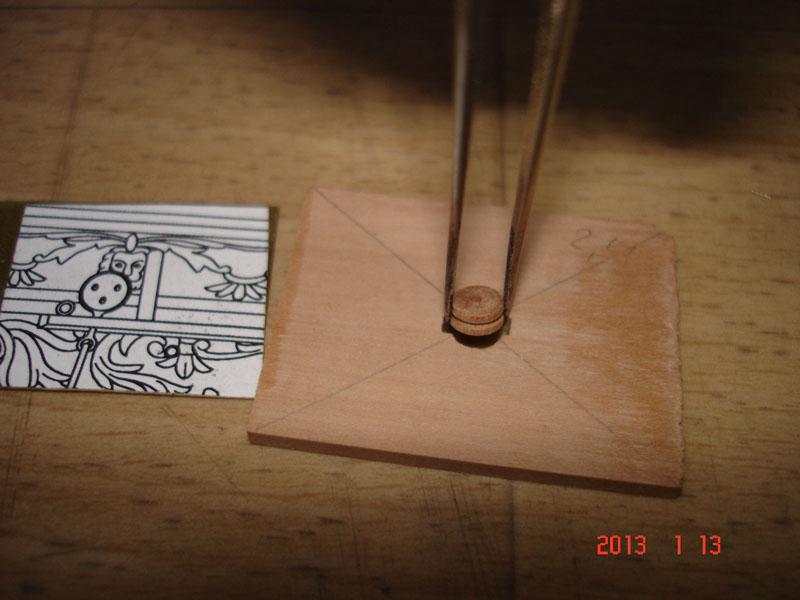
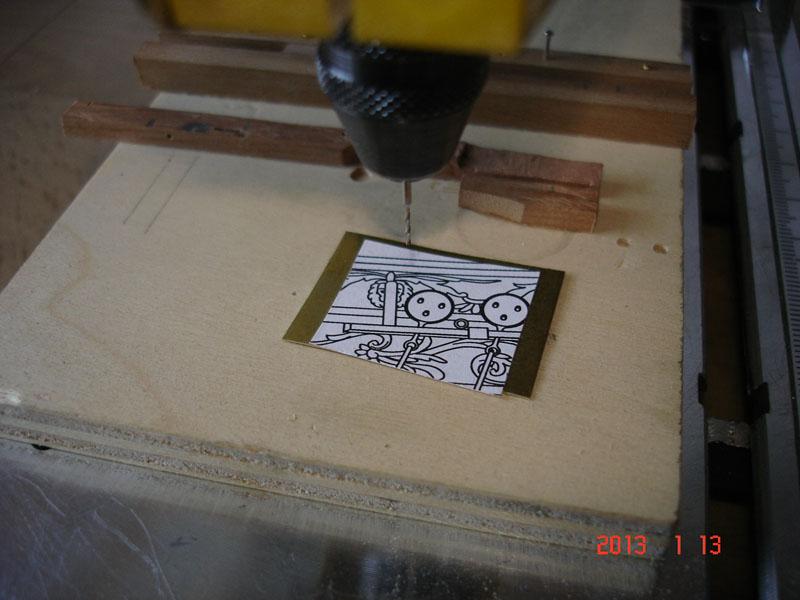
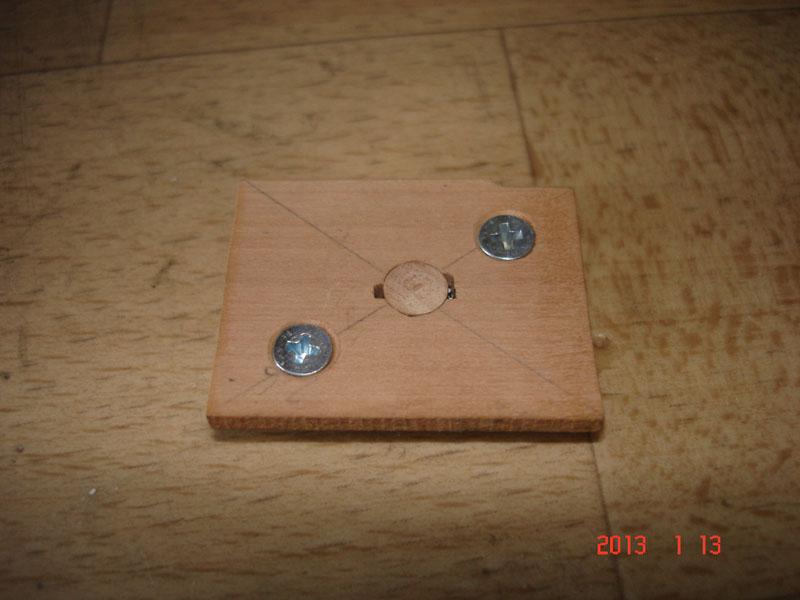
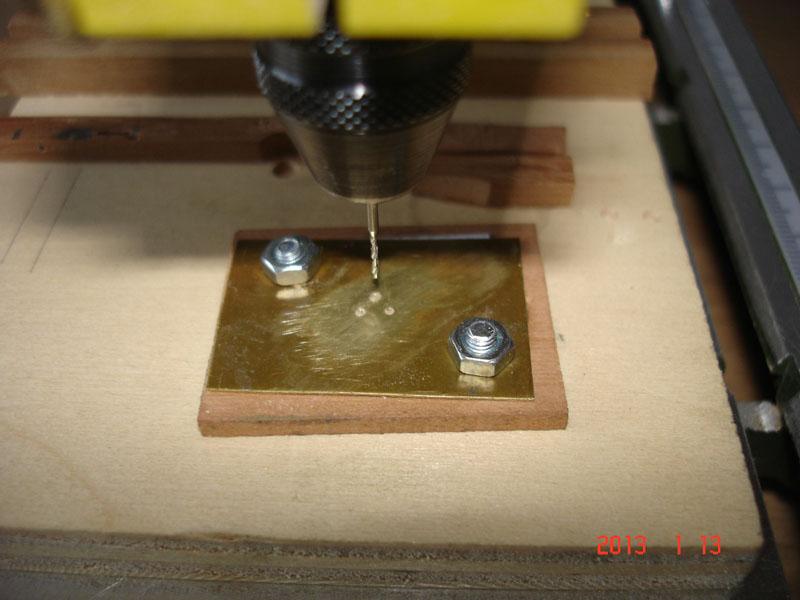
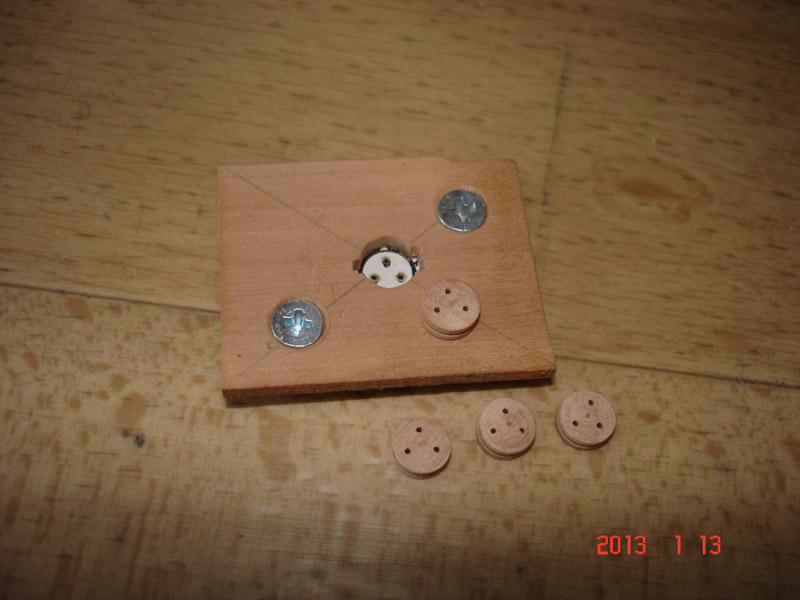
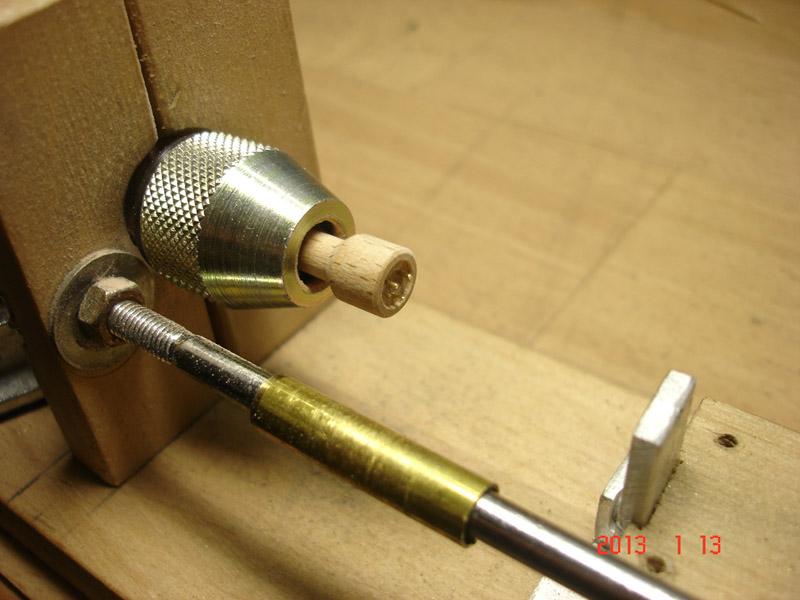
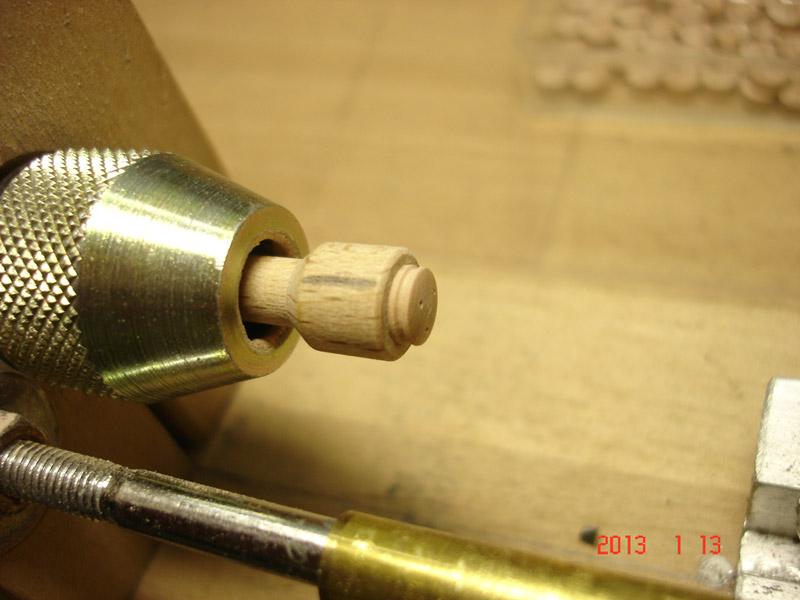
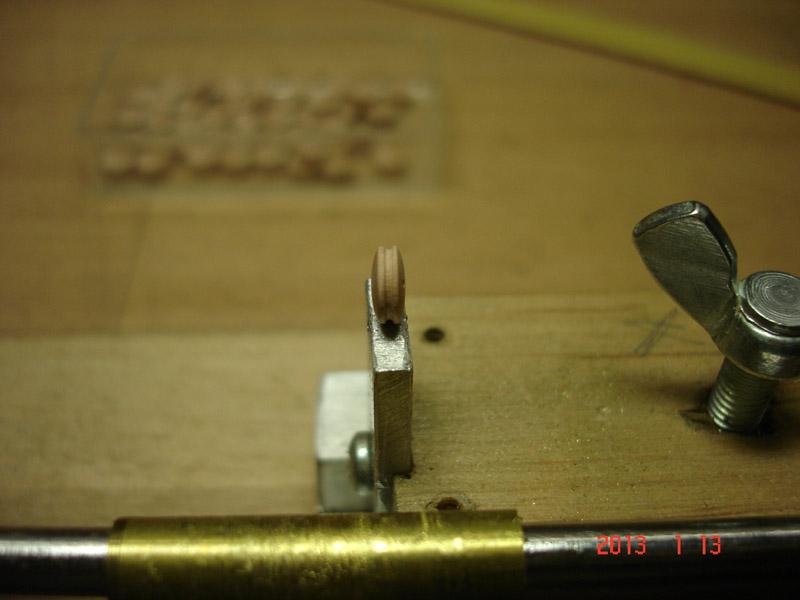
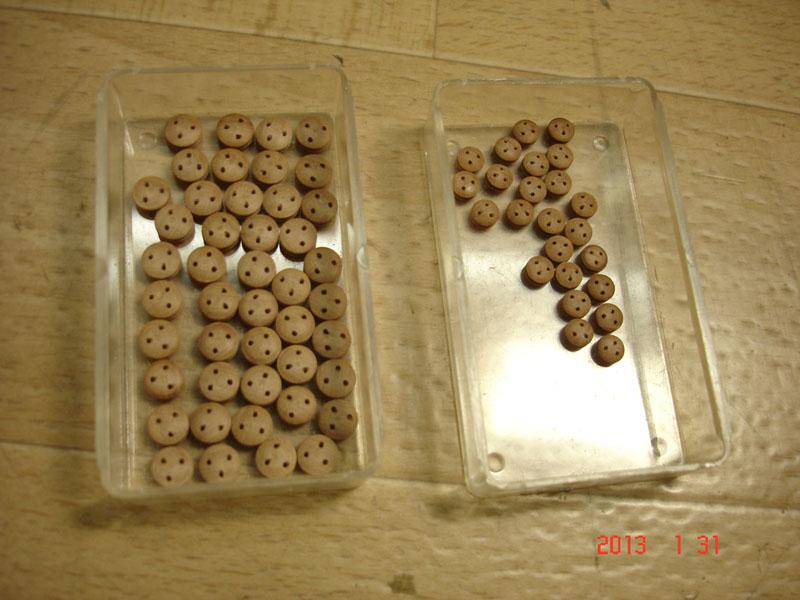
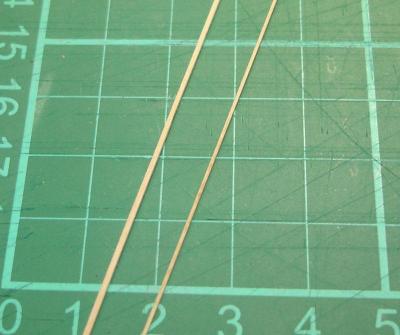
Hello, the next task is to make deadeyes. I have tried to photograph each step, and hope the images are self explainable. One end rounded with "truck tool" Turned and cutted Holding tool for drilling Truning of the holder The first deadeye One side done, shaped witn fine grind paper Ready deadeye And here are these This was the last post from me before crash, so the re-building of the log is now done. To be continued Alexander


-
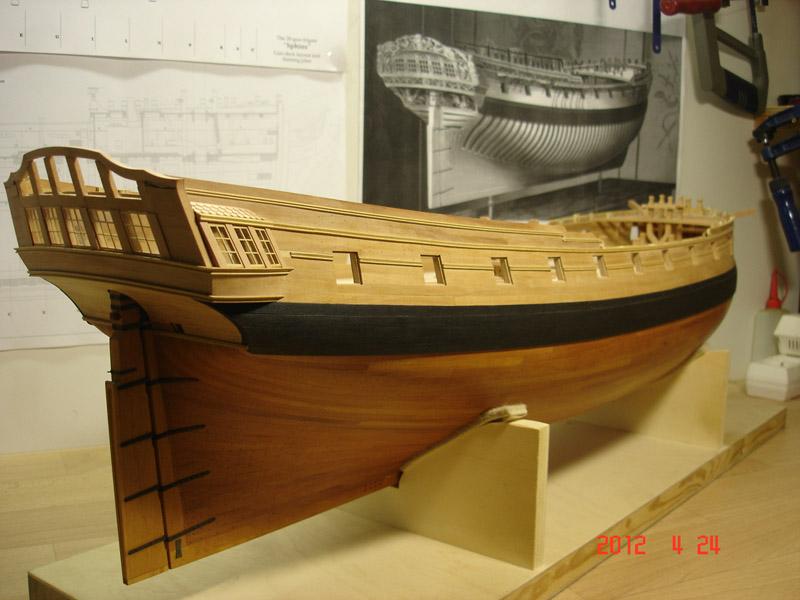
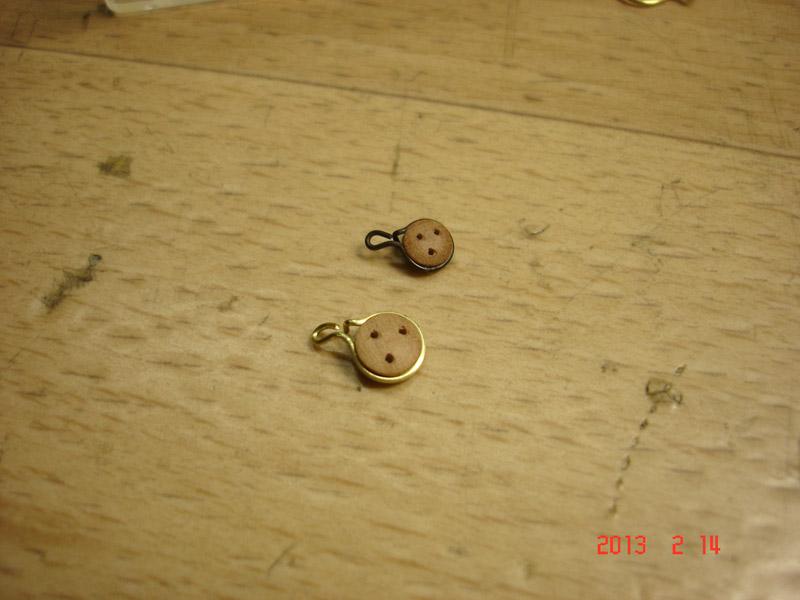
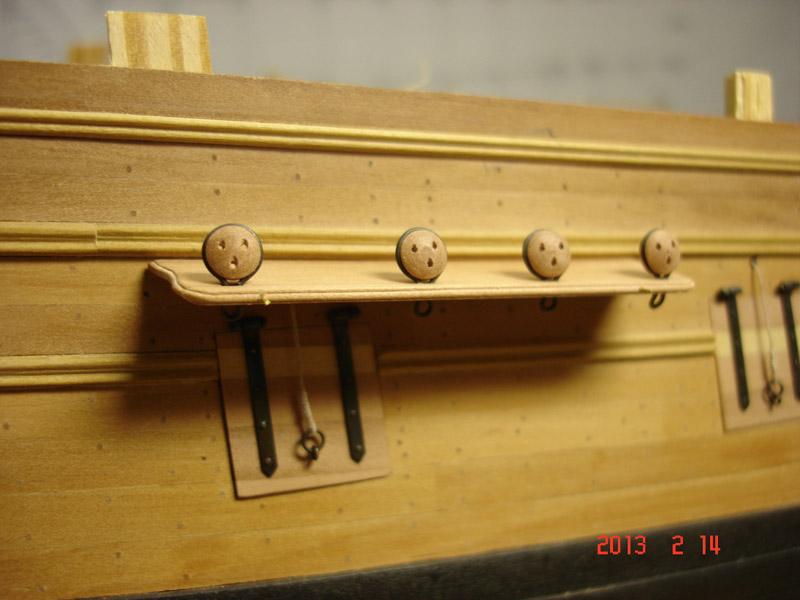
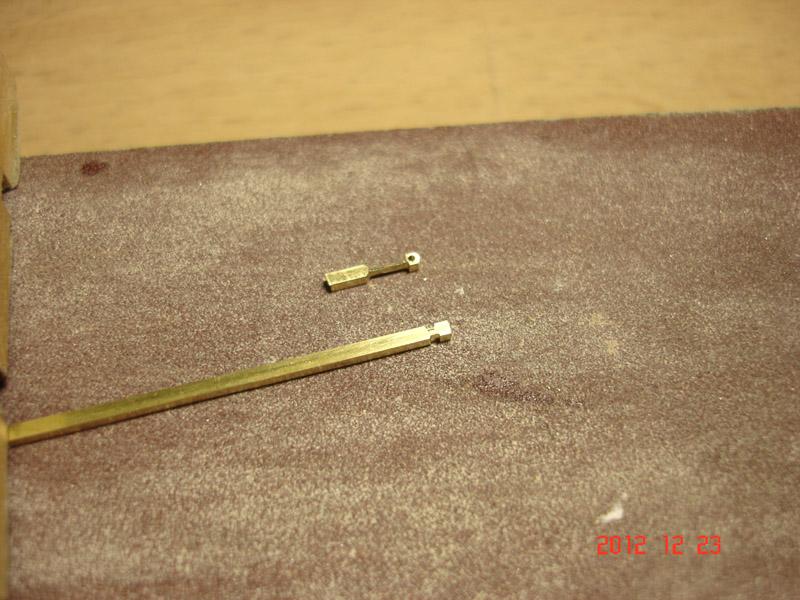
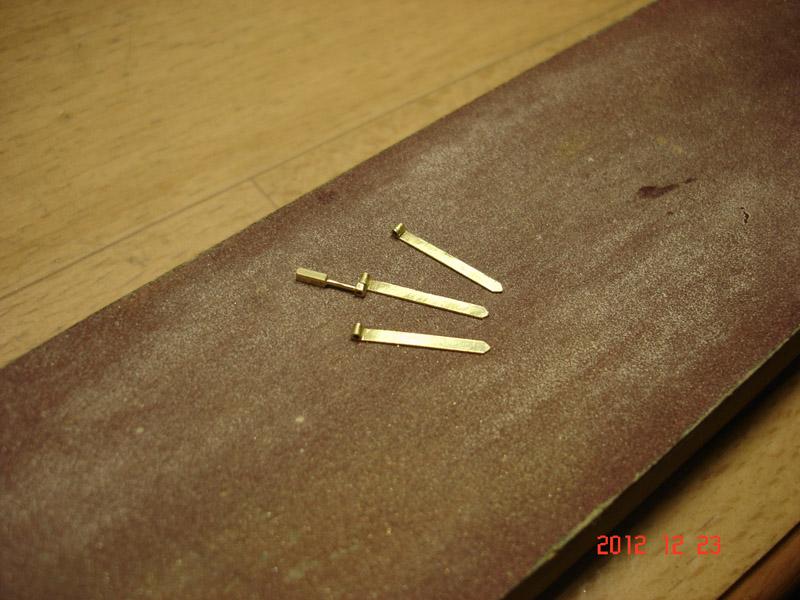
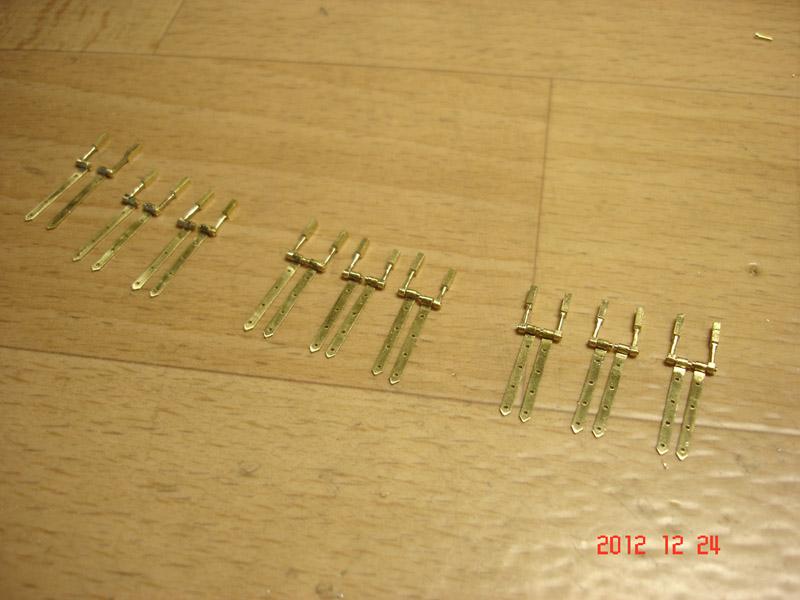
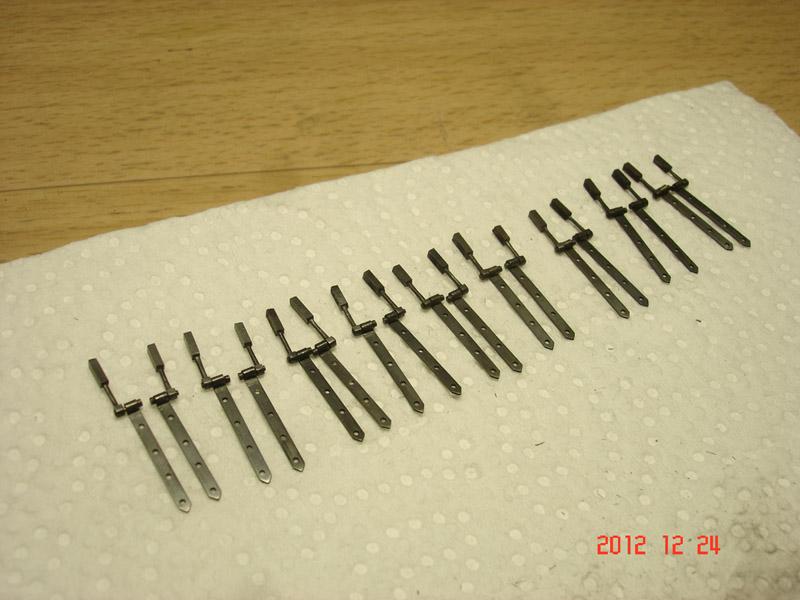
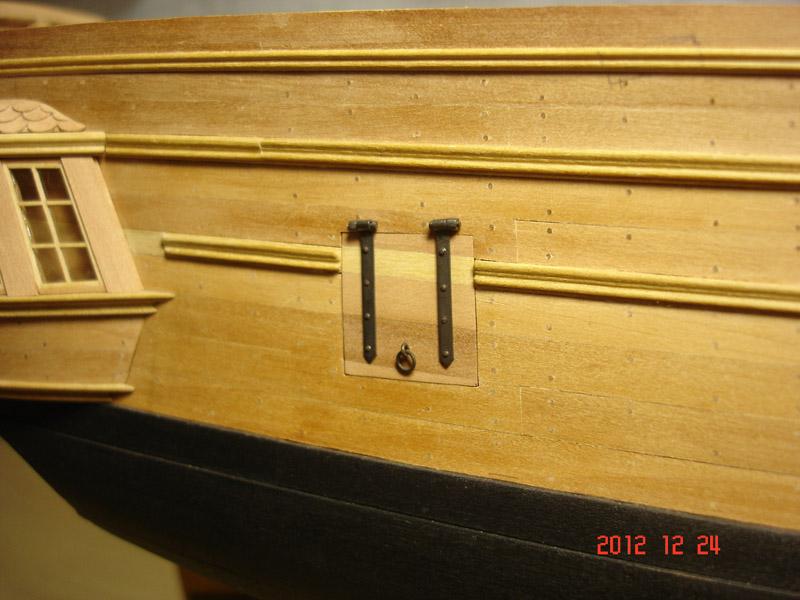
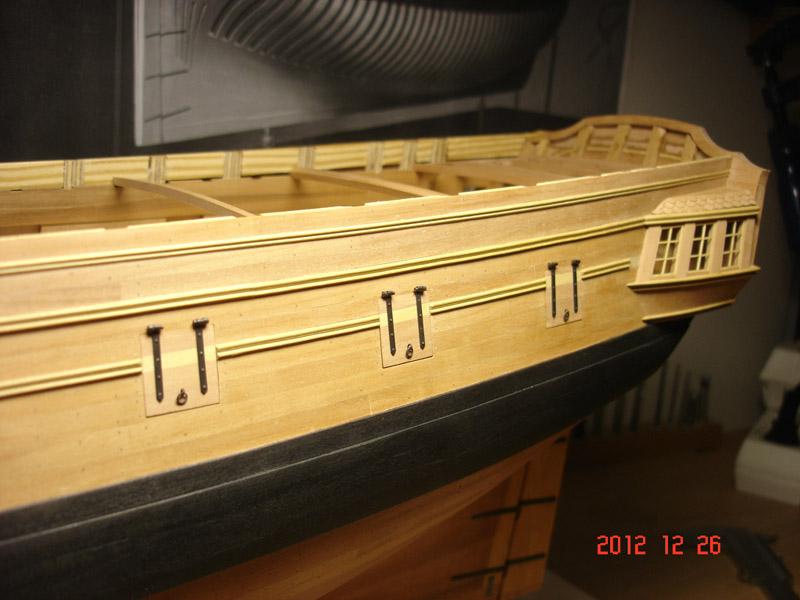
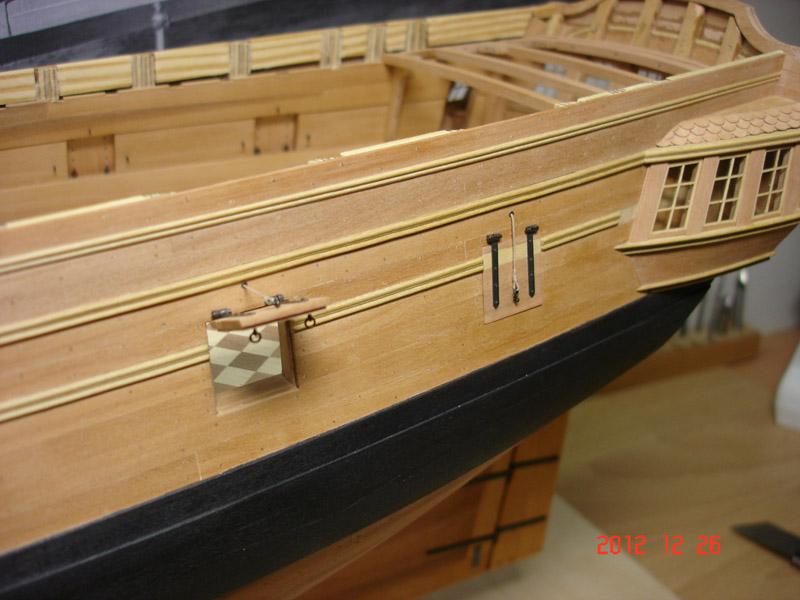
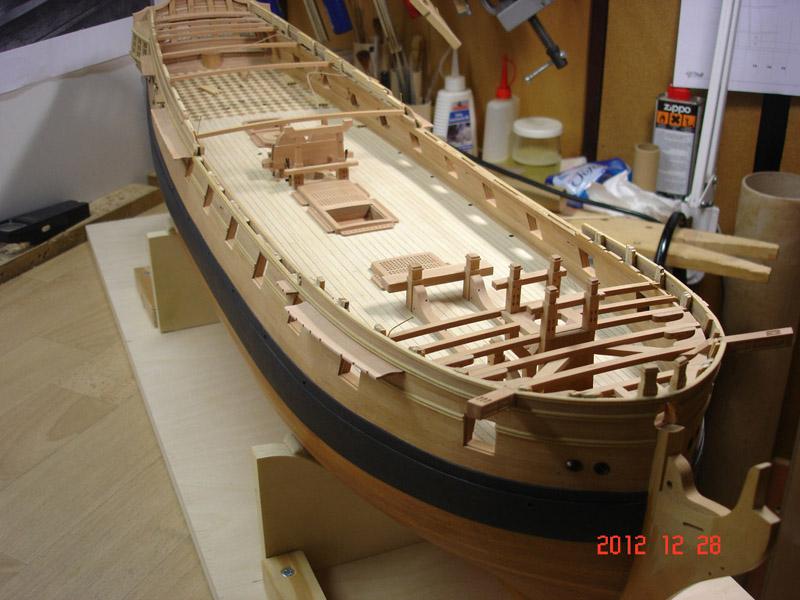
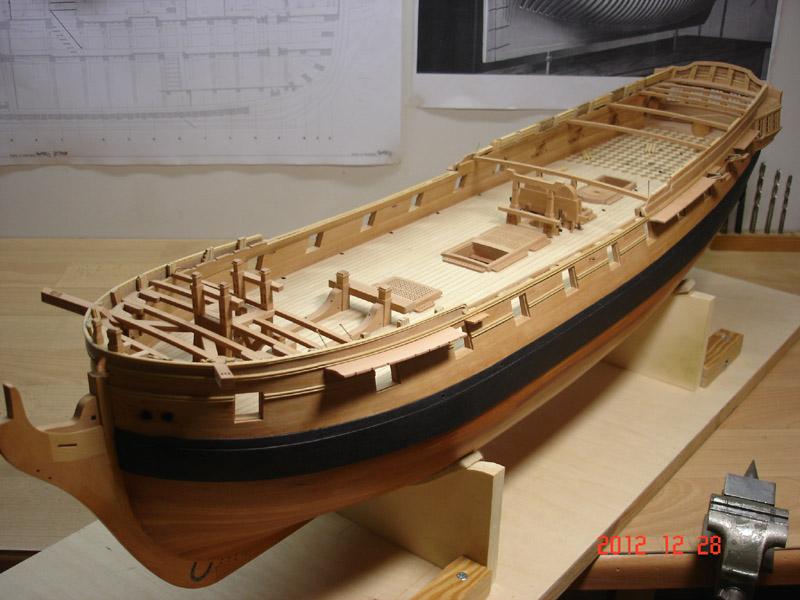
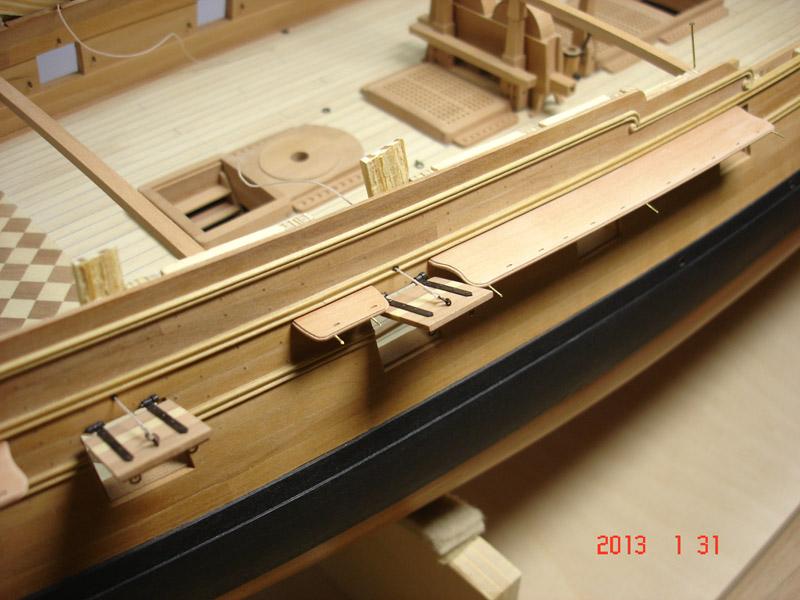
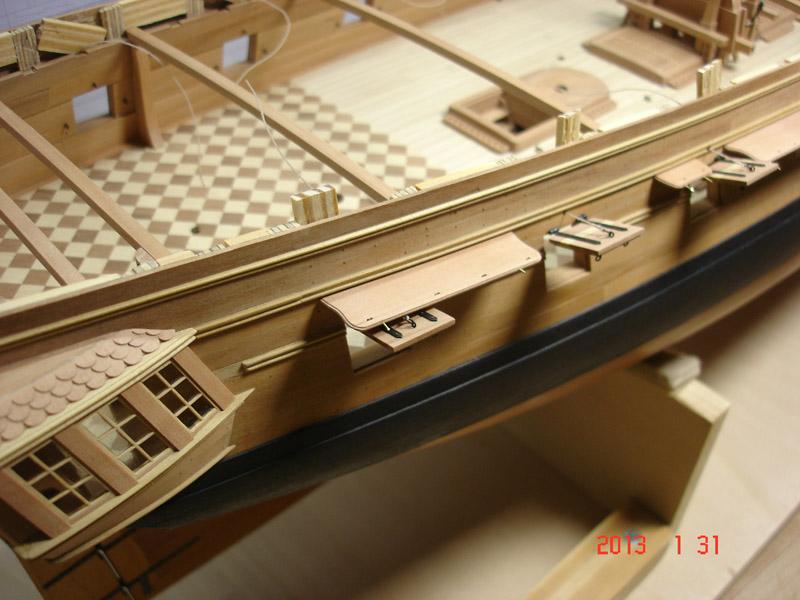
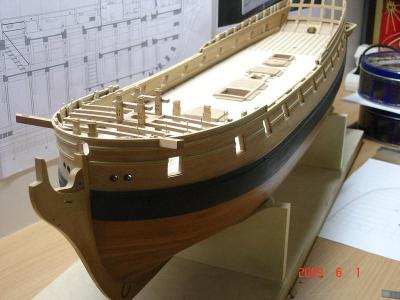
Hello, Before I begin to install all guns, and work further with beams and knees for quarter deck, gun port lids must here. So the production of hinges, the lids itself are made earlier. I hope, the images are self explainable. The installation of hinges and lid tackles. After I have installed all lids, I have made blanks for channels, shaped them to right size and thickness, and installed them (only dry now). To be continued Alexander


-
Thank you Harry, Gregg, Peter, Joe and Toni! I very appreciate your comments! Hi Harry, warm welcome and hope to see your build log soon here, It's Kit or Scratch? Hi Peter, the monograms are glued with CA glue to barrels, I have describet this here: http://modelshipworld.com/index.php?/topic/410-hms-sphynx-by-alex-m-scale-148-english-20-gun-frigate-as-build-1775/page-2#entry5559, pictures from 13 to 16. Alexander
-
ancre LE BONHOMME RICHARD by Jeronimo - FINISHED
Alex M replied to Jeronimo's topic in - Build logs for subjects built 1751 - 1800
Hello Karl, it is a pleasure to watch you finest workmanship, I'm really impressed! Alexander- 662 replies
-
- 1
-

-
- bonhomme richard
- frigate
- (and 1 more)
-
Thank you Karl nad druxey! The base for windows is plastic sheet, as I have described earlier. The varnish is applied between mullions on to plastic, as it do only imitate old glazing. The idea is from Karl, I was impressed by his windows of Bonhomme Richard model. Alexander
-
Hi Karl, the model is a piece of Art, absolutely wonderful! Alexander
- 40 replies
-
- 1
-
-
- ancre
- Chaloupe Armee En Guerre
- (and 1 more)
-
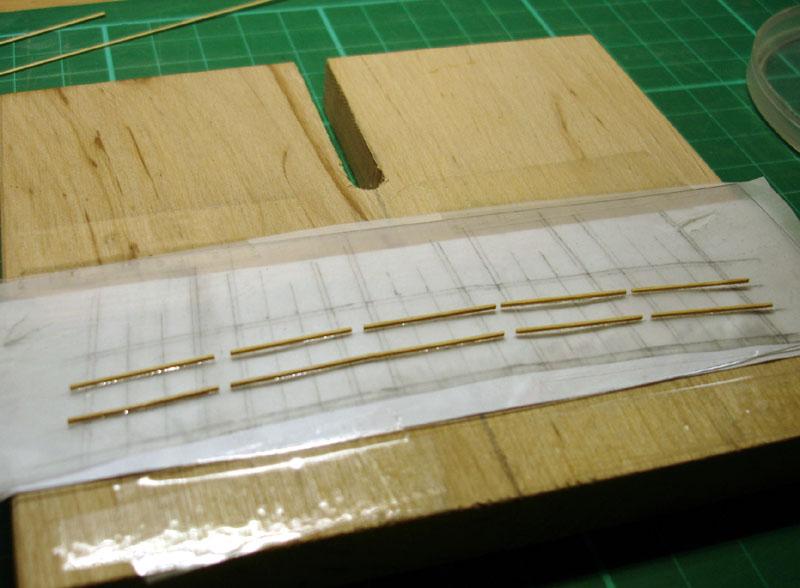
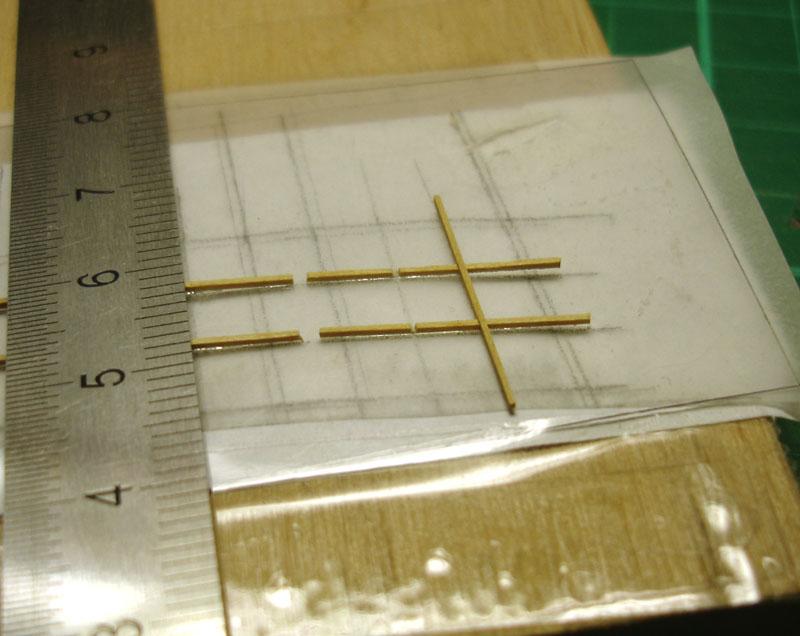
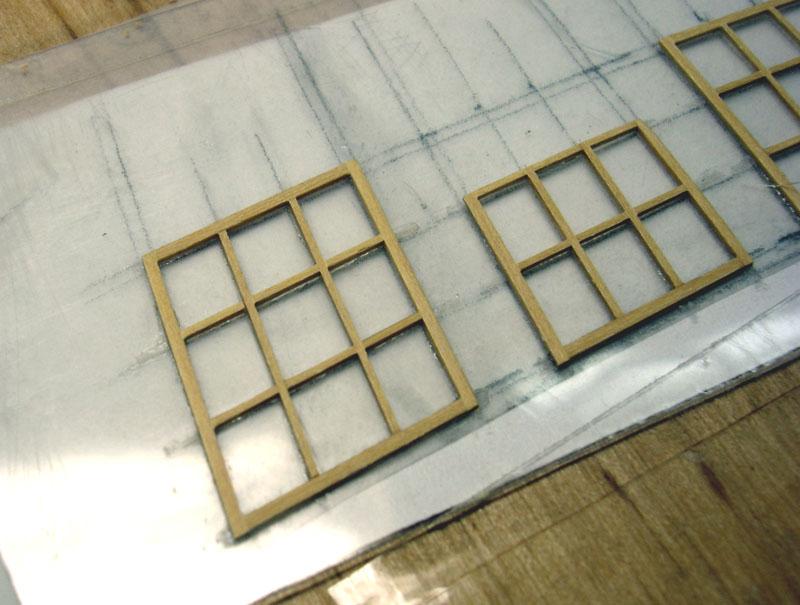
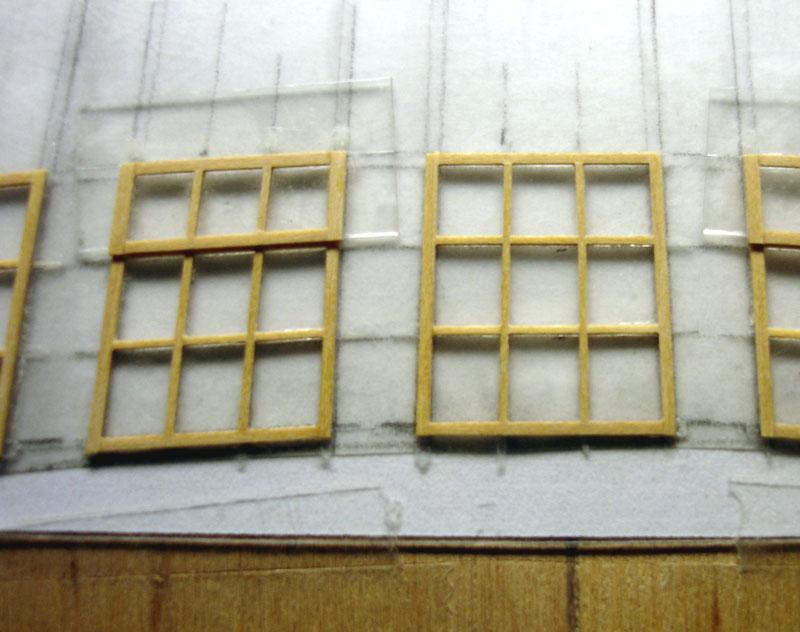
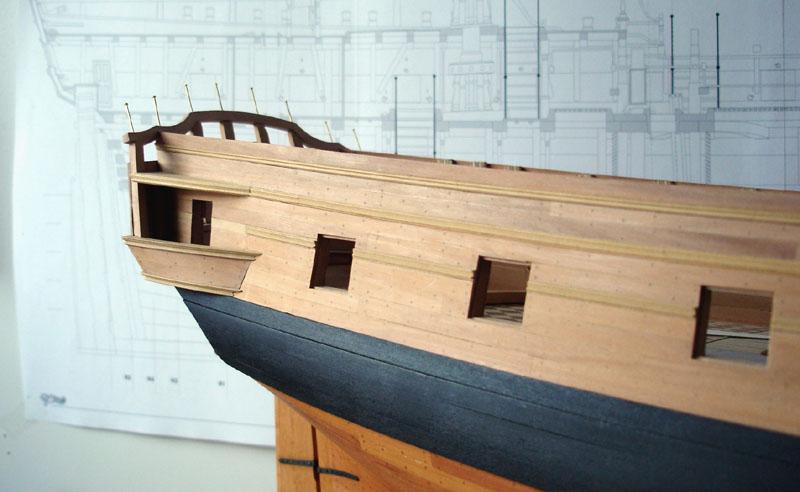
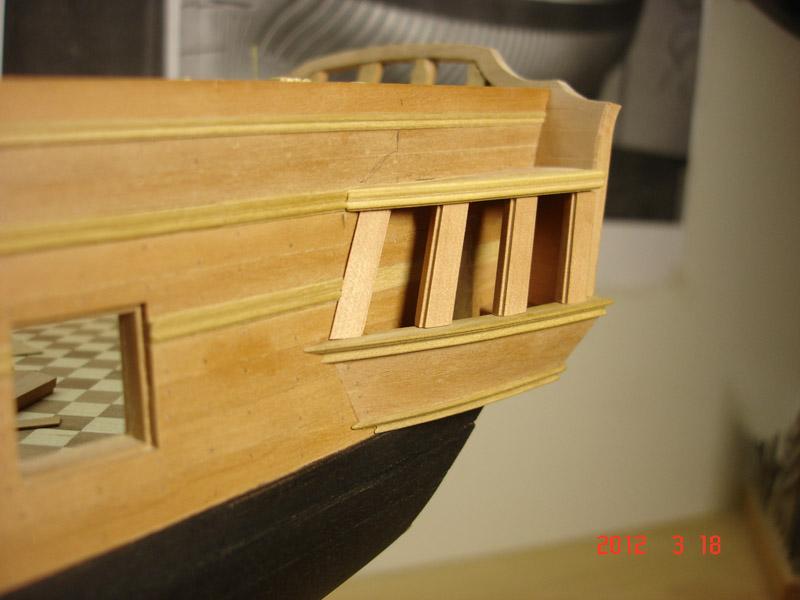
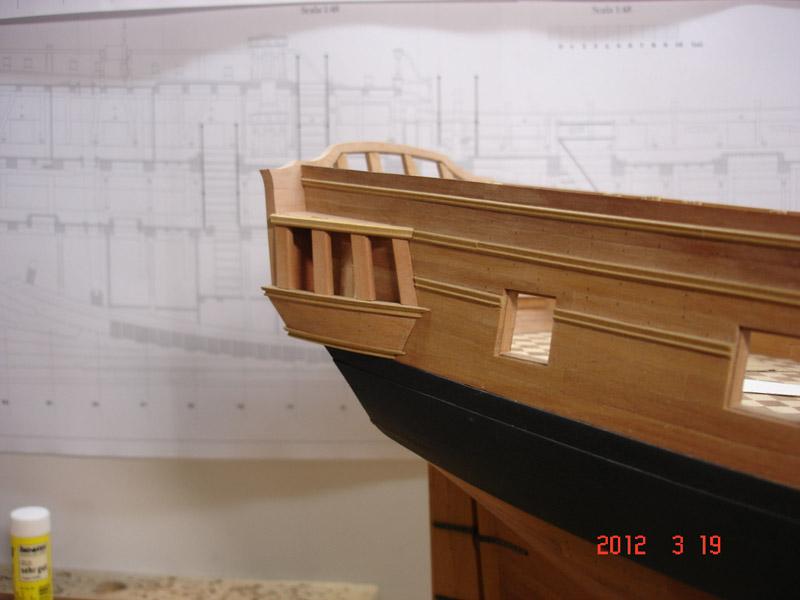
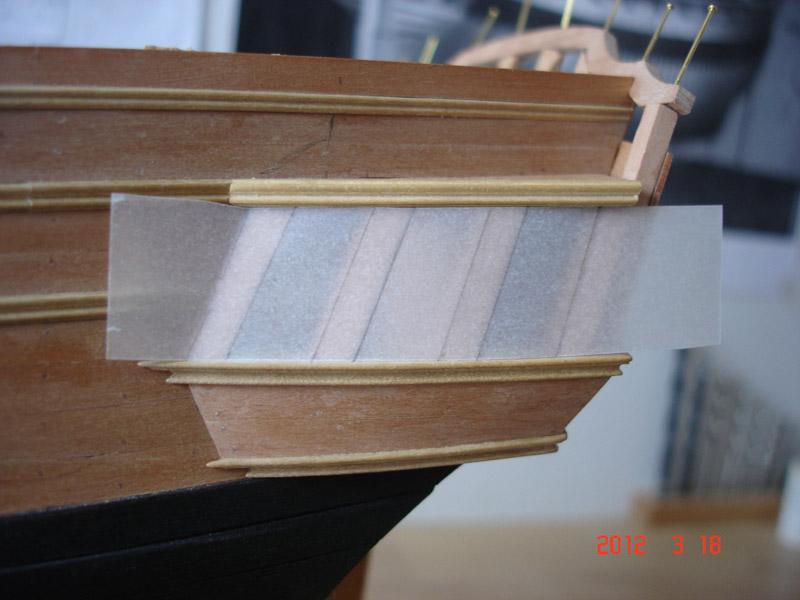
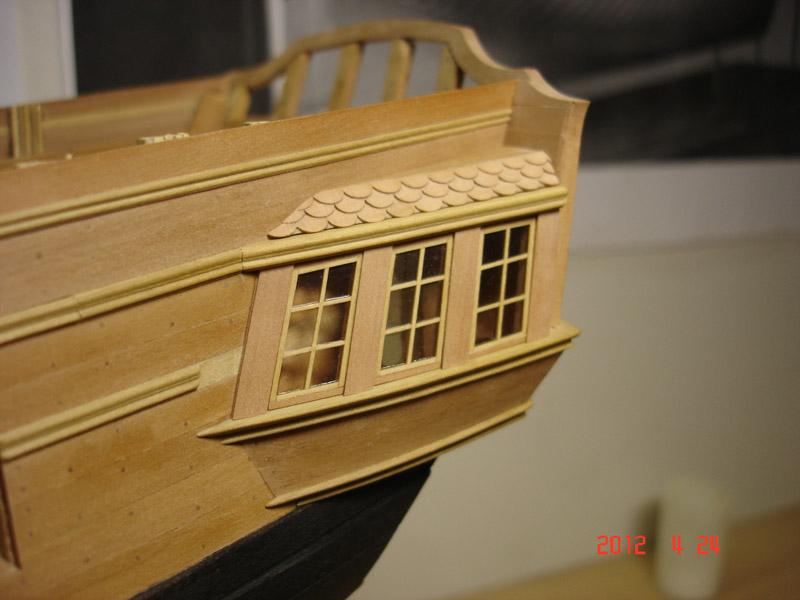
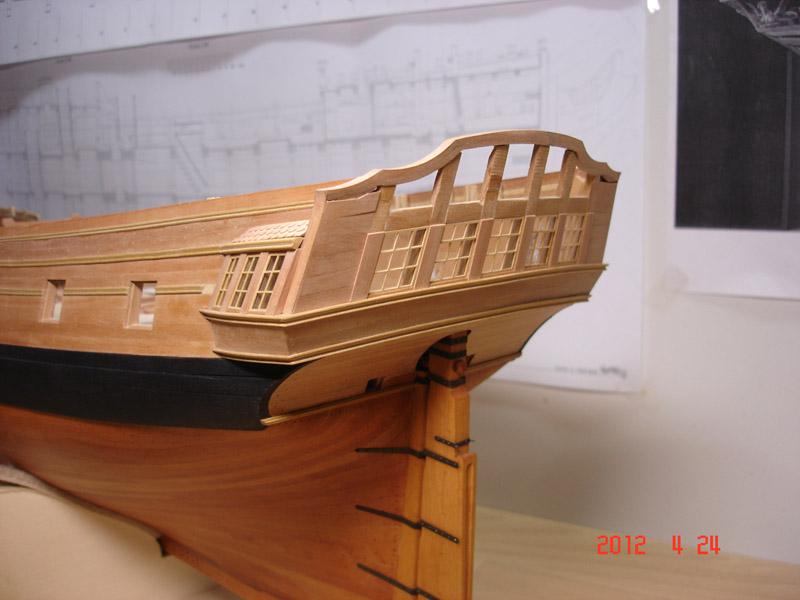
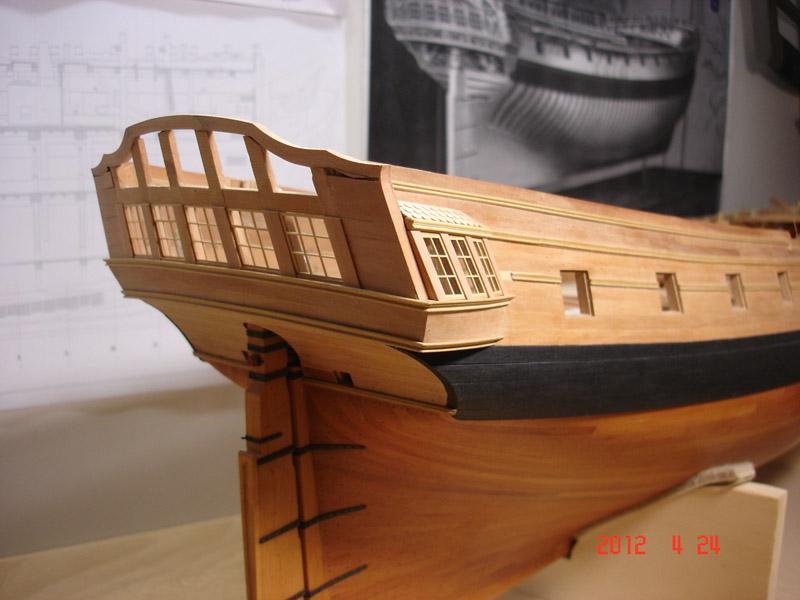
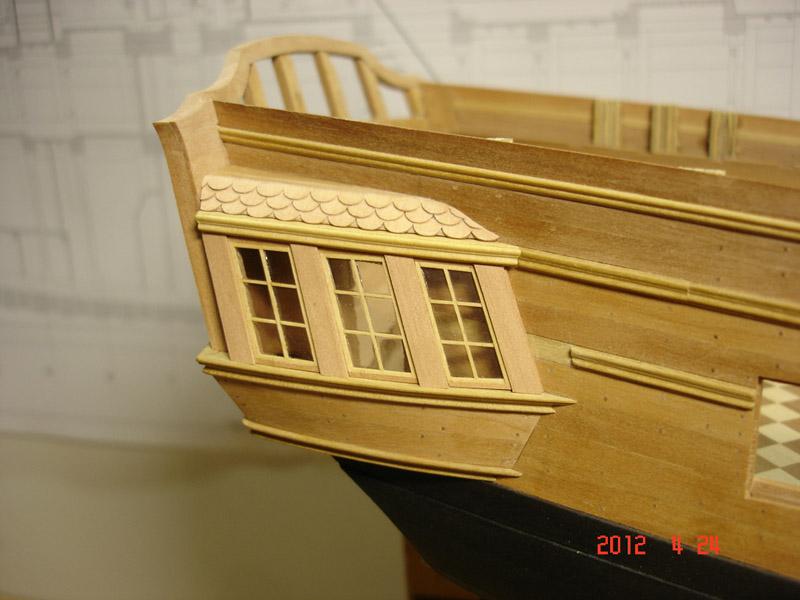
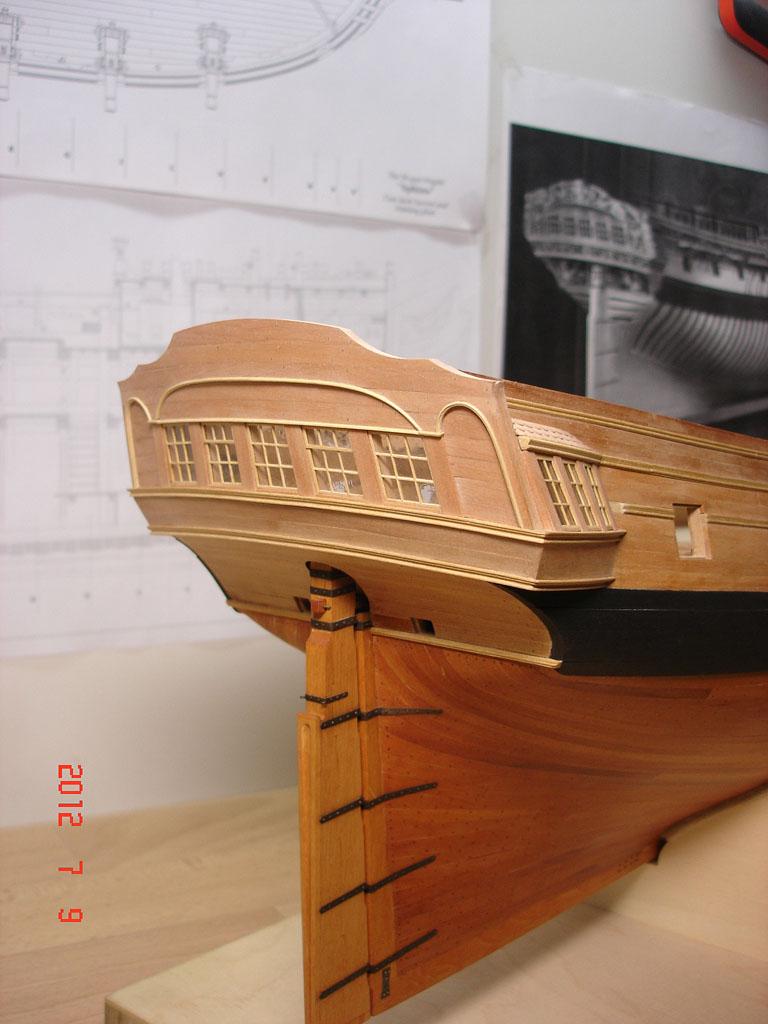
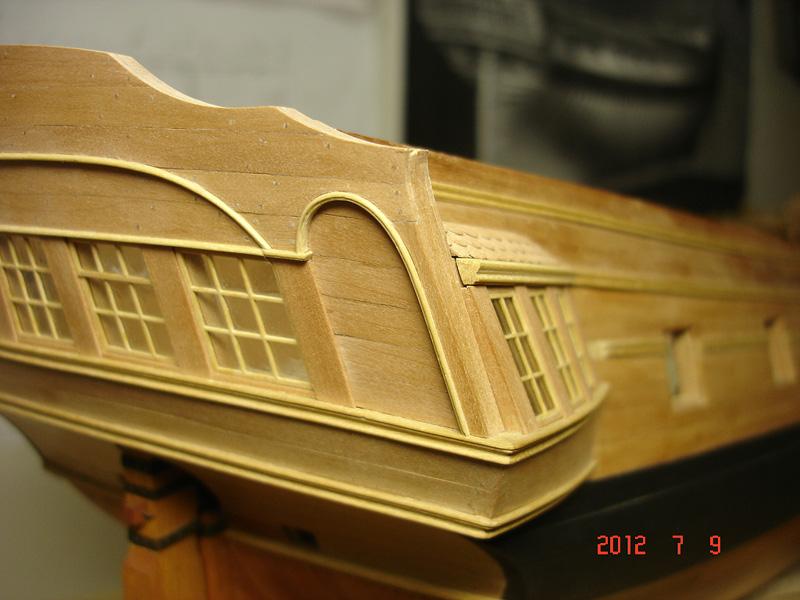
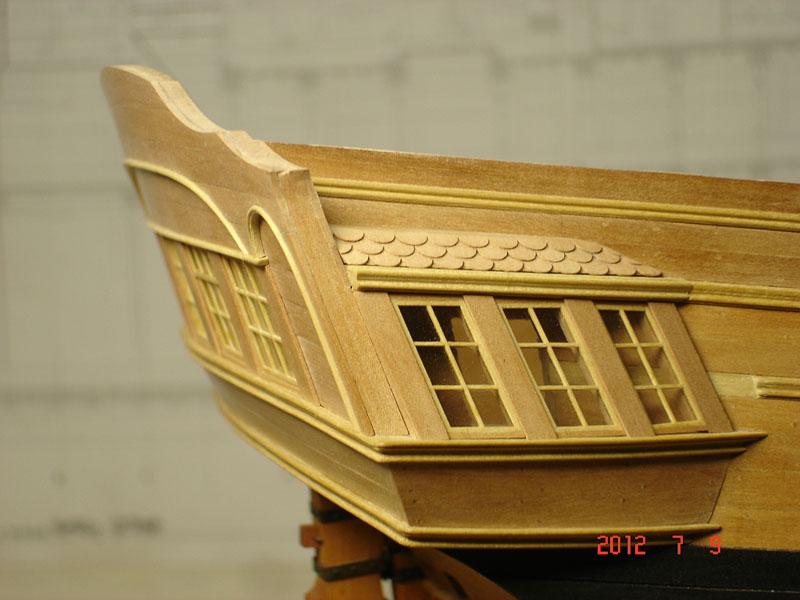
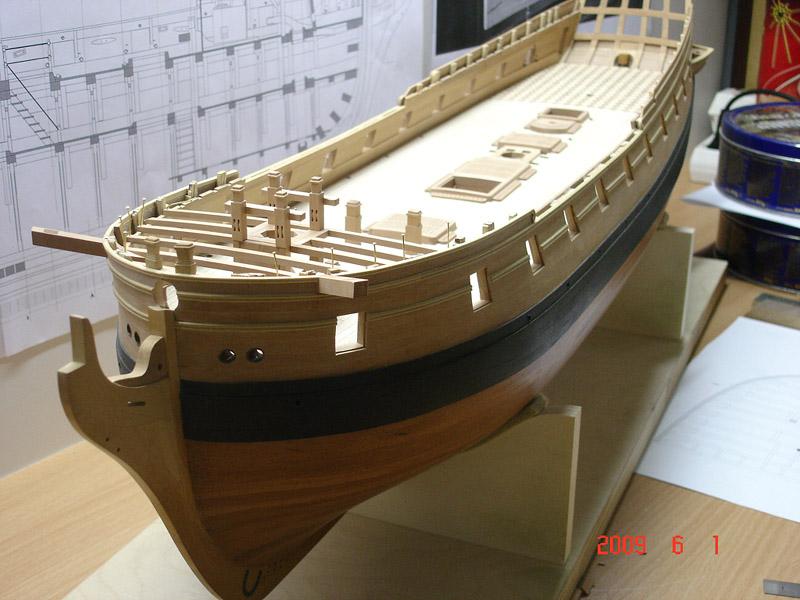
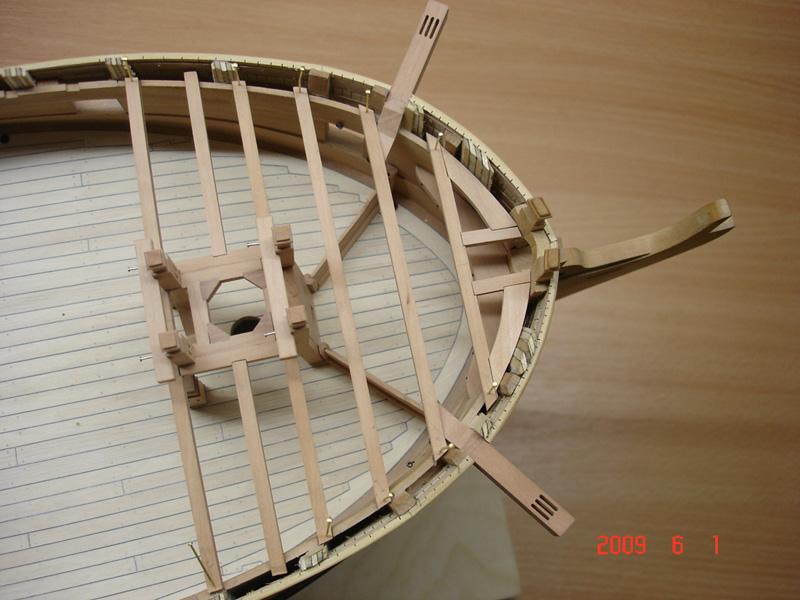
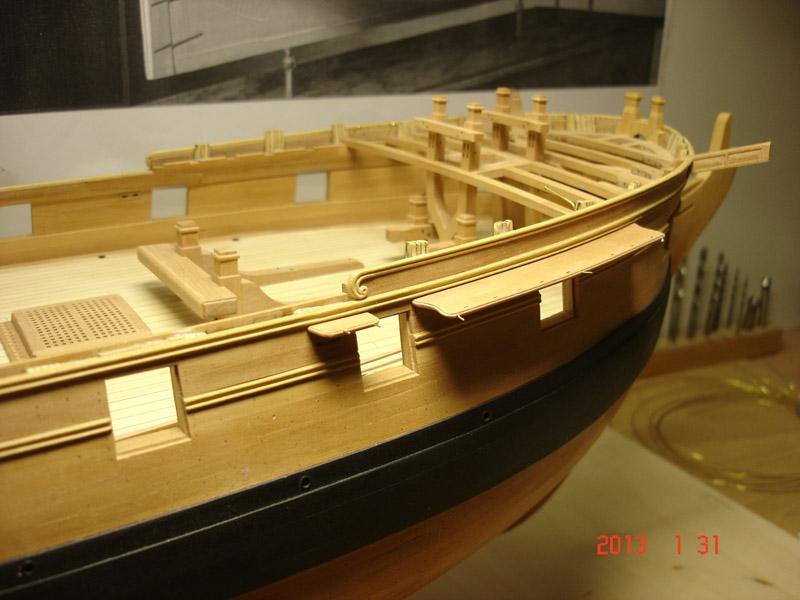
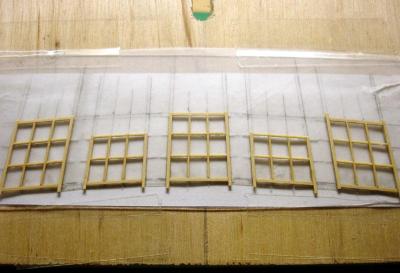
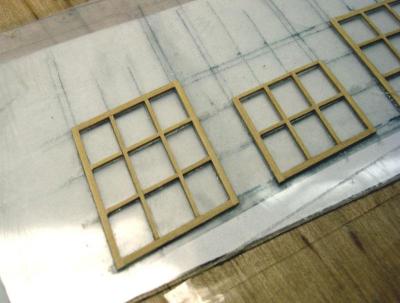
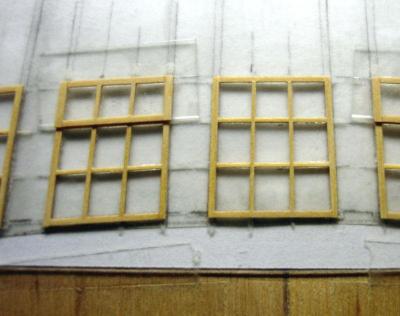
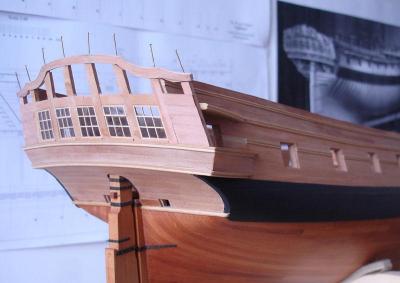
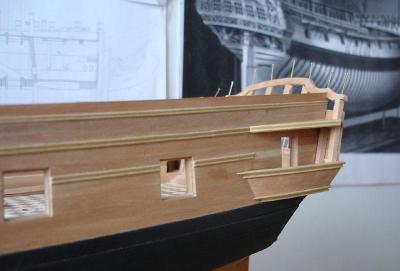
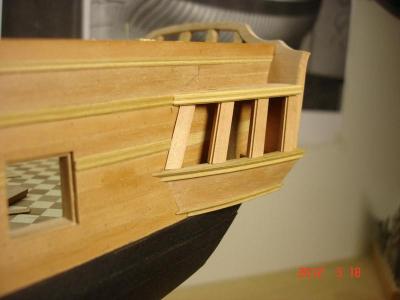
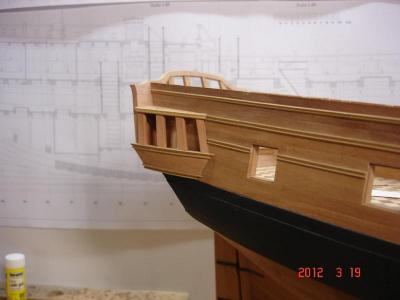
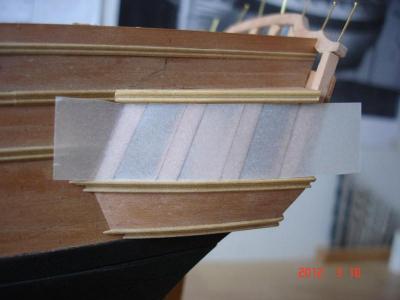
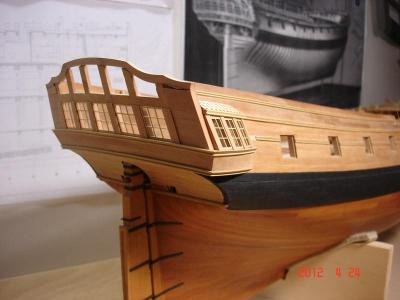
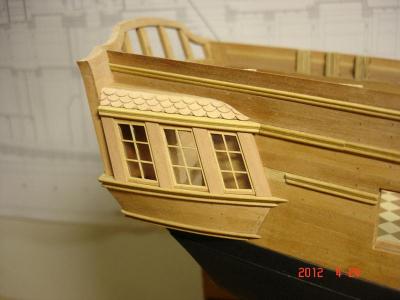
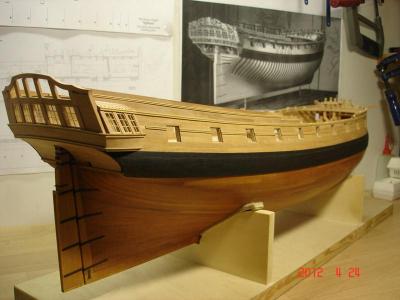
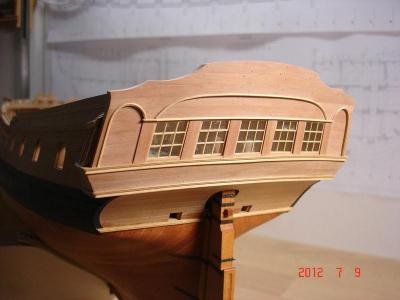
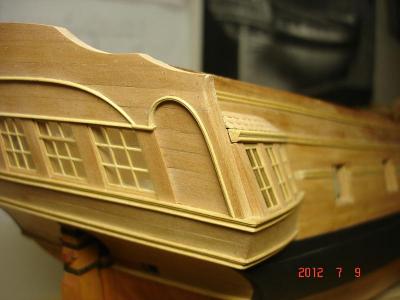
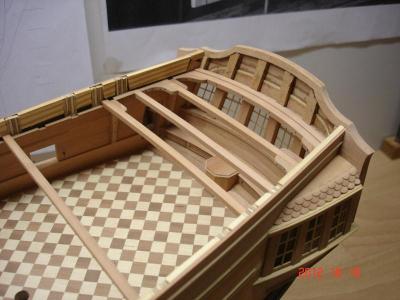
Hello, before I put the guns on their positions, I have decided to work around hull, especially the stern area und the bow. Here are few pictures of making the windows. The wood is Castello, the strips are 0,5x0,5mm and 0,5x0,8mm. For glazing I have used 0,3mm thick plastic from package, then glued framing with CA. The framing of stern windows was transfered to transparent paper, then the windows mullions are drafted on this transparent paper according to plan. Then I have glued white paper sheet to wood plate, and glued transparent paper over the first. So I have correct windows outline and right angles. Then placed clear plastic sheet over paper, and fixed them with tape. Now the mullions. Horizontal mullions (0,5mm x 0,5 mm) are glued directly to plastic with CA glue. Then slots for vertical mullions are cut out with chisel, they are not halflapped, they go through horizontal down to plastic. This is showed in third picture. Then vertical mullions are glued on. then all was cut to right length according to drawing. Then outer frames (0,5mm x 0,8 mm) are glued, again directly to plastic. Then the windows are sand flush, the plastic was then cut out, and the window is ready. The horizontal strips are glued first, then gaps for vertical strips are cut. Vertical strips glued on, cut to right height, and outer framing gluing overall view with outer frames. Also the sliding windows. Close view after sanding The frame for permanent window glued over additional sheet of plastic Check how they fit. The windows need some cleaning, then coat of varnish will be added to simulate old glazing. Preparing framing for galleries beginns The shape of windows traced to transparent paper. The windows for galleries are done in the same manner as before. The glazing is imitated by adding a coat of varnish, this give the irregular transparence like old glass. The battens between windows added separately. They will recieve mouldings later, and are hold at now by a little spot of glue. All windows are dry fitted at now. Here is how the wooden shindles are made, and ready cover for gallery The planking of stern is completed. The arches are made from two strips of 0,6mm boxwood glued together. Internal view with few beams of QD installed To be continued Alexander


-
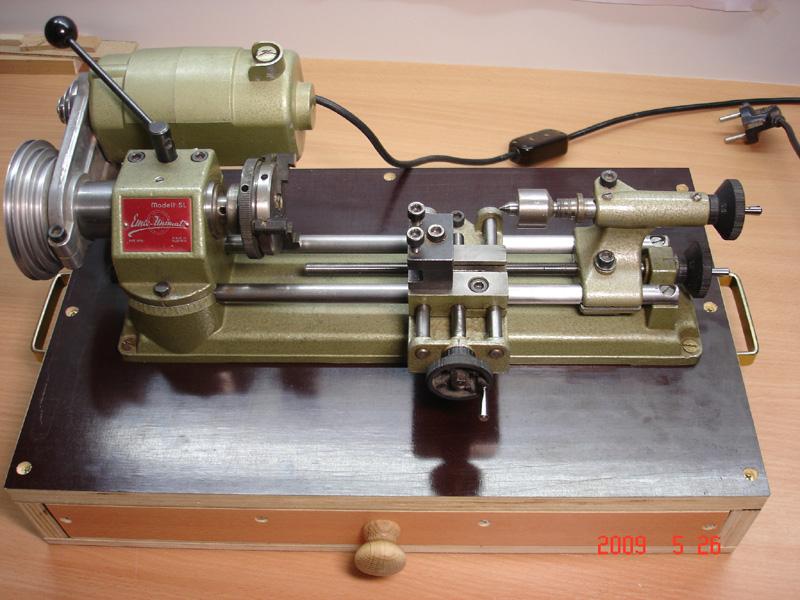
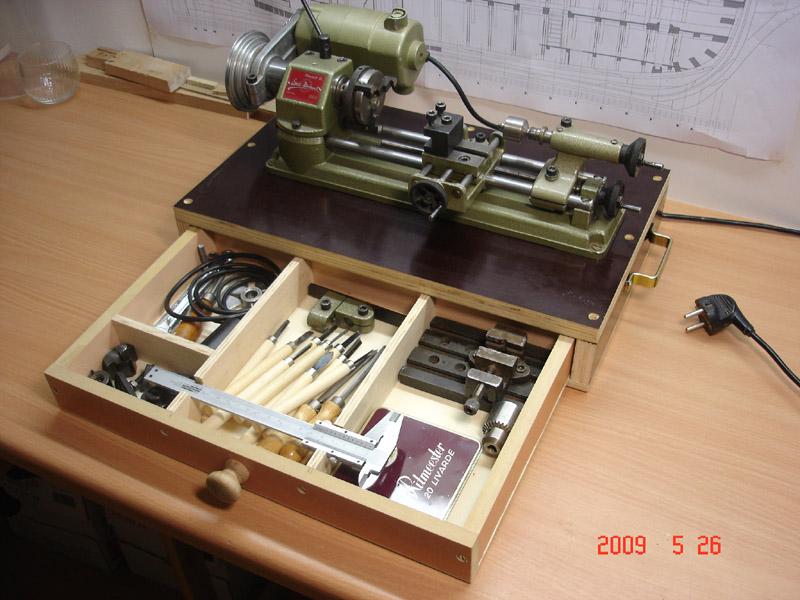
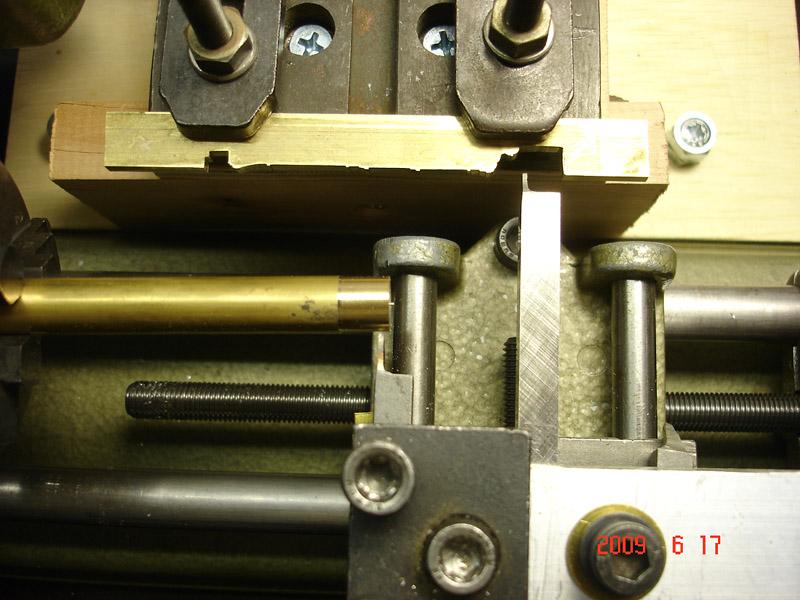
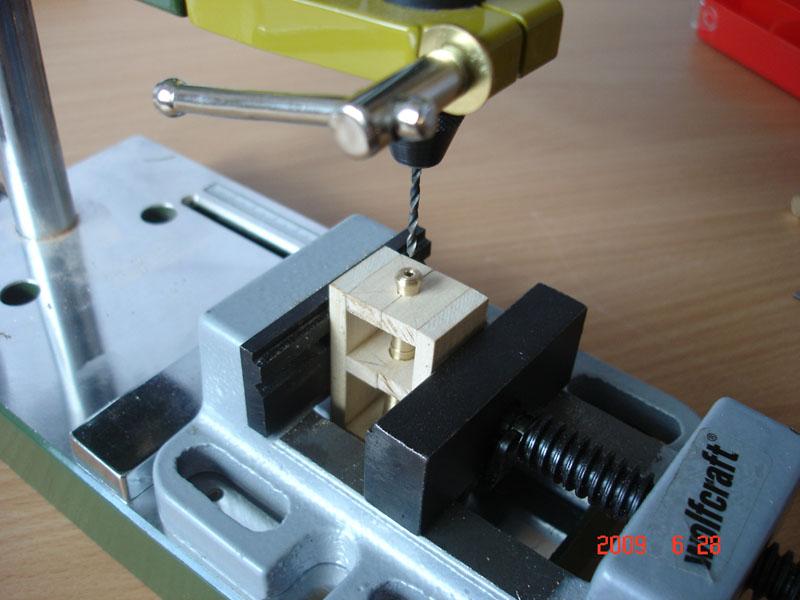
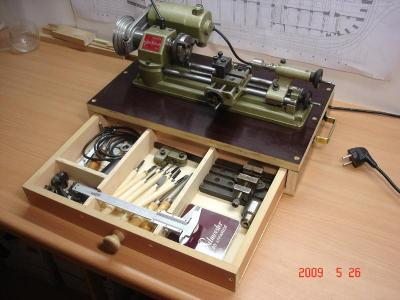
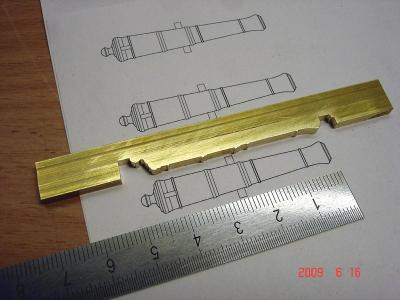
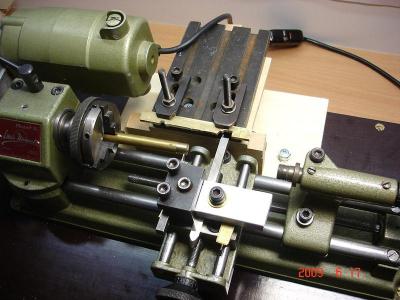
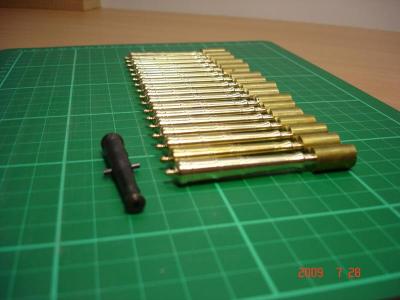
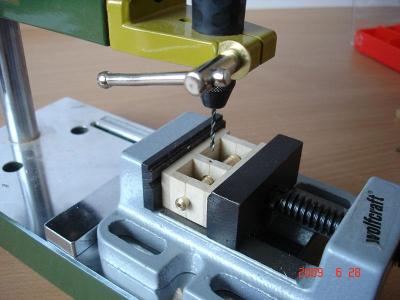
Hi Pat, I showed my set up here: http://modelshipworld.com/index.php?/topic/410-hms-sphynx-by-alex-m-scale-148-english-20-gun-frigate-as-build-1775/?p=5559 I have turned them on an old Unimat SL machine. To turn taper surfaces you should set the head stock to the angle of taper, so I do it as showed in the picture from above. Then I have tuned each gun at one time using brass template as guide. Here is my Unimat: Alexander

-
Hi Dan, I was impressed by you build log and by you Vulture in old MSW, now I'm impressed by you re-build! Marvelous work you do here, Hats off! Alexander
-
Many thanks you all guys for your warm words about my Sphynx! I very appreciate this! Alexander
-
ancre Le Commerce de Marseille by Zbigniew
Alex M replied to Zbigniew's topic in - Build logs for subjects built 1751 - 1800
Hello, really awesome build and very fine woodworking! Lovely images! Alexander -
Hello Klaus, great to see you back! It is a great research and extraordinary reconstruction you have done with Mayflower! Alexander
-
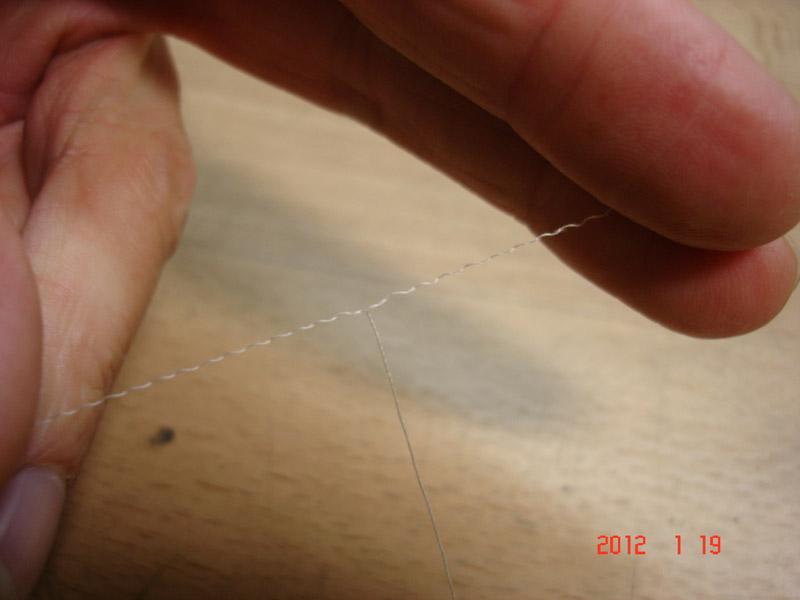
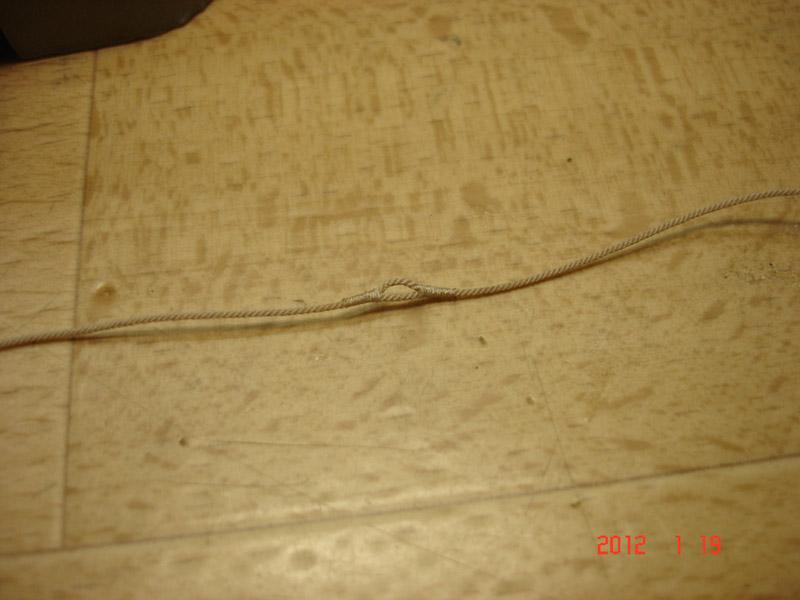
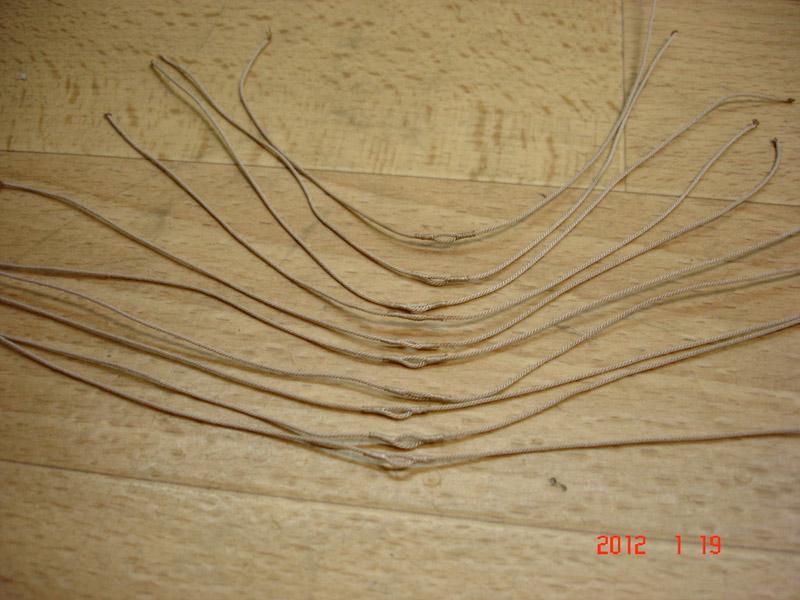
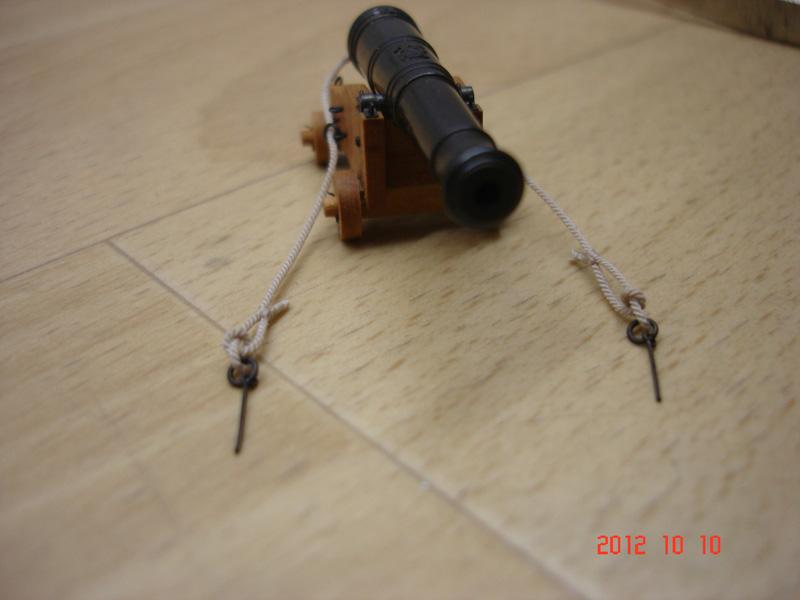
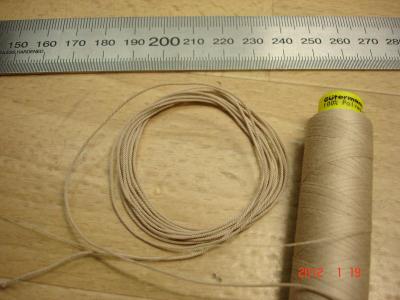
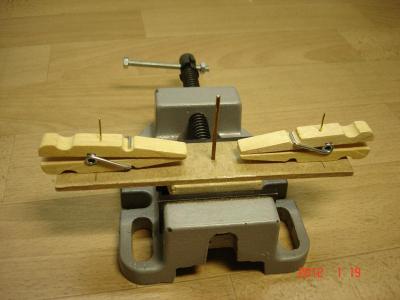
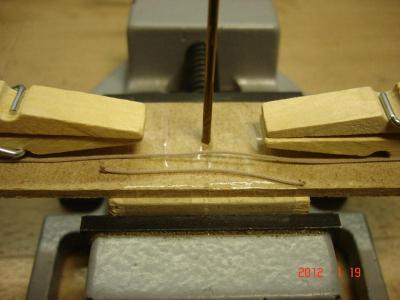
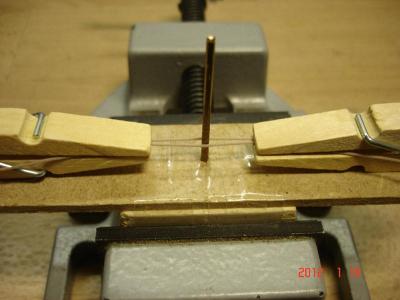
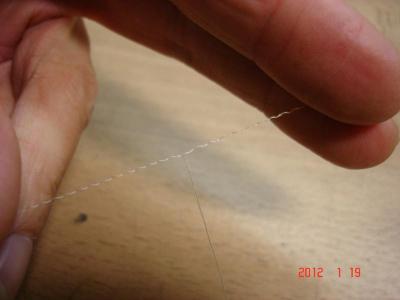
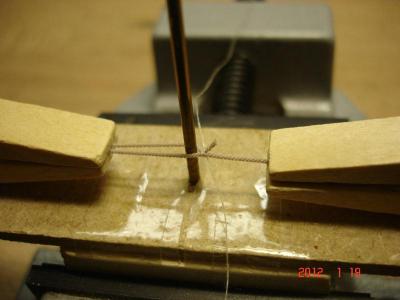
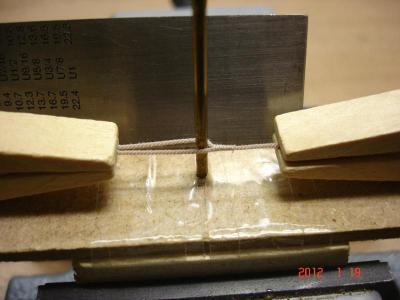
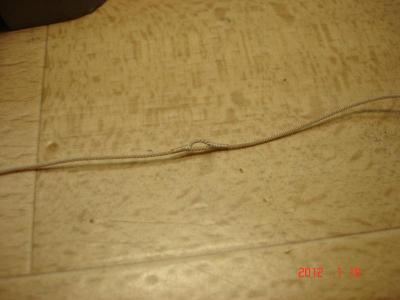
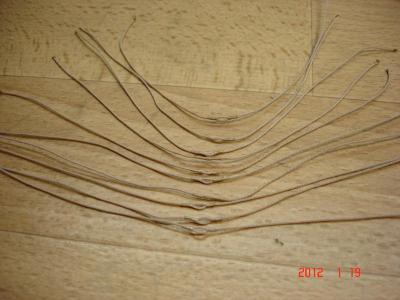
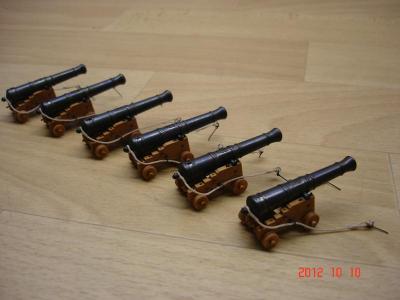
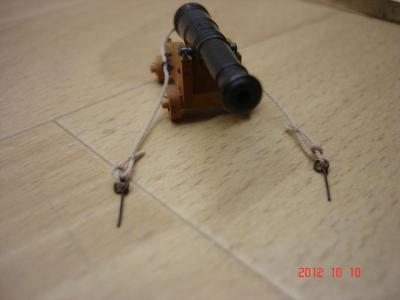
The breeching ropes, material is 120 Gütermann poliester. To be continued. Alexander


-
ancre LE BONHOMME RICHARD by Jeronimo - FINISHED
Alex M replied to Jeronimo's topic in - Build logs for subjects built 1751 - 1800
Hello Karl, great to see you back! It was awesome build log, and I'm happy to follow it here! Alexander- 662 replies
-
- 1
-
-
- bonhomme richard
- frigate
- (and 1 more)
-
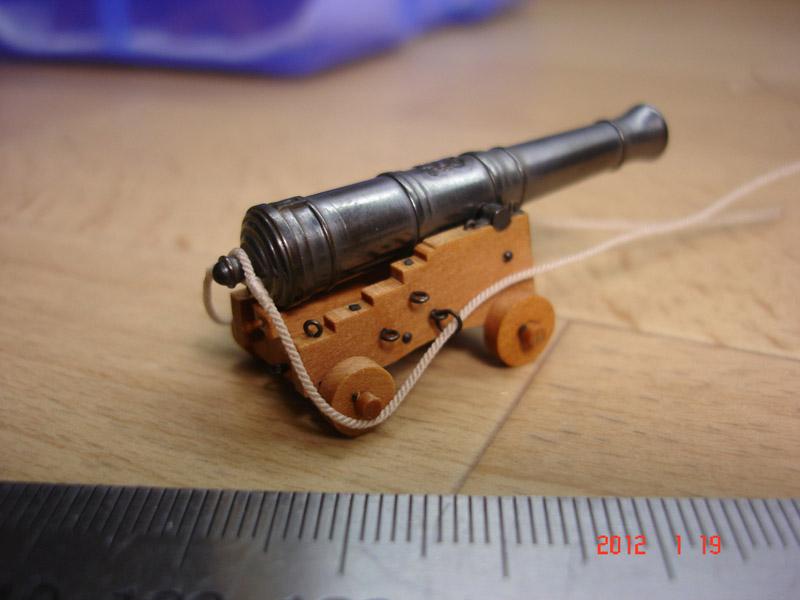
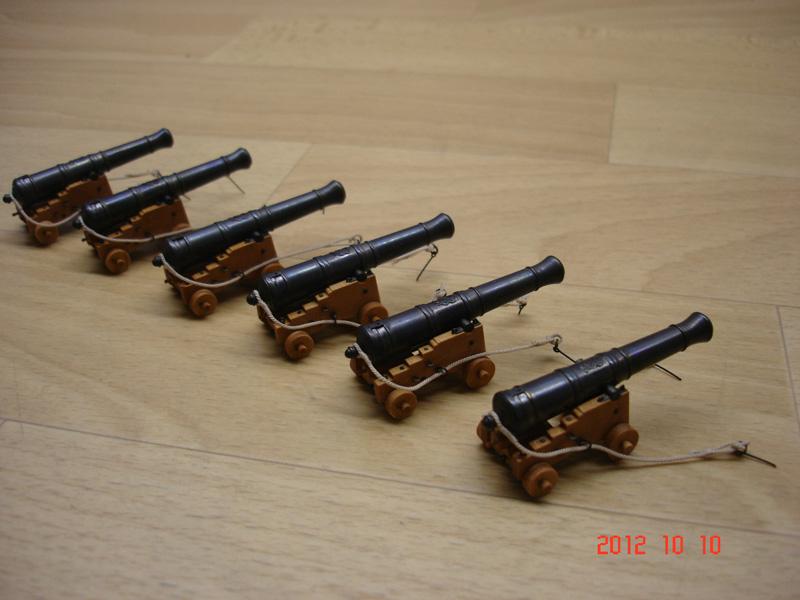
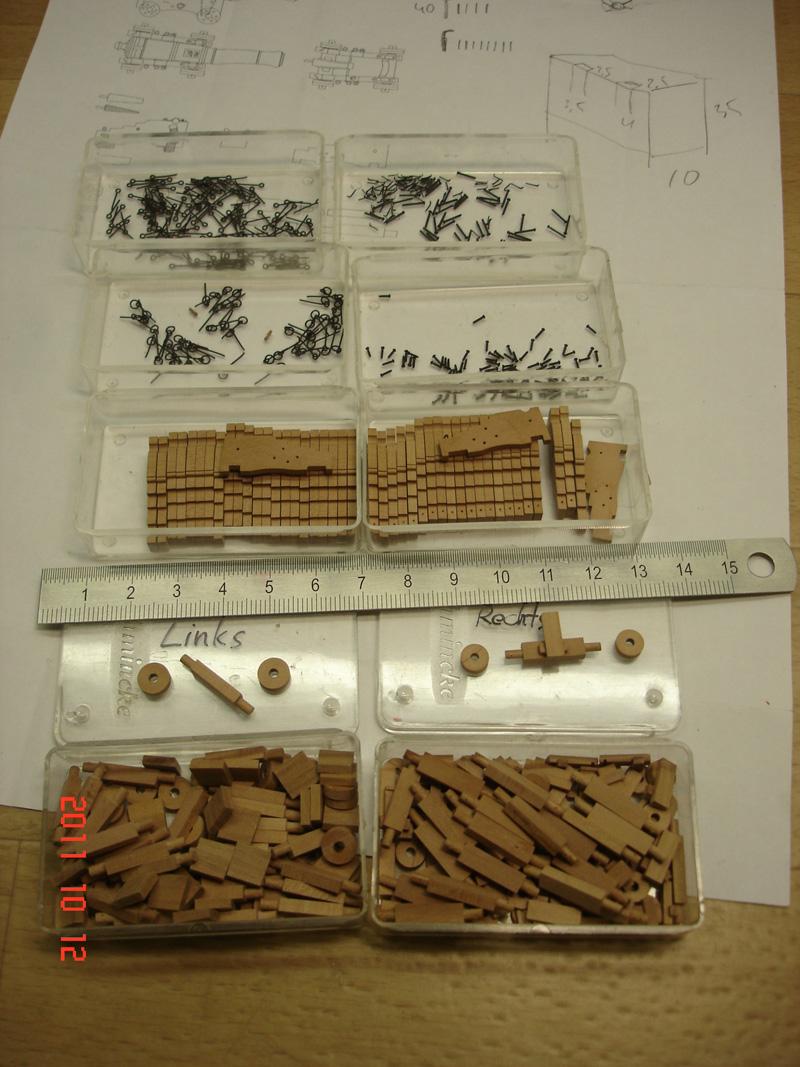
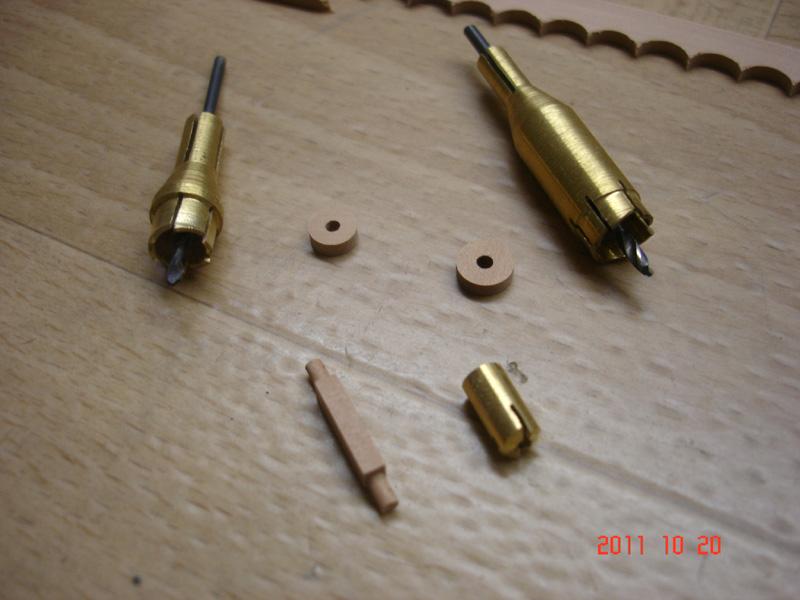
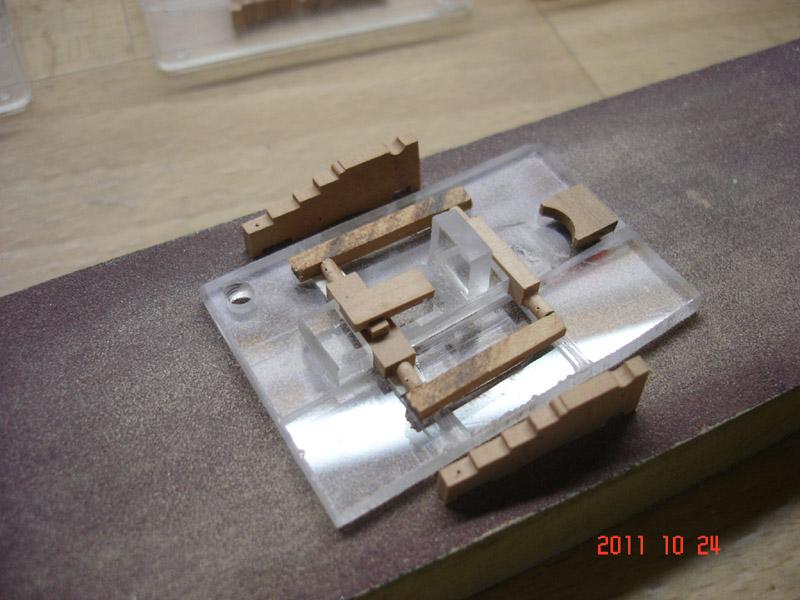
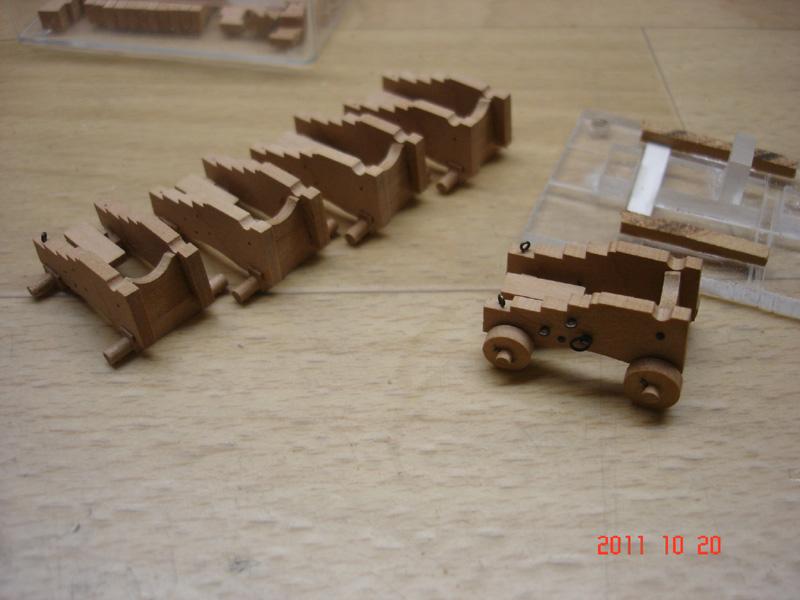
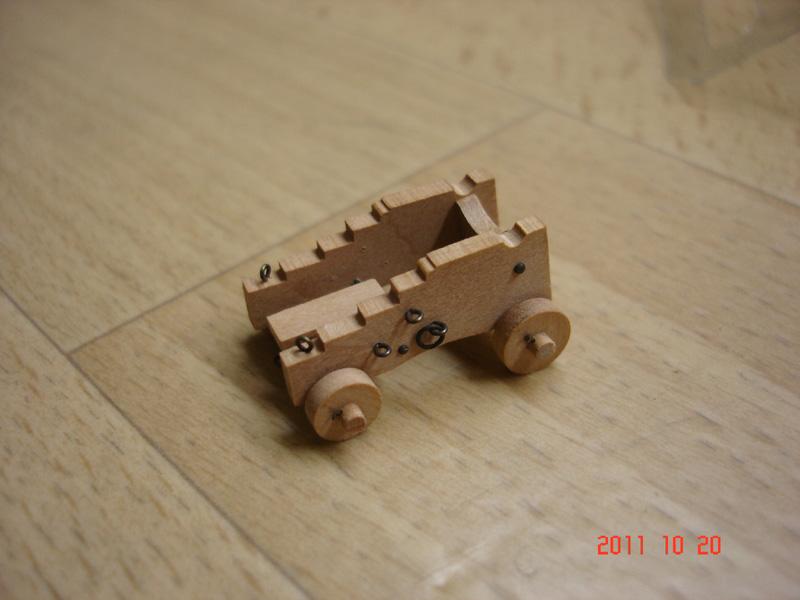
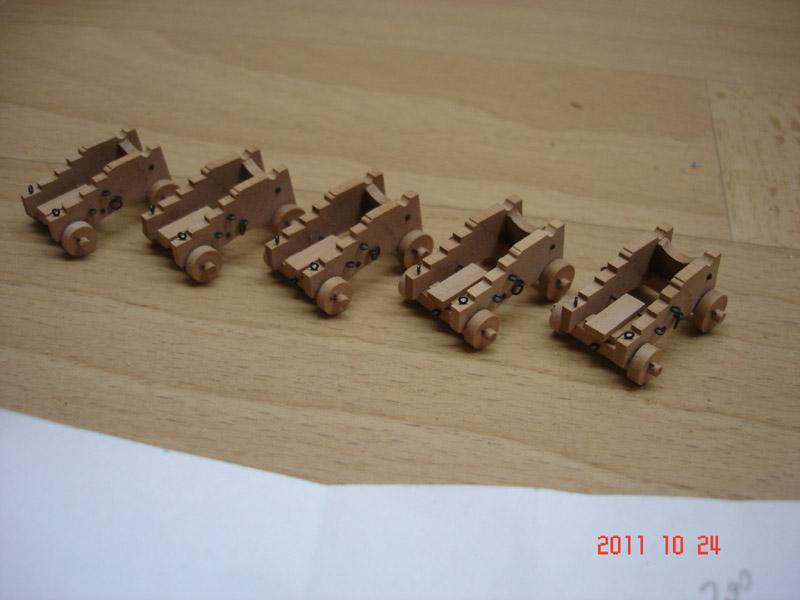
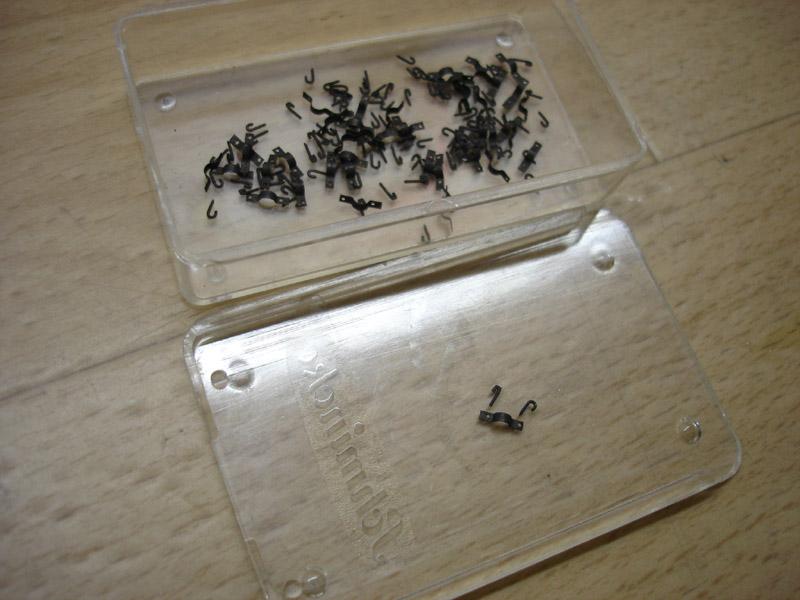
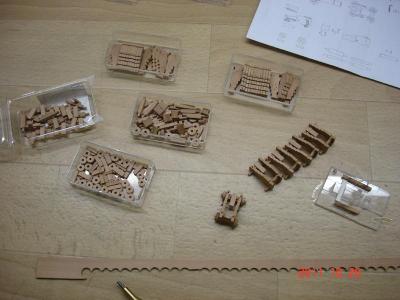
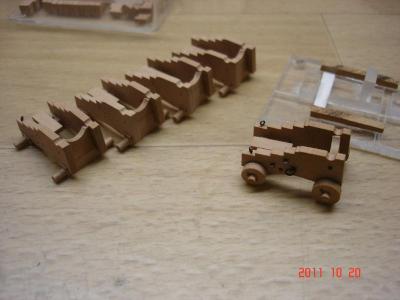
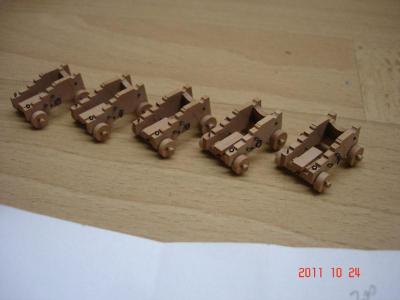
The production fo gun carriages. The different parts, ring and eyebolts, etc. The tools for trucks and axles I have turned on my Unimat Assembly jig for carriages And putting together all parts To be continued. Alexander


-
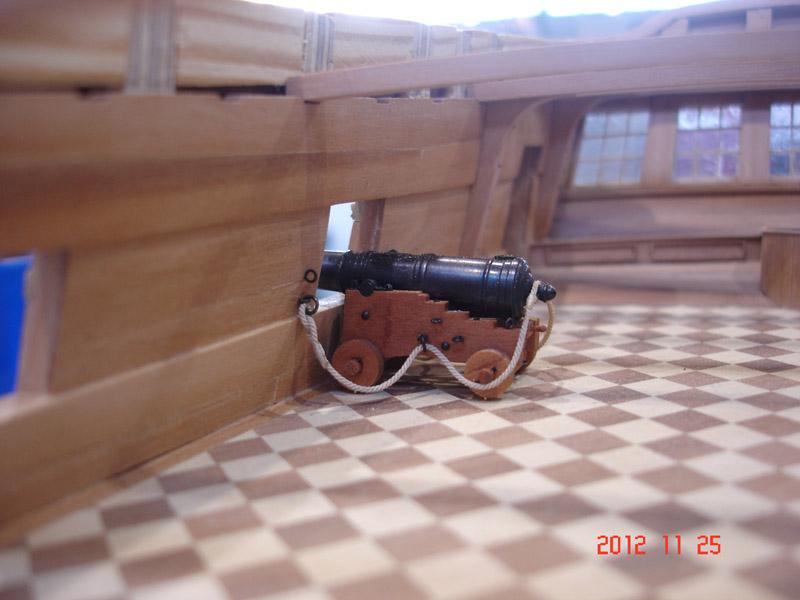
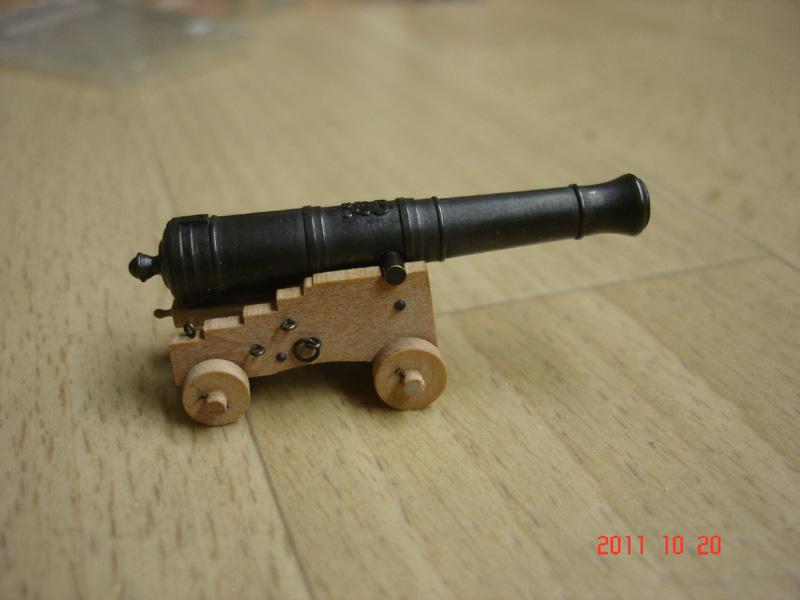
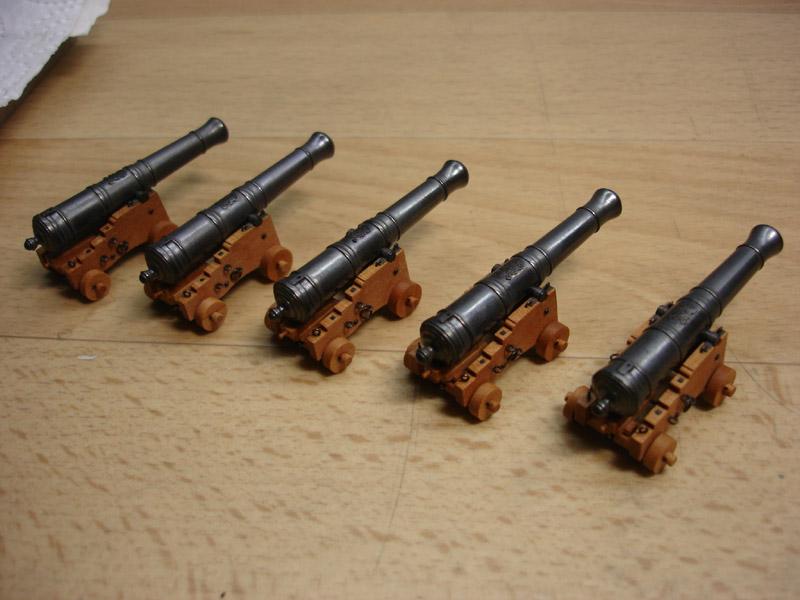
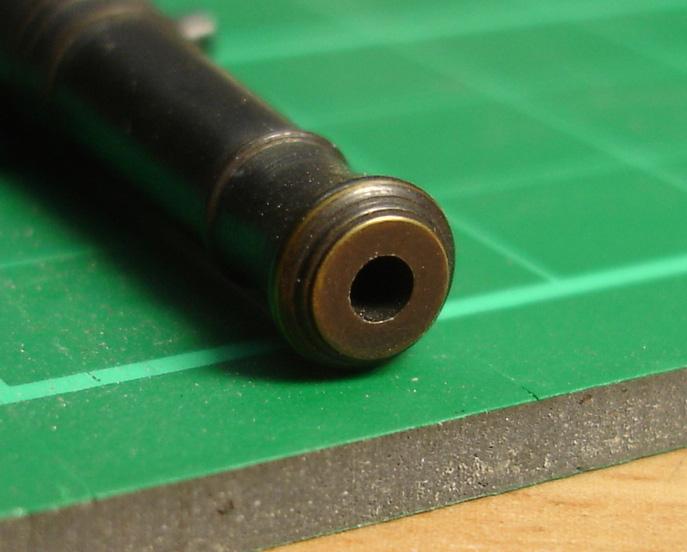
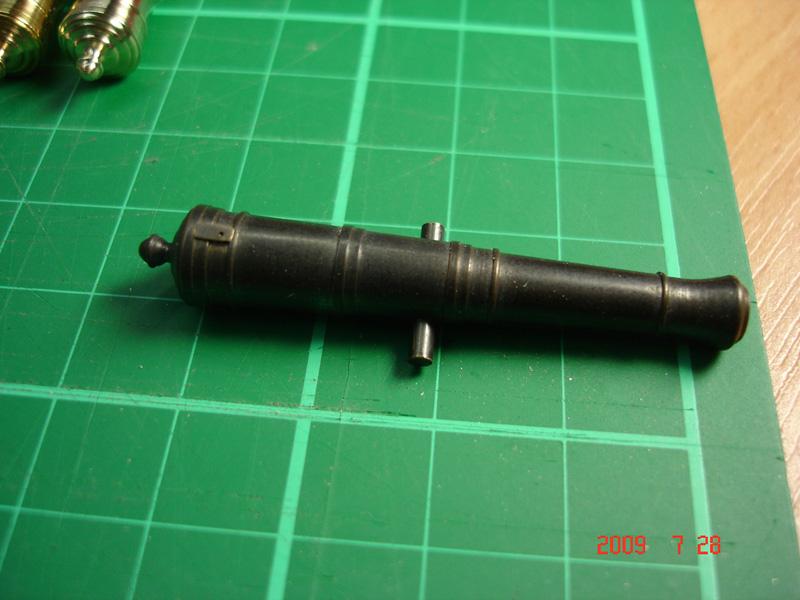
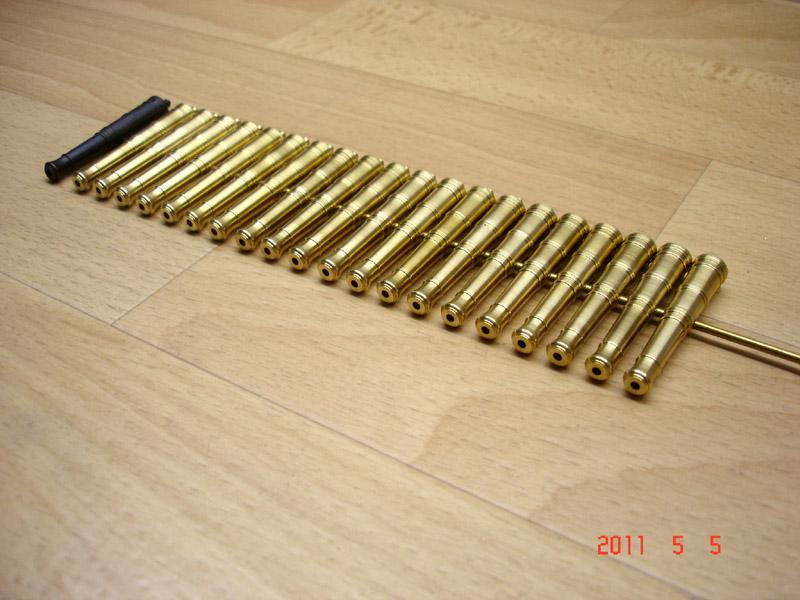
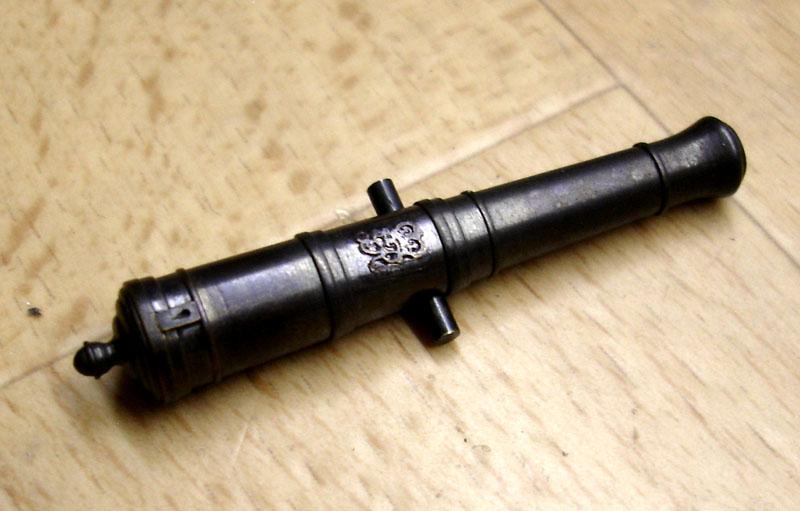
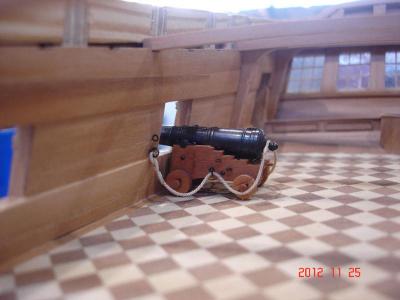
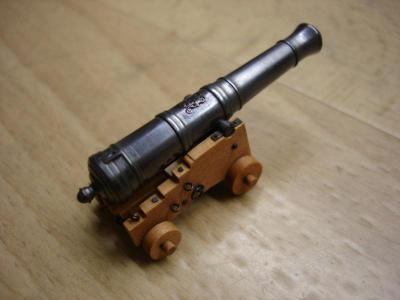
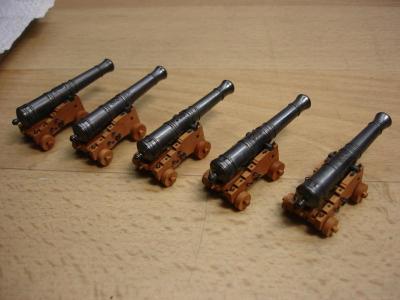
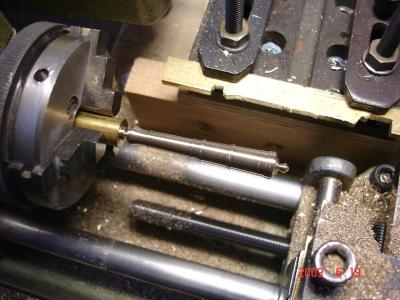
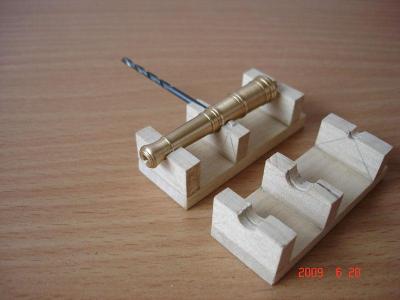
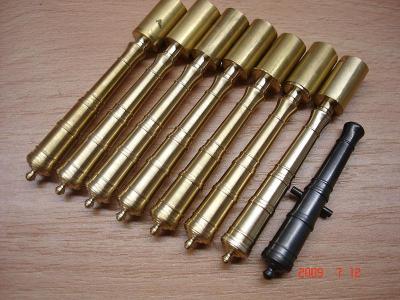
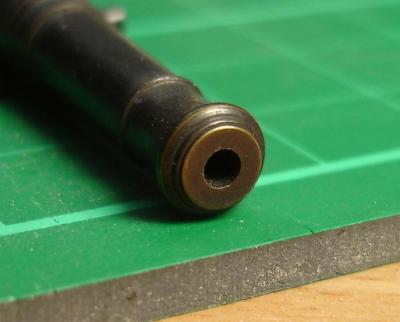
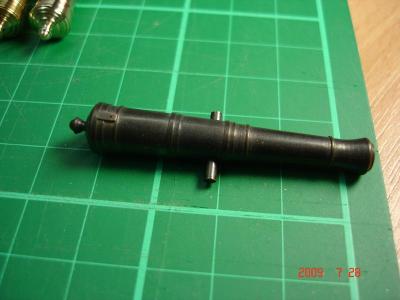
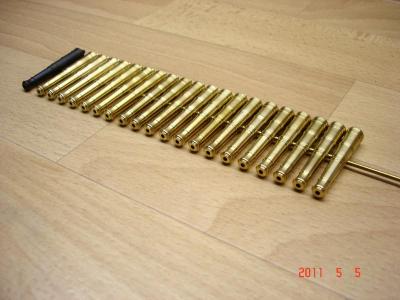
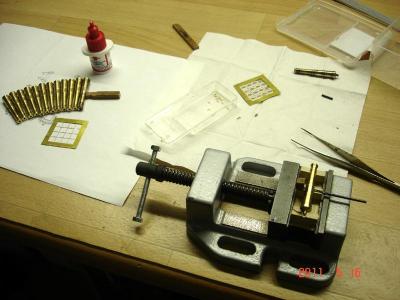
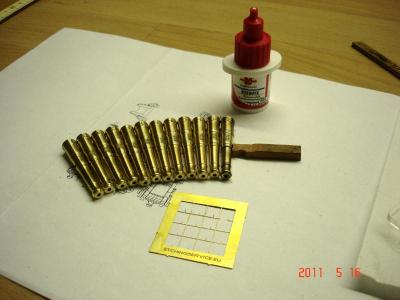
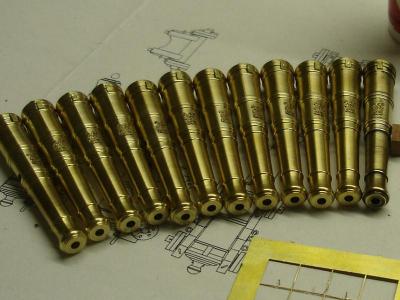
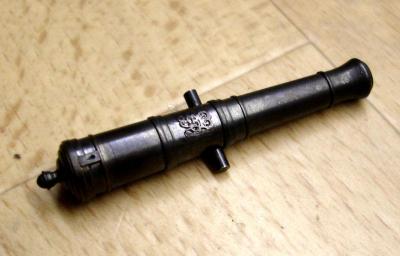
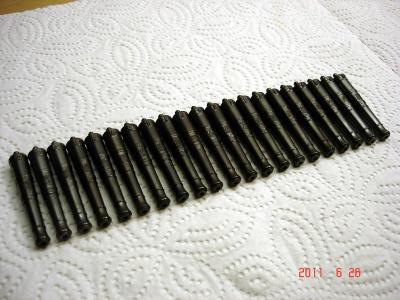
The turning of gun barrels with duplicator on my Unimat SL lathe. The holder for bore the holes and blackening test. All barrels turned and bored: Gluing of royal arms and vent plates with CA glue All guns done and ready for mounting on carriages To be continued. Alexander


-
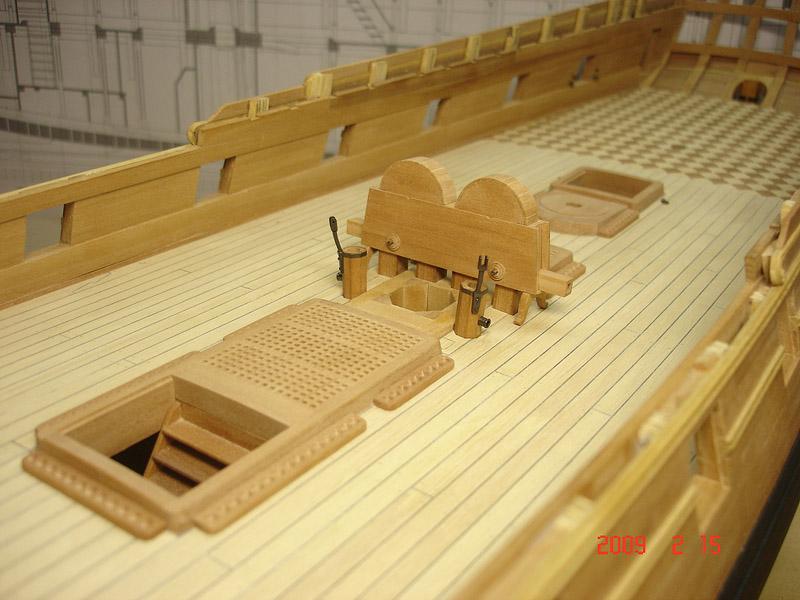
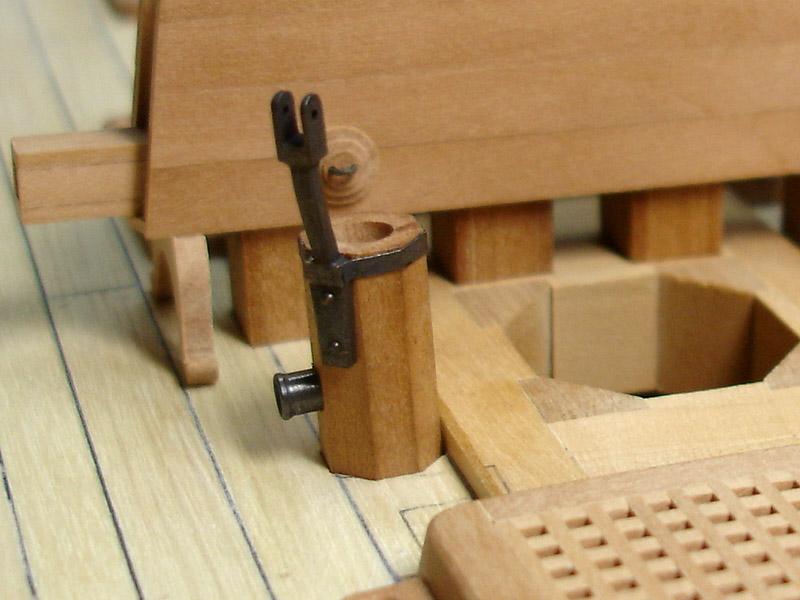
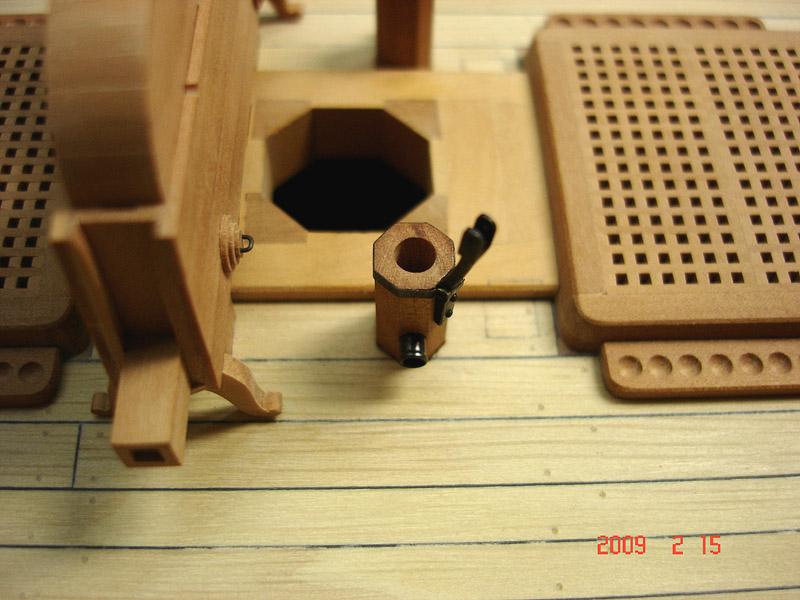
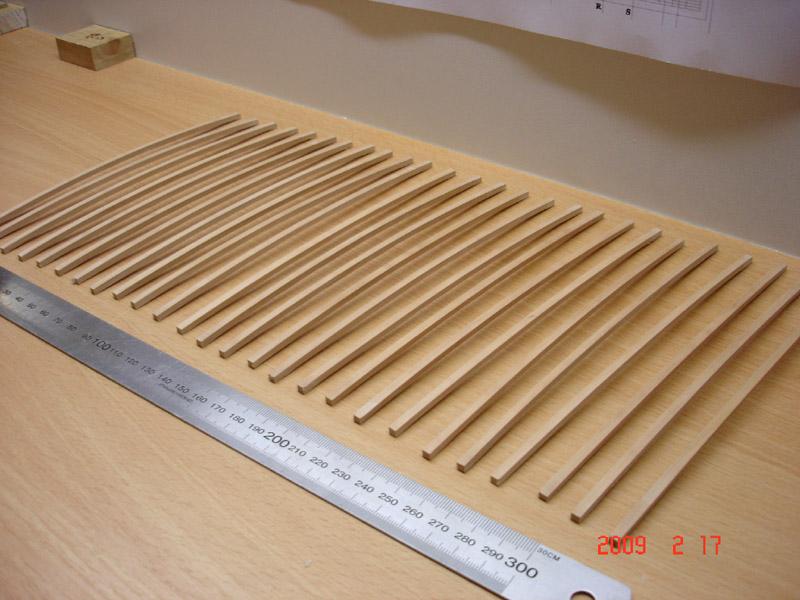
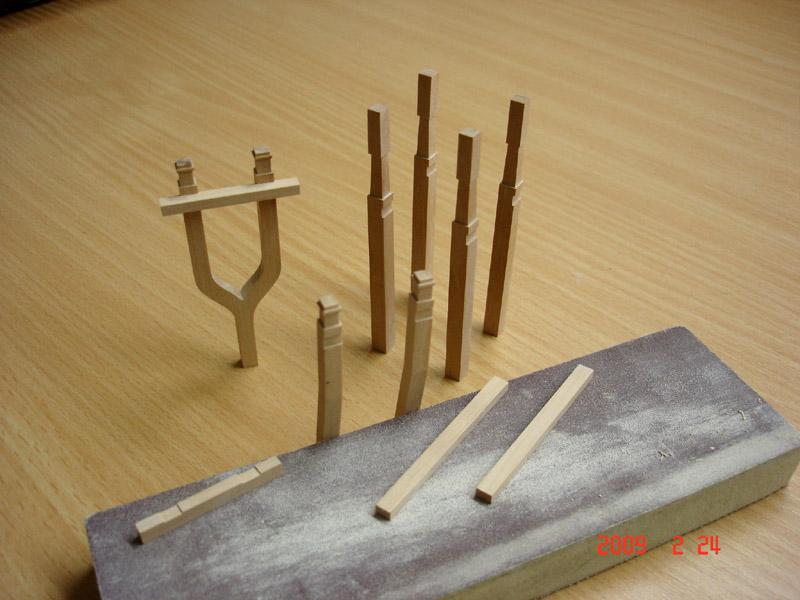
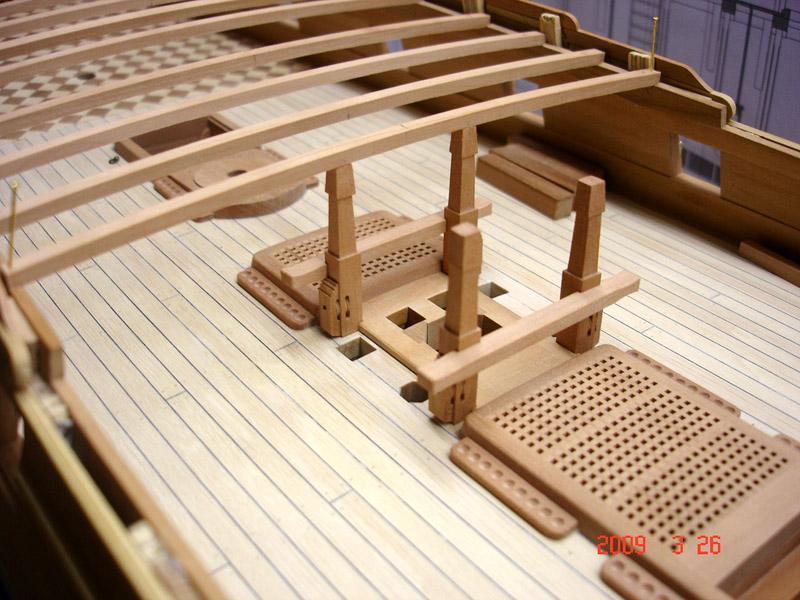
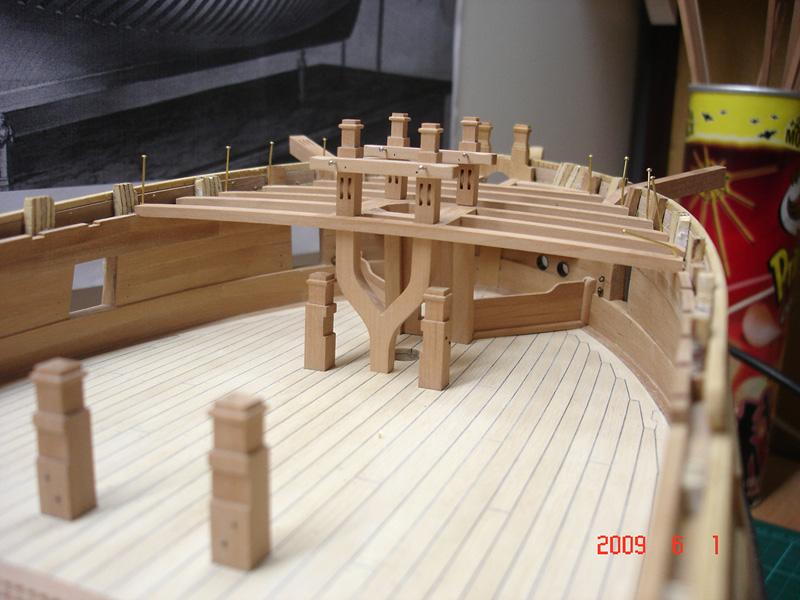
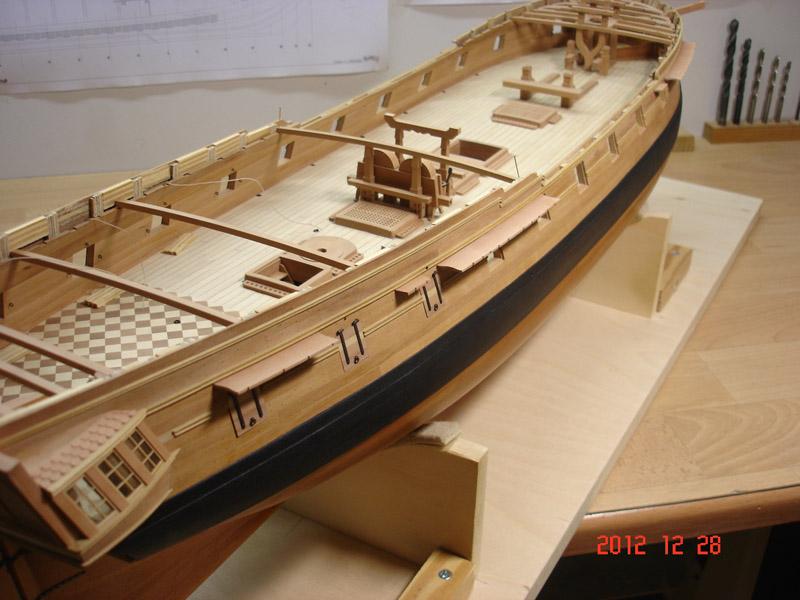
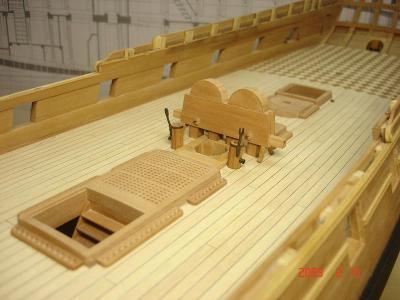
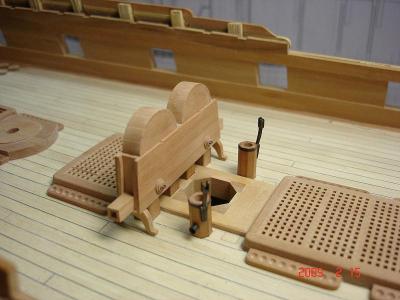
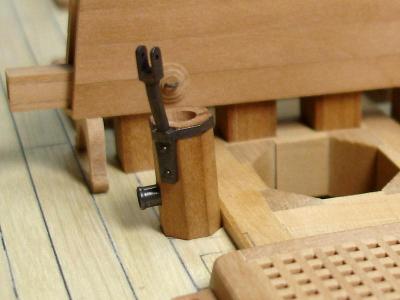
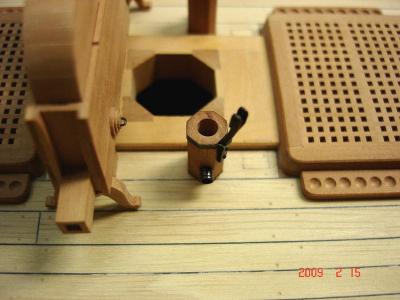
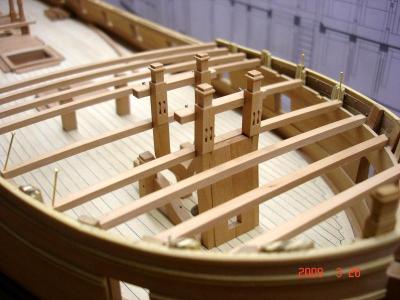
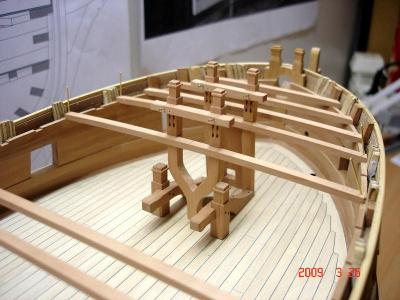
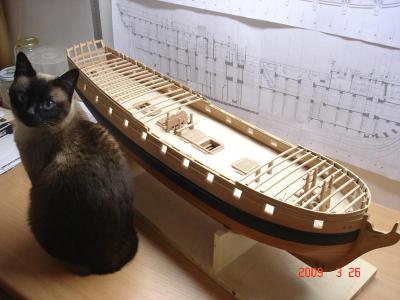
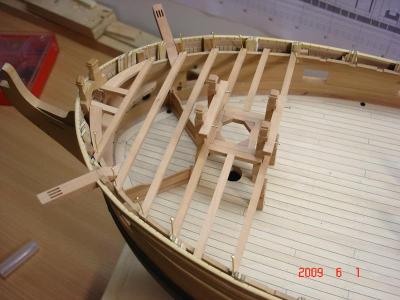
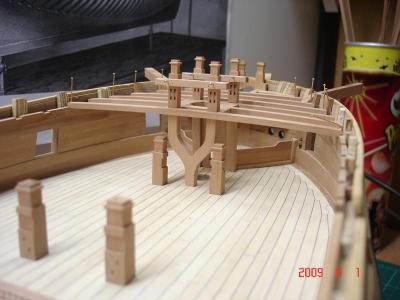
Thanks you Greg, Wacko and Pat! Posted: Tue Feb 17, 2009 9:47 am I have worked on pumps, they are not completed at the moment. The brakes of hand pumps are not installed now. I'm not sure, if I do to cower the pumps heads with cooper plate, as show on the model of Amazon by NMM. Probably not. So the pictures follows. Quarter deck and fore castle beams cutted and sanded, and main and fore bitts in process: Knees for fore castle beams: To be continued. Alexander


-
I'm happy to see you Alfred, Gary! A great build! Alexander