Alex M
-
Posts
360 -
Joined
-
Last visited
Content Type
Profiles
Forums
Gallery
Events
Everything posted by Alex M
-
Good start Mark! You are not only modeling a ship, but also modeling a complete ship rebuild using parts of an old one... I will follow this! Alex
-
ancre LE BONHOMME RICHARD by Jeronimo - FINISHED
Alex M replied to Jeronimo's topic in - Build logs for subjects built 1751 - 1800
Hi Karl, beautiful work on capstan! It's a pleasure to look on you photos again and again, inspiring! Alex- 662 replies
-
- 1
-

-
- bonhomme richard
- frigate
- (and 1 more)
-
Hi Remco, incredible work on lanterns and bulkheads! The fire hearth looks terrific, like every part of your model! I like it! Alex
-
An extraordinary work with excellent result, Alexandru! Very good! Alex
-
Thank you guys for your comments! Alex
-
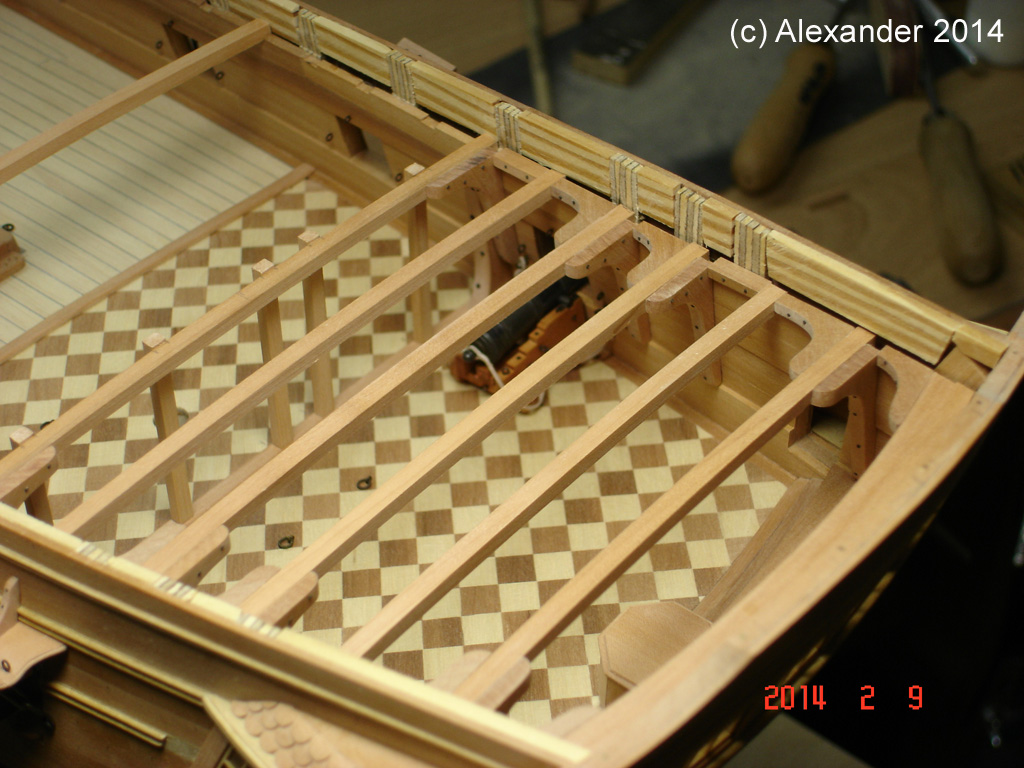
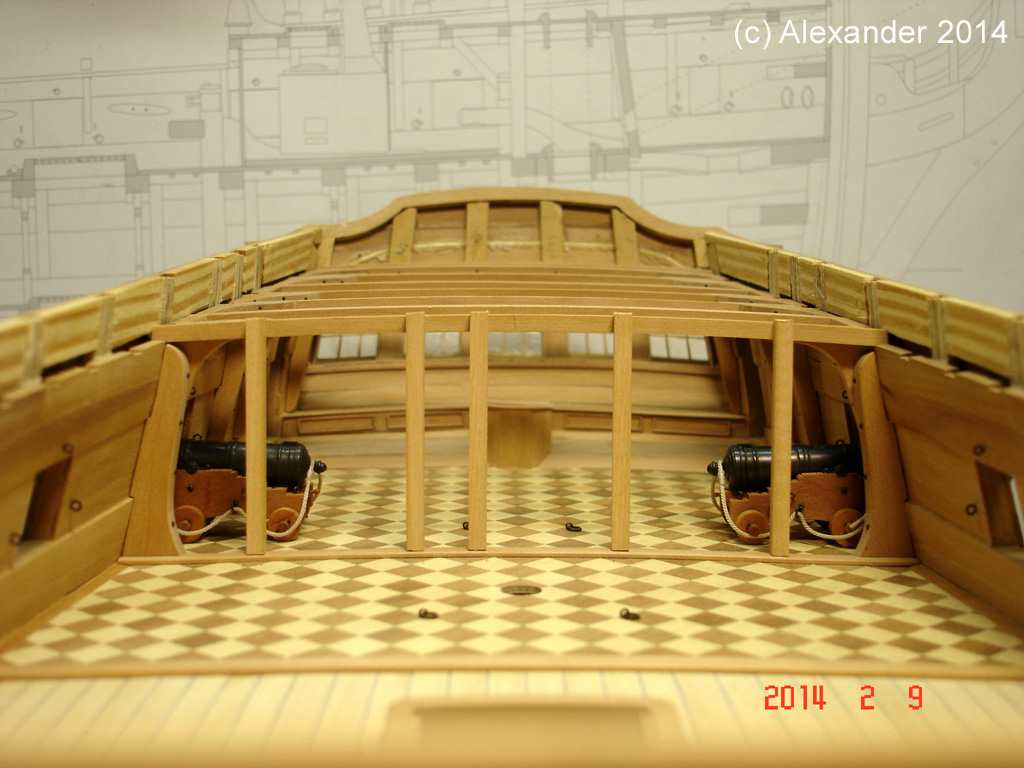
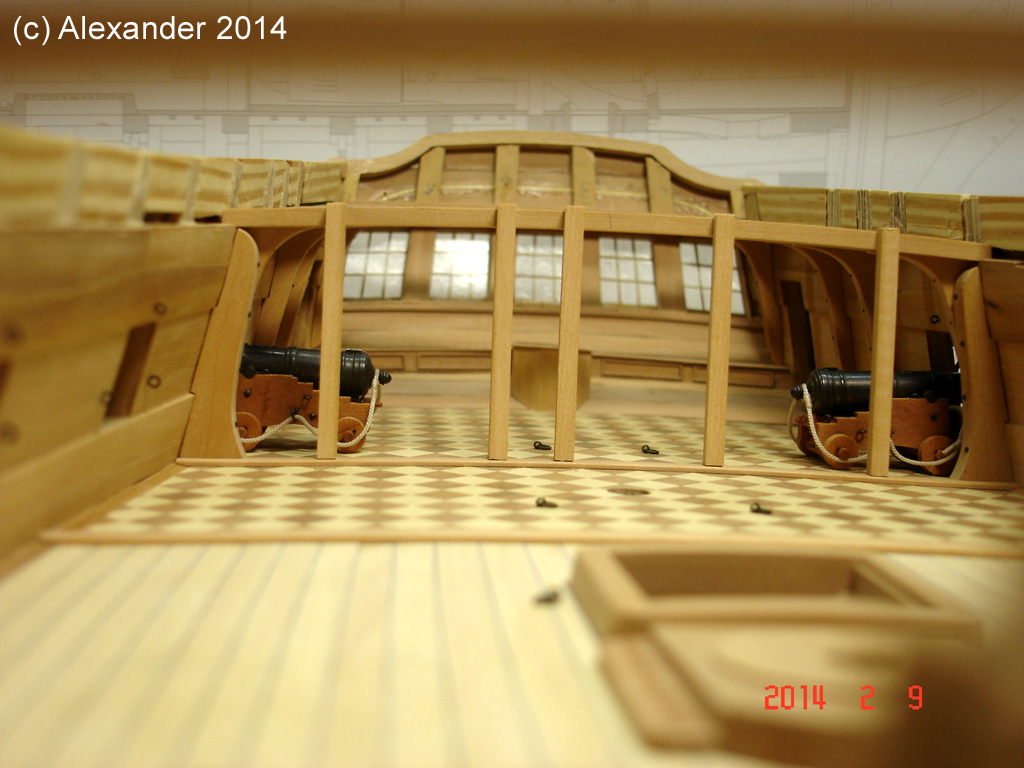
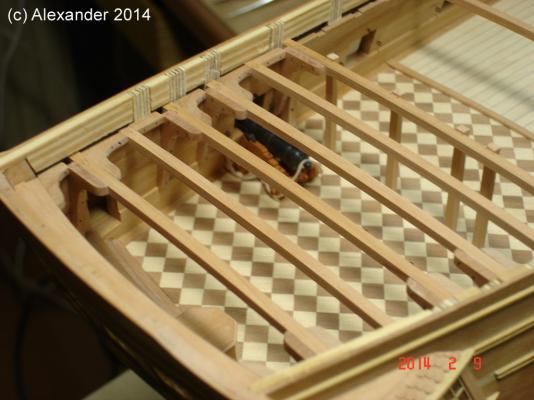
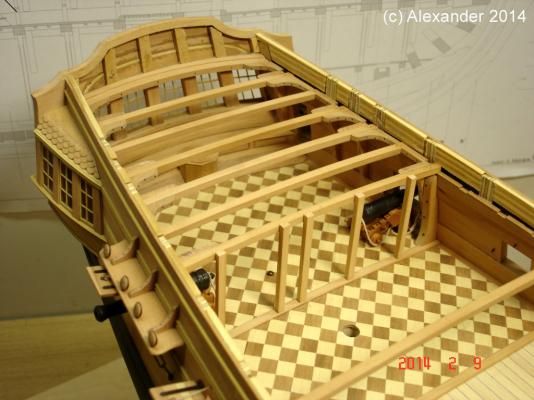
Hi guys, have managet to get a free time at this weekend, here the result. Last two beams of Captains cabin are in place now, and I'm beginning to build the bulkhead. Here the stantions test fitted. Alex


-
Hi Alan, an interesting project you have started! I will follow this. What I can recommend according to my experence: choice (if possibly as build) only one plan that is lesser distorted, and use only this plan for measurements and redrawing. Use all other plans as reference. Set the sheer plan with keel horizontal, this will match the body plan as been drafted in this way, and draw you own waterlines horizontal at needed distance (for fairing the frames lines). I would also recommend to draw the sheer plan first, with all lines taken from original plan (such as rising line, lower and upper breadth lines, deck lines, rabbet and other), as it was done in those days. You will then have a lot of reference points for accurate redrawing the body plan. Alex
-
ancre LE BONHOMME RICHARD by Jeronimo - FINISHED
Alex M replied to Jeronimo's topic in - Build logs for subjects built 1751 - 1800
Hi Karl, allways enjoing watching you progress and new images of a great model! Very fine job! Alex- 662 replies
-
- 2
-
-
- bonhomme richard
- frigate
- (and 1 more)
-
Terrific Remco!! Absolutely amazing! Alex
-
WOW Remco! Looks very real, hard to imagine this is at small scale! Alex
-
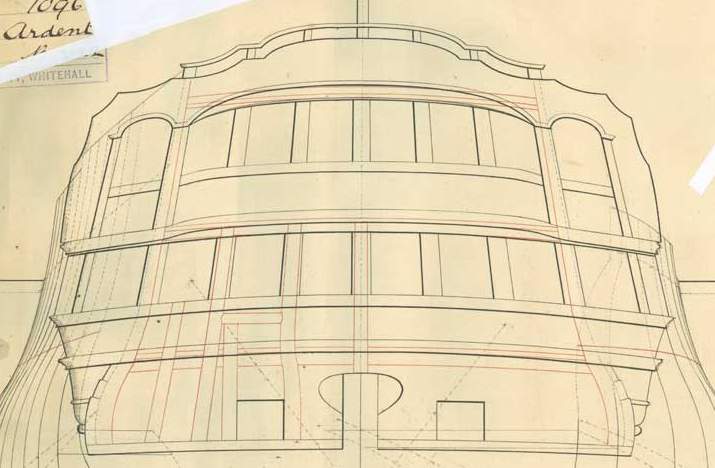
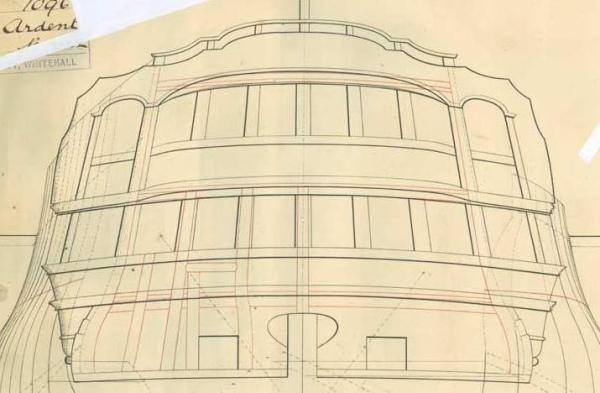
Hi, sorry Mark for boring your Post, by it's very interesting question. Druxey, I know what you mean: round aft. I post another image where I redraw the curves I mean. Also note that the transom is drawn as where it at the after end of balcony. I don't think it is drawing error, because the drawing is very accurate due to paper distortion. The lines show just the difference in the round up between windows and deck. The disposition on the Anson drawing is similar to Ardent. Alex


-
Hi Gary, have you seen this drawing: http://collections.rmg.co.uk/collections/objects/382824.html ? Also interesting this image of St. George Capstan: http://collections.rmg.co.uk/collections/objects/113568.html (note the notches for pawl's in the top of the drum) The drop pawl's as showed in your picture requires a massive wooden drum at the bottom. It's are just two different types, you can't install such pawl's to old type of capstan. The model in Bellona book represent the ship from about 1790-1800, note the raise of floors and also the seppings method of joining the frame timbers without a chock. Alex
-
Hi Gary, that is a wonderfull stove, looks absolutely realistic! Also good to see you updates, congrats for finishing deck planking! Fantastic work on pumps too! Alex
-
Hi Mark, first I must say: first clas work you have done on your Bellona! After some weeks absence in the forum I have now a lot of updates to read! You building repot is one I follow and waiting for new images. You have also started a very good discussion about stern construction. It is trickly part I have puzzled by my Anson too. I have researched some drawings of 64 and 74 gun ships, because there are very often only size difference, the construction is the same. I have seen some stern plans, that shows the difference (from one to one and half inch) in the round up of quarter deck transom and the lights. One of these is the Hunt's Ardent (1782 rebuild) here: The plan of Anson show the same difference. Also from Ardent: the lines represented the decks at the side are drawn at different distances in different plans (sheer, inboard works and framing plan). Those plans of same ship are drawn at different times, and are only as accurate as draftsman can do them, or as shipbuilder can inspect them (if been neccessary). If you look at sheer draught, there is the lower line of quarter deck planks, touching the lower point of balcony rail at middle line. At the outer ends of balcony rail it should raise just one or one and half inch. The rabbet of balcony rail was cut with different depth to match the difference in round up. As been stated abowe by Druxey and Ed, the round up of deck beams ist constant in the whole deck length. It is also only one number for them given in contracts and establishments. Hope this help a little, and because my bad english you can understand what I wrote. Alex
-
Hi Gianpiero, What for impressive work! Very good done! I will follow with interest. Alex
-
Creating Hull Planking
Alex M replied to fnkershner's topic in Building, Framing, Planking and plating a ships hull and deck
Floyd, thin blade go quickly hot and cut zig zag, and you have plank with different thicknes. I also do cut all planks as you do (between blade and fence), no problem. I think, that 1mm blade don't produce more dust than sanding down from 1,2mm to 0,6mm ... Alex -
Creating Hull Planking
Alex M replied to fnkershner's topic in Building, Framing, Planking and plating a ships hull and deck
Hi Floyd, I know probably what the problem is: too thin blade. What is the diameter of your? I have some .020 (0,5mm) 50mm diam, but use they only for small stuff, or cut thin sheets of wood. If you have 63mm or bigger, use thicker blade, min 1mm. You will have much less wood waste, and nearly zero tolerance planks in any thickness... Reagrds Alex -
Dito with John, Gary! Exeptional metalwork at the tiller. Alex
-
Thank you Robert! Alex
-
Hi Robert, WOW! not much remains from the Kit if I look on the photos. Really very fine work, the pumps and other details looks very good! Alex
-
Hi Johann, very good step by step presentation of awesome work! Fascinating! Alex
-
Thanks you Chris and Sinan! Two days later... The plastic sheets are not covered with varnish now, so they looks just like plastik Alex
-
Hi Ed, very good start with incredible details! I will follow your build with interest! Alex
- 3,618 replies
-
- 1
-
-
- young america
- clipper
- (and 1 more)
-
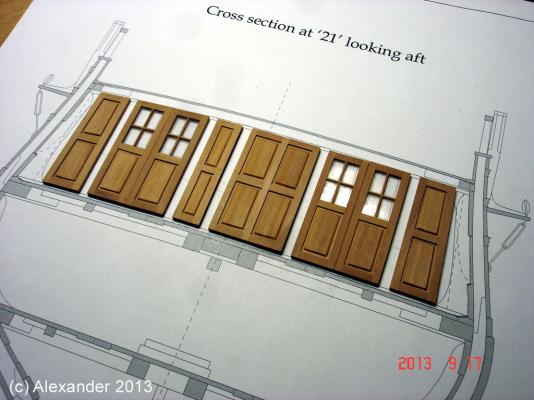
Thank you Daniel! The doors are similar on both sides. Alex
-
Thank Brian and Rob! The wood is pear. Alex