
HOLIDAY DONATION DRIVE - SUPPORT MSW - DO YOUR PART TO KEEP THIS GREAT FORUM GOING! (Only 24 donations so far out of 49,000 members - C'mon guys!)
×

Sailor1234567890
-
Posts
995 -
Joined
-
Last visited
Content Type
Profiles
Forums
Gallery
Events
Everything posted by Sailor1234567890
-
 I was at the hobby shop here the other day. I saw two boxes with swift in them. Same scale, same text, same pictures. Different sized boxes though. Same scale as well. Not sure why one was significantly bigger than the other box. Looking good so far. Keep it up.
 -
10 gun cutter kit to bash into Witch of Endor?
Sailor1234567890 replied to Sailor1234567890's topic in Wood ship model kits
Nobody knows of a good early 19th century 10 gun cutter kit for a beginner? -
Cutty Sark by NenadM
Sailor1234567890 replied to NenadM's topic in - Build logs for subjects built 1851 - 1900
I've been wondering how you'd make those freeing ports. Look forward to seeing them.- 4,152 replies
-
- 1
-

-
- cutty sark
- tehnodidakta
- (and 1 more)
-
Just looking. Love the work. She's a beaut.
-
Cool. I like that hull so far.
-
How many guns is she?
-
Nice little boat. This one will be nice as well I'm sure. Keep us up to date on your progress.
-
Probably best I guess. I probably would have had a difficult time restraining.
-
One day I'd like to scratch build a large Cutty Sark. I need to practice first. A smaller vessel, less rigging etc. I've built a few plastic kits of a number of different ships. Cutty Sark, Constitution, some old "Spanish Galleon" when I was a really young kid….. I think a simple kit would be a good place to make the foray into wood. I have always liked the story of Hornblower escaping down the Loir river and absconding with Witch of Endor. I suspect she'd make a great first wooden model. The problem is, she's fictitious. I'd like to know if anyone knows of a reasonably simple wood kit of a generic kit of a 10 gun cutter that I could bash into the Witch. Or is there a kit of the fictitious ship out there somewhere?
-
I don't recall seeing any of those but I didn't get all that close to other ships all that often. Wasn't really paying attention to that and didn't know to look.
-
Best of luck with the medical emergency. Hope it's not too serious. Get back to model building and get yourself that camera.
-
Is that Ariel hull planked in Hornbeam then? This hull is starting to haunt me. I see it in threads here and there and can find nothing about the build. Sudomekh..... where are you? Tell me more about this model. She's beautiful and I want to know more about her.
-
My point exactly jud. Fake the coil out ready for running but even then only if the line is about to be used. If the ship is at sea, the place for line is coiled on a pin somewhere. Easily accessible, no locking hitches and ready to drop on deck capsized (upside down so the running part is coming off the top of the coil, not from beneath it). Flat coils or cheesed lines are purely decorative and serve no practical purpose. Everything in a ship must be practical. Beauty will follow. Take the clipper ship for example.
-
Sounds like a great build. Look forward to seeing the pics to follow.
-
Cool. I remember the booms on both ships I sailed in were made up of round pipes triangulated. Is S.S Stadacona's like that as well or is it angle?
-
The problem with cheesed coils as you're showing there Nick are that first of all, the coil will never stay put at sea. Since the model is clearly not sailing, no sails, obviously static, this shouldn't be a problem. The other issue is that a cheesed line like that takes for ever to dry and leaves a wet spot on deck while it does so. This is bad for the deck. Yes, teak should be sluiced down regularly but keeping a damp spot on deck all the time is bad for it. Rot is virtually guaranteed to start showing up under the place where the coils are kept. I'd never cheese down a line for those reasons. It's time consuming, often imparts a twist into the line so it can't run free through a block or fairlead and to my mind is plain unseamanlike. That being said, there are many professional navies that cheese and point every line. That's they're business. My boats... never.
-
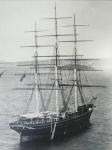
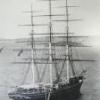
Does anyone know if a composite hull such as Cutty Sark would have had has ever been modeled? Plank on frame of a composite clipper would involve much more skill I would assume. Has anyone seen a source for model sized angle steel that could be used to do this? How would one go about it? Enquiring minds just want to know. Maybe once Ed finishes his Young America.....
-
Looking good. I like that cutout idea. Looks great.
- 803 replies
-
- 2
-
-
- colonial cutter
- modellers shipyard
- (and 1 more)
-
Nenad, If you feel you have a poor understanding of nautical terms, just ask me. I LOVE nautical terminology. As a naval officer I'm a stickler for it. Odds are I can help. If I don't know off the top of my head, I am sure I can find out pretty quickly with my library and google. Plus I love doing that sort of thing.
-
Yes, I should have noticed, Australia. I'm in Canada so we have a bit of a temperature difference. Disregard my last then.
-
Have you any shots with more of the hawser you made? Looks cool.
-
Silver Soldering Tools
Sailor1234567890 replied to bundybear1981's topic in Metal Work, Soldering and Metal Fittings
Always was curious about this silver solder thing…. Something I'll have to look into if I'm going to scratch build something. -
That is a small eye right there. WOW. Impressive.
-
I find warming it up thins it considerably and allows you to get it to run better. Keep in mind that changes the pot life though. I usually sit my cans of a and b in a pot of boiling water for a few minutes to warm them up. My epoxy work has all been full scale though, not model scale.
-
Cutty Sark by NenadM
Sailor1234567890 replied to NenadM's topic in - Build logs for subjects built 1851 - 1900
Sweet find.