HOLIDAY DONATION DRIVE - SUPPORT MSW - DO YOUR PART TO KEEP THIS GREAT FORUM GOING! (Only 13 donations so far - C'mon guys!)
×


Beef Wellington
-
Posts
2,249 -
Joined
-
Last visited
Content Type
Profiles
Forums
Gallery
Events
Everything posted by Beef Wellington
-
Atlantic Conveyor?
-
 I'd leave it as it is Eamonn, nothing wrong with how it is and i slooking great. One thing to consider (I goofed this up), is to ensure that you know where the coamings end and not just use the holes in the deck as a guide. I had a couple of instances where it looked a little odd having a hatchway and a butt very close - luckily I could hide it with a couple of judicious small tweaks.
- 1,039 replies
-
- 1
-

-
- ballahoo
- caldercraft
- (and 2 more)
-
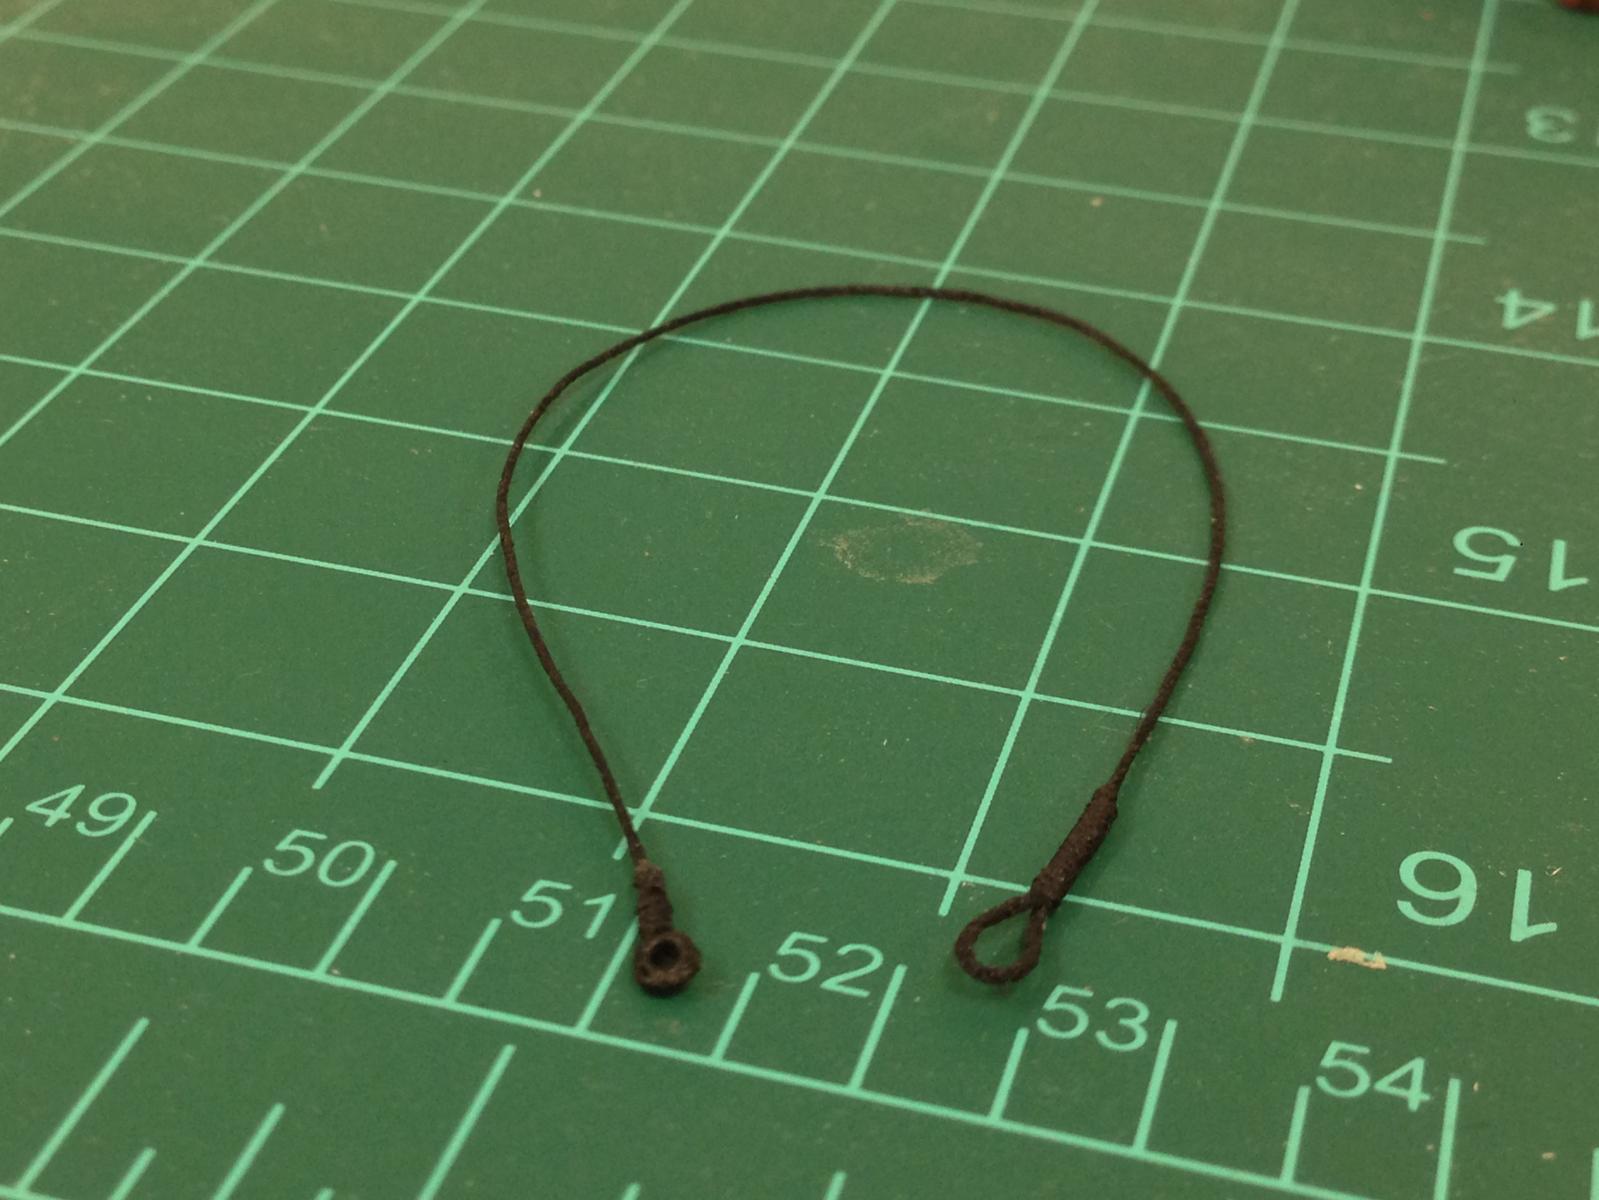
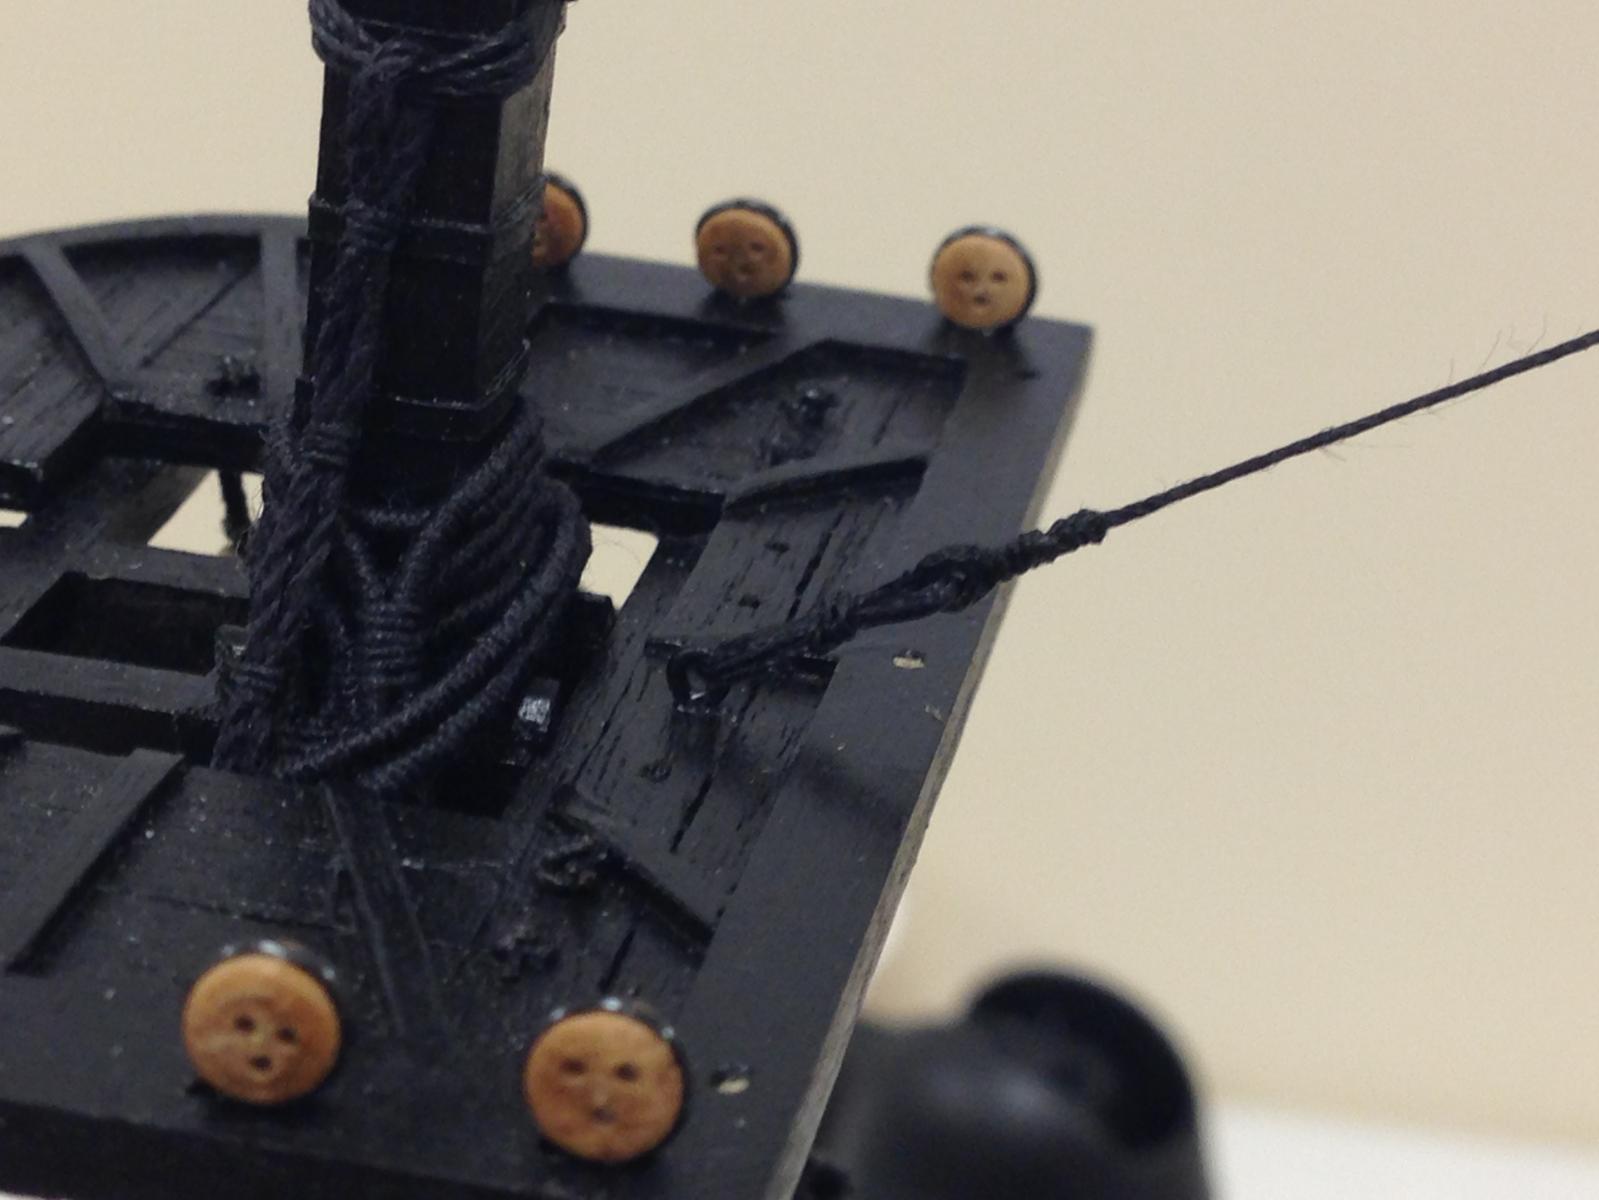
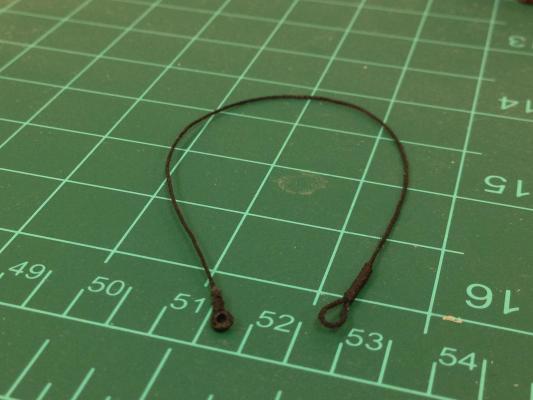
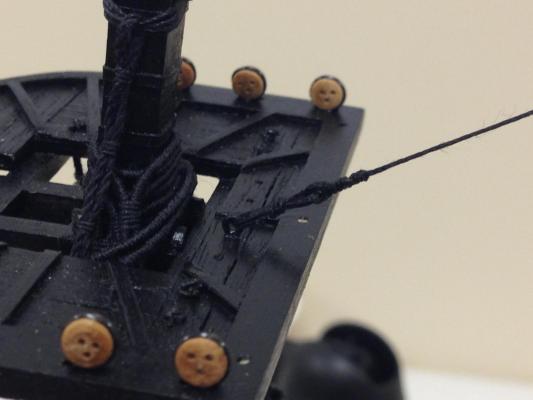
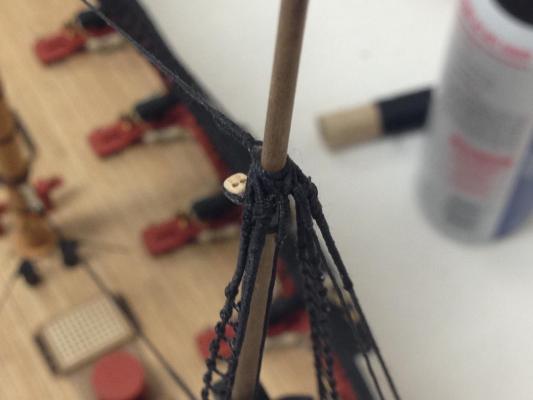
Thanks BE as always, and all the 'likers' - means a lot to have so many excellent modelers looking in. Mizzen topmast stays have had me thinking for a while - it just doesn't seem to make sense to have standing rigging attached at both ends with no method of adjustment. I followed a general principle seen elsewhere and made the stay up with a loop to go around the hounds (not served around the hoop as its only 0.5mm line - need to draw a line somewhere, and seems tricky at this thickness). At the other end, I inserted a bullseye (sourced from Bluejacket) and attempted to simulate a splice. This was lashed to a ringbolt on the maintop as per plans - this would allow adjustment. I went with thin black line for the lashing to avoid looking too busy, don't think its too much of a stretch. Stay before installation The bullseye lashed to maintop The completed mizzen standing rigging at the hounds.
- 800 replies
-
- 14
-
-
- snake
- caldercraft
- (and 1 more)
-
You got it Nigel, your go. Eamonn - actually not that much, but think its nice to have a little something else to go on if the ship is not overly distinctive. Of course we've had Euphrates, Arklow (x) etc.
-
Sorry Nigel, feel like a bit of a stinker The biggest surprise here is that I got it without seeing your clues Eamonn (had just been watching a classic Bond movie with my son, expecting to hear crickets chirping on the dredger photo but checked in anyway!) Anyway, here goes.....so we've had a Wolverine and Cyclops so far...
-
Must be the Brazilian navy's Barasso, ex-USS Philadelphia. BTW - Eamonn, how on earth did you get that dredger, was expecting that to sit for weeks!
-
Joe, very nice start to your Granado. I did the same thing sanding the edges of the planking, it does make a difference to get a nice tight fit (Tanganika in my case though).
- 302 replies
-
- 1
-
-
- granado
- caldercraft
- (and 1 more)
-
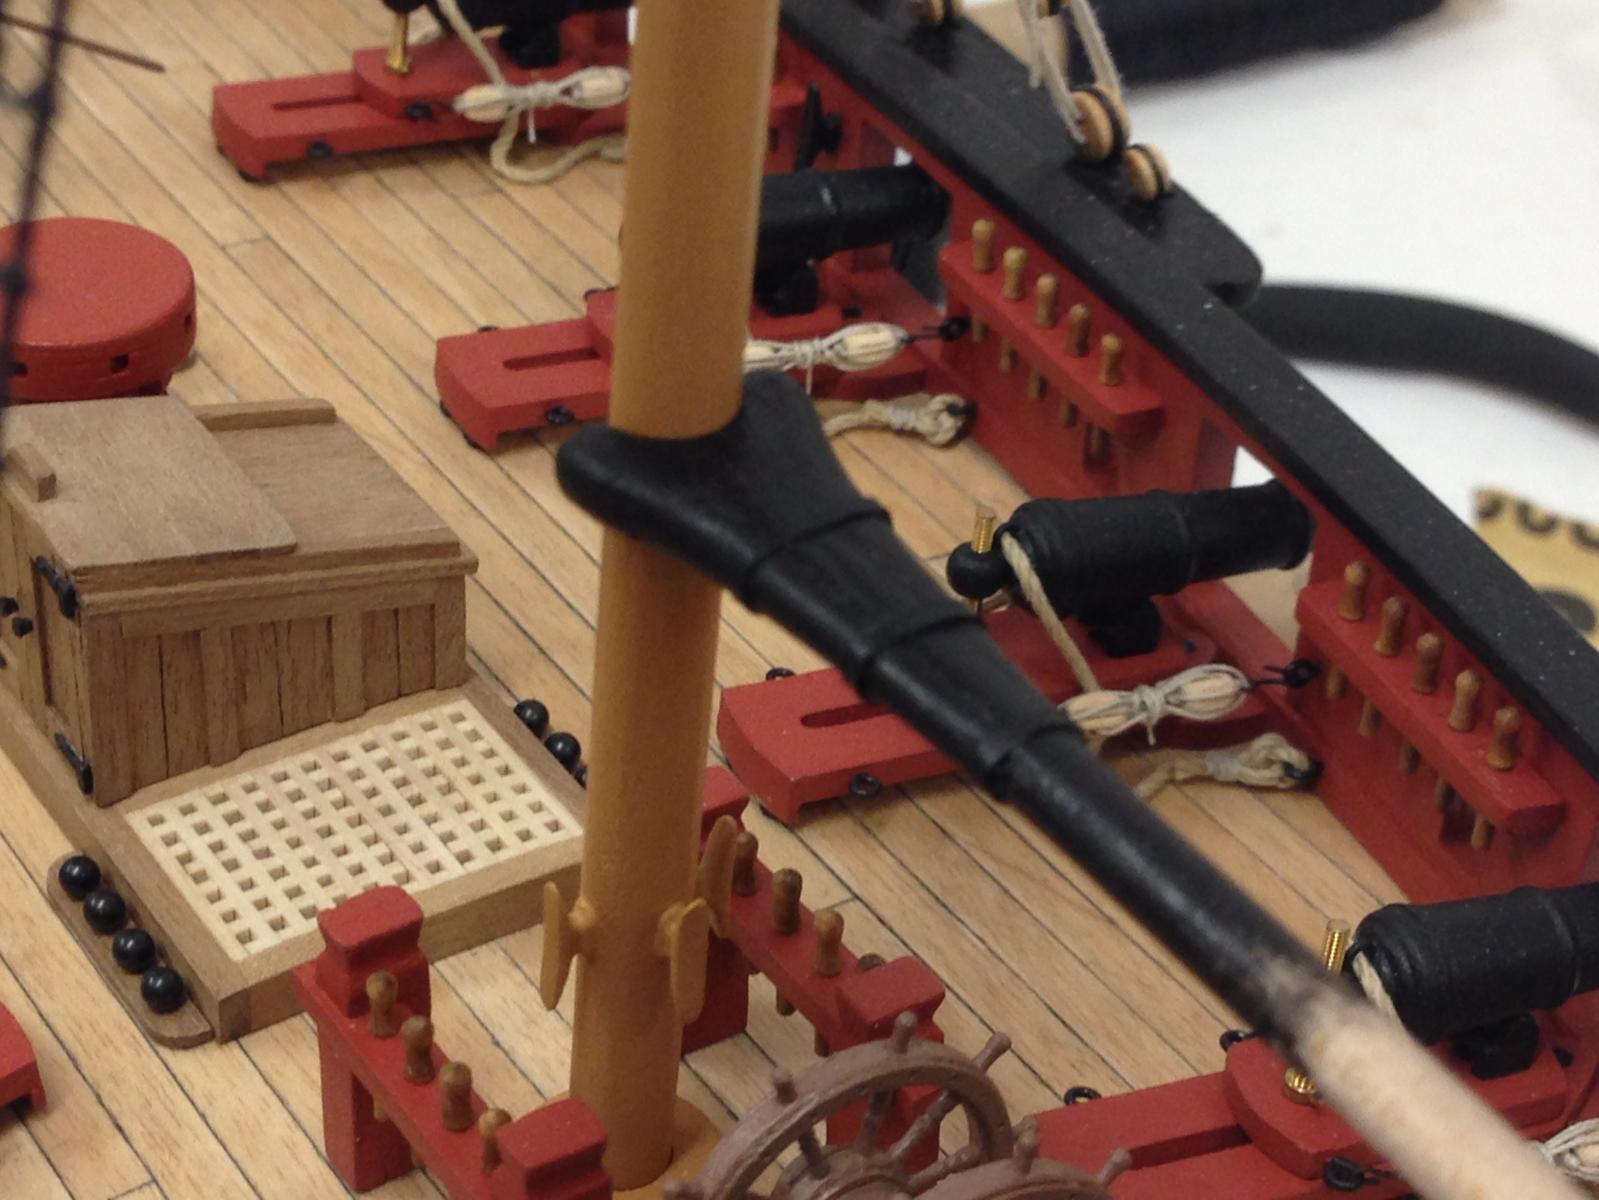
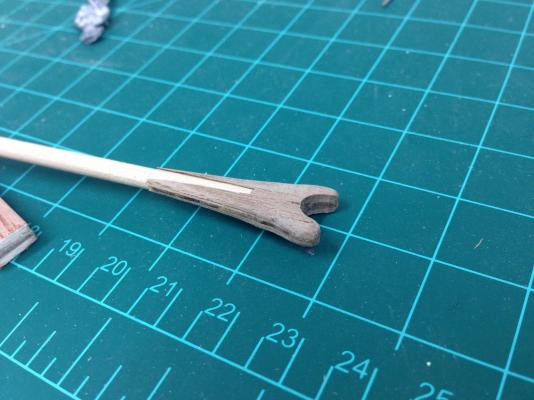
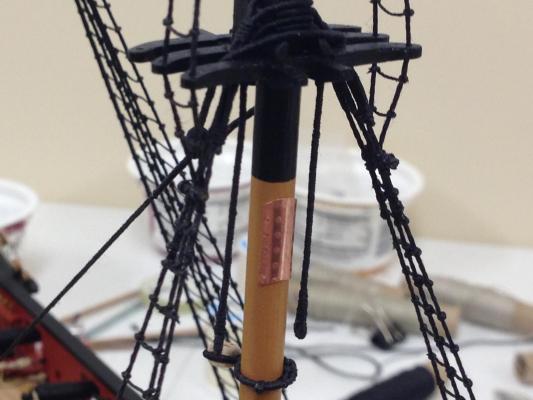
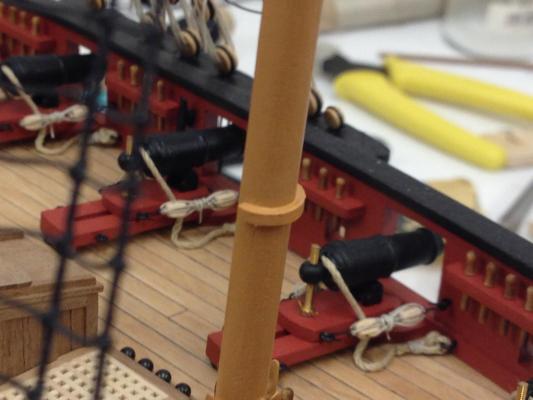
Jesse - thanks for the kind words, just sharing the learning experience I'm going through. And thanks for the 'likes'.... Finishing up the mizzen topmast ratlines, these are proving to be quite challeging as the shrouds don't have anywhere near as much tension as the others due to the fact they transfer all tension to the lower shrouds/futtock stave and would pull that all askew. With all the other ratlines, they tend to want to pull the shrouds together, here, the shrouds are thinner line and close together and its the opposite effect where the ratlines want to push them apart. Anyway, its coming together. Bit of a diversion, as next step will be to rig the mizzen backstays and there were a couple of items I wanted to get done before the backstays make access a bit more difficult. Installed a copper 'sheet' where the driver gaff will go (yes, its a spare copper plate from the hull rolled as flat as I can to get rid of the bumps - it looks better in person and should tone down with age.) Its an approximation and not mentioned in instructions, but adds a bit more interest. The tops are shaped to the angle the gaff will sit at once installed. Next up was installing a saddle which again is not mentioned in the instructions. This was a square strip of styrene bent to shape. I've stared at the driver boom and gaff jaws ever since I opened the box and wondered how they would look. Well, I got my answer, pretty awful - they just look a bit big and flat, and didn't look that great to my eye. Anyway, I dutifully assembled these and then decided to try to improve them by building up with some spare walnut and then sanding to shape. I much prefer the end result. Built up with spare strip wood and roughly shaped Finished driver boom, iron bands simulated with paper, ring bolts and holes not added yet, more work to do on the boom itself first. The 'out of box' solution is next to it. Driver boom in place sitting on its saddle. Still maybe a little big (?) but I'm happy. Now to do the driver gaff which will be a little more tricky because of the angle that needs to be built into the jaws.


- 800 replies
-
- 17
-
-
- snake
- caldercraft
- (and 1 more)
-
Well done, you got it Nigel. Your turn.
-
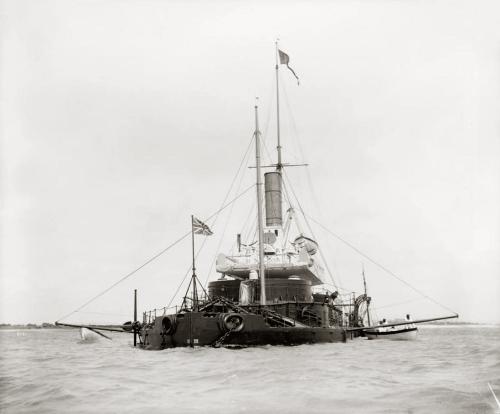
Negative Nigel, but nice try! - name connection is to Dave's ship HMS Wolverine...there aren't that many monitors so with the clues given should be easy to narrow down... Monitor Launched in 1871 Her name is the same as her class
-
Those dimensions are same as mine. I purchased some 2mm anchor rope from Amati as it was more scale appropriate.
- 1,144 replies
-
- 1
-
-
- snake
- caldercraft
- (and 1 more)
-
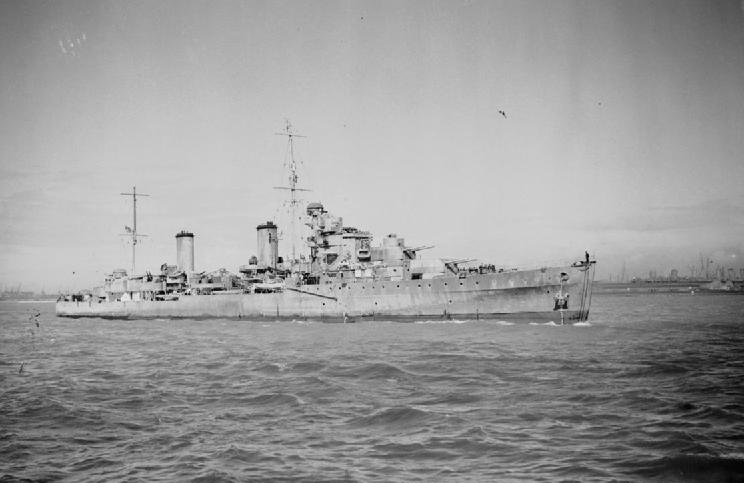
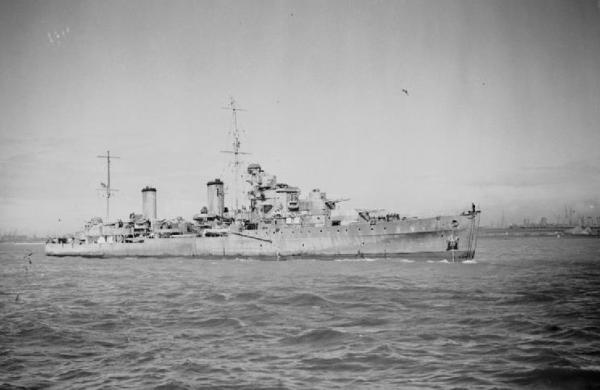
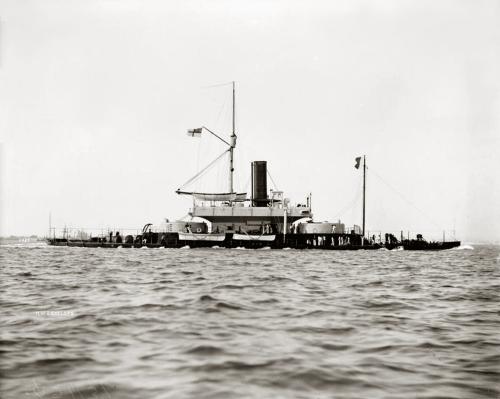
Jan - you're correct, its British - hoped the flag would give you that Slog - Not HMS Glatton, but close. This ship was lauched in the same year, and she was bore the same name as her small class. (you'll notice this ship has two turrets, I believe Glatton only had one).
-
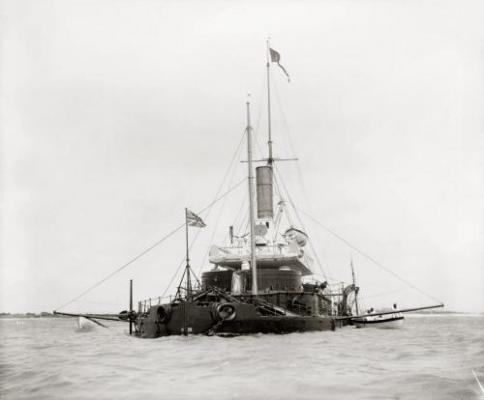
Jan - here is another view...
-
Change of pace. Photo is unaltered and hopefully enough clues to allow you to home in on. Freebie clue is that there is a tenuous connection to the previous ship.
-
Bob - take my hat off to you for persevering with this kit - trying not to let this taint my view of the kit once they solve all the production issues. You're really proving you can work through the challenges with beautiful results. I'll definitely be watching from here onwards.
-
That must be HMS Wolverine, ex-Rattler. She was built to demonstrate a system devised by Captain John Schank by which the carronades ran in grooves in the lower deck.
-
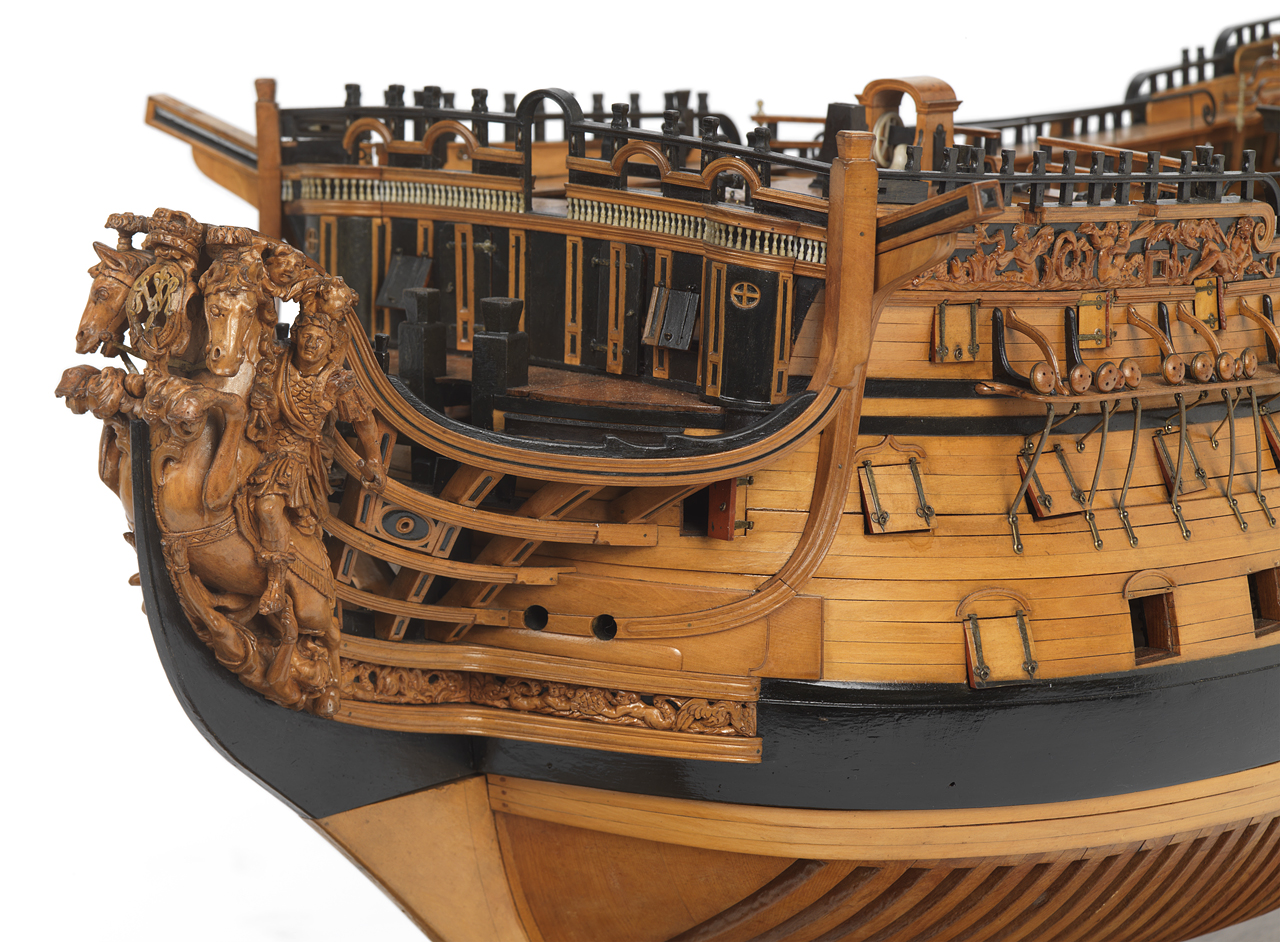
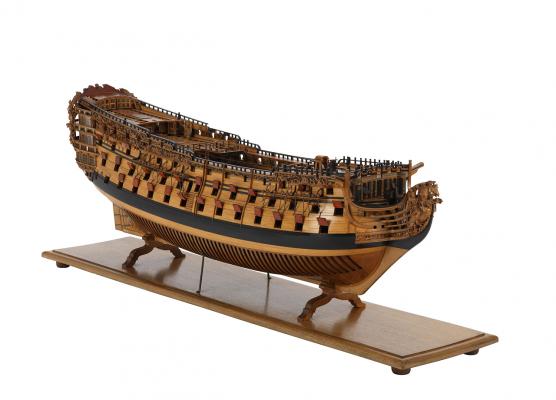
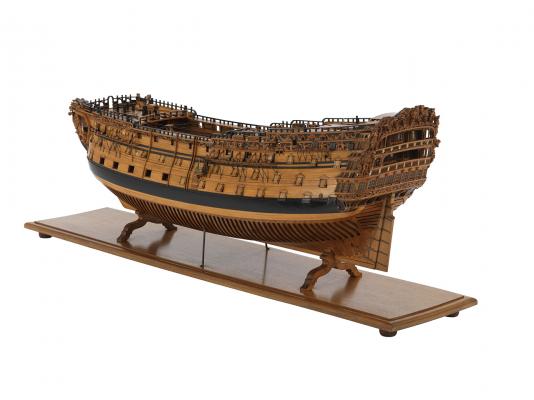
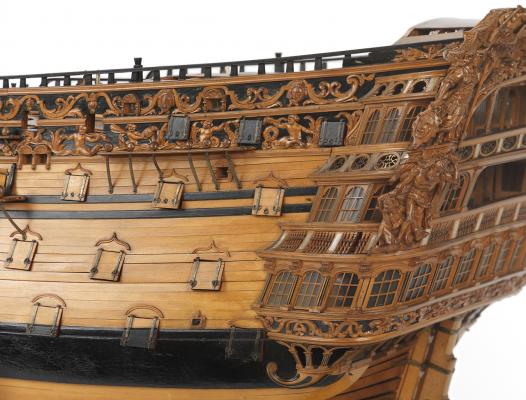
It really is a stunner. The ‘Royal William’ was never fitted out for sea as 100-gun first rate, and its active life began when it was reduced to a second rate of 84 guns in 1756. It saw service during the Seven Years War as part of Hawke’s fleet in 1757 and took part in the expedition to Quebec, and carried home the body of General James Wolfe in 1759. The ‘Royal William’ was reduced to a third rate of 80 guns in 1771. During the American Revolutionary War it was involved in the relief of Gibraltar, before becoming a receiving ship at Portsmouth in 1790 and, from 1801, a guardship at Sheerness. It was broken up in 1813. The ‘Royal William’s’ longevity is sometimes ascribed to George III’s particular fondness for it. A more likely explanation is that it was constructed from charred winter-felled oak. Dave - back over to you
-
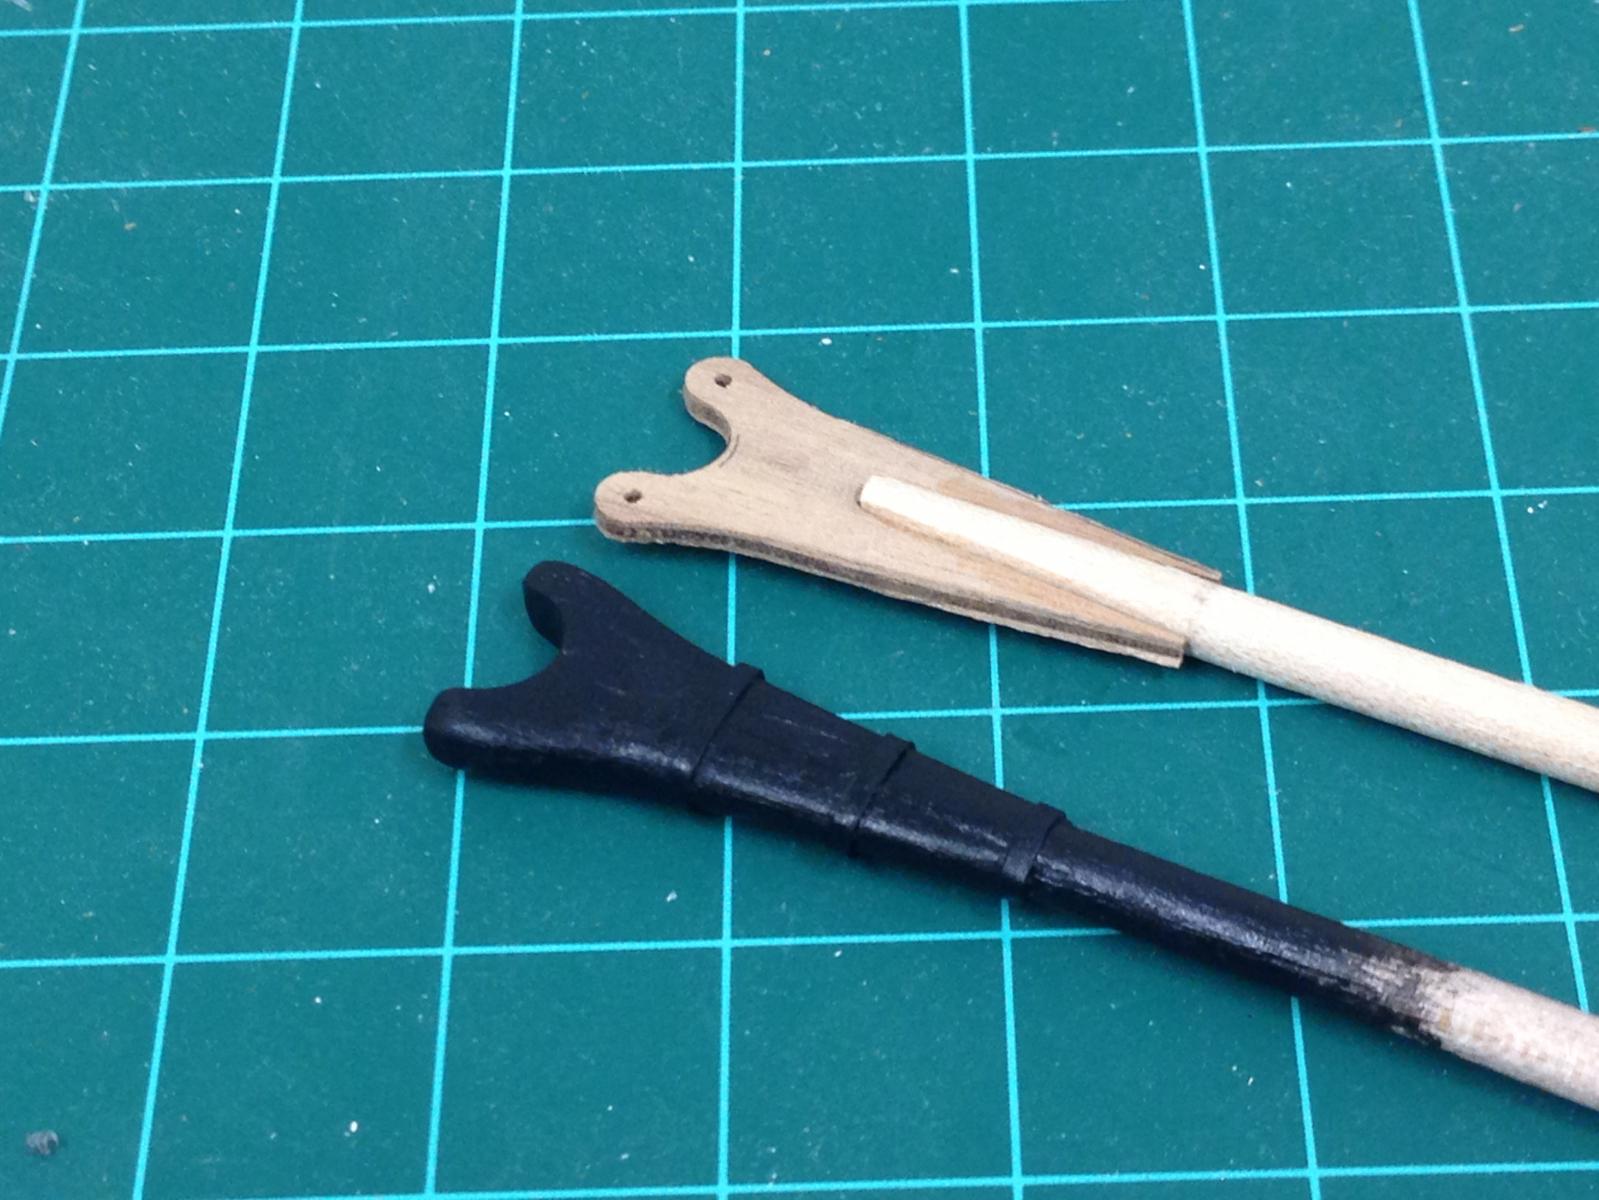
Did you flatten the end of the dowel? That will make it sit further back, it will also affect the angle slightly. I have pictures in my log - I also found that the bowsprit was seemed to want to finish in front of the bowsprit brackers, that was mainly why I used a false end in the bracket to hide this, but keep the angle of the bowsprit appropriate. If you haven't already seen it, I did keep track of the various challenges/mistakes I made doing this so that may be worth a look. Best of luck!
- 1,144 replies
-
- 1
-
-
- snake
- caldercraft
- (and 1 more)
-
I decided the most important thing was to ensure was the length of the bowsprit from the front of the hull matched the plans, rather than shaping exactly according to the plan. Before I cut the bowsprit to length, the end that attaches to the deck under the bracket was shaped to ensure that the bowsprit angle was correct (I drilled a hole for a pin to help ensure consistent positioning). Once that is known, its pretty simple to then measure from the bow to determine where you need to cut bowsprit to give correct length.
- 1,144 replies
-
- 1
-
-
- snake
- caldercraft
- (and 1 more)
-
Slog, not a stupid guess at all - she is a beautiful model and the reason I wanted to share after Doug set a precedent. Time period is earlier and closer to the original Victory that was launched in 1737 and wrecked in 1744 vs the Victory at Trafalgar. This ship was launched in 1719.
-
I don't think this will be too tough, continuing the model theme...

-
So I'll go with Richmond class of 1756, I don't think its possible to identify the specific ship.
-
- Worth a guess. They do look similar, pretty sure I'll get it later after I get home unless someone gets it first....
-
Niger class frigate (HMS Winchelsea?)
-
Shes looking great Nils, the stove is a really nice contrast. I love the feeling of depth that you are acheiving by leaving some of the decking open, especially some of the earlier photos showing the view onto the hold throught he main hatch.