HOLIDAY DONATION DRIVE - SUPPORT MSW - DO YOUR PART TO KEEP THIS GREAT FORUM GOING! (Only 13 donations so far - C'mon guys!)
×


Beef Wellington
-
Posts
2,249 -
Joined
-
Last visited
Content Type
Profiles
Forums
Gallery
Events
Everything posted by Beef Wellington
-
 Hope you enjoy the lathe Timmo, I've also invested in one and agree its easier than using a drill. Doesn't seem to fix the issues with warped dowel though Do I see some micro-chisels in the background as well?, curious where you got those.
 -
Menno - some clues might be helpful, if something sits for a while it probably means people are struggling...
-
I suspect plans are all similarly limited, even from the better kit providers. Certainly on the Snake plans, I found it very difficult to figure out what was really going on and what had been simplified, but maybe that is just down to my inexperience. I found using a reference book like Petersson's "Rigging Period Ship Models" and Lever's "Young Sea Officers sheet achor" very helpful to translate the lines and 'blobs' on the plan into something visual.
-
Some great shots Nils, its been a while since we've seen the overall effect, shes looking very nice indeed. I especially like the deck shot, seems to come alive with the figures.
-
Great start Dave. Thats quite the contraption you've built there for the planking!
-
Nice solution Ray, you're lucky that Amati have these in the correct size - I had scoured around for alternatives on Snake a couldn't find anything in the correct size so ended up making my own. I'll keep definitely keep this option in mind! Did you make your own stanchions to support the rail are are those kit supplied? They look great as well, better than the 1x1mm wood option.
- 536 replies
-
- 1
-

-
- diana
- caldercraft
- (and 1 more)
-
Hi Mike, just catching up. The Lion figurehead will look great, is there any reason you are not considering adjusting the stem? Seams that could be an easier option, and I'm not sure that whatever is held between the lion's paws is necessary wrong. Just a thought. Your stem looks fantastic!
-
Good start Sjors, I know exactly where you are. One thing to mention just in case. The plates pick up finger prints easily which are not that noticeable, however, by the time you're done with coppering, they will likley have started to patina much faster than the clean one, guessing the acids in skin oils. Its easy enough to clean off with a cleaner/polish (which will of course then patina again), but if you want to keep the look a gentle wipe down after each build session could remove the need for that. One other point, as mentioned above, when you come to doing a gore line, flattening the nails can help the plates overlap a little more cleanly and avoid you having small gaps between the plates.
-
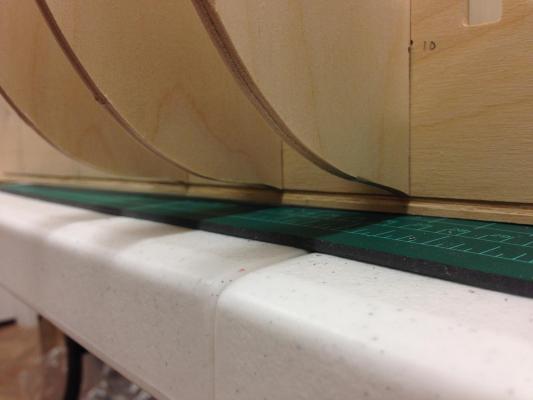
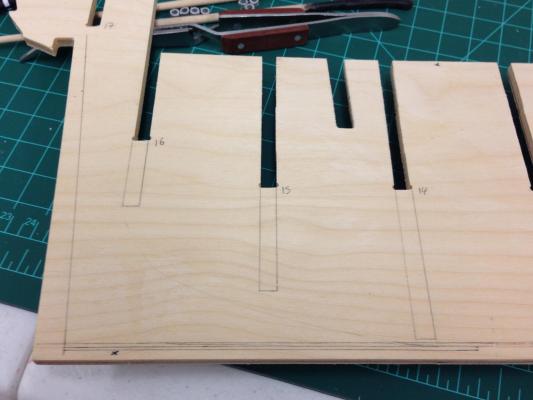
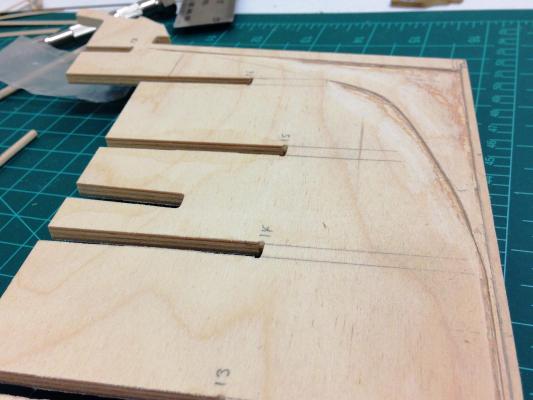
Cheers all. Ray - I haven't got as far as looking at those, but if mine is the same as yours looks like I'll be making some wire ones again, thread just doesn't seem to pass muster. Ron - I'm sure you're right. Although CC do have some great products, they don't seem to have the same passion as the BJ folks who I visited while on vacation - to your point the Surprise and '74' that seems to have been 'imminent' since I started in this hobby 3yrs ago. Talking with Nic (the ower) they will be releasing a large scale CW Morgan kit early next year in response to the NE Model poll on what people want - thats bringing something from 'thought' to reality in not much more than a year, and there will be more after that. They clearly have a passion for these kits - I think I may also have identified my next build, but thats way down the road... Anyway, a little progress at last. The new keel arrived while I was on vacation, thankfully needed a signature so it wasn't left outside in the heat and humidity for 2 weeks! New keel is just fine, the bottom is honestly as straight as could be expected, but does have a very slight curve at the top, that should be easily addressed with the false deck. So onwards... The kit comes with the keel in one piece, so a bit of thinking was in order. I dryfitted the bulkheads to identify where the bottom should be (5mm from base of keel). Marked a line on the keel and started cutting a rabbet to accomodate the first planking. I didn't do this on my Snake as it was before I had found this site and of course there is no mention on the instructions. This introduces a problem which I'll get to below. To determine where planking will terminate I marked on the sternpost estimating dimensions as best I could from the AOTS book. Keel with roughed out rabbet and tapering. This is not final or perfect, but I wanted to get as much of the hard stuff before the bulkheads get installed. The plans indicate where the first planking should terminate, the boundaries for the second planking is the sternpost and rabbet recessed below the first planking rabbet which could be estimated after determining where the first planking rabbet should go. All of this results in a keel that will be around 2.5mm below the second planking, the plans and AOTS suggest this should be closer to 5mm, so I will plan to build this up to be consistent at some. This will also require so thinking at the bow as the the keel shape will similarly need to be 'lowered'.
-
Is anyone there to post next ship?
-
Simply outstanding Alexey, the sun certainly brings out the beauty of the wood and your craftsmanship. Wonderful!
-
The shipyard will be closing down for a few weeks for the summer holidays/vacation - heading up to Maine and New Hampshire. Feeling like I'm leaving on an upnote so its all good. Hopefully I'll have this baby complete by end of year even with some side work on the "Jason". I'm not taking anything with me to work on as I can guarantee something would get lost, a break is not a bad thing. Tom - good to hear from you. Its not a big deal at all, I can either try to sand down some the the 4mm stuff I already have or order more. To answer you question, I haven't had too much luck with stains and had decided to keep everything a natural wood colour, so my first choice would be to stick with walnut to match. Sjors - yup, think all the great minds are thinking alike Nils - thanks for kind words Eammon - its amazing how much of a difference .5mm can make, I would never have believed it, but these small scales do have surprises (both pleasant and unpleasant)
- 800 replies
-
- 4
-
-
- snake
- caldercraft
- (and 1 more)
-
Woops...I meant David, not Andy...my mistake...
-
Pretty sure its HMS Balsam, but Andy should be the winner by identifying the class as there are really no differentiating markings/features.
-
Spyglass, pretty sure you have it, but lets wait for confirmation. I still can't figure out how any of the hints get to this! http://hasanskiy-dv.ru/index.php?option=com_content&view=article&id=7474:ostrov-karamzina-taina-gibeli-dvyh-qindigirokq&catid=58:history&Itemid=415
-
Now I'm thinking out loud, but you could simulate a hinge by wrapping the end of the paper arms around a piece of thin wire
- 1,039 replies
-
- 2
-
-
- ballahoo
- caldercraft
- (and 2 more)
-
A couple of options come to mind - you could take look at some of the PE sets from other kits, not too bad costwise if I remember (e.g. Badger), I had to buy some to get the smaller eyebolts as (I just couldn't wait until they came back in stock) - the upside is I also got some additional hooks which will be useful in rigging as Snake kit only has a few, and also the hinges that I used on my companionway cover. Paper would work just fine as you suggest. You are probably more skilled than me, but if you were to use metal you'd need to find some very thin stuff to not look too thick, and the edges may take a bit of cleaning up and could be tricky.
- 1,039 replies
-
- 1
-
-
- ballahoo
- caldercraft
- (and 2 more)
-
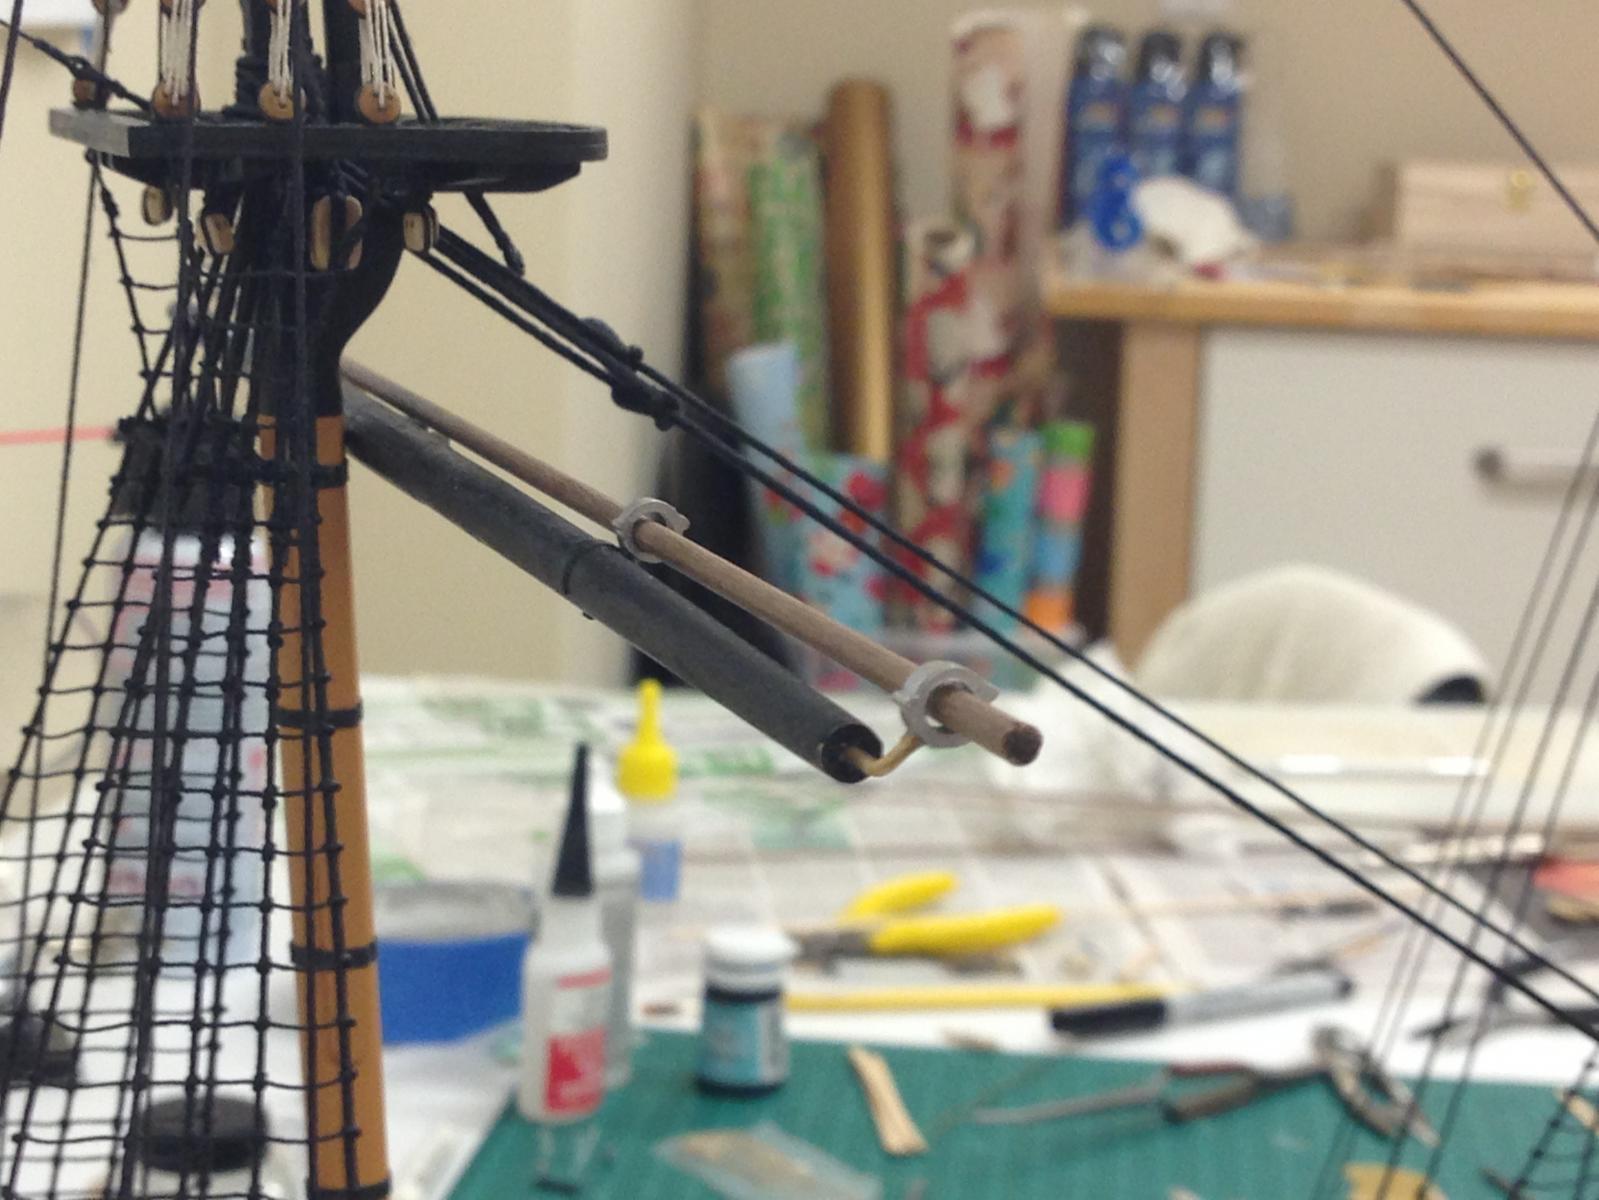
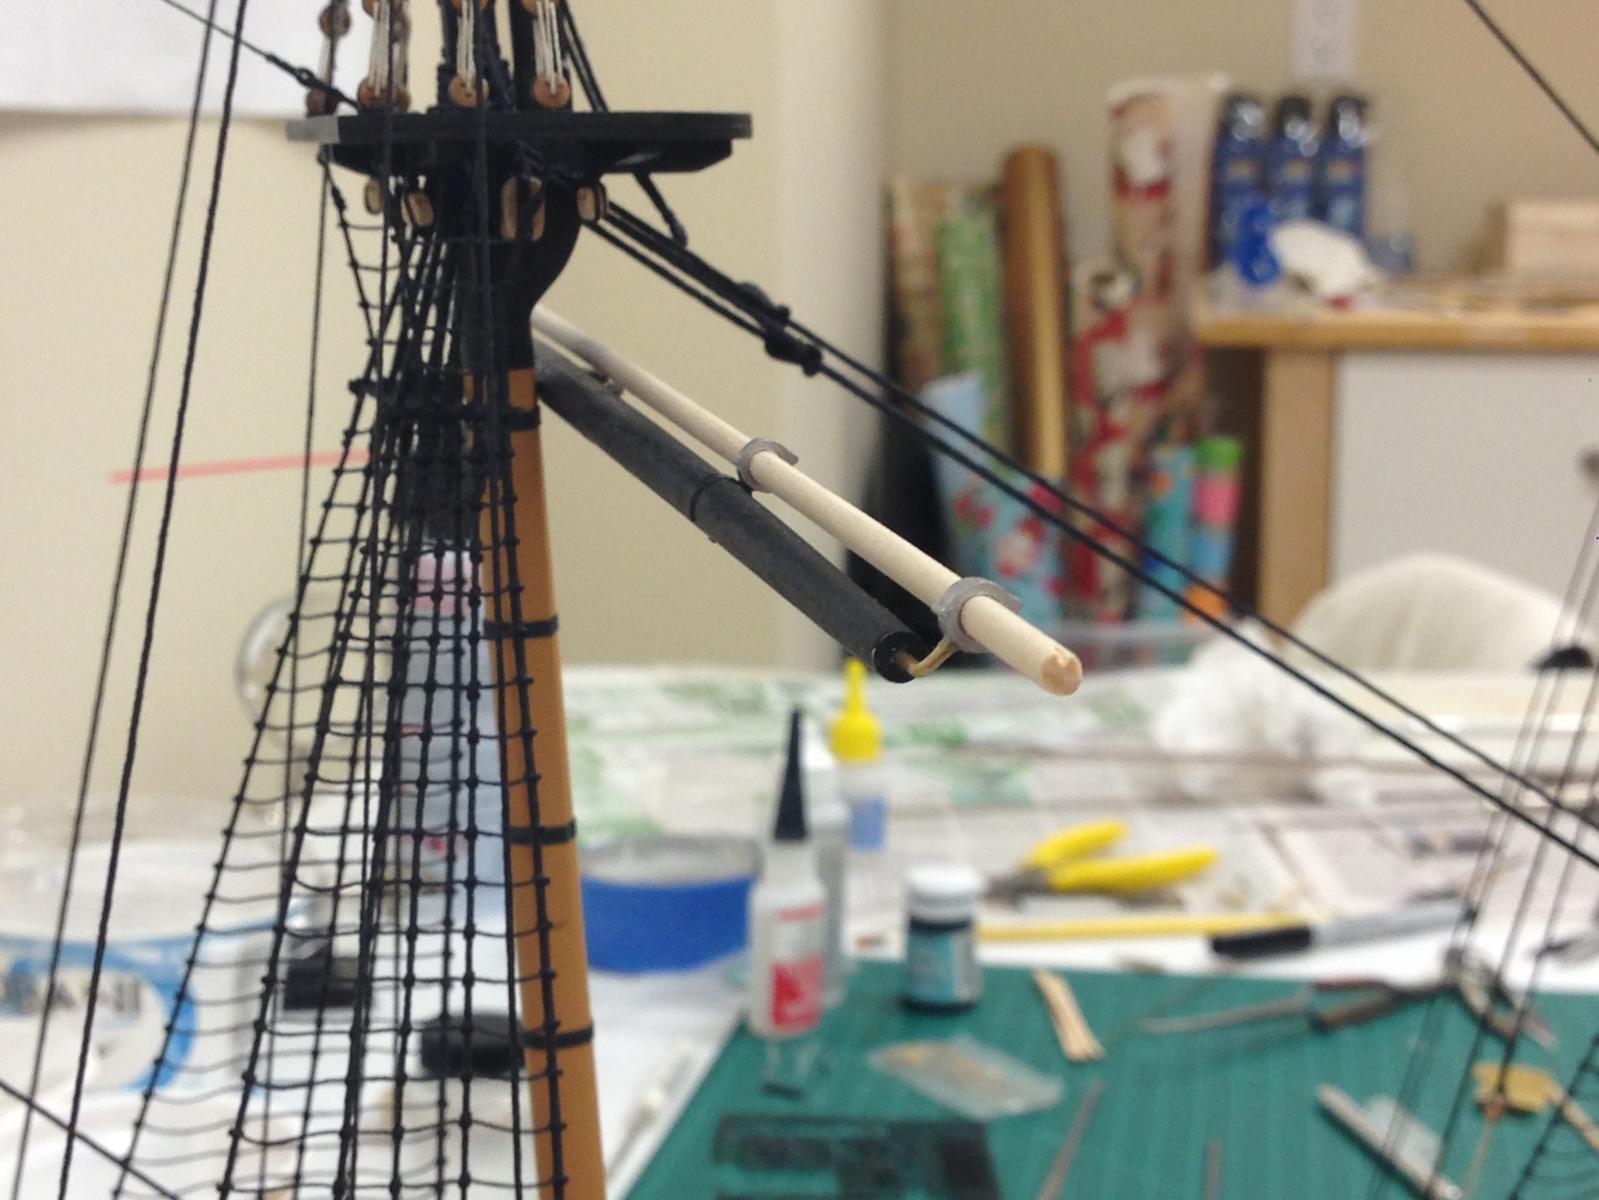
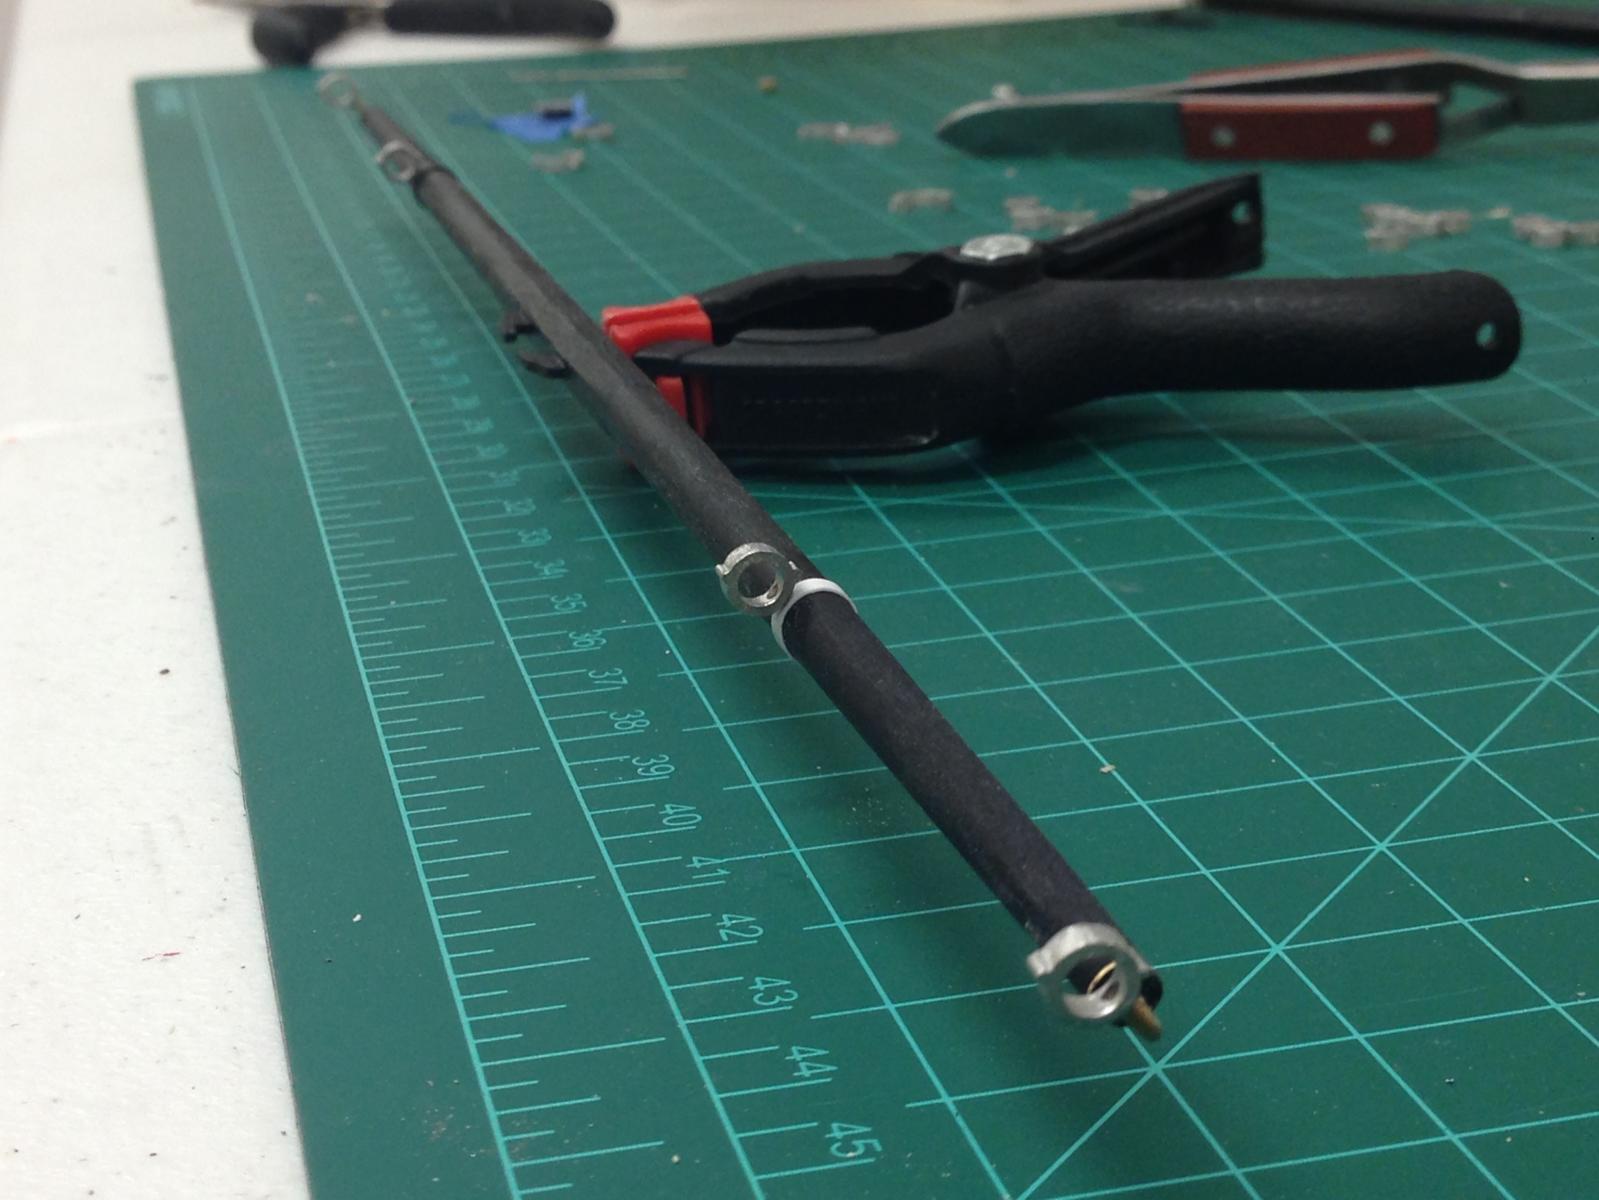
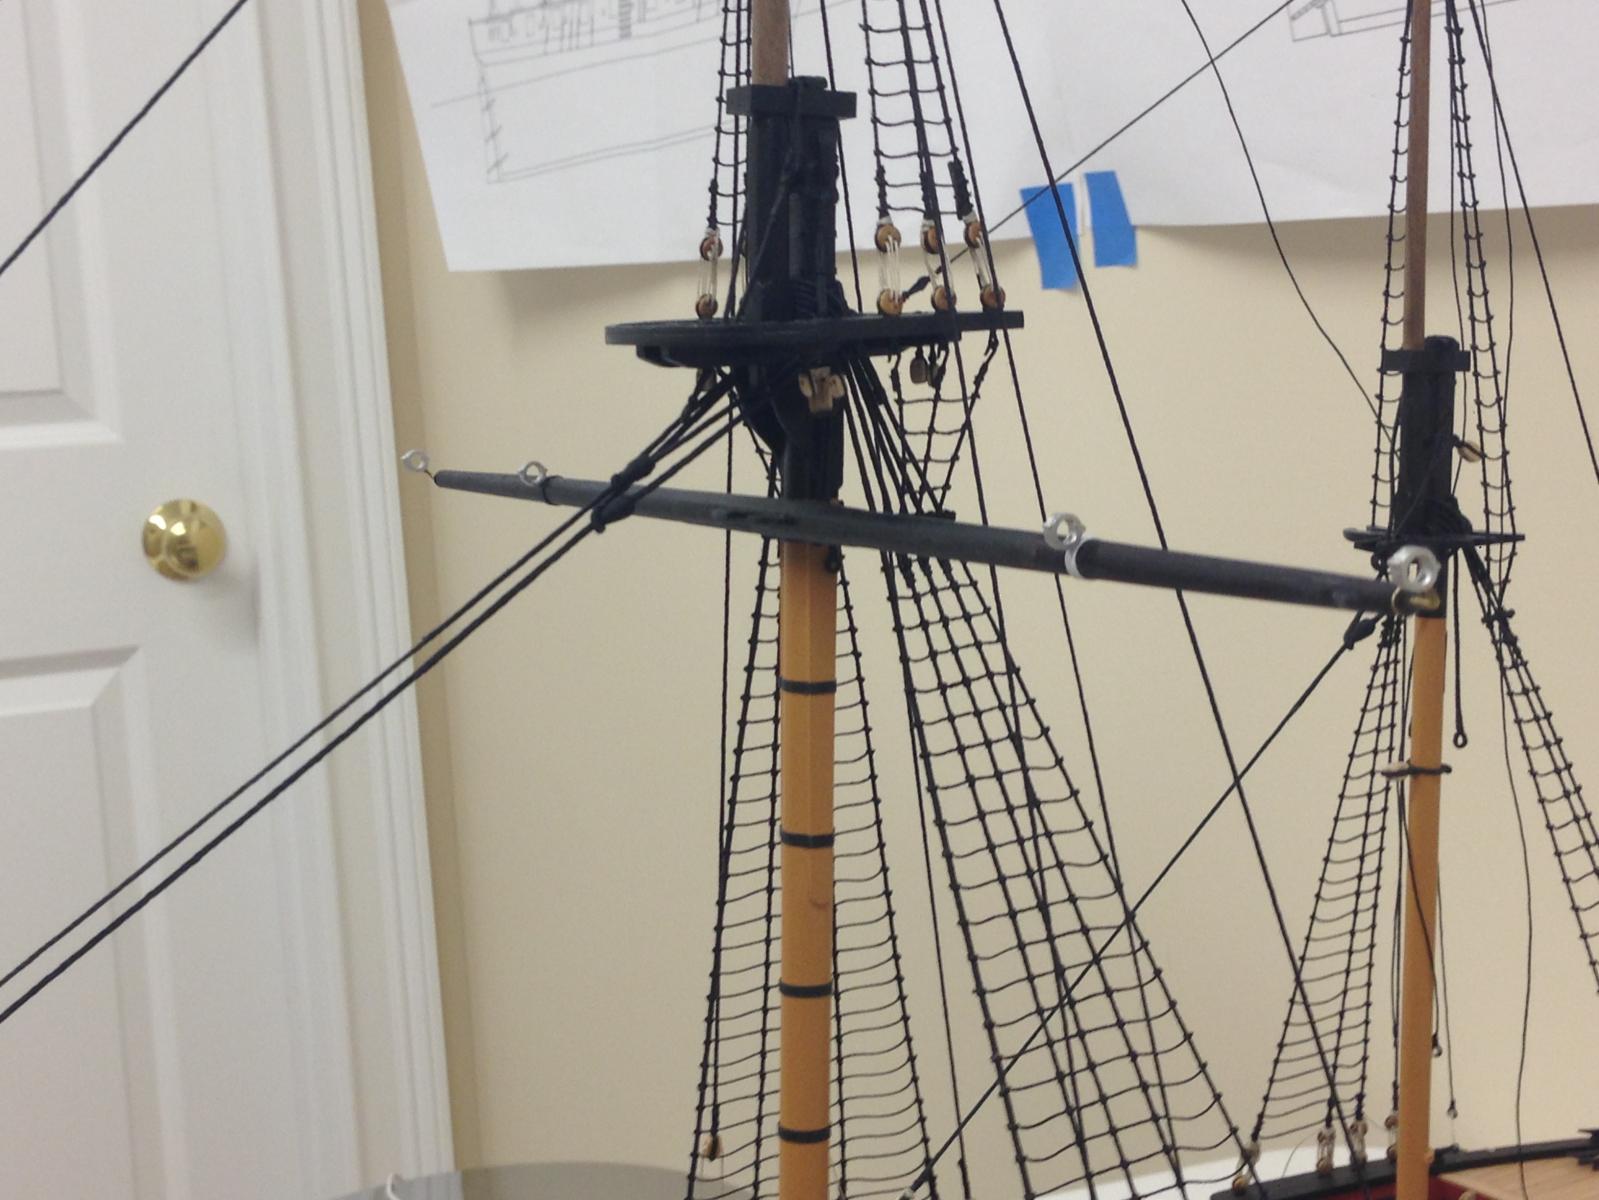
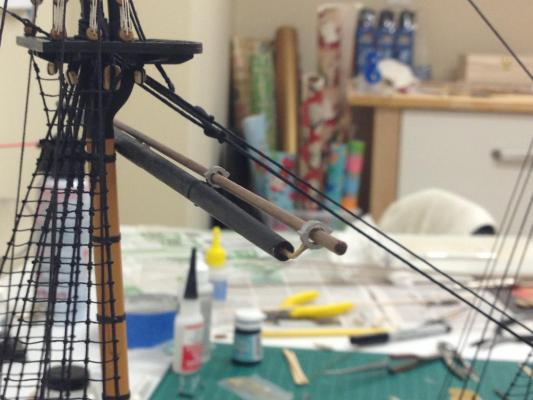
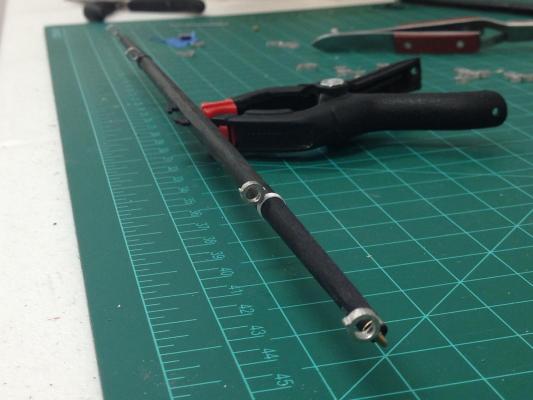
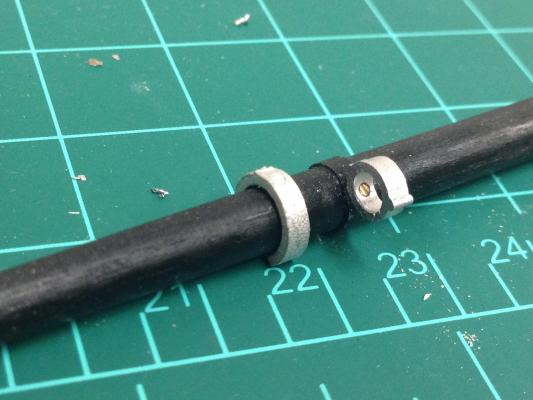
Yards... Putting rigging aside for a wee while to do some work on the yards. Decided that I'm going to keep the jib boom off for as long as I can as it really does seem to make working on the ship easier (and probably safer). The yards are probably the last point where I think this build could stall, so I'm quite keen to get past this. Per instructions, yards were shaped with a small davids plane to get a rough shape and then sanded to shape. I'm not sure the dimensions given in the plans are 100% accurate, but I'm following them anyway. I will be more meticulous with "Jason" when I get to this point as I'll follow the AOTS book closely. I've started with the main yard as a prototype and will finish this one before doing the others together. Additional detailing, cleats and blocks should be fun, but I'll leave that for now. To help secure the yard to the mast I inserted a small length of brass wire and drilled a hole in the mast, as well as installing the sling cleats. There are some photo etch 'caps' that go onto the end of the yard, not sure these are needed, but they do have some wings on each side, presumably to simulate an iron band. I don't have a photo, but they were way to thick/big at this scale and removed them. I will possibly simulate with thin paper strips. The kit provides two soft metal pieces to make up the quarter irons, which are to be joined by brass wire. These are too thick for scale, but I think the kit can be forgiven for this. After fiddling, I decided to replace the cast mast band with a thin strip of styrene, but thin card would probably be easier to use. The hoop for the studding sail yard has two bumps that I'm guessing simulate the hinge and cotter pin. These need to be lined up I think and be parallel to the waterline. The various pieces were drilled, glued together and attached to the yard. To get these to align properly I used a piece of long dowel feeding into each hoop allowed each one to be fine tuned before glueing in place. Also helped ensure they are symetrical, especially important for the boom irons. Yard dry fitted for first time... I had ordered some walnut dowel for the studding sail booms. Of course, I now come to find that the alleged "3mm" dowel is in fact 2.5mm Would welcome opinions on whether this looks OK, 0.5mm seems a big difference. Using supplied 3mm beech dowel (of course, slightly larger than 3mm!) perhaps illustrates whats intended. No need for a decision now, but it does appear a little more to scale so I'll probably try my luck again and order some 3mm walnut dowel.


- 800 replies
-
- 13
-
-
- snake
- caldercraft
- (and 1 more)
-
Very nice Nils, if you don't mind me asking, where did you get the wire mesh?
-
Thanks guys Kester - thanks for the great (and detailed) explanation and tip, think I now understand what I'm seeing in photos, will definitely try that approach Mike - the thought had occurred to me, but I agree with you that I'm not sure its any easier. The advantage of tying of the end at the belaying pin is that you do have a bit more control over the tension. There are a couple of points on the stays where I've had to seize a hook on the end 'in situ' and while it can be done, its challeging. Sjors - The line I'm using (kit supplied) is rather springy and I found it just wanted to pop off, but seemed a bit more controllable by doing a couple of turns and then tying off. Do you think I'll encounter a problem doing that?
- 800 replies
-
- 2
-
-
- snake
- caldercraft
- (and 1 more)
-
Ray, nice neat start to the masts, looks like you've got everything very square. Perfect timing for my question! Looking through the Diana plans it appears that the bowsprit is just intended to fit into a enlarged slot on the bow. This doesn't appear to have much depth and I was a little concerned that this would not be strong enough. Is that a valid concern? I was considering creating a proper hole and mounting the bowsprit on the gun deck to be a bit more authentic and give a bit more strength for the above reason.
-
Thats a really nice paint job Joe, great effect - the blue you picked seems to be a good choice, may try to find some myself to try out. The blue recommended by Caldercraft just doesn't seem to look right to me.
- 302 replies
-
- 1
-
-
- granado
- caldercraft
- (and 1 more)
-
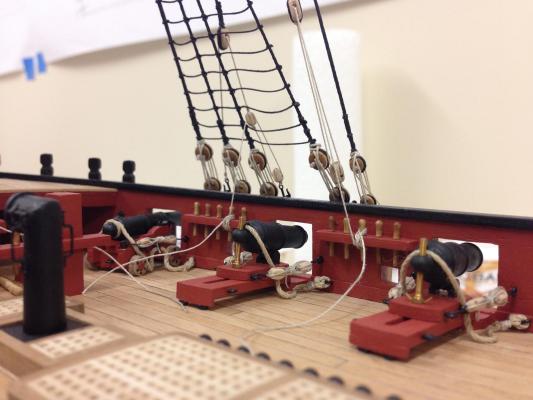
Hamilton, Mike - thanks for the comments, and also to all for the likes. Sjors - 'fast' is maybe relative Progressing with the rigging and have started tying off on cleats and pinrails. Delicate procedure that did result in one of the bulkhead cleats coming loose - mustn't have glued it well enough. It was a real swine to get back in straight with all the rigging, pin rails and carronades in place. Question: I'm tying off using the standard figure of 8 around the pin and using a dab of GS-Hypo glue to make doubly sure its secured, do people typically just trim this line off at the pin? I was planning to simulate rope coils and thinking I can just make all these when everything is done and droop over each pin hiding any loose end.
- 800 replies
-
- 14
-
-
- snake
- caldercraft
- (and 1 more)