HOLIDAY DONATION DRIVE - SUPPORT MSW - DO YOUR PART TO KEEP THIS GREAT FORUM GOING! (Only 13 donations so far - C'mon guys!)
×


Beef Wellington
-
Posts
2,249 -
Joined
-
Last visited
Content Type
Profiles
Forums
Gallery
Events
Everything posted by Beef Wellington
-
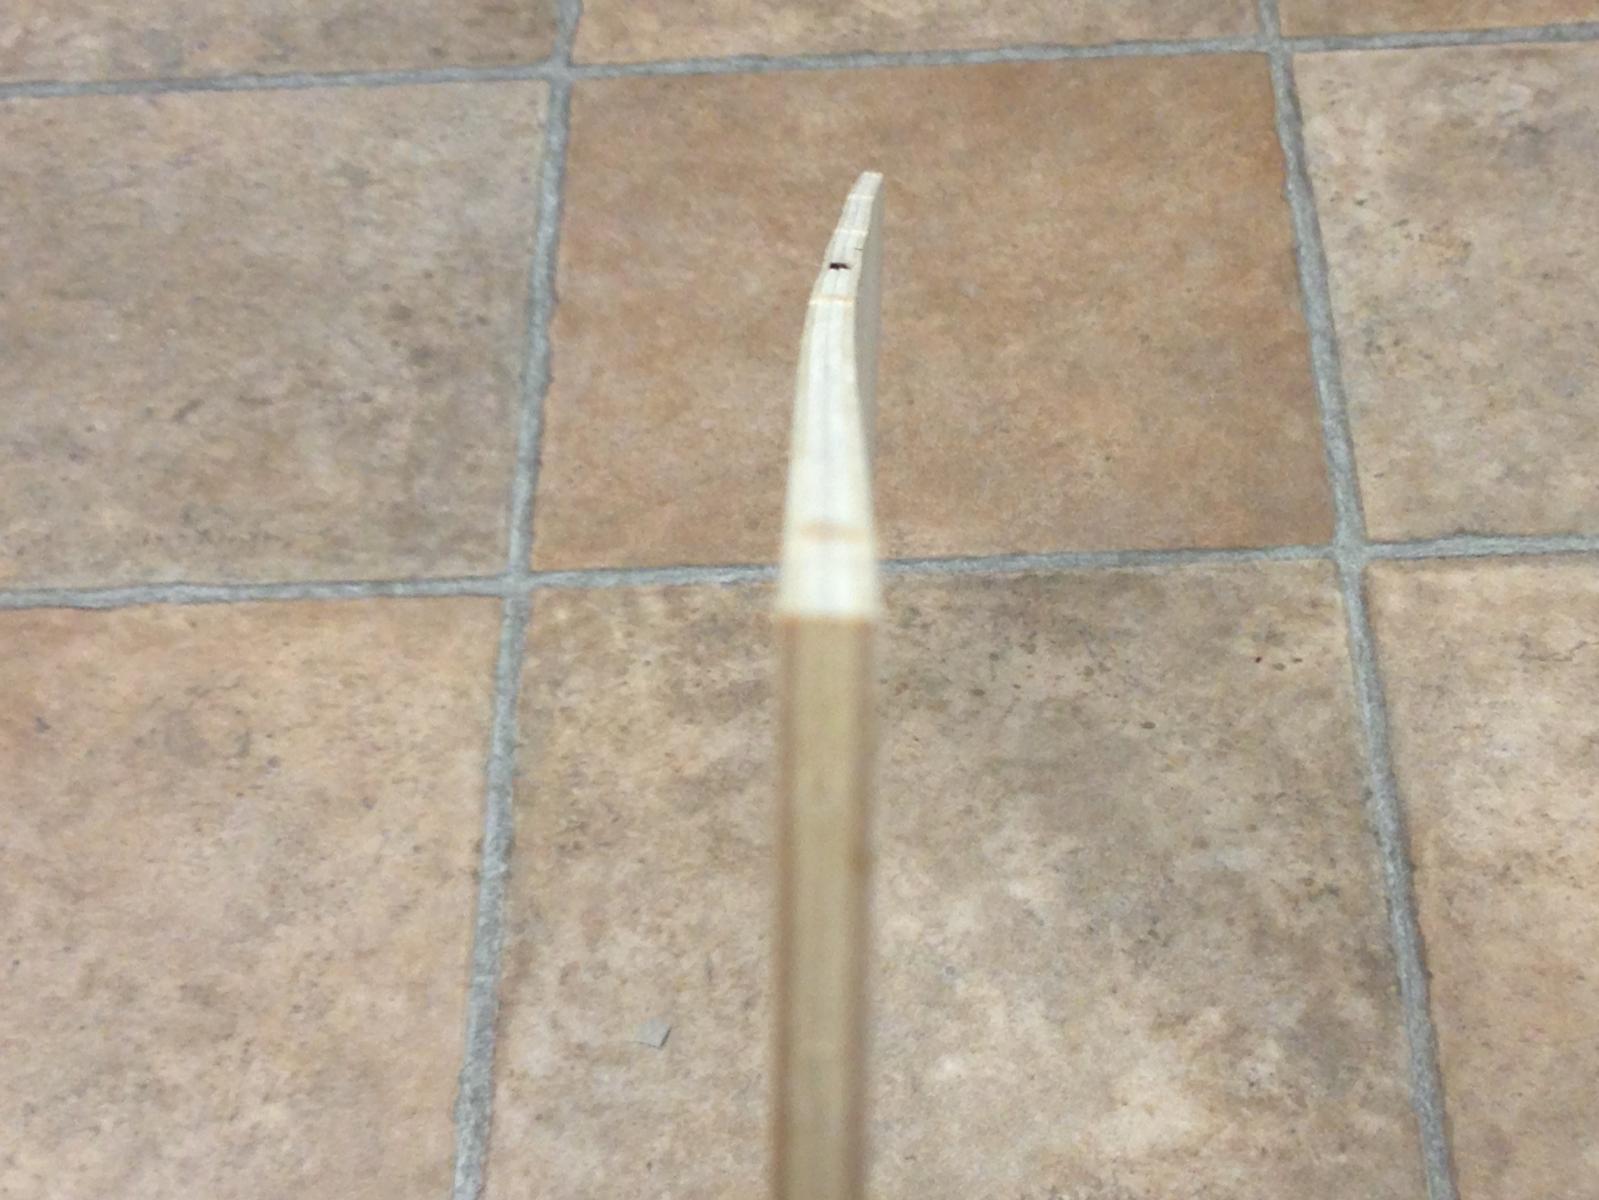
 Cheers guys - especially for all the ideas which I appreciate very much, each one of which has been tried, sadly to no avail. Despite what I'm passing on below, I think the peice of ply I had was fundamentally flawed and un-correctable, there seems to be a large void in the bottom centre of the keel right at the point where the curve/kink is most prevalent which I discovered after starting to cut the rabbet. Got up early this morning to put a call into Jotika/Caldercraft and spoke with John. He was very helpful and will be sending replacement (he promised to cut a the part specially and check it is OK before shipping). Once again this confirms my own and other's experience that Caldercraft really do have great customer focus - I'll wait patiently for it to arrive... He did mention one interesting fact, and that was that they have seen this type of issues with kits distributed by air, but that interestingly it doesn't seem to be an issue with kits sent by sea. They are not sure of the cause, but possibly the nature of the environment in the hold of a plane . This may be something to consider when sourcing a kit. I bought mine from Cornwall Model Boats and it would have been air delivered, suppliers of CC kits in the US would likely have received bulk orders via ship so may be less prone to this issue.
 -
Bob, ehoing others but looks very accurate, crisp and clean. I know I'm going to be dealing with similar challenges on the galleries, they must be tough to build so that they have the right look (seems so easy to get it looking 'not quite right') and get the prefab parts fit well. The bow shots look fantastic, everything looks very symmetrical. You've done a wonderful job on all accounts, well done.
-
Well....the plywood trials and tribulations continue. I've tried soaking and weighting a couple of times to no avail. Each time, everything seems as if its working out fine, and then the infamous bend re-appears. One reason could be that because of the air temp and humidity right now the wood was drying out too quickly and unevenly - I have the lower side against a granite countertop which is the flattest thing I can find, and had been turning the keel periodlcally to try to avoid that. I've also tried drying the keel under opposite tension hoping the resultant tension would correct the bend - unsuccessful. What makes this doubly problematic is that the keel is only distorted at the bottom, especially at the stern where it will receive very little opportunity for 'correcting' force from bulkheads and planking. The top of the keel is acceptably straight, and were the distortion the other way around it wouldn't be an issue as the false deck would force it to be straight. Anyway - I'm going to try one last time and go for broke. I've soaked for 5-6hrs and have the keel sandwiched between two heavy shelves with weights on top. Hopefully this will slow the drying time and hopefully allow to dry more slowly and evenly. This seems to be a common topic right now! I do have a couple of options: Cut my own - this would require sourcing flat plywood from 3rd party and me having to cut out. A lot of posters (I suspect people with appropriate tools) offer this as the obvious solution, but seems a lot of work. Cut off the bottom of the keel and glue on a 5x5mm walnut strip similar to Snake construction. Less dramatic than above, but I will still likely be dealing with a non-true keel or frame alignment Ask for a replacement - I suspect I'll be making a call to Cornwall Model Boats early next week if current effort fails. I've paid good money for the kit and I don't think its reasonable to have an important piece like a keel thats not up to standard. Sorry for the complaining, but it did make me feel better
-
Joe - looking good despite the walnut challenges. I had ordered some additional walnut strips through Cornwall Model Boats as I needed additional materials to help with some of the customizations I made on Snake. I found that the colour of the walnut provided by CMB also varied a lot (especially between strips cut to different sizes) and was not dissimilar to the quality of the kit supplied walnut. However, it was pretty cheap and I was able to mix and match to get as consistent a colour as possible. I'm not sure how much of the issues with the walnut is down to CC and how much of it boils down to the original suppliers of the wood and quality control around that. Of course, I recognize that doesn't help you much
- 302 replies
-
- 1
-

-
- granado
- caldercraft
- (and 1 more)
-
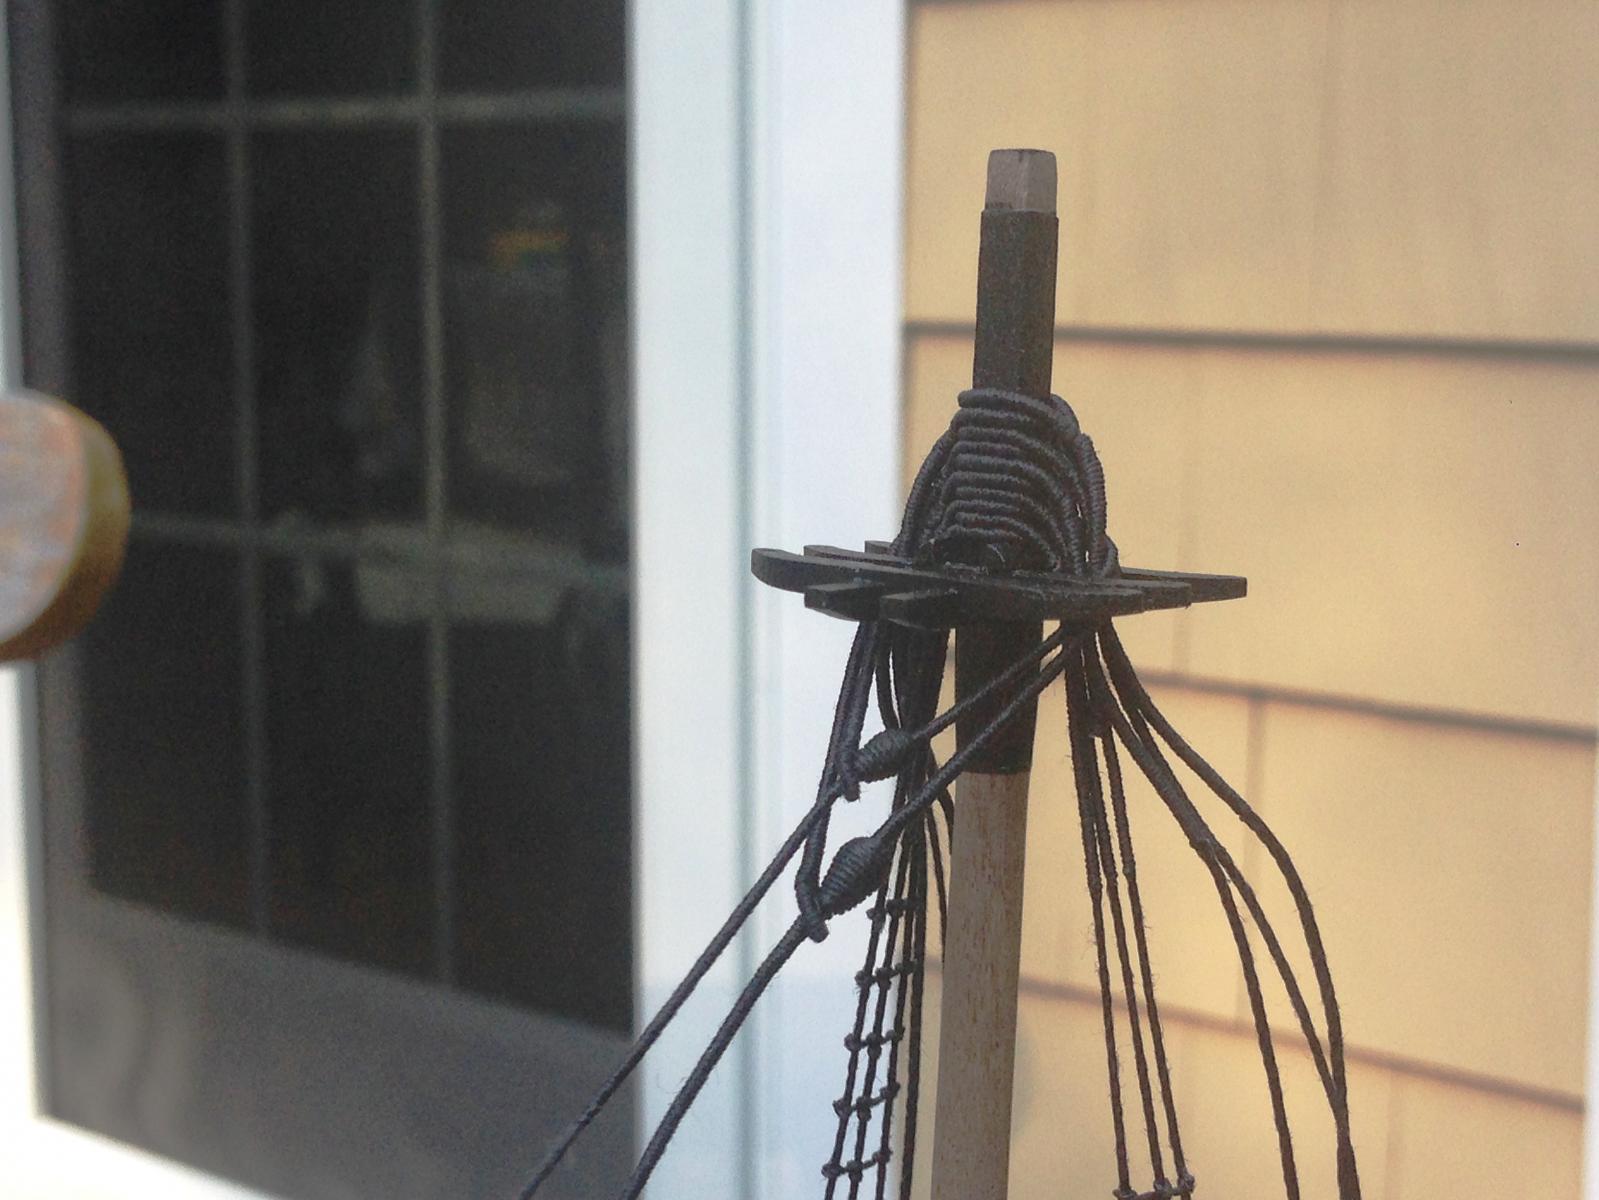
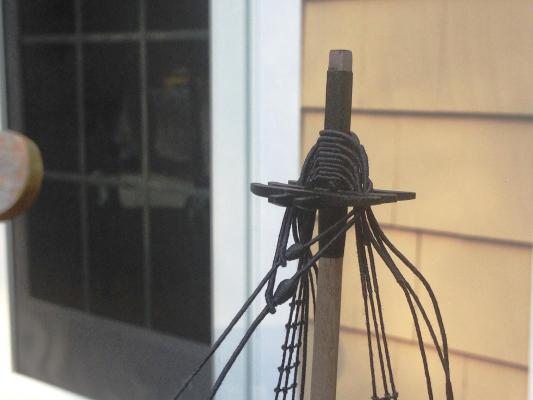
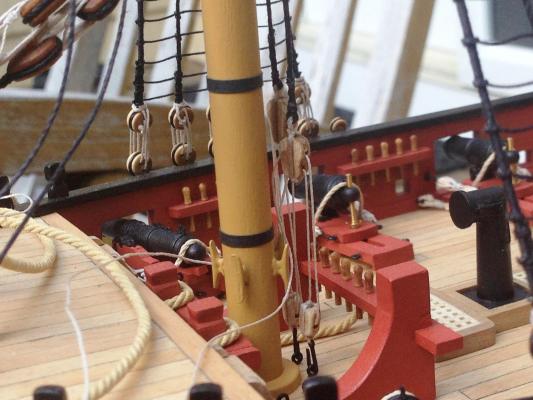
Mast look great Colin. What did you use to make the 'hoops' at the top and bottom of the woolding? (I have no idea what they are called).
-
Look forward to seeing photos of your progress Louis. As for the copper plates, there is a lot of discussion on this, although it boils down to personal preference. I found that using CA (superglue) works just fine - however, it comes in different thicknesses/viscosities. You should use the 'thick' type as this will give you time to place the copper plate. I have only done coppering once and used the Caldercraft "thick professional" CA glue and it worked well for me (very small amounts is all it takes). I'm sure other brands work just as well. You should be careful not to get the glue on the outside of the plates as this will prevent the copper from developing a patina where the glue is, and could look rather odd in the future. I also bought some 'Super Solvent' in case of accidents which can be used to clean off any CA glue get on the plates while it is still fresh - works quite well but does require some rubbing. Best of luck!
-
Thats a very nice looking rudder Mike, goes well with the wonderful stem. I suspect that you will deviate more significantly from the kit when you progress, just can't see you being happy with the out of the box approach after all your research.
-
Looking great Stuart, interesting kit. Looking forward to seeing this develop more.
-
Hipexec, BE, Alistair, Eamonn, Mike, Hamilton - thanks for the kind words, means a lot coming from you guys. Tim - I'm still struggling with this a little myself but definitely getting my eye in I think. Thanks for the kind comments Small bit of progress - ratlines are now completed, I say again, ratlines are now completed! Little bit of a celebration, I haven't found these too bad and have figured out a rhythm that works. What most bothers me is that I deliberately tried to avoid using line that was too thick to keep it looking the right scale, - I think I ended up with line that still looks a little thick to scale (not horribly so) but I will do differently next time. Not everything is finally fixed yet, but she's starting to look more like a ship. Started securing some of the various topmast back stays. I followed the plans on these - why use just a couple of blocks when you could use more! Next job will be to secure to the pins.
- 800 replies
-
- 11
-
-
- snake
- caldercraft
- (and 1 more)
-
Louis - the second planking turned out better than could be expected so I'll take my hat off to you , not sure if you made any changes to the first planking or not. You seem to have a solid hull shape with which to work from now. I'm building my first ship as well, so hope my experiences are useful and relevant. I'd suggest the following - its hard to see all the detail in the photos but I'm sure you'll get lots of constructive support from the group here. Take your time with sanding the hull to get a nice smooth finish and bring out the beautiful lines of the Pegasus - getting a good smooth, even surface will be really important. If necessary, use some wood filler for any gaps or low points. If I didn't stress it enough the first time, take your time I definitely recommend spending time to ensure that you get a nice sharp line between the hull planking and the stem and keel, and that it follows the side profile shown in the plans. Take a look at some photos in other logs how this should look. I think patience will be important again here to get the result you are looking for. You will likely encounter a lot of issues with the copper plates unless you address this. Other Fly/Pegasus builders can comment more on this, but I'd check the thickness of the hull at the stern post to the thickness of the rudder. These should be the same. It appears from the photos that you planked over the false keel which adds additional thickness to the hull at that point. You will likely again need to spend time sanding this profile down to correct dimensions. It may be that you nearly sand through the second planking to get this result. This could also give you real problems when it comes to attaching the rudder when you get to that point. If I haven't said it enough ( ), take your time as you are building the foundations for how the rest of the build will go. If its any guide, it probably took me around 2-3 months to get to this point on my Snake. Look forward to seeing how you progress.
-
Glad to see your Pegasus up and running Mike, can fully understand your frustration with the Unicorn kit.
-
Mike - I do have the AOTS book, that was one of the factors in selecting this kit. Its definitely one of the better ones. As for the stem: I really don't think I have the capabilities to build the individual pieces (maybe get there on my 3rd build but that is way out there!). My thoughts are still coming together, but I hope to use the boxwood to represent the what would ordinarily be painted yellow ochre rather than tying to represent some sort of admiralty style model with truly authentic spiled planking. I'll probably just need to see how I feel when I (eventually) get there, I may try to go out on a limb in some areas, like doing top and butt planking on the deck, wales etc.
-
Louis - Seems like you've been really busy, the planking can be a challenge! Its hard to tell from the photos with all the pins, but I'd really recommend trying to get a nice fit of the planks to the stem, I think you'll really appreciate that when you get to the second planking. If you haven't already, I also suggest you consider putting in 'stealers' in between you planking where you have the gaps, especially the stern and the stem, you'd need to cut these to shape but would probably look like long thin triangles. That will give you an opportunity to get the hull to the smooth shape you want. I'm sure the others with experience of this particular kit can probably offer some more specific advice. Its fun isn't it ?
-
Cheers Mike - It seems like even a plan B needs a plan C - isn't it amazing how difficult it is to find stright wood or dowel. MDF seems like a much better alternative, although I understand the Diana kit is quite old and as Ray points out, if could definitely do with some updating. Unfortunately I don't have a scroll saw, its very much a manual shipyard, cutting a new keel seems a little daunting but never say never. Will maybe try again soaking/weighting. If that fails, I may just push on ensuring that the bulkheads are truly perpendicular to the keel and then using bracing between the bulkheads to force alignment - there is also a false deck that may help straighten a bit, but the warp seems more accute at the bottom of the keel. . I'm strongly considering cutting off the stem and stern post area of the hull and then replacing with boxwood rather than painting the plywood. As for the figurehead, I've ordered Chuck's resin offering after seeing it at the NE model ship show, high quality, and is suitably 'Greek' and warlike
-
Thanks for the interest guys - again, progress will be slow, even by my standards Joe - you're definitely right about the maple/tanganika. Think I got lucky on the Snake with the wood provided, the tanganika supplied with this kit has a rather larger grain with lots of colour differences, so maple will likely be the cost effective option - I'm expecting lots of waste. Encountered first problem, the plywood keel template is pretty significantly curved, this is probably exacerbated because it is pretty long, relatively thin piece. Last night I tried soaking for an hour and flattening with weights, but this morning revealed it to be a spectacular failure, maybe I didn't soak enough (?). I don't have much experience with this so any suggestions would be appreciated - do I run the risk of ruining the piece by soaking too much? This seems a common problem, frustrating non-the-less.
-
Wow...you have the patience of a saint, great results though, well done.
-
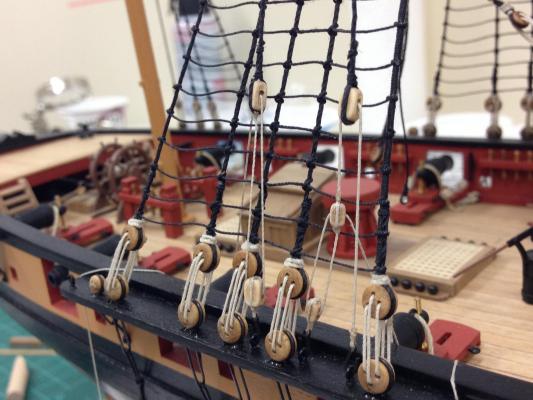
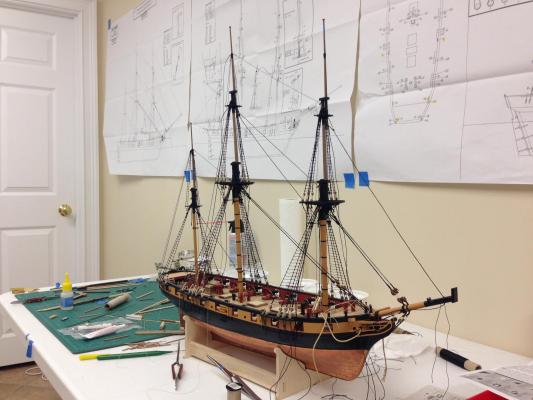
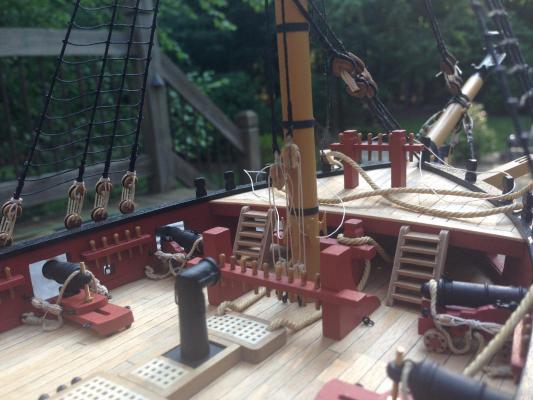
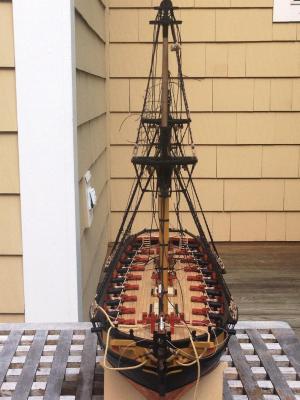
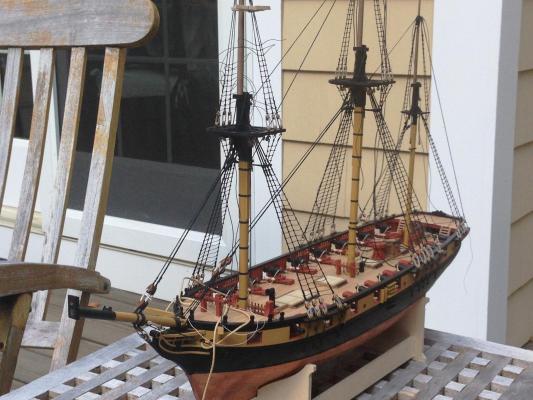
Got the old girl outside today for a few pics, it was such a gorgeous day. Rigging will probably continue to look a bit scrappy until everything is in place (maybe thats why this tends to be a less photographed stage of any build). I'm following the principle of avoiding tying things off until absolutely necessary to try to avoid things getting in the way, and continuing to work from stern to bow - its serving me well so far. The main topmast with the shrouds and stays rigged, its quite the stack. Backstays have not been finally secured. Main stay and preventer stay arrangement - these will be finally tensioned and tied off later. The violin blocks do look rather clunky despite trying to round these off. Couple of overall shots - she does still look as if she has her curlers in with all the loose line!
- 800 replies
-
- 20
-
-
- snake
- caldercraft
- (and 1 more)
-
Nice start Louis, glad to be able to follow this from the the beginning.
-
Cheers Mike. Of course I'm kicking myself now, I was just down in DC this past week - I should have tried to schedule a "showing" of your Badger and Unicorn....doh!
- 800 replies
-
- 1
-
-
- snake
- caldercraft
- (and 1 more)
-
Given my log has slipped to near the bottom of page 2 on the 'my contents' tab it looks like I've been slipping - work, visitors, garden all playing a factor in the snail like progress. I'll save some photos for a little later when I have something concrete to report. In true MSW tradition, I'm going to attempt to disguise the lack of progress by showing my next kit which I'll be tinkering with when I can to take advantage of the nice weather.

- 800 replies
-
- 8
-
-
- snake
- caldercraft
- (and 1 more)
-
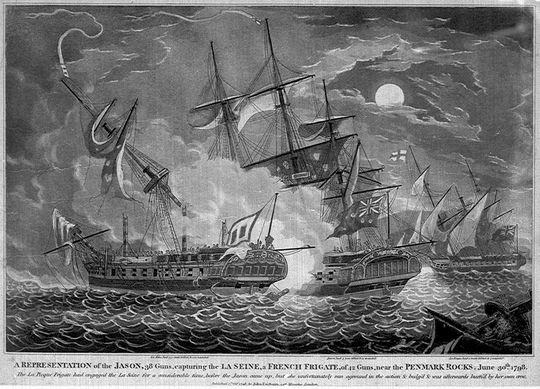
A little history: HMS Jason was a 38-gun Artois-class fifth rate frigate of the Royal Navy. She served during the French Revolutionary Wars, but her career came to an end after just four years in service when she struck an uncharted rock off Brest and sank on 13 October 1798. She had already had an eventful career, and was involved in several engagements with French vessels. Jason initially served in the English Channel, at first under Douglas, and then by 1795 under Captain Charles Stirling. Stirling remained the Jason's commander for the rest of her career. In a highly active career against French shipping he took at least six French vessels, including two that later became part of the Royal Navy. The Jason was present at the Quiberon expedition in October 1795 as part of John Borlase Warren's squadron, and went on to be highly active against French privateers and raiders. In December 1796 she was part of the British squadron that frustrated the French Expédition d'Irlande, capturing the disarmed frigate Suffren. Further service in the Channel followed; Jason captured the 14-gun privateer Marie off Belle Isle on 21 November 1797, the 24-gun privateer Coureur on 23 February 1798, and in company with HMS Russell captured the 12-gun privateer Bonne Citoyenne on 20 March 1798. Further successes that year included the 6-gun Arrogante off Brest 19 April 1798, and in company with HMS Pique, the 38-gun frigate Seine in the Breton Passage on 30 June 1798. HMS Jason struck an uncharted rock on 13 October 1798 while sailing off Brest and was wrecked. She was one of a handful of frigates to be lost on the dangerous Brest blockade, with three of her class being wrecked in the space of three years. HMS Artois had been lost the year before, while HMS Ethalion was lost the following year. Here is the only contemporary (or otherwise!) picture I can find of her capturing the Seine.
-
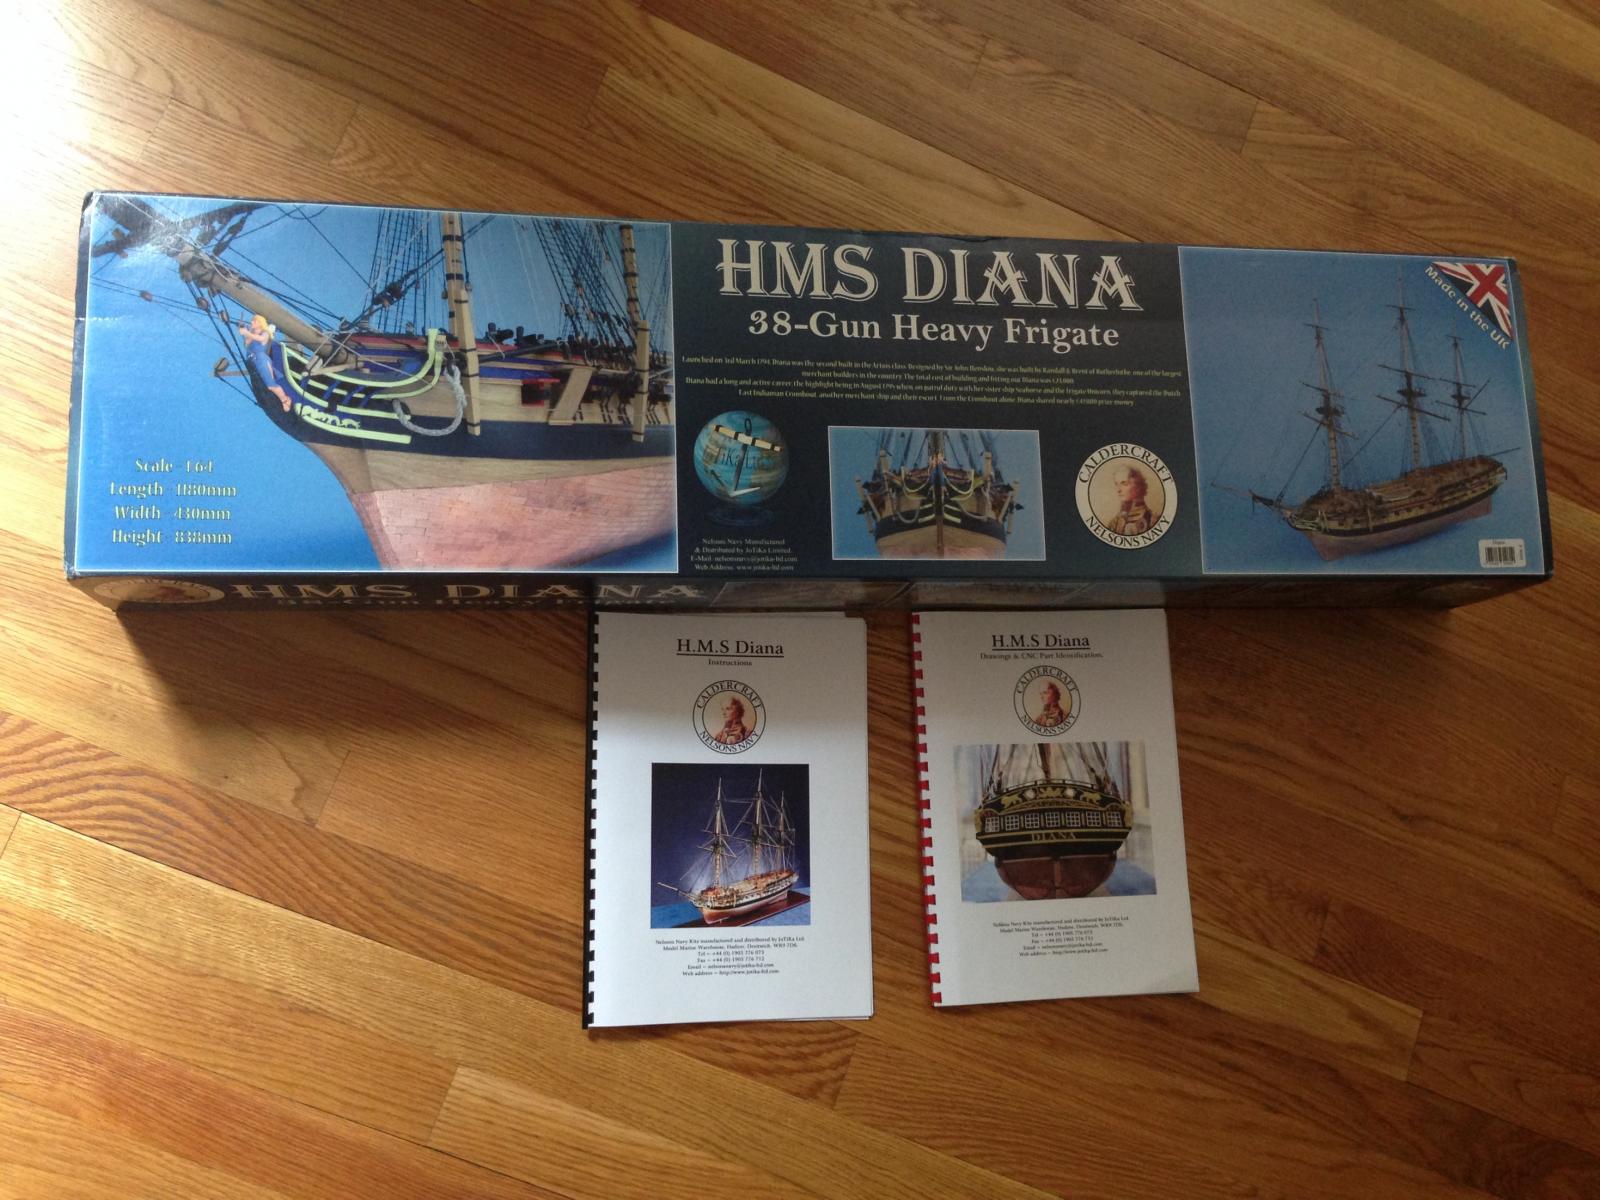
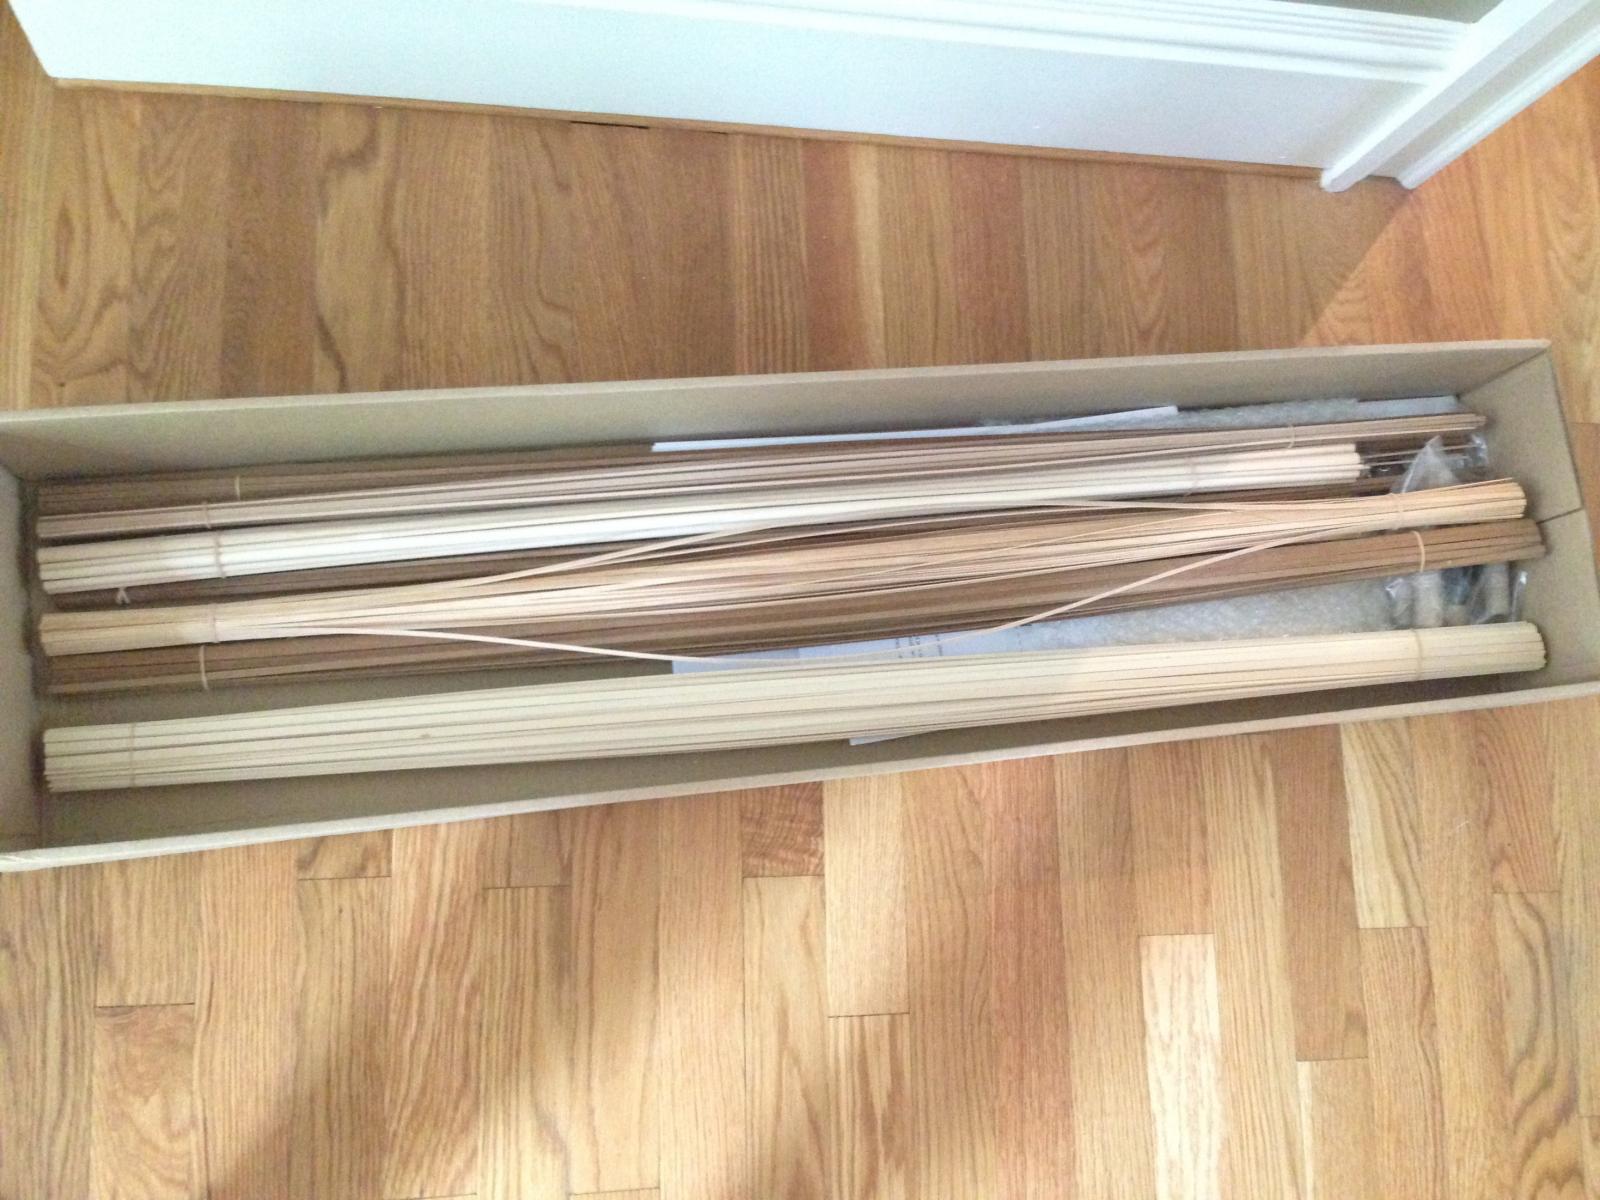
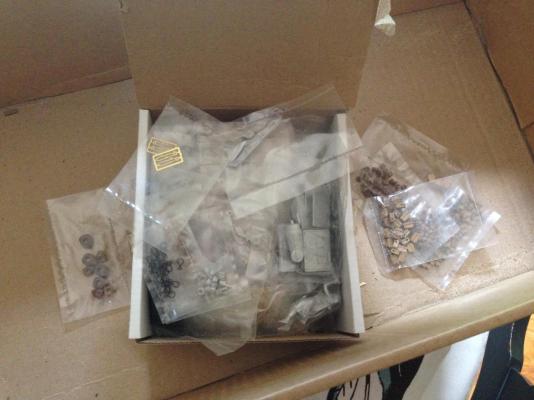
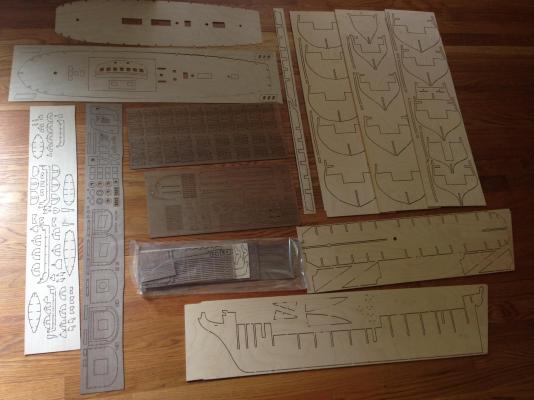
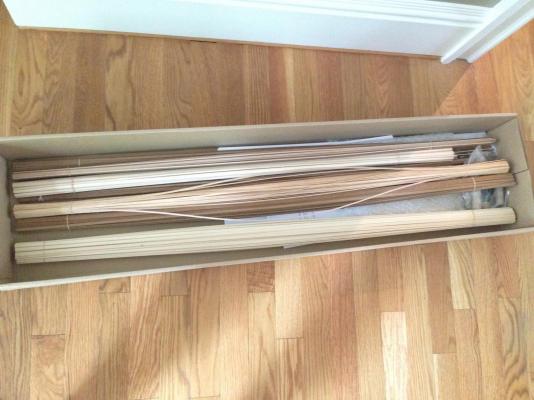
As I'm slowly approaching the end (or at least the beginning of the end) on HMS Snake, I gratefully received what will be my next installment for my birthday. Don't expect much progress as I want to keep working on HMS Snake as time permits, but I wanted to have the kit in my hands so I can start to do some planning ahead, and most importantly, get my order in for some upgraded wood. I also want to take advantage of the warm weather to get the larger sanding jobs done outside if I can. I plan to take the first planking slowly to avoid repeating errors and to hopefully ensure I can get the lines as close as possible to the plans. I had a great experience with my Caldercraft Snake, and after trying to evaluate other kits out there, decided to stay in the family due to the expected kit quality, interest in the subject matter and availability of aftermarket items. I've been vacillating between HMS Agamemnon and HMS Diana for some time, but what finally swayed me was getting a copy of the AOTS Diana book which I'd like to follow as closely as possible as skills permit. Initial thoughts on the kit and approach: I'm going to build her as HMS Jason, the 5th of the 9 built Artois-class frigates. Don't think this will mean any significant deviations, but I have downloaded the plans from NMM, and there is of course the narcissistic additional interest for me . This will require me to change the figurehead, I have thought through options. While not quite a beautiful as the Diana admiralty models with open quarterdeck rails, I do plan to build her as she was when completed with the build up quarterdeck bulwarks. My reading indicates that most, if not all, would have had this feature when actually launched as it was back in fashion. Wood - The supplied walnut does not look great, not a surprise and this seems to be a (sadly) common factor in CC kits. I have decided to upgrade/change the wood, and will probably go with boxwood for the external hull, and maple for the deck as I'll try to replicate the decking in the AOTS book which Ray so successfully handled on his build. I'll keep the walnut below the waterline where possible to save on cost as this will be coppered . Instructions - Poor, but as expected. I hope this won't present too many challenges, and hope my initial experience on Snake will get me through OK. Copper plates - The CC plates get a bad rap, and I don't think they are as bad as commonly perceived when looking at a completed hull. That being said, I would like to try to replace them with Amati ones which look very authentic if finances allow (on a "cost per year" basis, this is easier to justify given my slow pace) Armament - The HMS Jason plans show her with 6 identical ports on her quarterdeck, suggesting the original 9lb'er configuration. The kit provides a mix between carronades and cannons with differences in the gun port configuration and size. I may change this but we'll see. Quality - Overall, I do like the quality of the kit, CC do provide some high quality parts that are correct scale. Where I know the kit provided items will not be up to it, I'll replace/upgrade those (pumps, blocks, rigging line etc). The keel and bulkheads are very solid. I have plenty more thoughts, but will keep those to myself for now. Onwards and upwards! The box, manuals and part identification Frames and pre-cut parts The wood strips Photo-etch All of the really small bits still in box until inventoried


-
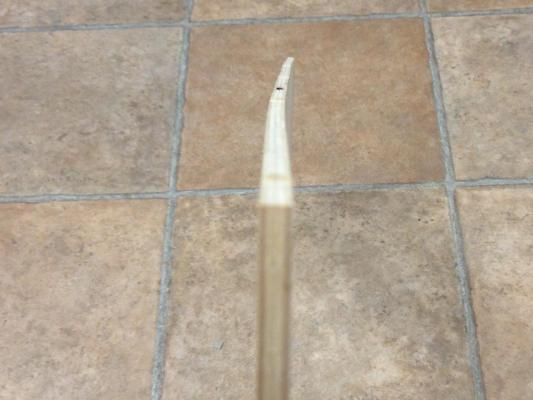
I filed to the correct angle rather than adding material.
-
The masts should all be at different angles, the foremast will be closest to perpendicular, the slots in the keel factor this in. Every think is looking good!