Beef Wellington
-
Posts
2,249 -
Joined
-
Last visited
Content Type
Profiles
Forums
Gallery
Events
Everything posted by Beef Wellington
-
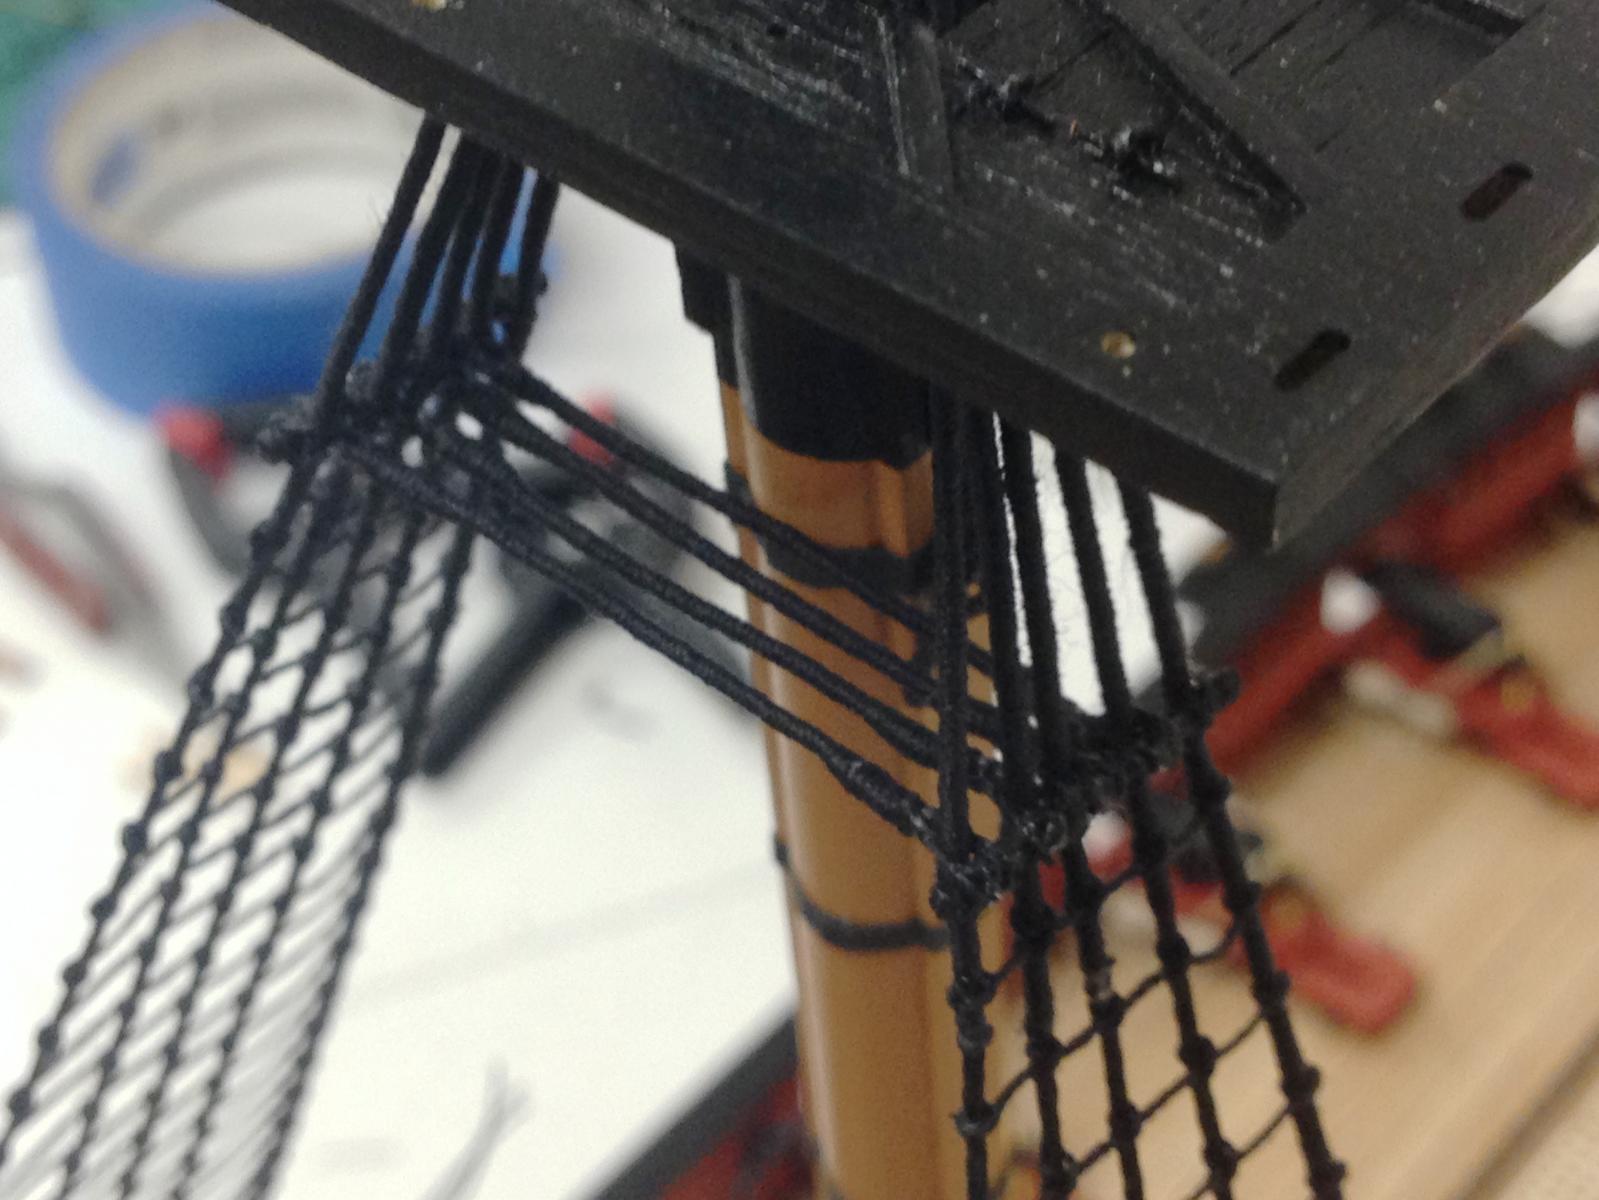
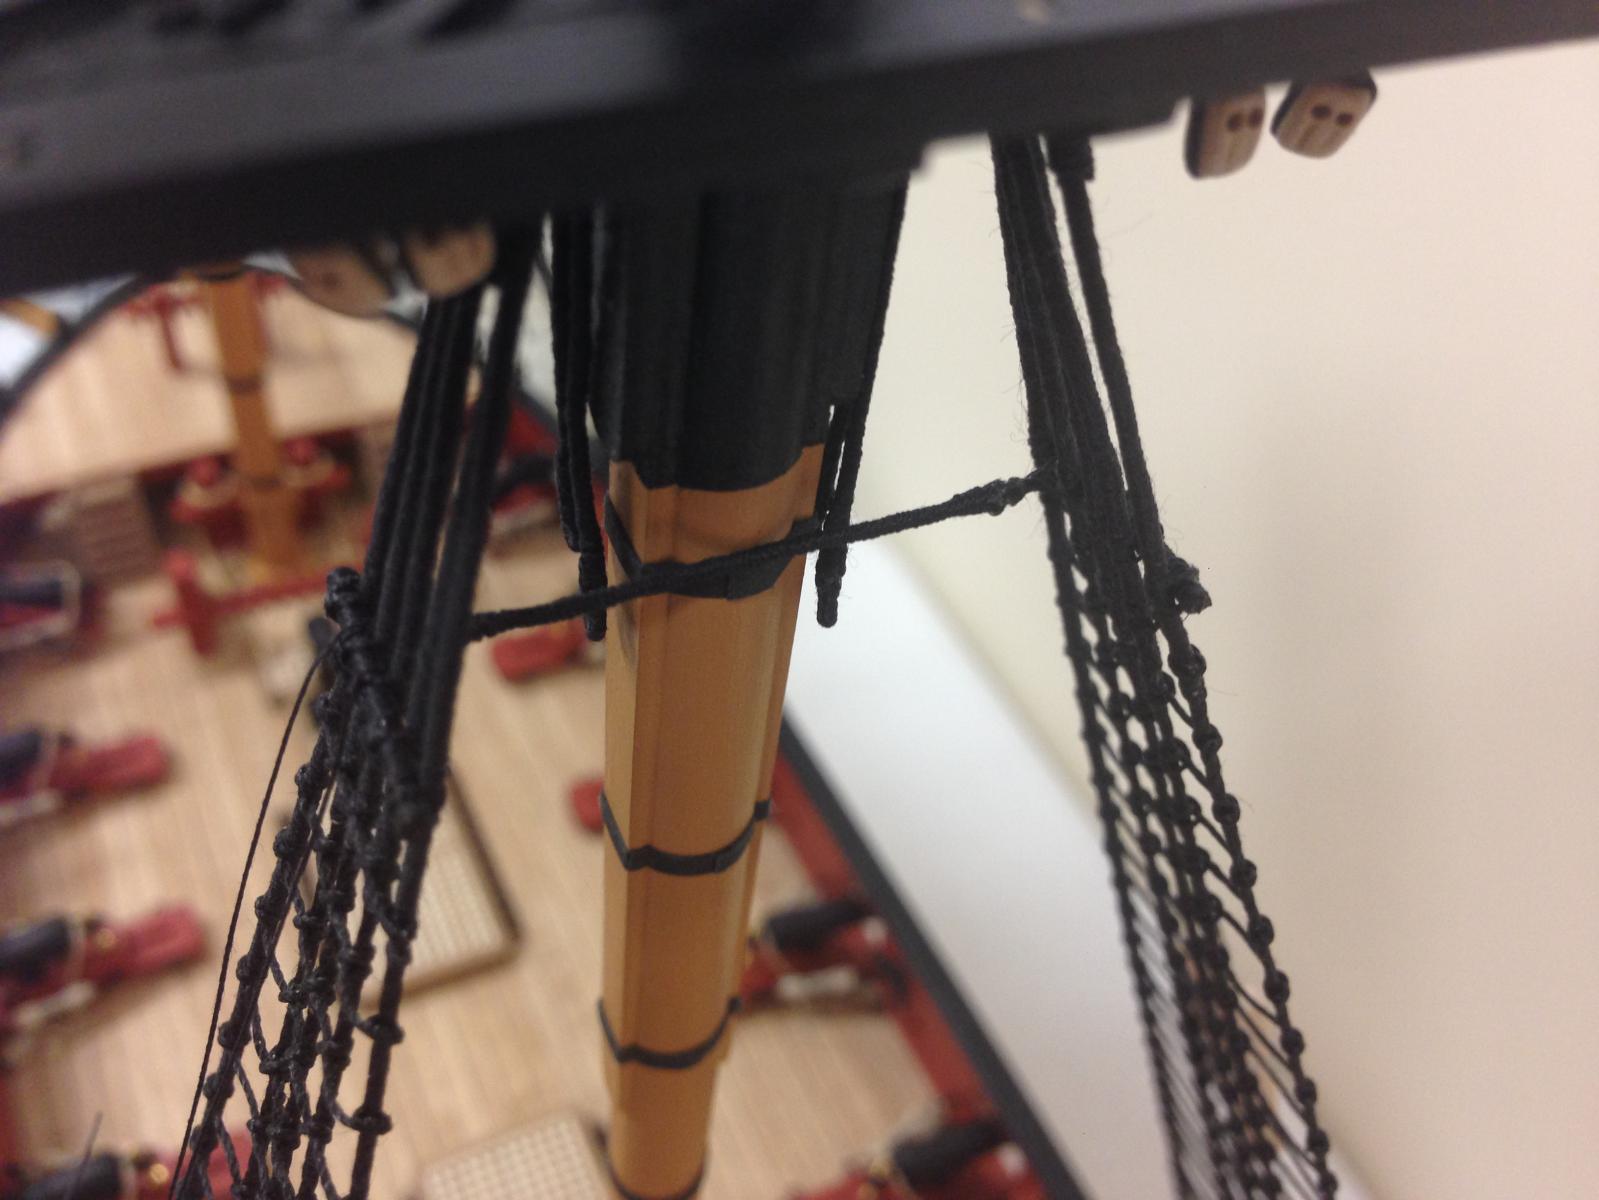
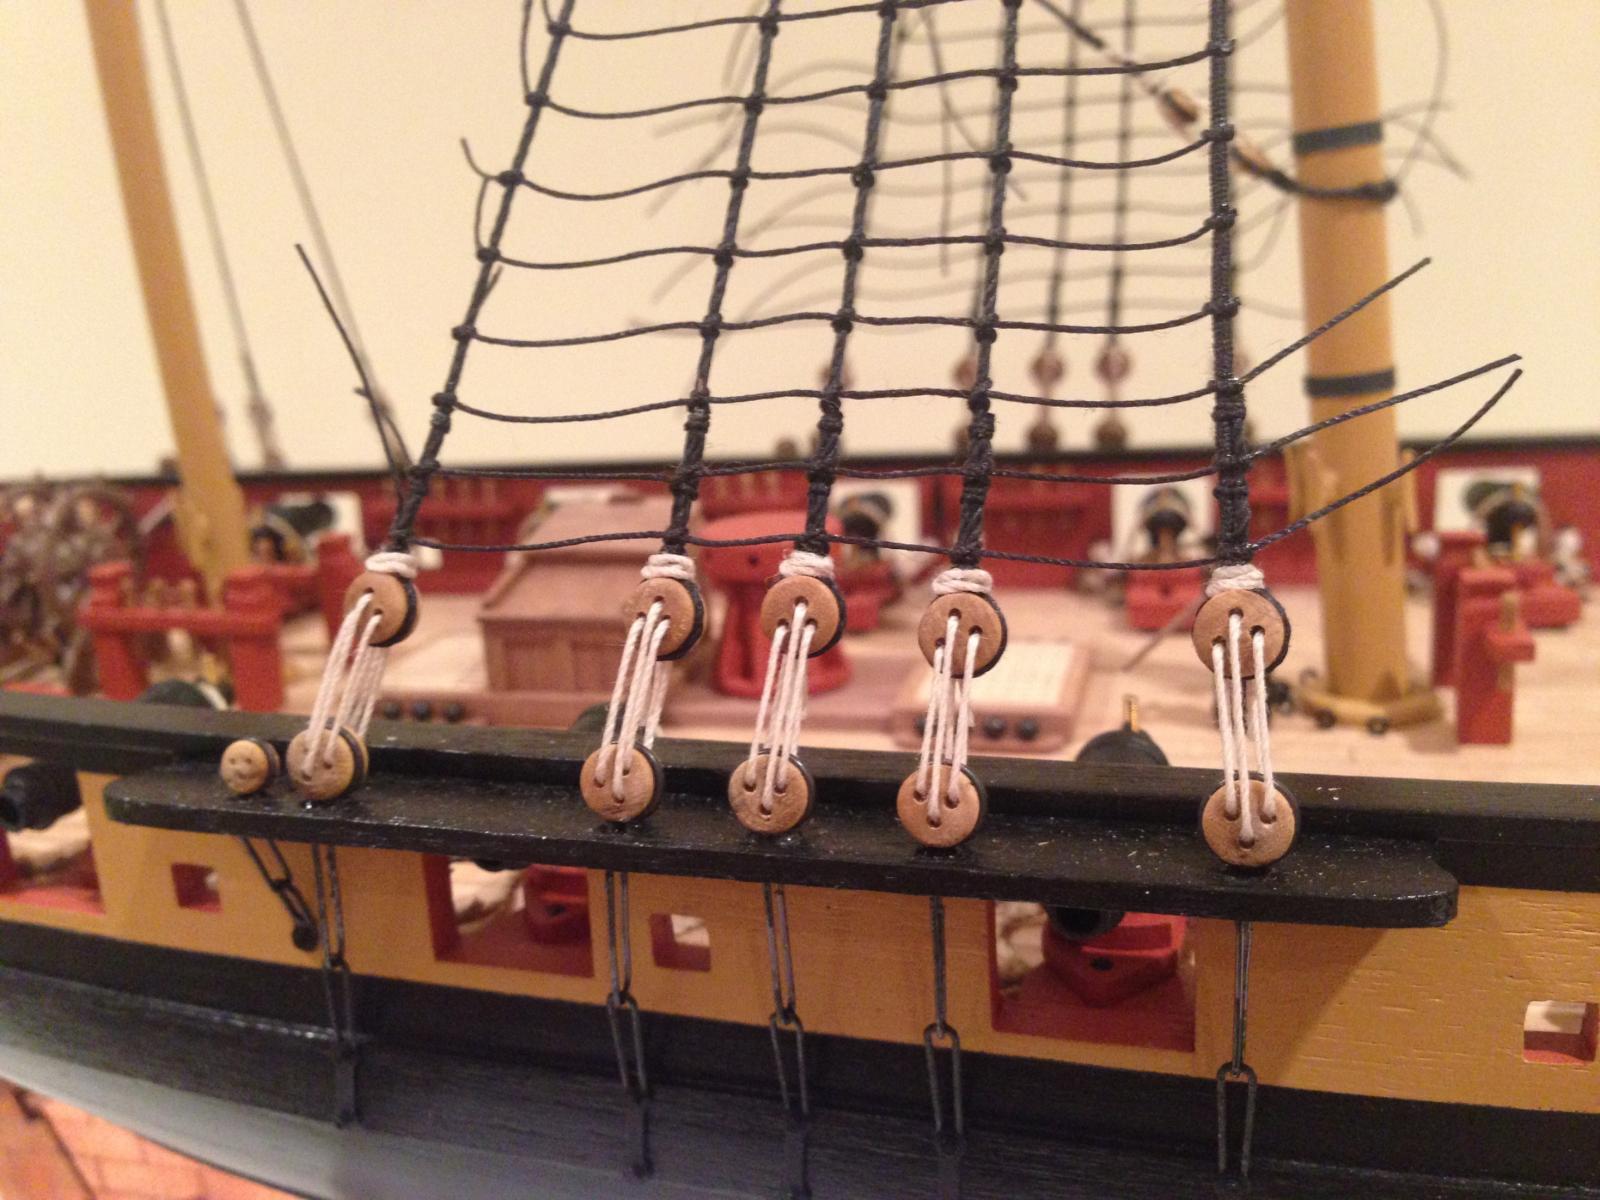
 Hamilton - Cheers mate. I don't have Lees, Lever indicates that when used, the cross catharpins would be installed in addition to the catharpins going athwartship, basically forming an 'X' so that the starboard foremost shroud is catharpined to the aftmost larboard shroud and vice versa. If I ever build HMS Surprise, she will have to have cross-catharpins . I'm growing to love the Lever's Young Sea Officers sheet anchor and am following the order outlined there so far. On your second question, I'm probably going to go with the wire and use epoxy again to secure them, but as usual will reserve final judgement until necessary. Quick additional update on progress...main mast catharpins are all on. Pederson has a nice picture showing that these would have been lashed to the futtock stave with thinner line. Its not really practical at this scale, so I sort of got thesame result by threading the eye with two pieces of thread to try and keep the catharpin in line with the shroud. Pretty happy with the way things turned out (and not a pin or rubber band in sight).
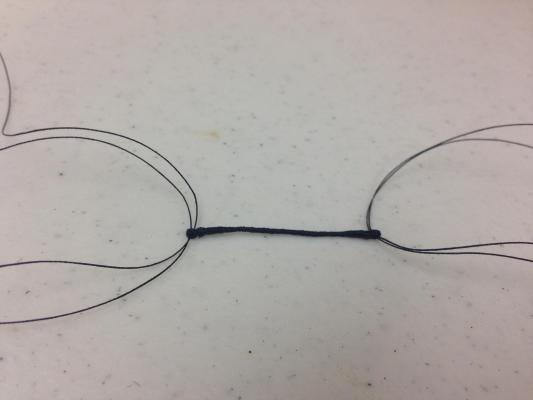

- 800 replies
-
- 15
-

-
- snake
- caldercraft
- (and 1 more)
-
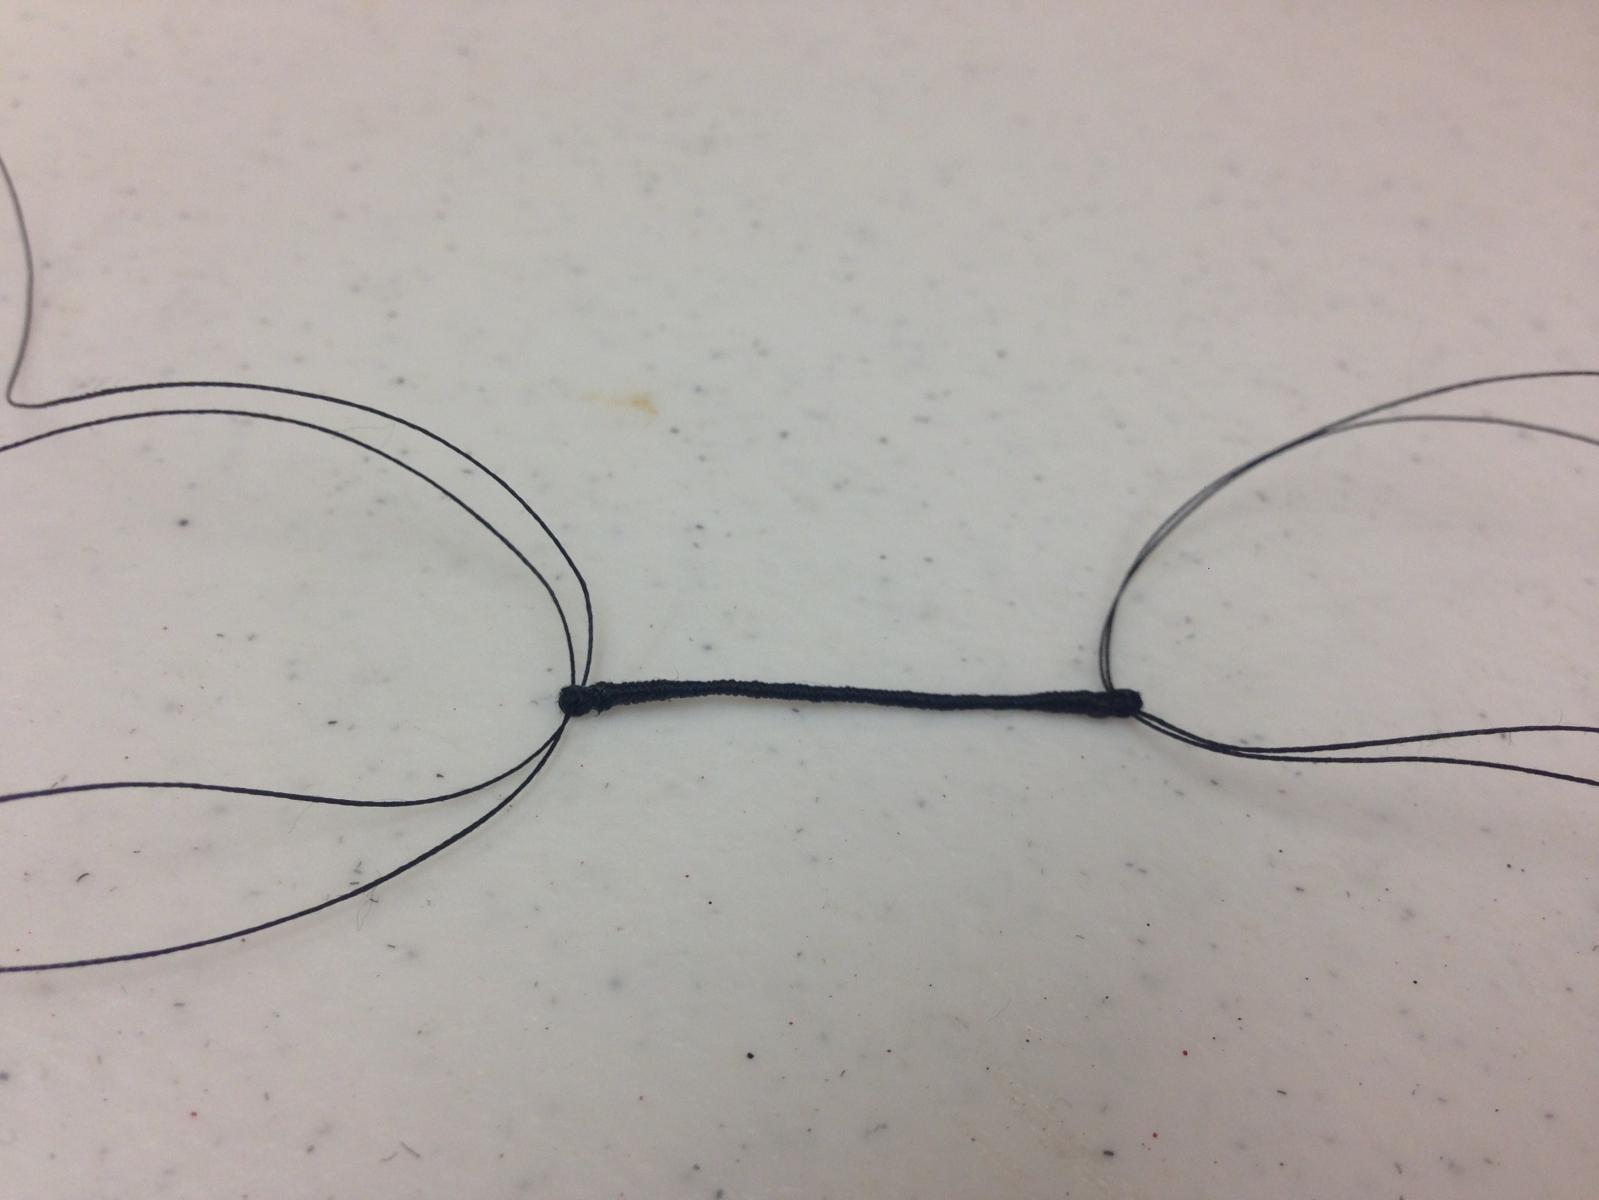
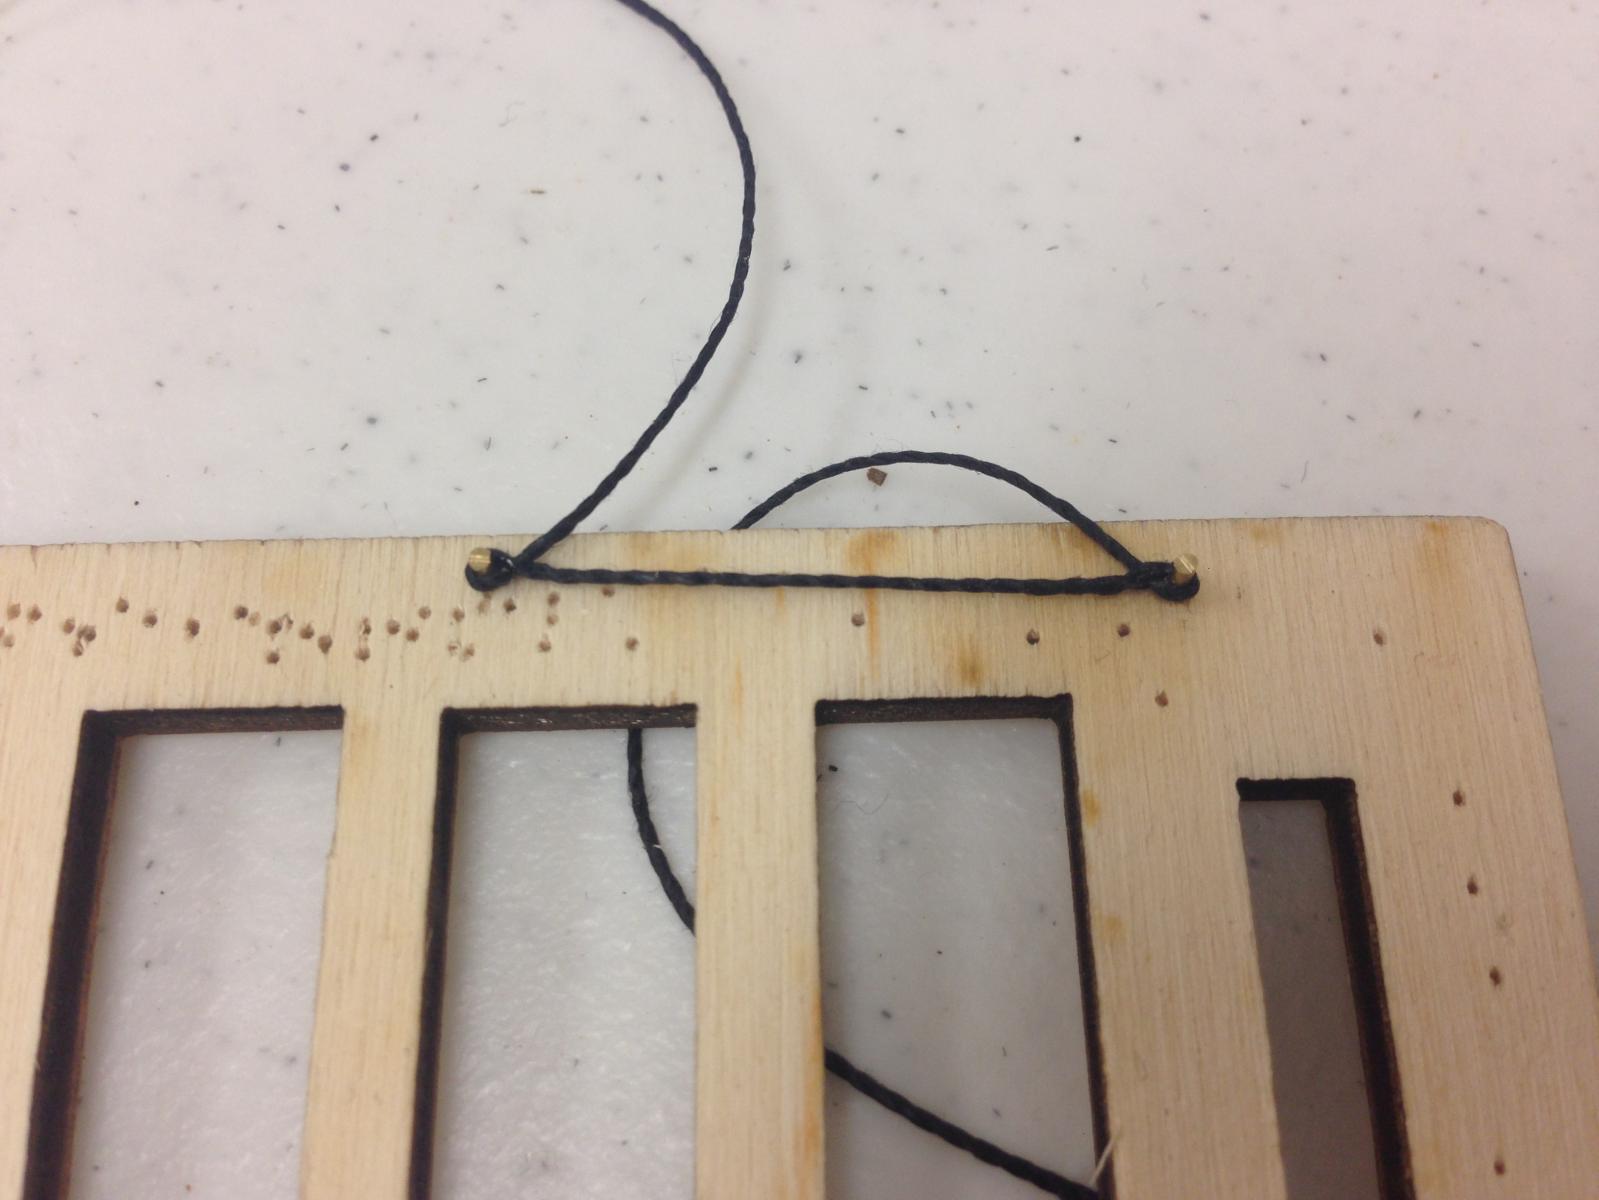
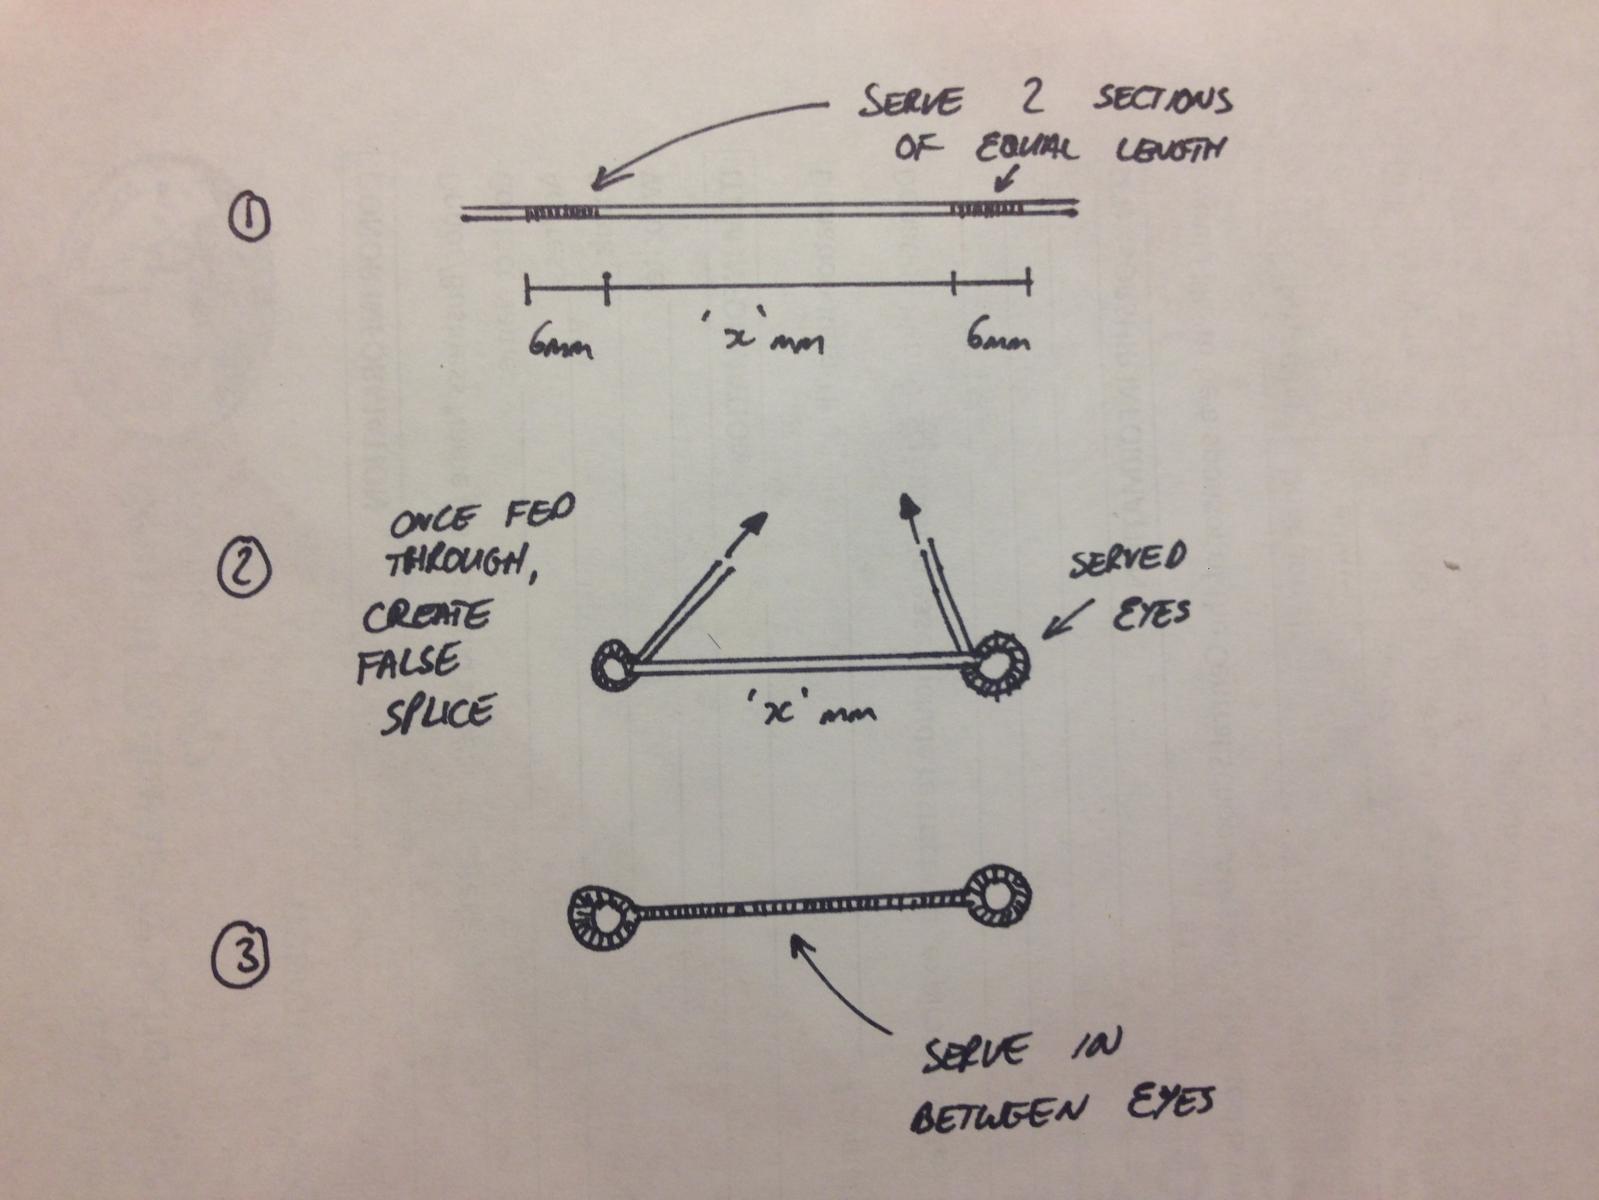
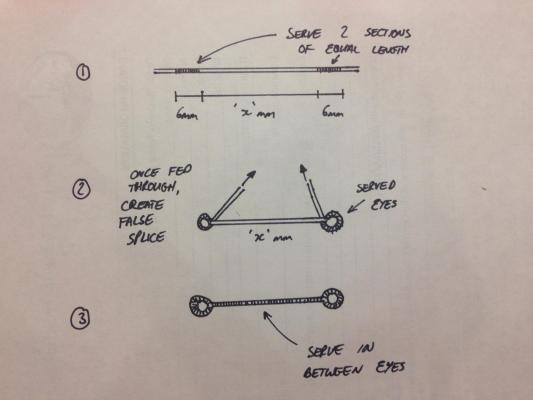
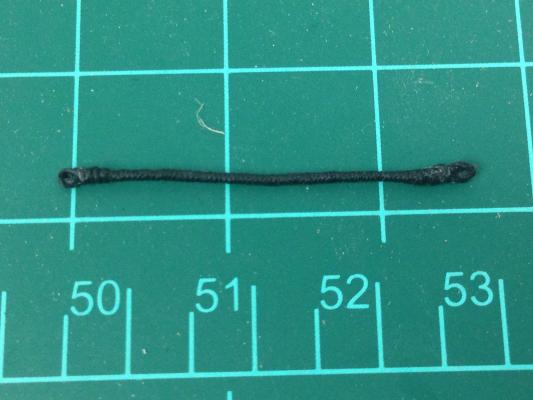
@Nigel - Boy, I hope I don't sound whiney! Unfortunately seeking perfection is in my character, I know I'll never get there but doesn't seem to stop me banging my head sometimes...of course the challenge is part of the fun @Scott - you found my secret! @Jim - Think there are a couple of answers, and I'm sure the serving 'masters' out there could provide more tips as well. For the stays, I created the served eye on one end (per method below which Andy put me on to) and then attached the mouse in what seemed the right spot. The serving then was done in one go starting at the eye toward the mouse, over the mouse, and then terminated a 'suitable' distance - Lever says this discretionary and who am I to argue. As far as the catharpins go, hopefully the following diagram makes sense. Either way, you need to know the dimensions of what you looking to achieve beforehand. One technique that works well is to mock up the element you want to create with light (similar thickness) thread, you can then mark the part that need to be served and go from there. Unfortunately, however well planned, there is always room for discrepancy and there have been plenty of times where the end result is a little to long or short and its back to the start - probably gets better with practice, but seems to be part of the territory. The approach below can probably be applied to any rigging element, just requires planning and forethought. The catharpins were made in same way as the burton pendants. What work for me is to figure out the length I'll need and then use two 'pins' with which to create the eyes the set distance apart to help ensure consistency. Photo at the bottom are the catharpins in an early stage (I didn't bother serving the eyes for these as it they wouldn't be really visibly, this save quite a bit of time and risk of error).

- 800 replies
-
- 4
-
-
- snake
- caldercraft
- (and 1 more)
-
Inspirational work Gil, I wish I had known about MSW when I was still living in Seattle given that there is such a great bunch of modelers in the area - I've been following your Victory for quite some time.
-
Mort - great tip, I didn't know that about the school glue just being diluted PVA - not sure what I thought it was Will be great to meet you. Anyway...Catharpin'ing on.... Catharpins have been something else I've been pondering. The Snake plans just seem horribly inconsistent with other materials (Lever, Pederson etc) so decided to follow those. Lever identifies a number of methods, desperately wanted to go the cross-catharpin route, but Lever seems to indicate that even when this was done, it was in addition to the regular catharpins, not in place of. So, the bog standard approach it will be. Mk1 Catharpin. Of course, catharpins were eye-spliced at either end and served...(has anyone been diagnosed with compulsive 'serving' disorder? ) ...and lashed into place temporarily it seems to work just fine. Although the detail of the eye splice is somewhat lost, it does give a cleaner look (IMHO) than lashing the catharpin around the futtock stave. I was a little relieved to see that the second shroud can be catharpined in without rubbing against the mast as Lever suggest only the foremost shroud was not catharpined in. I feel scale is a little bit of an issue, it would be nice to be doing the same on a larger ship so the imperfections are perhaps a little less noticeable.

- 800 replies
-
- 13
-
-
- snake
- caldercraft
- (and 1 more)
-
Walnut - they do lighten up when they've been sanded in the block tumbler
-
Looking great Eamon, I think the plank tapering Nigel suggests is well worth it, you've done such a grand job already on the top planks. Try to enjoy it, bizarrely I'm looking forward to my next planking challenge, whatever that proves to be As for the rubber bands, down with this sort of thing!
- 1,039 replies
-
- 2
-
-
- ballahoo
- caldercraft
- (and 2 more)
-
Mort - I'm not a member, but I am hoping to attend and was thinking of taking Snake with me to display (more so I can have people critique and offer advice). It would be good to meet some of the MSW folks in person, are you going to be there? On your beeswax question - I do have some, but have avoided using it so far as I'm still treading carefully. Dilute PVA brushed on seems to deal with a lot of the visible fuzziness issues, so I'll probably brush a little of this on at the end of the major stages for the standing rigging. Maybe I'll try the beeswax ont he running rigging.
-
Burton Pendants, Tackle and Falls
Beef Wellington replied to BANYAN's topic in Masting, rigging and sails
Pat, I had the same question and this is how I interpreted the things I saw in various rigging books. In Lever's book, the pendants are identified as having to go on before the shrouds as they are need to tension them. What is probably referenced as being 'removeable' would be any blocks attached to the pendants.
-
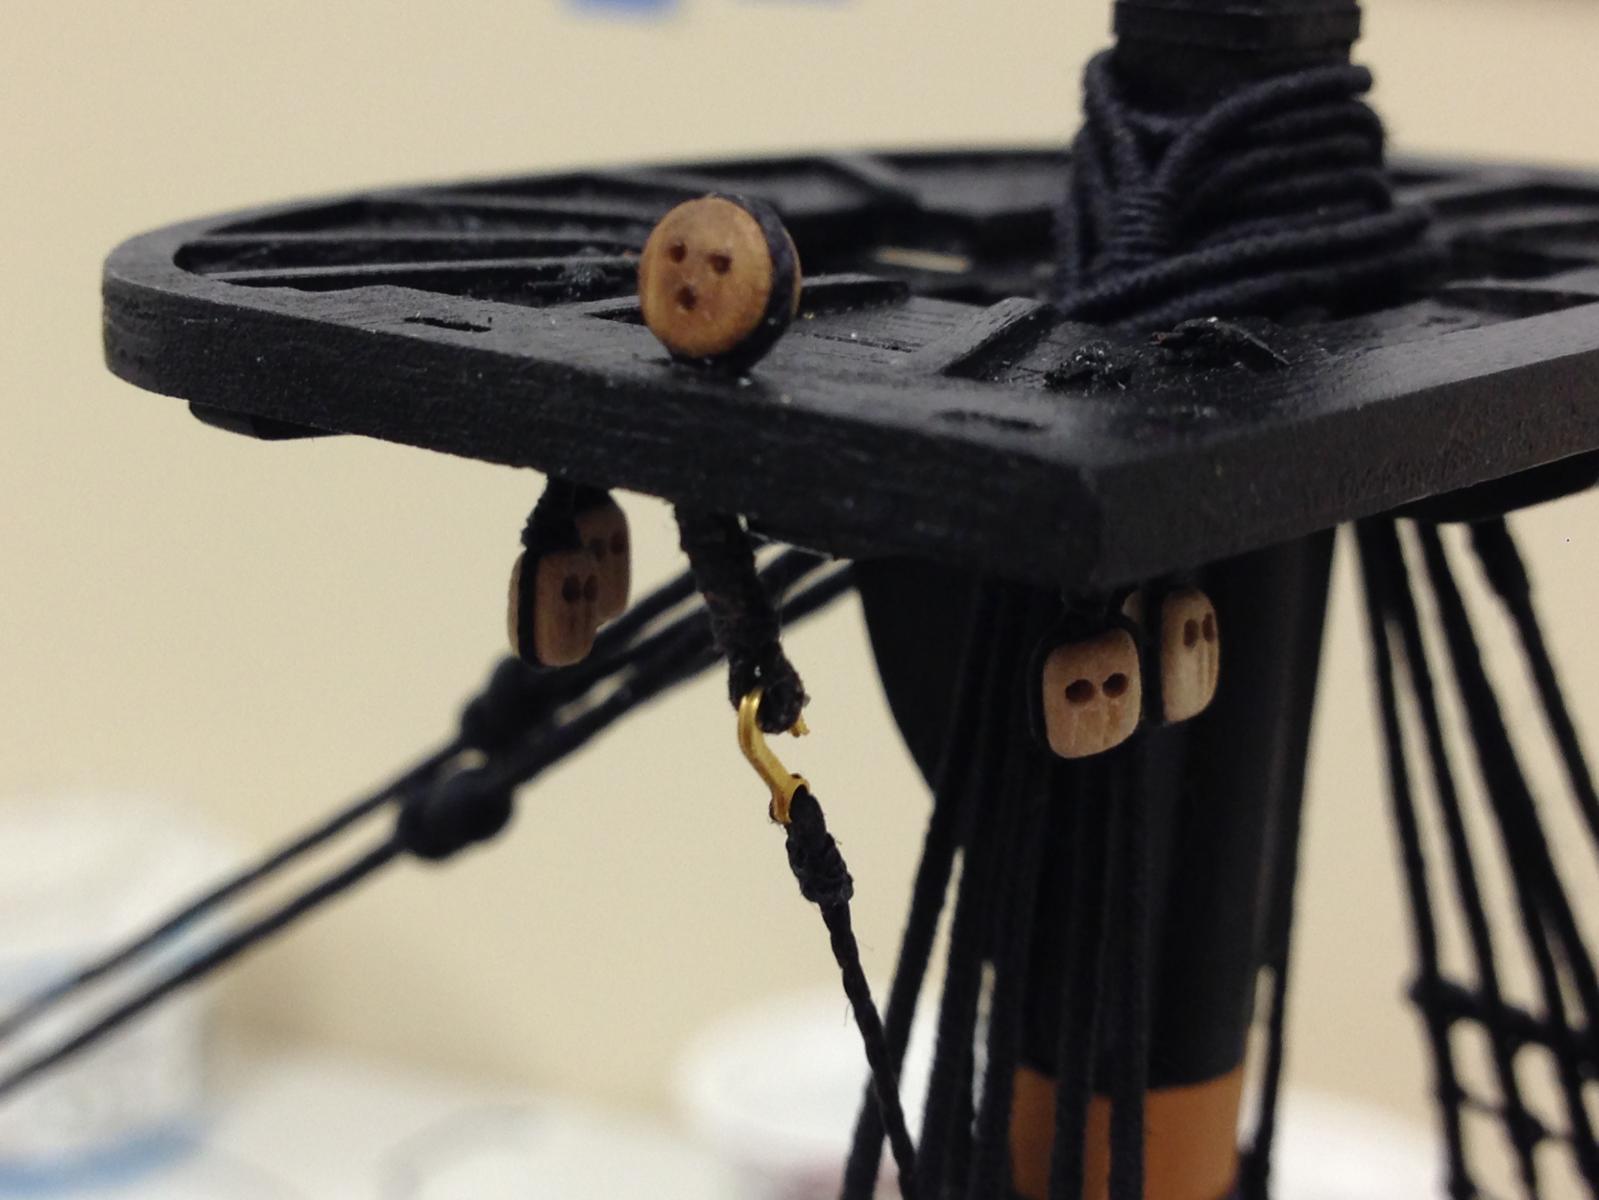
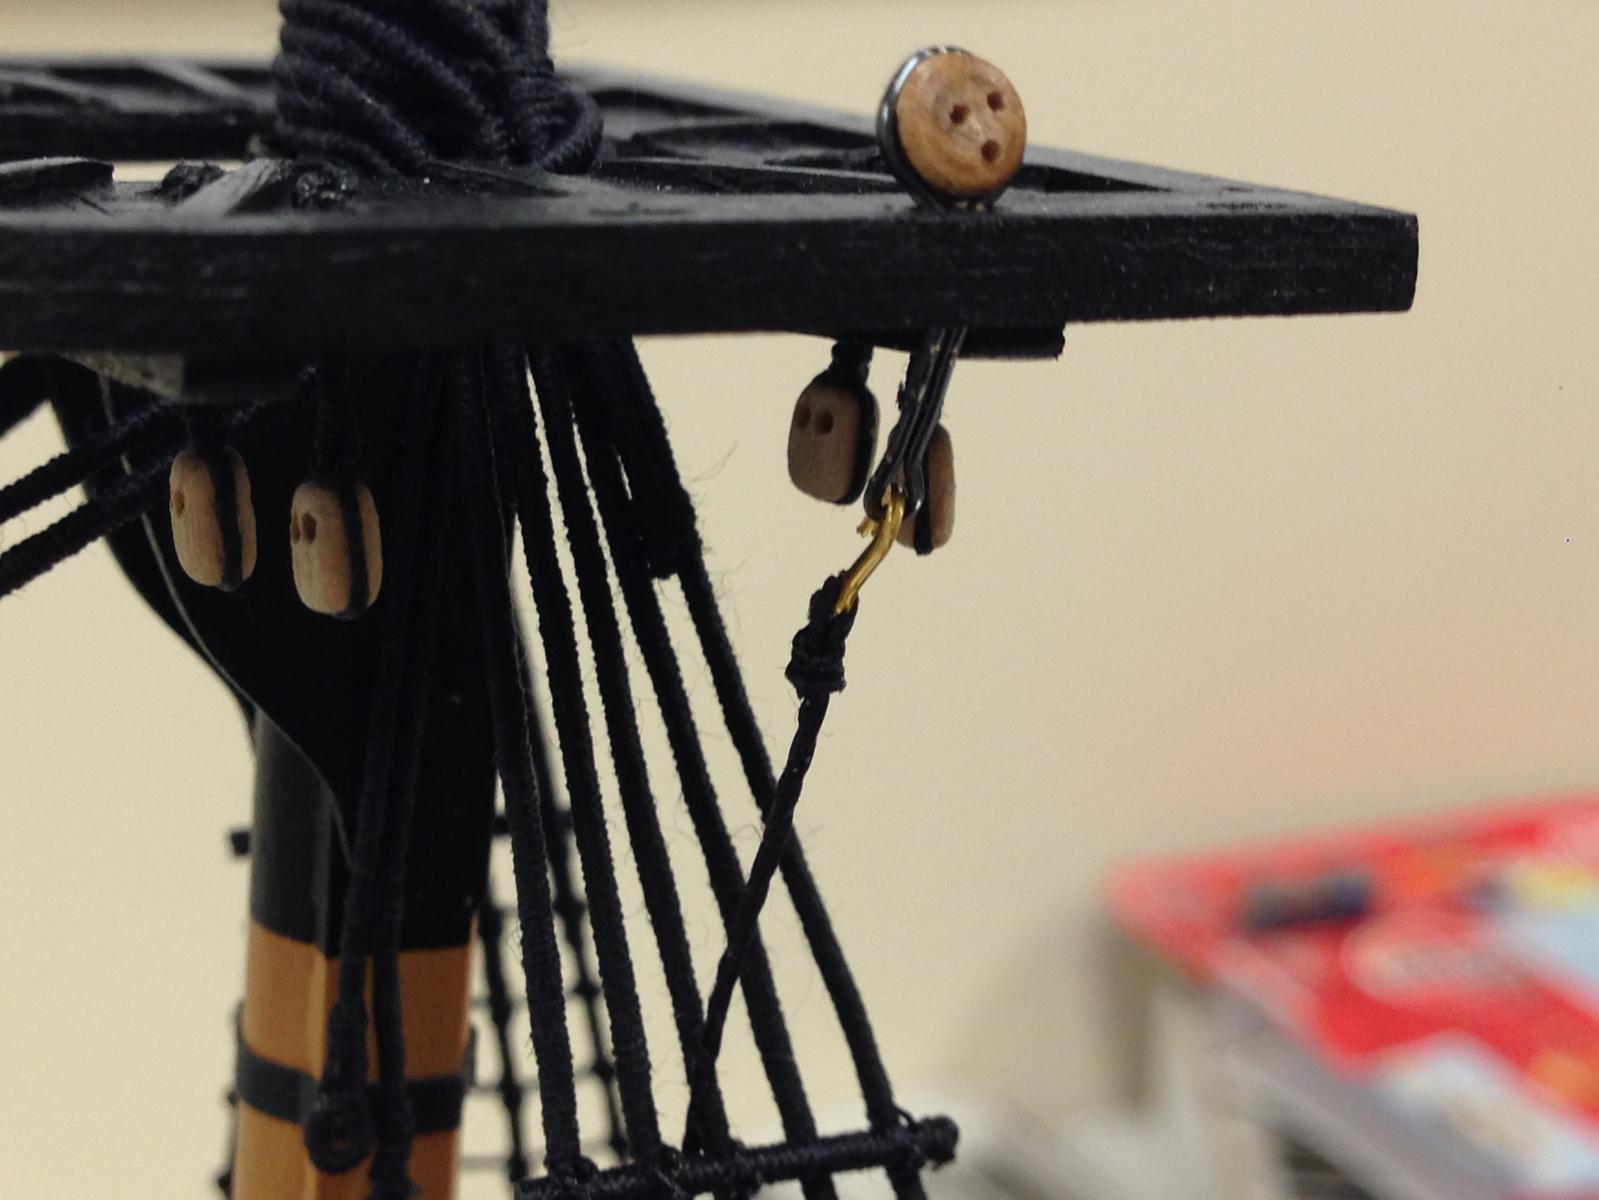
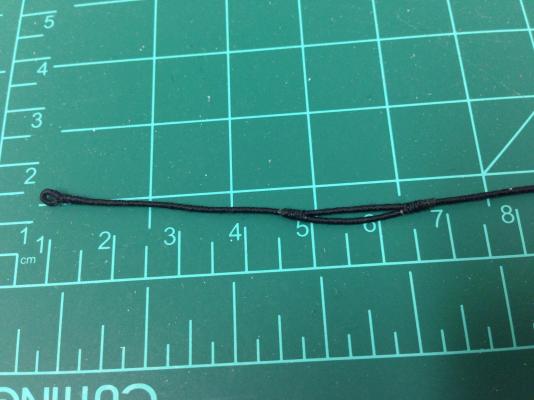
Andy, BE, Scott, Matti, Stergios, Pawel, John - thanks again for the interest and kind words Final stages of the ratlines are on hold for a bit - I'm out of thread and it seems that what I'm looking to replace can't be found anywhere local so had to resort to the internet. Meanwhile, my attention has moved to something that I've been thinking about for a while...the futtock strops. The kit supplies some rather pathetic cut loops, the same as provided for the larger deadeye strops. I can't see how they could possibly work as the bottom doesn't even clear the thickness of the top. I'd also like to to get s slightly more authentic look with a hook for the futtock shrouds, which seems to leave two options, make something out of wire, or thread. I tried both. Any other ideas would be welcome. Meanwhile as I ponder, I'll turn to making up the topgallant masts. Wire was easiest to make, but not completely sold on the look Thread took an age, maybe looks a little better, but I'm not sure how sturdy this would be (it broke as I removed it after the photo)


- 800 replies
-
- 7
-
-
- snake
- caldercraft
- (and 1 more)
-
Making hooks with the 2mm photo etch "eyebolts" definitely gives a smaller hook (its what I used) than with the 3mm wire kit supplied ones - they come in sets of 250 from CMB.
- 1,144 replies
-
- 1
-
-
- snake
- caldercraft
- (and 1 more)
-
The same wire cutters used on the other brass wire, you do want to be carefull. Top can then be filed to remove any sharp edges. Hooks are looking good. If you haven't already, I'd suggest making up one full set and seeing how they look on the carronade. You don't wan't to make all the hooks and then find they're not going to work. Its hard to tell the size, but you do want to be careful to ensure the hooks aren't too long otherwise there won't be any space between the blocks.
- 1,144 replies
-
- 1
-
-
- snake
- caldercraft
- (and 1 more)
-
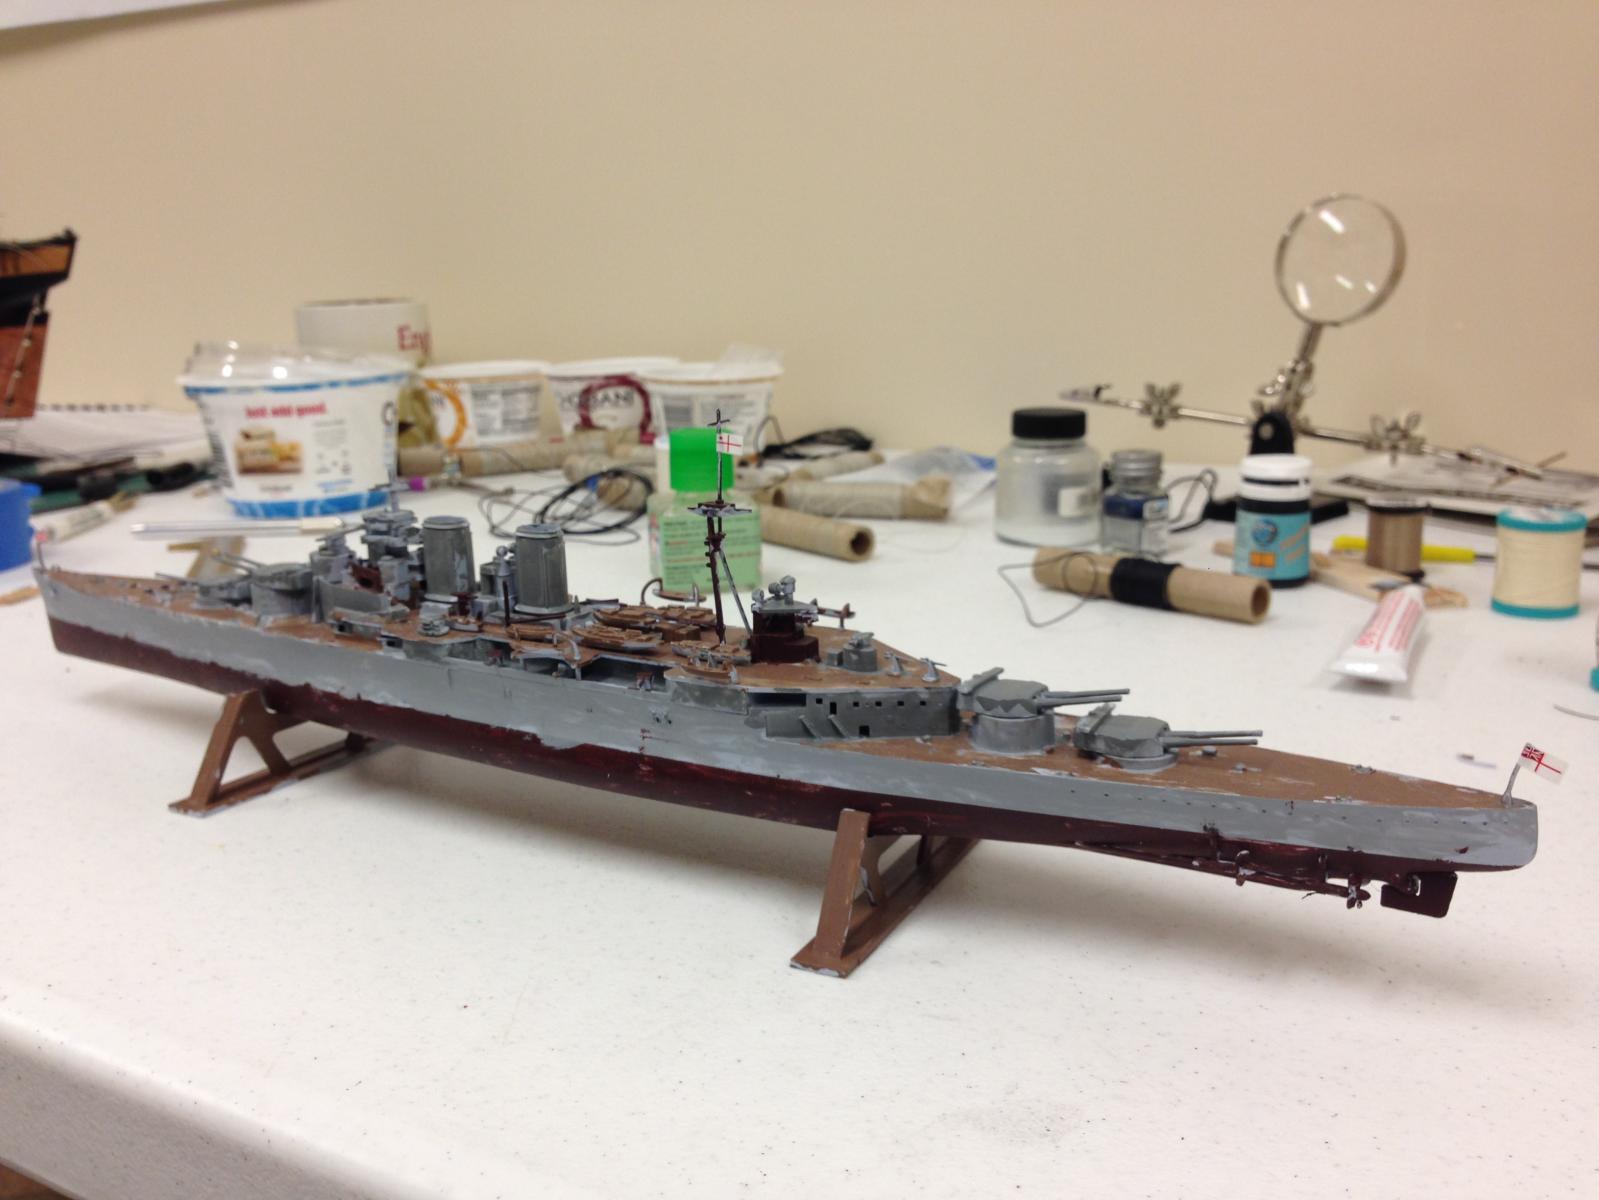
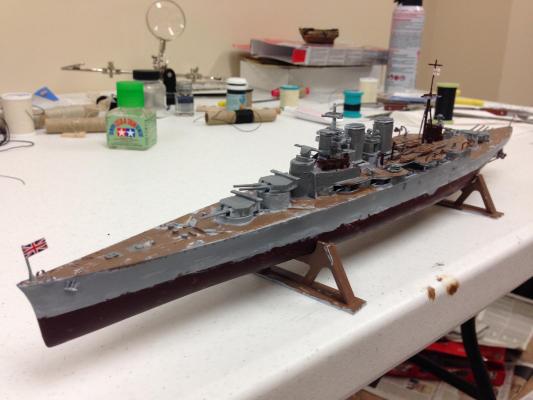
Thanks everyone for the kind words and support. Some of you my remember a project that my son was taking on some (many!) months ago, HMS Hood. Well, it was finally finished recently and just getting round to posting the pictures my son has been wanting to. Although recently launched, she has already sustained some battle damage (as would be expected in a 7yr olds bedroom) and undergone a major overhaul. I'm hoping to get down the New London CT model show with Snake in April, and my son is wanting to attend with me and display her, so some of you may be lucky enough to see this masterpiece in person Next on the blocks is HMS Victory which hes already started (a starter kit he picked up on our visit to Victory the last summer), you can get some tantalizing glimpses in the background of the second photo)

- 800 replies
-
- 5
-
-
- snake
- caldercraft
- (and 1 more)
-
I used a "block tumbler" to round off the edges of the 3mm blocks, it rounds off the hard edges.
-
Very nice planking Sjors. Looking at your first picture it looks like you have cut a rabbet but its not clear, if so how did you cut it? I had started my Snake before I found this site and didn't realize you needed to do this....next time though I will.
- 1,616 replies
-
- 1
-
-
- caldercraft
- agamemnon
- (and 1 more)
-
Thanks Bill, the 'light wetting and sanding' seems very much more consistent. Thanks for the additional background.
-
Hi Bill - I had never ever heard of this before, would you be able to point me to where you saw this? Doesn't seem like an intuituve design feature given the deck would often be ogten awash and slippery with no means to drain off the surface water. I had always thought that it was more important to ensure the seaman serving the guns had a sure footing by throwing sand on the decks before action.
-
Looks great Stergios, what was your technique for the serving that you got on the breachrope, it look slike you wrapped thread around some sort of tube and and fed the thicker line through afterwards (?). I have to ask, how did you find the making of the carronades to the cannons, for me, the cannons are a much more fun to put assemble.
- 1,144 replies
-
- 1
-
-
- snake
- caldercraft
- (and 1 more)
-
Stergios, don't think there is that much to it - assume you are using the same 2mm eyelets. I found that small round nosed pliers are very helpful to get the initial hook bent which is most logical first step, but once you've done that its even possible to fine tune with your fingers. Putting a small bend next to the eye itself makes things look a little more authentic. These can be fiddly to make, and if I had any advice it would be to not be too obsessed with getting them identical, once installed the overall effect hides inconsistencies. Some photos from my log... http://modelshipworld.com/index.php?/topic/509-hms-snake-by-beef-wellington-caldercraft-scale-1-64-first-wooden-ship-build/page-21#entry95439
- 1,144 replies
-
- 2
-
-
- snake
- caldercraft
- (and 1 more)
-
Matti, I've been following for a while but not commenting. Do have to say that those outside shots look absolutely fantastic, great colour choices very skillfully applied. Very well done indeed.
-
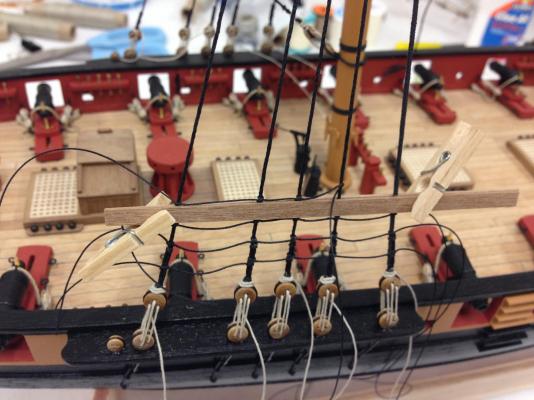
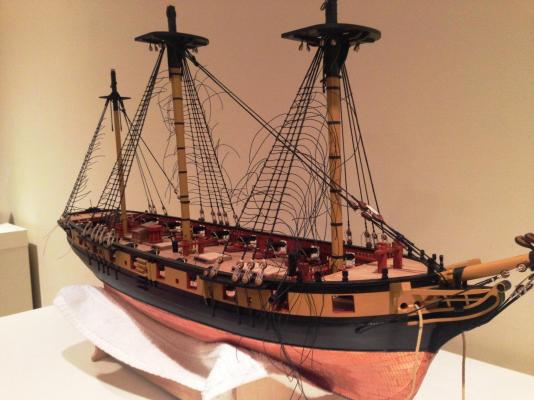
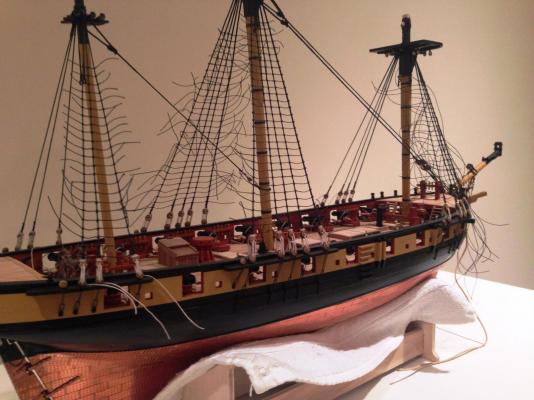
Thanks for all the likes and comments, definitely keeps one going. Just a few progress pics on the ratlines. Judging from the majority of comments, these seem to be one of the most disliked steps and maybe one of the last major hurdles for a first build (after planking, coppering, rigging carronades). All said, I'm pleasantly surprised and actually finding this a quite enjoyable. But lets be clear, my results are far from perfect, but passable I think. Obviously work still to do. Although natural line seems to be in vogue, found this a little distracting so went with black glacee thread close to the needed dimension. Overall, pretty happy for a first effort. Lessons learned for next time: Masts and shrouds should be built and mocked up prior to identifying the line of the chains. Not too noticeable, but my 'rough and ready' method didn't take account of the actual lie of the shrouds over the tops and resulted in some of the chains not lining up as well as could be with final shroud placement I hate to blame materials, but I suspect that aftermarket ropes would result in big visual improvements and build enjoyment vs the standard supplied stuff which never seems consistent in size, shape or 'roughness'. My mind is absolutely made up that additional cost is probably worth it. The tops and the channels are not parallel, although it looks best (IMHO) if the ratlines are parallel to the top and the channel where they meet, its pretty simple to slightly adjust the ratlines to achieve this in between. 4mm spare walnut strips were used to 'clamp' the shrouds and provide the correct spacing (found that sitting these on top of the knots below and tying next set on top resulted in the almost exact spacing needed. This technique helped a lot! Overhand knots were used on first and final shroud as these seemed least bulky, I just couldn't get the cow hitch to work well for me, maybe next time...Snakes's channels are mounted very high so a ratline is needed right on top of the deadeyes. This means that deadeye lashings make most sense 'sitting' on top of the deadeyes as I've seen in a few photos of the real thing (not prettily lashed to the shroud). I also wanted to try and get a little natural sag into these, results are proving to be mixed, but adjusting is easy once in place to try to get close to desired look. And the current state...quite the mess with all the untrimmed ends

- 800 replies
-
- 18
-
-
- snake
- caldercraft
- (and 1 more)
-
Looking good Sjors - how did you do the inner planking, did you glue the strips together off the model and then install or did you glue one on at a time? You've got a nice smooth surface. Also, did you find you needed to bevel the interior frame surfaces so they sit properly? Sorry for so many questions!
-
Hi Eamon - I'm sure you'll fix the mix-up, after seeing someone make a similar mistake on the old site I was especially conscious of this (think they got the decking strips mixed up). Anyhoo - wanted to ask you how you were cutting your planks around the gunport, are you cutting it exactly (if so, would love to know your trick) or keeping a small overlap to finish back later - I found this the very devil to do with the walnut seemingly splitting all the time. Love the pins and clamps by the way...maybe some more photos from the stern?
- 1,039 replies
-
- 1
-
-
- ballahoo
- caldercraft
- (and 2 more)