HOLIDAY DONATION DRIVE - SUPPORT MSW - DO YOUR PART TO KEEP THIS GREAT FORUM GOING! (Only 72 donations so far out of 49,000 members - Can we at least get 100? C'mon guys!)
×


Beef Wellington
-
Posts
2,249 -
Joined
-
Last visited
Content Type
Profiles
Forums
Gallery
Events
Everything posted by Beef Wellington
-
Kevin, per the rules of the game you have the honour of posting the next ship given you correctly guessed the last one.
-

Cruizer-class Brig-Sloops of the Royal Navy
Beef Wellington replied to molasses's topic in Nautical/Naval History
I don't think there are any rules to the class, HMS Pelorus is a classic example. Initially brig rigged, she was converted to ship rig (a la Snake) in 1826. The pictures below clearly show both fore and aft platforms on her in 1840 (back brig rigged!). Having studied my own build at length during building (!!) the fore and aft platforms seems so be a big improvement (additional clear deck space for and aft) that I can't believe any ship wouldn't add. It would probably make more sense to buy the Snake kit and adjust for the brig rig than vice-versa, but either would work. The head rail detailing is a little different on each kit. -
Eamonn, not sure if you've seen this from BE's excellent Pickle log...very helpful pictures that make it all look very easy and make you wonder why you didn't finish it yesterday ( ). http://modelshipworld.com/index.php?/topic/783-pickle-by-blue-ensign-jotika-164-scale-pob-kit/page-1#entry11901
- 1,039 replies
-
- 2
-

-
- ballahoo
- caldercraft
- (and 2 more)
-
Could the blocks be for some of the back or jib stays? In conjuction with a block attached to the actual stay, the line would have gone through both and then be secured to a belaying pin on an interior bulwark.
-
Mike, will be interested to see how you progress on this Corel kit. My perception has always been that these kits tend not be historically accurate (which may be very unfair) but seems you are walking in with your eyes open and a comprehensive plan. You're doing some great research, looking forward to where you go with this.
-
Pretty sure they were Jim based on pictures I've seen. Also will show up your nice scarf joints better!
- 226 replies
-
- 1
-
-
- ballahoo
- caldercraft
- (and 1 more)
-
Nice ratlines Sjors, quite a few of them! Do you not have catharpins on the San Ildefonso?
-
Stergios - only advice I can offer is to drill a hole that isn't too tight. I didn't have too many problems with the pin breaking off but you're right that they are not strong. I did have one break and its probably inevitable given the soft white metal, and don't think there are too many alternatives. For the one that broke, I drilled a hole and inserted some wire - its probably a better solution all around, but didn't do that unless necessary. Hopefully you'll breath a sigh of relief when the cleats are on and the guns are rigged - definitely a change of scene after that.
- 1,144 replies
-
- 1
-
-
- snake
- caldercraft
- (and 1 more)
-
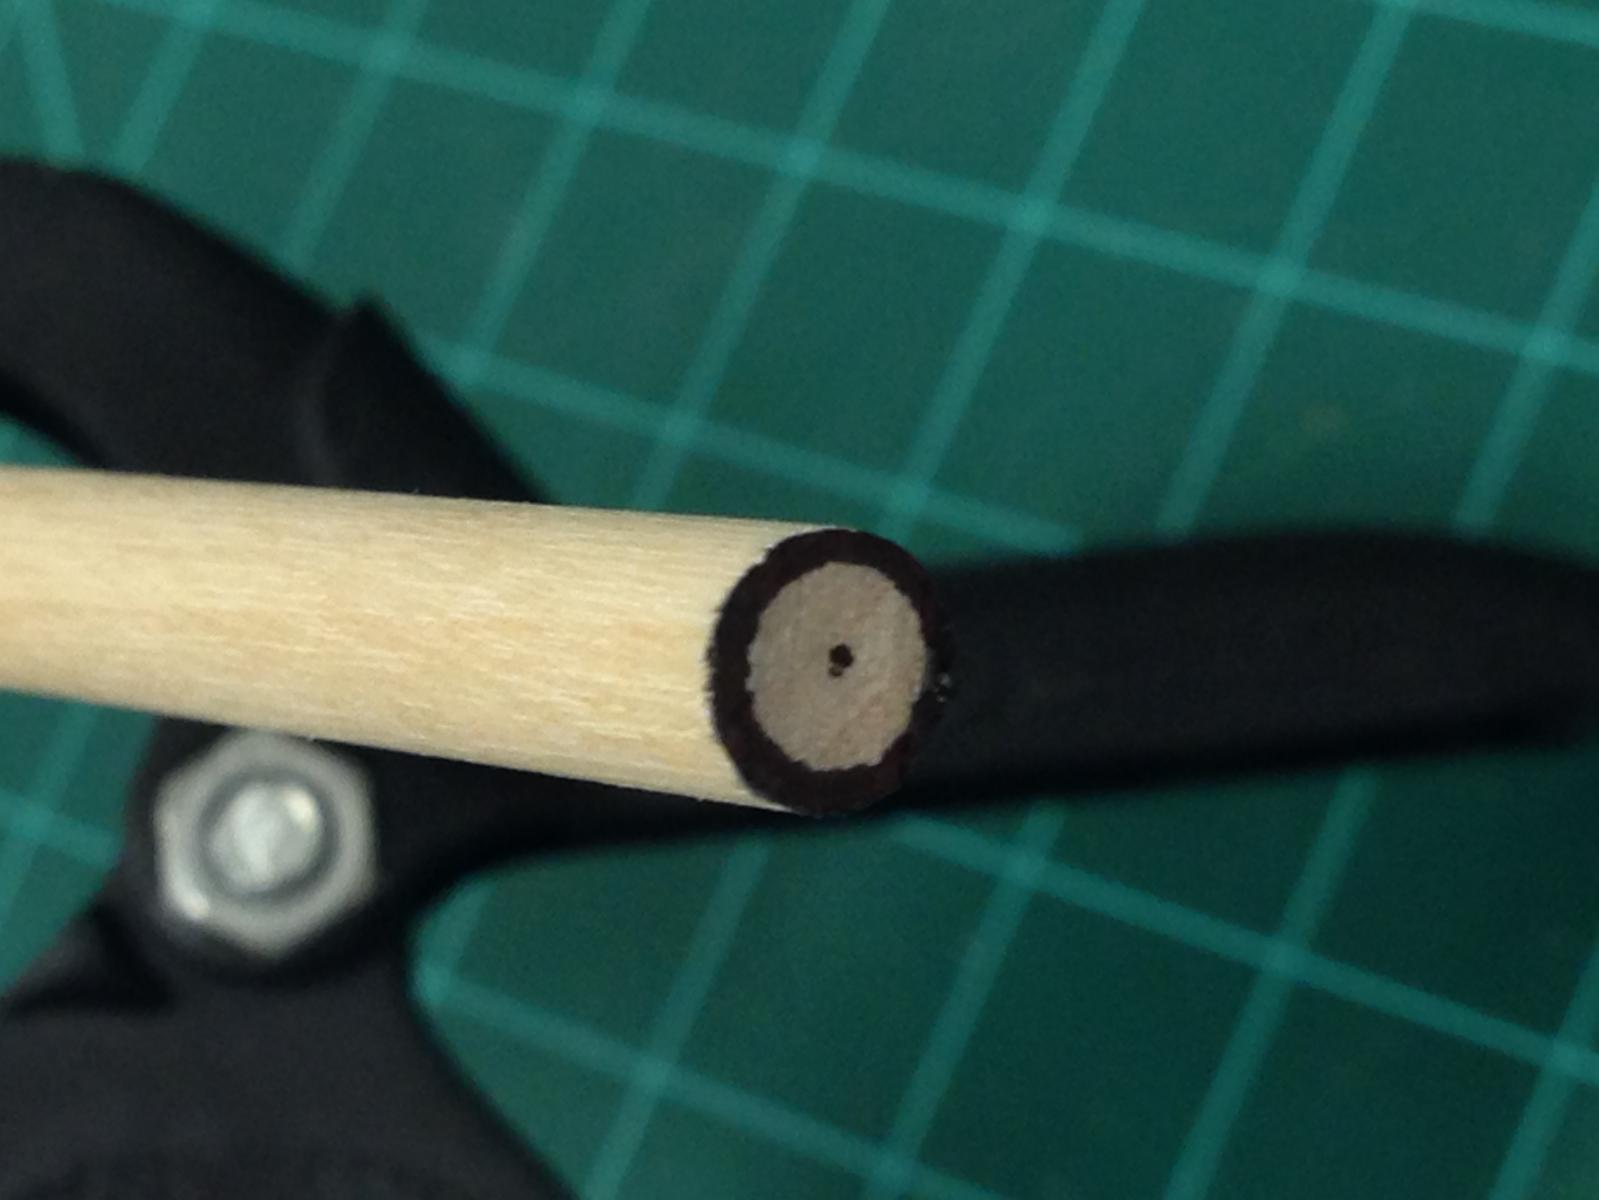
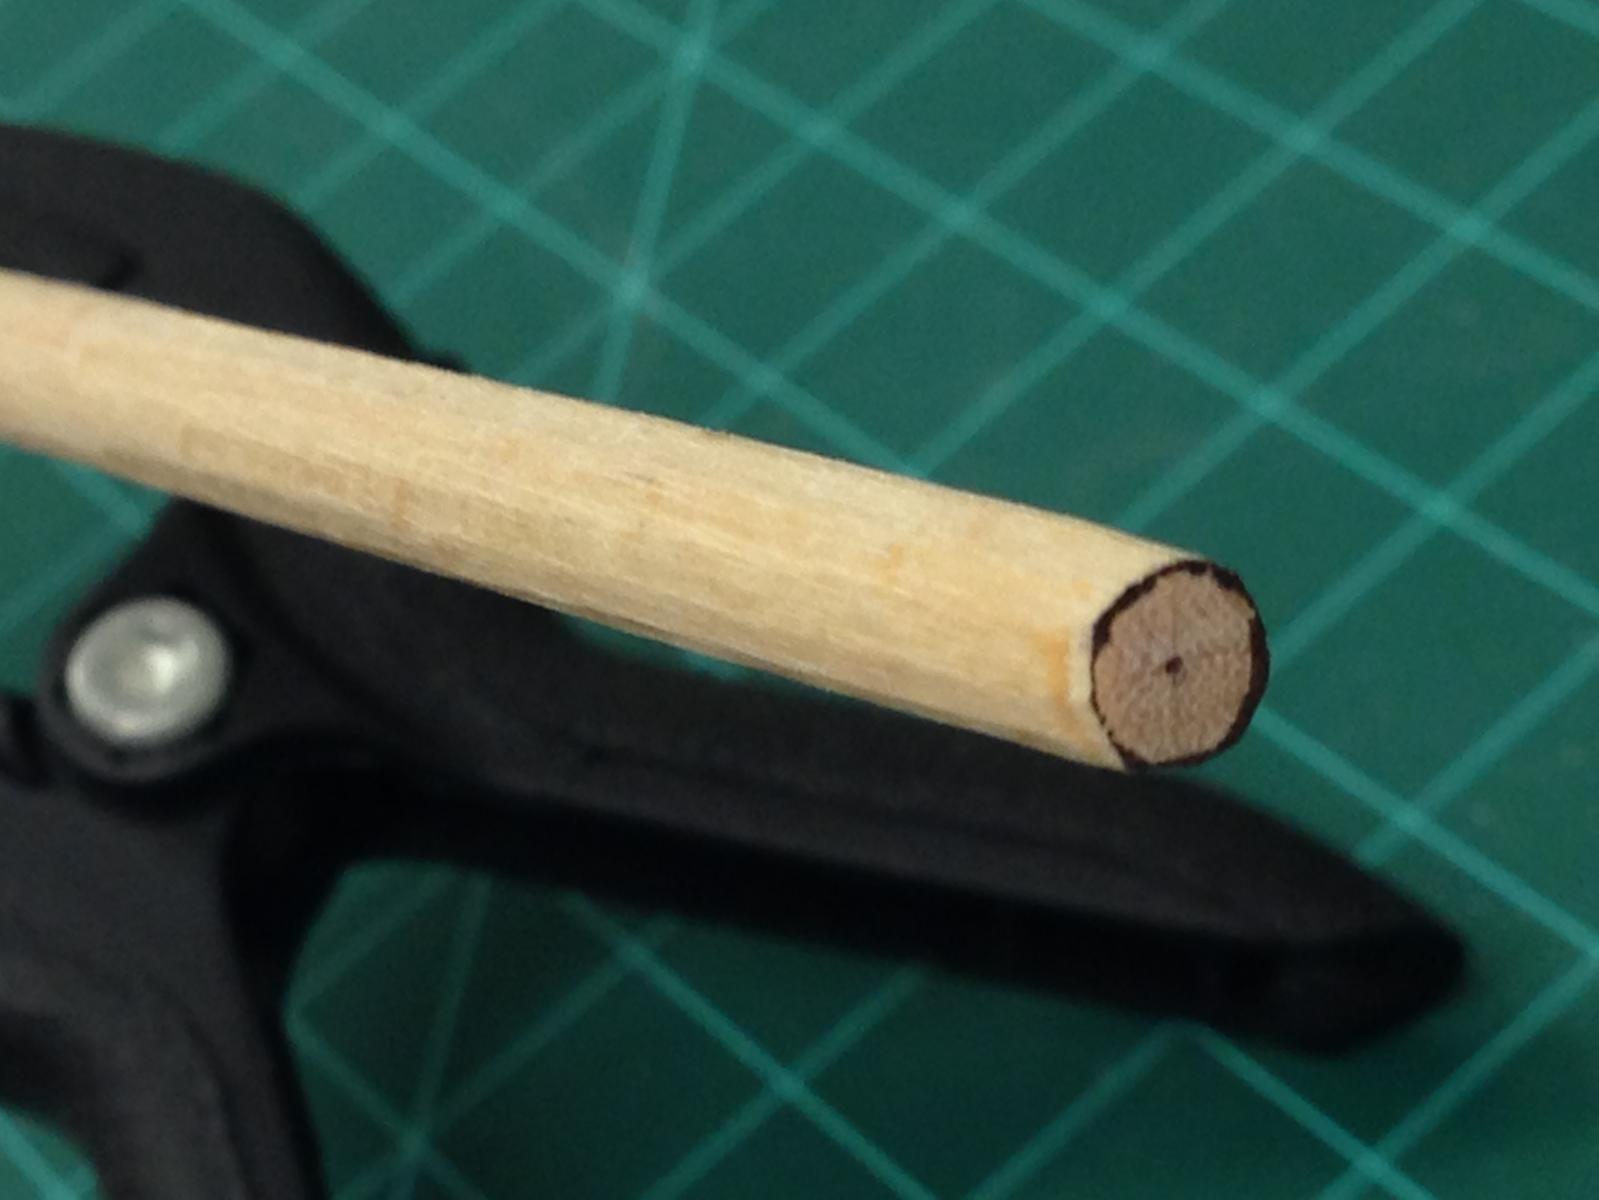
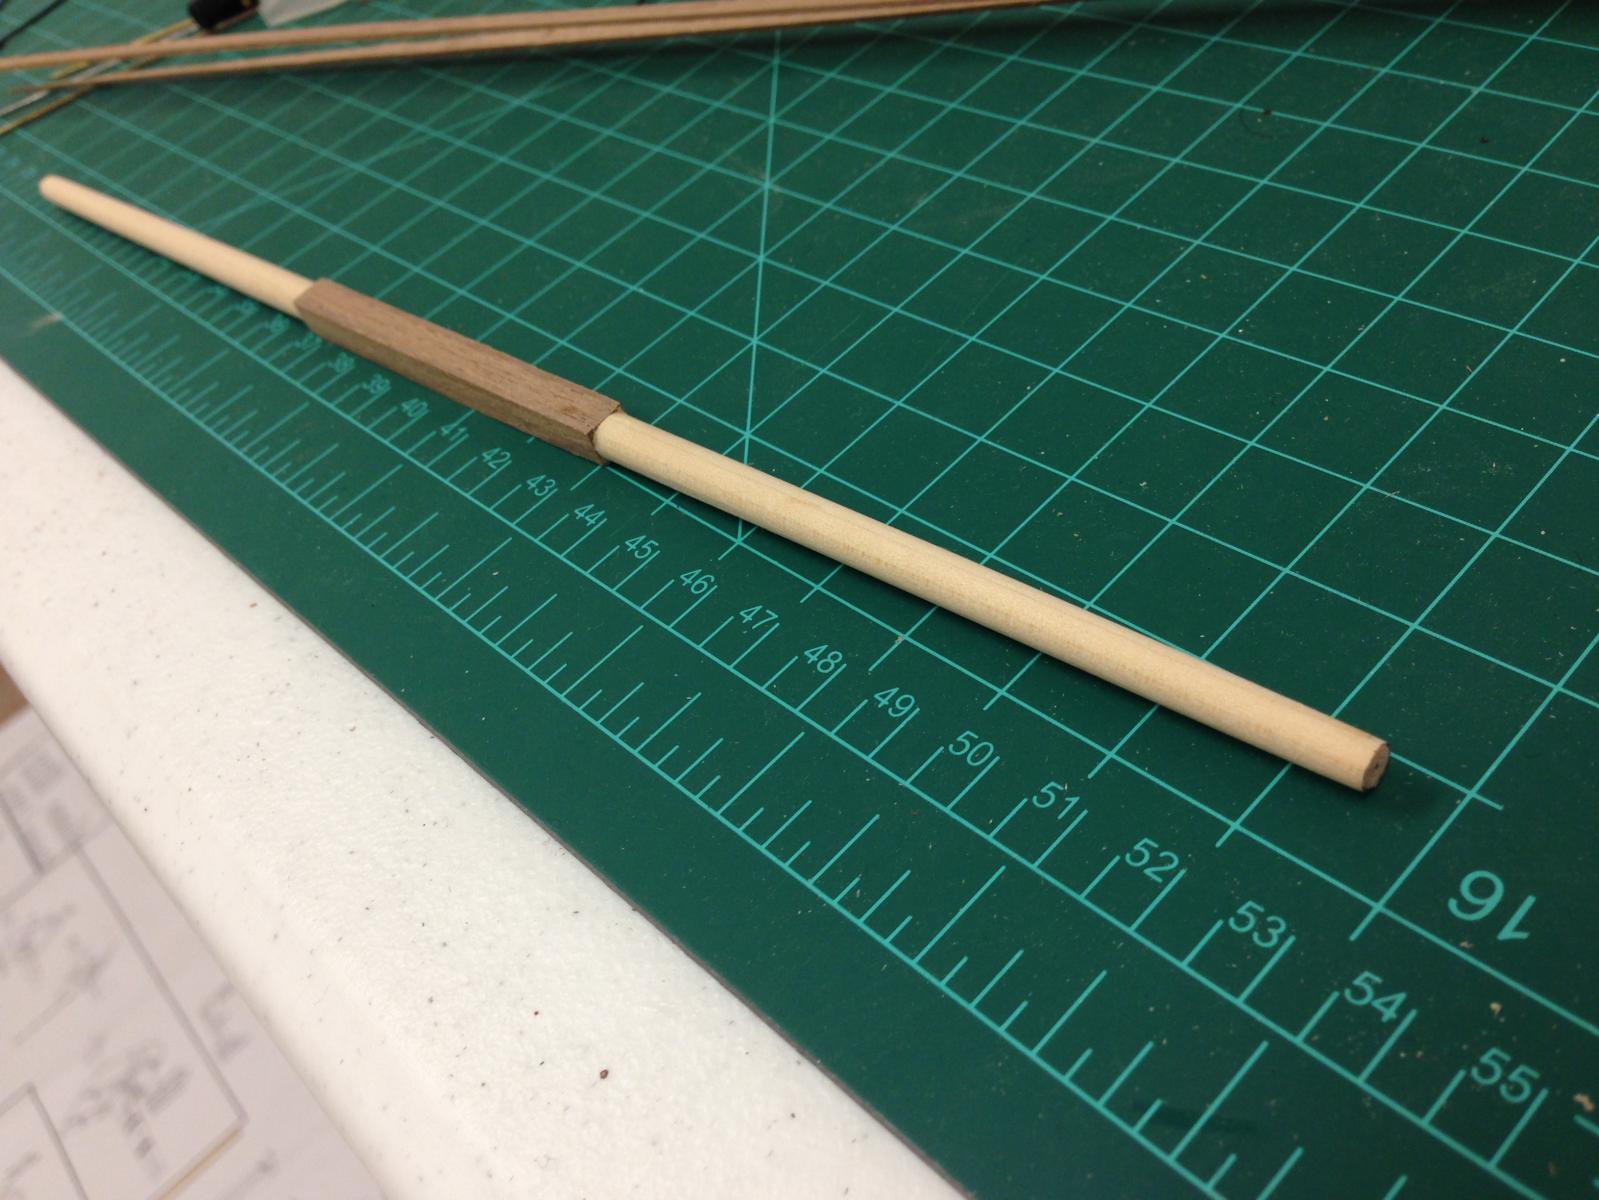
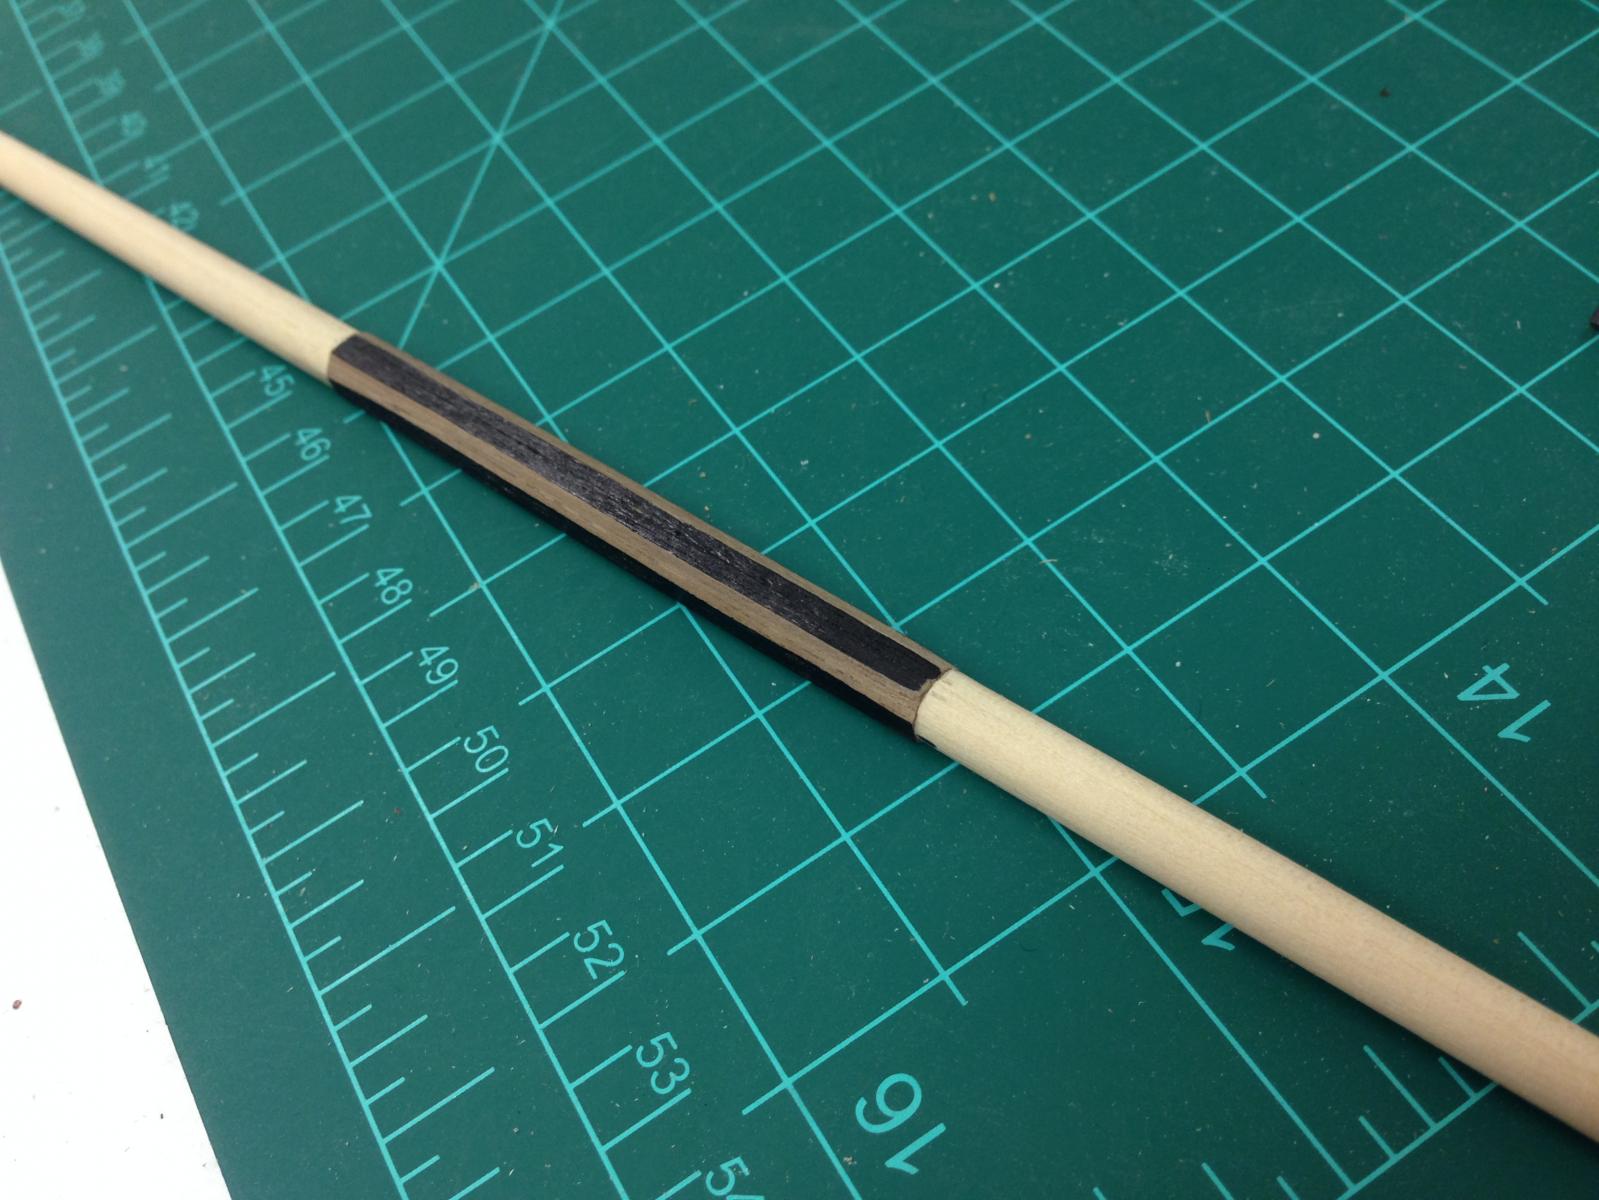
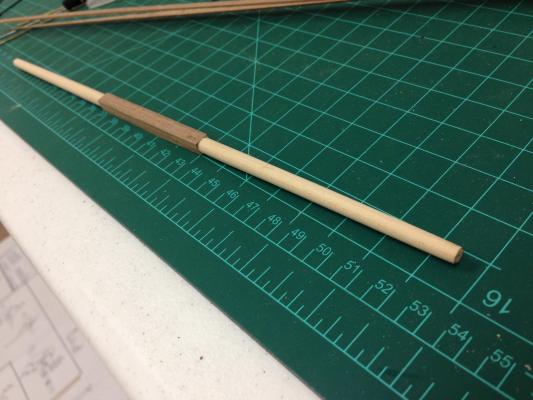
Yards: Feeling my way with my first yards, technique seemed to work well so will continue with others. Used the PE end cap to mark out the size that the end of the yard needs to be reduced to Used a small plane to roughly shape the yard being careful not to take too much off Sanded the shaped yards, and then cut down the central section to be a square profile (close to 1mm max depth) and then built up square section using spare walnut planks. (The instructions call for the central section to be filed into an octagonal shape, however its pretty obvious that its not possible to make an octagon 6mm across from a dowel of 6mm diameter, not quite sure what they were thinking) Filed down the corners to give the appropriate octagonal section needed in the center. I find that using a marker to colour the sides allows the shape to seen much more clearly to allow this to be done more precisely - otherwise its very difficult to see the shape. Paint will cover all this up, think it will be good enough once fine tuned.


- 800 replies
-
- 9
-
-
- snake
- caldercraft
- (and 1 more)
-
My only disappointment is that I haven't seen your RC build log up until now Doris, this is such a different approach. As others have said, simply wonderful and amazing work, your technical skills are masterly, and only surpassed by the harmonious way that you bring everything together to create such a work of art. I'll definitely be watching to see how this progresses in the future.
- 883 replies
-
- 2
-
-
- royal caroline
- ship of the line
- (and 1 more)
-
Jim - Some very nice planking there, especially the stealers, something I want to do better next time around. Are you still going to copper her? Eamonn - don't even try to get in a race with Jim
- 226 replies
-
- 1
-
-
- ballahoo
- caldercraft
- (and 1 more)
-
Jim - You're absolutely correct - the area marked on my plans showing the trusses is a not printed too well and I couldn't make out the 8 & 9, now I know what to look for that they are definitely marked there! Cheers mate.
- 412 replies
-
- 1
-
-
- snake
- caldercraft
- (and 1 more)
-
Jim - backing up a little to the question of main topstay and preventer stay. I believe that the foreyard and mainyard will need to have two trusses rigged, these also go through blocks and need to be secured to 2 mast cleats (these are not numbered on the plans, which suggest that the mast cleats are not needed when in fact they are) - take a look at the lower right diagram on sheet 5. Just wanted to pass this on as this may affect your thinking on where to secure the stays.
-
Isn't that at least 3 things? Looking forward to seeing them in action.
- 1,279 replies
-
- 2
-
-
- agamemnon
- caldercraft
- (and 1 more)
-
Very nice shots Colin, looks fantastic. Where did you find the detail to allow you to replicate the complex planking patterns? I'm sure that was quite the project but well worth it.
-
BE, Kester - thanks, I'll gratefully take that as guidance not to do anything! Sjors - still didn't mind doing the ratlines. With tweezers its pretty easy to get into a rhymn. Next build though I definitely want to use better line for the shrouds (either Morope or Chuck's) Ferit - man, you thrust a dagger into my heart! Some of the clove hitches have proved to be a little 'stubborn' despite repeated retightening/tweaking, especially in very tight areas where the shrouds are only a couple of mm's apart. Luckily they don't look as bad at real scale and I'm happy to move on.
- 800 replies
-
- 4
-
-
- snake
- caldercraft
- (and 1 more)
-
Thats a great technique to use to get the fascia attached off the ship where it must be easier to handle. Does the resin part bend easily enough? The stern is reall coming together now.
-
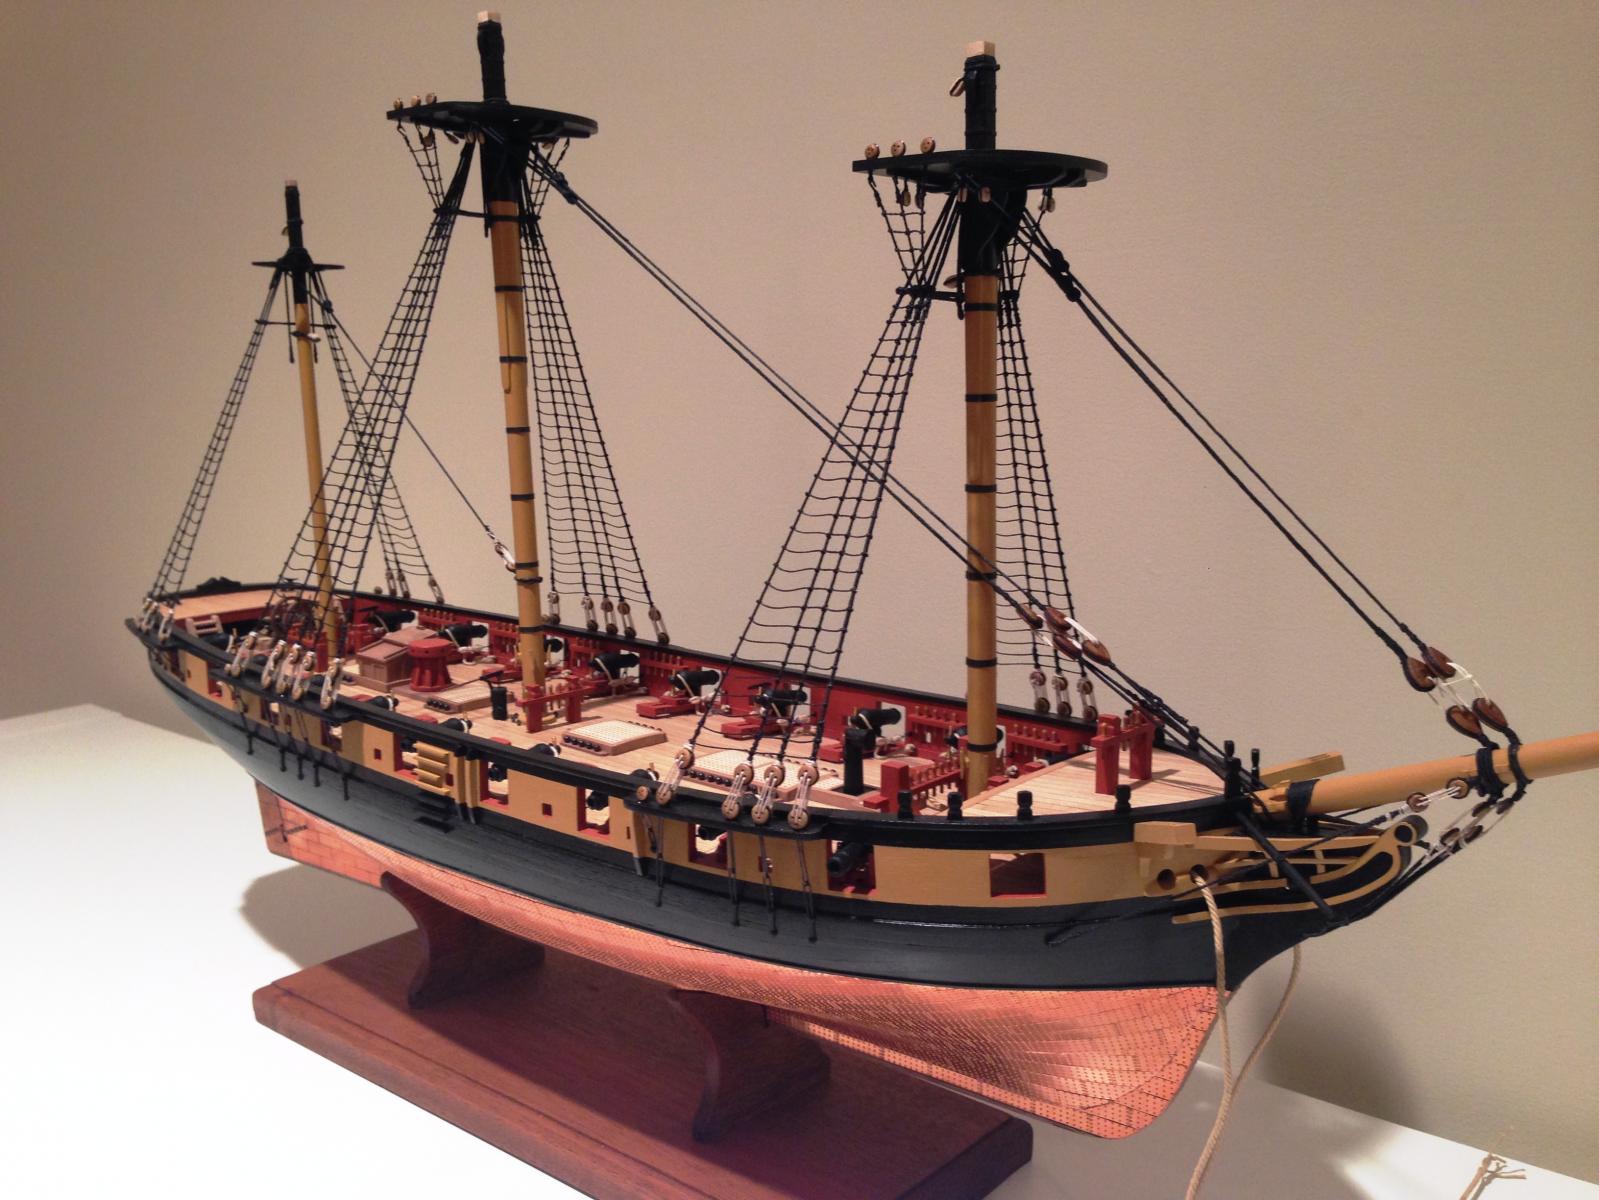
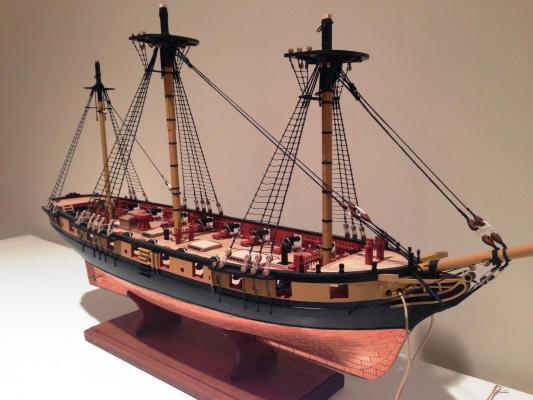
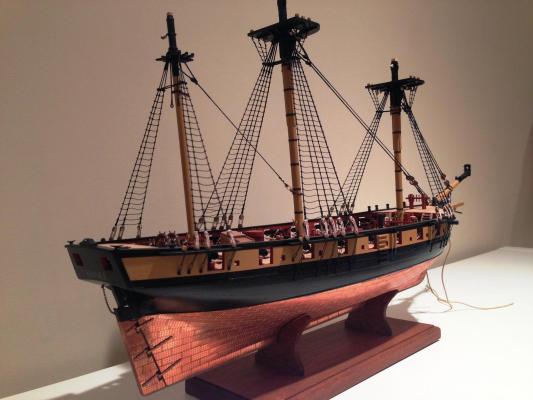
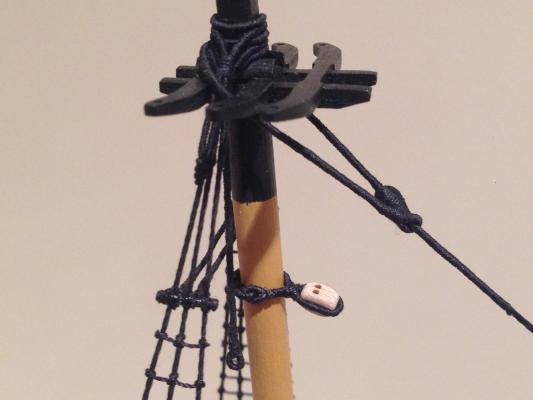
Cheers Mobbsie! To hide the rather slow progress, I'll post a few 'state of the build' pics. Ratlines and futtock shrouds all done, although there are one or two ratlines that I may yet redo. First picture falls into the 'warning by me take' category, I'd completely missed a double block on the mizzen mast which was rather painful to get on with all the shrouds in place. Definitely try to get this one onto the mast before any shrouds. I did have a pleasant experience though, after having somehow made the served length approx 10mm too long even after mocking it up, I couldn't face remaking it. Found that carefully applying some GS Hypo glue around the served line at the appropriate point allowed it to be cut cleanly with no frayed ends! I've also noticed that the tension in the main and preventer stay has been reduced, despite having stretched the line before installing. Not sure whether its necessary to redo the heart lashings to tighten, only potential problem I can foresee will be when the braces get put on they may pull the stays unnaturally out of alignment, but this seems somewhat inevitable anyway so still pondering this one.
- 800 replies
-
- 15
-
-
- snake
- caldercraft
- (and 1 more)
-
I love your jig for the capping squares Nils, very simple but I suspect very effective.
-
Nicely done Jim.
-
Lovely work E&T, will definitely be following your progress.
- 346 replies
-
- 1
-
-
- terror
- polar exploration
- (and 2 more)
-
Jim - I can only offer humble opinions based on my reading of sources. I think the Snake plans are deficient in a number of ways for the standing rigging, the key theme throughout is that the minor standing rigging is shown as having standing lines terminating without any means of adjustment (either with a blocks or simple thimbles and lashing). I'm sure thats to simplify the rigging which seems reasonable, but then I do think this could shown more clearly. Can't remember if you have Petersson, but if you do look at page 61. The stay would go through the block as you describe and with a thimble, this can then be secured to a thimble attached to the collars of the forestay hearts with a simple lashing. Thats at least is how I was planning to do it.
- 412 replies
-
- 1
-
-
- snake
- caldercraft
- (and 1 more)
-
I've been staring at the same thing as well Jim. The pins are taken up, so I think it would be appropriate to secure around the fore mast pin rail itself between the pins. Would be done in the same way as the lines in the above picture for 23, 7 & 26 attaching to the forebits which don't have any pins either (not quite sure how those will work exactly!). Petersson seems to reflect this also on page 17 of his book.
-
Didn't want to give the impression its not appropriate, basically I just don't know . My guess would be that its a basic construction principle, but I'm sure others could comment more authoritively. Using something 0.5mm thick gives a pretty subtle result thats hard to argue with visually. Just be careful now.
- 1,039 replies
-
- 1
-
-
- ballahoo
- caldercraft
- (and 2 more)
-
St Tibulus would be proud Eamon! Think you'll find the interior bulwark planking relatively straightforward, only think to be aware of is how the top strip will lie - I had a small challenge on Snake as the top plank had to be tapered very thin, but it was all very manageable. In my (very limited) experience, planking the deck before doing the inner bulwark can help cover any 'gaps' between decking and bulwark to give a cleaner look (but it may be a bit late for that ) . You could also add a thin strip directly above the deck for spirketting which achieves the same result, but not sure if thats appropriate for Ballyhoo. Hope this makes at least a semblance of sense.
- 1,039 replies
-
- 1
-
-
- ballahoo
- caldercraft
- (and 2 more)