HOLIDAY DONATION DRIVE - SUPPORT MSW - DO YOUR PART TO KEEP THIS GREAT FORUM GOING! (Only 13 donations so far - C'mon guys!)
×


Beef Wellington
-
Posts
2,249 -
Joined
-
Last visited
Content Type
Profiles
Forums
Gallery
Events
Everything posted by Beef Wellington
-
 Sjors, don't get bullied out of coppering Although it definitely has its own challenges, you will get a beautiful result I'm sure. Its all personal taste of course, but definitely not an 'easy way out'....
- 1,616 replies
-
- 1
-

-
- caldercraft
- agamemnon
- (and 1 more)
-
Nils - you really have a wonderful model coming together, she looks very nice indeed. Its really inspirational to see what you have achieved without all the usual supplied kit parts. You really have captured her lines and the copper plates look as good as any aftermarket item. Looking forward to seeing more progress.
-
Hi Jim, I think our approaches are probably the same. I just don't want to put the masts on until I absolutely have to, but will definitely do that before attaching any spars. Definitely glad I haven't rigged any more of the bowsprit otherwise I can guarantee that would have been broken a few times. Theres probably some more rigging to add as well before masts go up, things like the jeer blocks and slings, and few more blocks that I noticed I had missed off for running rigging. On you soldering question, I did consider it but then dismissed it pretty quickly (for now anyway, not that familair with the technique either) as it just didn't seem to need it. Epoxy seemed the simple solution for what I'm aiming for. Would be very interested in seeing how you get on with silver soldering.
-
Hi Nigel, I'm still not quite sure where you are going with this, but it all looks very impressive!
-
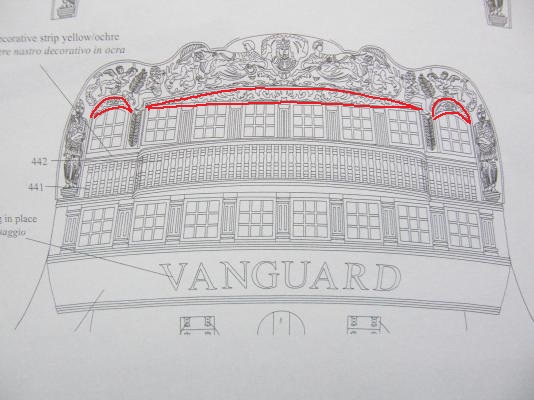
Bob - wow, thats an amazing paint job on the stern moldings, very nice indeed. I don't know what is reflected in the instructions but looking at your previous post and the photos above it appears that the molding is in line with the plans, but what seems to be missing is some addition detail beneath the large molded piece (where you've painted red,and also above the port & s'bd windows) - are there more pieces to go in there?
-
Hi Eamonn, not entering the competition, never attended anything like this before so should be an experience (though when I come to think of it, maybe a few rubber bands and pins could help sway judges). Should be nice to get some suggestions and feedback as well from the more experienced crew there (you know, those questions one is too embarrassed to ask ), seem to be a fair few MSW-ers going as well.
- 800 replies
-
- 1
-
-
- snake
- caldercraft
- (and 1 more)
-
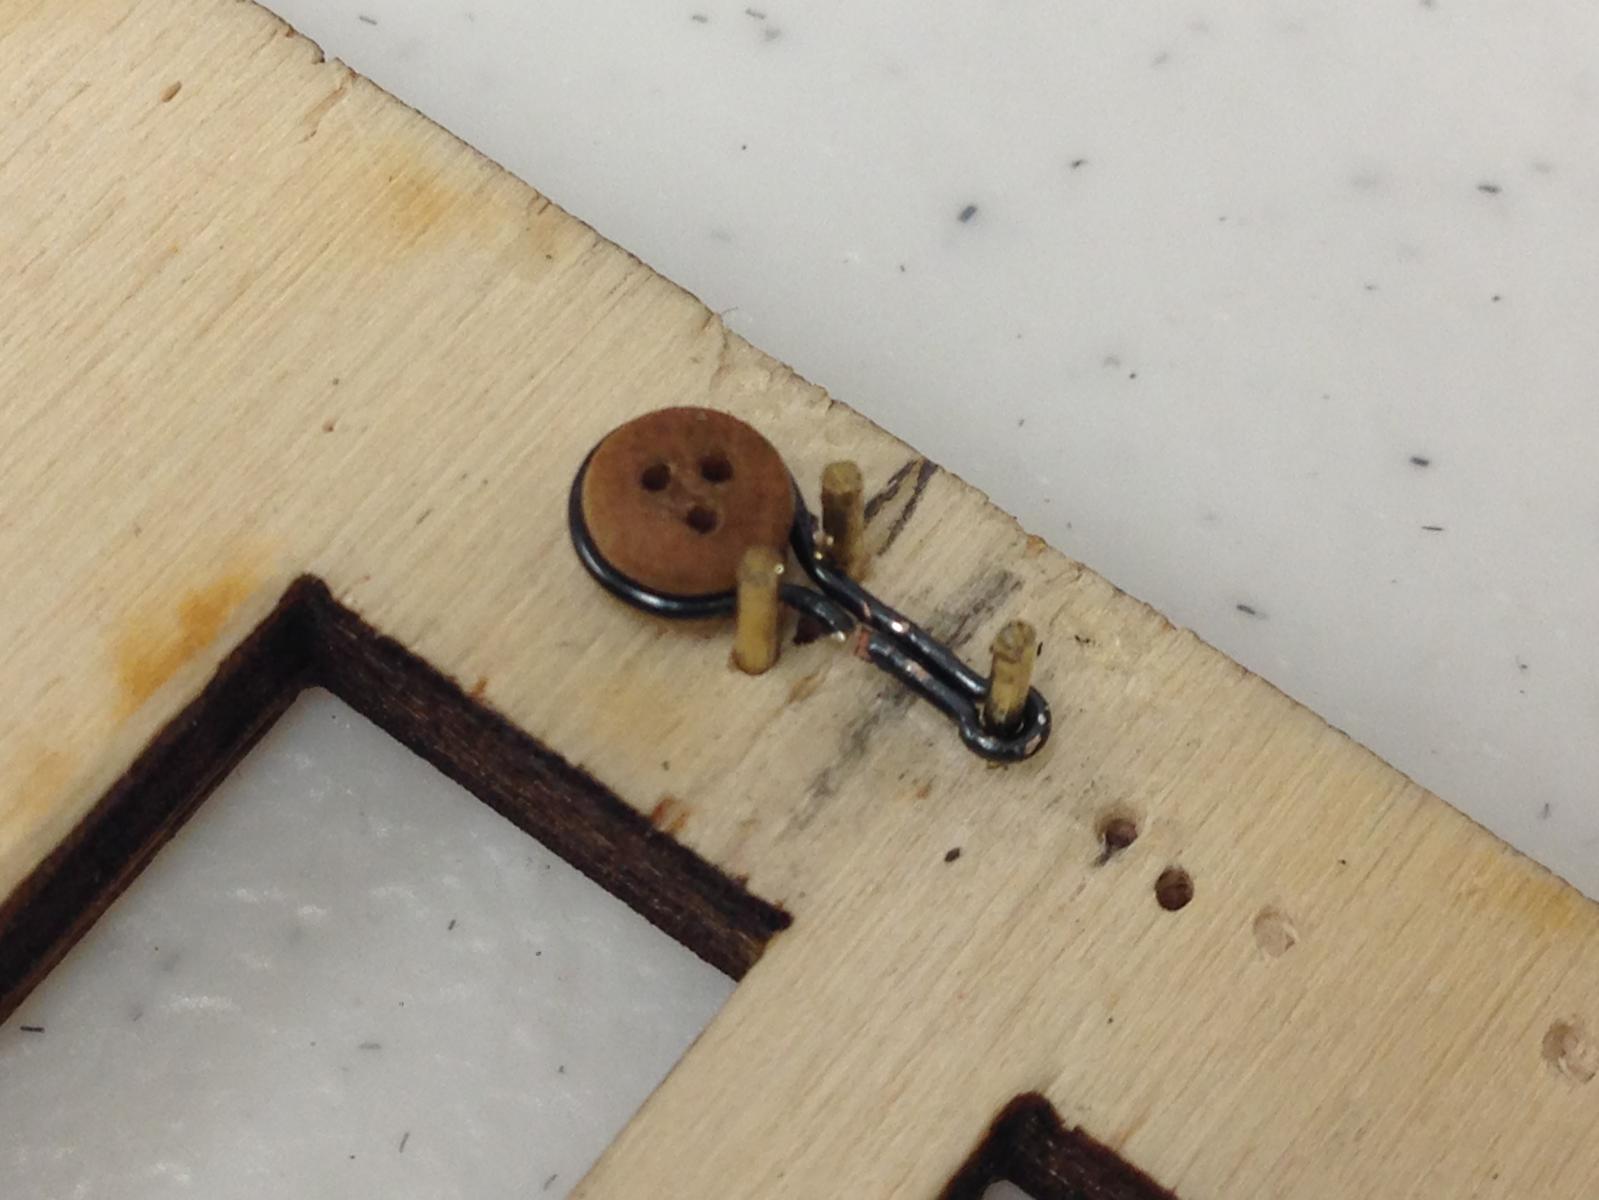
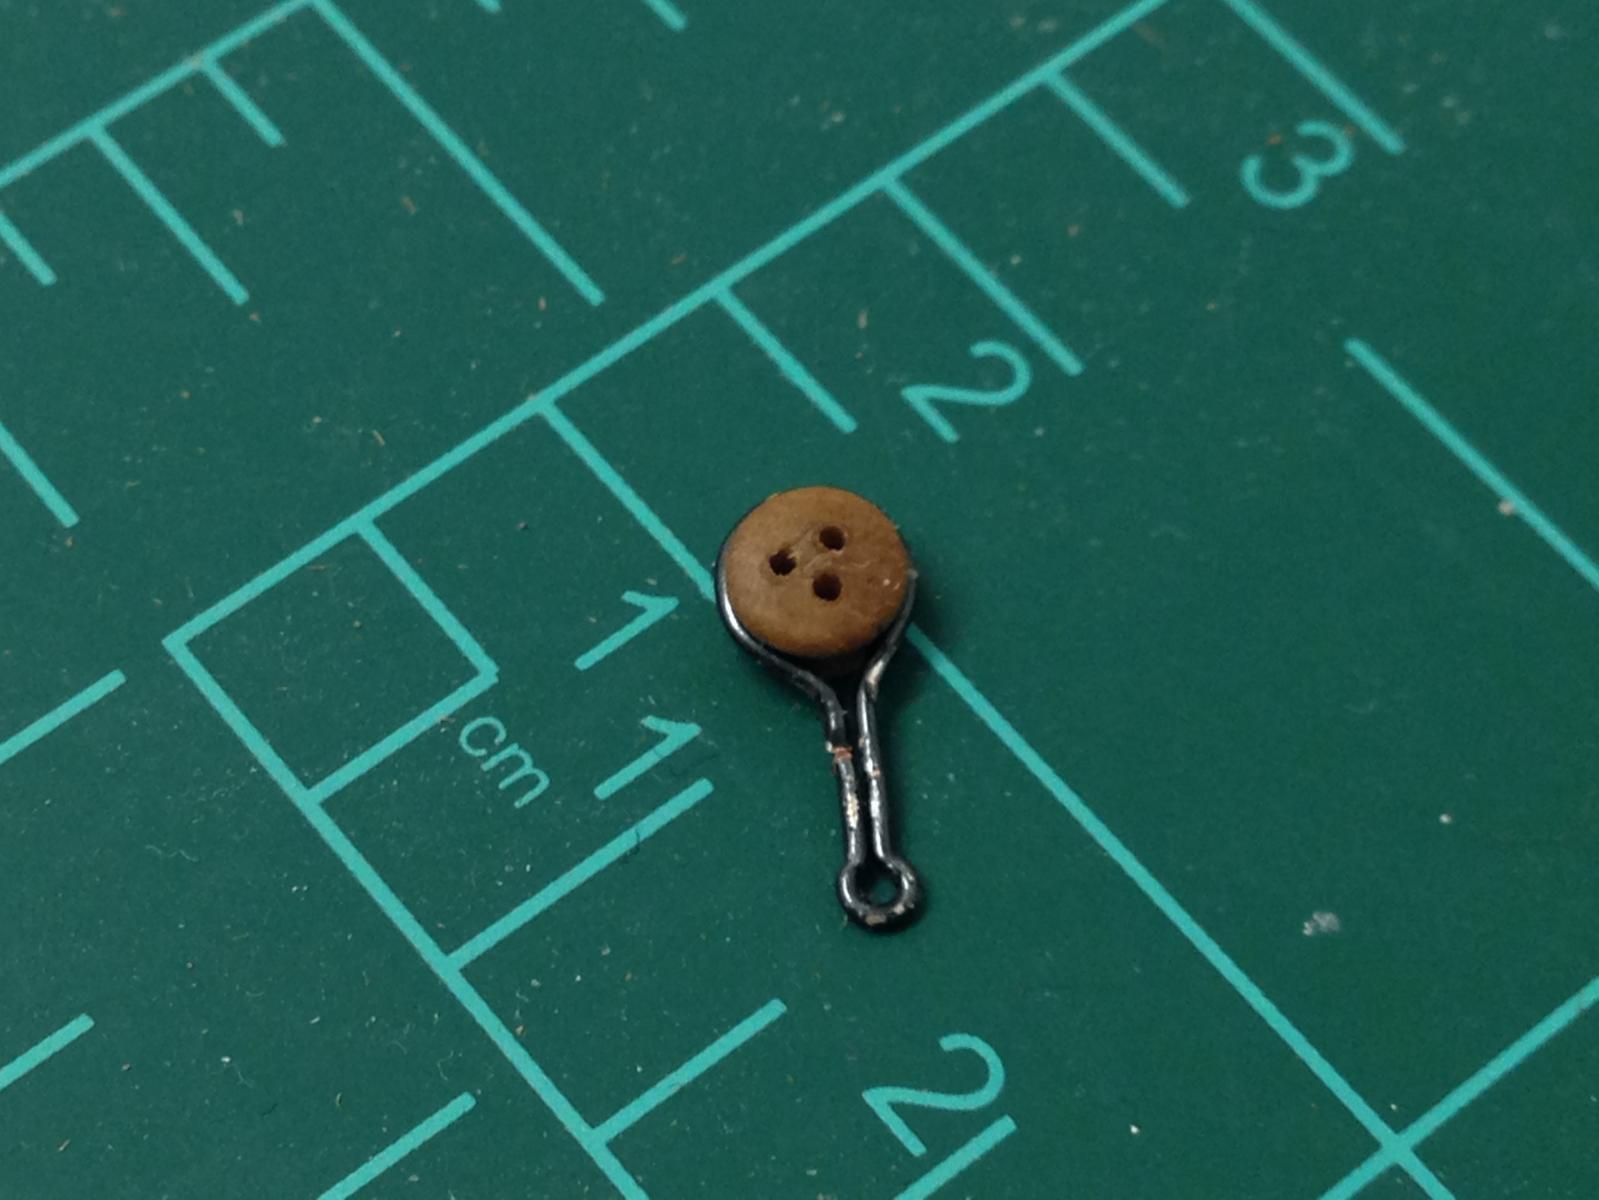
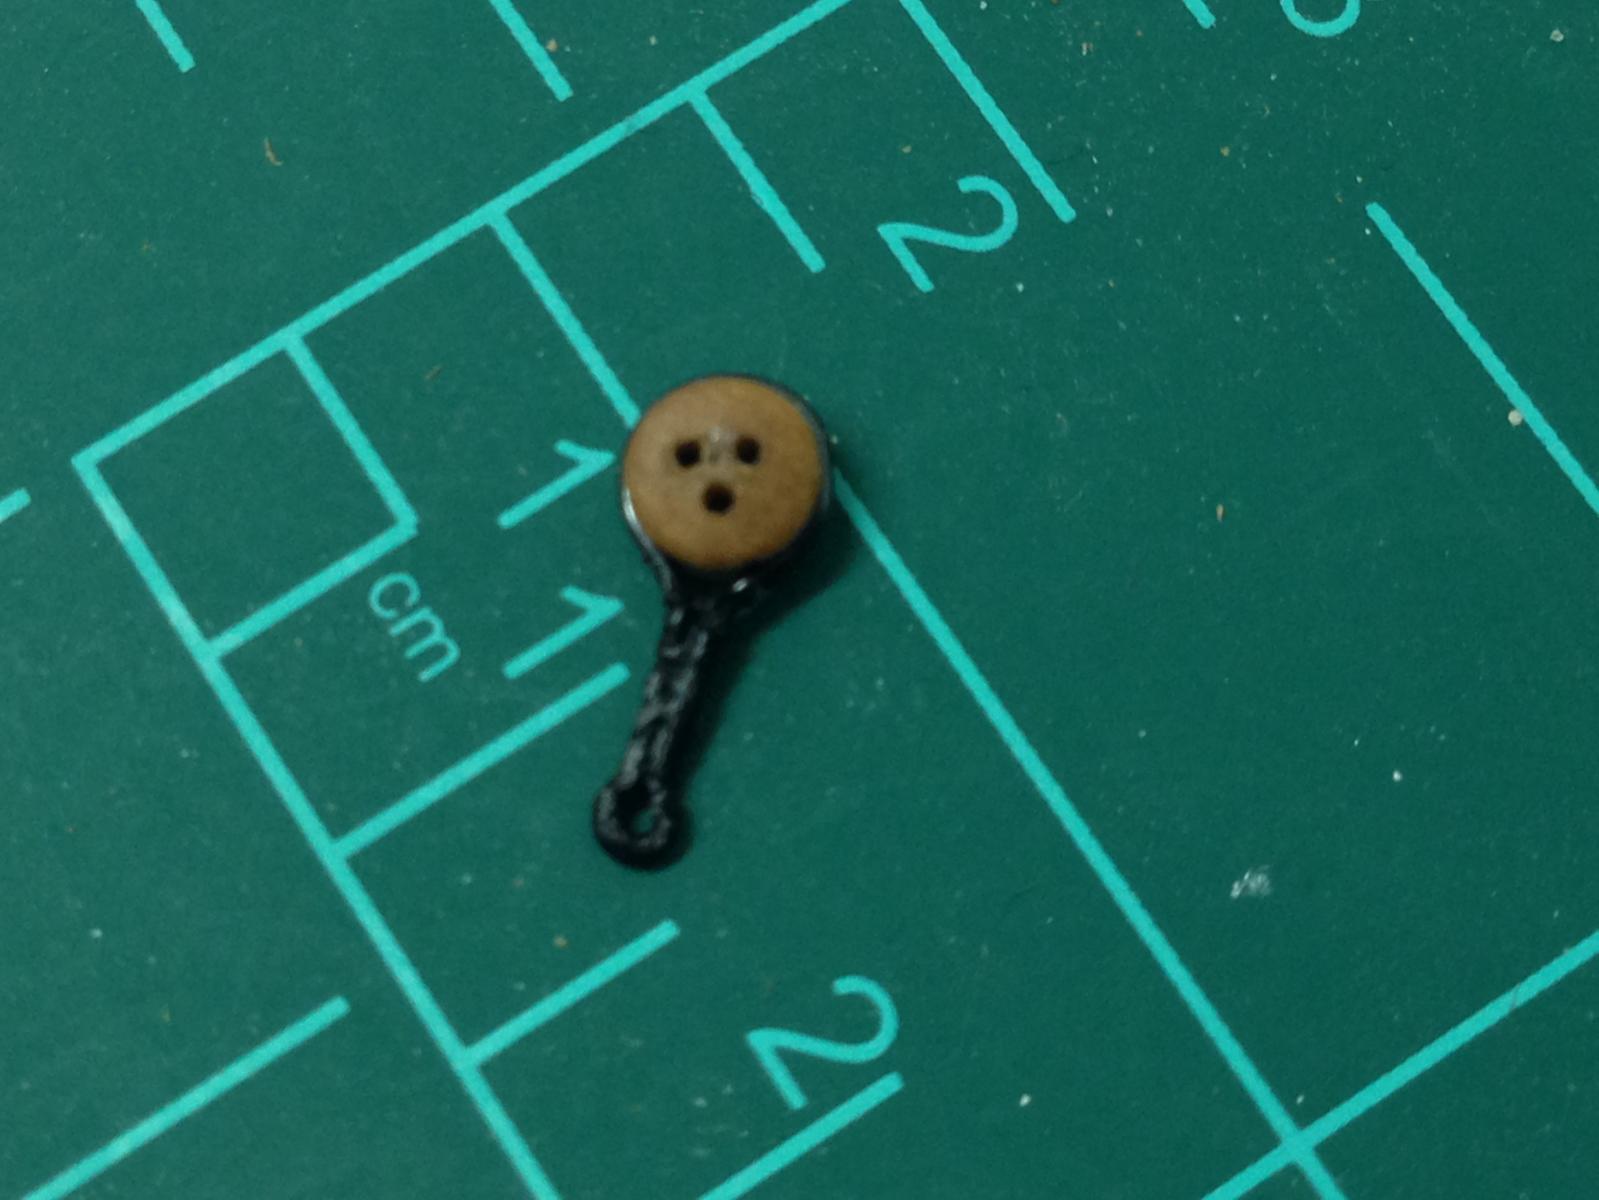
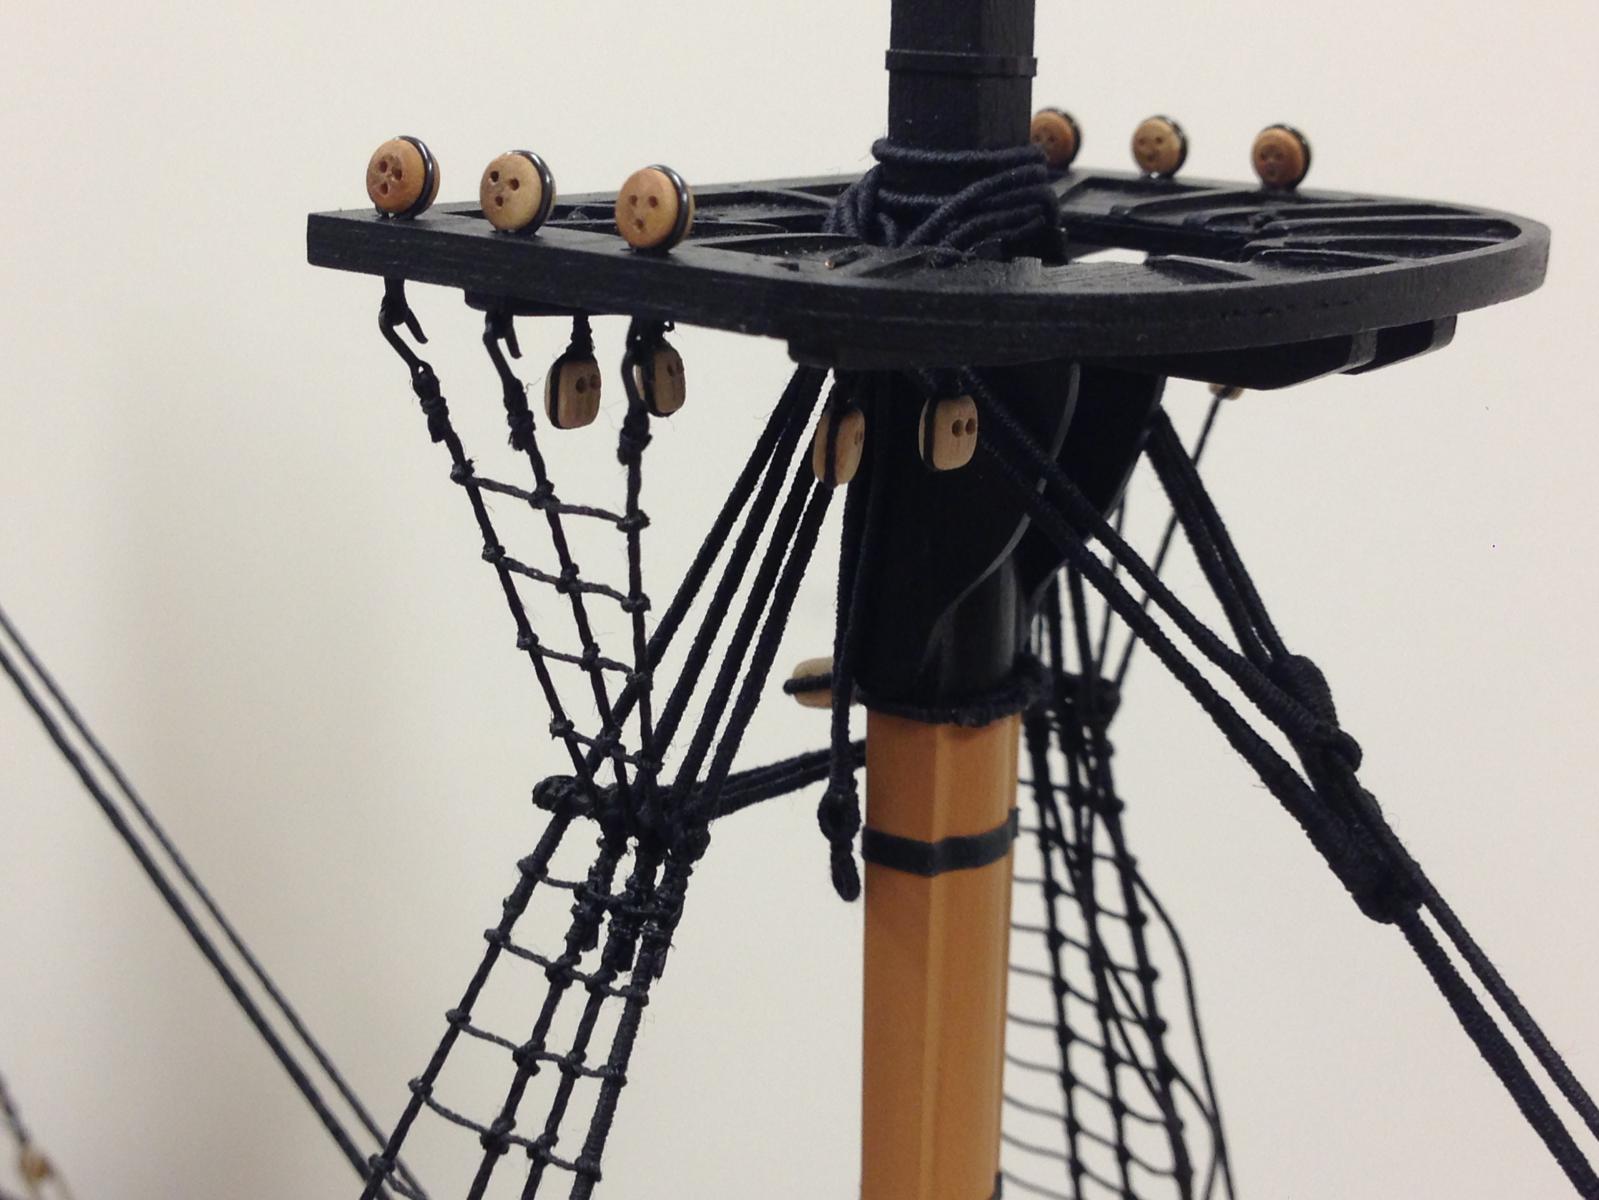
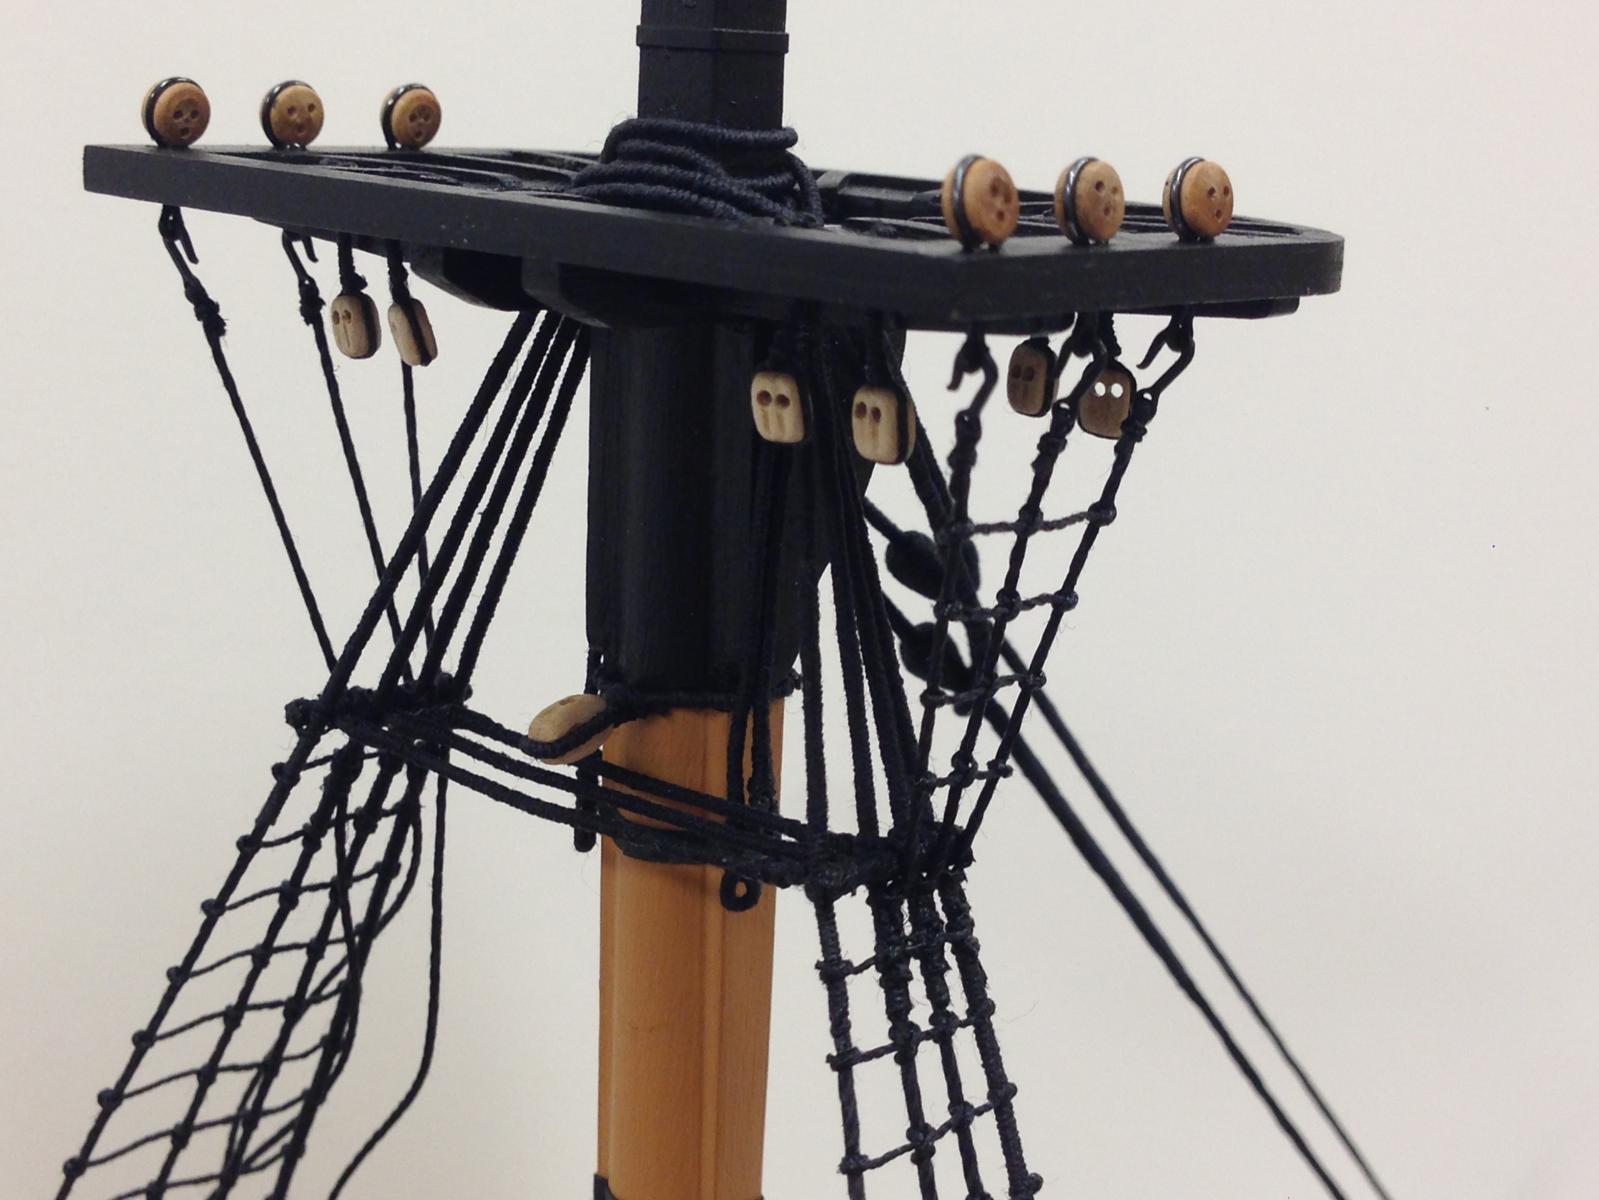
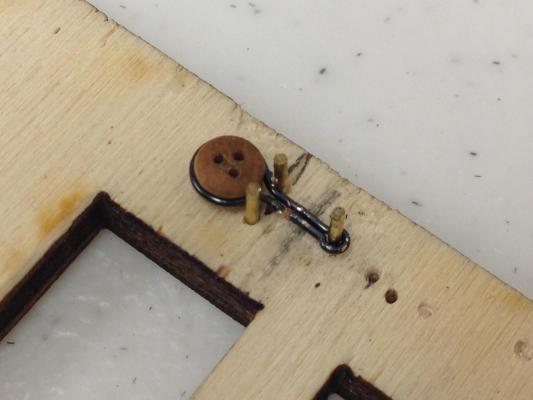
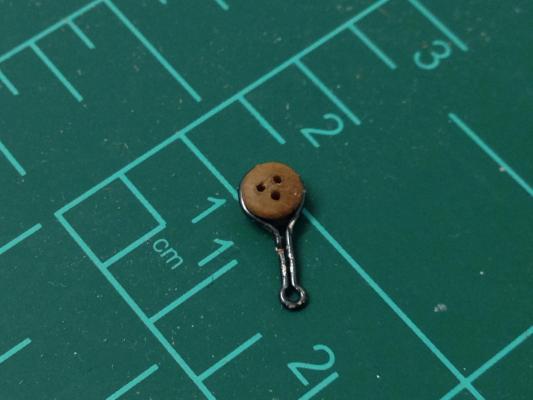
Finished up making the wire strops for the top deadeys, usual pins and excess wood making up the jig. Went with a slightly shorter version than my first mock up as some hooks from a 'Badger' photo-etch kit I'd ordered last year were used (unfortunately none of the supplied PE strops fitted the 3mm deadeyes). Once bent a spot of CA was used to close any remaining gaps and a coat of paint applied. These were then epoxied into the tops so the top mast shroud tensions don't cause any knock-on complications. Completed one set of futtock shrouds to see if everything would work OK before continuing, and pretty happy with the results. Given that I'm planning on taking Snake to the Connecticut model ship show, I'm only going to finish up the other futtock shrouds and various small repair/touch-up jobs for now. Am planning to start on the various spars once thats complete and get these finished before installing any of the top and topgallant masts as these would be an accident waiting to happen I suspect.


- 800 replies
-
- 17
-
-
- snake
- caldercraft
- (and 1 more)
-
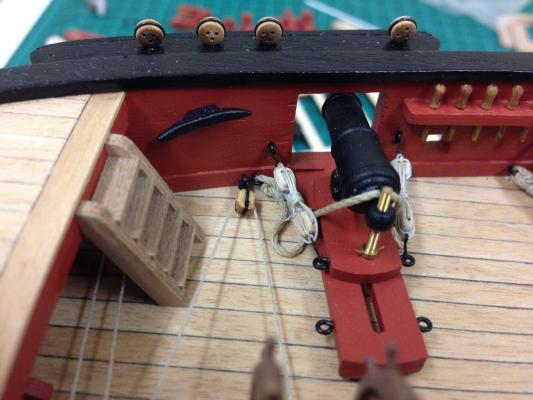
Looking great Stergios. If you're not planning to already, I'd suggest getting the staghorns and bulwark cleats installed sooner rather than later as this will get trickier as the deck fills up, the ones near the aft platform are probably the most challenging. Forgive me for posting the photo below, but shows what I'm talking about.
- 1,144 replies
-
- 3
-
-
- snake
- caldercraft
- (and 1 more)
-
Congratulations Mobbsie, officially reached the holy grail of 'museum quality'. Great stuff.
- 1,279 replies
-
- 1
-
-
- agamemnon
- caldercraft
- (and 1 more)
-
Happy birthday Pierre, hope you get to spend some time in the shipyard.
-
Bob, nice shots of the stern and great progress. I'd second Alistair's recommendation to use the letraset approach, its nice because it has more authentic 'painted on' look to it, to the brass etch always look rather to pronounced. I used these on Snake and would take the same approach again. The other advantage, you get plenty of letters, and if you mess up, they can be rubbed off easily and then you simply have another go. I was initially worried about letters being gold, but IMHO it doesn't call atttention to itself when next to the yellow ochre. Its all opinion though, and it'll look great whichever way you decide to go.
-
Thanks for the great detailed photos Jim, stand (and all) looks fantastic. Hope mine turn out as good. Very basic question, did you just belay the lines to the pins or tie with some kind of knot?
-
Rob - very nice start on Pickle. Did want to ask you about your HMS Cottesmore model, would love to see pictures - was that from a kit or scratchbuild? Wondering if you've ever come across any kits of their replacement the River Class?
-
Looks great. Can't wait until you show us it going in the bottle, fascinating process. Thanks for sharing!
-
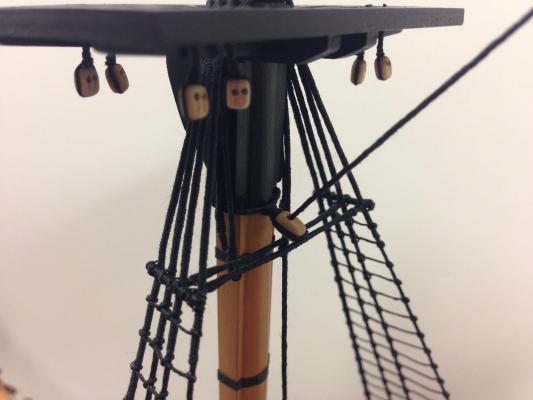
Ferit, Eamon, B.E., Timmo - cheers guys! Still proceeding at a snails pace. Following picture for the benefit of other Snake builders. The block on the foremast for the maintopmast preventer stay could very easily interfere with catharpins on foremast shrouds, felt a bit lucky that I didn't run afoul of this, the positioning of the futtock stave is important as the block couldn't move any higher because of the mast cheeks. One more catharpin to go on foremast (which I'm remaking again because it didn't fit....)
- 800 replies
-
- 14
-
-
- snake
- caldercraft
- (and 1 more)
-
You should also wait for confirmation that it is also the correct ship from the person who posted...
-
Interesting comment on the deck material Eammon, I thought Caldercraft supplied Tanganyika for all of their ships decks. Lime wouldn't be my choice for the decks.
- 1,039 replies
-
- 2
-
-
- ballahoo
- caldercraft
- (and 2 more)
-
Echoing what everyone has already said, shes simply stunning Timmo, outside views really show her off. Given your experience on this, would you consider using a different wood other than walnut next time? Walnut just seems so hard to work with sometimes, but it can give nice wood tone as you've shown. The underwater paint looks perfect as well.
-
Pierre, shes looking great. I can only imagine the amount of work to get all the gunports cut and lined. Beautiful photos, but I am jealous of your weather, we still have snow on the ground and the temperatures way below freezing :mellow:
-
I used PVA wherever possible on untreated wood, but in a number of spots CA is necessary because the surfaces were sealed (either paint or varnish). I used CA for the ladders, but had finished them with matt varnish beforehand, otherwise I've noticed that that CA glue can seep into the wood grain and it leaves unfixable dark patches. Thick CA is my preference as it tends to take the longest to set so maybe gives you a few more micro-seconds to adjust things
- 1,144 replies
-
- 1
-
-
- snake
- caldercraft
- (and 1 more)
-
Looks fantastic Timmo.
-
You seem to have it thought out Stergios, its definitely a tedious process but feels so good when complete. The technique that worked best for me was to make up the tackles off the ship first (loosely), attach and then gradually tighten. You are right, there is a lot of wasteage of the thread between attaching the hooks and the actual tackle, but its better to be safe than sorry as its not a big expense.
-
Hi Jim, very nice shots. I followed the Petersson approach around the hearts and seized them - if I can justifiably go with seizing I'll take it every time You should have no worries about me catching you up
-
You've got a very nice smooth run for the planking Sjors, looks great. At the stern I wonder if you think you will use a filler block for the awkward angle? Hope you have a lot of fun with the cannons, you can put a lot of detail on those.
- 1,616 replies
-
- 1
-
-
- caldercraft
- agamemnon
- (and 1 more)
-
Fantastic work and great pictures Hamilton, definitely reference quality!