MORE HANDBOOKS ARE ON THEIR WAY! We will let you know when they get here.
×


KenW
-
Posts
1,231 -
Joined
-
Last visited
Content Type
Profiles
Forums
Gallery
Events
Everything posted by KenW
-
 Thanks Tom, Martin and Jon and the 'likes'. Good reminder Jon, I always put all my bottles in re-cycling. Did they smash bottles at launches back in those days? It's not like the boat will sail off any time soon. Cheers.
- 481 replies
-
- 2
-

-
- rattlesnake
- model shipways
- (and 1 more)
-
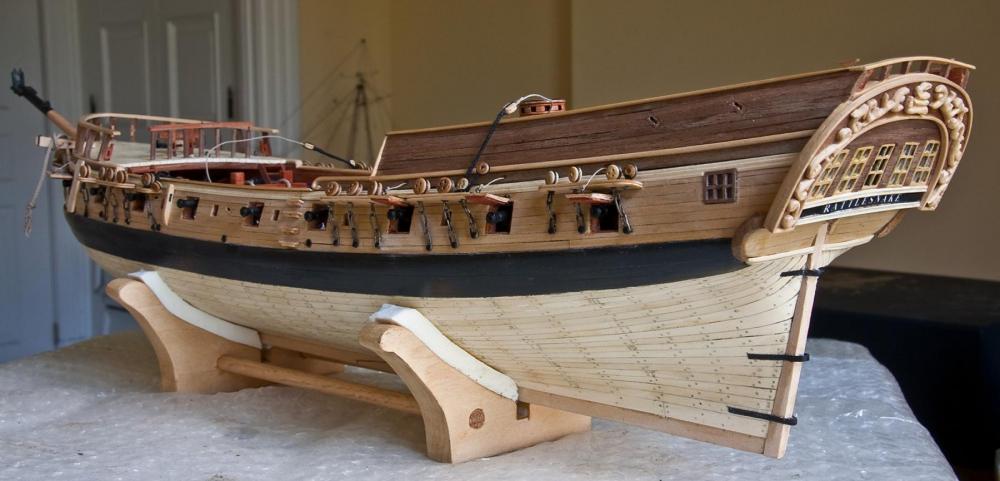
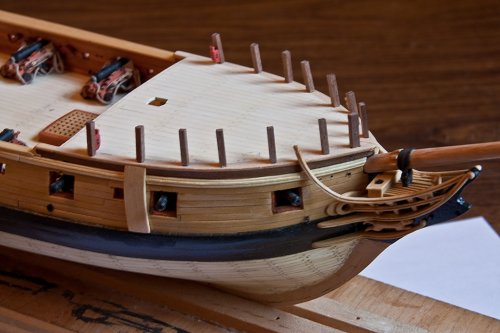
Launch Date I believe I’ve completed the hull. All the gun port lids, channels and deadeye & chains are installed. I’m not actually sure what is required for launching a boat, but I think I’m there. I know I have to make my belaying pins smaller, but aside from that I’m ready to start on the rigging. My first step is to try out my new serving machine (from Syren). And, of course, I need to start making masts. But now I’m happy that the hull meets my requirements for a Launch Date. I will have a party this weekend. I also should clean up that cradle I made. It doesn’t look so good.
- 481 replies
-
- 17
-
-
- rattlesnake
- model shipways
- (and 1 more)
-
Great job! I remember those issues from my last model. Persistence always pays off. Cheers.
- 974 replies
-
- 1
-
-
- rattlesnake
- mamoli
- (and 1 more)
-
I don't believe you put a painting in the cabin! Great work, by the way. Congrats.
- 306 replies
-
- 3
-
-
- armed virginia sloop
- Patrick Henry
- (and 2 more)
-
Thanks Jon. I already knocked off the aft ones, but thought it was save to reinstall them as part of the hull completion. I didn't think they would be in danger during rigging. I'll have to be careful. (Or, reinstall them later. Maybe I'll wait on those 6 aft ones.) Cheers.
- 481 replies
-
- 2
-
-
- rattlesnake
- model shipways
- (and 1 more)
-
The next step is to install the gun port lids and the channels and chains. I just completed the lids for the two foremost guns and the first channel and chain. Now that I have a process for each, the rest should go a little quicker.
- 481 replies
-
- 9
-
-
- rattlesnake
- model shipways
- (and 1 more)
-
Thanks and I'm glad I could be of help. I'll check out your build log. Cheers.
-
Thanks for the comments and the 'likes'.. Mike: The wood hardener is by Min-Wax. I got it at the local hardware store.
- 481 replies
-
- 1
-
-
- rattlesnake
- model shipways
- (and 1 more)
-
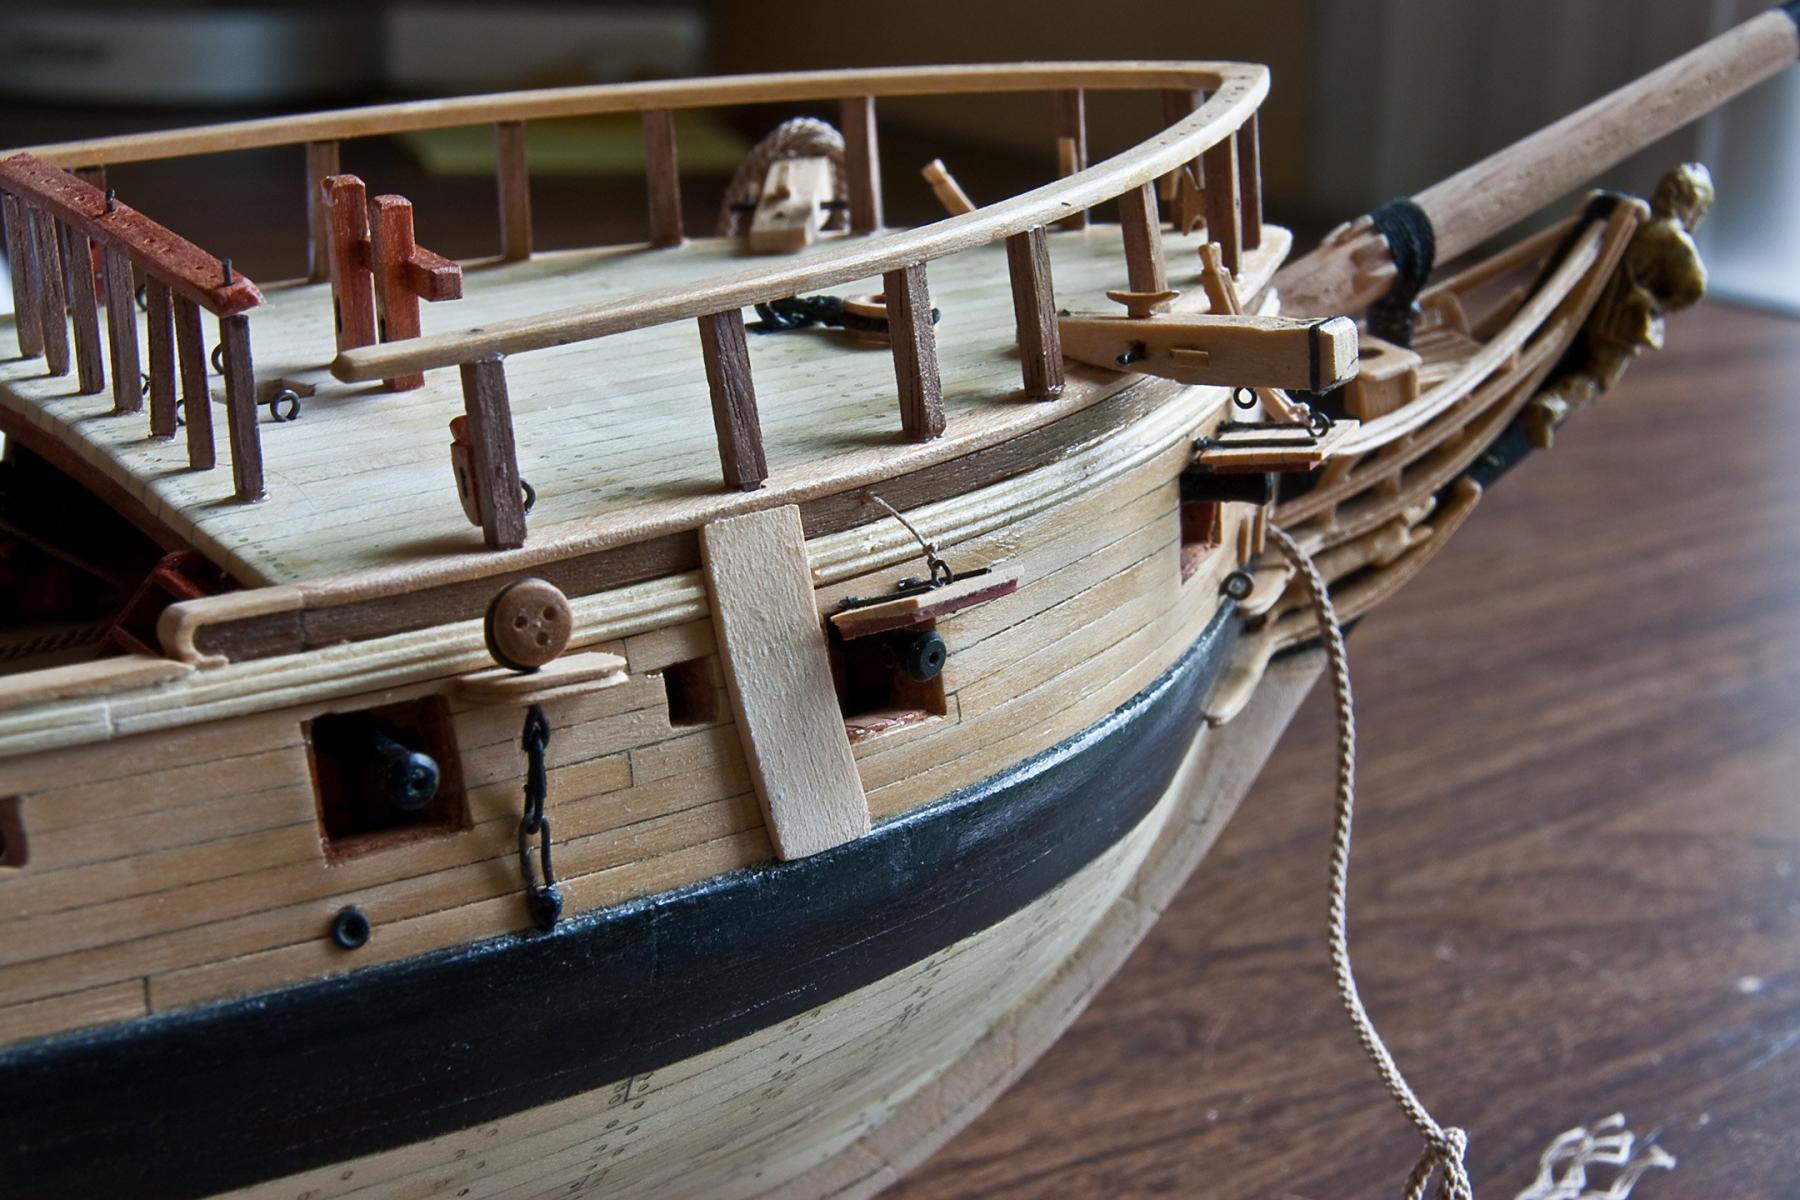
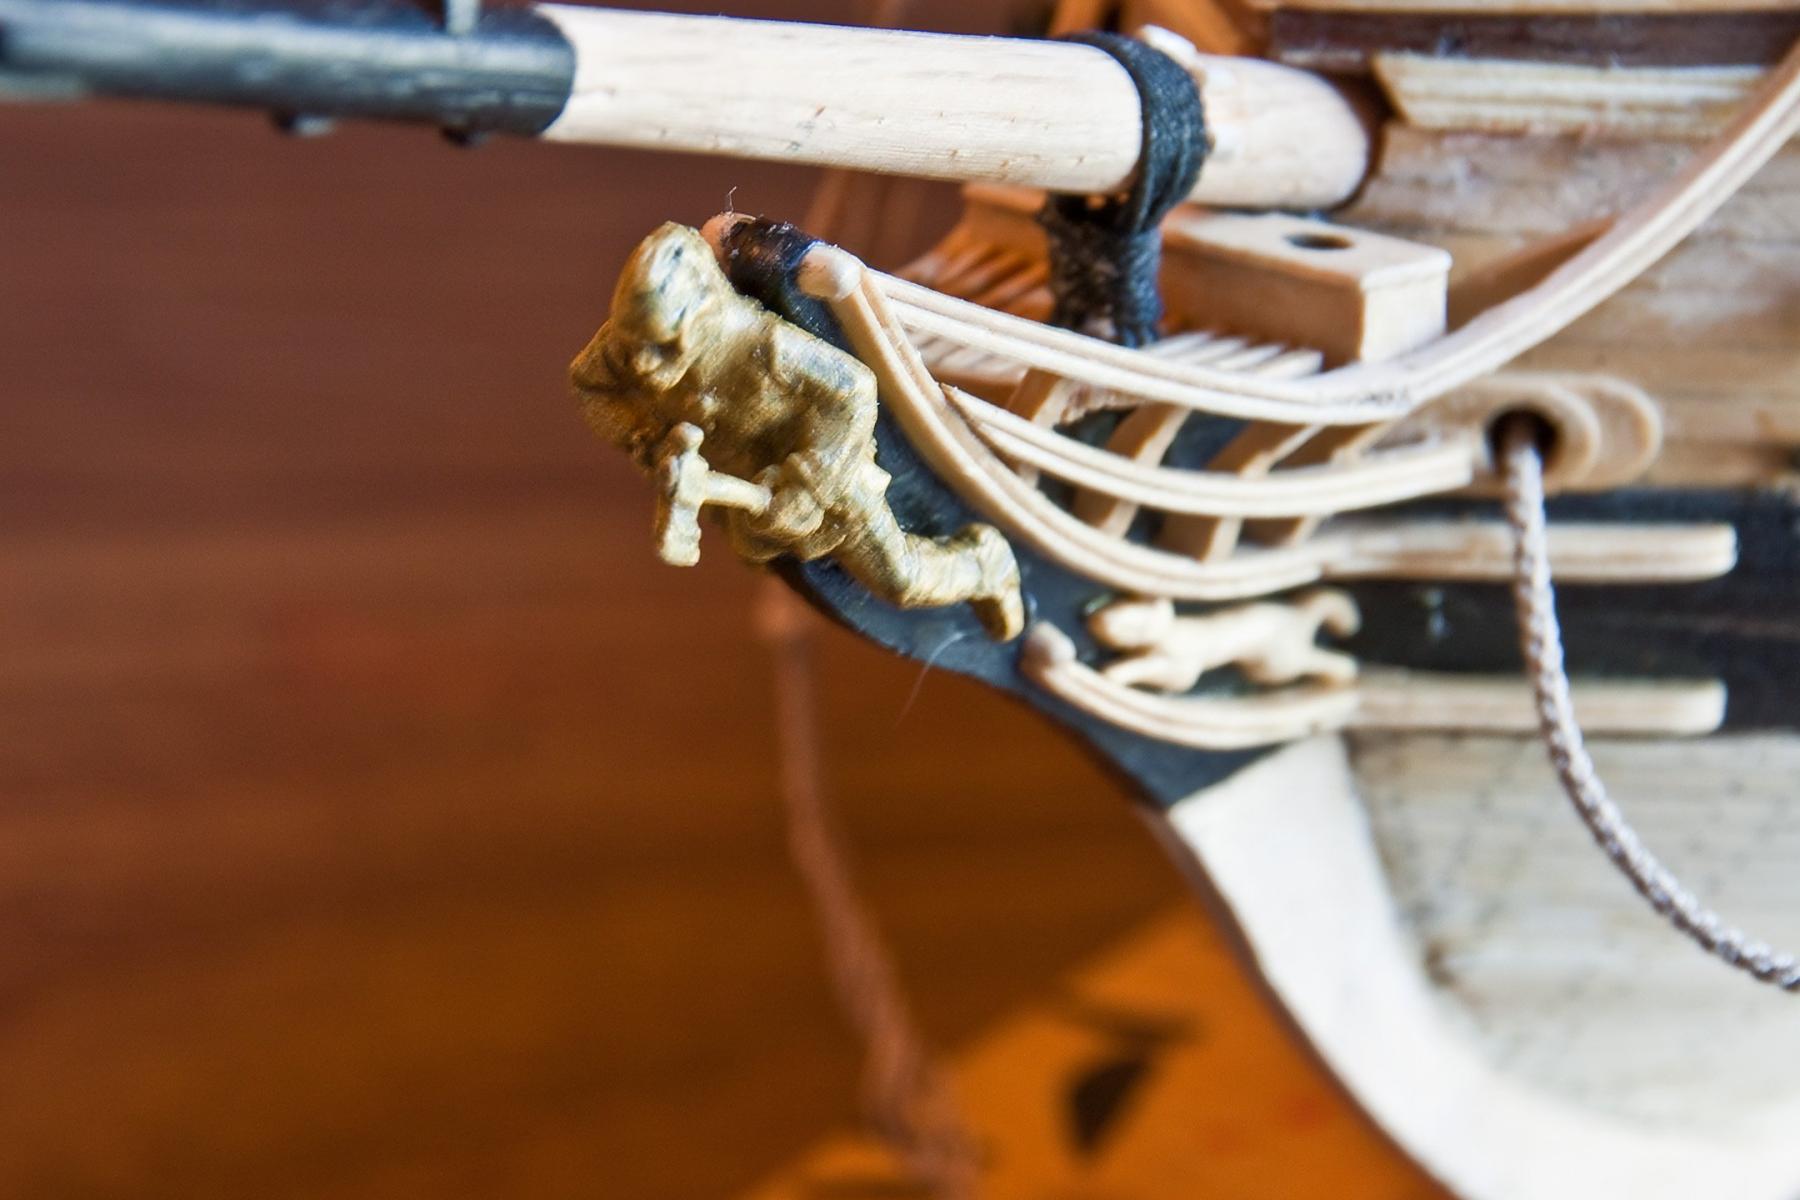
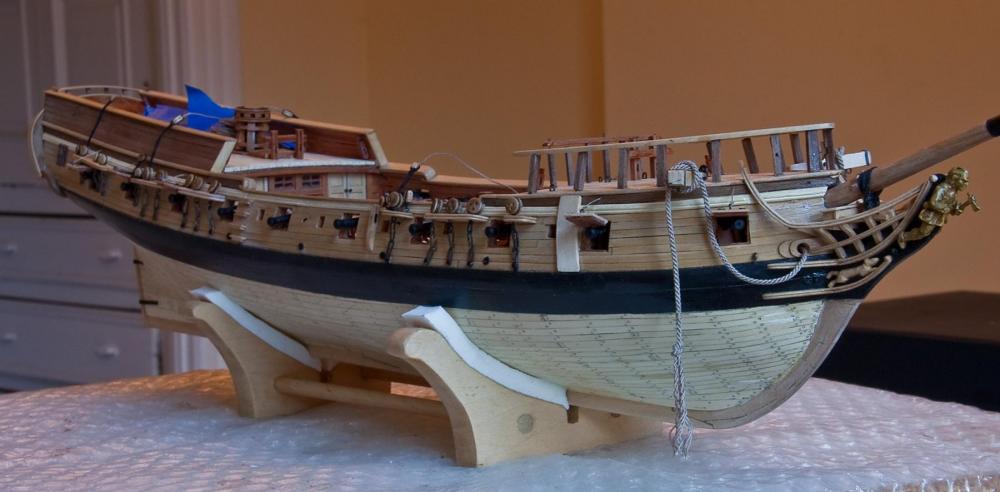
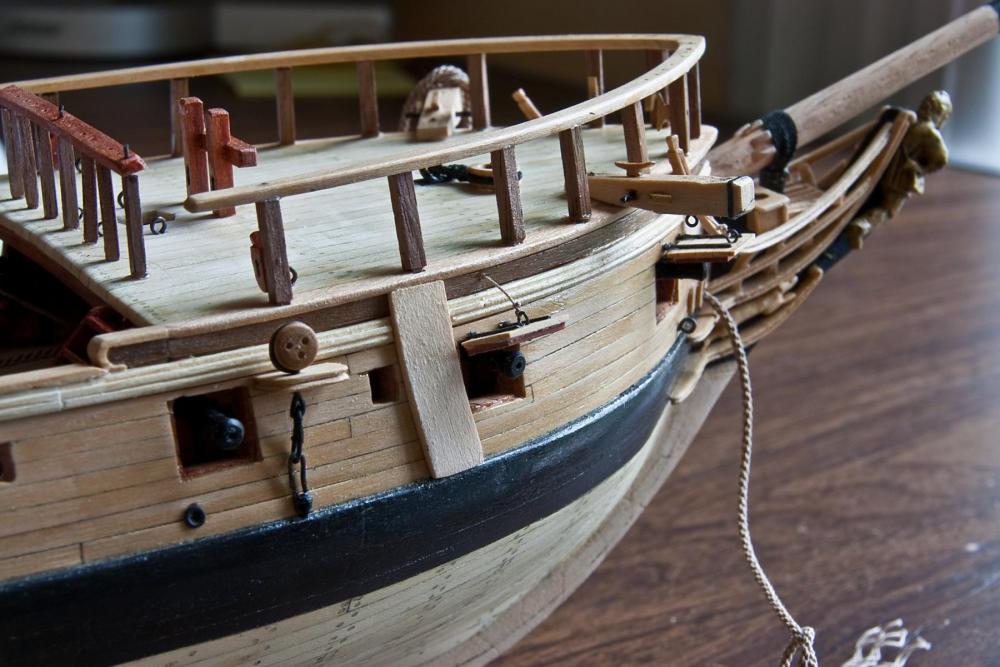
The forecastle furniture is complete. The breast rail is not glued yet because I’m worried about having enough room to tie the rigging. A lot of people on this site have mentioned that, so I’m holding back on a lot of stuff. Maybe I’m over-reacting. Next I realized that I forgot to install the anchor cable before I planked the forecastle. So I used a piece of wire and snaked the cable through the hawse hole. Now the cable is secured and the other end is just hanging there waiting for the anchor. I also finally glued the figurehead onto the stem. I think I’ll bring the model to my club meeting next week.

- 481 replies
-
- 15
-
-
- rattlesnake
- model shipways
- (and 1 more)
-
Thanks to Russ, EJ and Dave, as well as the 'likes'. I'm optimistic about the tooth picks - I do know they are not bamboo. Cheers.
- 481 replies
-
- 1
-
-
- rattlesnake
- model shipways
- (and 1 more)
-
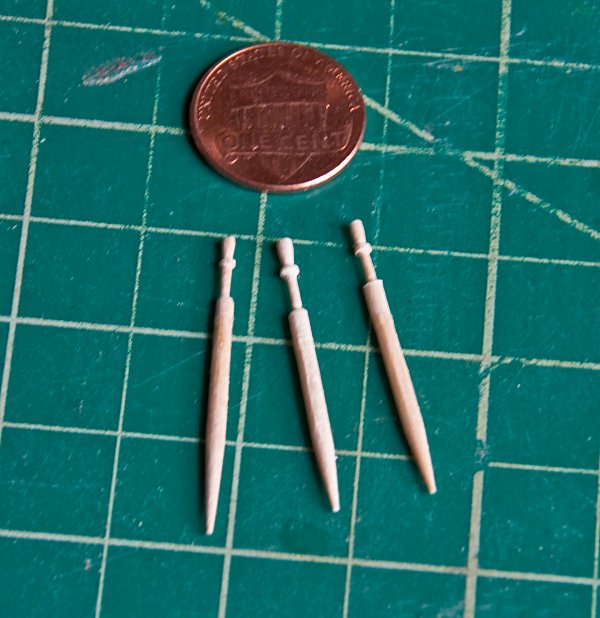
Quick status: I made 25 belaying pins from tooth picks. They are 5/16” long and, needless to say, there are many rejects in the waste basket. I’m going to paint them with the wood hardener and hope that whatever wood the tooth picks are made of will hold up to the rigging. The model is progressing slowly, but steady.
- 481 replies
-
- 13
-
-
- rattlesnake
- model shipways
- (and 1 more)
-
Hey Brian: Great job; your build looks fantastic. Where did you get those little clamps? Cheers.
-
WOW. That's small. So at 3/16" scale they should be about 5/16.
- 452 replies
-
- 1
-
-
- cheerful
- Syren Ship Model Company
- (and 1 more)
-
Hey Mike: Good looking pins. How long are they? Thanks.
- 452 replies
-
- 3
-
-
- cheerful
- Syren Ship Model Company
- (and 1 more)
-
Great work Dave. It's nice to see someone else using redheart. Your model is really coming along. Also, I assume you are cutting your own bulkheads, keel former, etc. Otherwise, I can't see how you can change the scale. Cheers. Oh, and your nibbling looks great.
-
E.J. I really like the coloring of the wood on your model. A nice deep tone. Well done!
- 608 replies
-
- 3
-
-
- la couronne
- corel
- (and 1 more)
-
Thanks Jon. They do look a little big, but hopefully that will be 'covered up' by everything around it once the rigging starts. The stanchion cleats aren't nearly as big looking. Cheers.
- 481 replies
-
- 1
-
-
- rattlesnake
- model shipways
- (and 1 more)
-
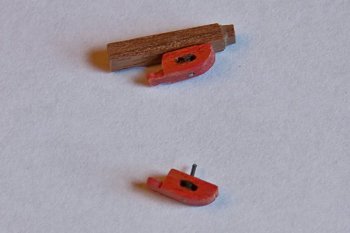
I wanted to show the kevels, which I thought were pretty good. These are for the forecastle and are much smaller than those on the quarter deck because they have to attach to a stanchion. While none of the stanchions are glued, and I have yet to cut the cap rail, I think that the model is progressing, all be it slowly.
- 481 replies
-
- 7
-
-
- rattlesnake
- model shipways
- (and 1 more)
-
Thanks Ryland. Good to meet you as well. Cheers.
- 481 replies
-
- 1
-
-
- rattlesnake
- model shipways
- (and 1 more)
-
Thanks Dave. I'll have to look up those definitions again.
-
Thanks Russ. Surprised you noticed the nibbling. Cheers.
-
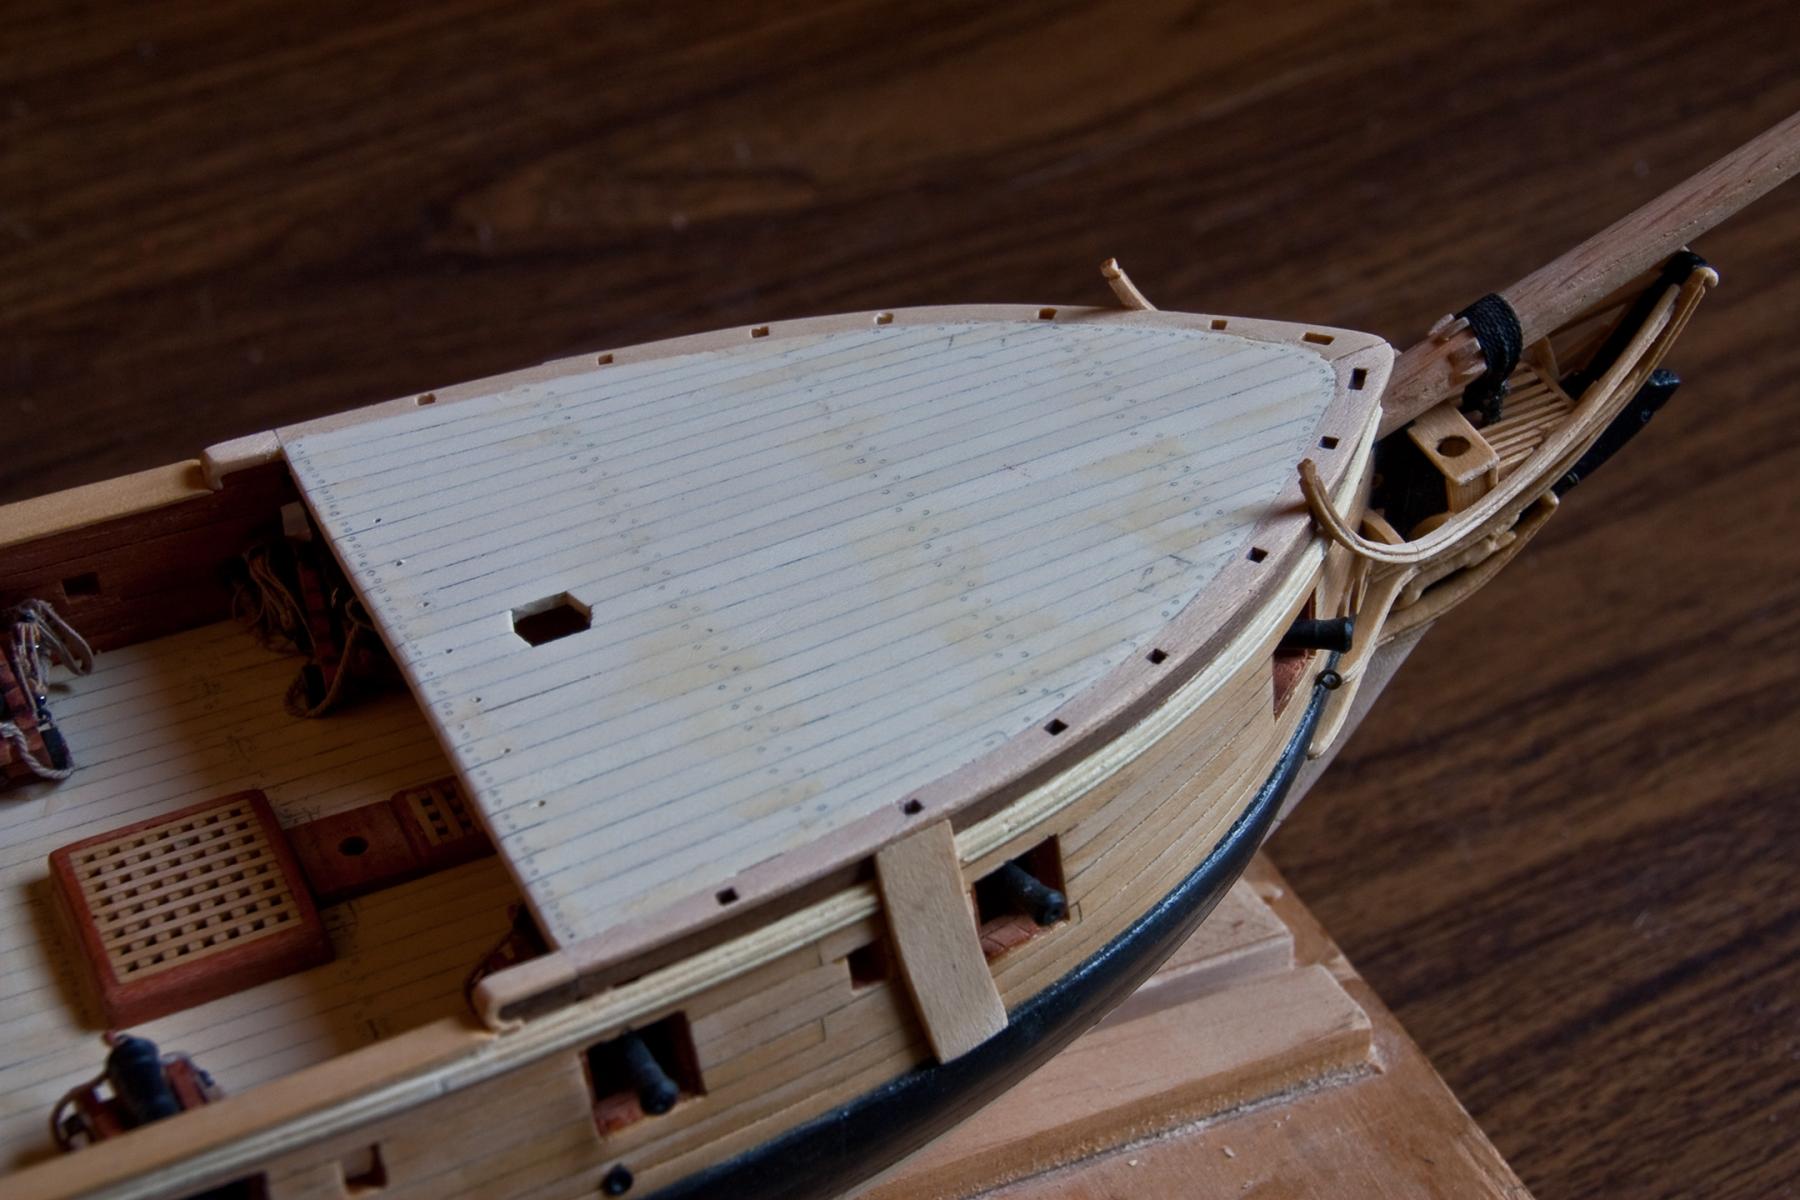
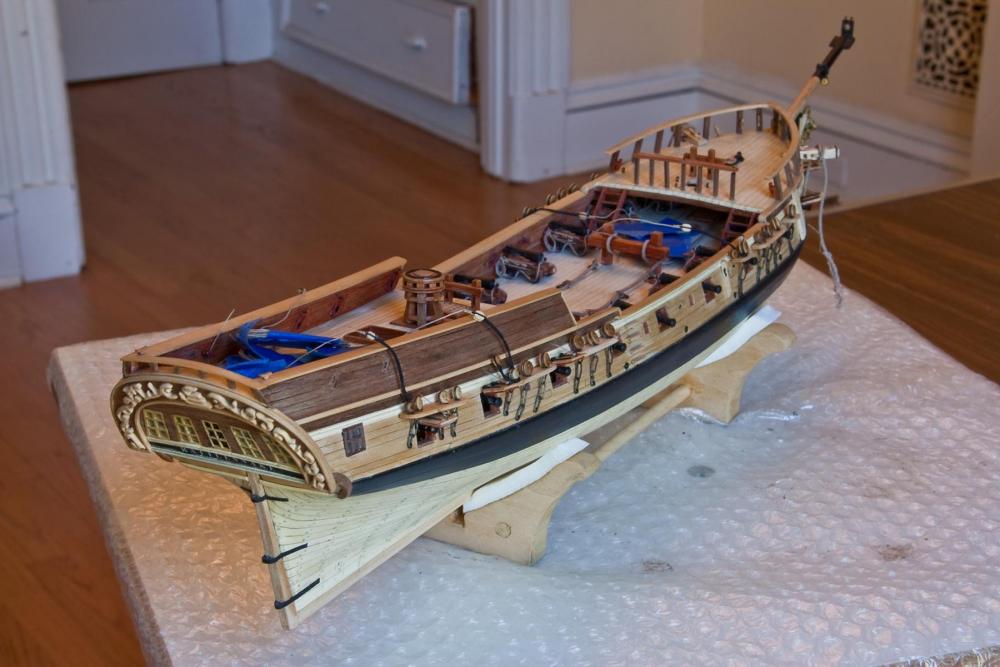
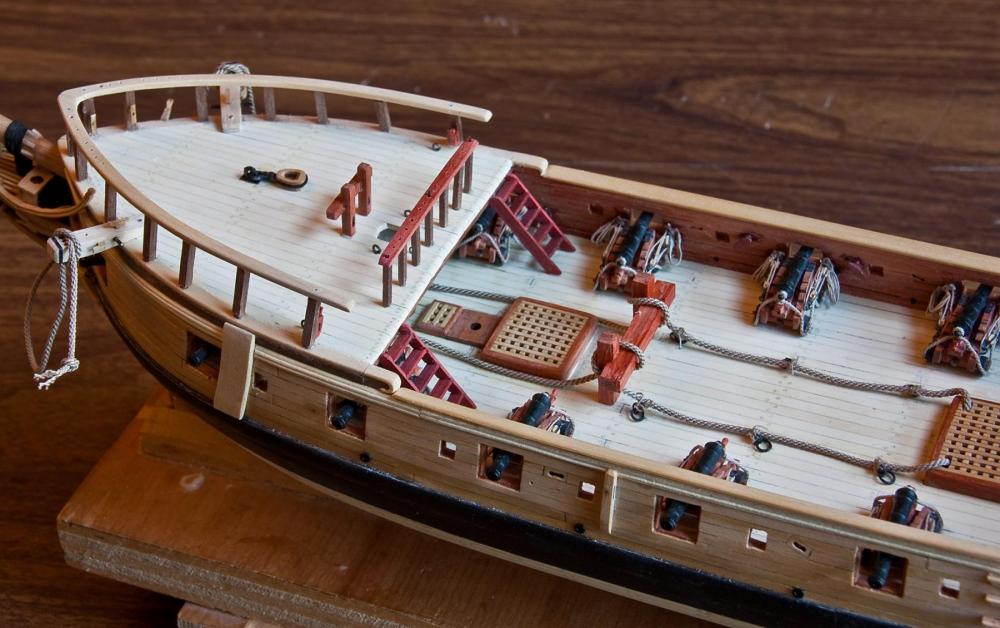
I’ve planked the forecastle deck and I’m pleased with the results. I think that the tree nailing is the best I’ve managed to do - certainly the best on this model. (In the photo, the yellow coloring means I have to do more sanding.) So, it’s on to the next challenge.

- 481 replies
-
- 13
-
-
- rattlesnake
- model shipways
- (and 1 more)
-
Hey Christian. No trouble; I want to rig the ship's boat on my 20 gun Rattlesnake, so I was doing the research anyway. Hope I was helpful. Cheers.
-
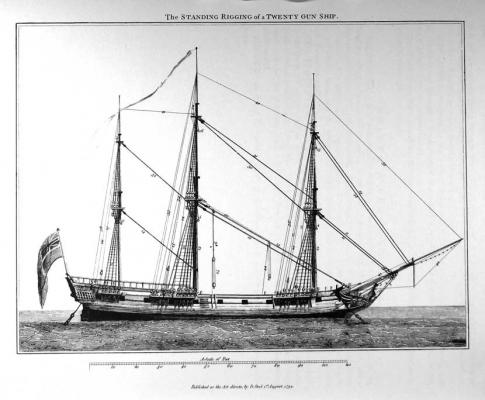
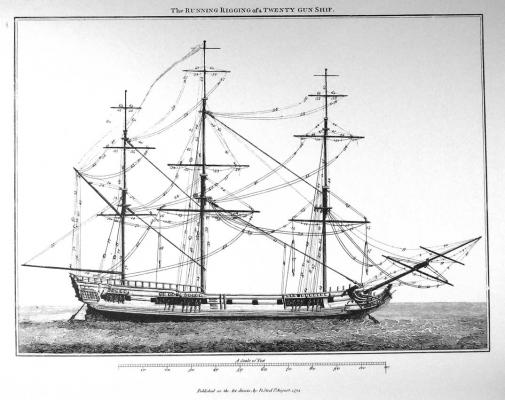
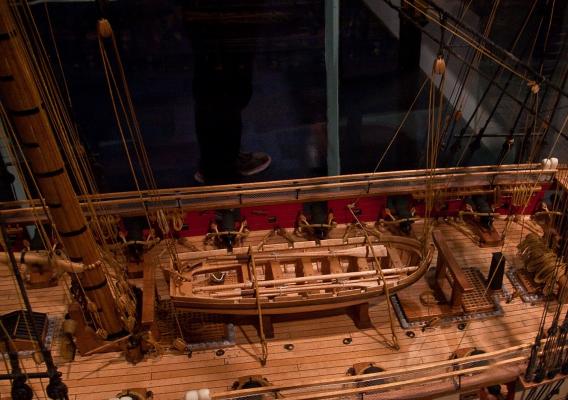
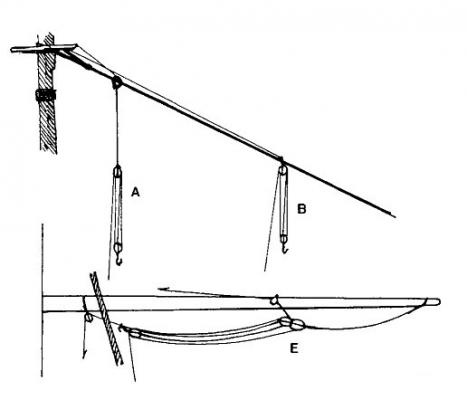
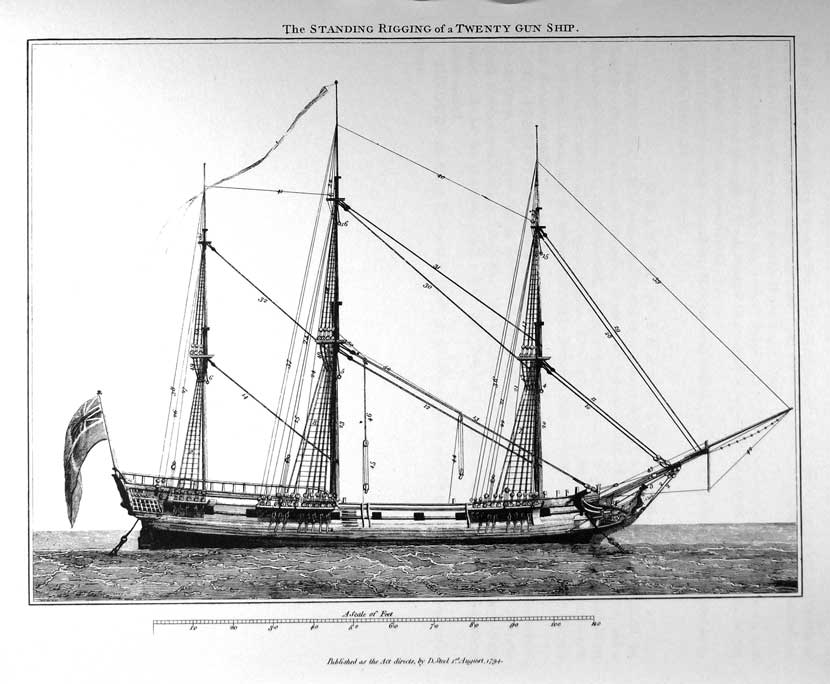
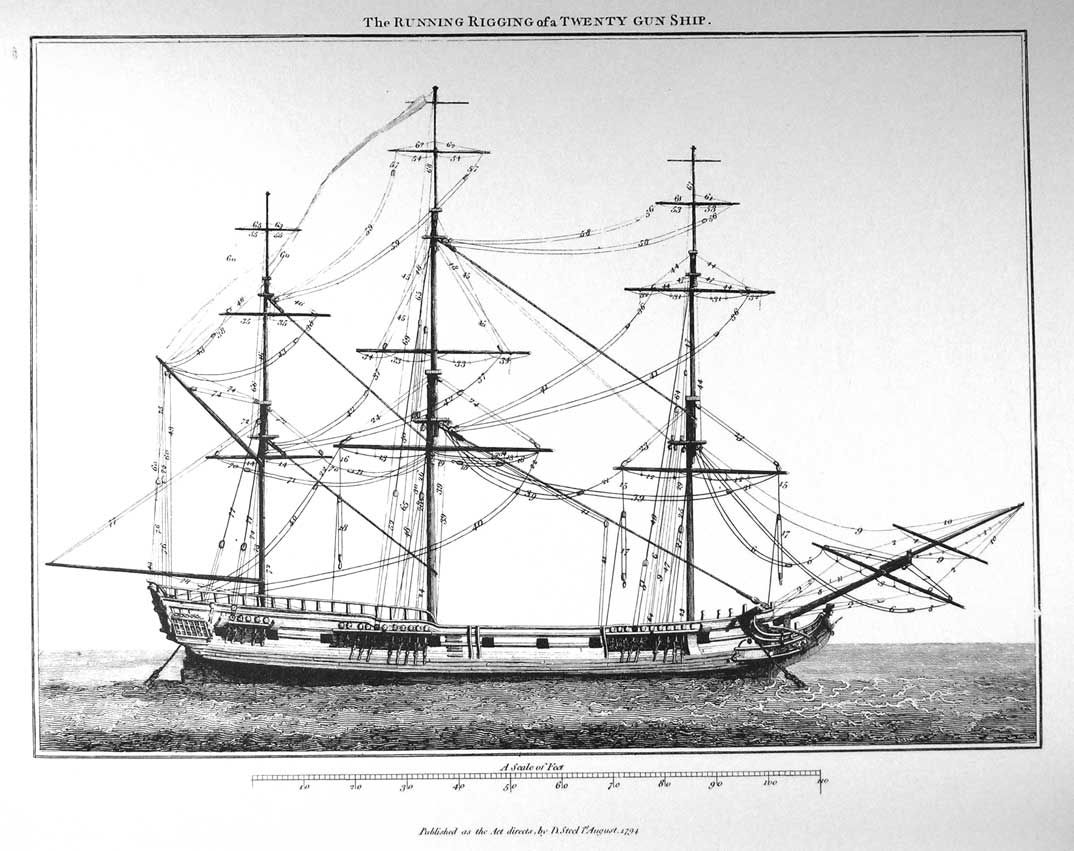
Well, I did some more research - I downloaded the Steele book and this is what I found. The main and fore stay tackles and pendants, on a small ship (20 guns or so), seem to be attached to the boat. Photos from Steele: On a recent trip to the US Navel Academy Museum, one of the models had the stay tackles were attached to the boat with the lines attached to the gallows. Photo of the model: And the John Harland book shows the yard tackle and pendant 'traced' up to the yard. Photo from Harland: So, from all this, there may be a solution for a small ship with only one boat. However, I don't know what happens to the main and fore yard tackles and pendants on a large ship with multiple boats. Don't know if this helps.