Gahm
-
Posts
1,217 -
Joined
-
Last visited
Content Type
Profiles
Forums
Gallery
Events
Everything posted by Gahm
-
 Nice, clean planking B.E.! A pleasure to watch! Thomas
- 261 replies
-
- 1
-

-
- muirneag
- vanguard models
- (and 2 more)
-
As far as I can tell there were different methods used and either of your choices would work fine. I tried the four methods, which I found the most often, and finally selected the one I liked best for my situation. I hope this helps. Thomas
- 950 replies
-
- 4
-
-
- syren
- model shipways
- (and 1 more)
-
US Brig Syren by Gahm - Model Shipways
Gahm replied to Gahm's topic in - Kit build logs for subjects built from 1801 - 1850
Thank you, Yves! Thomas -
US Brig Syren by Gahm - Model Shipways
Gahm replied to Gahm's topic in - Kit build logs for subjects built from 1801 - 1850
Bob, Mike and Jesse, thank you so much for your kind comments! Thomas -
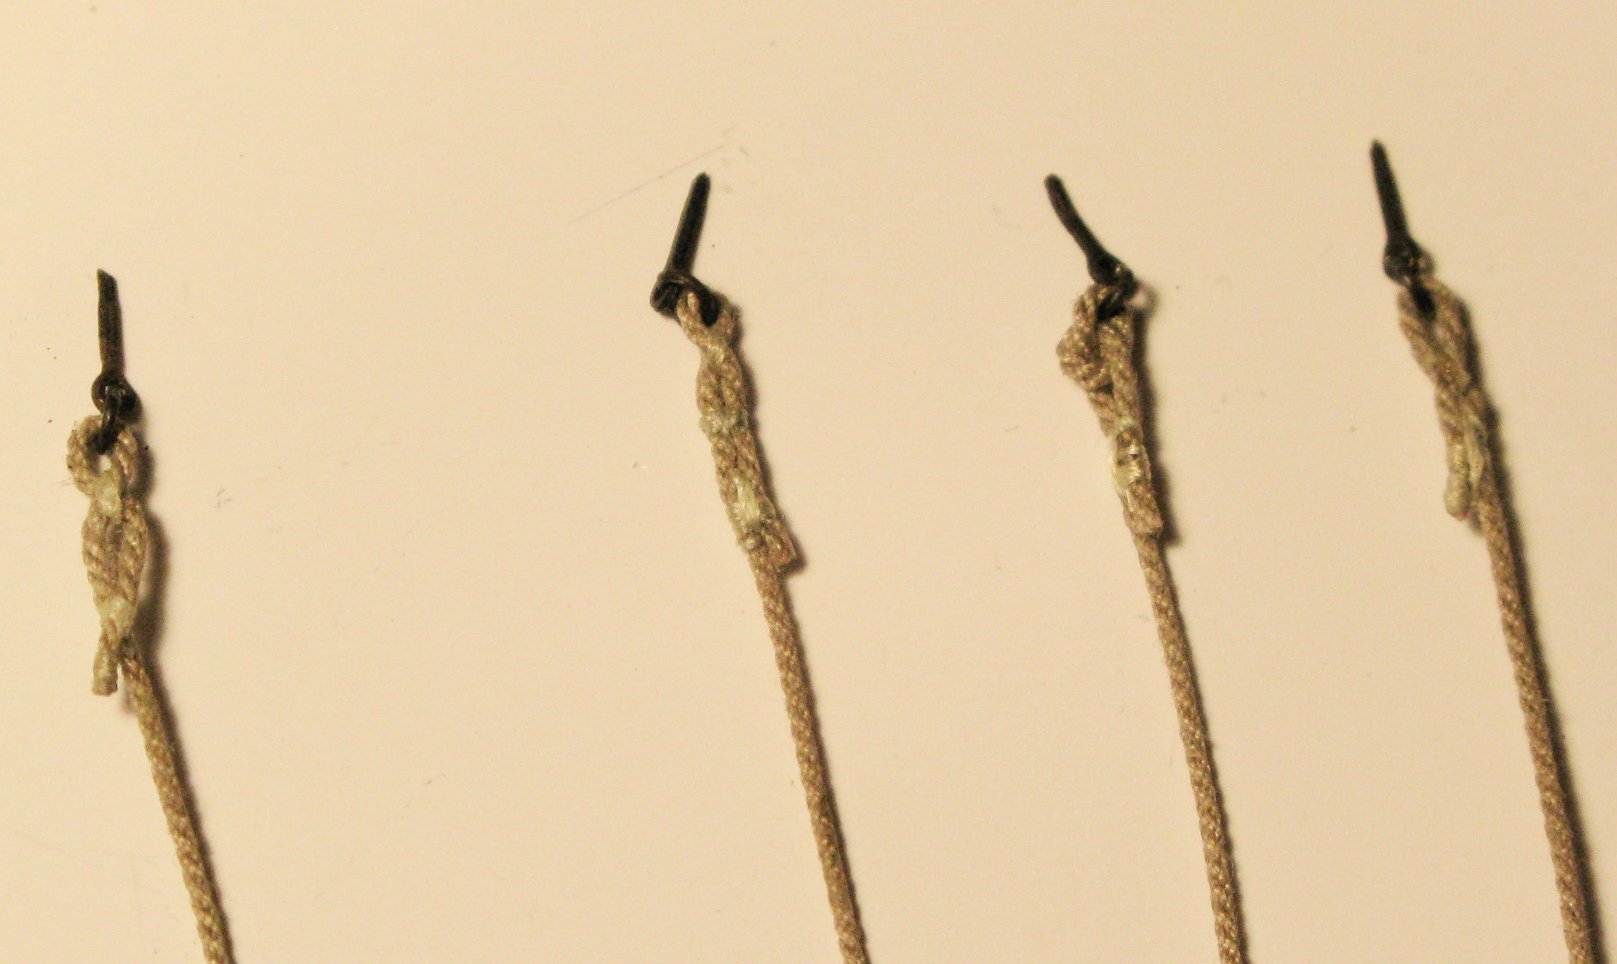
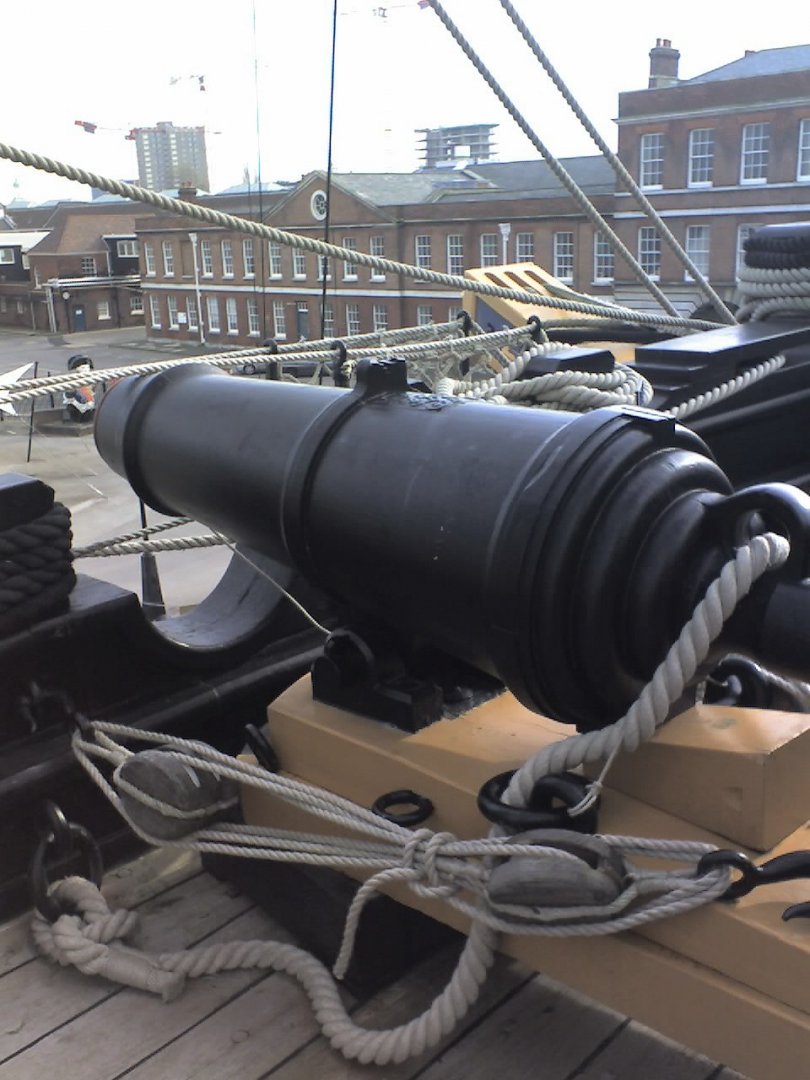
Your carronade looks very good! And I agree, the Syren rope makes a big difference in the overall appearance. Thomas
-
US Brig Syren by Gahm - Model Shipways
Gahm replied to Gahm's topic in - Kit build logs for subjects built from 1801 - 1850
Thank you Dowmer and NovaStorm, and thanks for all the likes! Your feedback and your kind words are highly appreciated! And you are right, 'the devil is always in the details' 🙂, but this is also where the fun is. Thomas -
US Brig Syren by Gahm - Model Shipways
Gahm replied to Gahm's topic in - Kit build logs for subjects built from 1801 - 1850
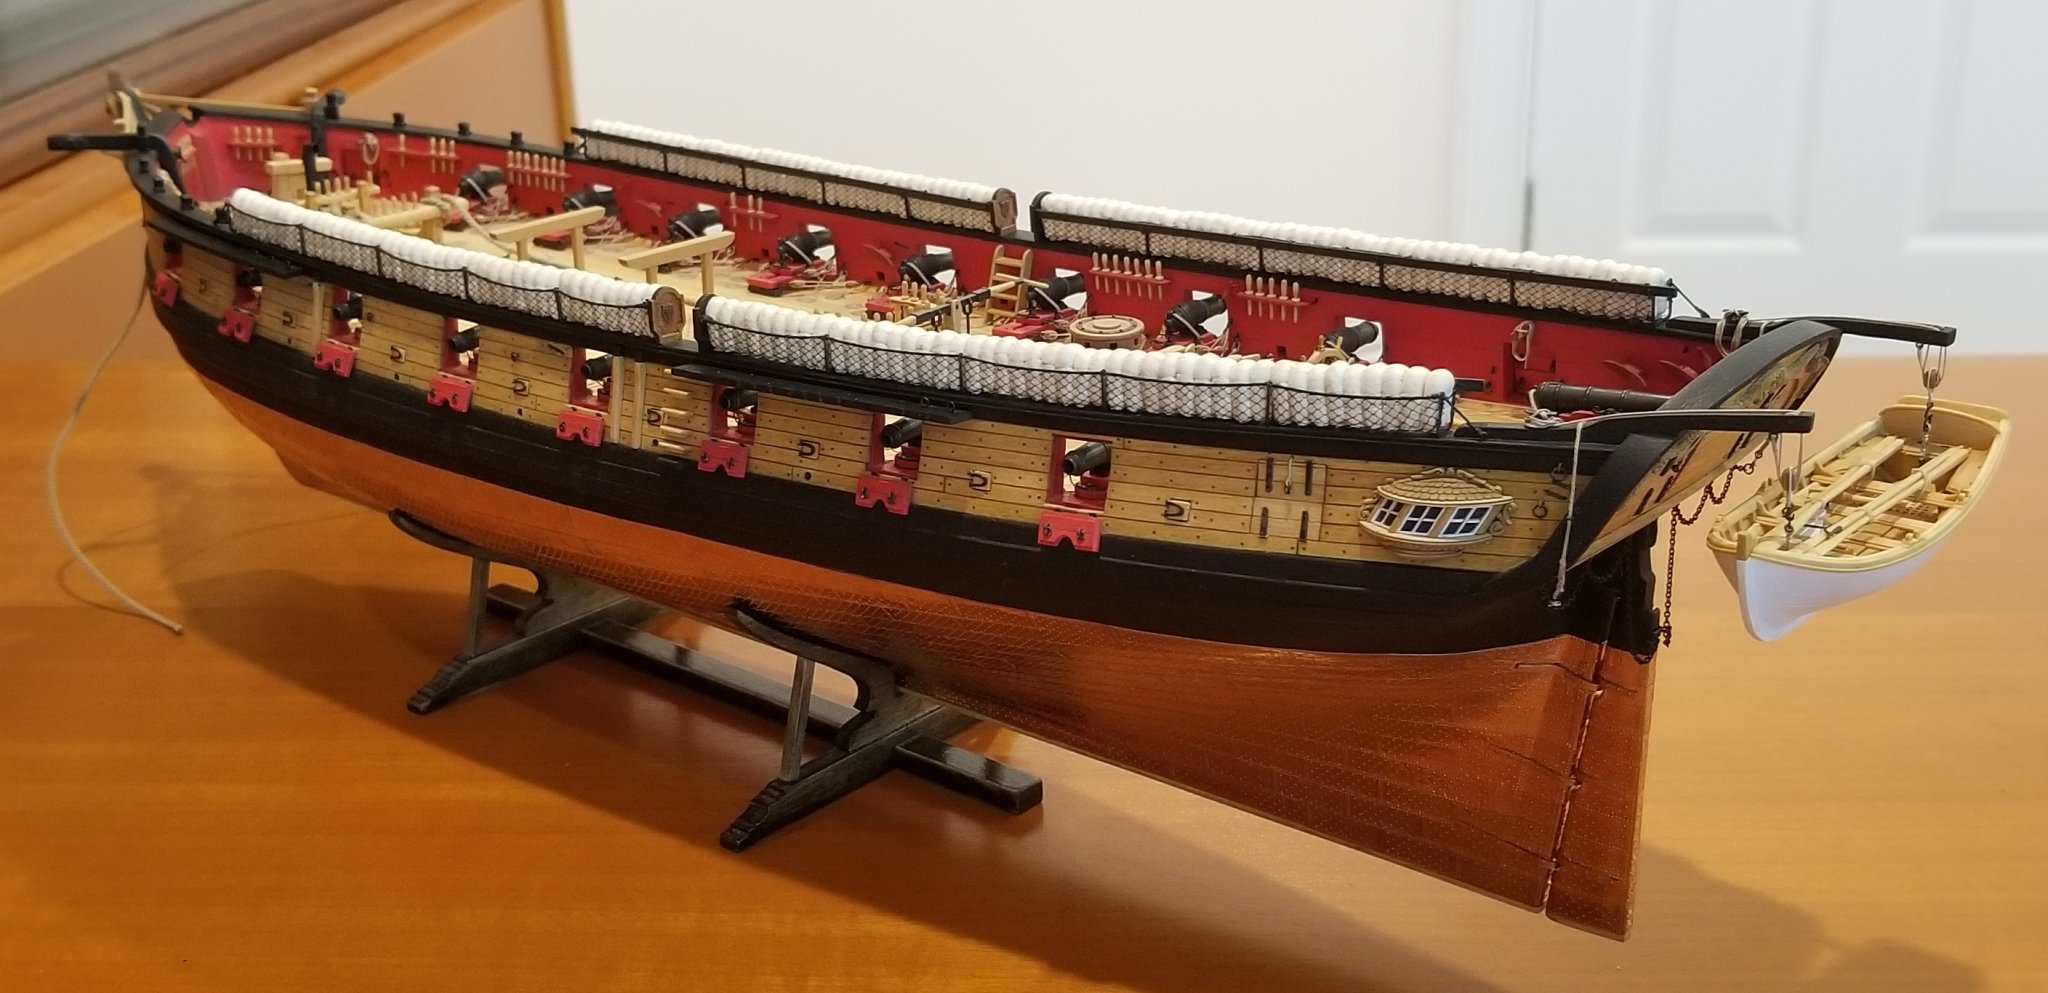
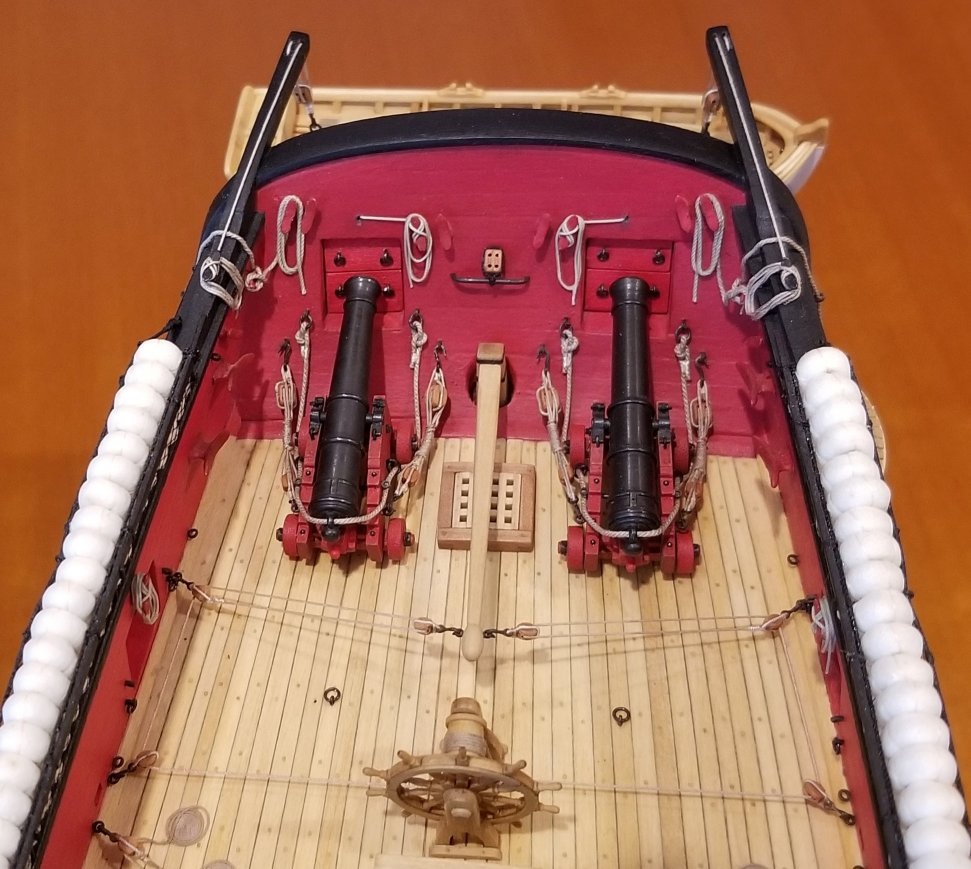
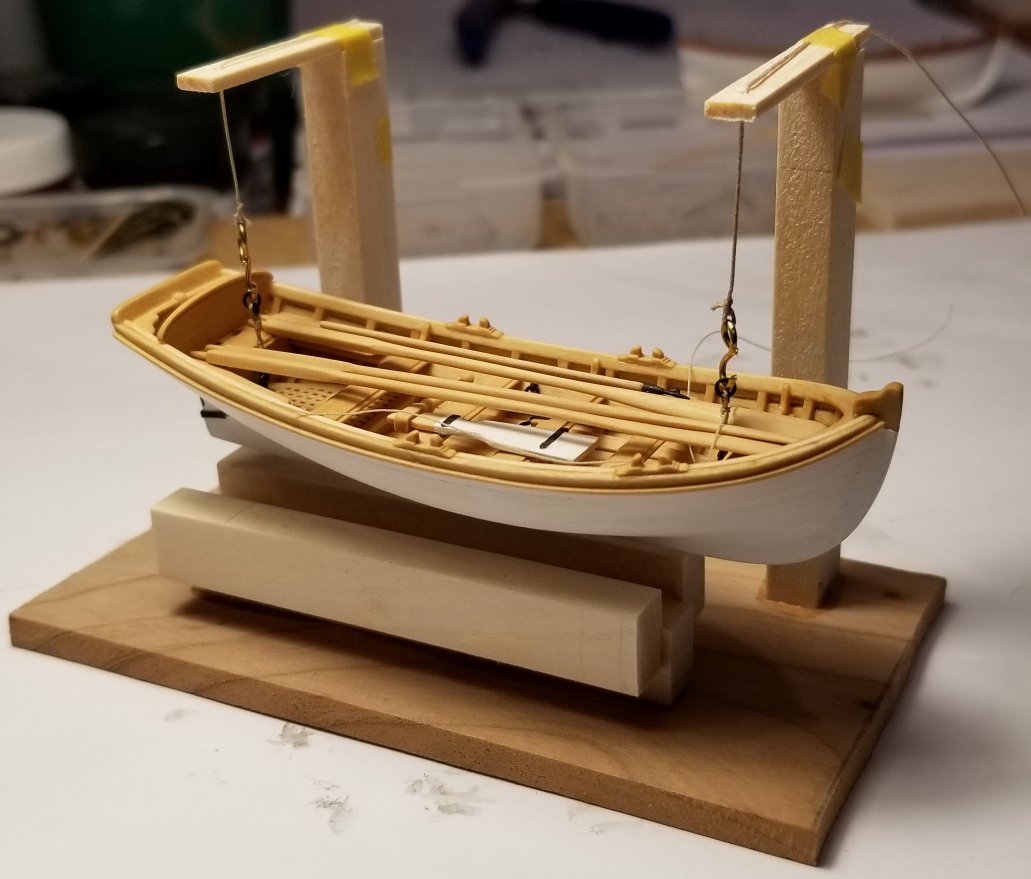
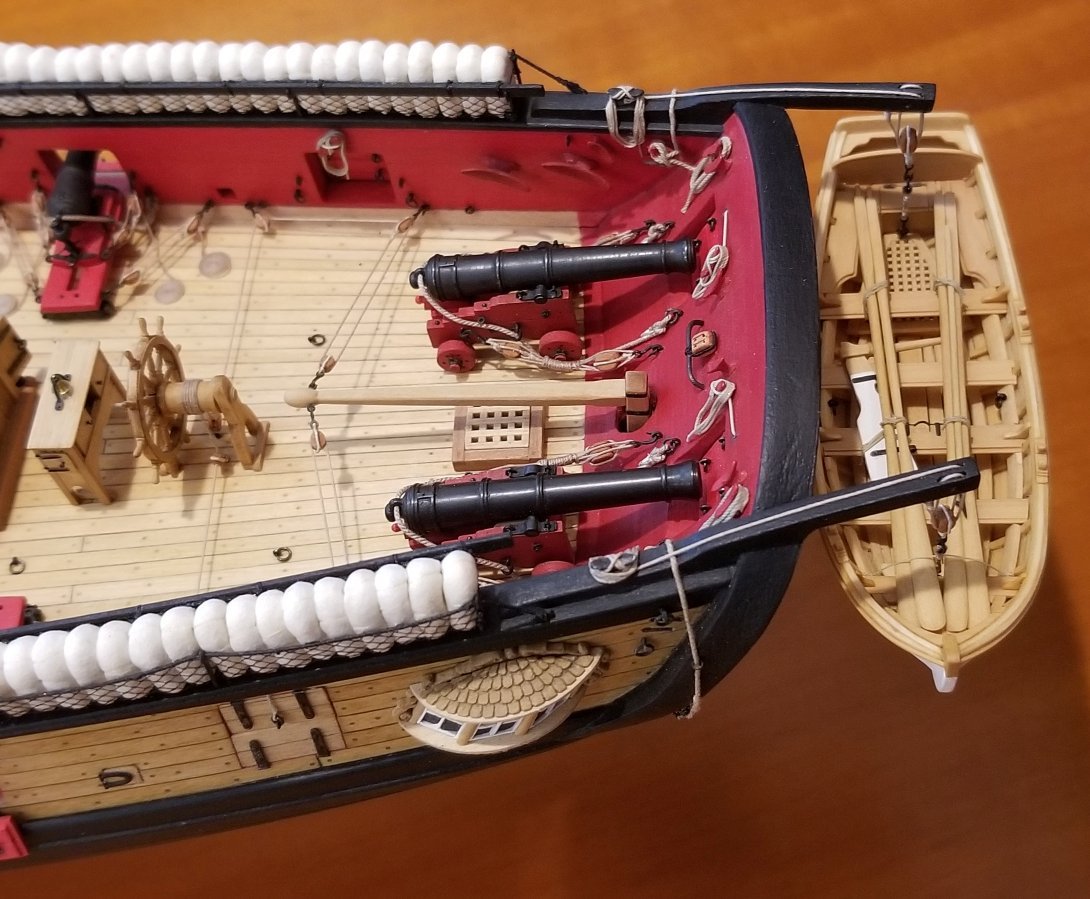
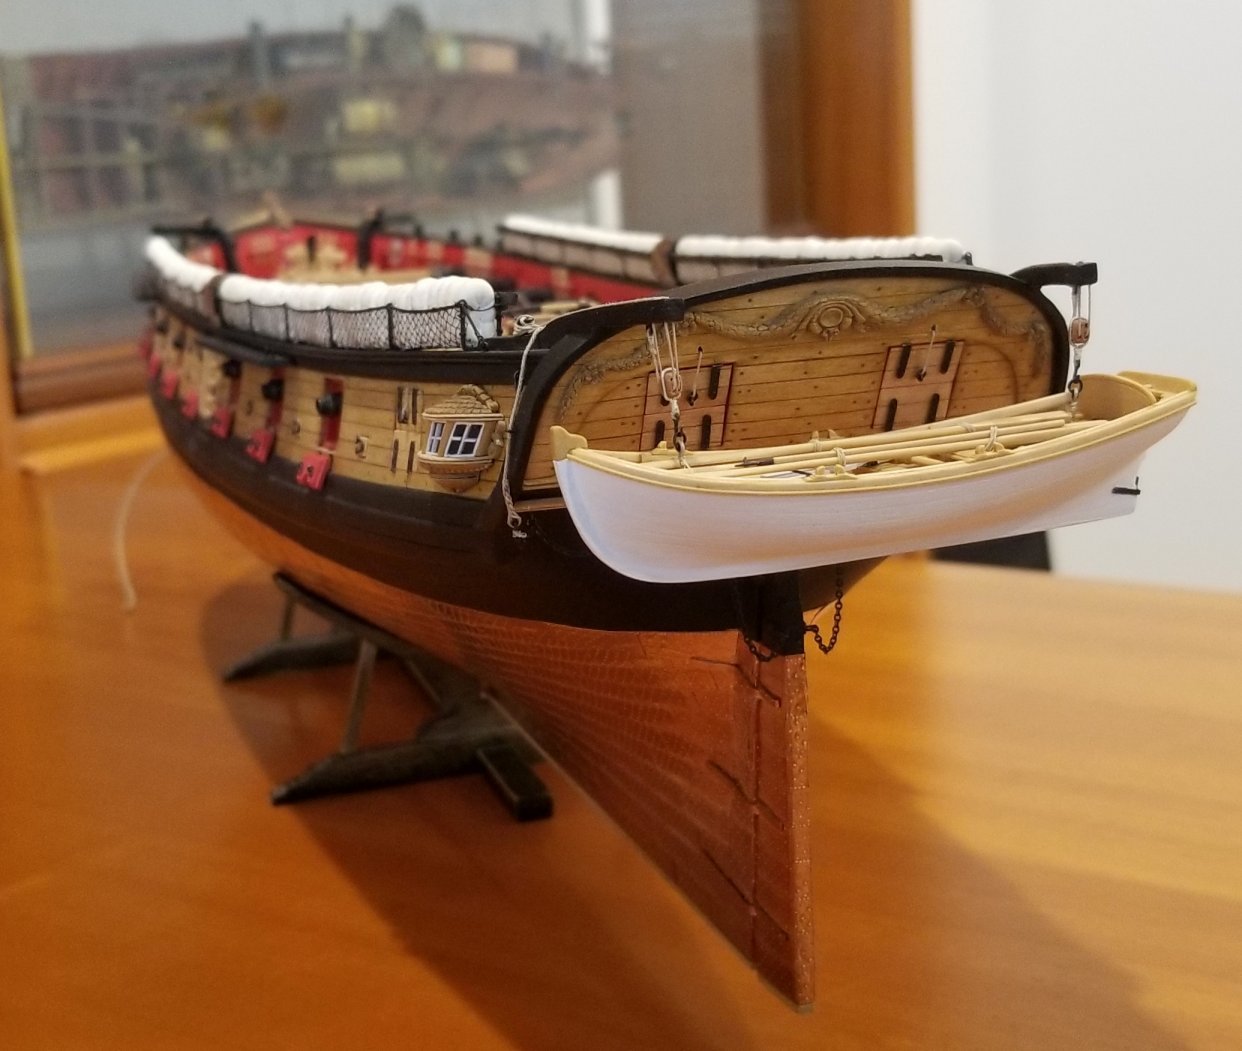
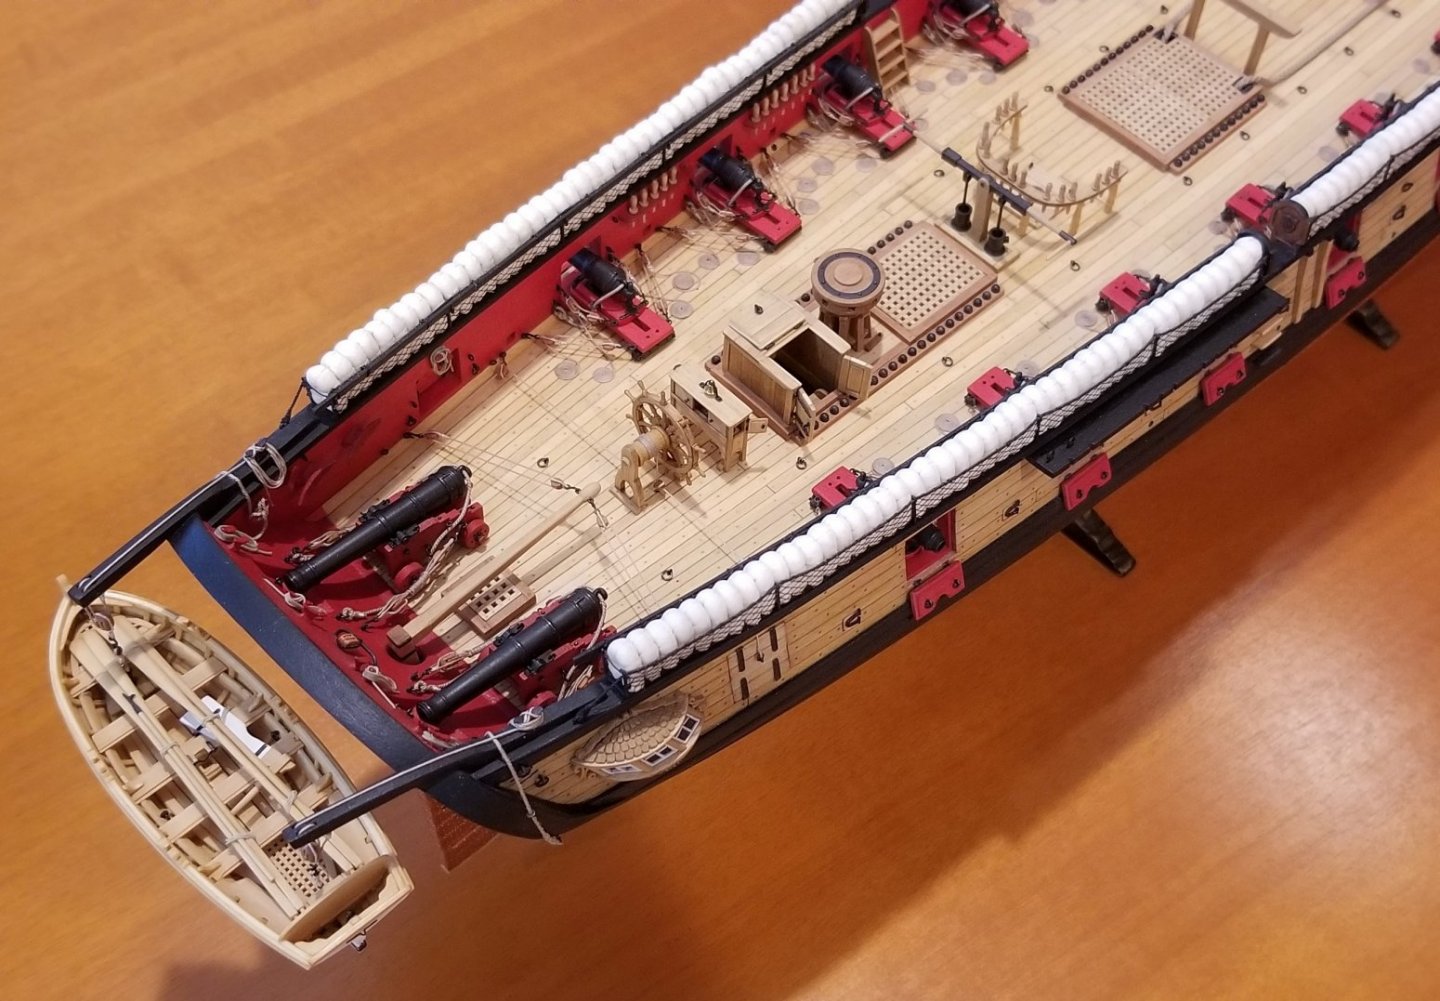
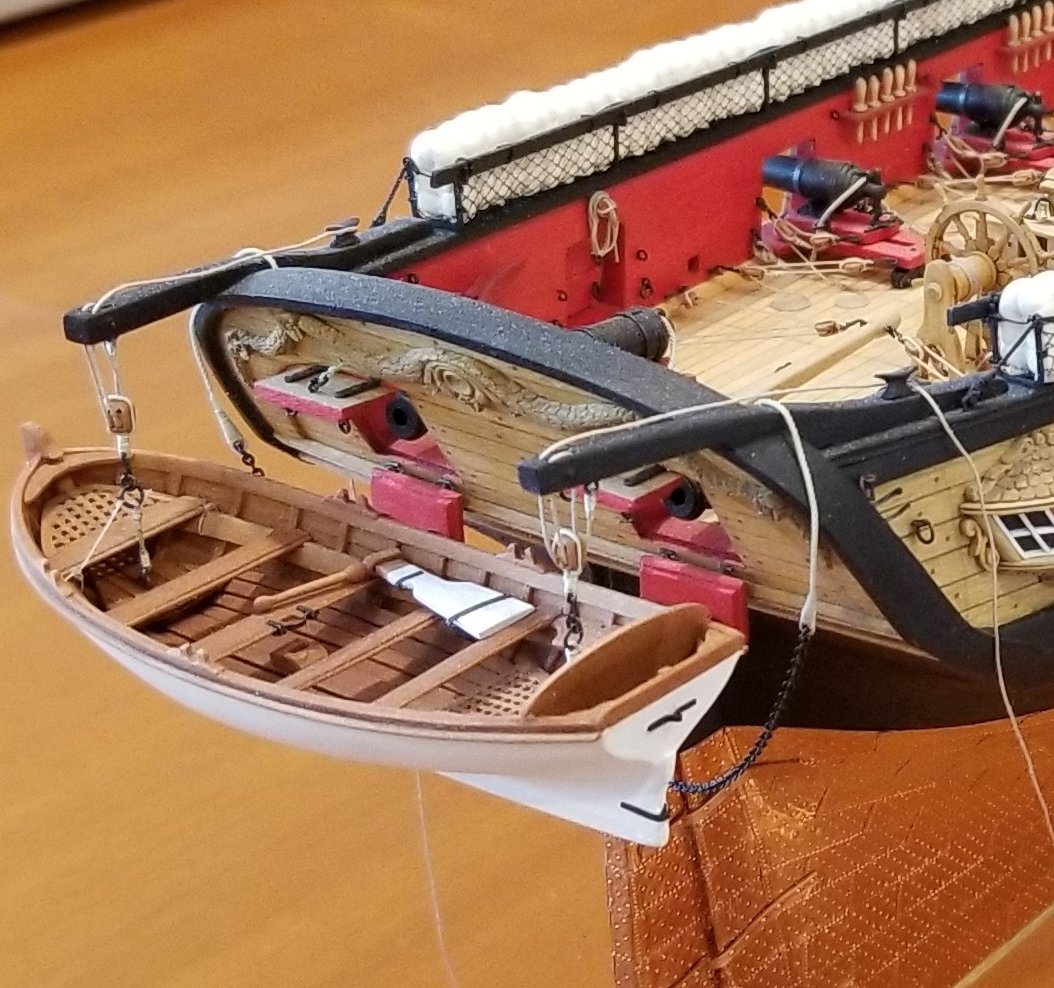
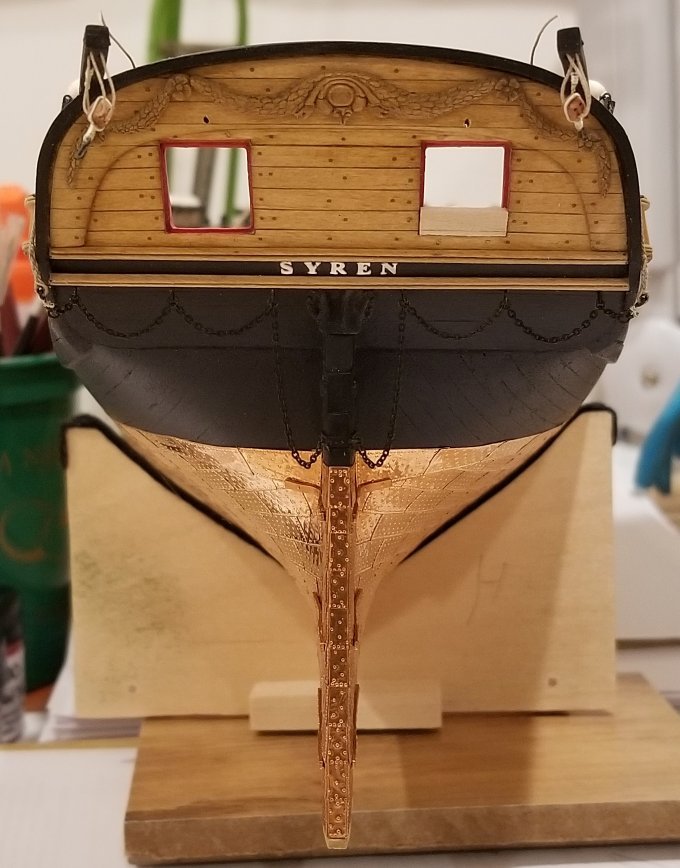
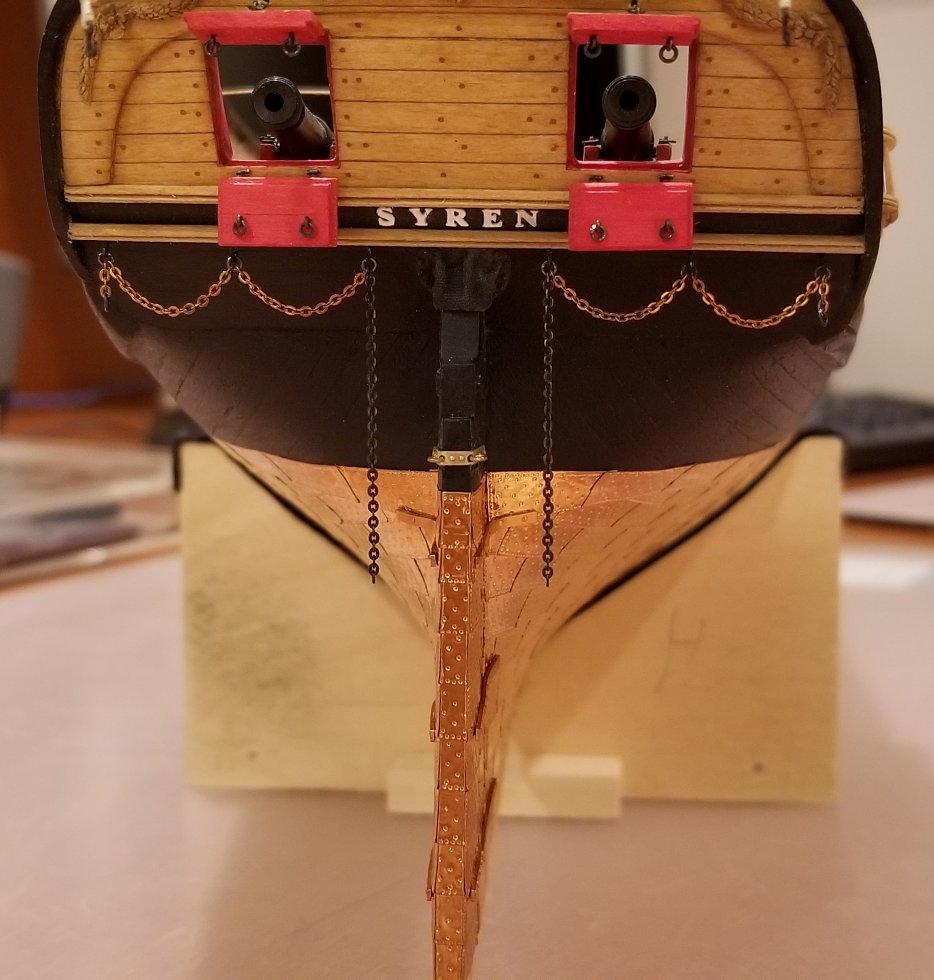
Finally the changes to the stern of my Syren are finished. The gun ports are closed (img 1), the long guns are back in place and rigged (imgs 2 and 3), and the jolly boat is in its final position (imgs 4 – 8). Thomas Img_01 Img_02 Img_03 Img_04 Img_05 Img_06 Img_07 Img_08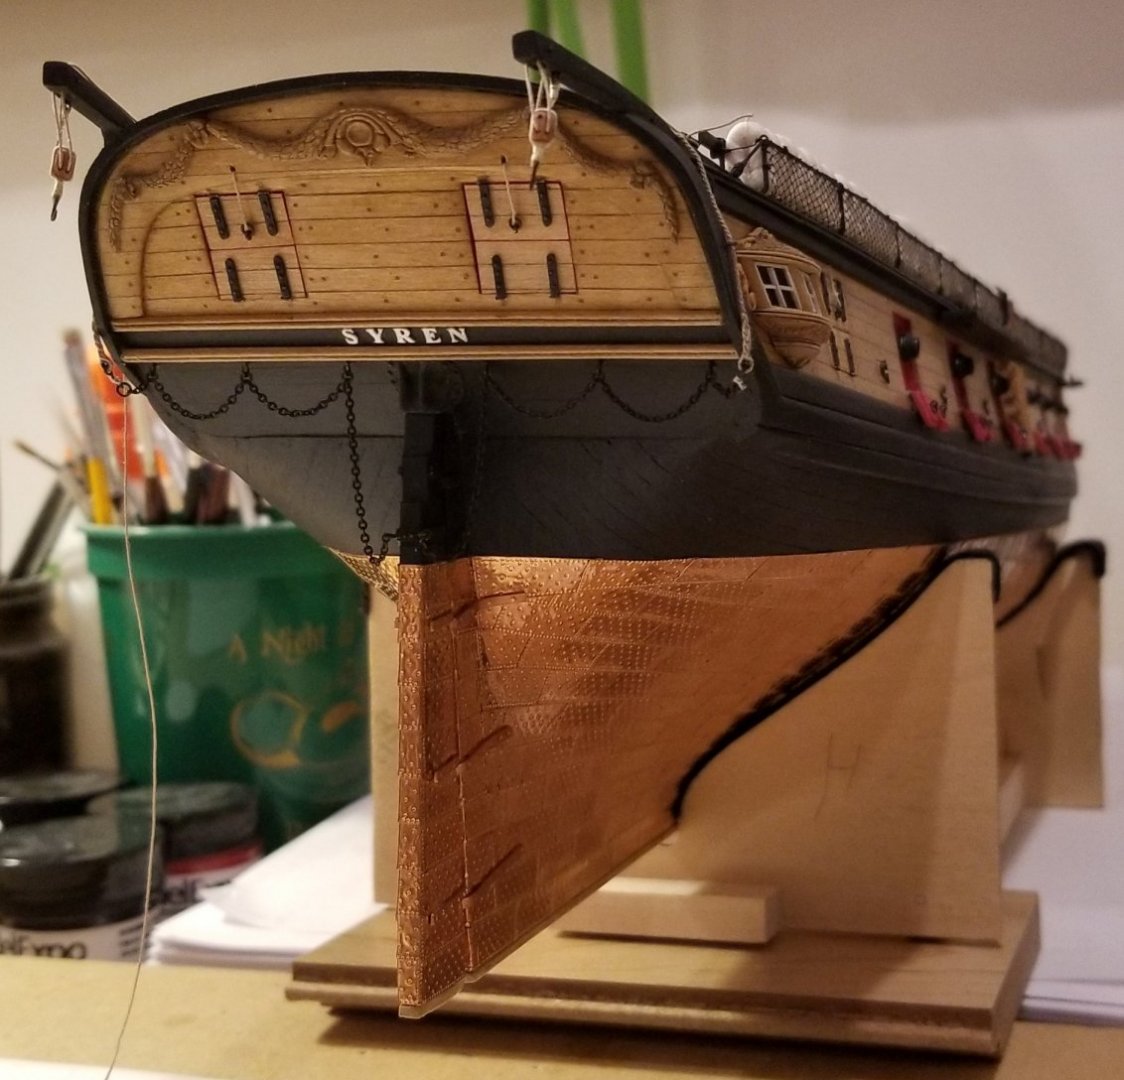

-
It always looks very impressive when the whole battery is in place for the first time! Your Syren got her teeth now 🙂 Thomas
- 950 replies
-
- 2
-
-
- syren
- model shipways
- (and 1 more)
-
Simply beautiful, B.E.! You probably mentioned it somewhere, is the upper part of the hull made of cherry wood? Thomas
- 261 replies
-
- 2
-
-
- muirneag
- vanguard models
- (and 2 more)
-
Your Winchelsea is a beauty! A pleasure to follow your build log! Thomas
-
You have done such a beautiful job with your Syren so far that you would be far better off using some good looking rope (see for example Chuck's Syren shop) instead of the kit provided nylon stuff. Most of the kit material I just use for prototyping 🙂 (and that even included the bass wood - for planking I bought new bass wood strips which I carefully selected for grain and coloration). In my opinion the main investment is not so much the money we have to spend now and again for good material but rather the time we invest in our models. Thomas
-
Wonderful job on those quarter galleries, Bob! Thomas
-
Congratulations, you finished one of the most difficult parts of the Syren build. It took me for ever to get this done 🙂 Thomas
- 950 replies
-
- 1
-
-
- syren
- model shipways
- (and 1 more)
-
US Brig Syren by Gahm - Model Shipways
Gahm replied to Gahm's topic in - Kit build logs for subjects built from 1801 - 1850
Thank you for the likes! Thomas -
Well done! You are getting one difficult part after the other out of the way 😉 Thomas
- 950 replies
-
- 1
-
-
- syren
- model shipways
- (and 1 more)
-
US Brig Syren by Gahm - Model Shipways
Gahm replied to Gahm's topic in - Kit build logs for subjects built from 1801 - 1850
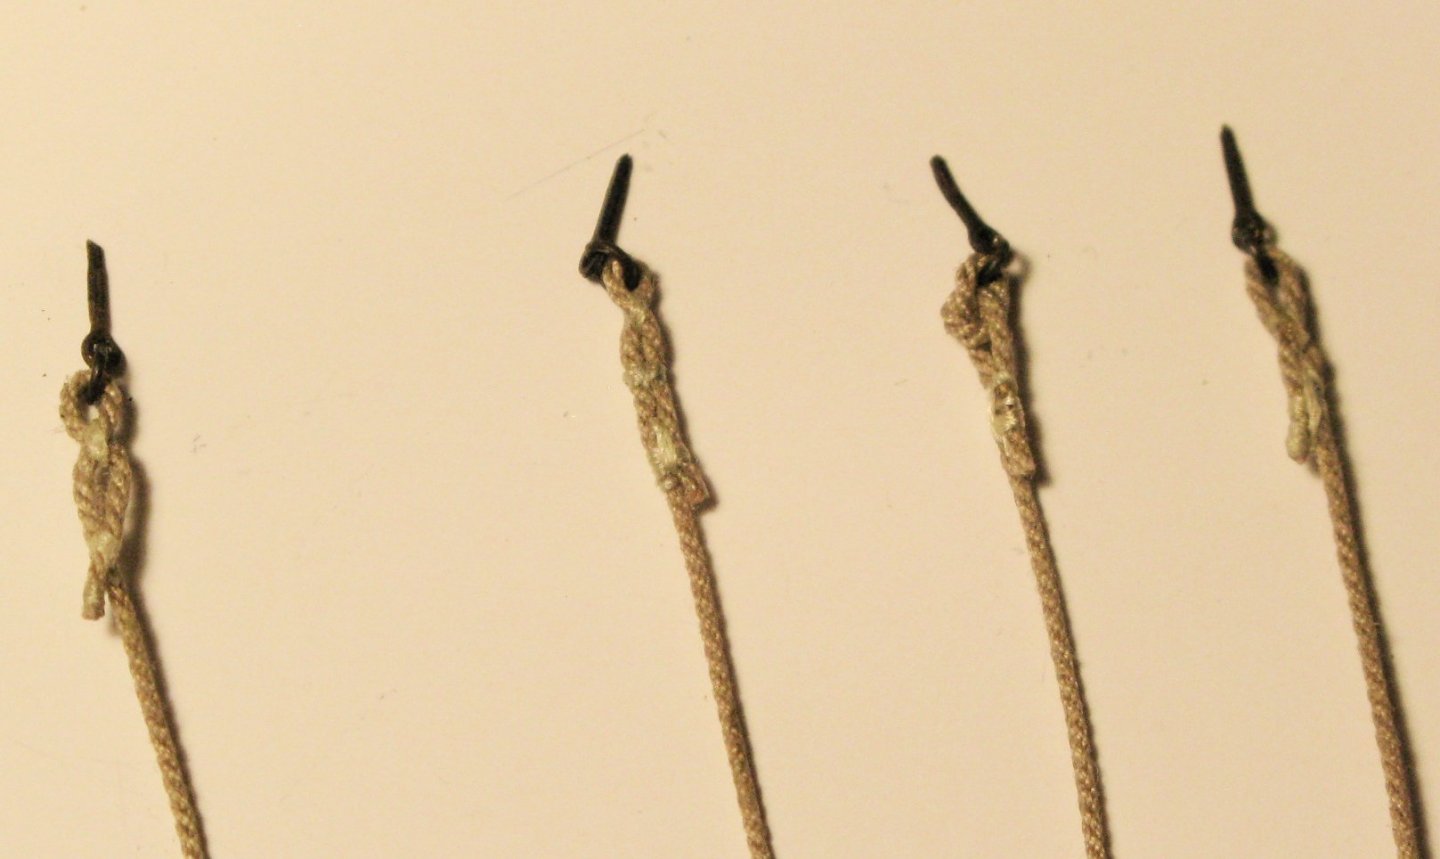
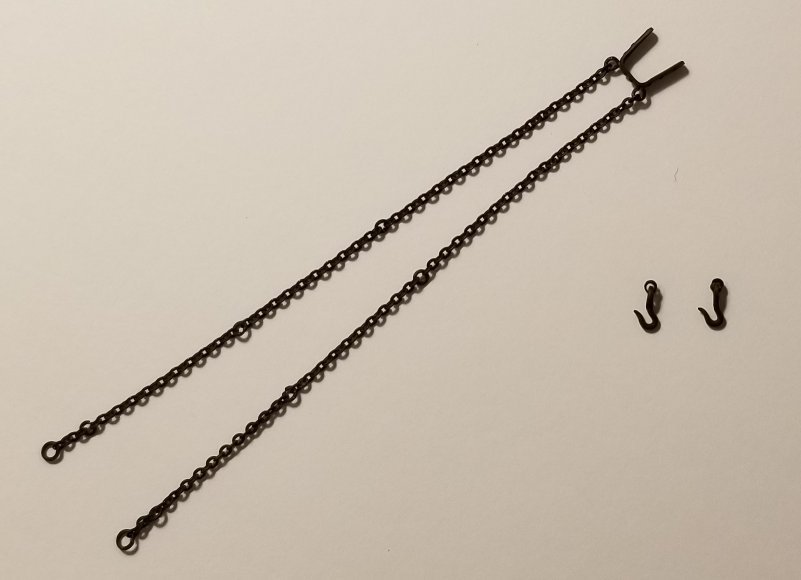
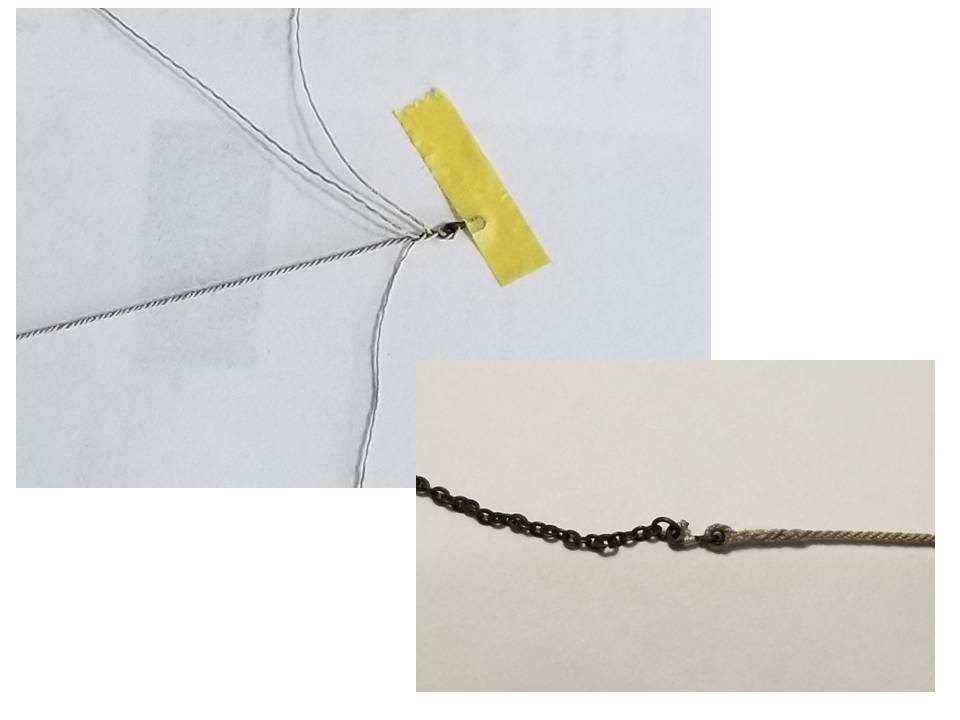
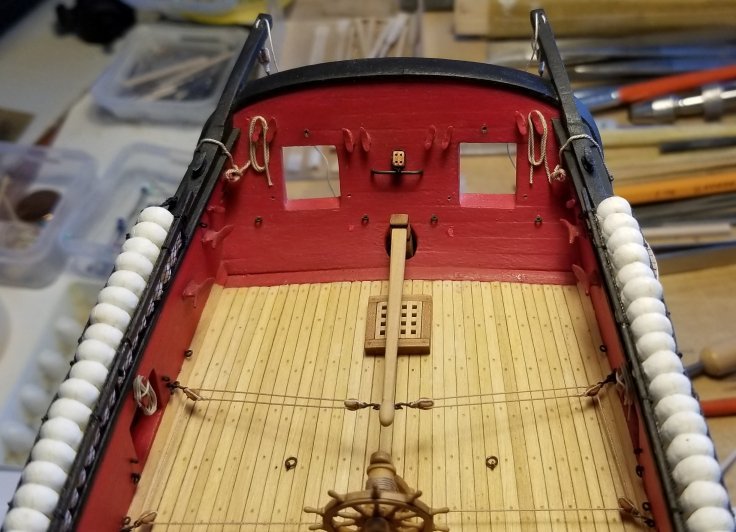
To hang the jolly boat from the rear davits a few steps are necessary: I need to get the rudder pendants out of the way, close the gun ports, hang the jolly boat from the davits and relocate/ re-tackle the long guns. As a first step of course a lot of destruction is necessary . . . Img 1 shows the initial solution for the rudder pendant. With this solution on my Syren the rudder pendants and the tackles for the jolly boat would have touched each other where they crossed (img 2). To avoid this I used a slightly different solution for the rudder pendants, which can be found on a lot of models and follows in general the guidelines from Steel (img 3). This solution moves the crossing points of the rudder pendants to a part of the davits, which has a stronger slope and which allows to have the ropes cross each other without touching: the rudder chain is moved outward and hung from three hooks on each side of the rudder (imgs 4-5). Each rudder pendant is attached to a ring at the end of the rudder chain via a moused hook with a ring splice and a thimble (img 6). Imgs 7-8 show details of the implementation. Thomas Image 1 Image 2 Image 3 Image 4 Image 5 Image 6 Image 7 Image 8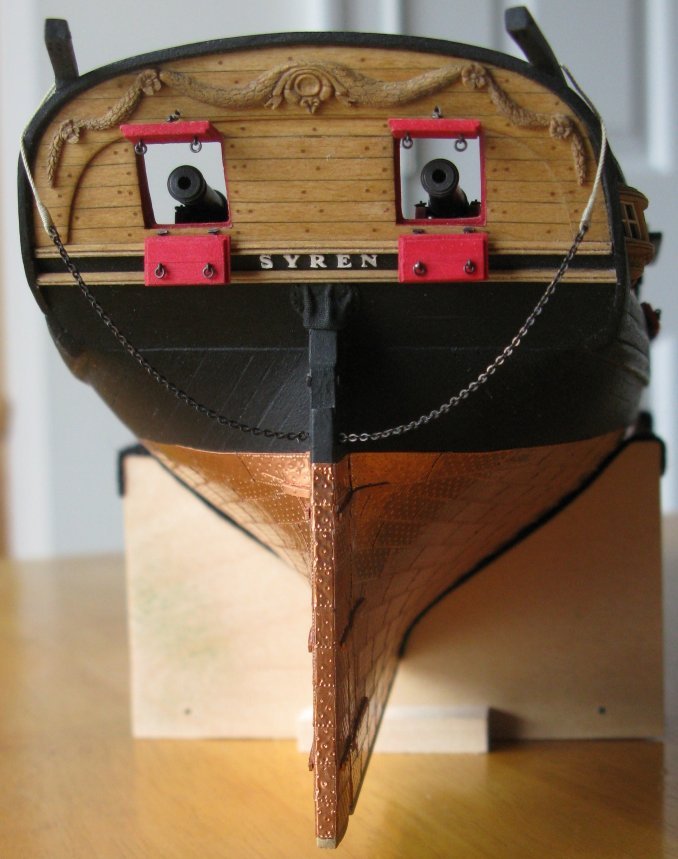

-
Your head rails are coming along very nicely! This clearly is one of the most challenging pieces of the Syren build. And I guess most builders go through a few rounds of construction and destruction before the task is finished 🙂 Thomas
- 950 replies
-
- 1
-
-
- syren
- model shipways
- (and 1 more)
-
I can only repeat what others have already said before me: your craftsmanship and execution of these miniature details is just mind bugling! Thomas
-
Fantastic work, Dafi! I am always amazed about the details and the outstanding quality of work which you realize at such a small scale. Thomas
-
Congratulations on your finished Alert! What a beautiful model! Unfortunately I missed your whole building phase - too many "distractions" caused by non-modeling issues. I hope I can do better with your next project 🙂 Thomas
- 335 replies
-
- 1
-
-
- alert
- vanguard models
- (and 1 more)
-
Absolutely beautiful . . . ! Thomas