vossiewulf
-
Posts
1,477 -
Joined
-
Last visited
Content Type
Profiles
Forums
Gallery
Events
Everything posted by vossiewulf
-
 Of course it's all extremely helpful Rick, already would have run face first into several other walls without you pointing them out. Yes, there will be considerable thinking before placing any furniture, as you point out if there's a pattern I ain't seeing it. And thanks I will check out the cleats as well
- 714 replies
-
- 3
-

-
- lady nelson
- victory models
- (and 1 more)
-
Good point, need to go address that, and thanks you are admirably fulfilling your role today It wasn't in just one, it was in both and that's what made me wonder whether it was intentional. You see one drunk guy staggering about that's one thing, you see two doing it in exact unison and you suspect something else is up.
- 714 replies
-
- 3
-
-
- lady nelson
- victory models
- (and 1 more)
-
Rick, I sincerely hope you didn't quote that part number off the top of your head, if so you need help even more than me And thanks, I will go look. Yes I'm going to remove those bulkhead tabs now and plank the inner bulkhead surface first to get used to the harder boxwood, as of now that will be painted red so I could make some mistakes. I haven't decided on continuous vs. leaving openings, probably the former as these are basically straight. If it were a trickier area with bending and twisting I'd be more inclined to use separate planks to separate those factors as much as possible into individual planks. Tony, I was going back over the photos of cutters you provided. The things I need to think about that I came away with were: Deck furniture issues with the boom pin rail and windlass and position of pretty much everything, the first model showing the companionway forward under the boom and facing aft with different grate/light positions. One question here is the second model showed 3 additional hand-cranked small windlasses, what are those and were they common? Topmast forward of the mainmast. Two sets of braces for main and top square sails. Only I don't understand why there are two sets, why not just run them forward to keep them clear of the spanker boom? Seems overly complicated to run them to two places. Am I missing anything else important?
- 714 replies
-
- 2
-
-
- lady nelson
- victory models
- (and 1 more)
-
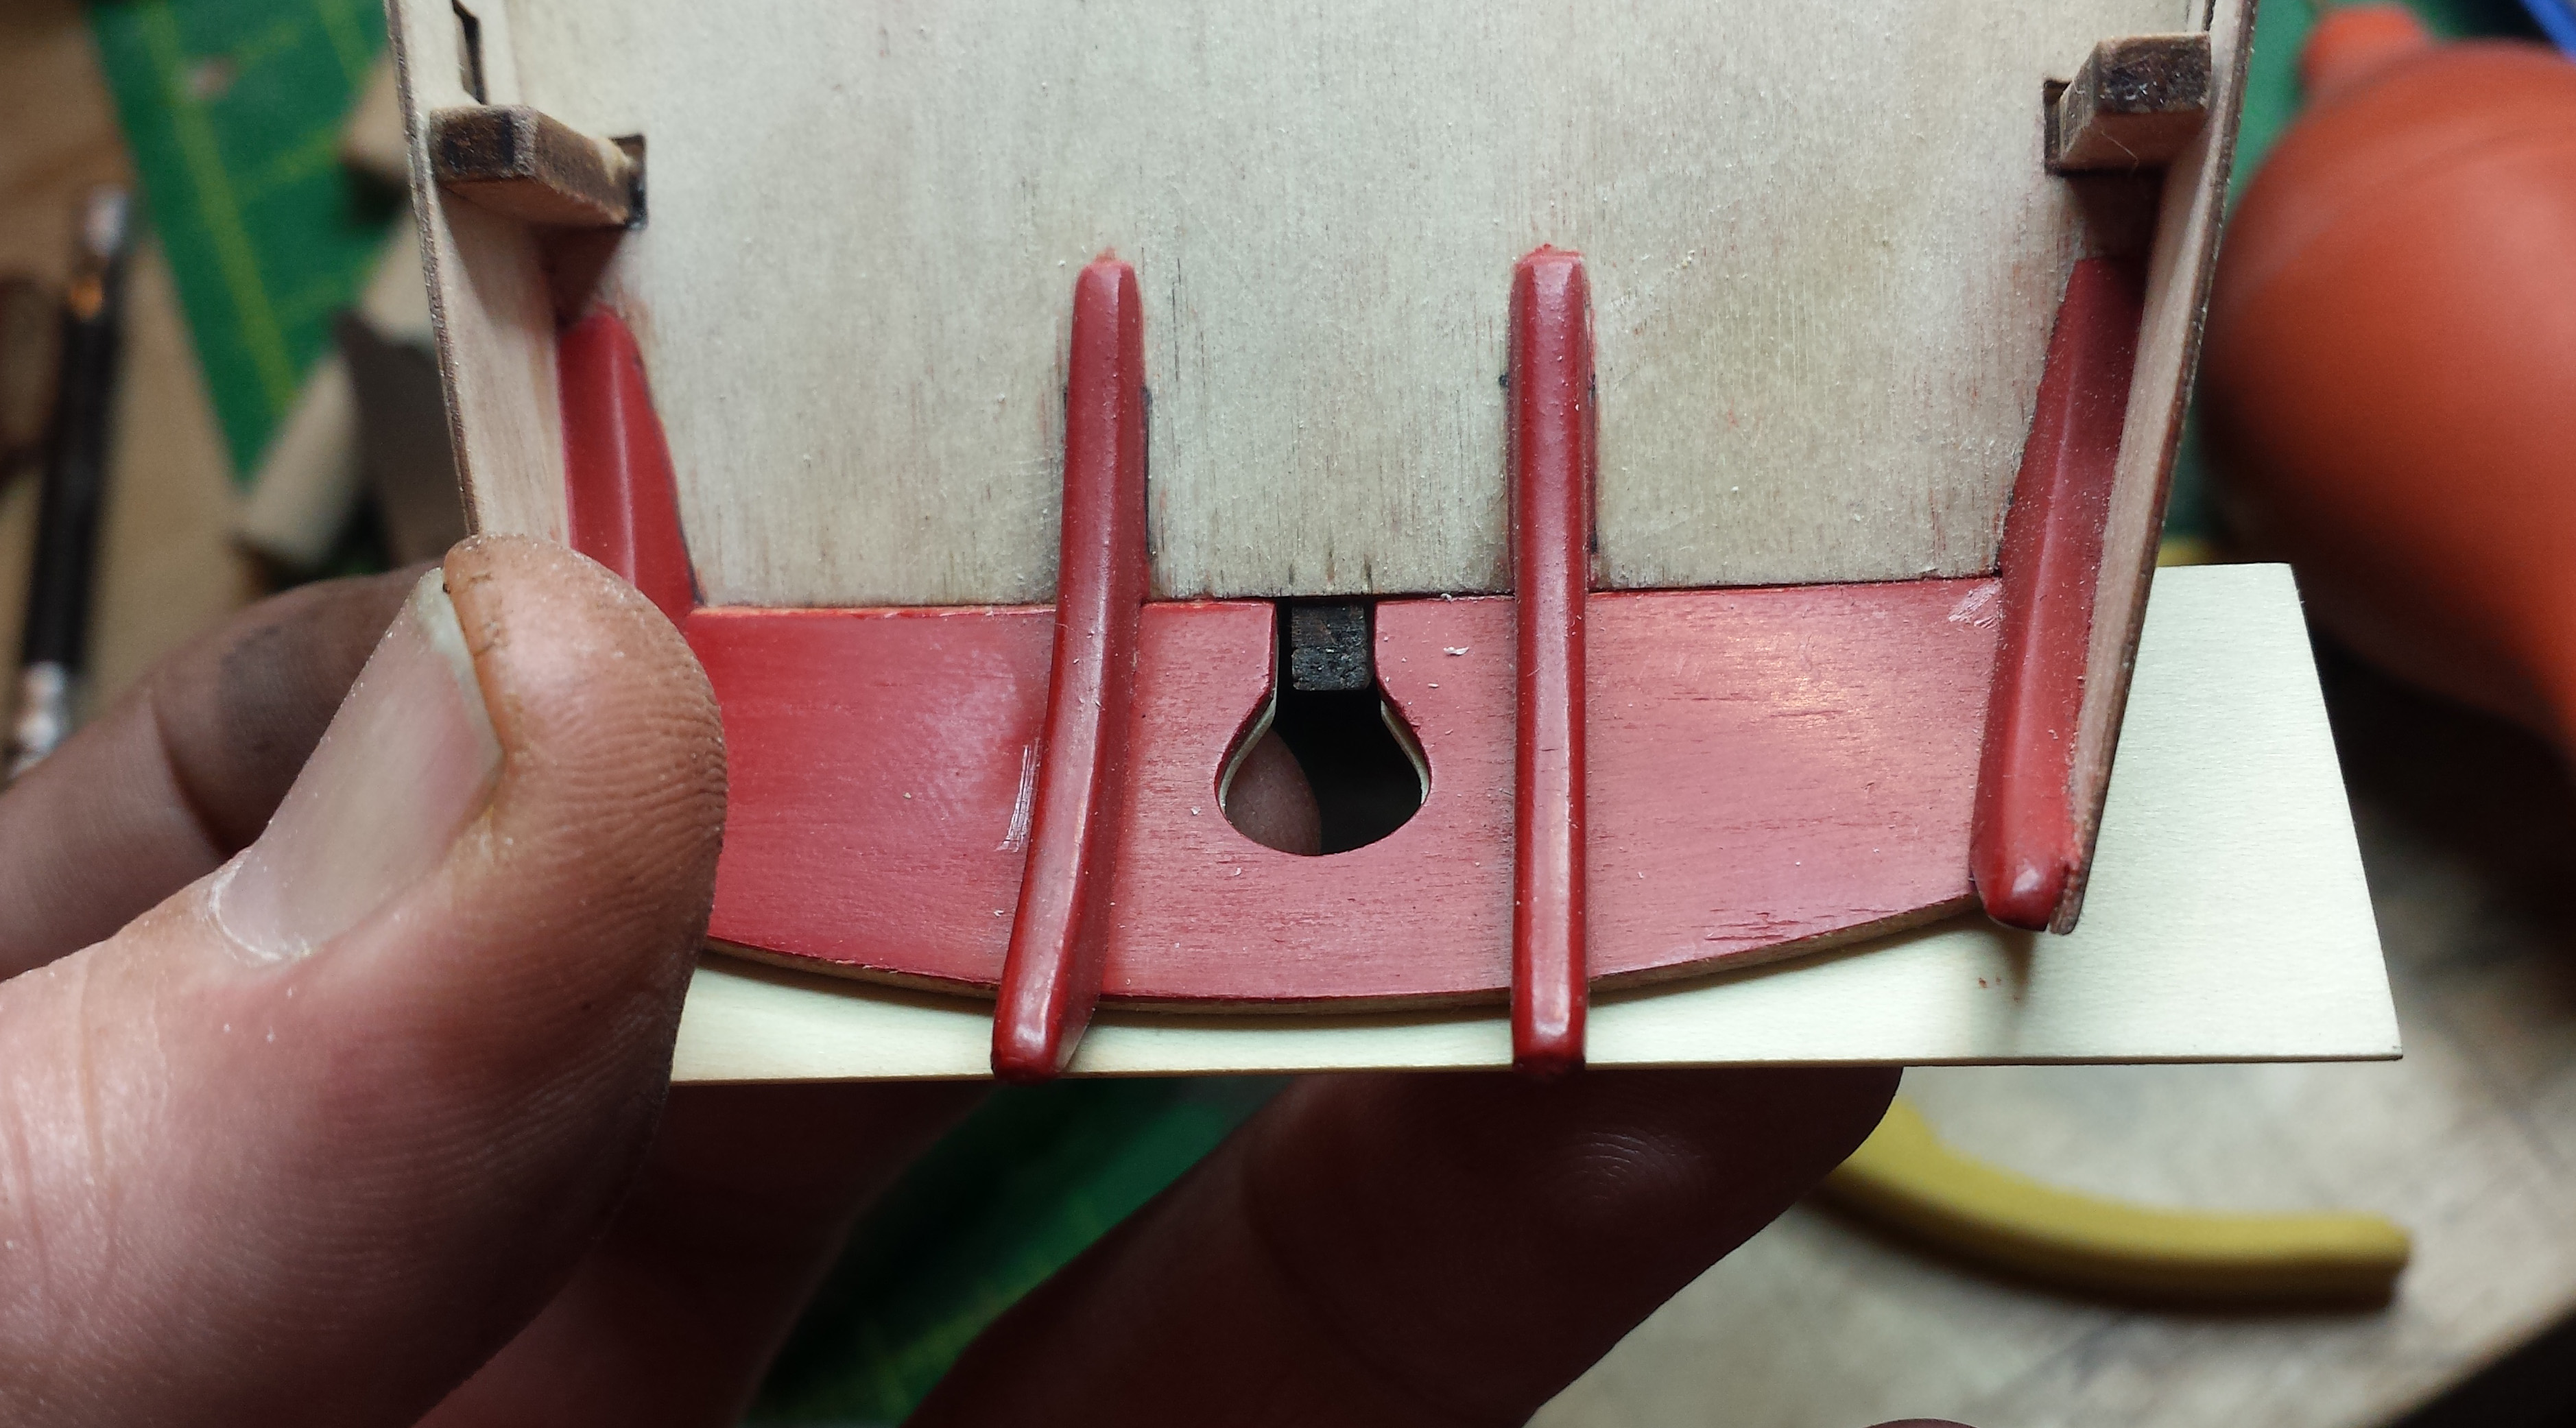
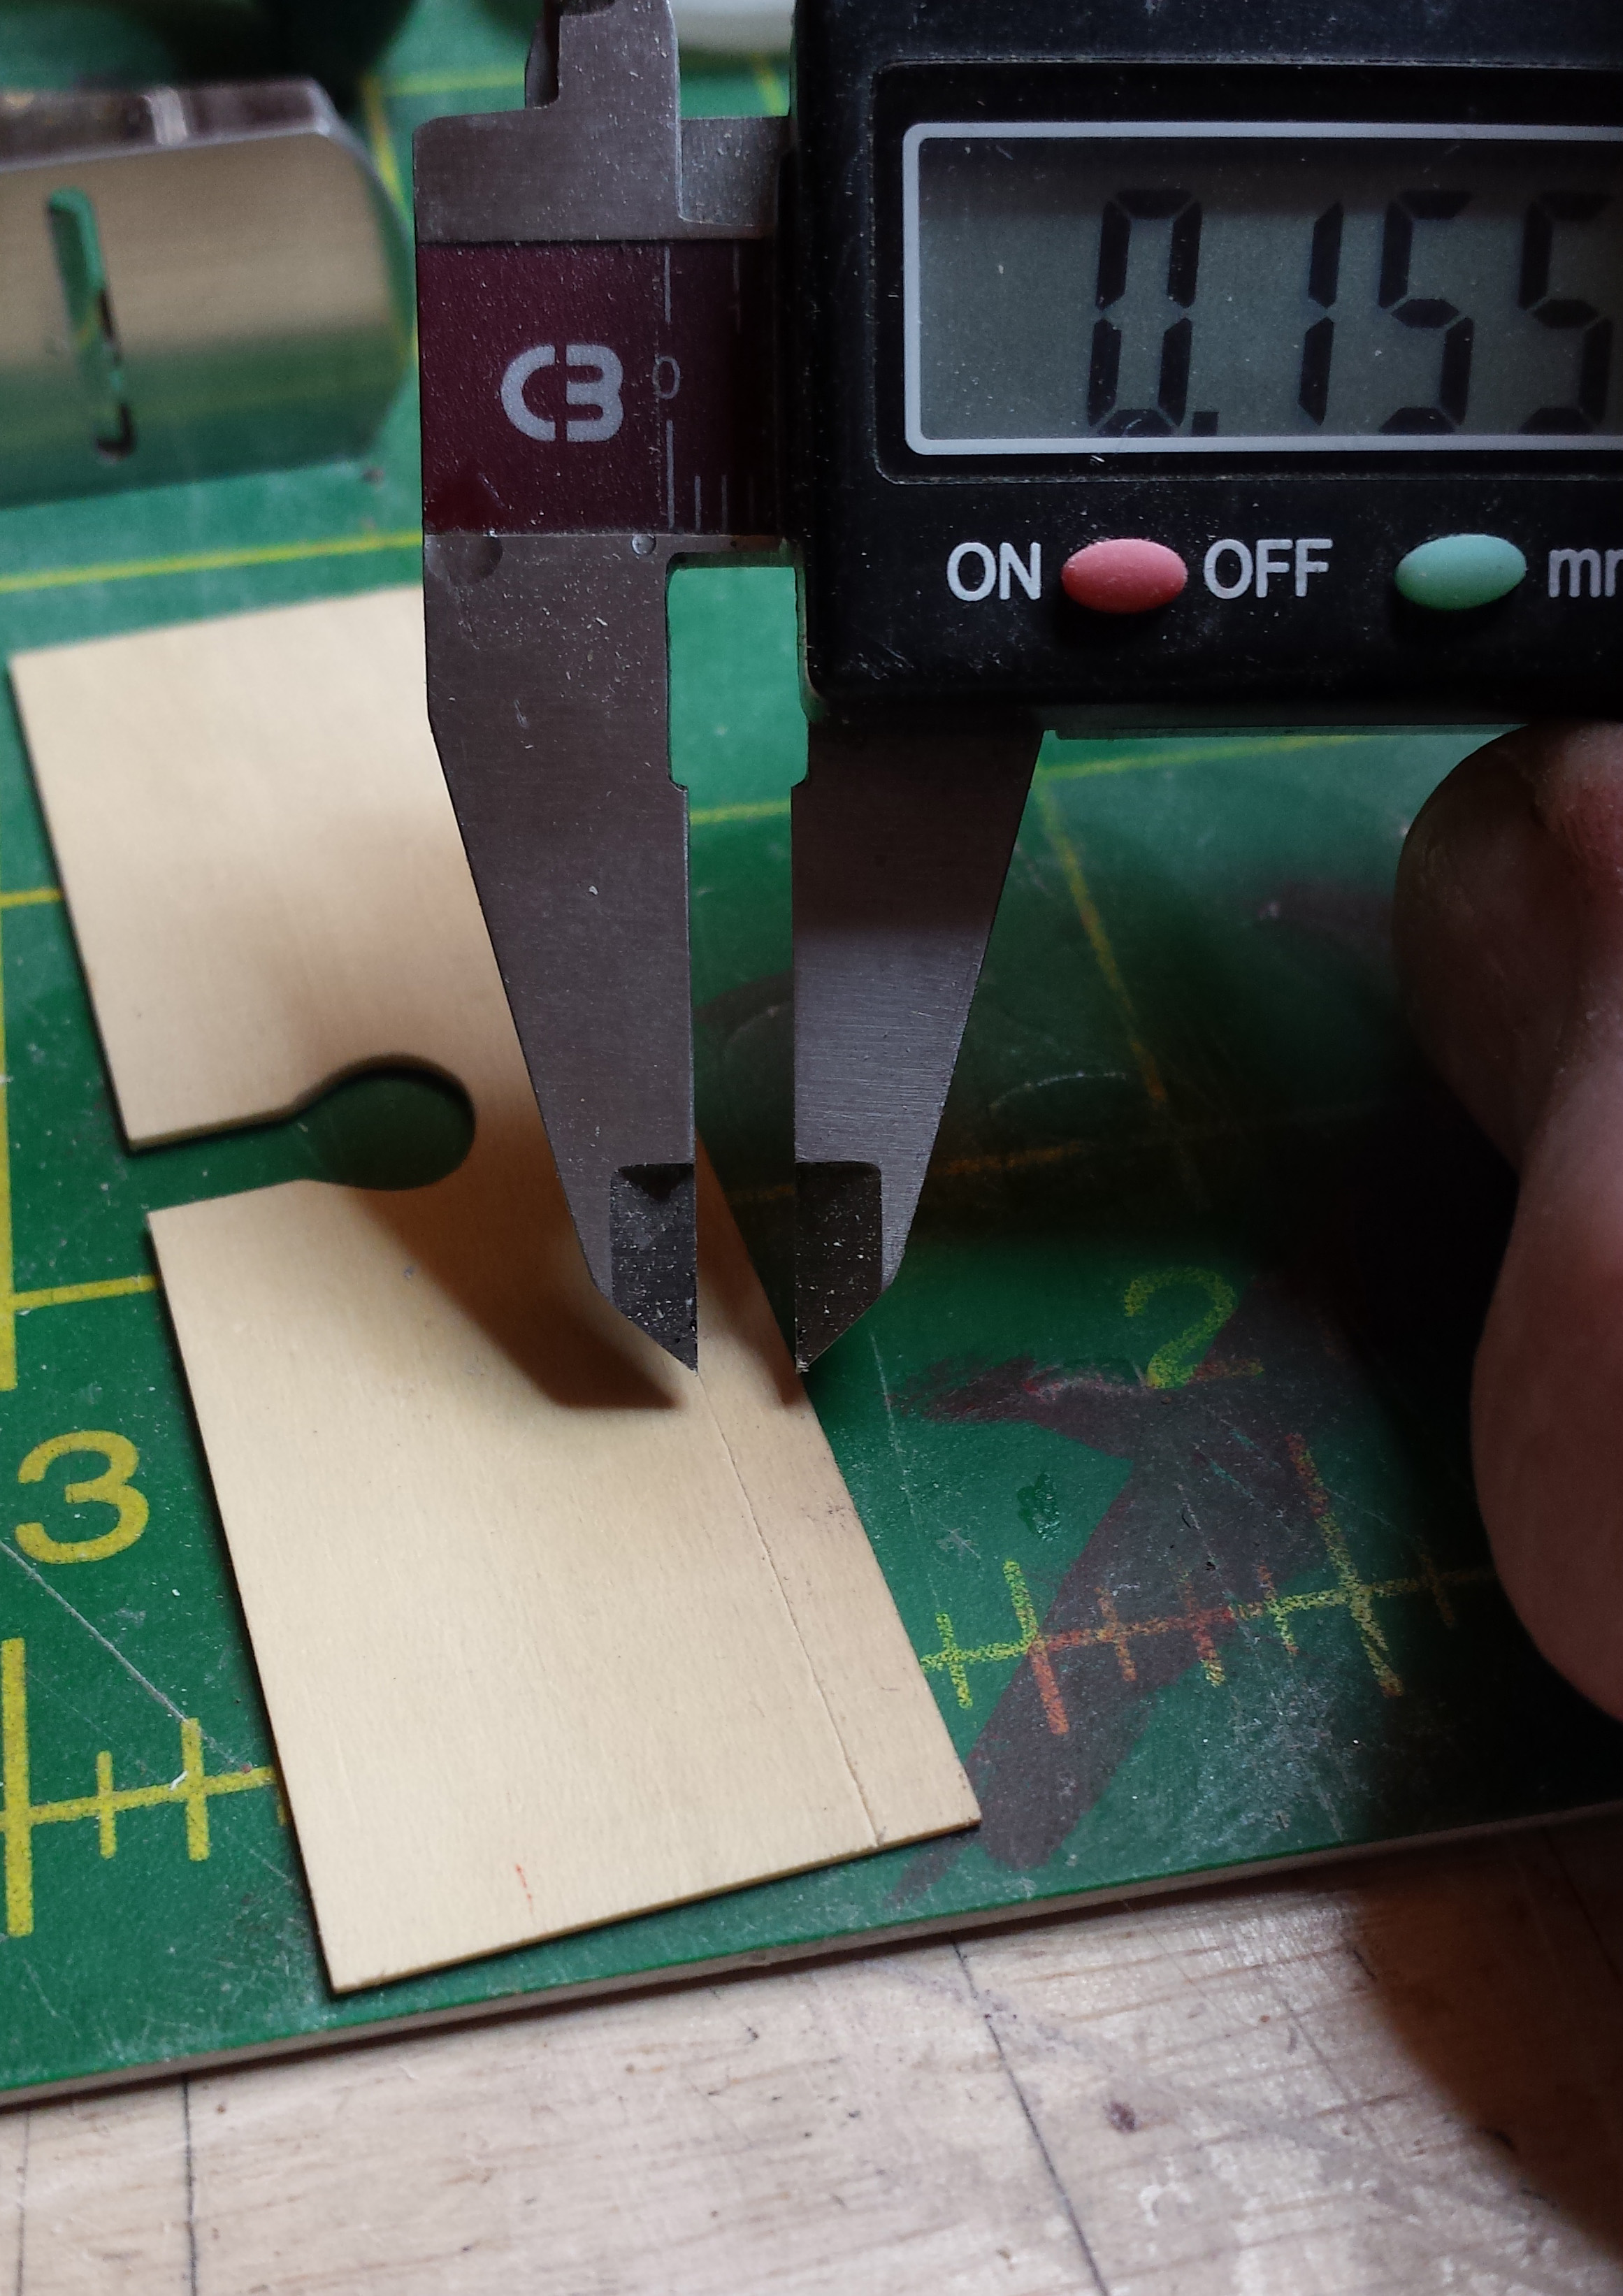
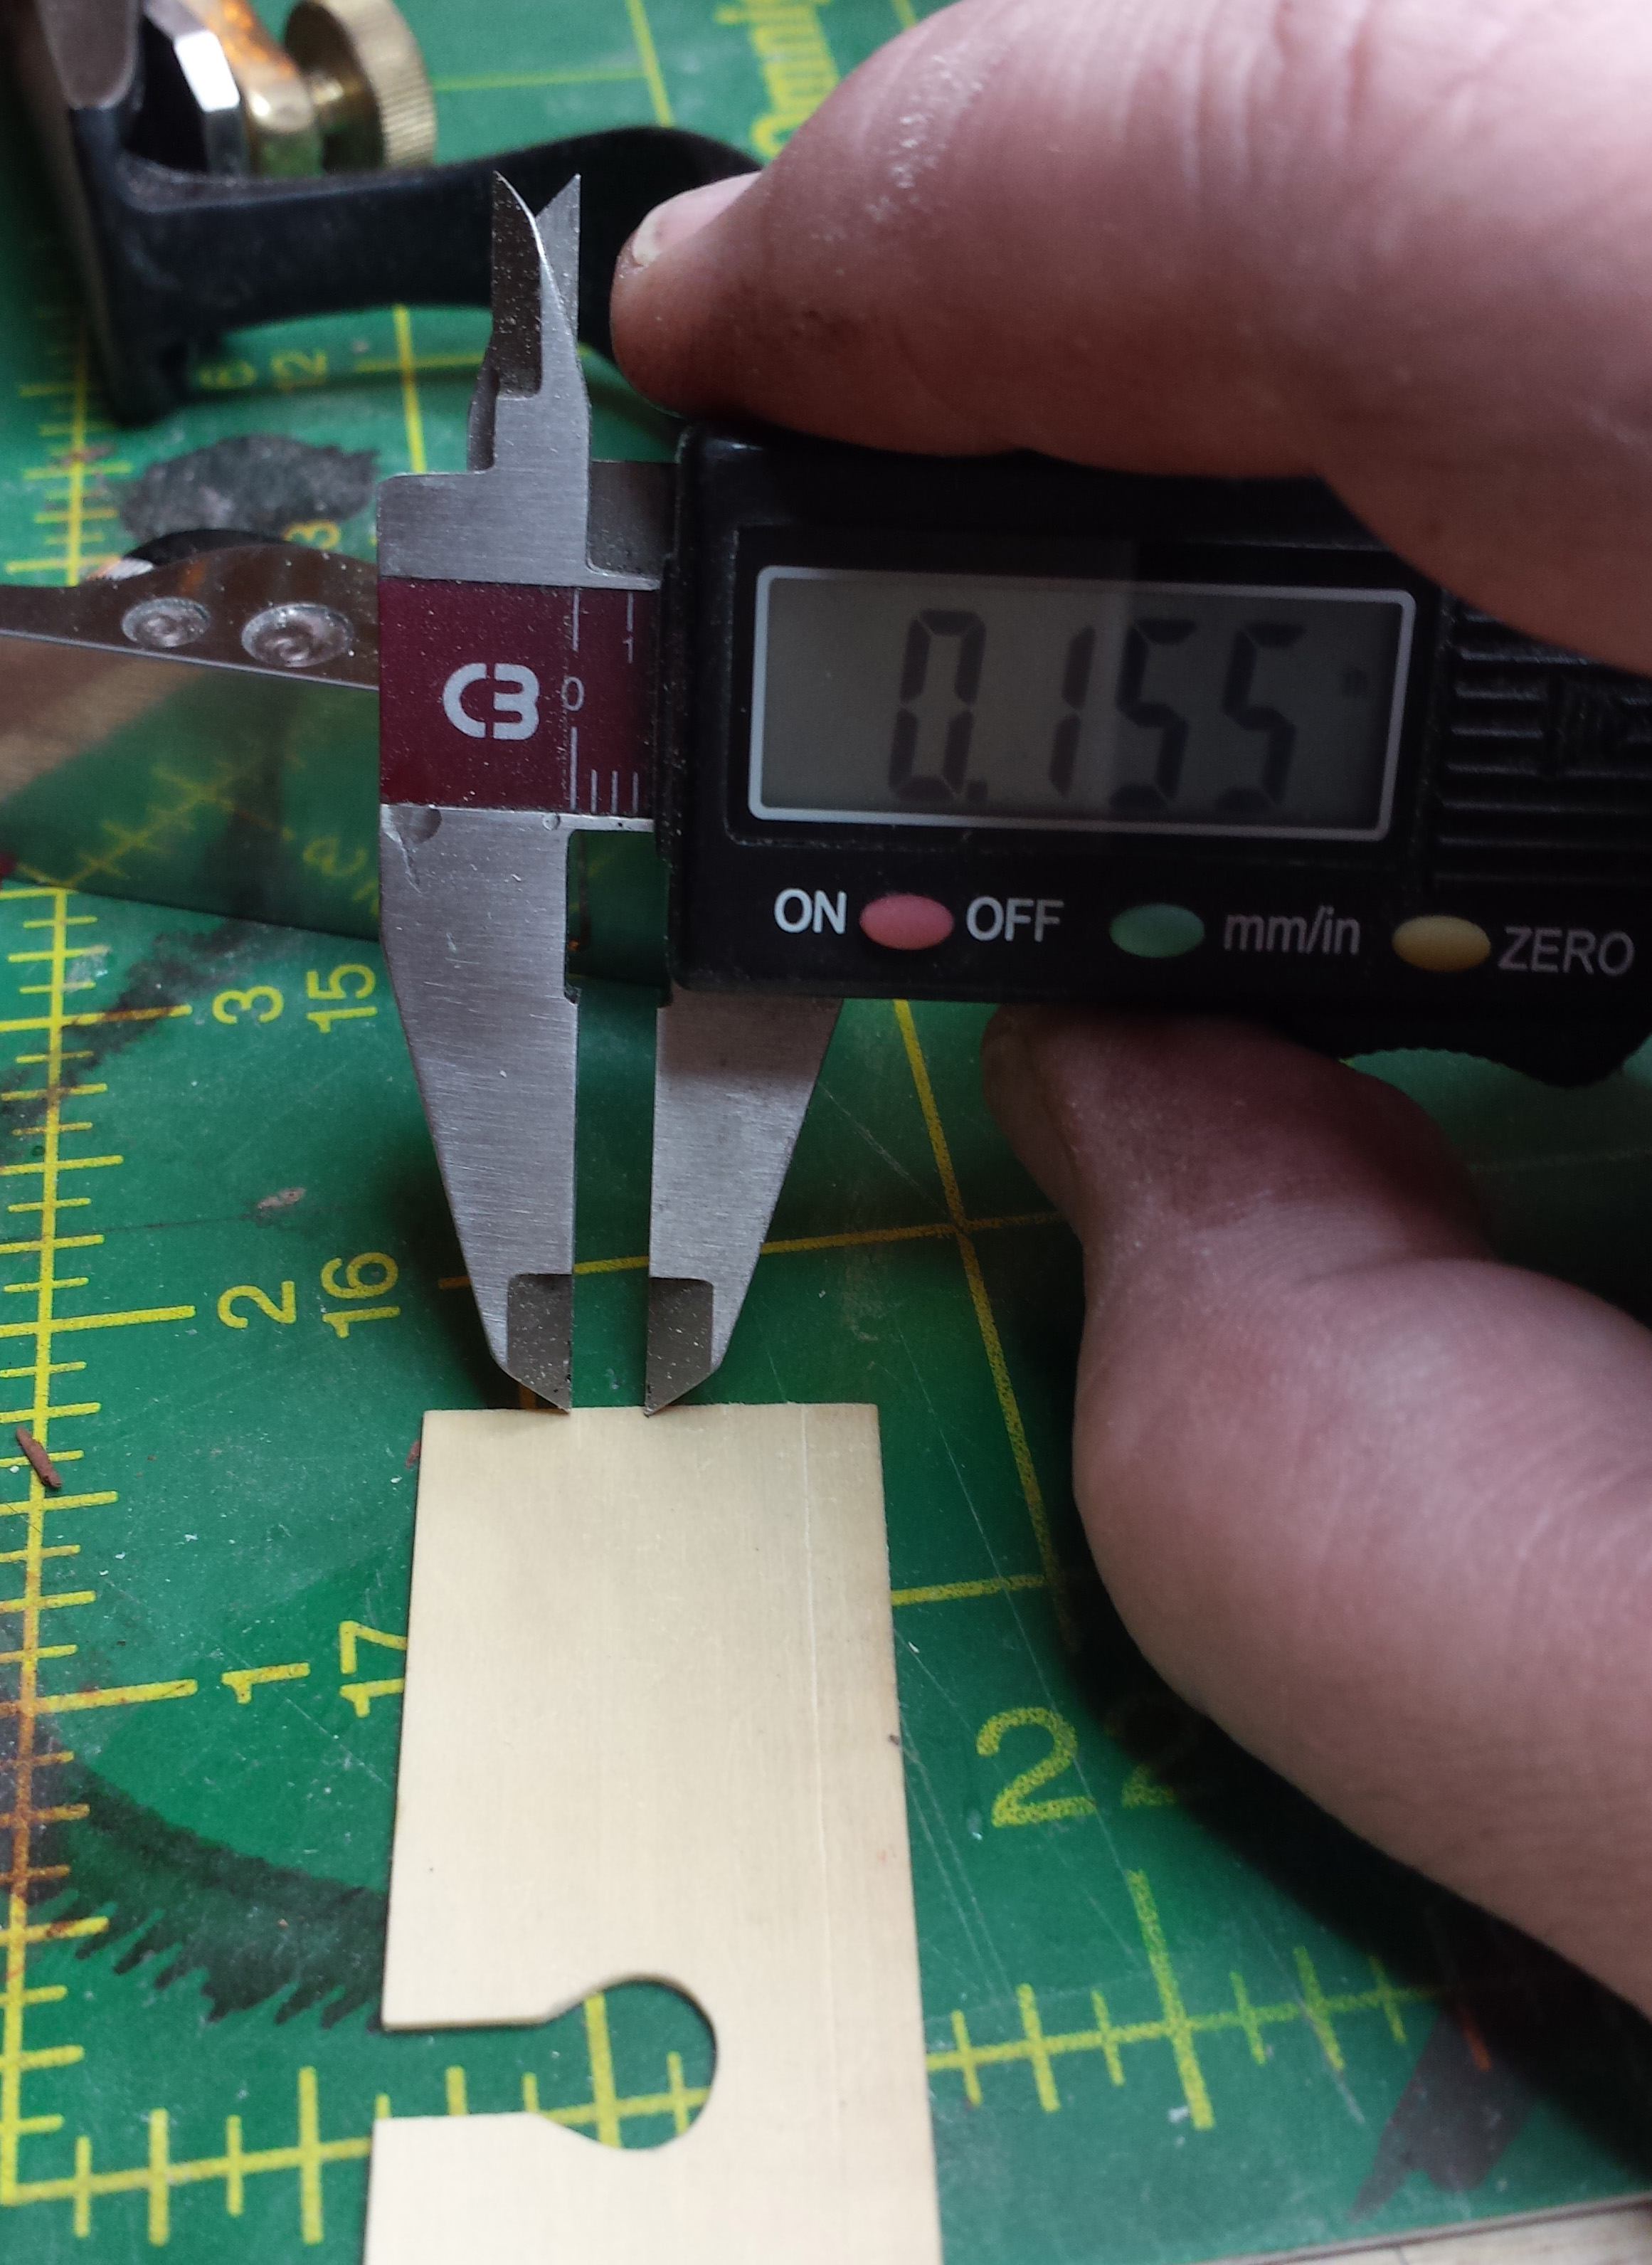
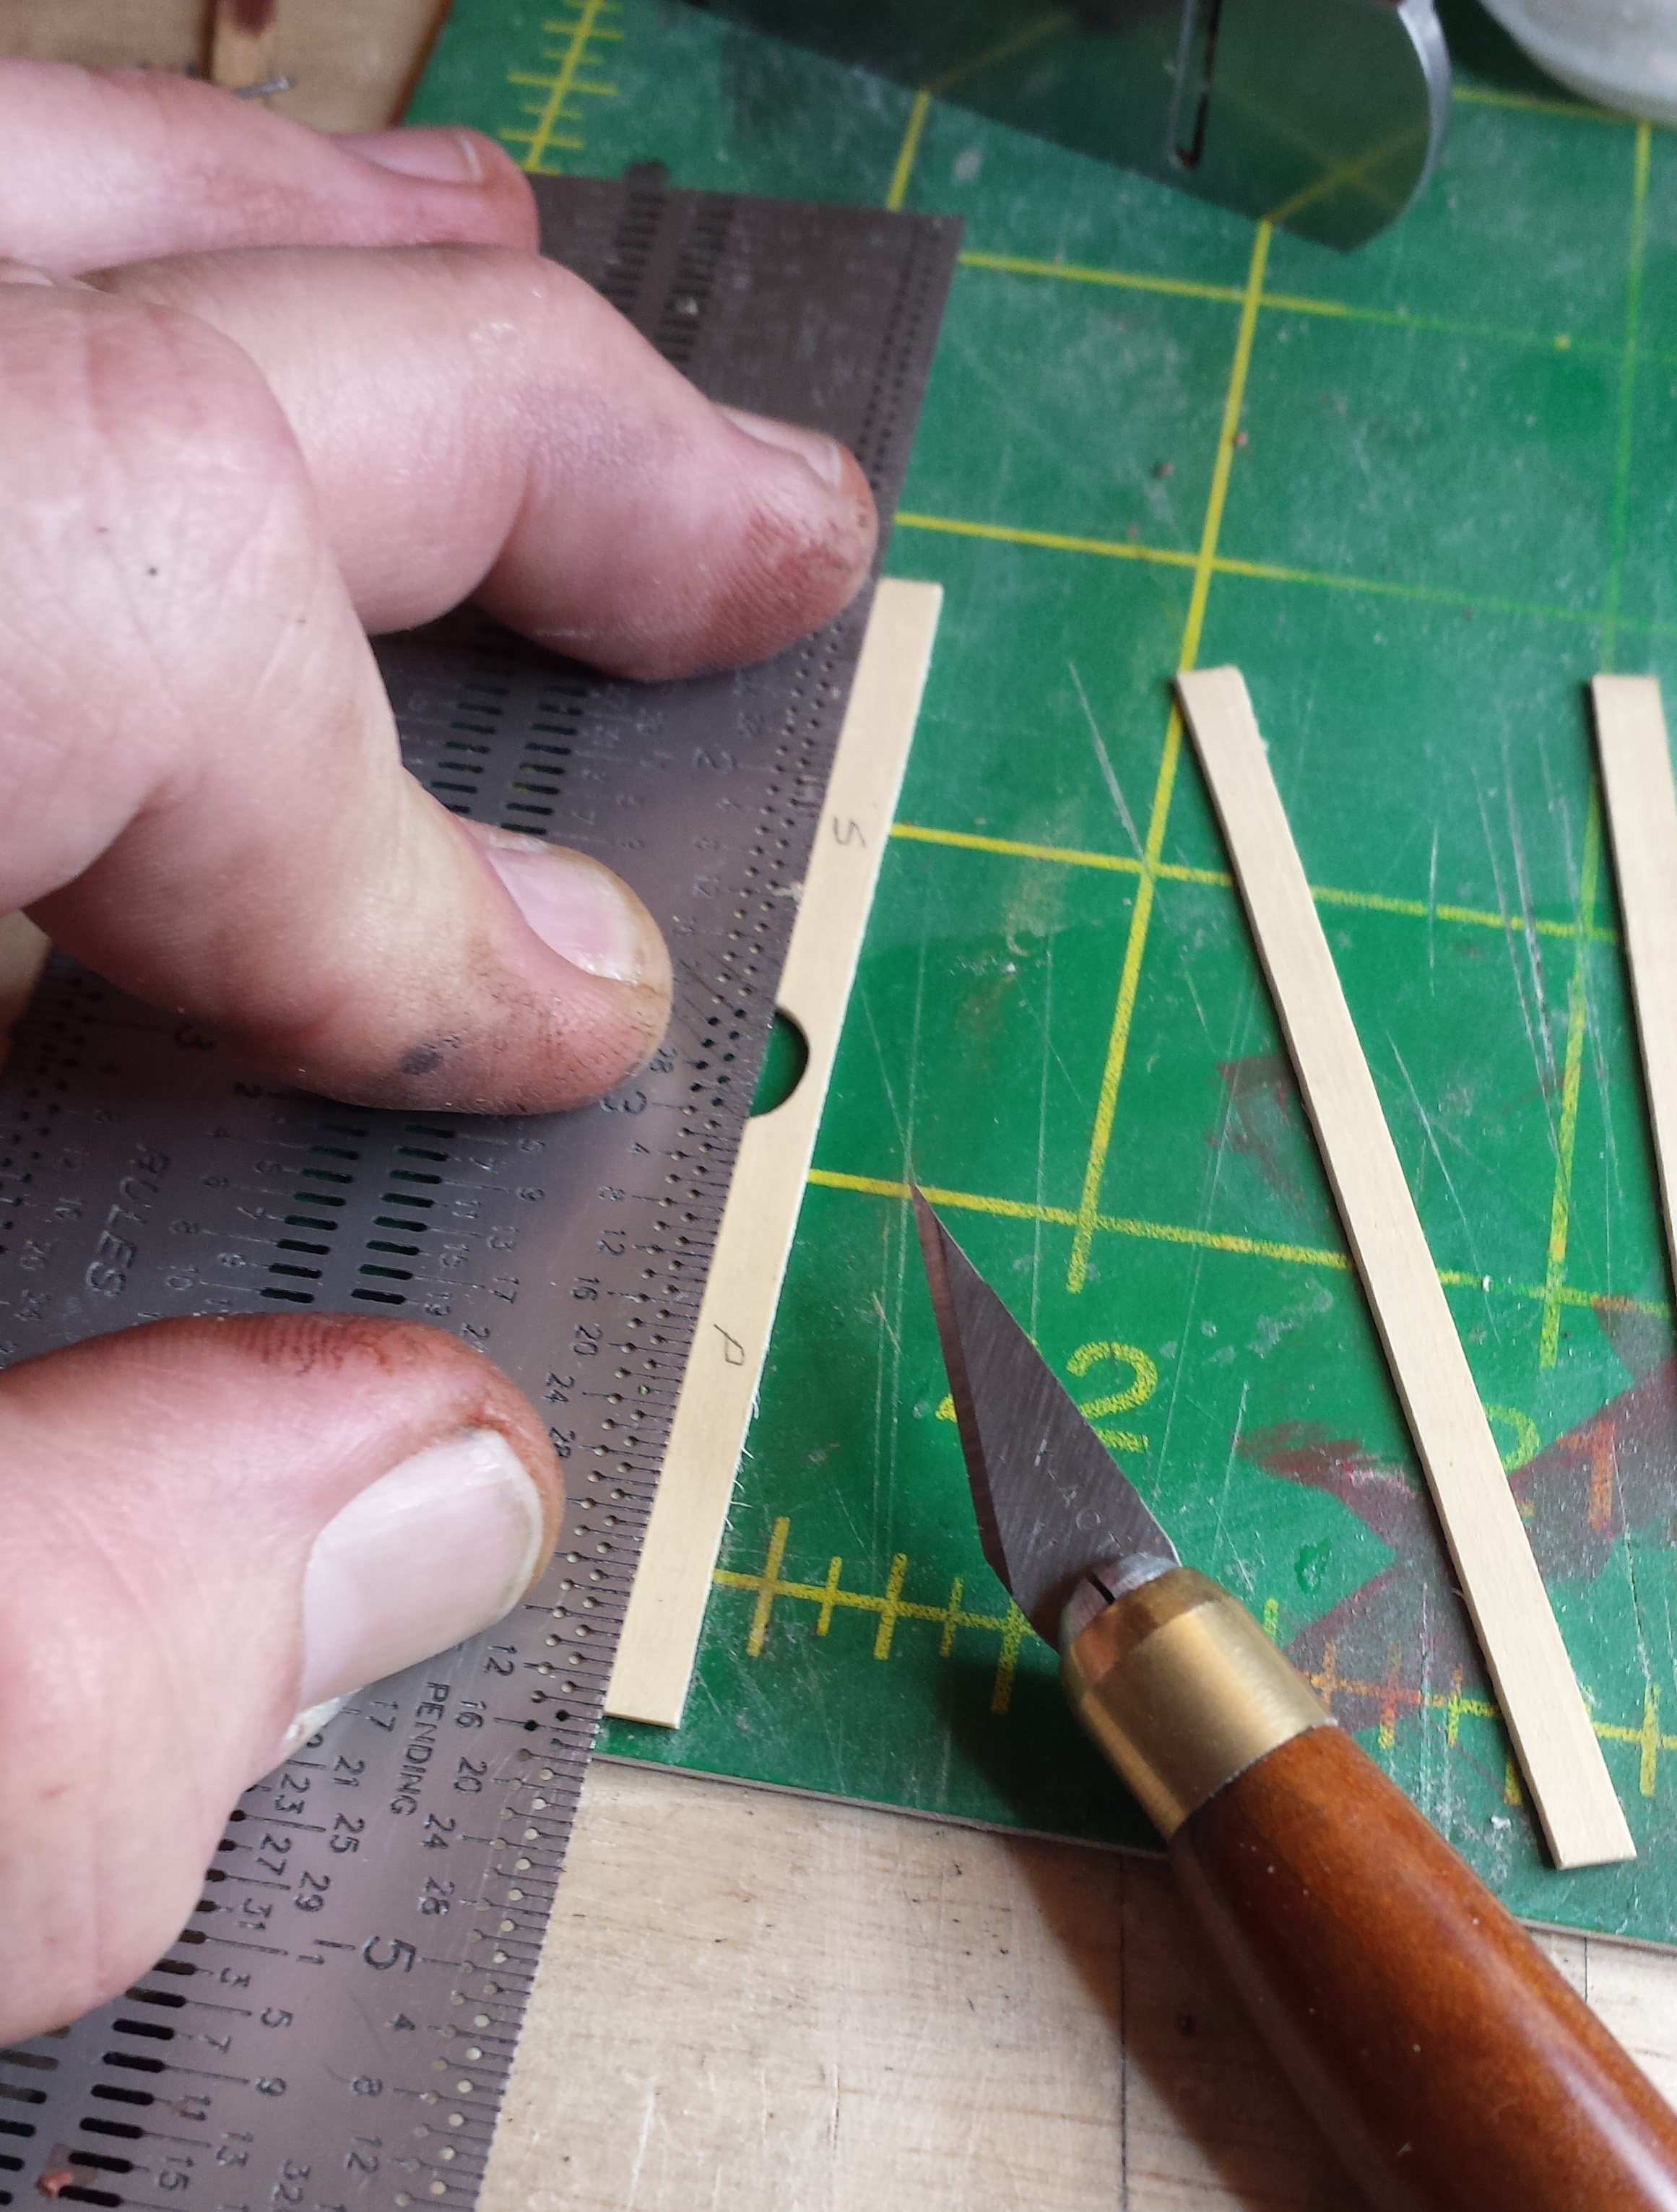
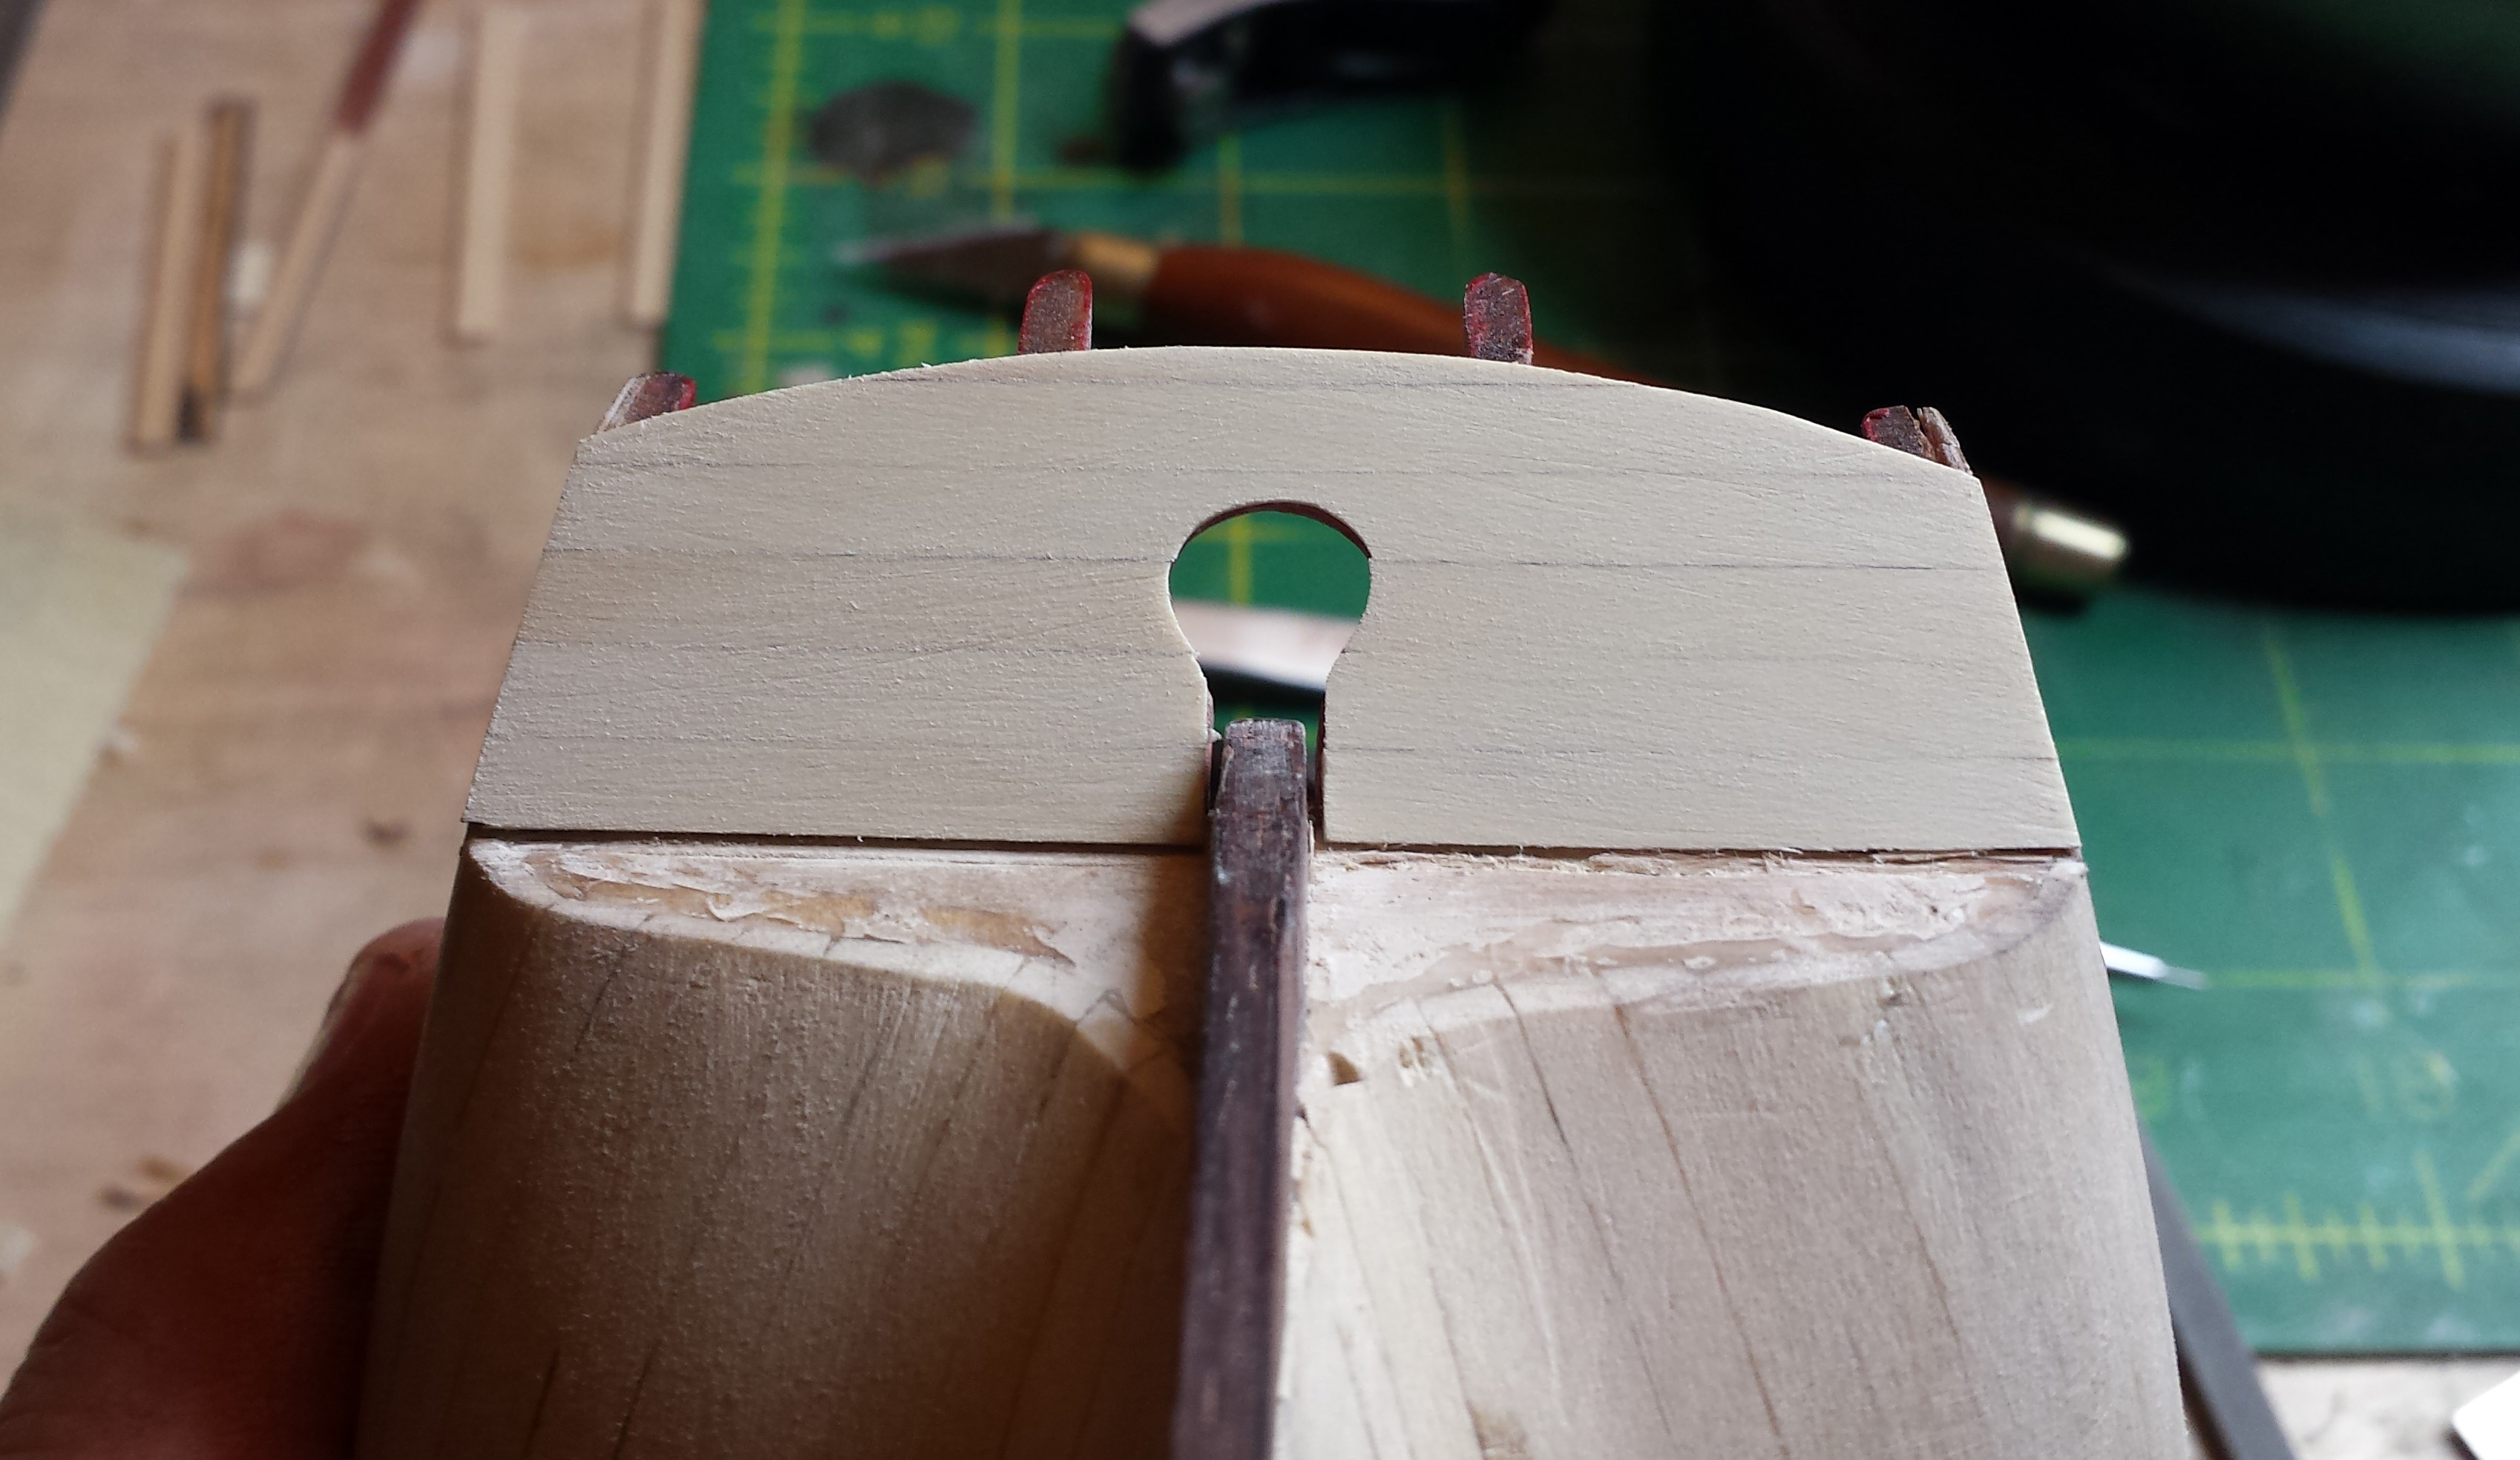
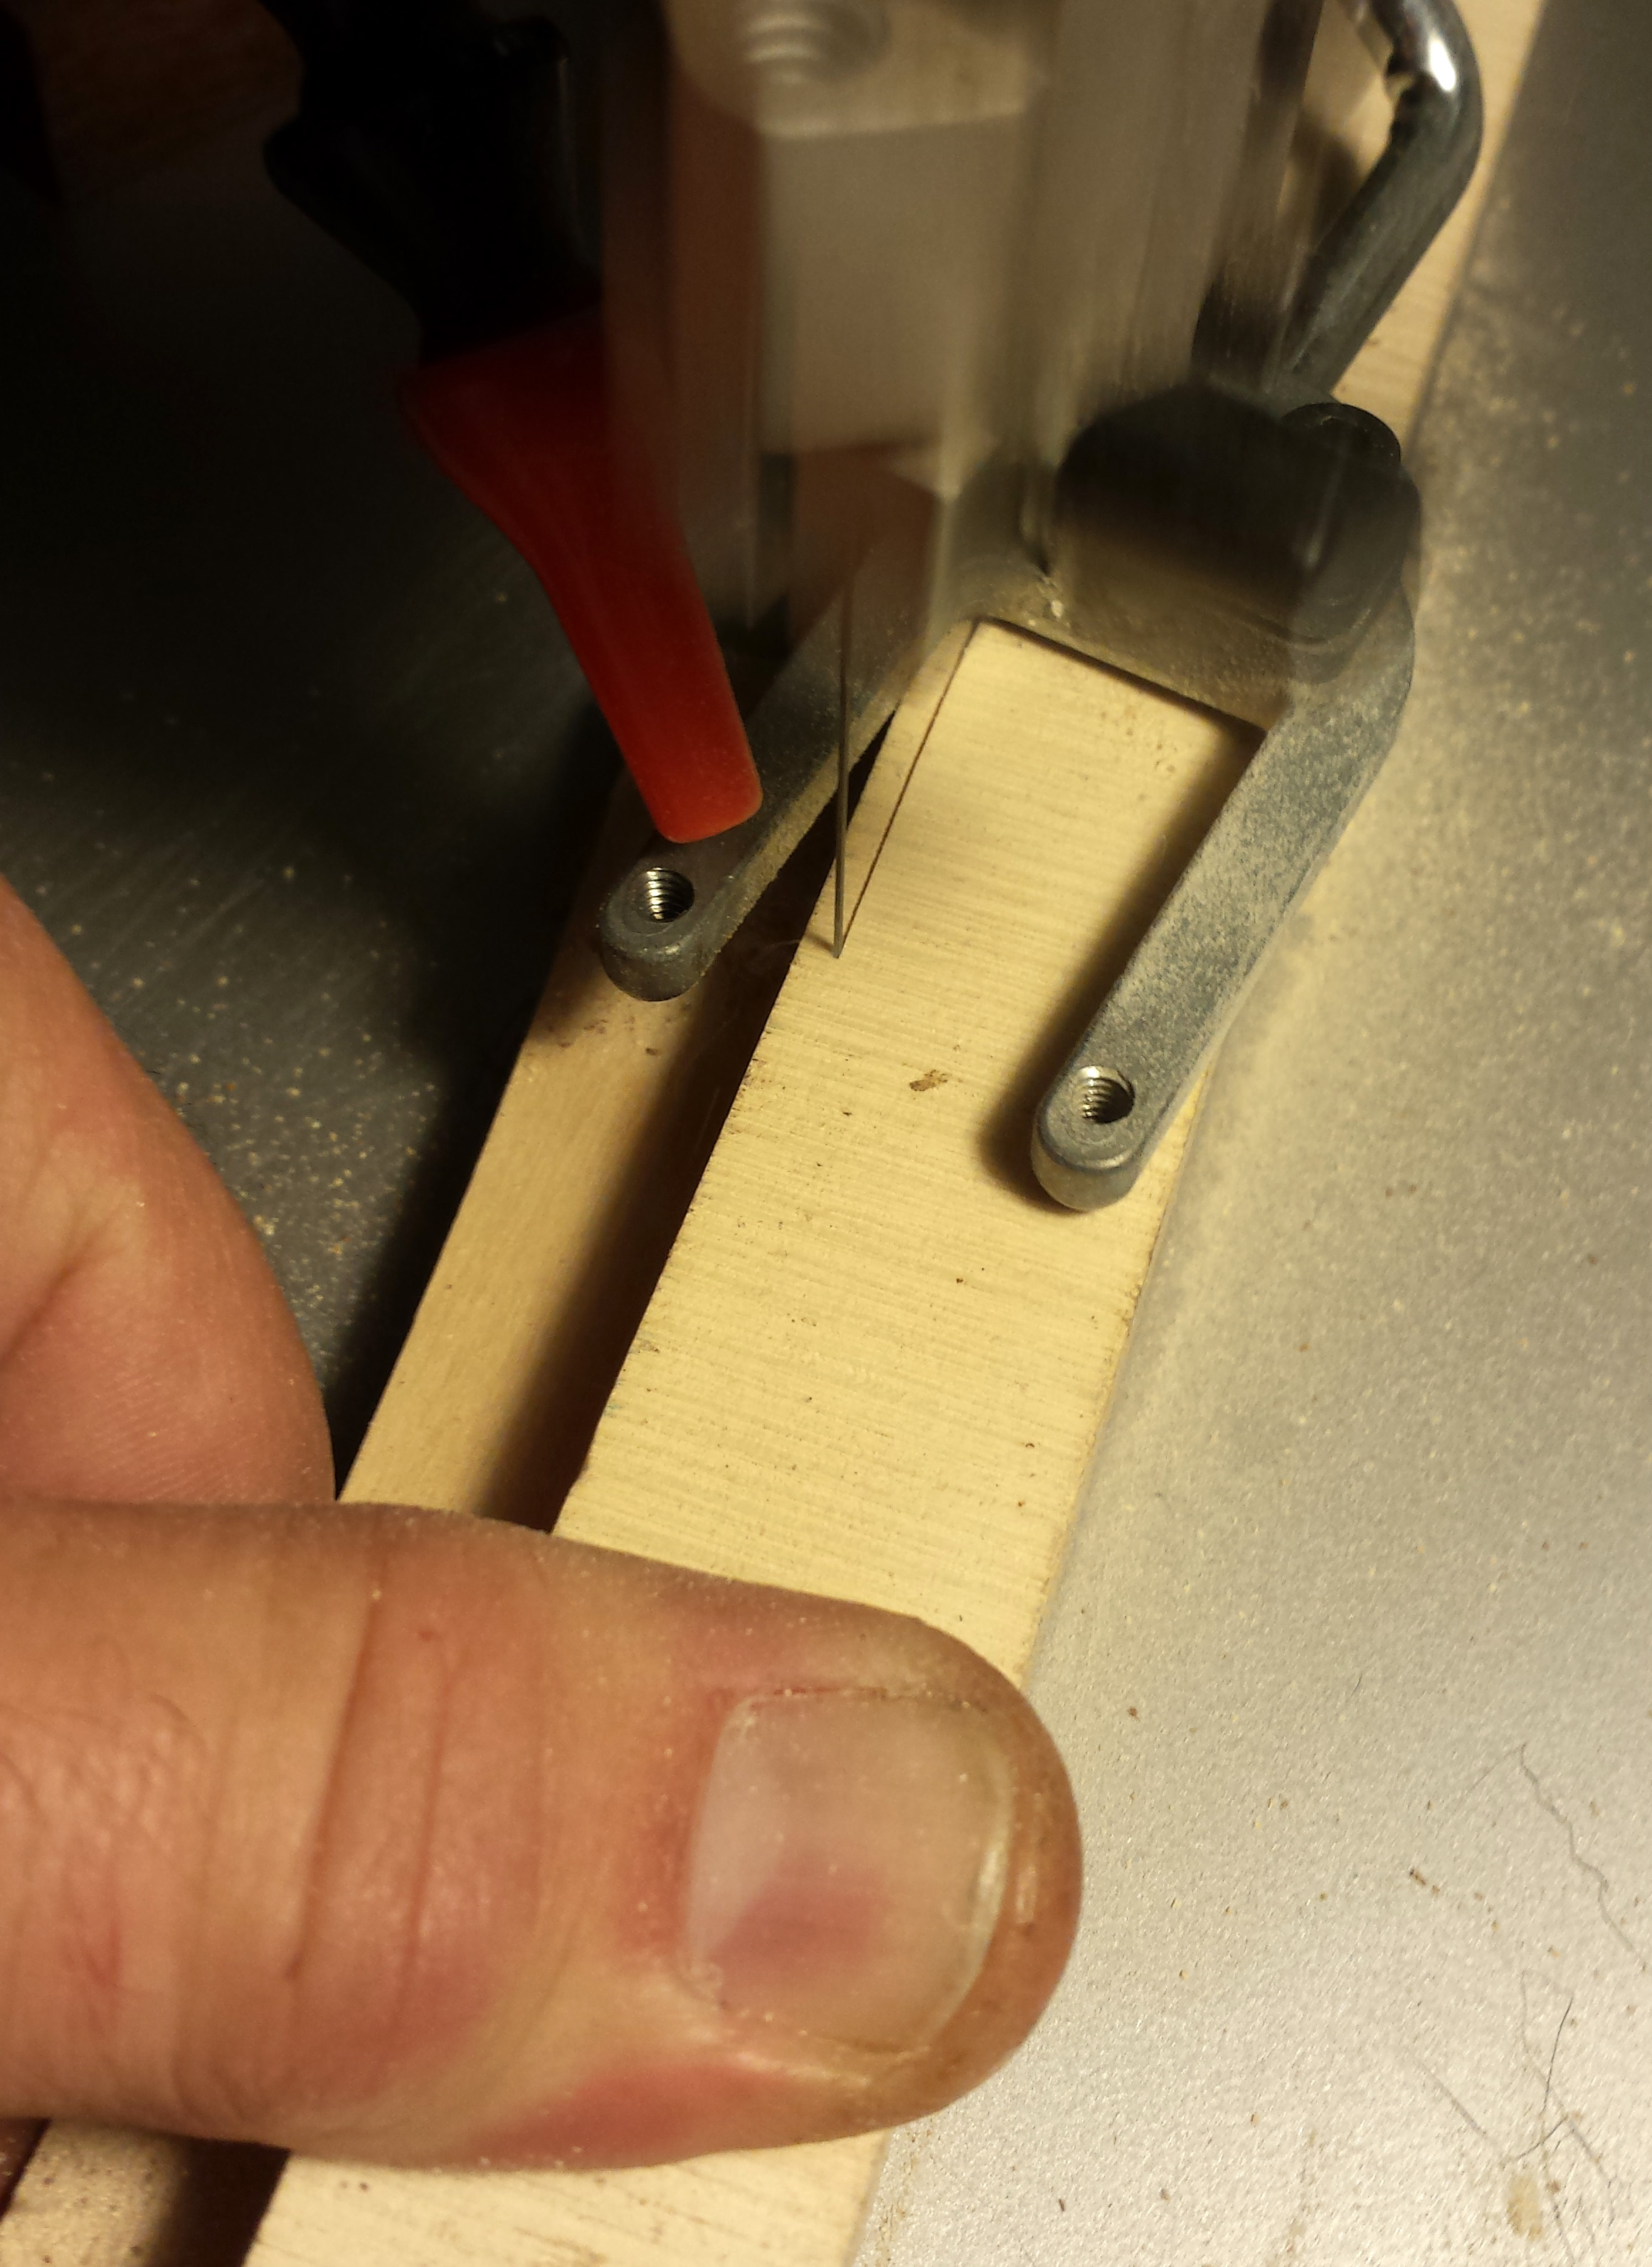
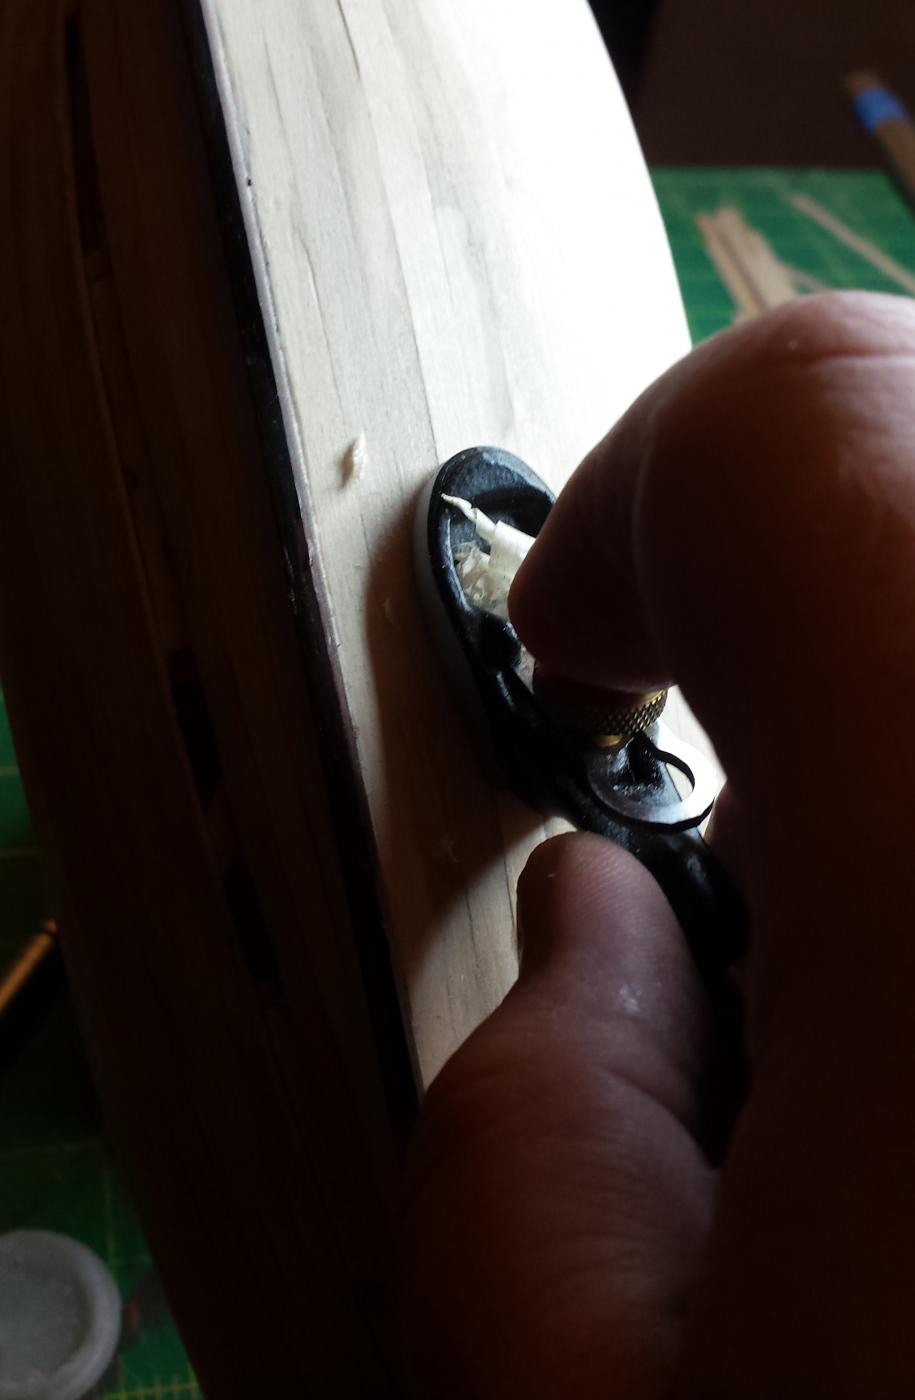
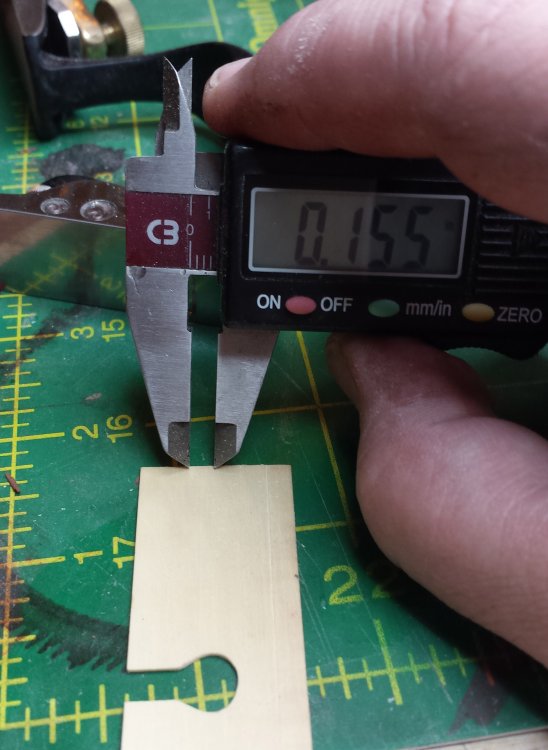
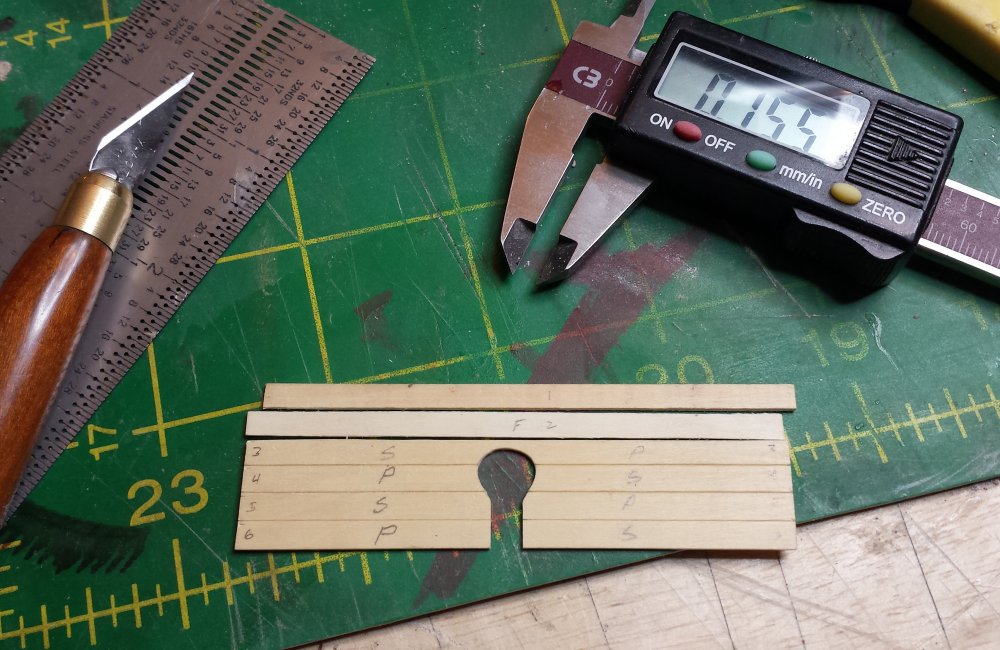
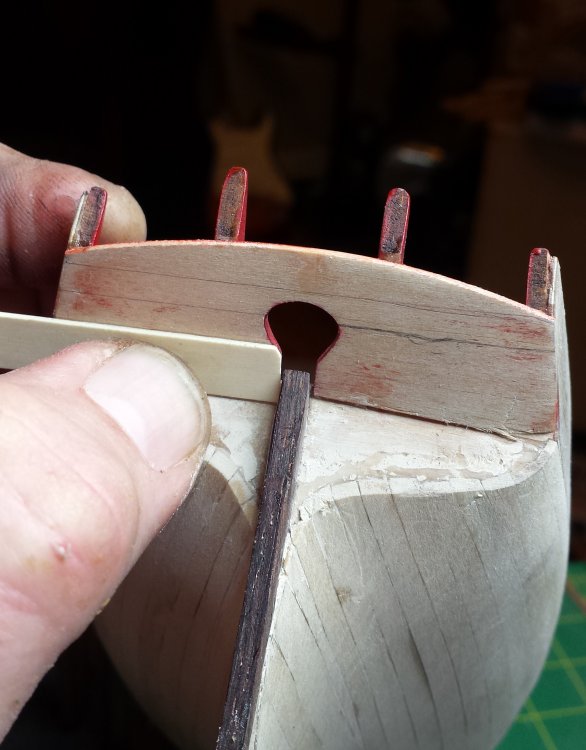
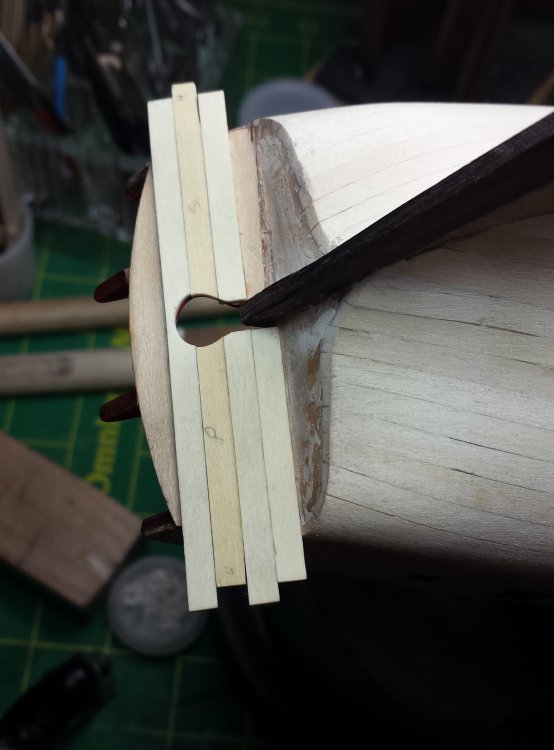
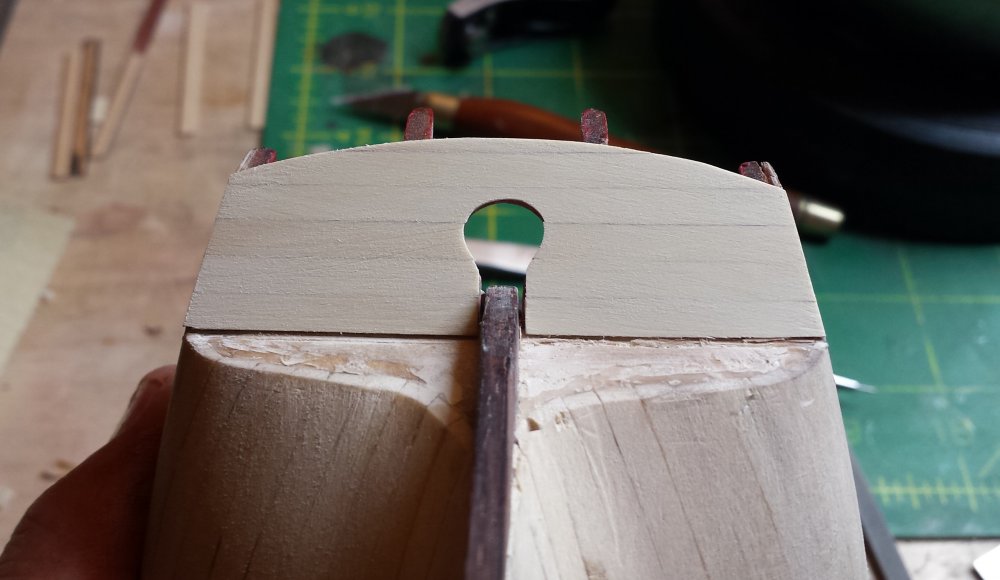
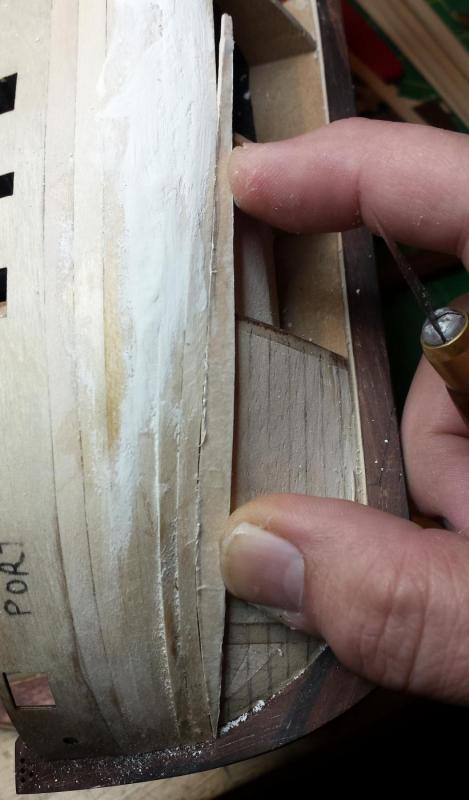
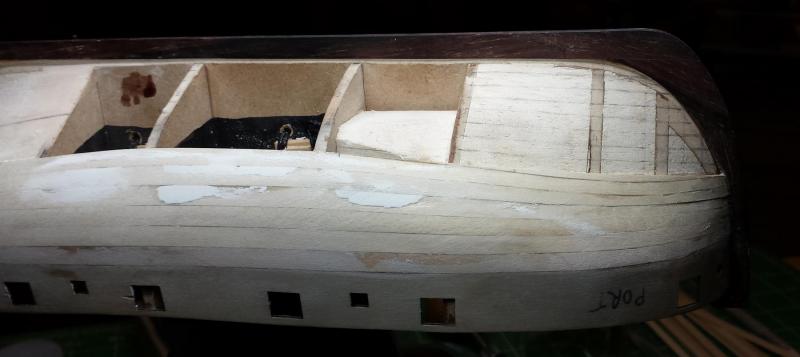
Glad you guys liked the holly idea, as I went ahead with it Yes Pat, usually oils of some kind reacting with the alcohol carrier of the dye stain. And if alcohol reacts water probably will too, and that's the other option for aniline dyes, but I have never quite grasped the concept of a grain-raising stain so I have always stayed away. In the end natural is probably best, but if anyone following has any ideas boxwood stain options, please let me know, I still would like to see a light brown. Rick, being 137% responsible means also being responsible for ensuring I've read your advice It's a tough gig. I thought single piece didn't make much sense either, see below. I'm not quite sure what you mean about the cap rail but at least I'll remember I have something to figure out with planking thickness on the bulkheads and the cap rail. The planking stock says 4mm x 1mm, it looked thinner at first. I haven't checked it yet but width is 4.08 - 4.10mm so I assume it's very slightly oversize. Edges are also straight and clean enough to make planking joints as is. This was my first order from Crown Timber but it looks like Jason takes his business very seriously. So I took my holly piece above and machined in the tiller opening. My red paint has collected dings, will need to touch up. I frequently use my digital caliper as a marking gauge, it has sharp and fully hardened steel jaws after all. Instead of cutting planks and trying to cut in the tiller operning once installed, I cut the opening first and then cut them into planks as it seemed way easier. Or I will just walk it across the piece. Each time you move it you carefully and gently register the rear one in the mark you just made so you don't mar it, and immediately roll forward and put some pressure to make the next mark. If you practice you can get very accurate. I cut off the first two planks, but only scored this one. Because, you know, it's holding the rest together and I want those lines to be straight too. Once I had the cuts done I marked half of them to be flipped to the other side. Although holly has hardly any grain, it still will help to make it look like a series of individual planks rather than all cut in order from the same piece. As I cut them apart, I used the piece to mark the plank layout on the fascia. No pics here, but once I had everything laid out of course, random alignment check 12 zillion and eight found that the fascia was not as flat or as square as I remember it being. So there's about 40 minutes of knife and mini sanding block work in here first getting the fascia fully flat vertically and then relieving the port side so both sides had an equal slight curve. Once that was done, on with gluing. Basically cleaned up. I used my little baby scraper that I posted over in my tools thread to level out the planking, just like the big ones they can be highly precise tools if sharpened and burnished correctly. And completely done with inner tiller opening filled with CA and sanded down and painted. I'll do the lower tomorrow before moving on to the hull planking. Also I need to get the counter out and get that joint right too, as you see the top of the fascia has a slight cant. I made sure the fascia planking was square to the keel so it's right, the top curve is currently wrong. Rick is there anything else I should do before planking the hull? Not seeing anything.


- 714 replies
-
- 11
-
-
- lady nelson
- victory models
- (and 1 more)
-
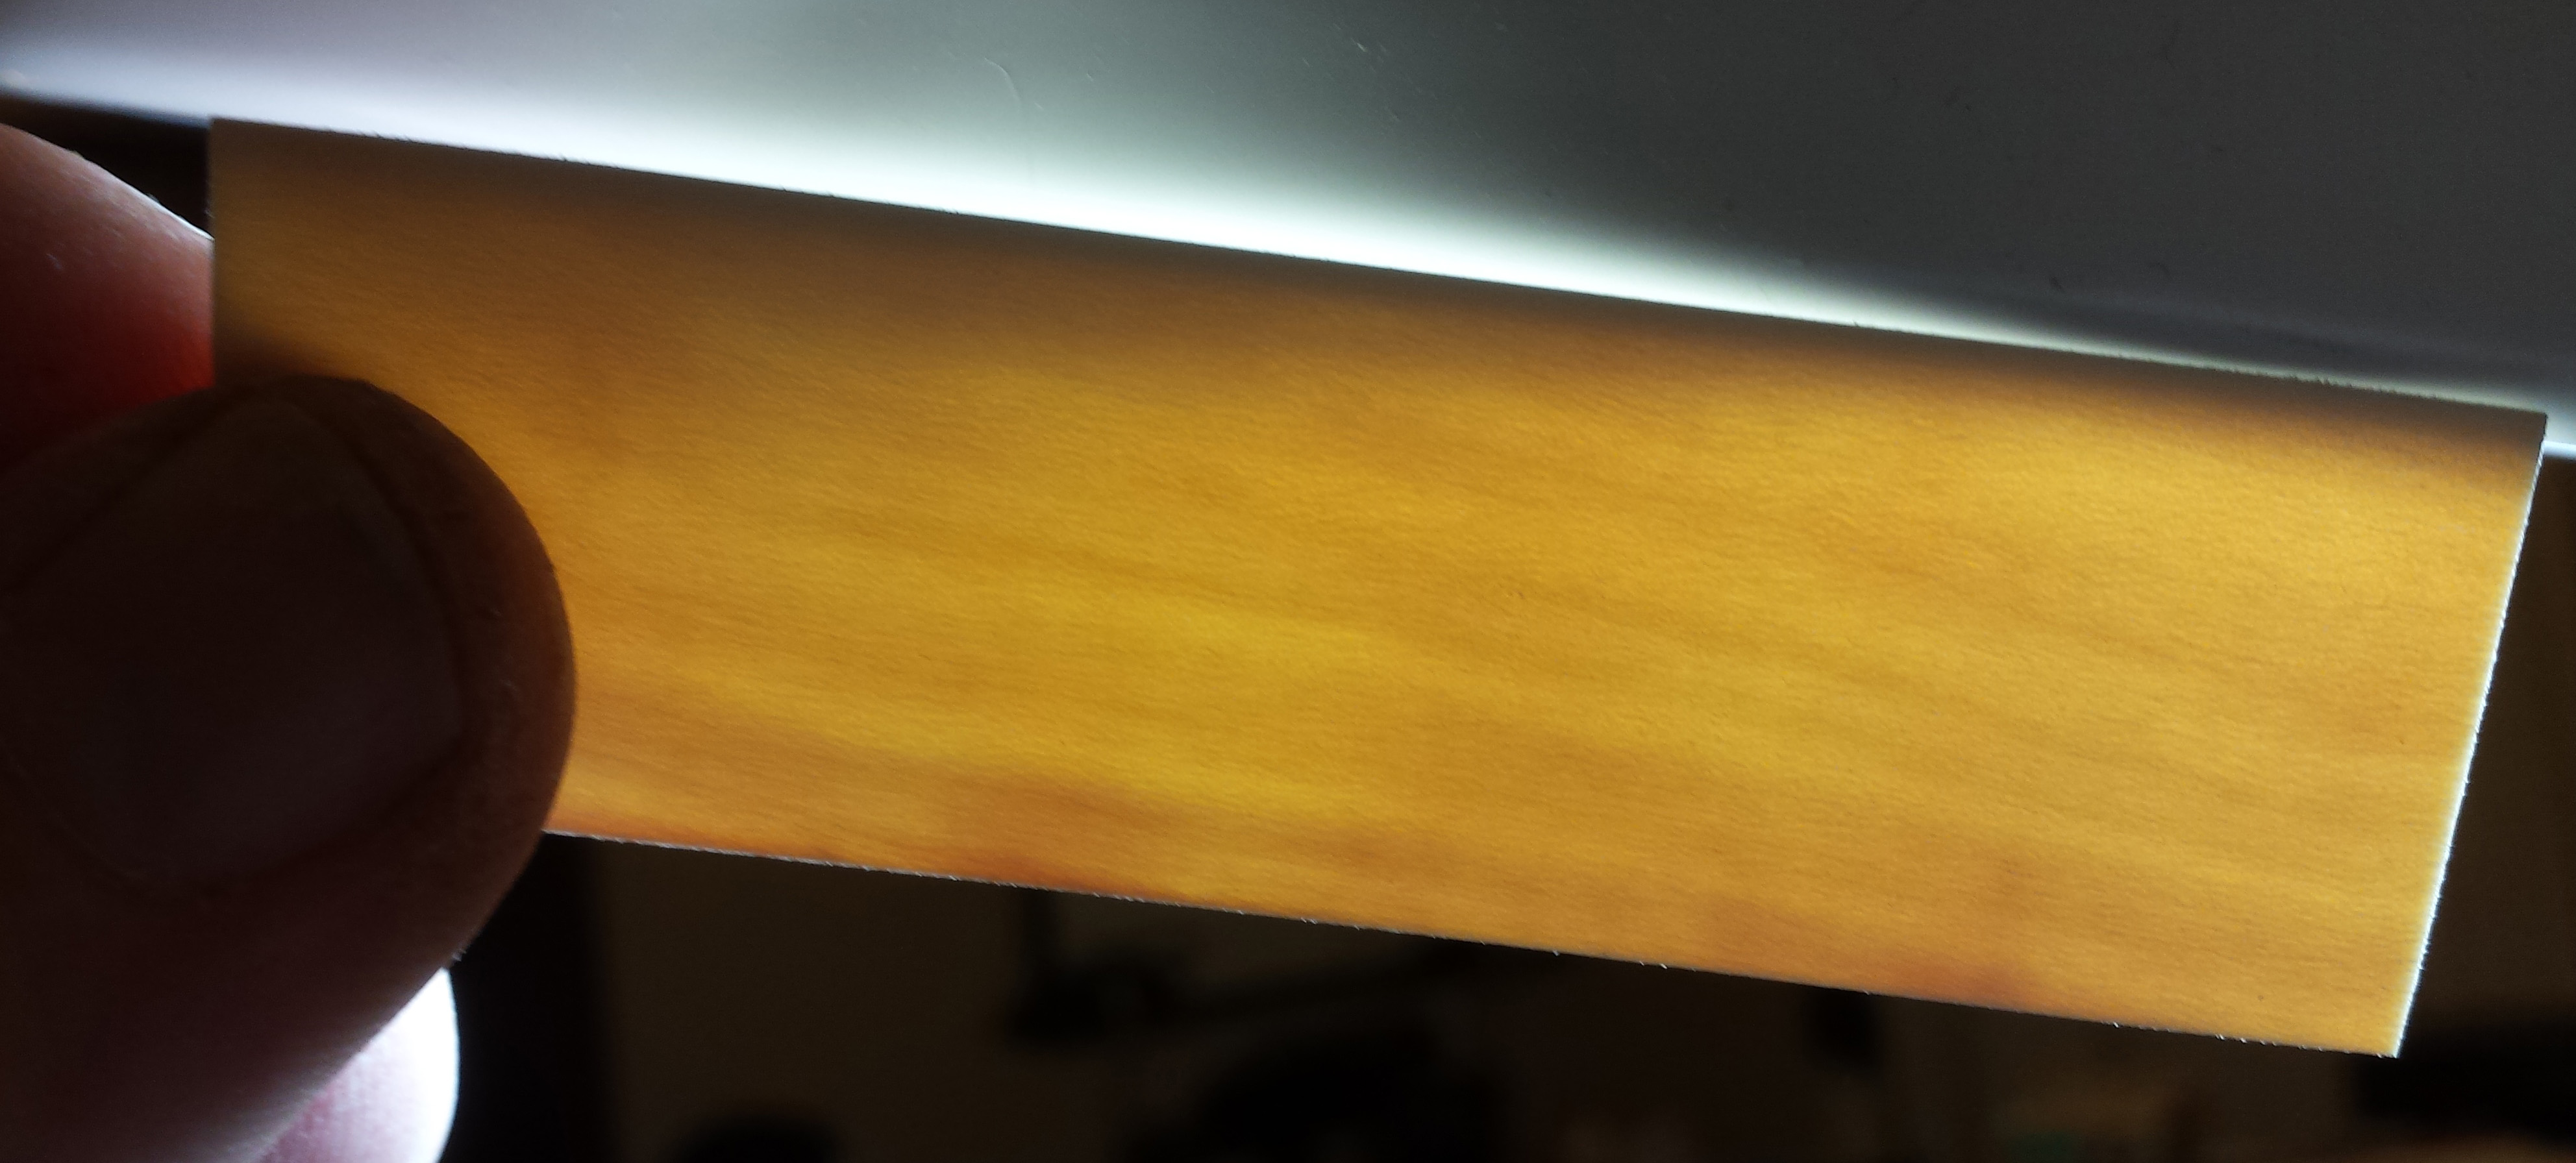
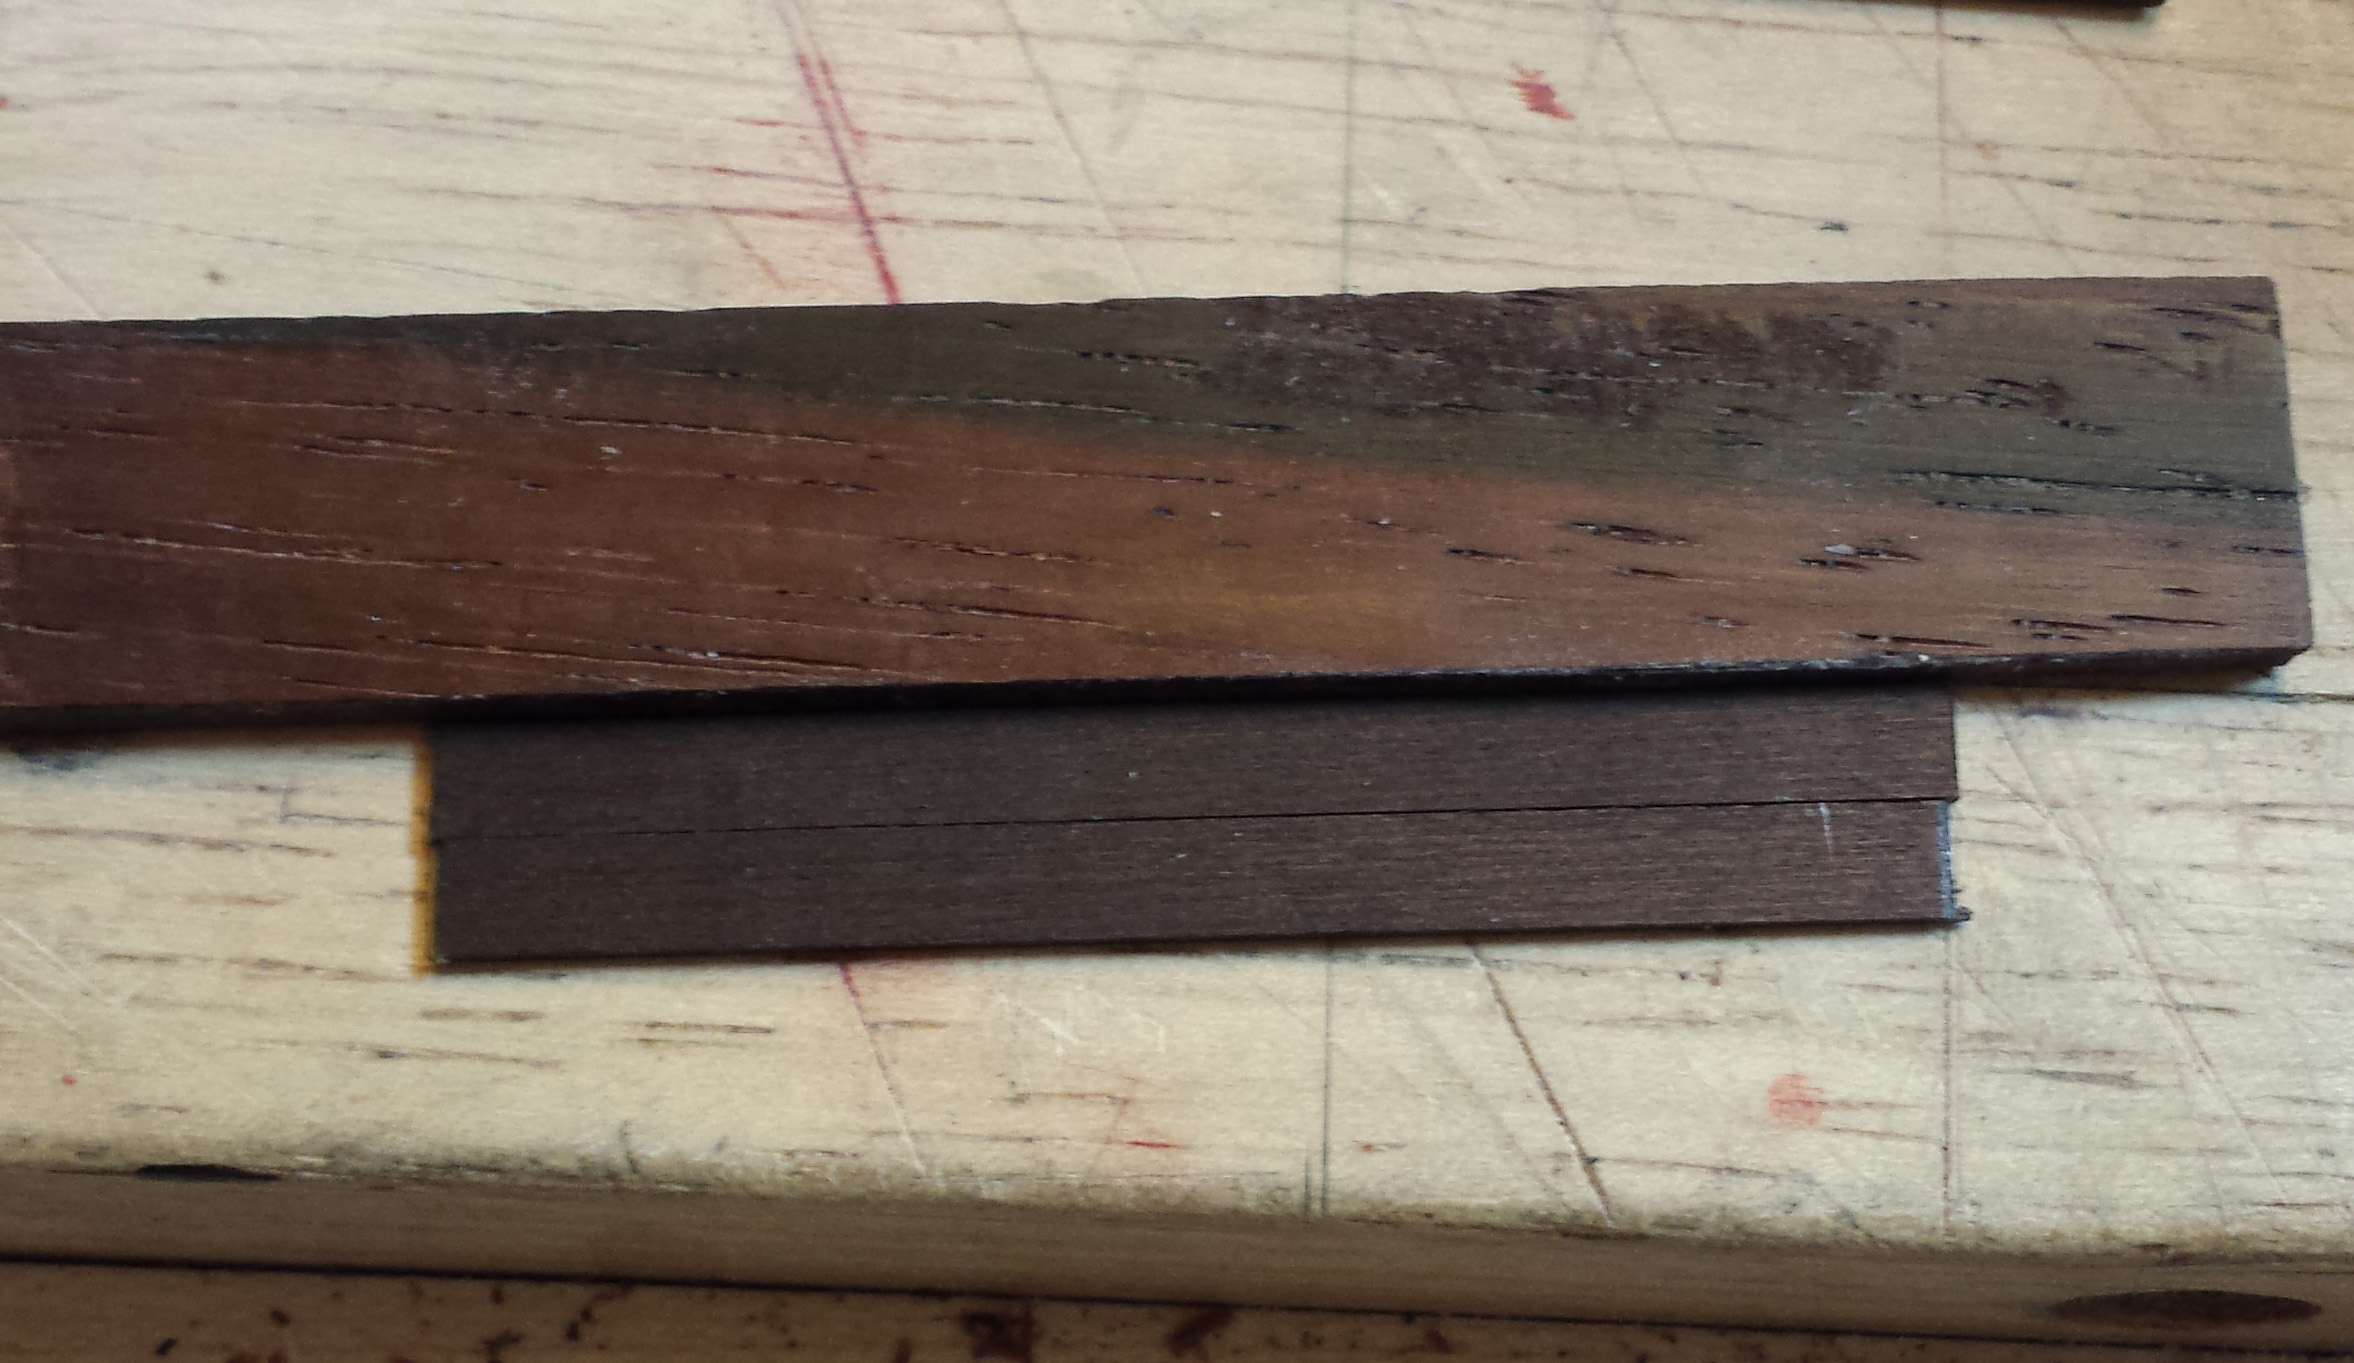
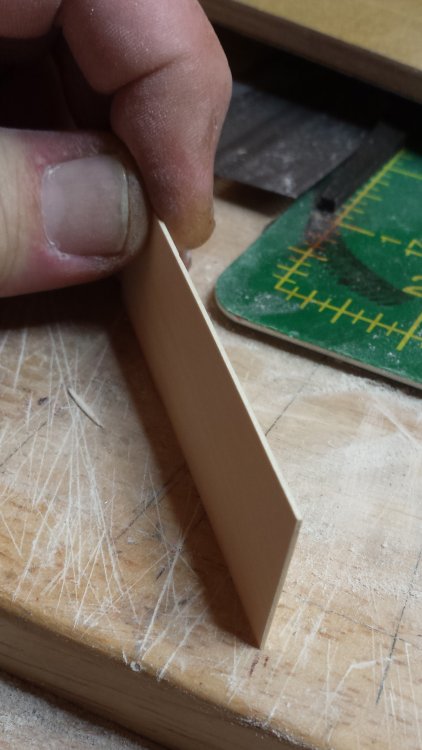
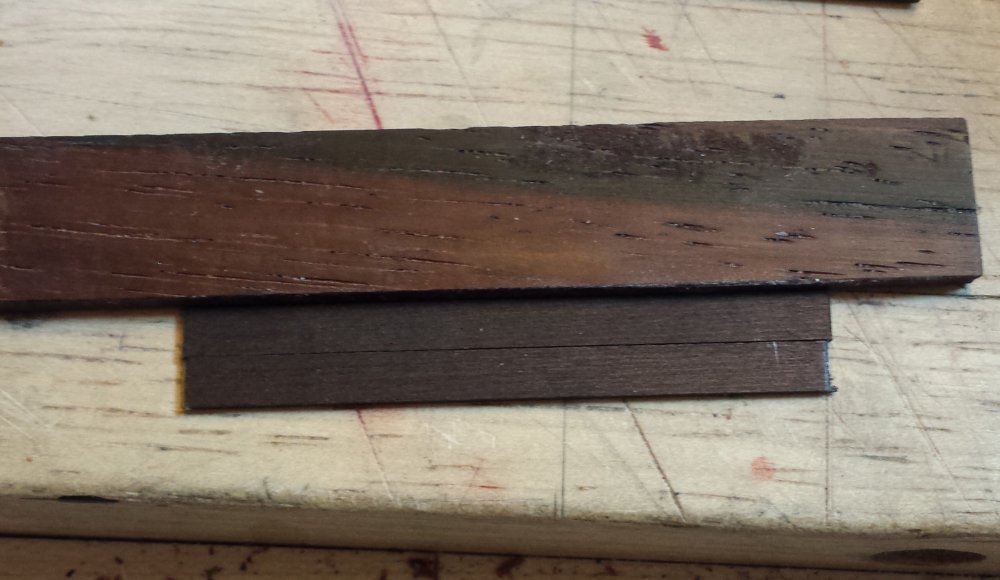
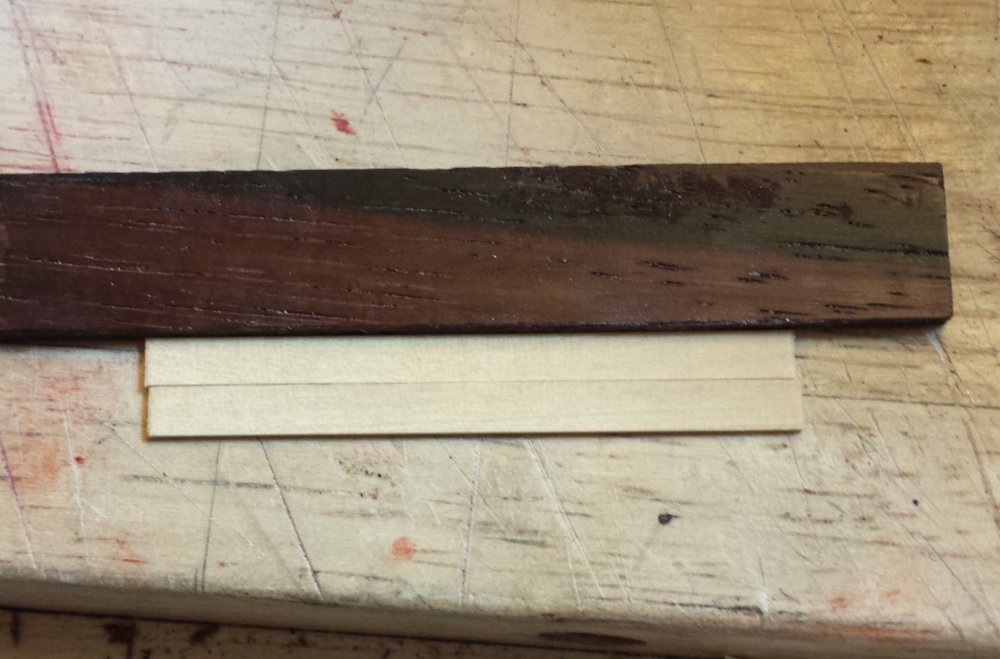
I spent almost all last evening thrashing around trying to make final decisions on wood colors. I experimented with a whole series of browns and yellows on the boxwood final planking, and mostly found out that boxwood does NOT like dye stains, the results were consistently badly blotchy with no correspondence to surface quality - i.e. I'd sanded the whole plank carefully just to avoid rough spot blotchiness. So this is chemistry somehow. There are things you can try to do to make wood behave for staining, conditioners and the like, but not worth the risk to me as they don't always work. I don't really like pigment stains as no matter what they partially obscure the underlying grain and wood, but if someone has recommendations for boxwood, I'm listening. My original thought was a lighter than cocobolo milk chocalaty color for the lower planking. Crap now I want chocolate milk. So it wouldn't have to be a very dark stain. Assuming nothing works there, that leaves me two choices for the final planking, the natural yellow of the boxwood or black; the blotchiness goes away if you stain it very dark brown or black. And it's a nice look, black with none of the surface character of the wood hidden by a layer of paint. So plan B color scheme is black lower planking (it's a reddish black too, works with cocobolo) with or without painting the bottom white (haven't decided on that either), natural boxwood along the bulkhead gunports, then back to black for the top rail. There is boxwood stock for all the masts so I can blacken the yards the same way and have the mast natural. But as mentioned, if anyone has a good light brown pigment stain for boxwood, I'd still like to look at that option. Anyway here is the cocobolo with a mild red/brown stain to bring out its color and the boxwood planking in black and "white". I also have a small problem in that I thought the outside of the stern fascia piece was planked, and RICK WHO IS 137% RESPONSIBLE FOR PROTECTING ME FROM DOING SOMETHING STUPID LIKE THAT ( ) didn't say anything, so now I have a supposedly finished surface with paint and dings. So I need to cover that too. I could do it with the boxwood but I was considering using holly for the lower two stern surfaces while having the counter black. I'm pretty sure that will either look really good or really bad, but I'm not sure which. I'm soliciting opinions here too. Gave me an excuse to resaw one of my holly pieces, had them a while but never had a reason to use any. Holly looks all sweet and innocent sitting there, but take a saw blade to it and it instantly goes full-on nightmare beast. This is another advertisement for the Excalibur 16 scroll saw, with a new 12.5 TPI skip-tooth blade it was possible to resaw it accurately. And I thinned it down quite a bit with various small planes as the fascia piece at least just needs a veneer-thickness cover. And I need to try carving this, the detail possible would be really excellent.


- 714 replies
-
- 6
-
-
- lady nelson
- victory models
- (and 1 more)
-
No, I have reached the standoff phase where he's not shredding me to pieces while giggling, but I haven't even brought the saddle out of the house yet. Until then he's waiting for me to lose focus for one second
- 714 replies
-
- 1
-
-
- lady nelson
- victory models
- (and 1 more)
-
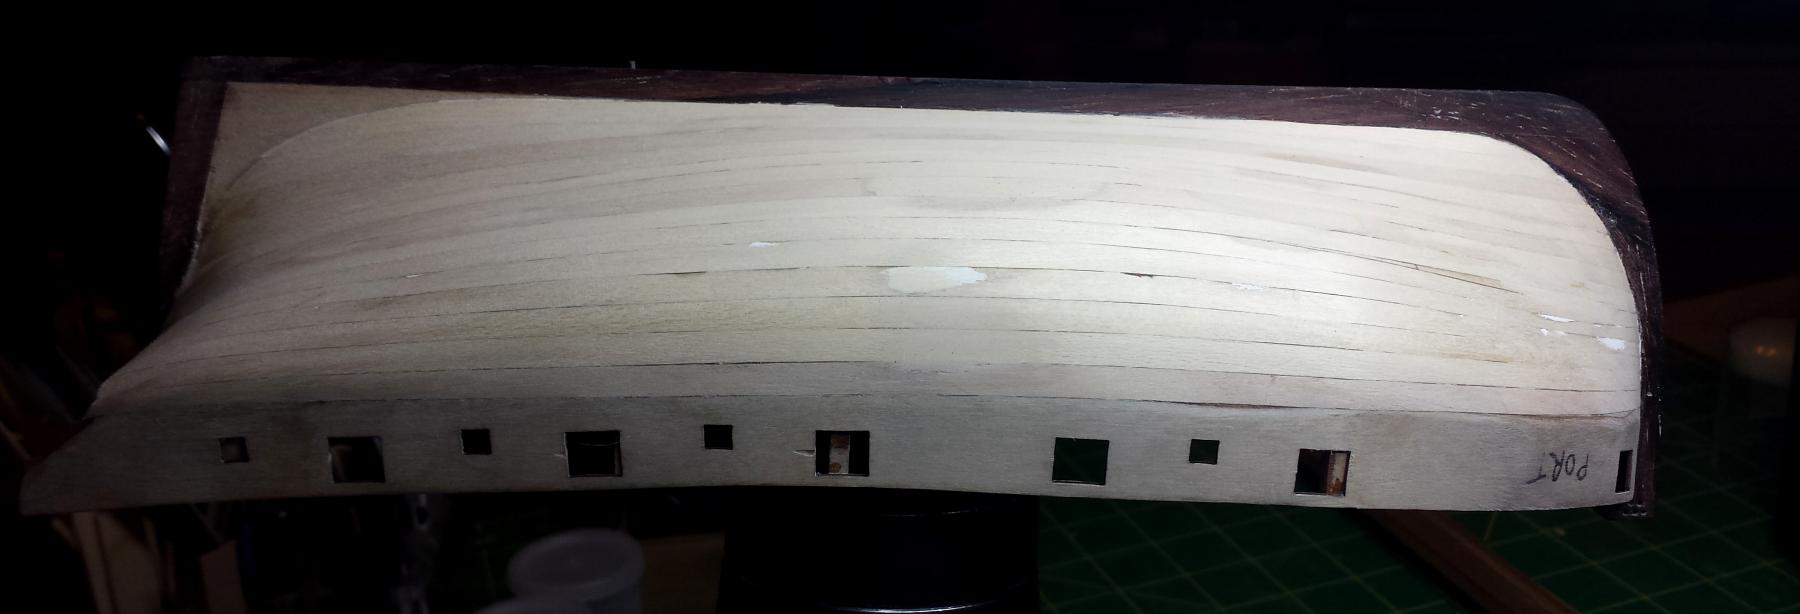
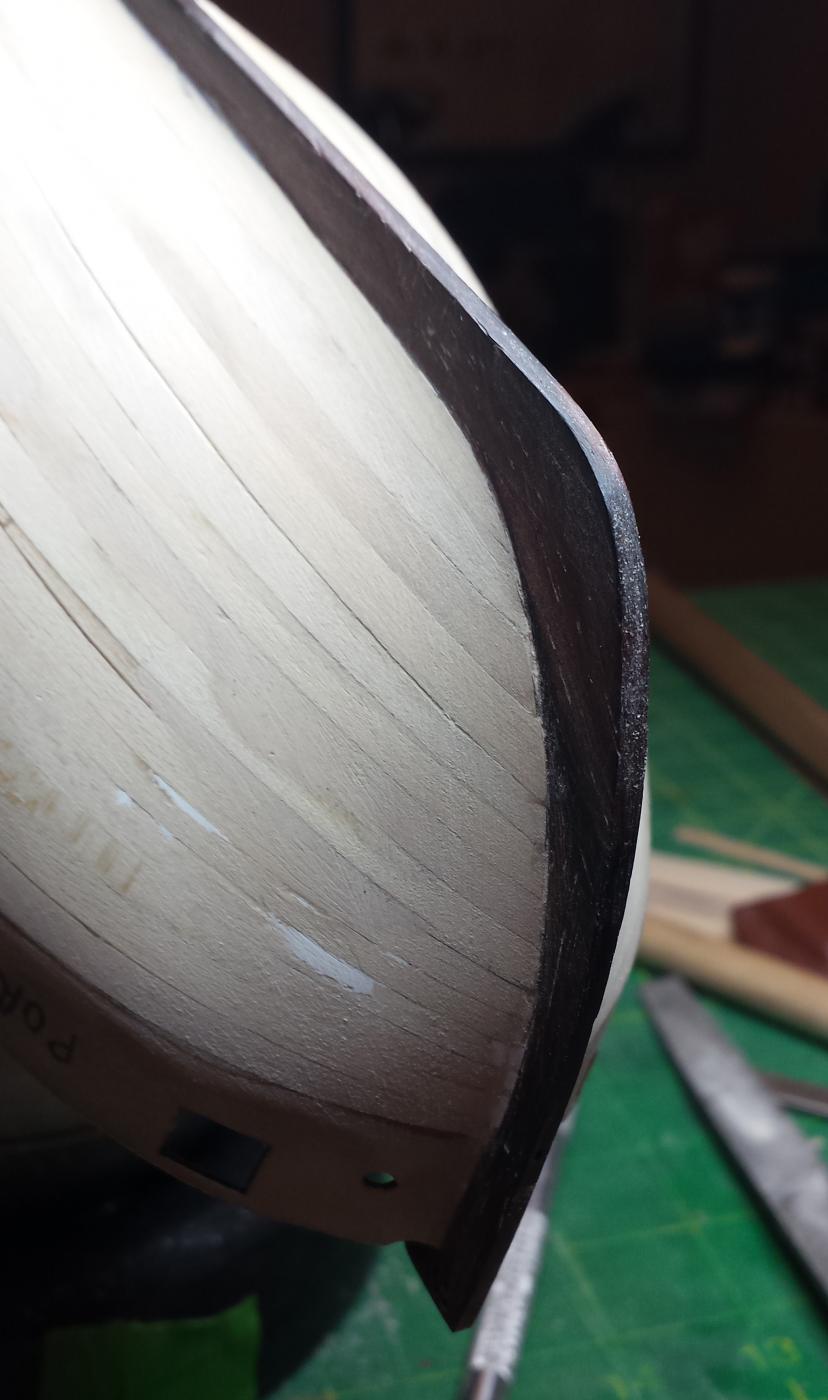
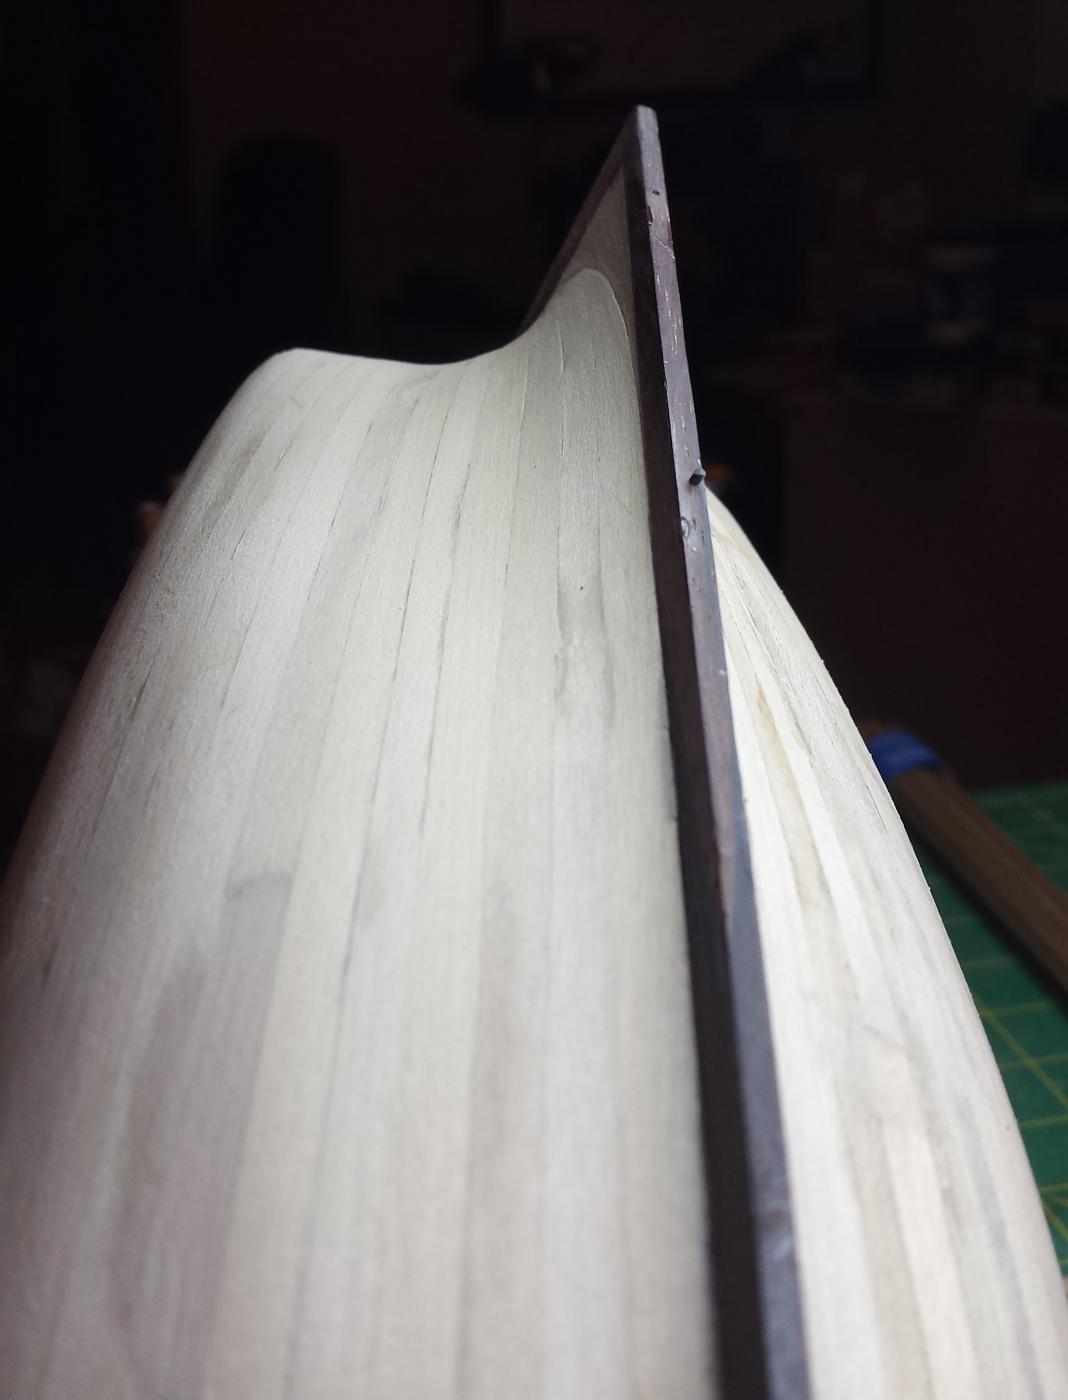
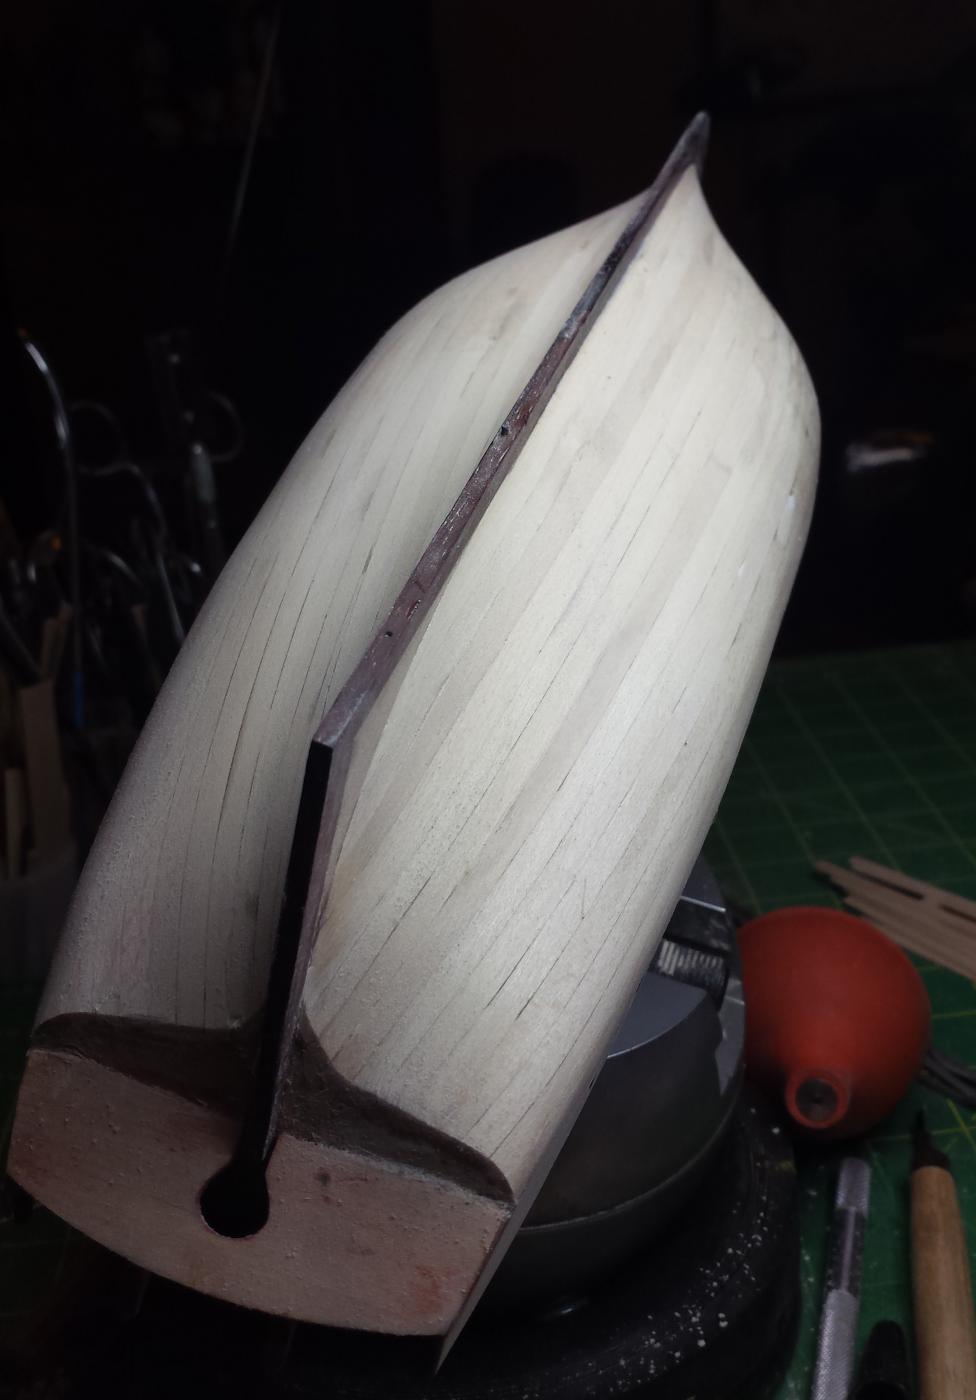
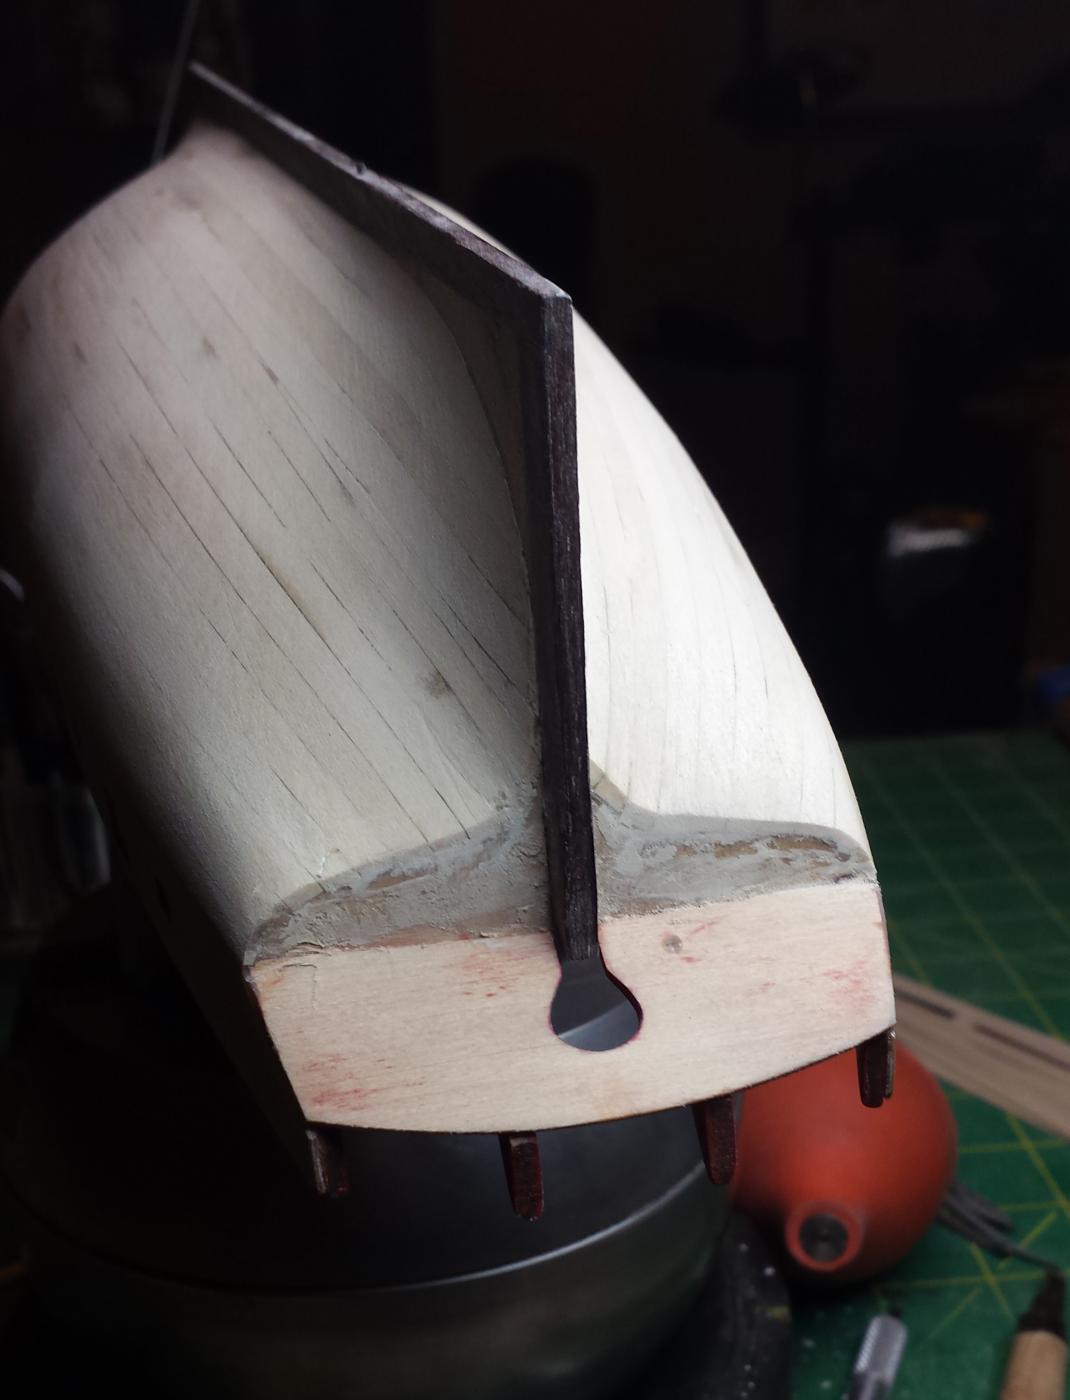
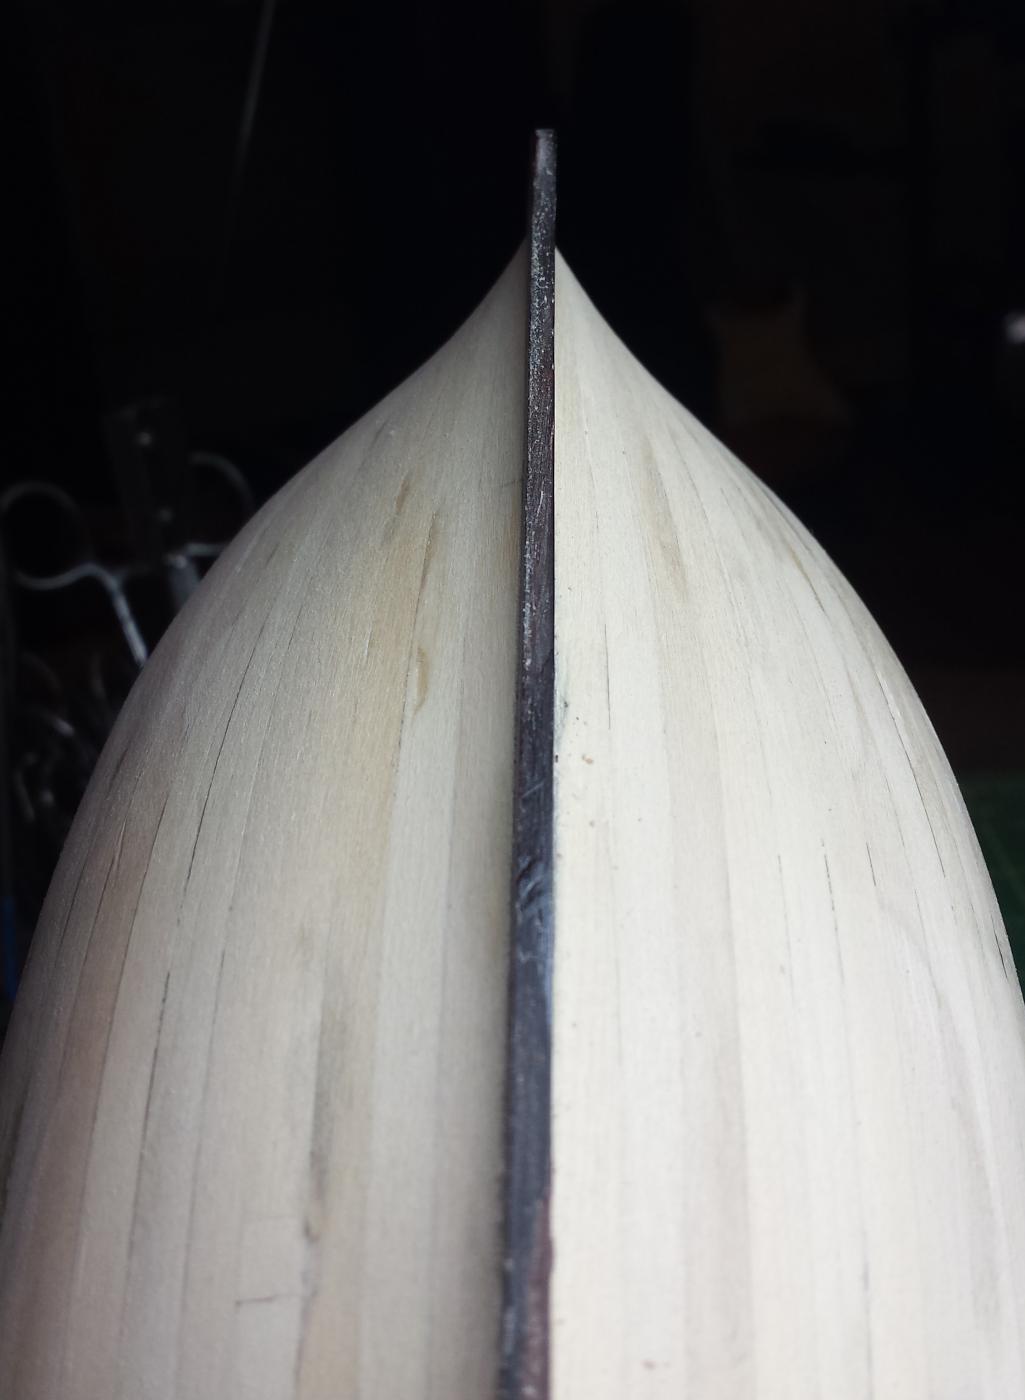
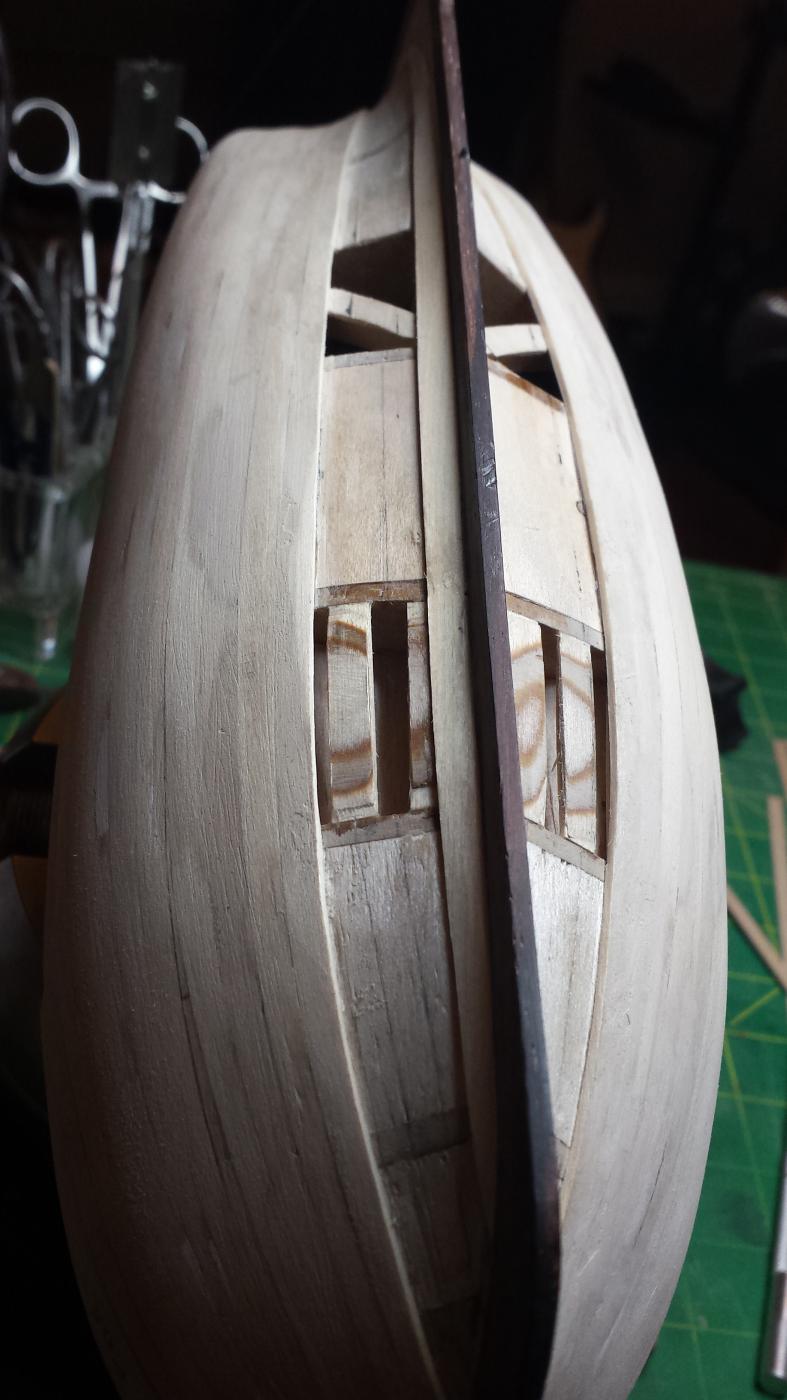
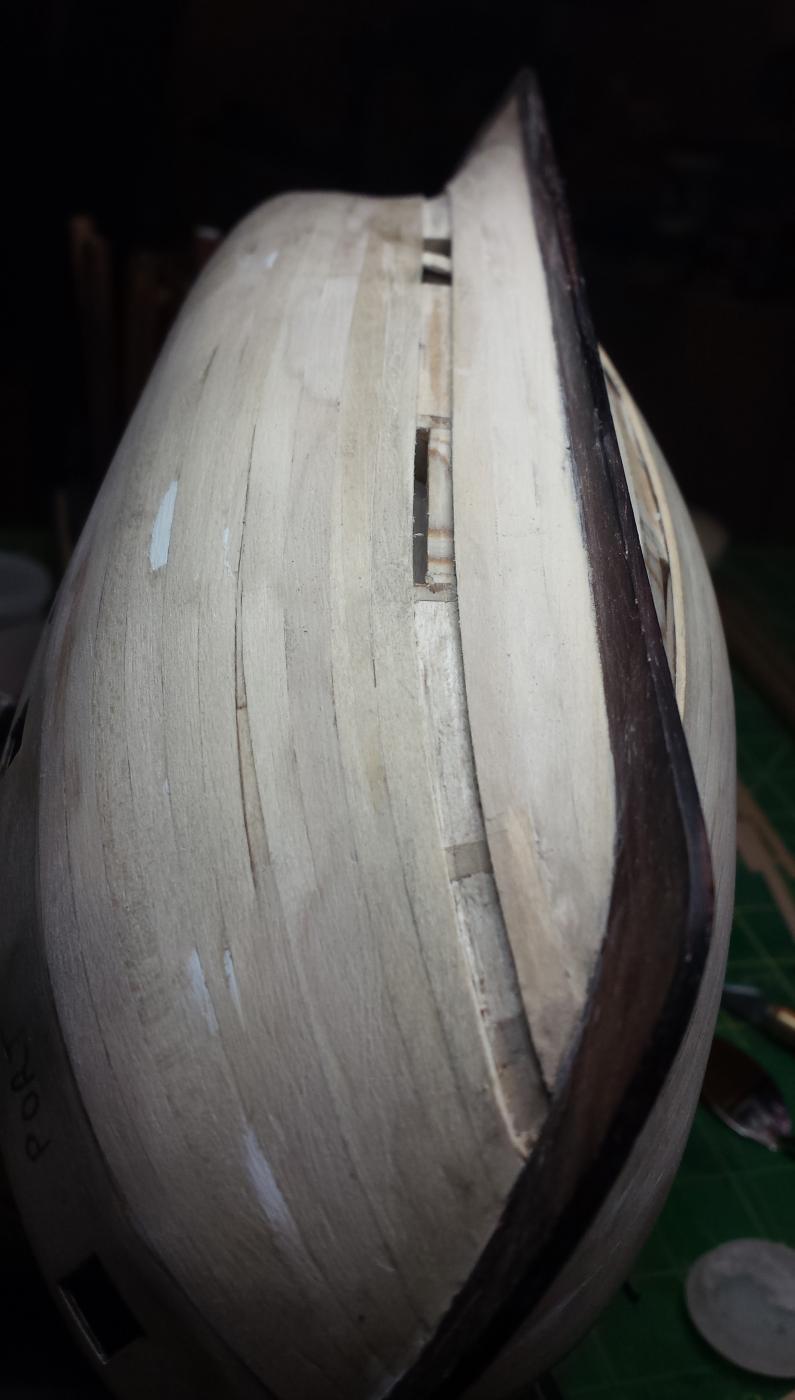
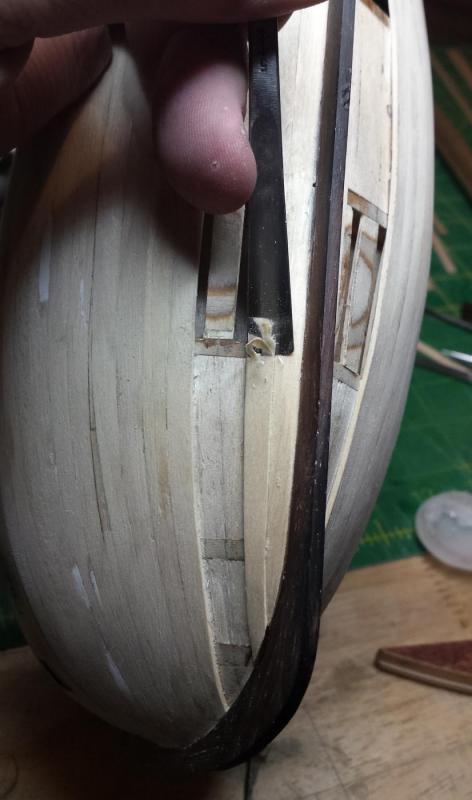
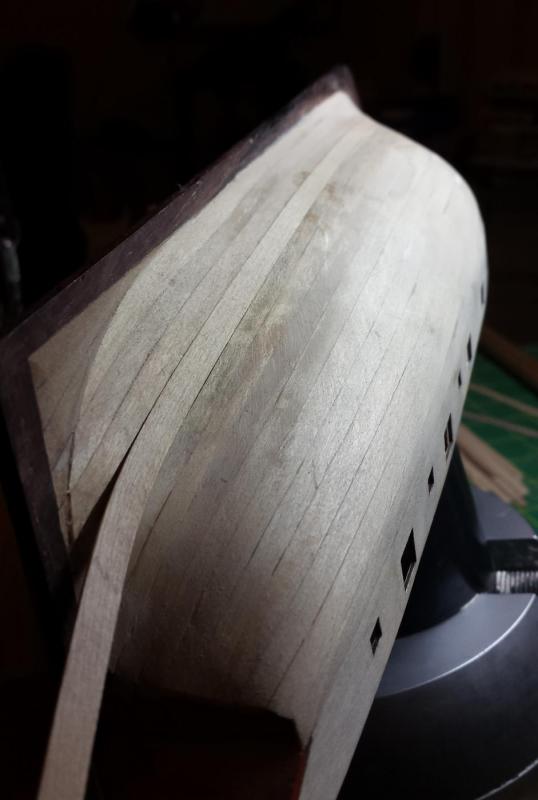
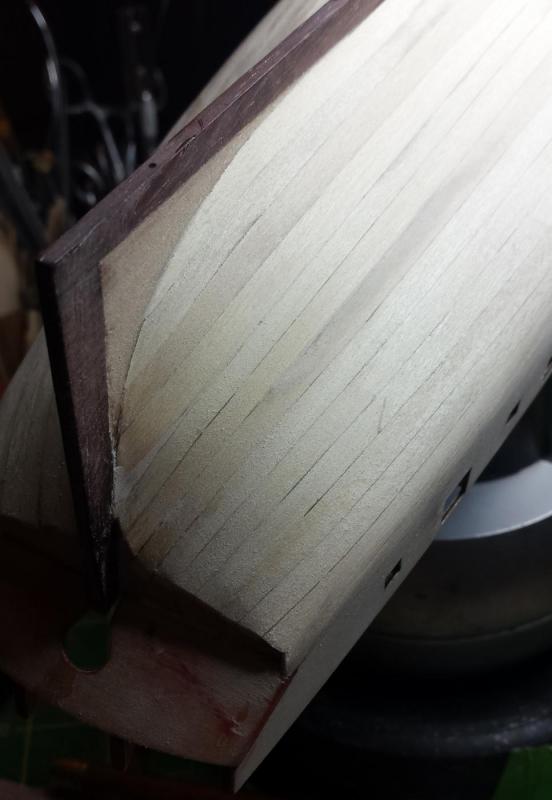
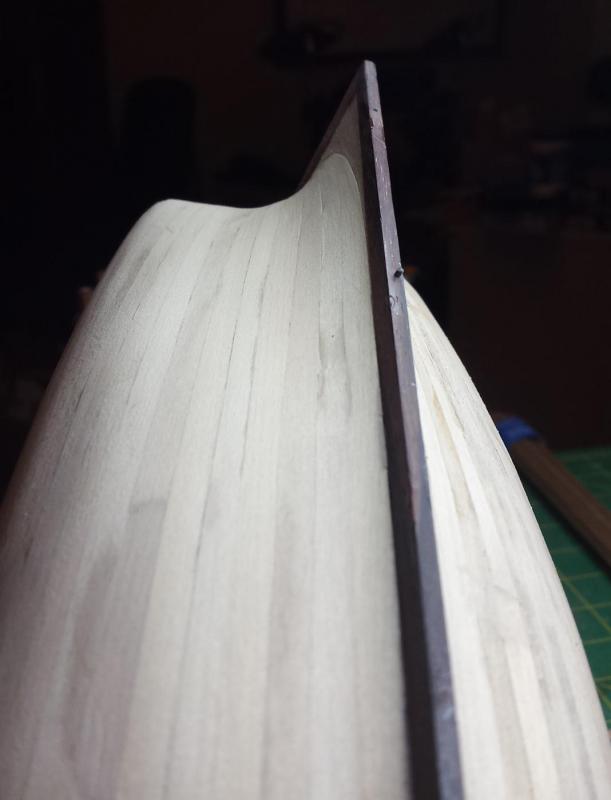
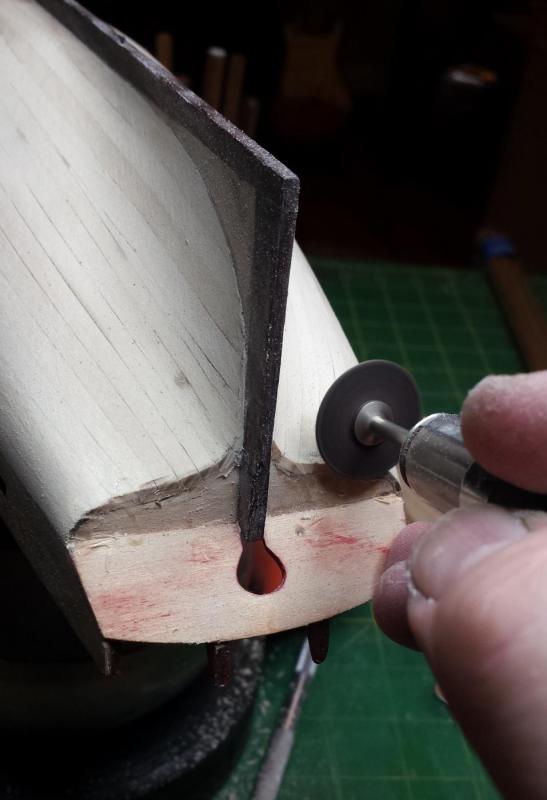
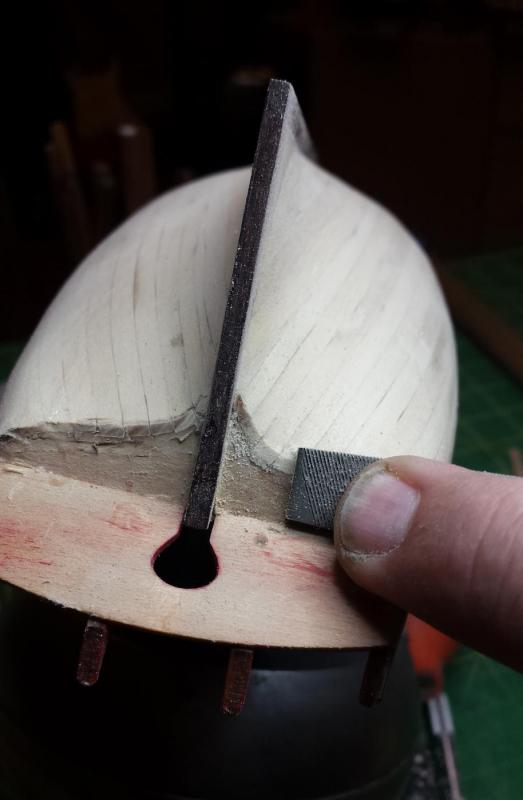
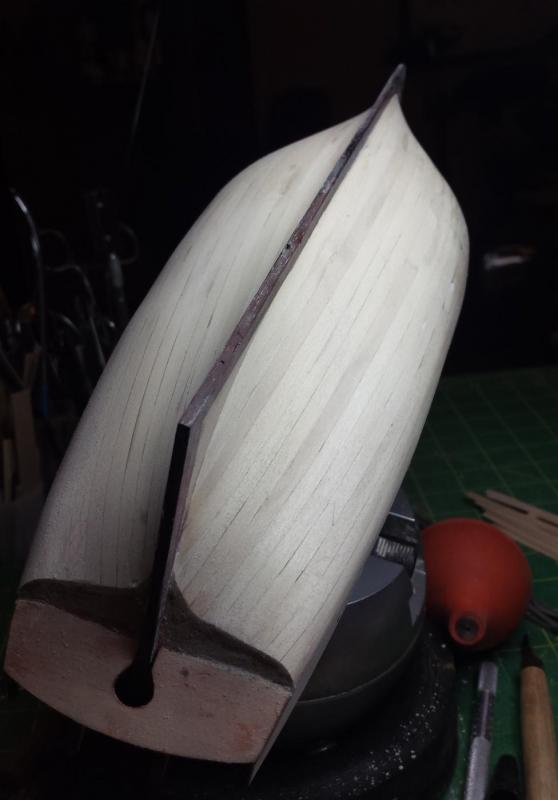
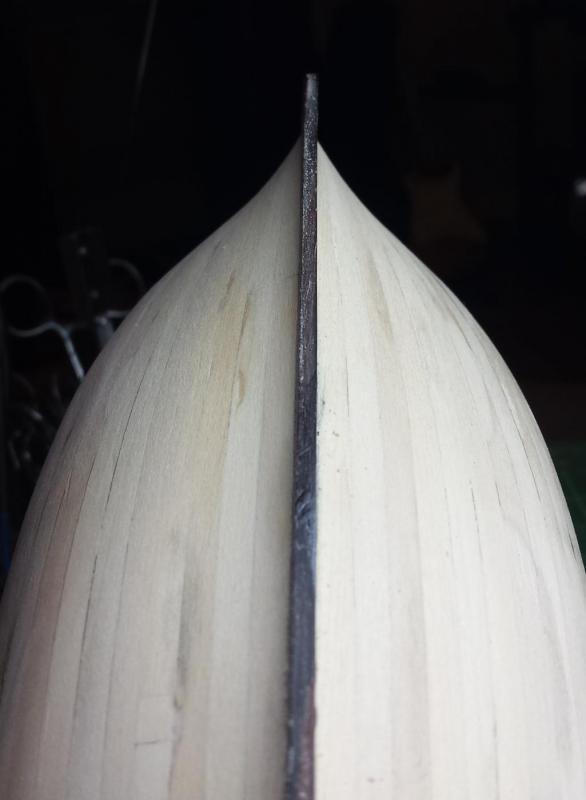
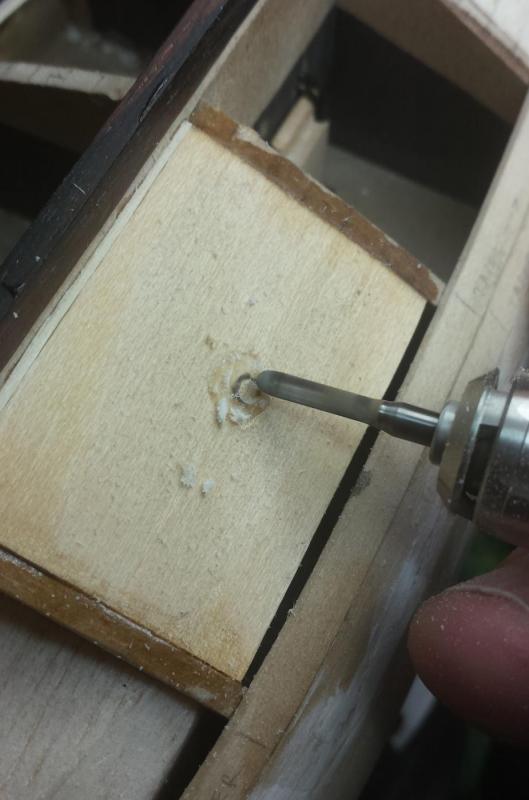
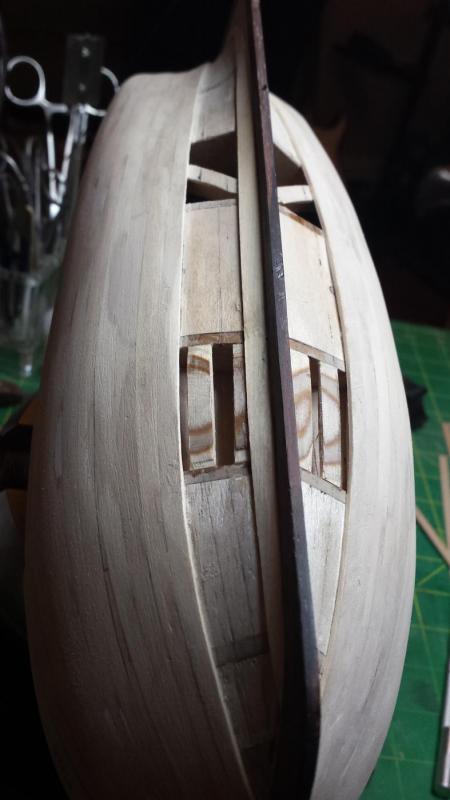
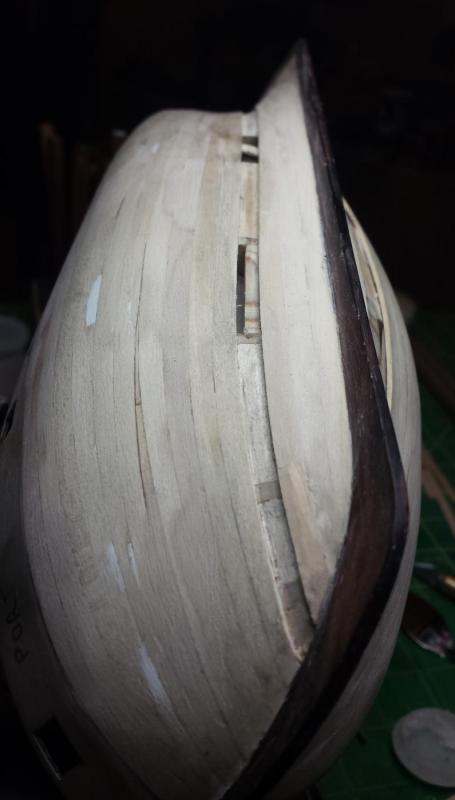
So here we were after adding a few more planks on both sides, making sure we were now fully with the program and the planks being added were fully aligned with the universe before moving to the next. I've now reversed order and have the garboards in on both side and am planking downward from there. Rick, had no issues with twist. What I adid was sweep upward those four final planks at the stern such that the garboard ones, if taken to the rudder post, would be two planking widths above the keel. That leaves stealers simple and at the bottom corner of the keel. I will do something similar with the final planking. I just bent the planks sideways for my sweep, twist over that length doesn't take much force. Finally had to move to concave tools to cleanup theses planking sections. I guess some people leave that entirely to the end, I cannot And here we are fitting, gluing, and cleaning up the final plank on this side. By the way I really like that flat and concave Veritas detail palm planes for this. Almost perfect combo of small footprint and precision and control with it in your palm. Clicky to go see how unhappy your wife is going to be. And here we are basic side view, which can best be called pedestrian. On the other hand, I'm very pleased with the what is the real purpose, which is establishing the final shape of the hull and after careful work here I'm very pleased with the shapes and the symmetry. Almost perfect fair curves. Fit into the rabbets all the way around also is good. As mentioned lines look good. Then last step for the evening was cleaning up the stern counter for the planking it needs prior to final hull planking. Since those ends were under considerable tension at gluing this was the one place I was using lots of glue and accelerator to set a good hold quickly. I shouldn't have, at least you should never do that however tempting on anything you'll have to fiddle with later. So endgrain reinforced with gobs of glue... where is my rotary tool? Then finalize with a good medium-sized file. All done ready for planking. That's going to help me get used to the boxwood, first place I plan to use it tomorrow is here on this nice simple straight planking area. Then since he'd been on his head for a while I decided to let him sit on his feet overnight. Starting to look like a cutter.


- 714 replies
-
- 8
-
-
- lady nelson
- victory models
- (and 1 more)
-
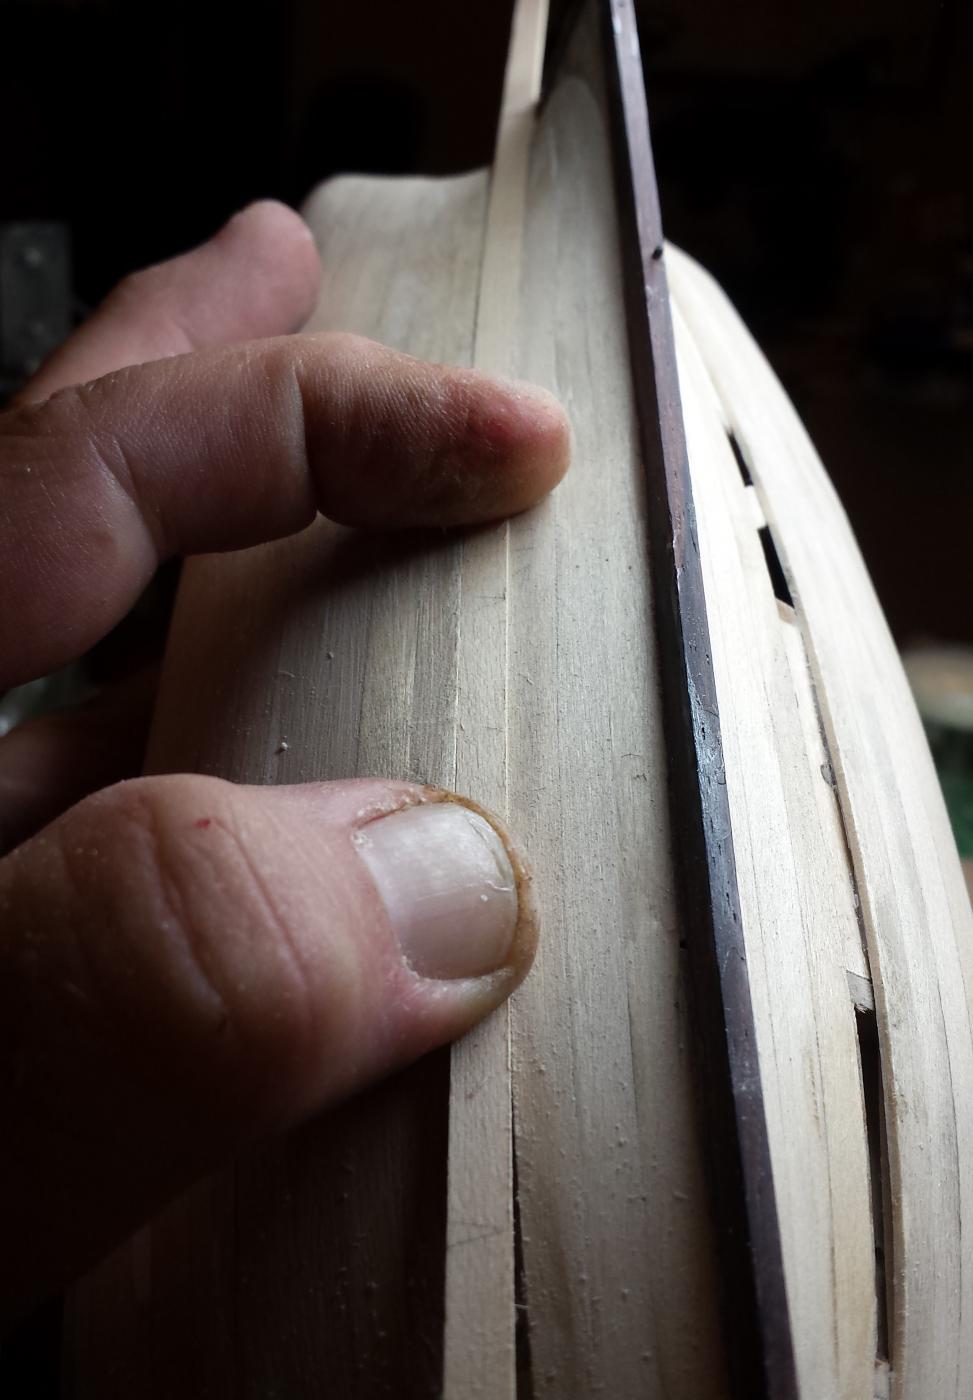
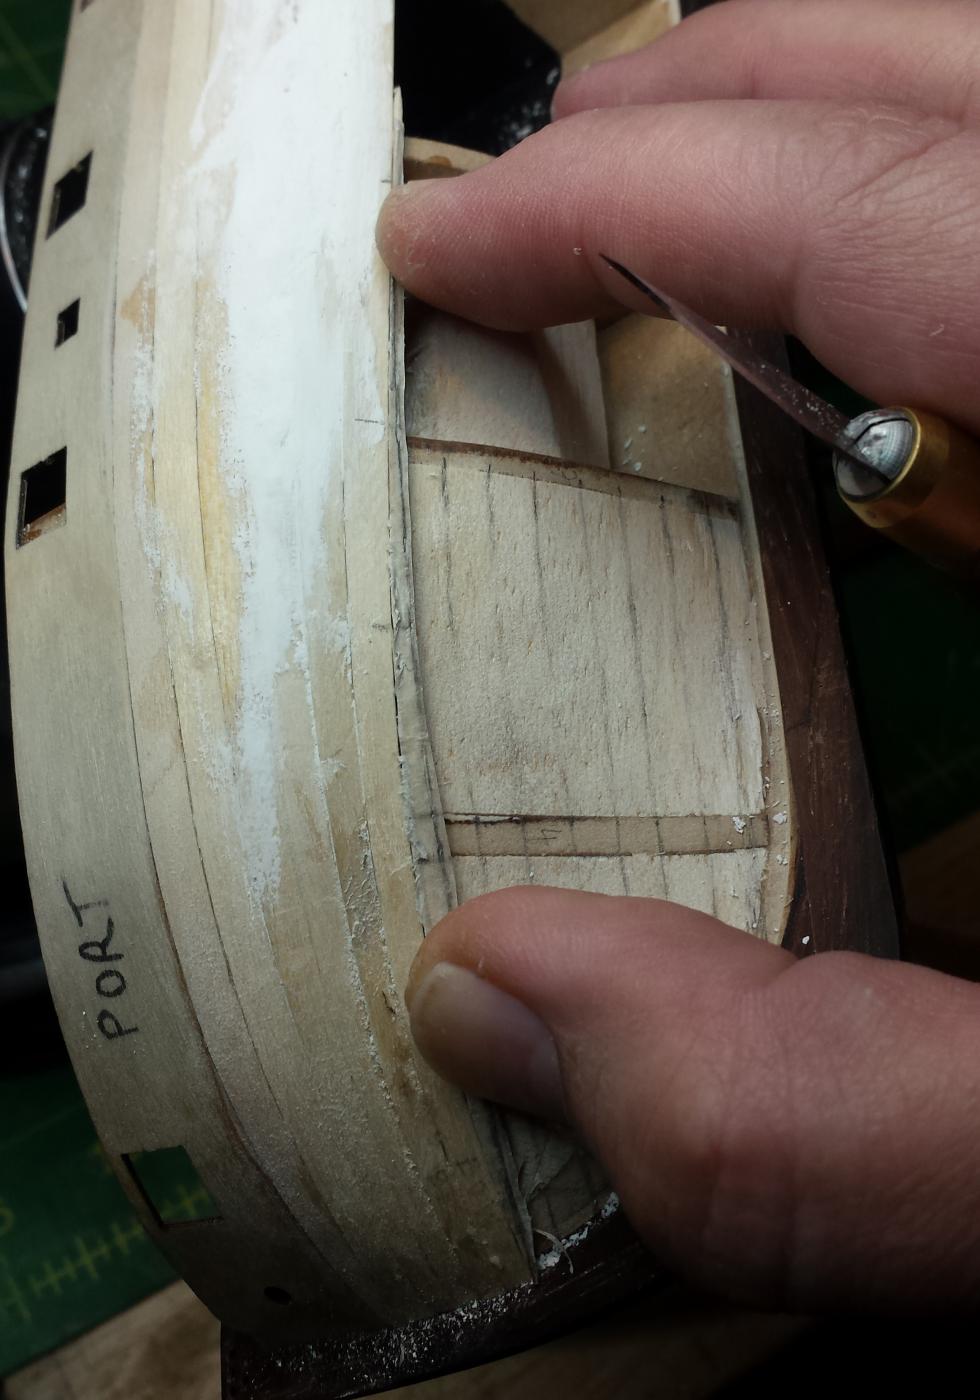
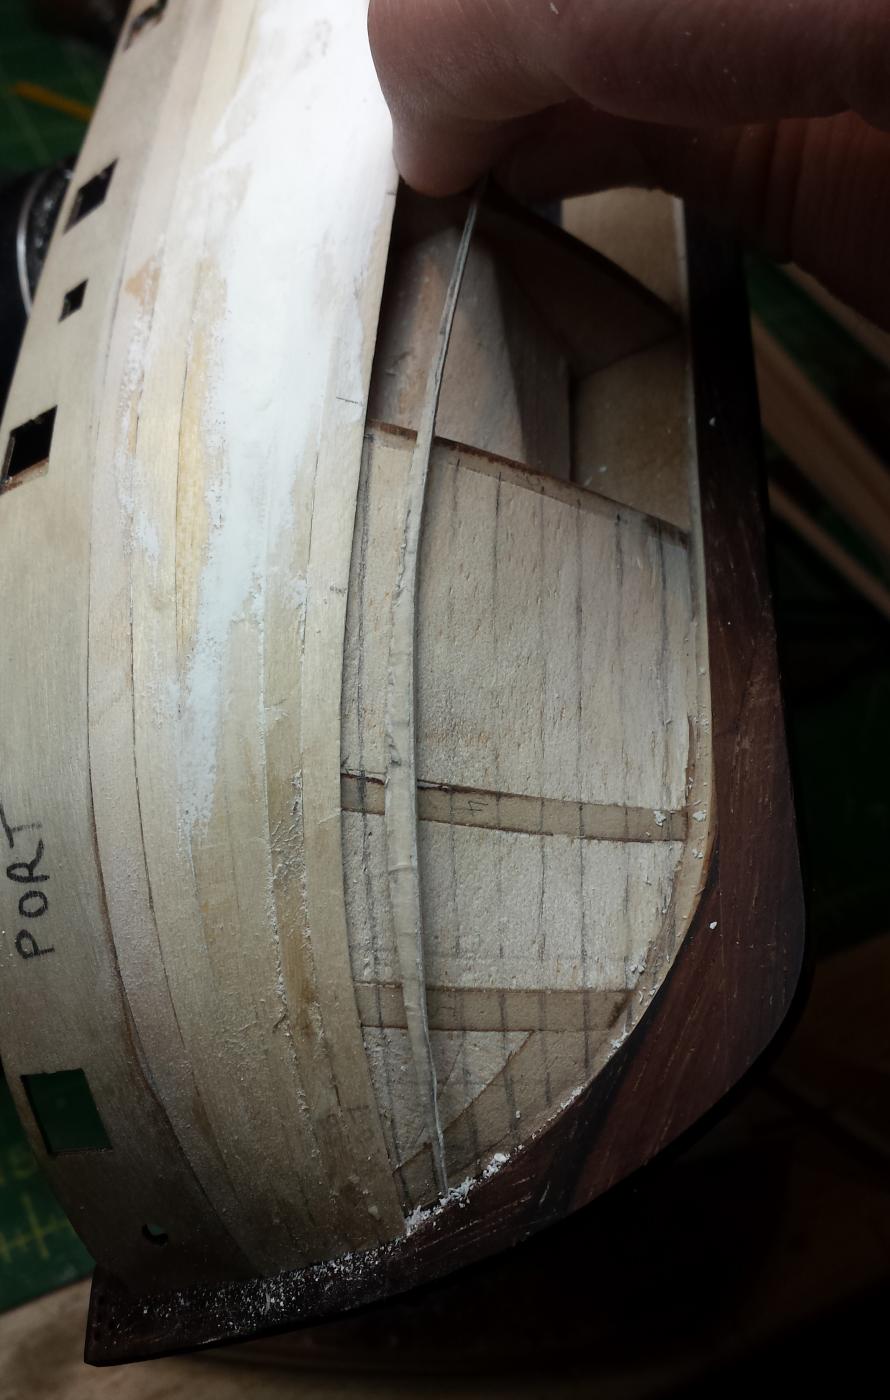
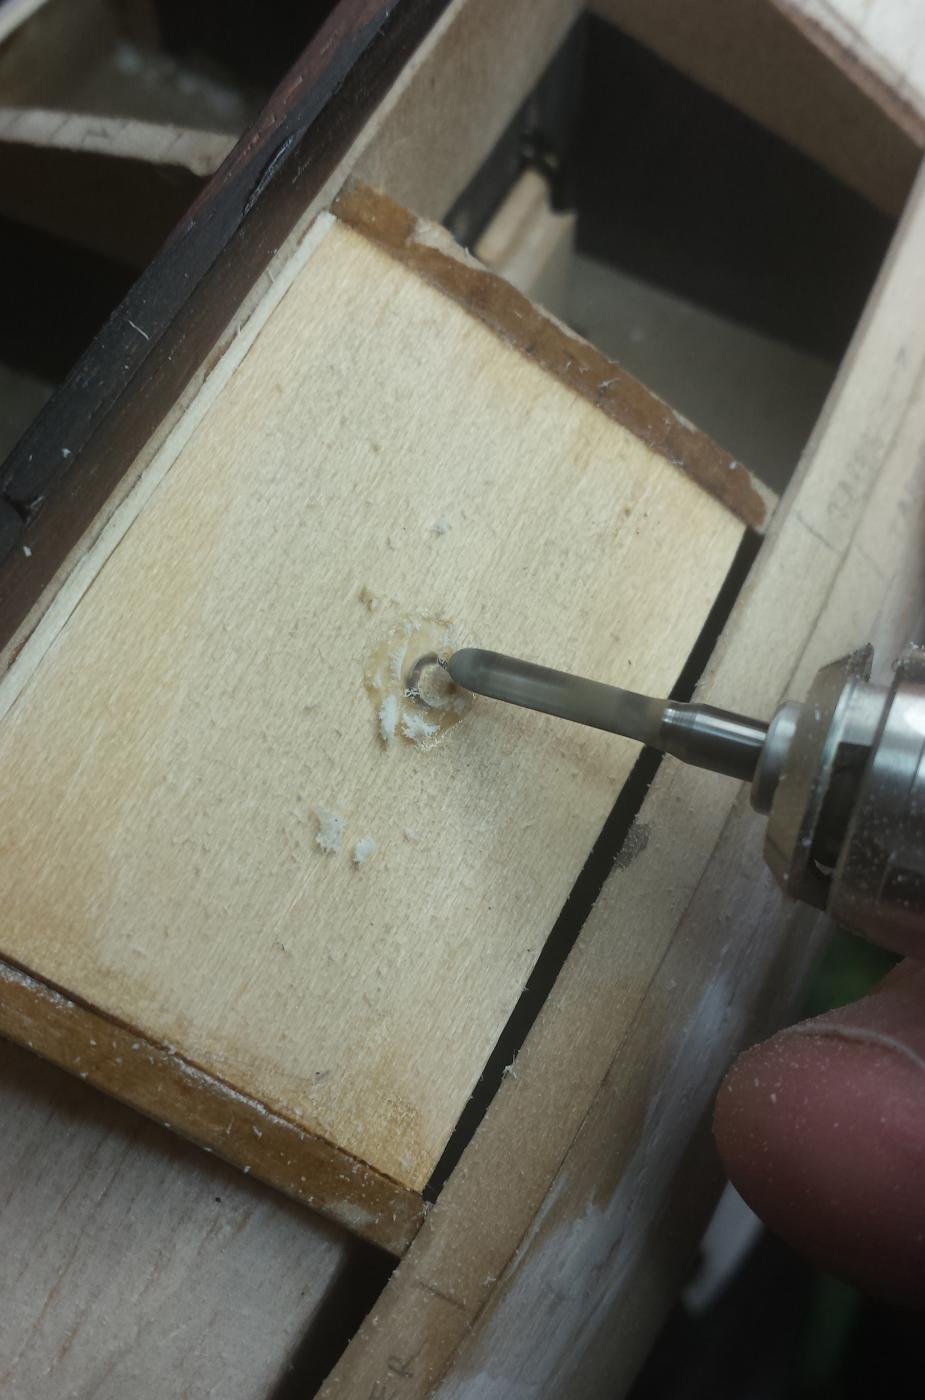
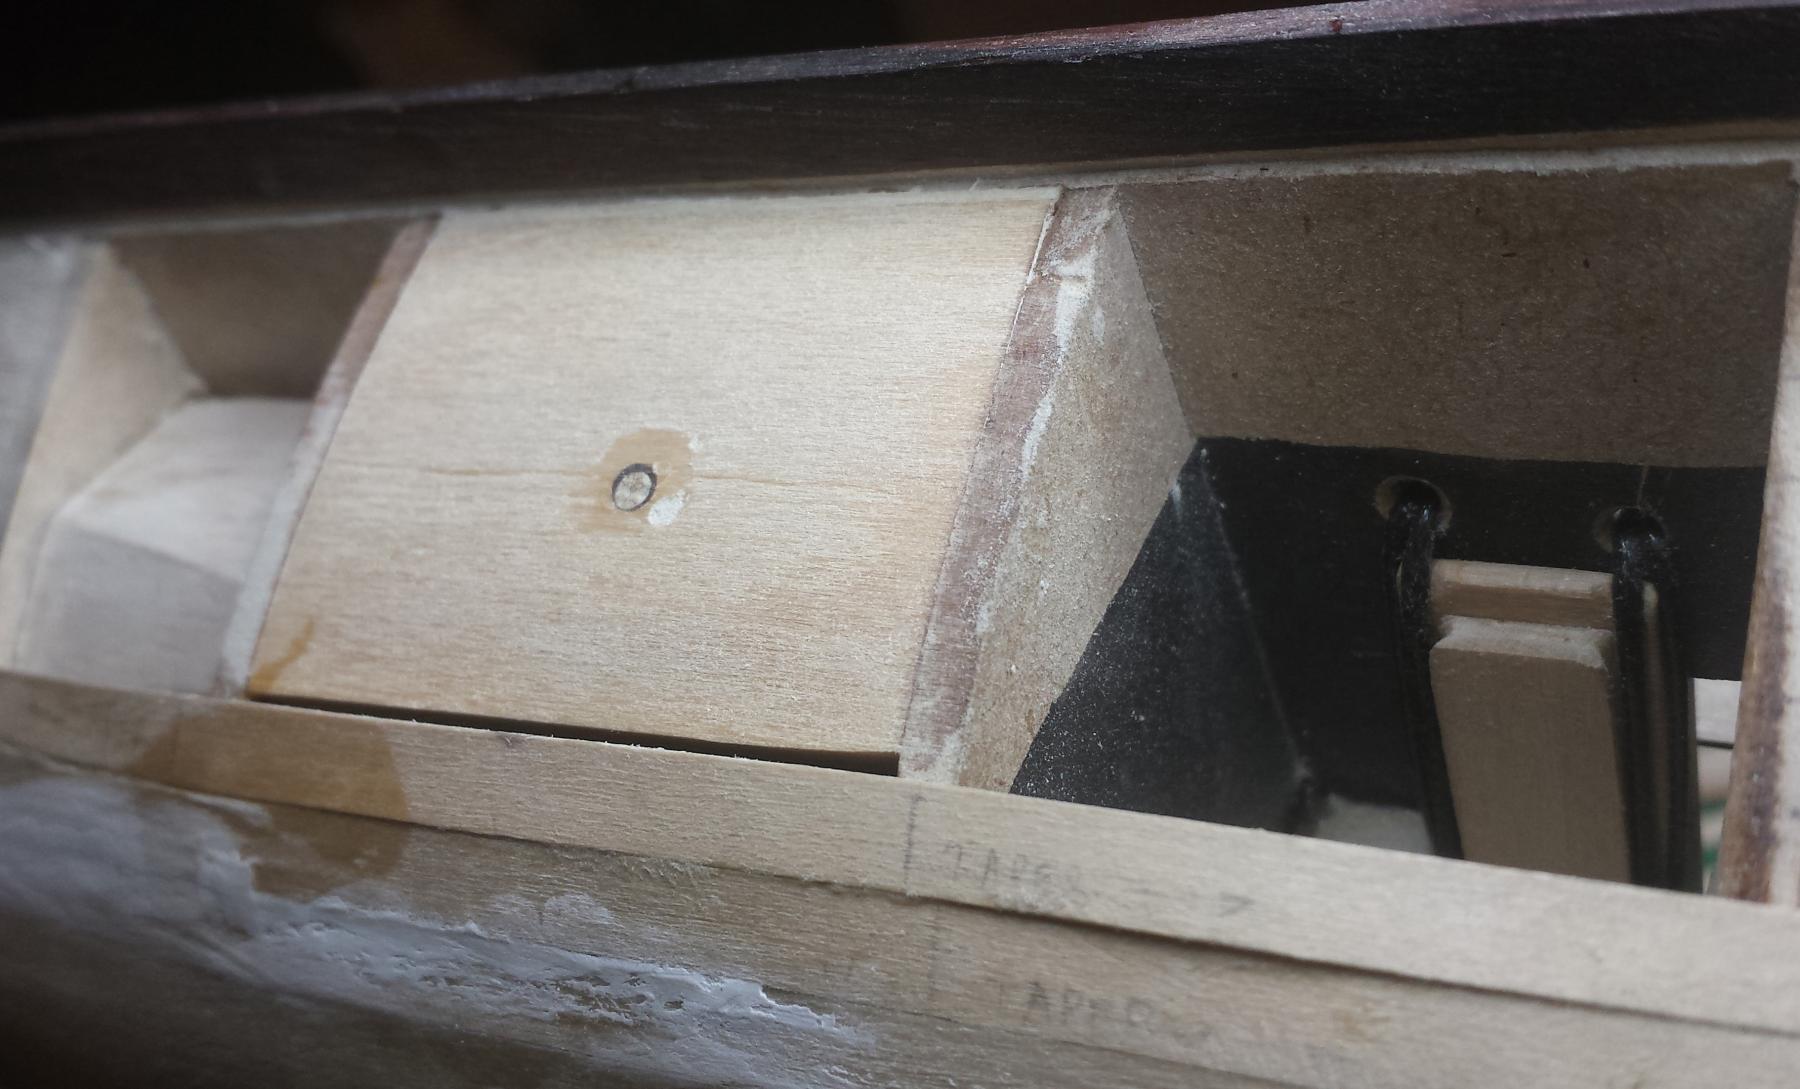
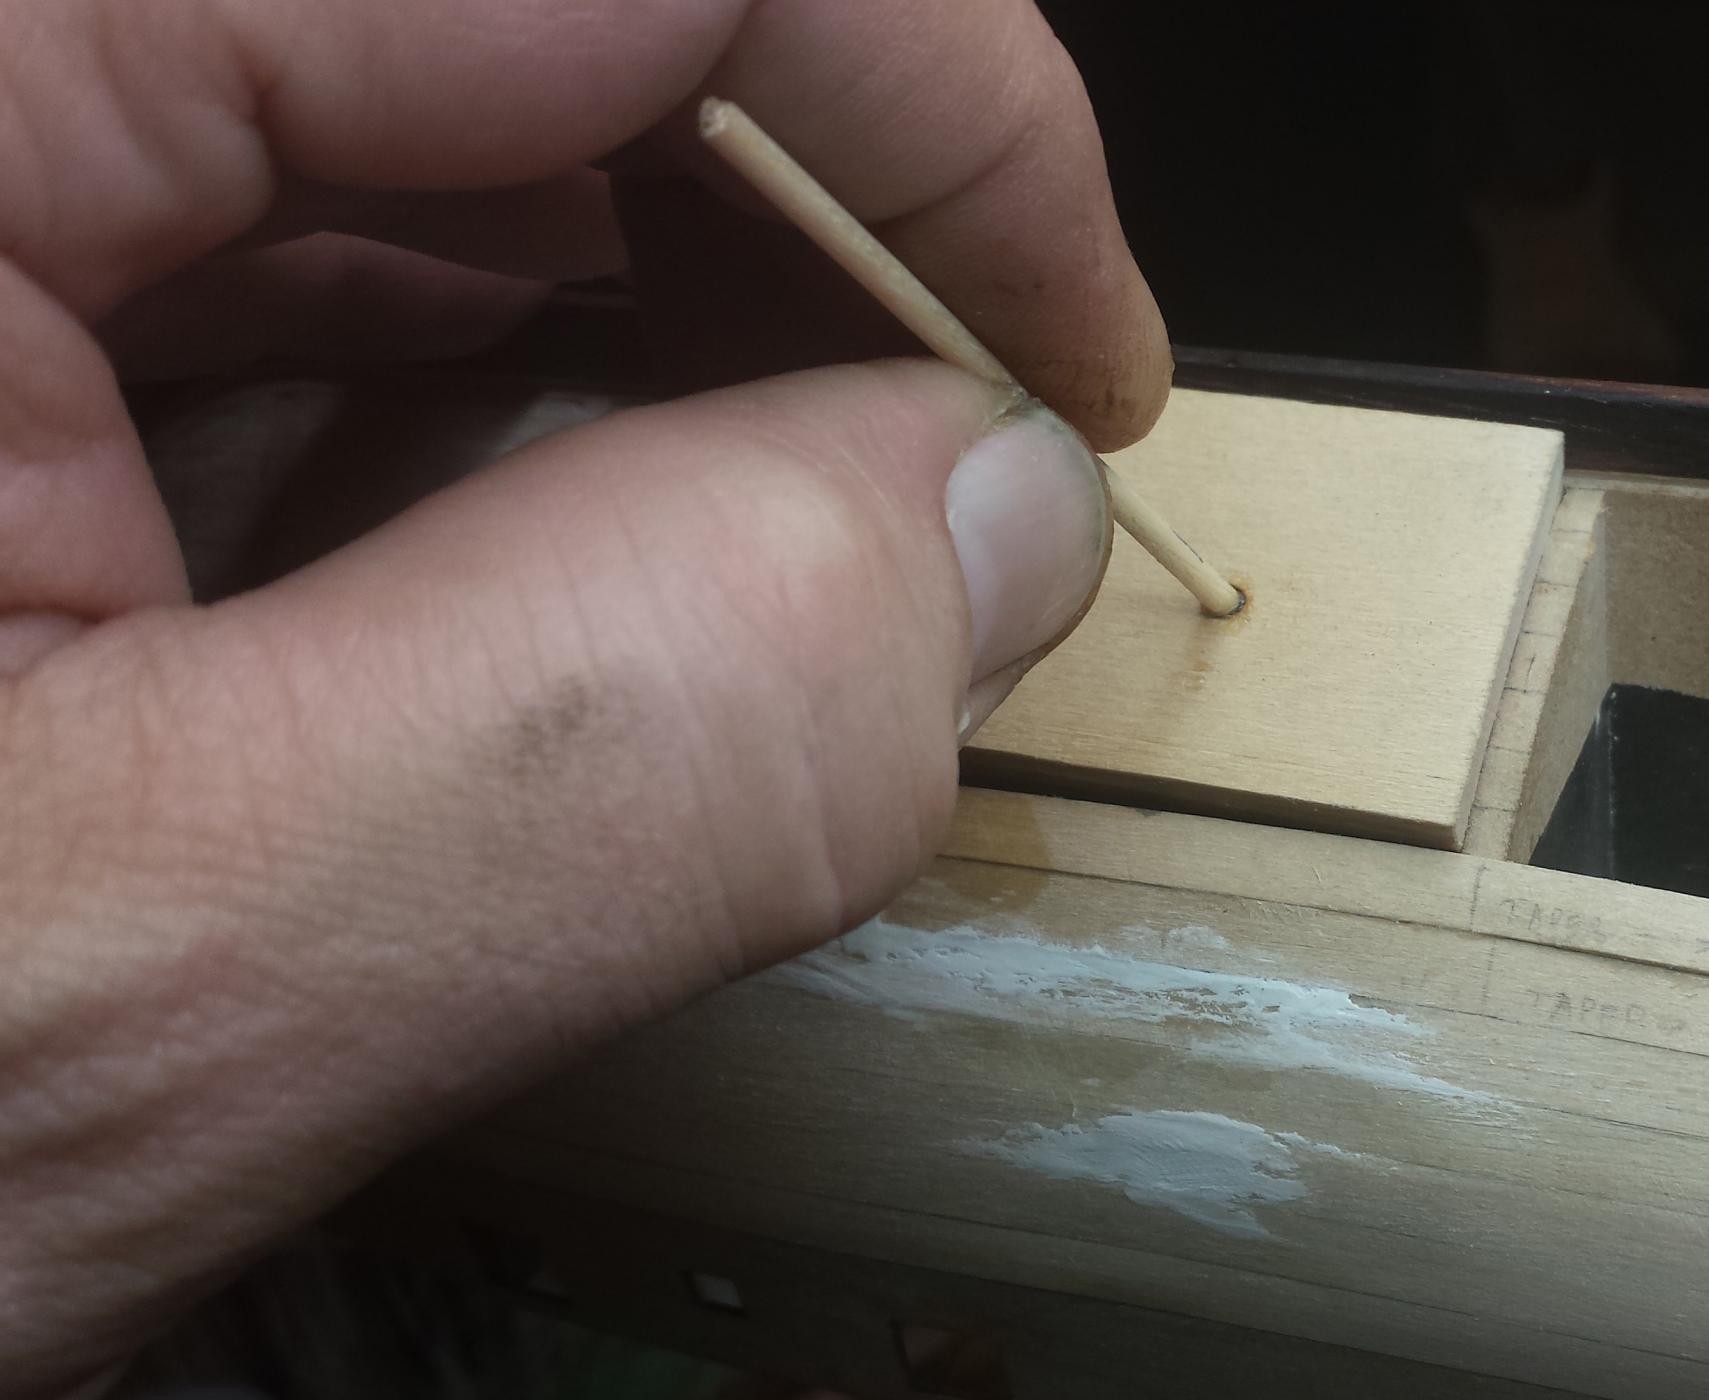
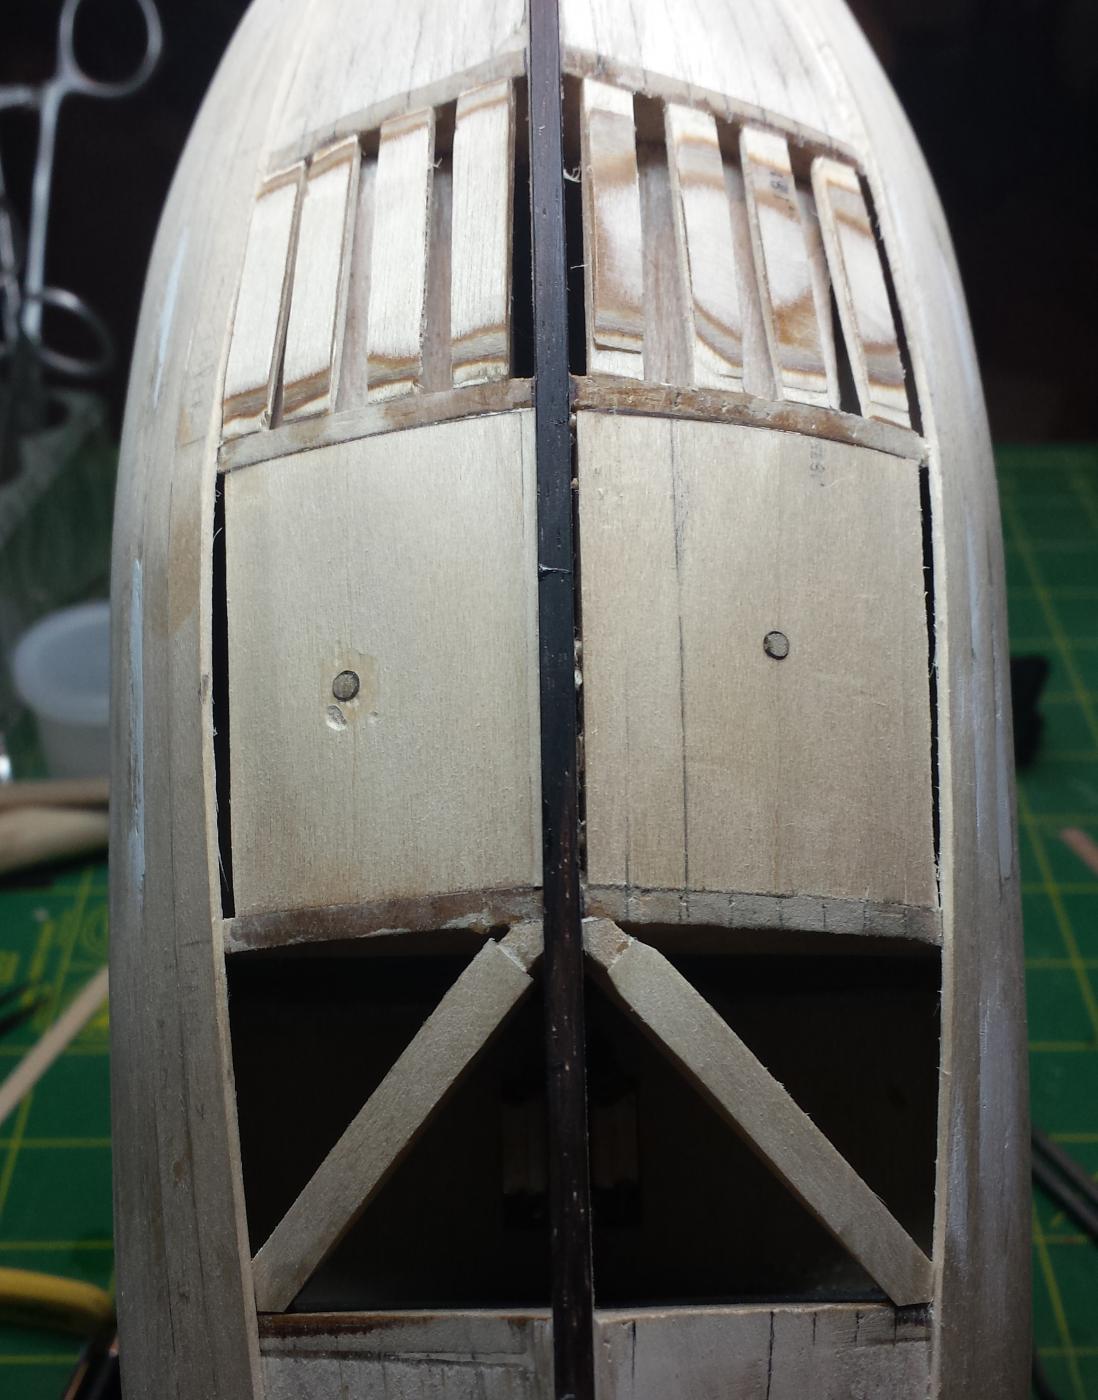
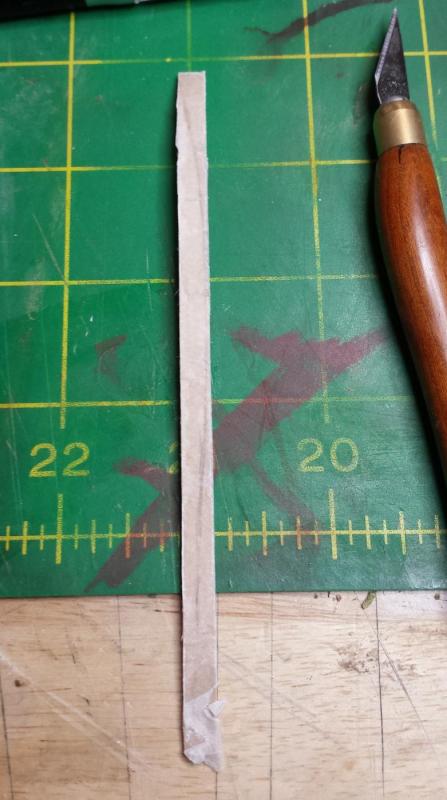
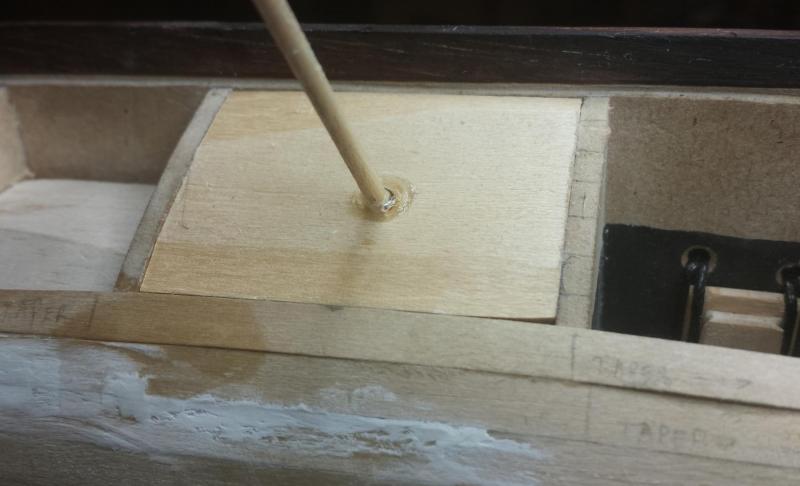
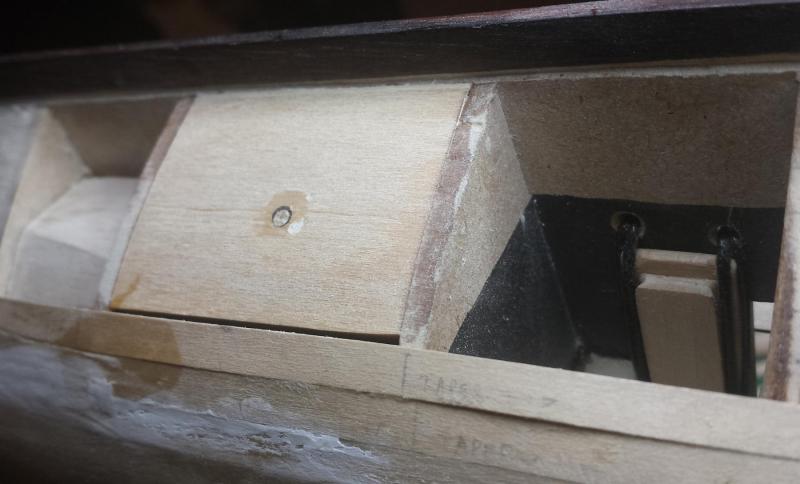
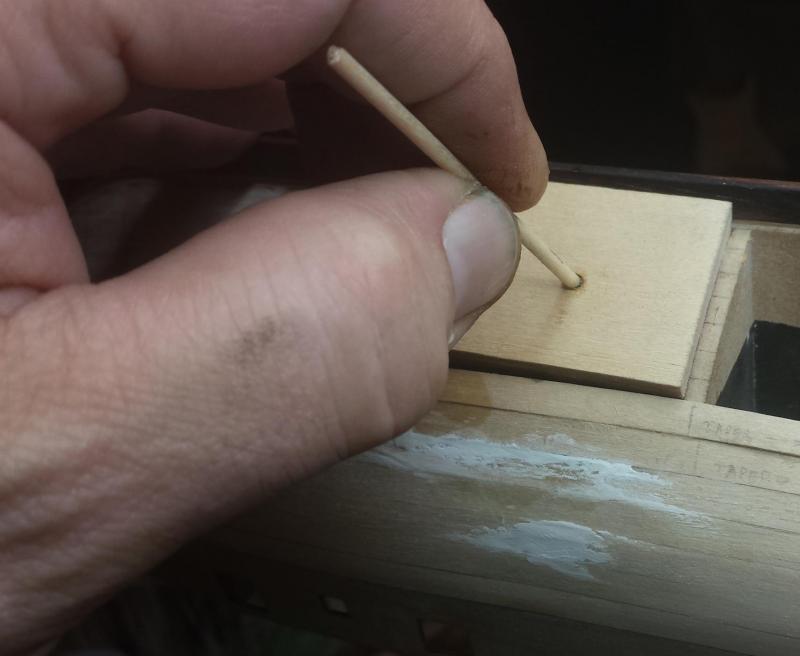
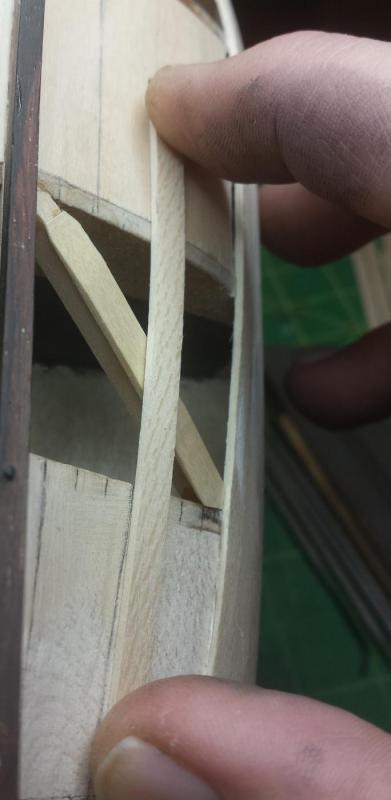
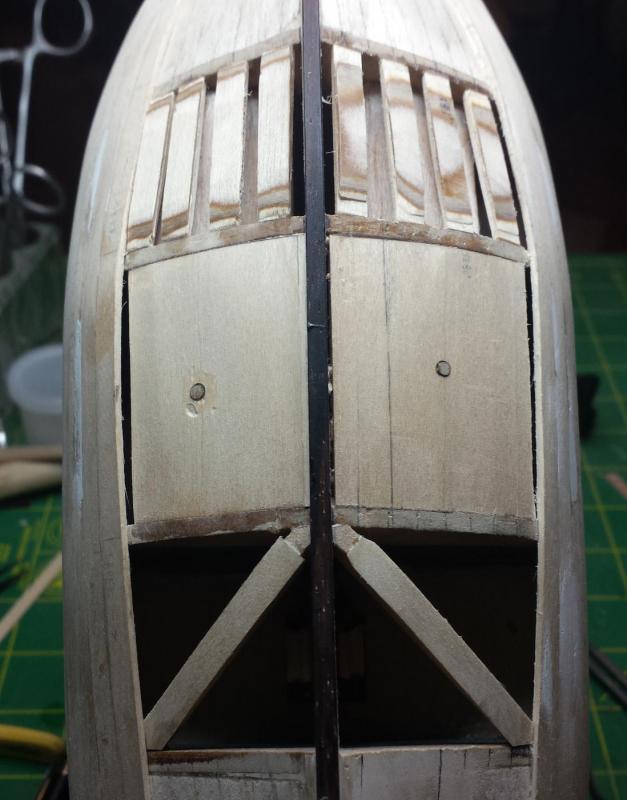
Thanks folks. This evening I put in those two planks, sanded down hull to final shape, and trimmed and flushed the planking ends and made the counter ready for its planking. Yes, I learned several lessons on what not to do and that there are not stages of planking anything that should not engender constant paranoia as to whether something - anything - is getting out of alignment. Also the last 8 planks use the technique I plan to use on the final planking, every single one of them has an invisible glue line. The way I had been doing the planks, which was beveling the plank I was about to glue on, just wasn't getting me the totally consistent results one needs here, there continued to be long stretches of good glue lines with a couple minor but noticeable wiggles. I finally decided that trying to do a fit that complex while working on a loose wiggly bendy plank was a bit trickier than I'd prefer, so I switched to beveling the edge of the plank that is already on the ship that I am about to glue to. With it being glued down, I had no issues using a sharp knife to bevel and true the edges such that they are always perpendicular to the bulkheads, followed up by some straightening with a straight flat rectangular #2 cut needle file. Goal was to make it just that a straight square edge on the plank you're about to glue down should fit perfectly. Also stopped using glue on the edges except where absolutely necessary, no matter how good your joint is it will be made slightly less good by glue that's thicker than water, I remembered this trick from something I did a long time ago. Also pretty sure I like having them able to move a bit independently in terms of long term stability, I think more problems will be incurred by locking them all together. Before I forget, a nice thing about my Mk.I Advanced Rope-Powered Keelalator it that is sounds like I'm working on a ship. Every time I put stress on it gluing or whatever, the lines creak against each other and the wood, unintentionally very nicely atmospheric. To go back all the way to fixing the problem I had.... First was an extensive and detailed post-mortem analysis, something I do at work every week on some issue or other. So I spent some time figuring out how that had happened while wondering why I didn't notice it. Once I understood that it was time to redraw the plank lines as necessary to be what I wanted them to be from here, and then that told me what I needed to do to fix the two sides. Those fixes involved cutting 4 or 5 inch curving pieces to change the current line into the line it should have been at that point. So I took some tracing paper, not to trace the curve but because it's thin and easily bendable, put it over the location where we needed the repair plank, and use a finger to bend the paper to give me a nice crisp line of the curve that I could see, then used that to draw the line, then glued the paper to a piece of planking stock. It looks considerably more messy than it is, I actually had a good line I could see. I also bent the plank to make sure the curve transposed correctly. Then trimmed it down to fit the curve with knife and sandpaper. Now that I had the curve I needed to mark the heights it needed to be at each station. Trimmed down, you can see it's now to shape. Even though it looked fine dry fitting it, I spazzed gluing it in and it ended up with a less-than-stellar glue line but it was a repair and I could deal with it. Note I'm just bringing myself back to the original plan, which itself was poorly conceived in that the bow planks should have more upward sweep for a graceful look, but considering the second planks have a different width and therefore a completely different scheme will need to be created, I didn't see any value in trying to fix this. It looks goof from all angles but beam on. Before I resumed planking though, as you saw from me reinforcing planks already installed, that I just wasn't happy trying to plank and then correctly fair planks that are floating over large amounts of empty space, so I decided I was going to fill all 6 remaining holes in some way, and while I was at it was going to try different methods for future reference. First for the biggest gaps was plan solid basswood. Here we fit, install, and clean up. For the back hole, I decided on a simple cross brace made from some basswood and a planking scrap. Here testing it for support with fair plank line, this one needs to come down still. The final hole got bridges of plank scrap covered by kit spare plywood, with them placed to go under the edges of two planks. Here they are all done. Will post this here before bringing us up to date.

- 714 replies
-
- 2
-
-
- lady nelson
- victory models
- (and 1 more)
-
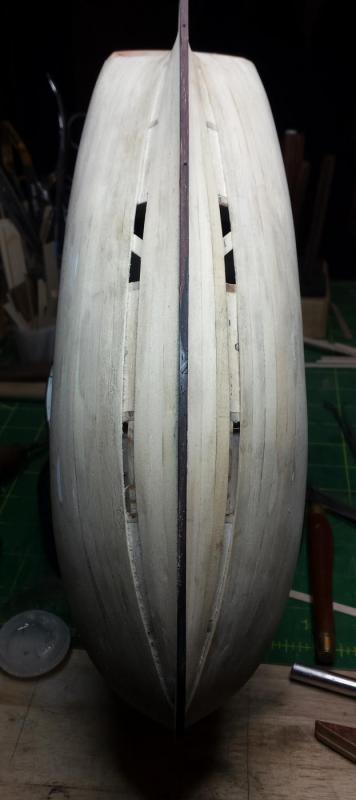
Yes I did Mark, and if you go back you'll see I went to the lengths of marking it all out on the hull. I just didn't execute said plan correctly. After the first three planks the problem was not very noticeable, it would be more so to me now. I decided my plan was working and put on 3 more each side, focused entirely on the side to side joints and geometry, playing around with tools to determine how I was going to do that part, and it wasn't until I was done with that that I realized there was an increasing problem. I have a bit more control of the planking lines now. Obviously almost done with this planking, will post something "real" when I am. Finishing with those planks is intended, since I started at bulkhead as required by the kit, finishing in the middle was inevitable since I wasn't going to try to plank into the rabbet at the keel with the garboard being the last strake. So I got to four left and reversed direction, placing the garboard and working down.
- 714 replies
-
- 7
-
-
- lady nelson
- victory models
- (and 1 more)
-
Thanks Gerard! Crap! I'm threadjacking! AGAIN! AAAAUUGGGH (still screaming as disappears over horizon)
-
This came from a discussion that turned into threadjacking on Mark's Licorne build log, as he was discussing his use of his laser to cut pre-fit deck planks for the Licorne. That made me think of something I've been wondering about, every single kit build you see 1) kit bulkheads fitted to keel, 2) blocks of some kind inserted at the bows and sterns at least because every single kit has way fewer bulkheads than it should, particularly around the bow and stern. What I've been wondering is why someone doesn't make quick 3d hull models of major kits (this really would be quick to anyone experienced) by using the kit bulkhead shapes placed at the correct locations on the 3d model. Once that model is skinned, you can slice it at any particular point and there's the bulkhead outline at that location. Add a little to allow for sanding to fully fair the hull with proper curves the whole way and there's the shape you'd need to cut with the laser. Only other factor is looking at the fit on the keel/keel plate to figure out what kind of fit you need for these extra parts. Doing versions with 2 or 3 or more bulkheads between each kit bulkhead would be trivial, with best results probably being variable, with many at the bow and stern, and a few less at midships, with the goal being that once sanded every plank should lay in a continuous curve as the real ones did and all are supported sufficiently so there are no problems with planks flexing under sanding. Anyway, since every kit build includes this step it seems to be a viable niche market for someone with a laser to sell into. I'd certainly pay a reasonable amount of money for pre-made parts that made this annoying step easier. And it's not like you'd have to maintain a big stock, you just make sure you have the files you need and when you make a sale, run what's needed through the laser and ship. Mark suggested we take the idea here to see if there are any takers.
-
- 4
-
-
About 6" across. I keep telling everyone these are too big and damned inconvenient to carry, but do they listen to me? Nooooo Real answer - .750"/19.05mm
- 453 replies
-
- 7
-
-
- thermopylae
- sergal
- (and 1 more)
-
Gemma, I agree with Pat that foam is questionable if you intend the model to have any longevity, they don't generally age well and some kind of bad thing will happen when they do so inside a ship model. Pat, no you can't cut wood of any kind with any hot wire cutter I'm aware of, they're designed to melt their way through with little resistance, I foresee fire extinguishers in the future of anyone who tries cutting balsa. I think the only reasonable way to do it is the same way the kit is done, with additional bulkheads laser-cut out of material of similar thickness. As nice as a fully continuous surface to work against is, it's not necessary, the requirement is to make the gaps narrow enough to really fair the hull lines with enough bulkheads that the planks can follow a correct curve the whole way, and to provide enough support so planks don't sag under sanding between bulkheads. It surprises me that no one has taken a run at making basic 3d hull models of most of the major kits using the kit bulkhead shapes in the correct locations, there is more than one possible aftermarket application of a library like that. In this case once you have the skinned model you can slice it anywhere you want and there's the profile of a bulkhead in that location. All you need to do is add enough extra to allow the fairing sanding and there's the final bulkhead that would need to be cut. Very easy to produce versions that use 2, 3, 4 or more new bulkheads between the existing ones. Only other factor is checking the keel/keel plate part to see what kind of fit you need for the new bulkheads.
-
More tools - Luthier, jeweler, fly-tying
vossiewulf replied to vossiewulf's topic in Modeling tools and Workshop Equipment
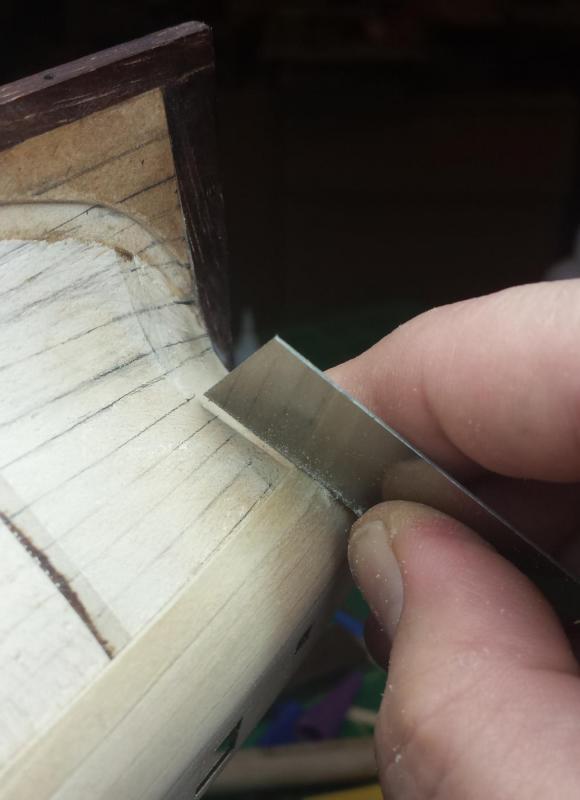
This is more of a supplies item than tools, but I just ordered these last night from Amazon. They look to be just the right size for small ship parts, come with labels, and a pack of 50 are $10 which seems a pretty good deal. -
More tools - Luthier, jeweler, fly-tying
vossiewulf replied to vossiewulf's topic in Modeling tools and Workshop Equipment
Interesting Derek, scaled down yes that looks like it could do a number of useful things. -
More tools - Luthier, jeweler, fly-tying
vossiewulf replied to vossiewulf's topic in Modeling tools and Workshop Equipment
First used mine to do a super-detailed cockpit on a 1/32 FW-190A-8 back in like 1991. They work very well, just has limited sizes. If you look on Otto Frei there are punch sets with a wider range of sizes, but they're also pretty expensive. -
More tools - Luthier, jeweler, fly-tying
vossiewulf replied to vossiewulf's topic in Modeling tools and Workshop Equipment
This thread isn't just for me to talk to myself btw, if anyone else comes across handy tools that others may not be aware of, post them here. -
More tools - Luthier, jeweler, fly-tying
vossiewulf replied to vossiewulf's topic in Modeling tools and Workshop Equipment
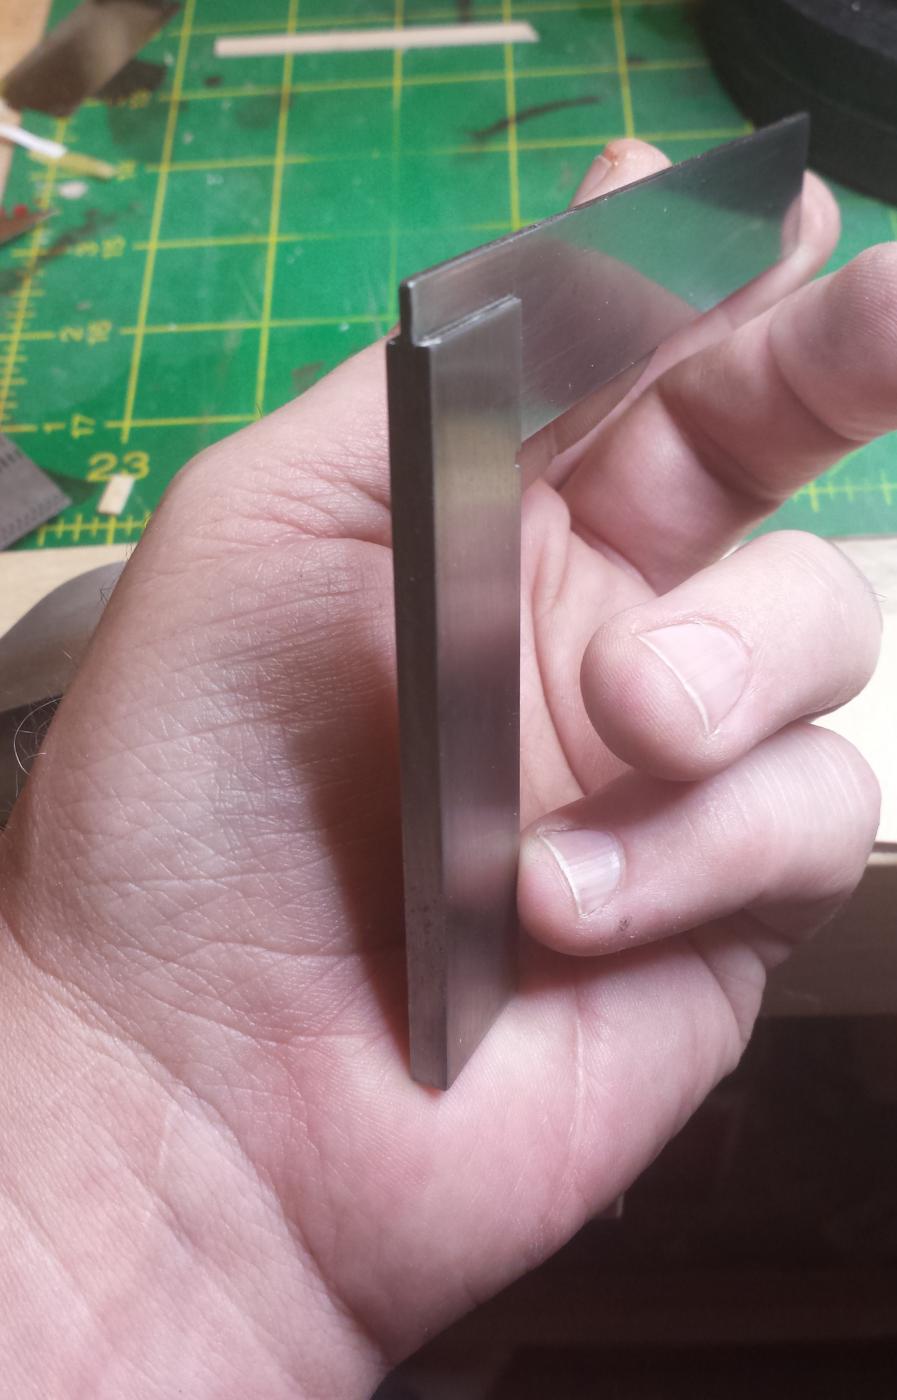
Thin-beam square from Micromark, very handy working with thin sheet stock. Mini-scraper from Lee Valley, just the right size for ship models.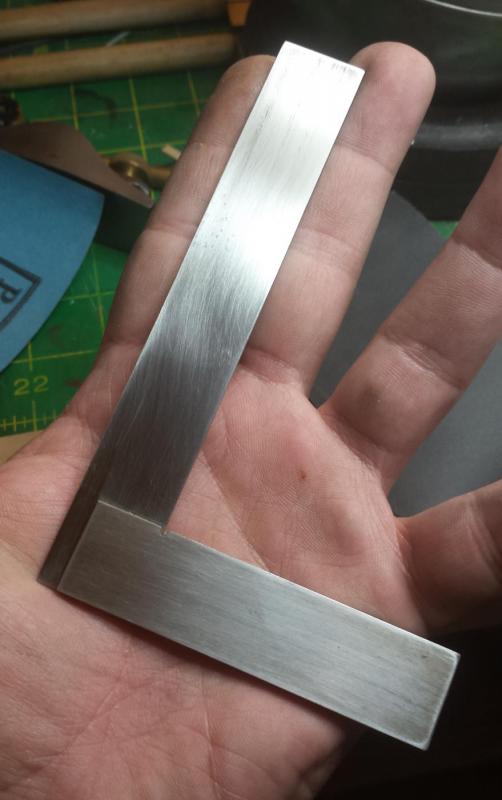

- 86 replies
-
- 10
-
-
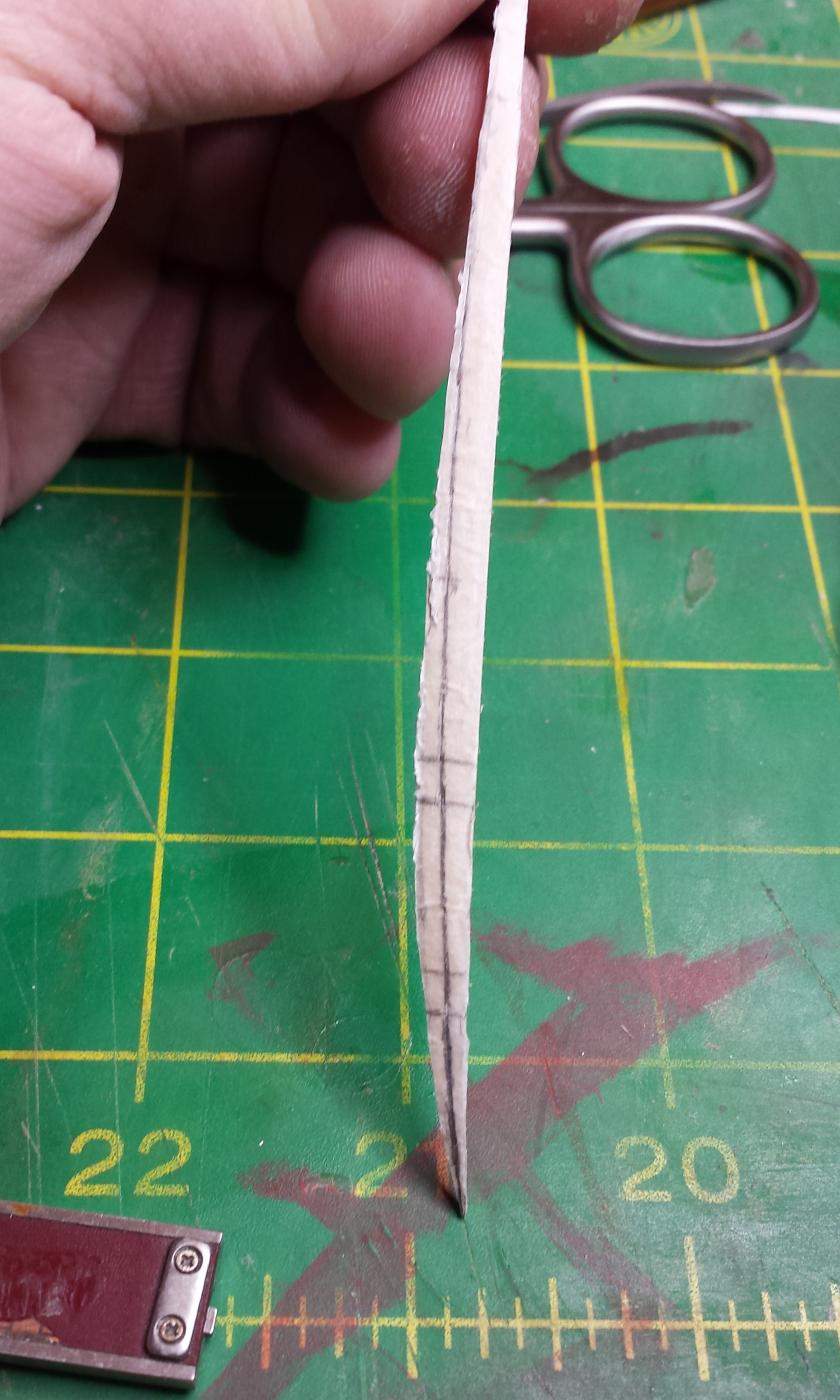
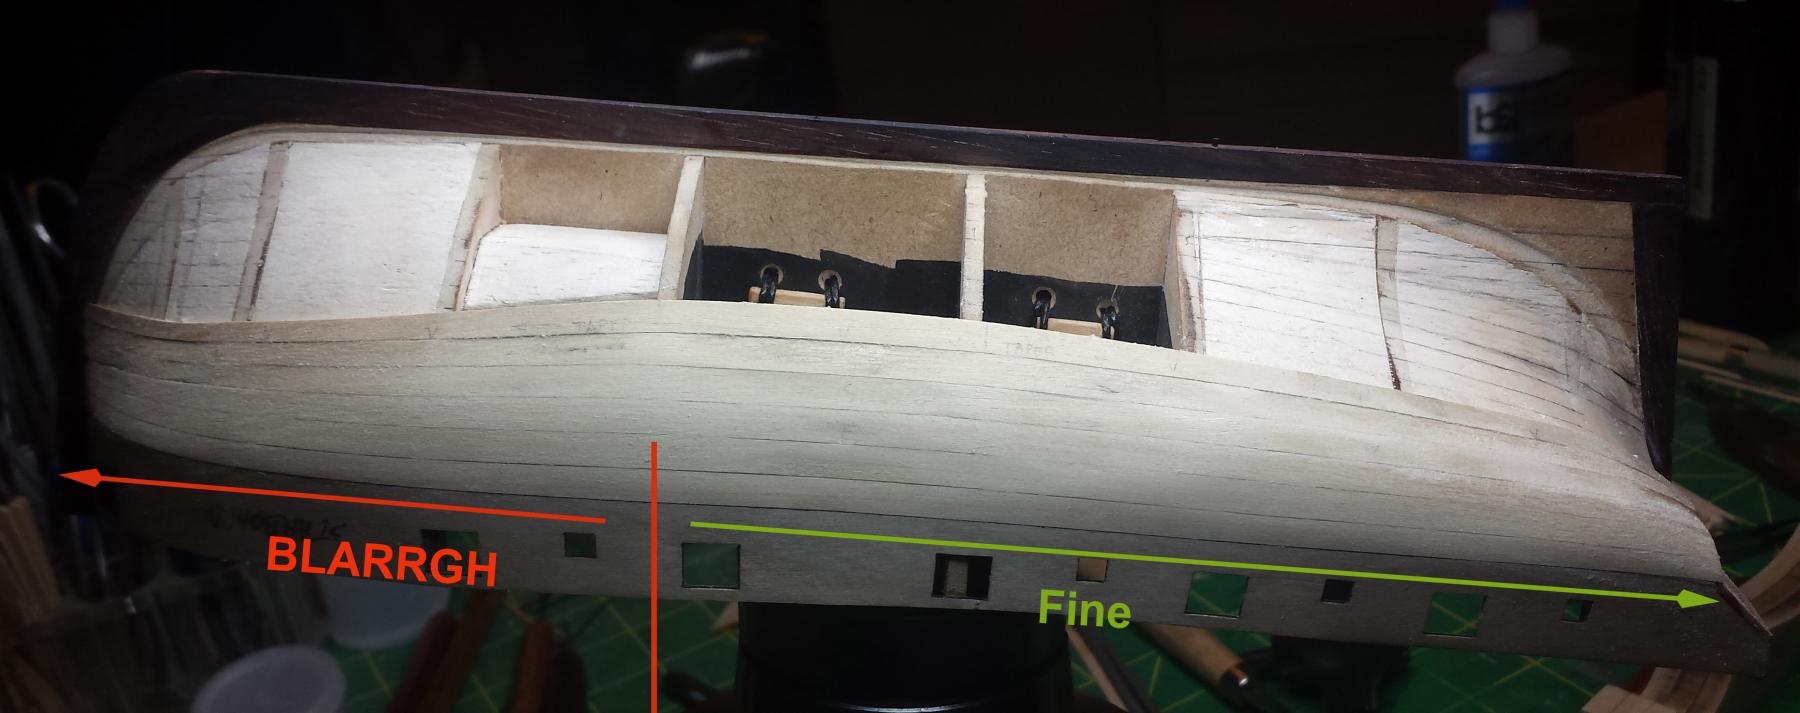
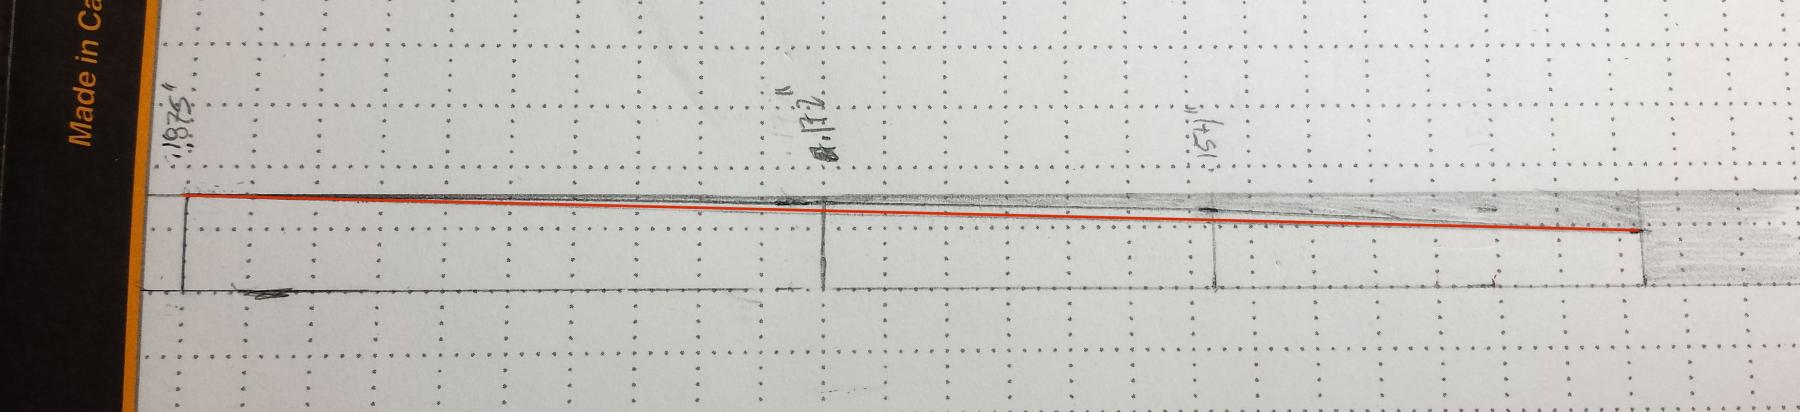
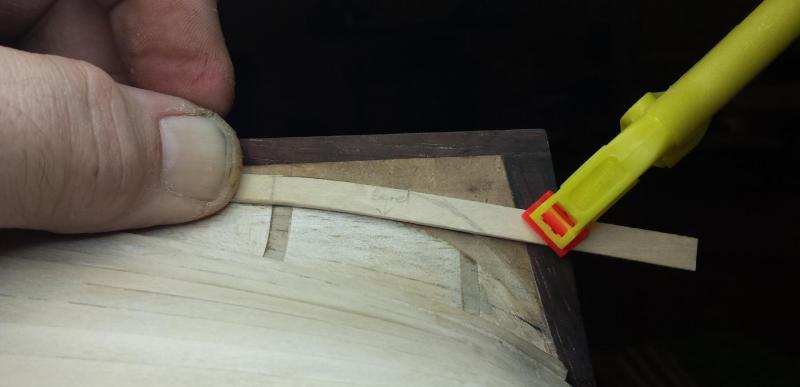
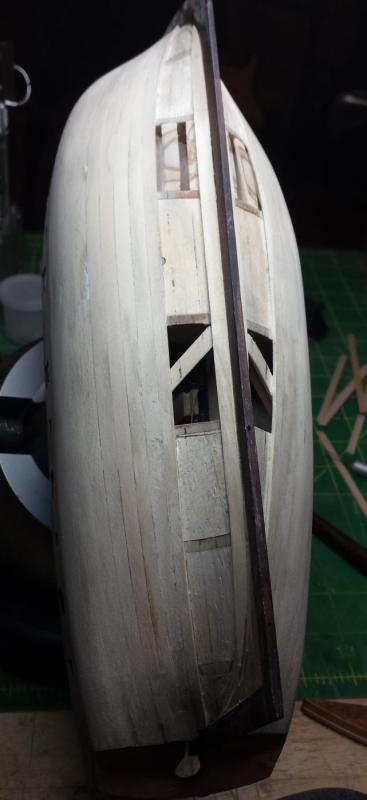
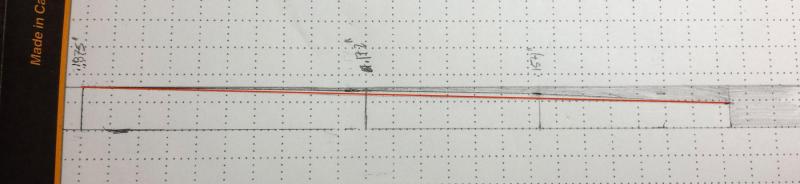
I've fixed the planking lines and am working on completing it, have pics of the steps but will post once I'm closer to done with the inner planking. This however is how I ended up needing to fix, this is a plank at 2x size, the outer line shows the widths the planks should have had at the interim stations, the red line shows what I actually did. Those slightly too narrow widths at the interim stations added up over a series of planks to that bad upward sweep. And the results:

- 714 replies
-
- 8
-
-
- lady nelson
- victory models
- (and 1 more)
-
Dang, I was hoping for Commerce de Marseille at 1/6 But I'm also sure that's going to be one of if not the finest model of a 74 in existence.
- 728 replies
-
- 1
-
-
- le fleuron
- 64 gun
- (and 1 more)
-
Repeating other folks, they look great Tom. I'm planning to use this build log for when I get to my Constitution, and I hope I can do someewhere close to as well. My workbench top will never look that neat however
- 1,354 replies
-
- 1
-
-
- constitution
- model shipways
- (and 1 more)
-
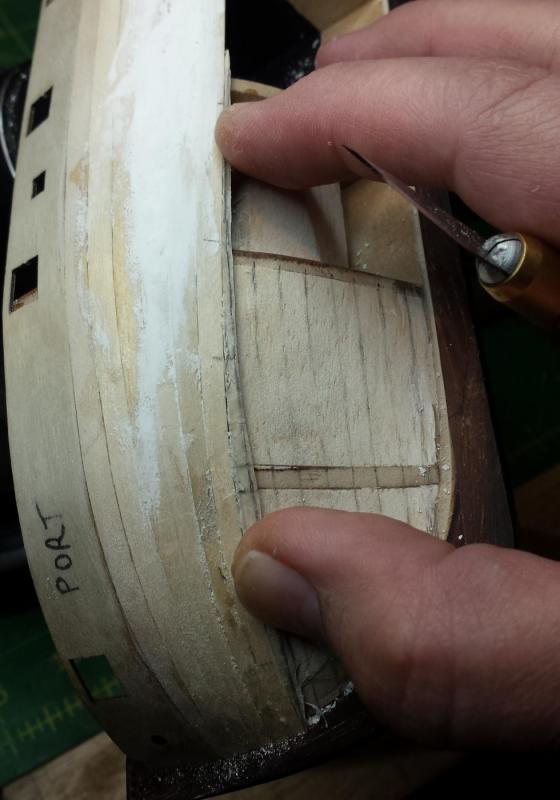
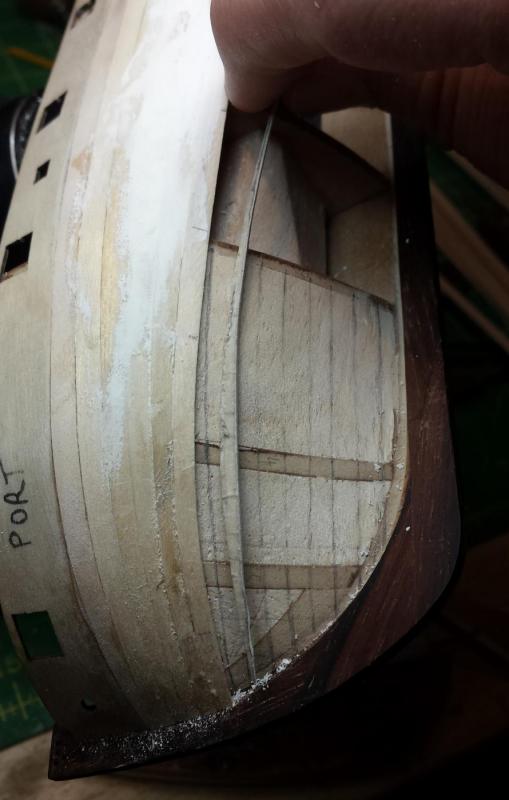
Thanks guys, I had actually read those, but I'd ruled spiling out as a factor since doing it correctly requires planking material three or four times the width of the intended plank, and we don't have that in a kit. The boxwood planking from Crown Timber that is intended for the final planking is even smaller, at 4mm wide, so I assumed this was something reserved for people scratchbuilding that was one area where scratchbuilding is a bit easier than kit building since we can't do that. I think the main issue for me here is that I didn't recognize the need for the taper on the bow end to be a pronounced curve, not at all a straight line between midships and bow as I cut, and hence the interim widths of the plank at the last two stations prior to the stem are much too narrow; otherwise I have no difficulty doing what this guy says is impossible, to bend a plank along its width and twist it so it lays flat on the bulkhead.
- 714 replies
-
- 3
-
-
- lady nelson
- victory models
- (and 1 more)