vossiewulf
-
Posts
1,477 -
Joined
-
Last visited
Content Type
Profiles
Forums
Gallery
Events
Everything posted by vossiewulf
-
 It's harder to explain than it is to understand once you start experimenting with them. Then you have to learn how to think through a logical workflow including those in your tool kit, they are your knives and saws. Like, you have a vertical line that you need to cut a series of rabbets into so it's like a vertical corrugated shape. You could try to draw that manually with the pen tool and you'd get something that is maybe close if you pay lots of attention. Or instead you could just draw a vertical line, then a separate rectangle shape that's correct for the rabbet. Clone that rectangle and then space them out with the ruler and guides or use an array tool (standard in modeling, not so much in 2d unfortunately, you can say I want this many of this shape spaced this far apart and click a button). Intersect the rectangles with the vertical line and then add them. Then delete any vertices or segments you don't need. It's a bit faster and more accurate. That's what I mean about learning to think in terms of boolean tools. Instead of a vertical line now make that the inside of a frame shape. You can correctly position a series of rabbets by creating one rectangle and positioning it, and then clone it while rotating it around the central point of the frame - manipulating the center point of a rotation is another common thing to keep in mind. In a few seconds you'd have the rectangles all at the right depth and oriented correctly. Subtract them from the frame shape and off to next step. You can make about any shape very quickly using simple tools that create lines with bezier splines if you want them and primitive shapes likes squares and circles and such and basic boolean operations.
- 2,699 replies
-
- 3
-

-
- heller
- soleil royal
- (and 9 more)
-
I could avoid stealers with some spiling of wider material, but I don't have any wider material, final planking is boxwood from Crown Timberyard and I neglected to buy any sheet stock. Probably because it's very expensive ;-) I think I'm going to reroute two planks down to running straight to the rudder post as Rick did, that will move the stealer location to where it's almost tangential to the expected viewing angle so you wouldn't have a chance to notice unless you really look around. I'm not sure why, I didn't need any stealers with the first planking that was .200". Final planking is .160" and I have a very nearly three-plank gap at the stern. I wouldn't think that plank width would matter, what would matter would be the ratio in sizes between bow and midships and stern. What am I missing? I do think what we're seeing though indicates that the hull form is simply wrong somewhere. Anyone who knows aerodynamics or the hydro version knows that good shapes are elegant and tracing cross-sections in any axis should result in lines and curves of similar elegance. Here I think the hull, as Rick has pointed out, is very full-bellied for her size and I'm thinking excessively so, followed by a too quick transition to a narrow lower hull. In short I would guess these lines indicate that this model's hull isn't an accurate representation of the real ships. Although I think I've built it pretty close to what the kit wants, I could also be off in a way that exacerbates the roller coaster lines of the lower planks. Anyway, as always thanks very much folks for suggestions and insights.
- 714 replies
-
- 3
-
-
- lady nelson
- victory models
- (and 1 more)
-
So I guess this is what it's supposed to be. But it's less than elegant and the best thing I can say is that it looks somewhat less inelegant when it's right side up. Also after looking at it this morning I'm probably going to move one more plank to run straight, if not two, so we can at least move the stealer point to someplace less visible.

- 714 replies
-
- 5
-
-
- lady nelson
- victory models
- (and 1 more)
-
Yeah, you need to figure the path-closing and adding to an existing path issues out in a hurry or you're going to end up with a large amount of required re-work. Really recommend you don't go very far trying to create your finished product until you've got everything working as intended, you can dig yourself very big holes otherwise. What I am talking about with path operations is what we call standard boolean operations in modeling. With boolean operations you can intersect two objects and 1) add them together, 2) subtract one from the other, 3) Remove everything but the parts that intersect. I have a cube and I intersect a rod shape with the cube. If I add them, the parts inside are removed and now I have a cube with two ends of a rod shape sticking out of it. If I subtract the rod shape from the cube I have a cube with a hole through it (very common operation). If I choose the intersection method, everything will be removed but the part of the rod that was inside the cube. Same thing applies to creating paths, in photoshop I can select two paths and add them together, subtract one from the other, or just leave the intersection. All three are required to efficiently model complex shapes.
- 2,699 replies
-
- 4
-
-
- heller
- soleil royal
- (and 9 more)
-
More tools - Luthier, jeweler, fly-tying
vossiewulf replied to vossiewulf's topic in Modeling tools and Workshop Equipment
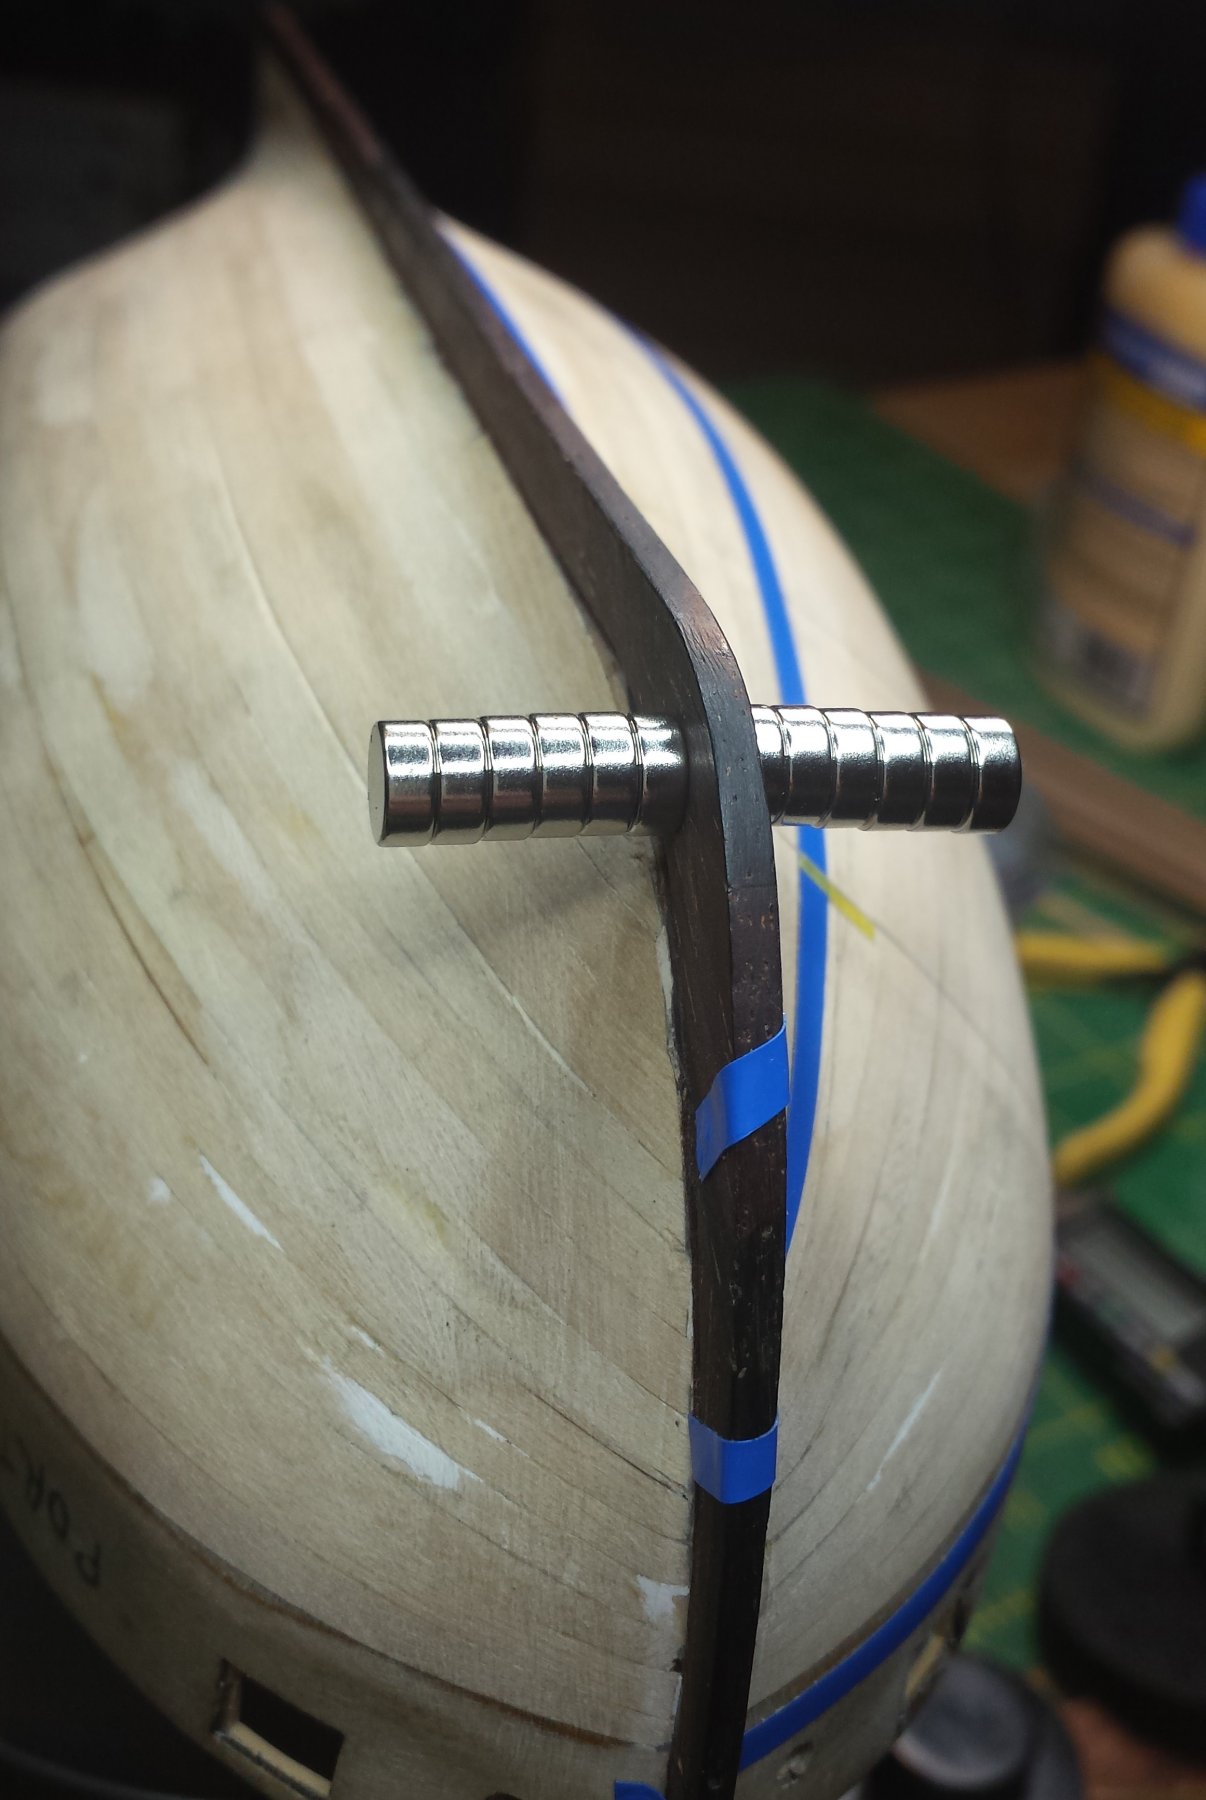
Meant to report back here. Yes, these magnets are going to work quite well as clamps, in fact by lucky guessing I think one of the two sizes is about the perfect one for ship modeling applications (1/4" x .100", 6.35mm x 2.54mm) . These, with just two on each side, easily put enough pressure on this keel to clamp the crap out of a plank. In fact if we go any larger in size I would guess you'd have more problems handling them and having them cause damage to the piece and that would outweigh the extra pull advantage. I'm going to glue them together and give them a small wooden handle and put them with my clamps, these are going to be handy. NOT recommended for small kids, not at all toys, very aggressive and will leap through the air or make other things do so.
-
Ok, thanks Rick. I will go draw a couple more and see what it looks like. But elegant is not one of the words that comes to mind at the moment.
- 714 replies
-
- 2
-
-
- lady nelson
- victory models
- (and 1 more)
-
I can tell you how to do those things... in Photoshop. Never used GIMP actively. While you are at it you need to understand the basic path modes - you need to be able to add one path to another, subtract a path from another, and last is leave only the intersection between two paths. Along with the path drawing functions those allow you to create about any shape with reasonable efficiency. I will say don't limit yourself on layers. Anything which you might want to change in isolation should be on its own layer. And GIMP has to have a layer grouping function. My UI design files will have hundreds of layers grouped in various ways, like all the elements that make up a button is one group, and that group is part of a bigger group that contains everything that goes on one dialog. Equally important is naming convention for layers. Don't use something arbitrary. Use something that makes sense and that tells you clearly what that layer is and what it's a part of.
- 2,699 replies
-
- 3
-
-
- heller
- soleil royal
- (and 9 more)
-
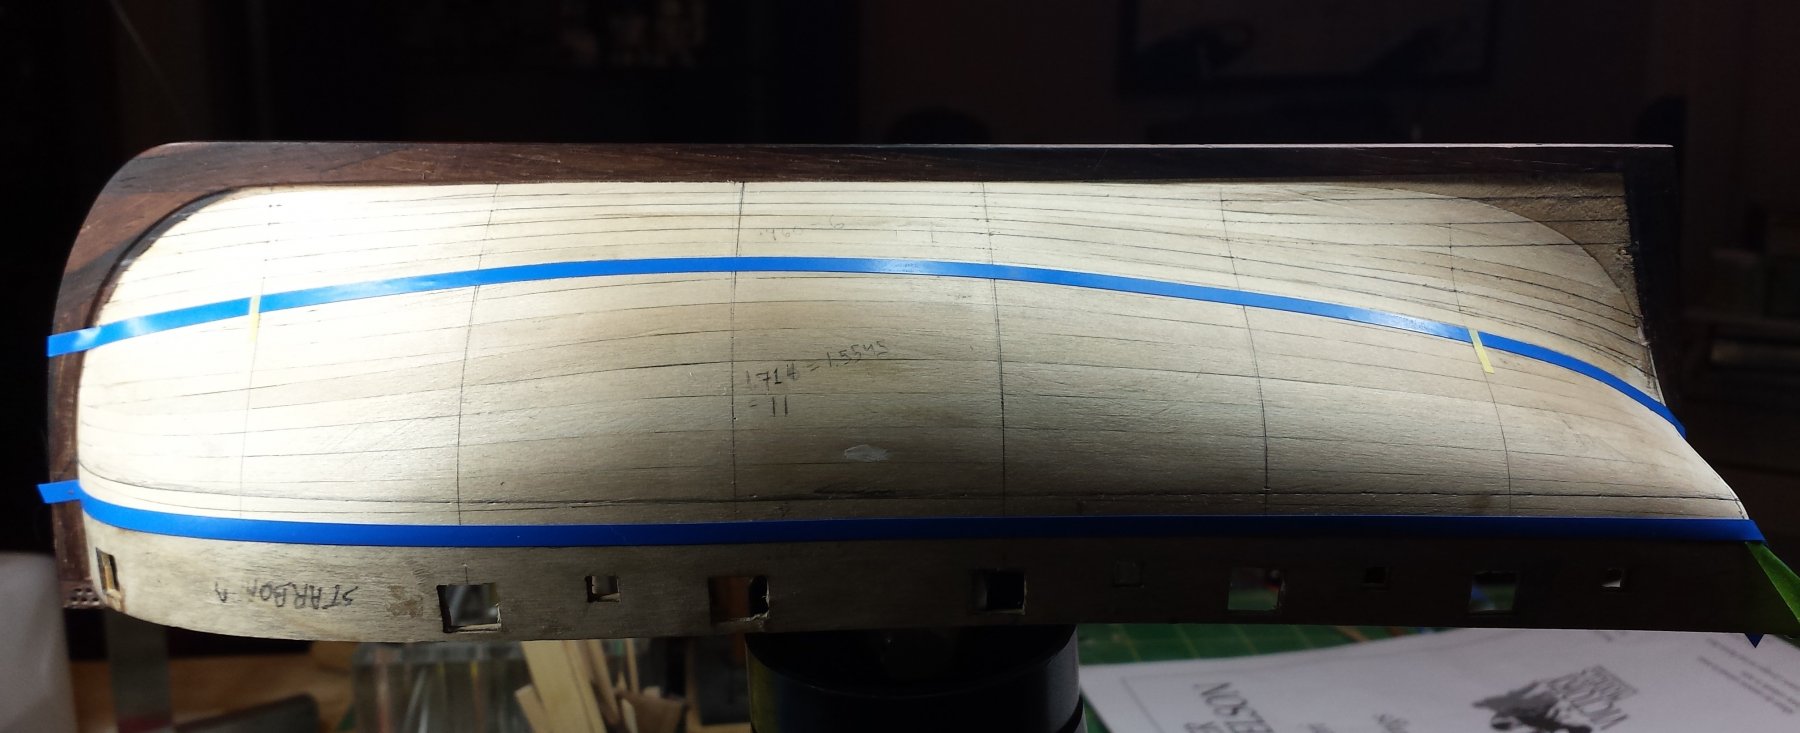
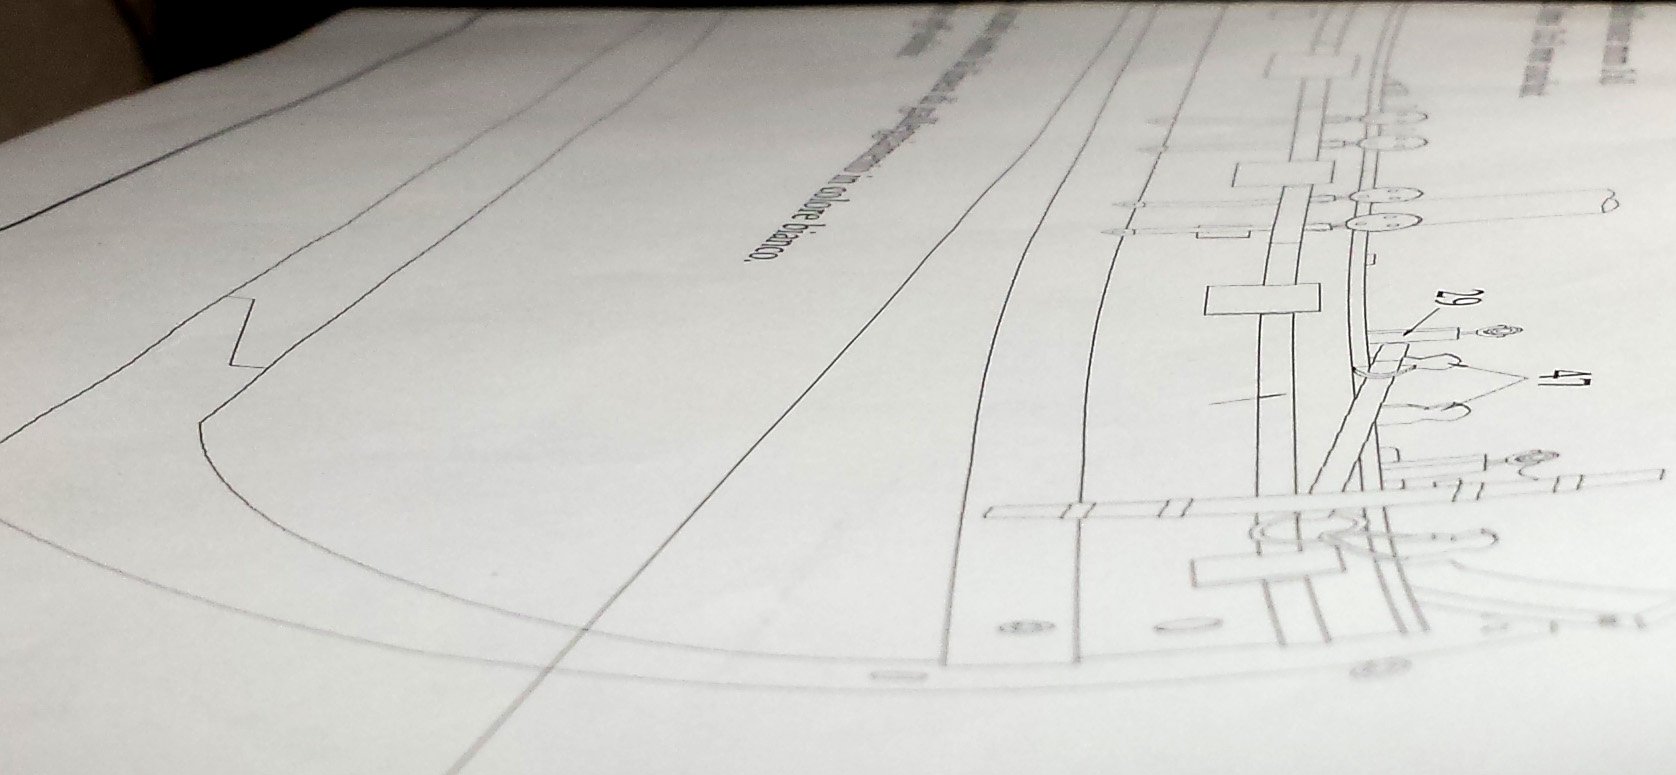
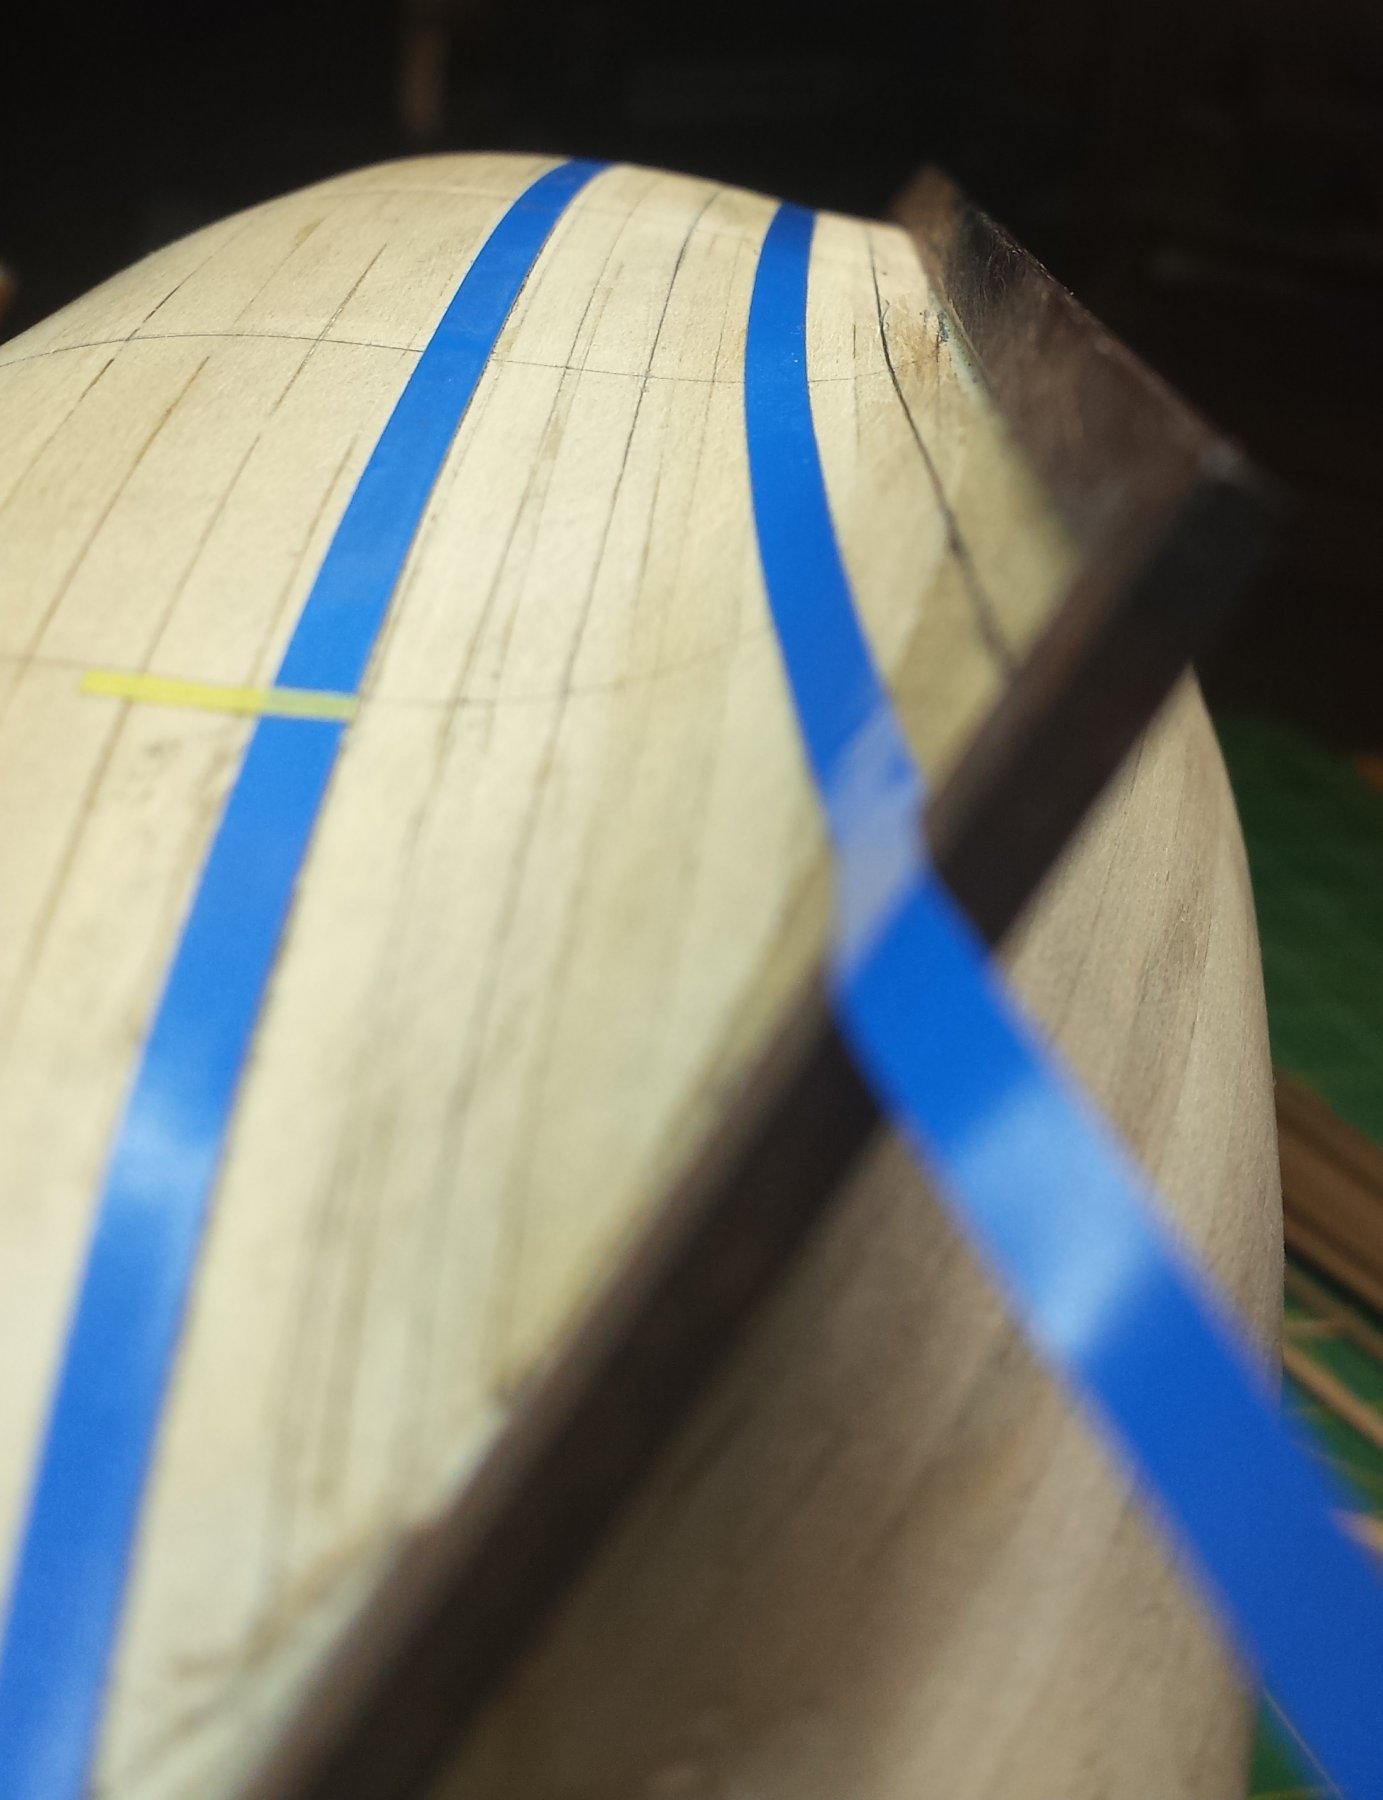
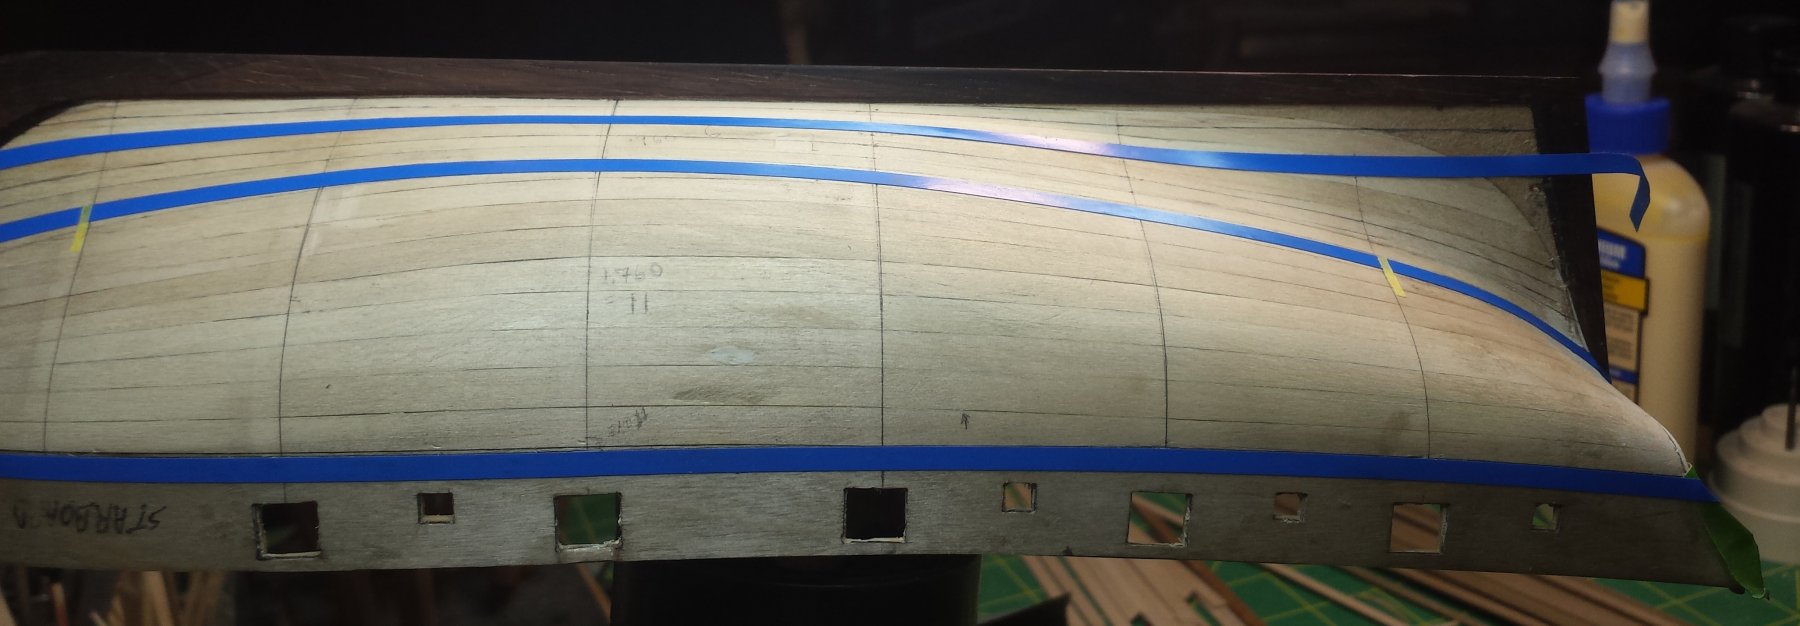
So finally got to sit down and work on this again. And found what I had carefully done before was not right, at least the wales position wasn't and I had to undo some of the work before redoing the wales location and then being able to move forward again. Rick, I'm going back to my original planking plan, I can only assume the mid-aft section of this ship is distinctly different the Cheerful hull. First thing I did was lay out the garboard and the next plank straight as you pointed out was done with Cheerful. The garboard was very carefully laid out using dividers to ensure the correct .160" width the whole way to the stern. What looks like a bend is where it does the 60-70 degree twist. But it don't look too good. It doesn't look straight, it looks like I have a severe downward turn. This hull, or at least in the way I have it, seems to want to do what I originally had. But I'm also not sure if garboards were permitted to leave the keel and have a stealer complete the run. That sounds wrong too. Also I was going a bit crazy trying to get the wales locations to work correctly, I was measuring from the plans and I wasn't getting fair lines when I looked down the length. So I did the same thing on the plans. That'll teach me not to blindly accept plans even from supposedly good companies.


- 714 replies
-
- 3
-
-
- lady nelson
- victory models
- (and 1 more)
-
Fokker Dr.I by Torbogdan - FINISHED - Model Airways
vossiewulf replied to Torbogdan's topic in Non-ship/categorised builds
I hope that was a not quite done pic of the horizontal stabilizer? As it's missing some reinforcing ribs on the elevator. This shows the ribs in the correct locations but the curve on the elevator tips is wrong on both versions, F.1 on the left and Dr.I on the right. And here's the first Dr.I model ever, made in the Fokker factory in 1917. Note the curve of the elevator tips and the elevator ribs.- 250 replies
-
- 13
-
-
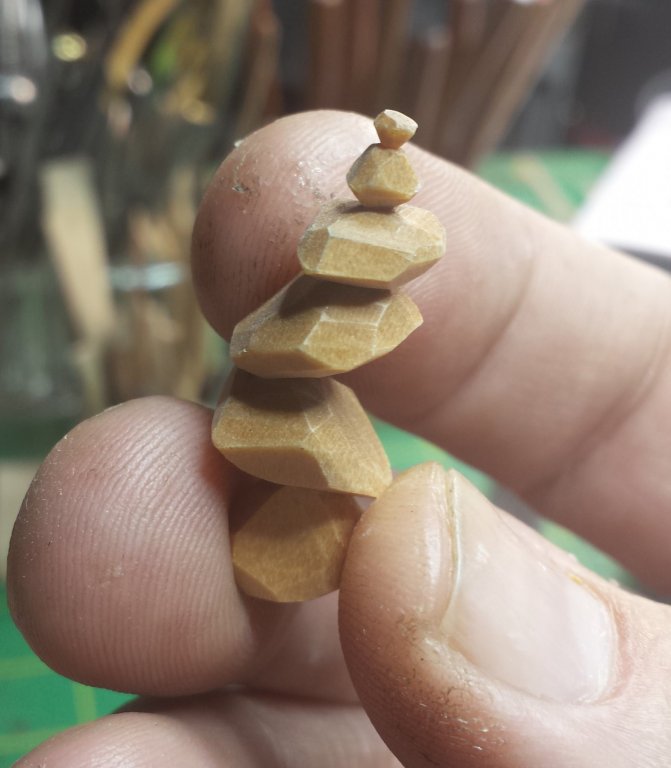
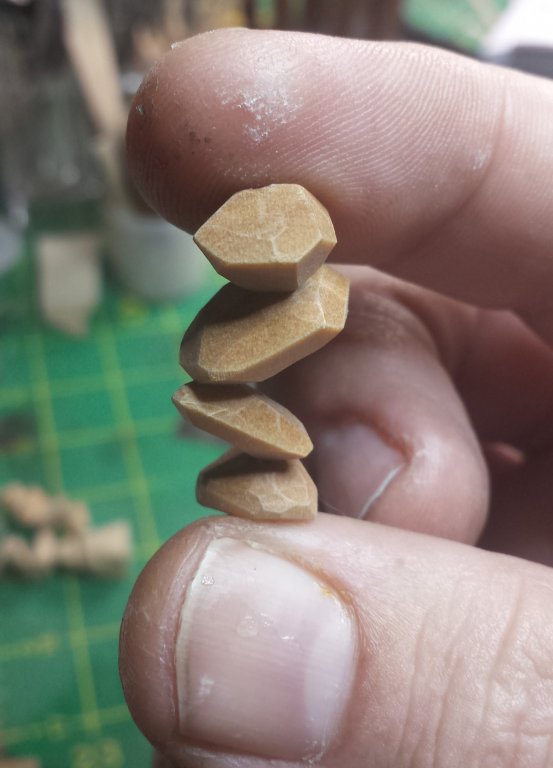
Oh by the way, both of those carvings are beautiful and I'm not sure how either was done, particularly the driftwood one. On the horse, the guy must have used wire wheels across the grain to make the wave pattern and then clean with sandpaper.
-
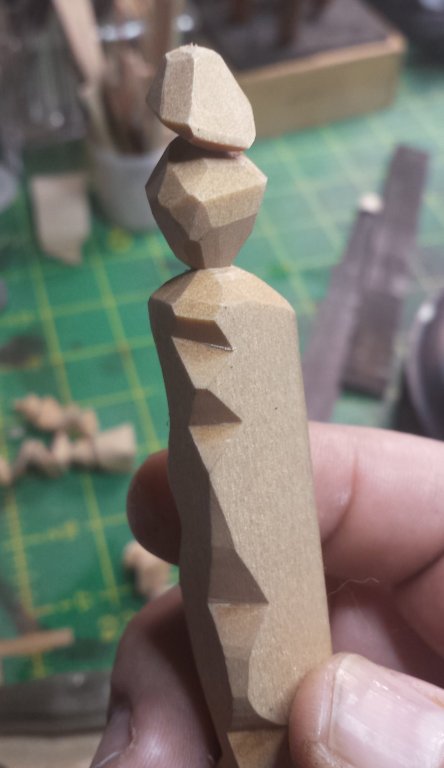
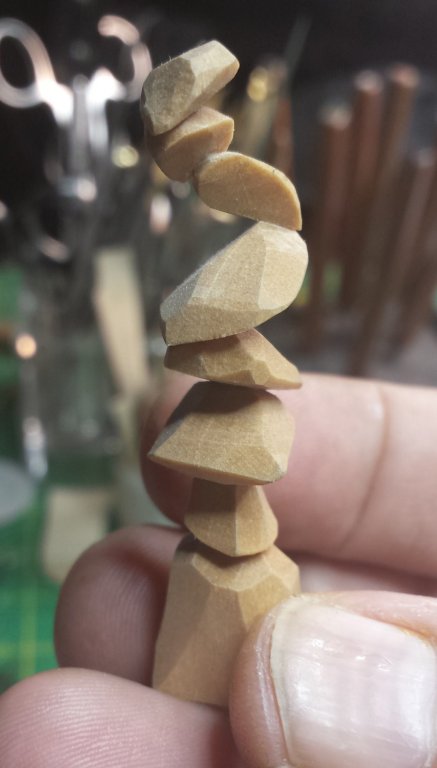
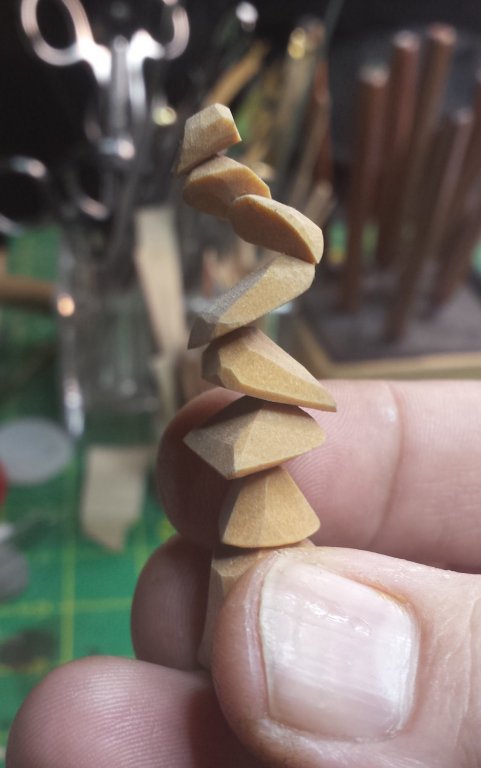
Thank you very much Alexander, scratching boxwood off my list and will look for apple. I can get Swiss pear. I also am going to try the holly, the pieces I have are very white when cut and has almost invisible grain, it's the closest wood gets to white marble. It seems to cut smoothly in what I've done with it so far, I would be tempted to do a copy of Michelango's David statue in this wood You don't like basswood because it's too soft, right? I also think it's softer than optimal but I'm perfectly comfortable using it as I have with all the chip carving. In fact my standard of sharpening is that it has to be sharp enough to cleanly carve basswood before it's done. I make these testing edges while sharpening. The rules of the game are 1) totally clean cuts, 2) minimal connection between pieces. The second one doesn't have much to do with edge sharpness and more to do with me being competitive with myself. Here is the next one starting for the next sharpening session. And ok, I agree on the larger sizes too. Sometimes hard here to find 2" thick stock that isn't super expensive, but I will do some looking in lathe wood suppliers.

-
Fokker Dr.I by Torbogdan - FINISHED - Model Airways
vossiewulf replied to Torbogdan's topic in Non-ship/categorised builds
I always thought one of those would look awesome half and half, only half covered. But I also think it would be pretty challenging to keep everything straight if you do that. If you think you can control the differential stresses, think about that method as it would look pretty cool. -
Great! I'm glad it sounds like it should work to you also. I don't have any brass in the right size, I need like 2cm x 4-5cm x 2.5cm. I think I have steel dowel pins in the right size for the ball bearings. I'll also find a good brass screw that won't mark the steel of the tools. I need to make some progress on my ship but I'll work in some time on this also, I'm using Mikhail's tools regularly so I want a good sharpening solution in hand soon. By the way, in following my thesis, you missed a question I had up there about typical sizes for wood for this type of carving See the post between the one with photos of other jigs and the post that has my design. I want to order some wood and I'd very much appreciate your advice on sizes.
-
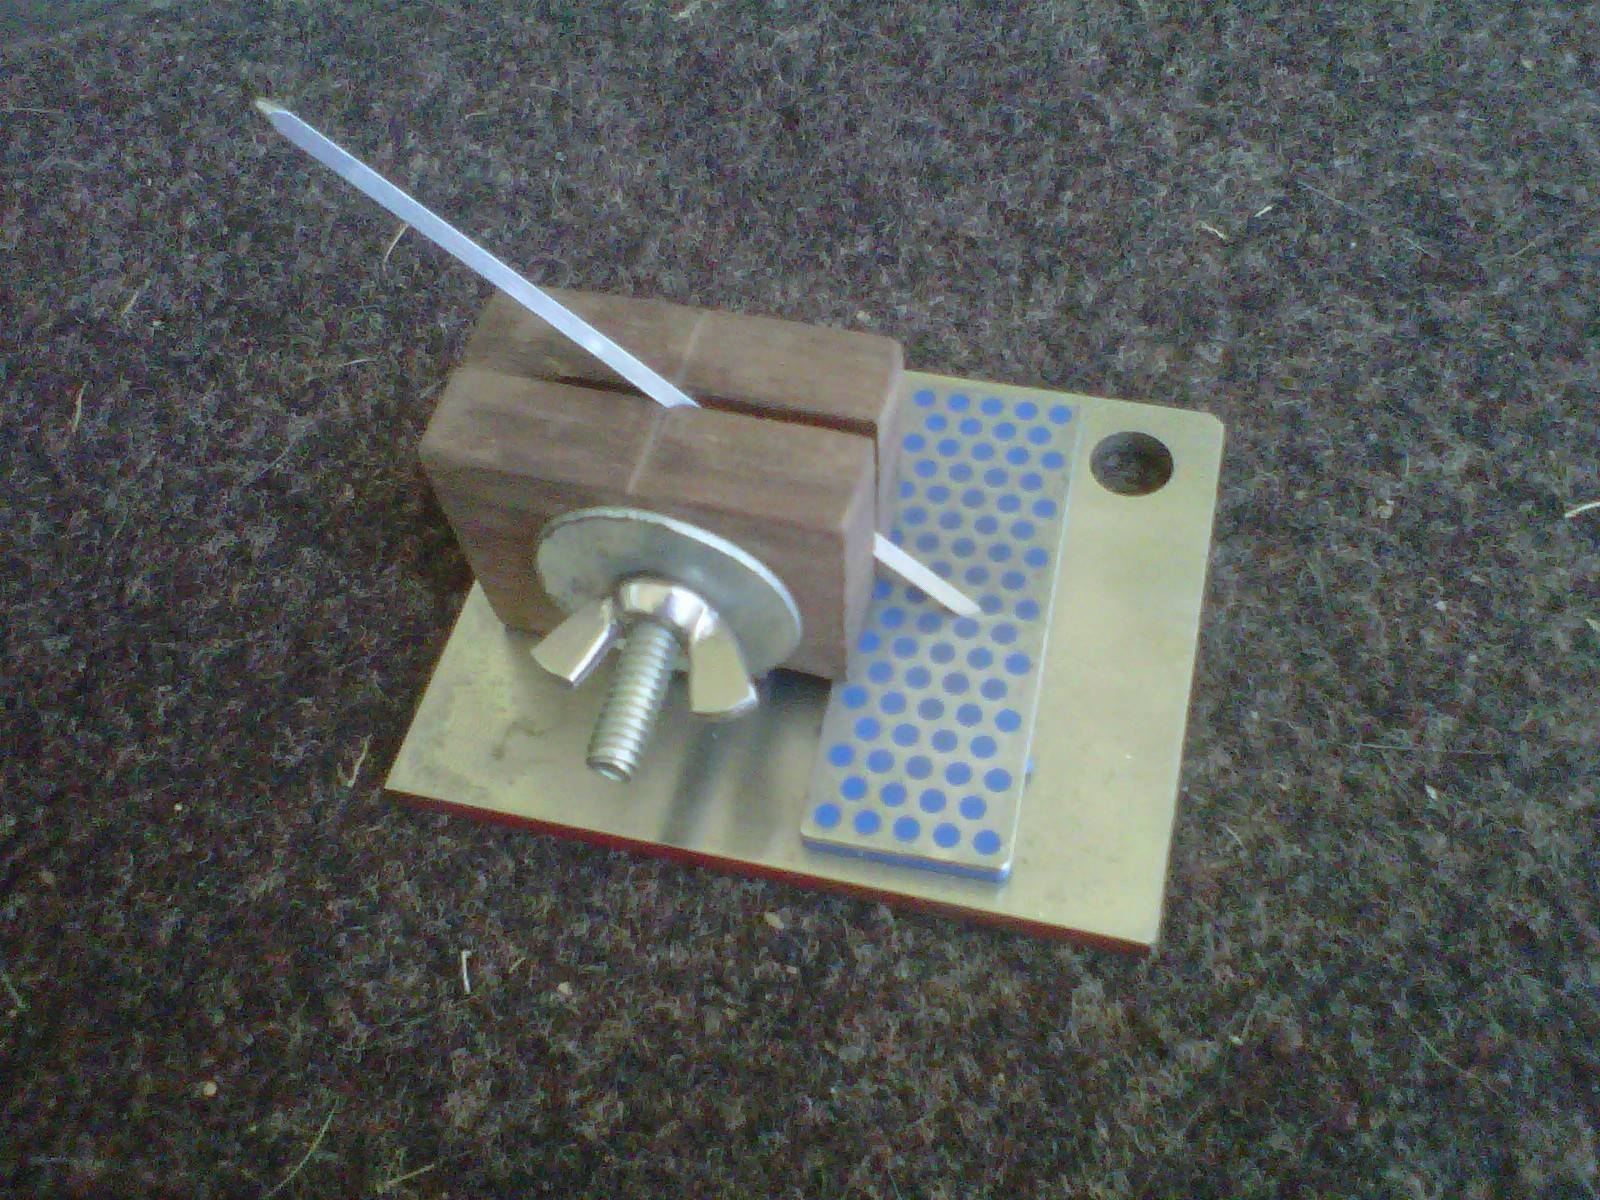
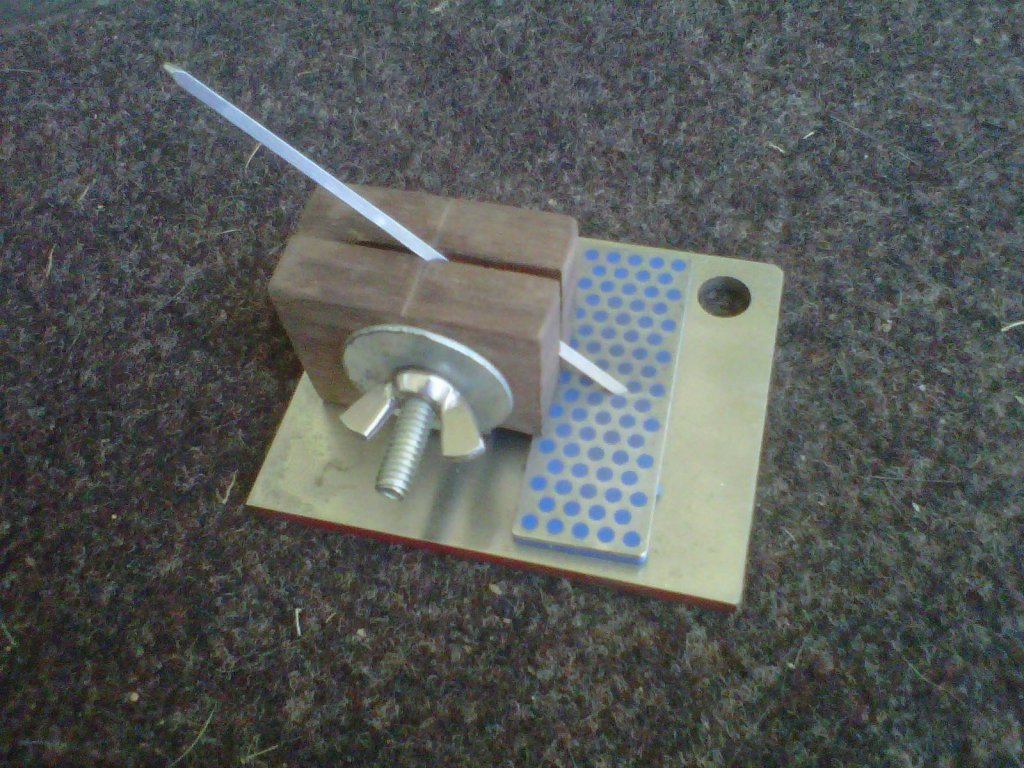
Maybe something like this. The disadvantage is we are not registering off the flat back of some of the tools, but the advantage is that I think maybe this will work for literally everything but the angled cutters (skew chisels). If I drill and ream the hole to .111" that would be .001" over the round tap dimension and therefore we could turn the tool by hand. Although there is some space to be seen between the tool handle ferrule and the jig, the idea is that ferrule sets the correct angle for grinding the straight cutters (chisels) and the semi circle cutters (gouges). We prevent the chisels from rotating with the screw, the gouges turn freely and we'll have to keep forward pressure to maintain the angle. I'm largely certain this will also work for the the spoon cutters as well, which surprised me. On the spoon tools, Mikhail has ground them such that the cutting edge is a radius centered on the tap center and therefore can be sharpened accurately by turning along their length. The only difference is they will not extend as far from the jig to account for their grind angle and will require a spacer, maybe one for each tool, so the brass handle ferrule can still set the correct angle. May get the skew chisels with the same jig if we drill holes 45 degrees right and left of the central straight hole. I'll have to look at the geometry. Oh the second ball bearing that is transparent is where I thought one would need to be to behind the tool's center of gravity (CG) and therefore naturally cause the jig to fall forward on the tool cutting edge. Actually that's not right, the jig itself is falling forward and it will have a reasonable mass. I will just have to see where the CG is when the tool is attached to the jig.

-
Alexander, what are the typical rough sizes of the pieces? I need to buy some wood if I'm ever going to do some carving with these, and my collection mostly consists of furniture hardwoods and exotics and basswood, I don't have any thicker pieces of boxwood or pear, although I do have some holly that seems to carve well. Have you tried holly? Anyway, what are the typical stock sizes? 3cm x 3cm? Bigger?
-
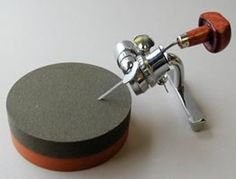
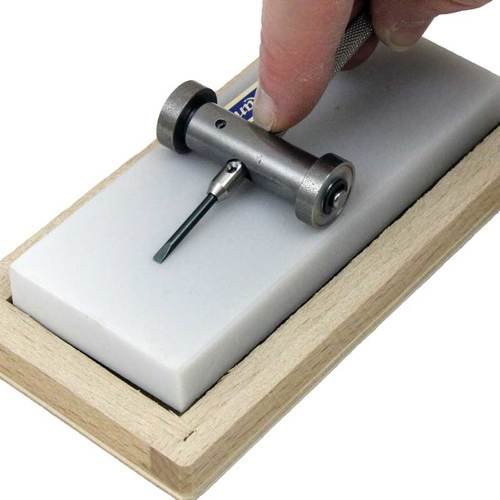
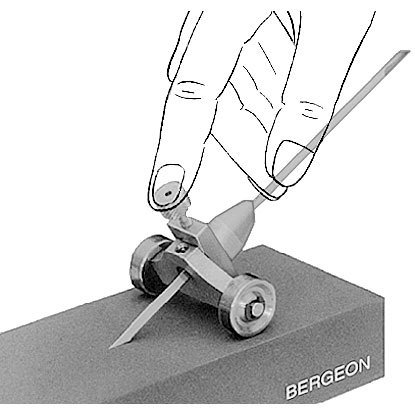
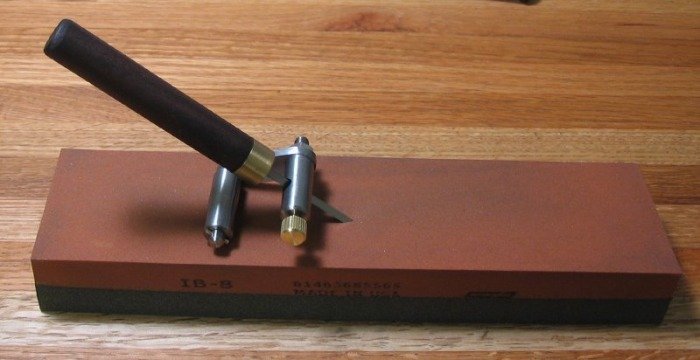
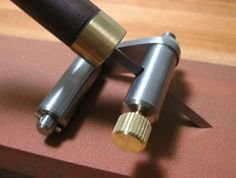
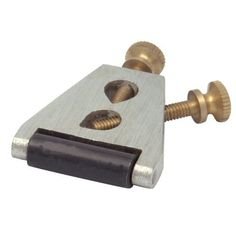
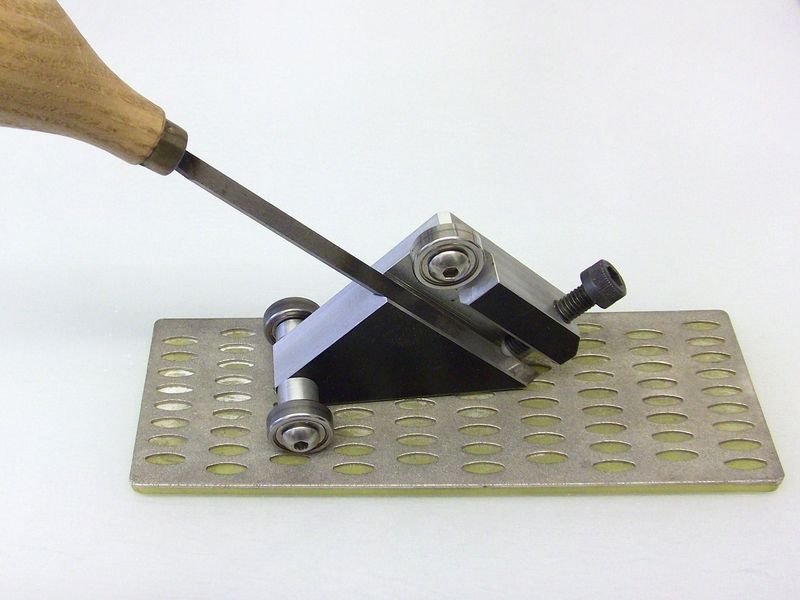
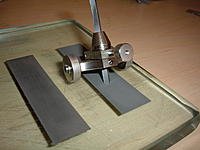
Thank you Alexander, I think I followed that, and I will try it - I mean the making of eyes. I understand what you mean about no protrusion of the lower edge of the semicircle gouges. Below are some photos of various jigs for sharpening gravers. These are what I have been looking at while thinking about making jigs for Mikhail's tools. As you see, a jig for the straight chisels should be very simple. With a little added complexity, it could handle the straight and skew chisels. This is what I intend to make first, I have some 1/4" ball bearings sitting around that are a good size. For the semicircular gouges, I am still thinking. Basically the idea is that the jig axle and the piece that holds the gouge are geared together such that as the jig rolls forward, the piece that is holding the gouge turns along its long axis. I think that will work but I'm not completely sure. This is the "Crocker Pattern" graver sharpener. They are made by many companies. I don't think they'll work without significant modification or making Mikhail's tools separate from the handles. This is a Bergeon 2461, not expensive, I ordered one to try it. It's for sharpening screwdrivers. This is a Bergeon 2462 graver sharpener, fairly expensive for what it is, not sure if I will try it. All brass version. This is a very cheap graver sharpener you can find all over EBay and any jewelry or watch making supply companies. This is one guy's home-made jig. I like it. Another home-made jig. More sturdy but only good for one sharpening angle. And a seriously cheap and easy home-made jig
-
For the straight and skew chisels a graver sharpening fixture will work to maintain the correct geometry, gravers are sharpened with flat bevels like we want on our chisels. But as you see they're expensive and they don't address sharpening of the U-shaped gouges. So I have been designing a jig in my head for the gouges, and a different jig for the chisels. The one for the chisels is pretty simple, the one for the gouges is not simple as what I want to do is have the tool rotate along its long axis while the jig moves forward on the sharpening stone so the entire edge is sharpened equally. I'll get a prototype going and show it to you once it's working.
-
Although English clearly isn't your native language, you are perfectly understandable, so don't underestimate your English. As I said, I think it is a very hard language to learn and you've already reached a point where you can discuss complex subjects successfully, so you are doing well. That ship is also amazing, do you have a link to the project? I'd love to see the progress on it. Speaking on engraving, have you looked at engraving blocks to hold your work when you are carving? It seems to be a perfect tool for the purpose, I have a GRS block and intend to use it for carving- it can be locked so it doesn't move, and you can also unlock it and easily move the work around to any orientation you need. In fact if you look at my build log, I have been using my engraving block to hold the entire ship - the block weighs about 15lbs, it's filled with lead, so it can be used to work and relatively large objects. Here's a video of one in use. And I agree about tool handles, anyone who is serious about the work will eventually make handles that fit them and the type of work they do. The only reason I want pencil-type handles is for wood joint work on my ship, sometimes the teardrop shaped handle is too big, I also want something narrow that can fit into tight corners.
-
Clamp 20 of them together like a book and sand all the edges on one side at once on a nice flat surface! Then reclamp and do the other side. Doing them one by one would be very annoying. I'd use a piece of 3/4" with a rabbet cut into it to hold 20 or so pieces with them just proud of the surface, then split that in half on my table saw and drill and install telescoping brass rod and tube so they can slide. Put pieces in, clamp with c-clamps.
- 453 replies
-
- 8
-
-
- thermopylae
- sergal
- (and 1 more)
-
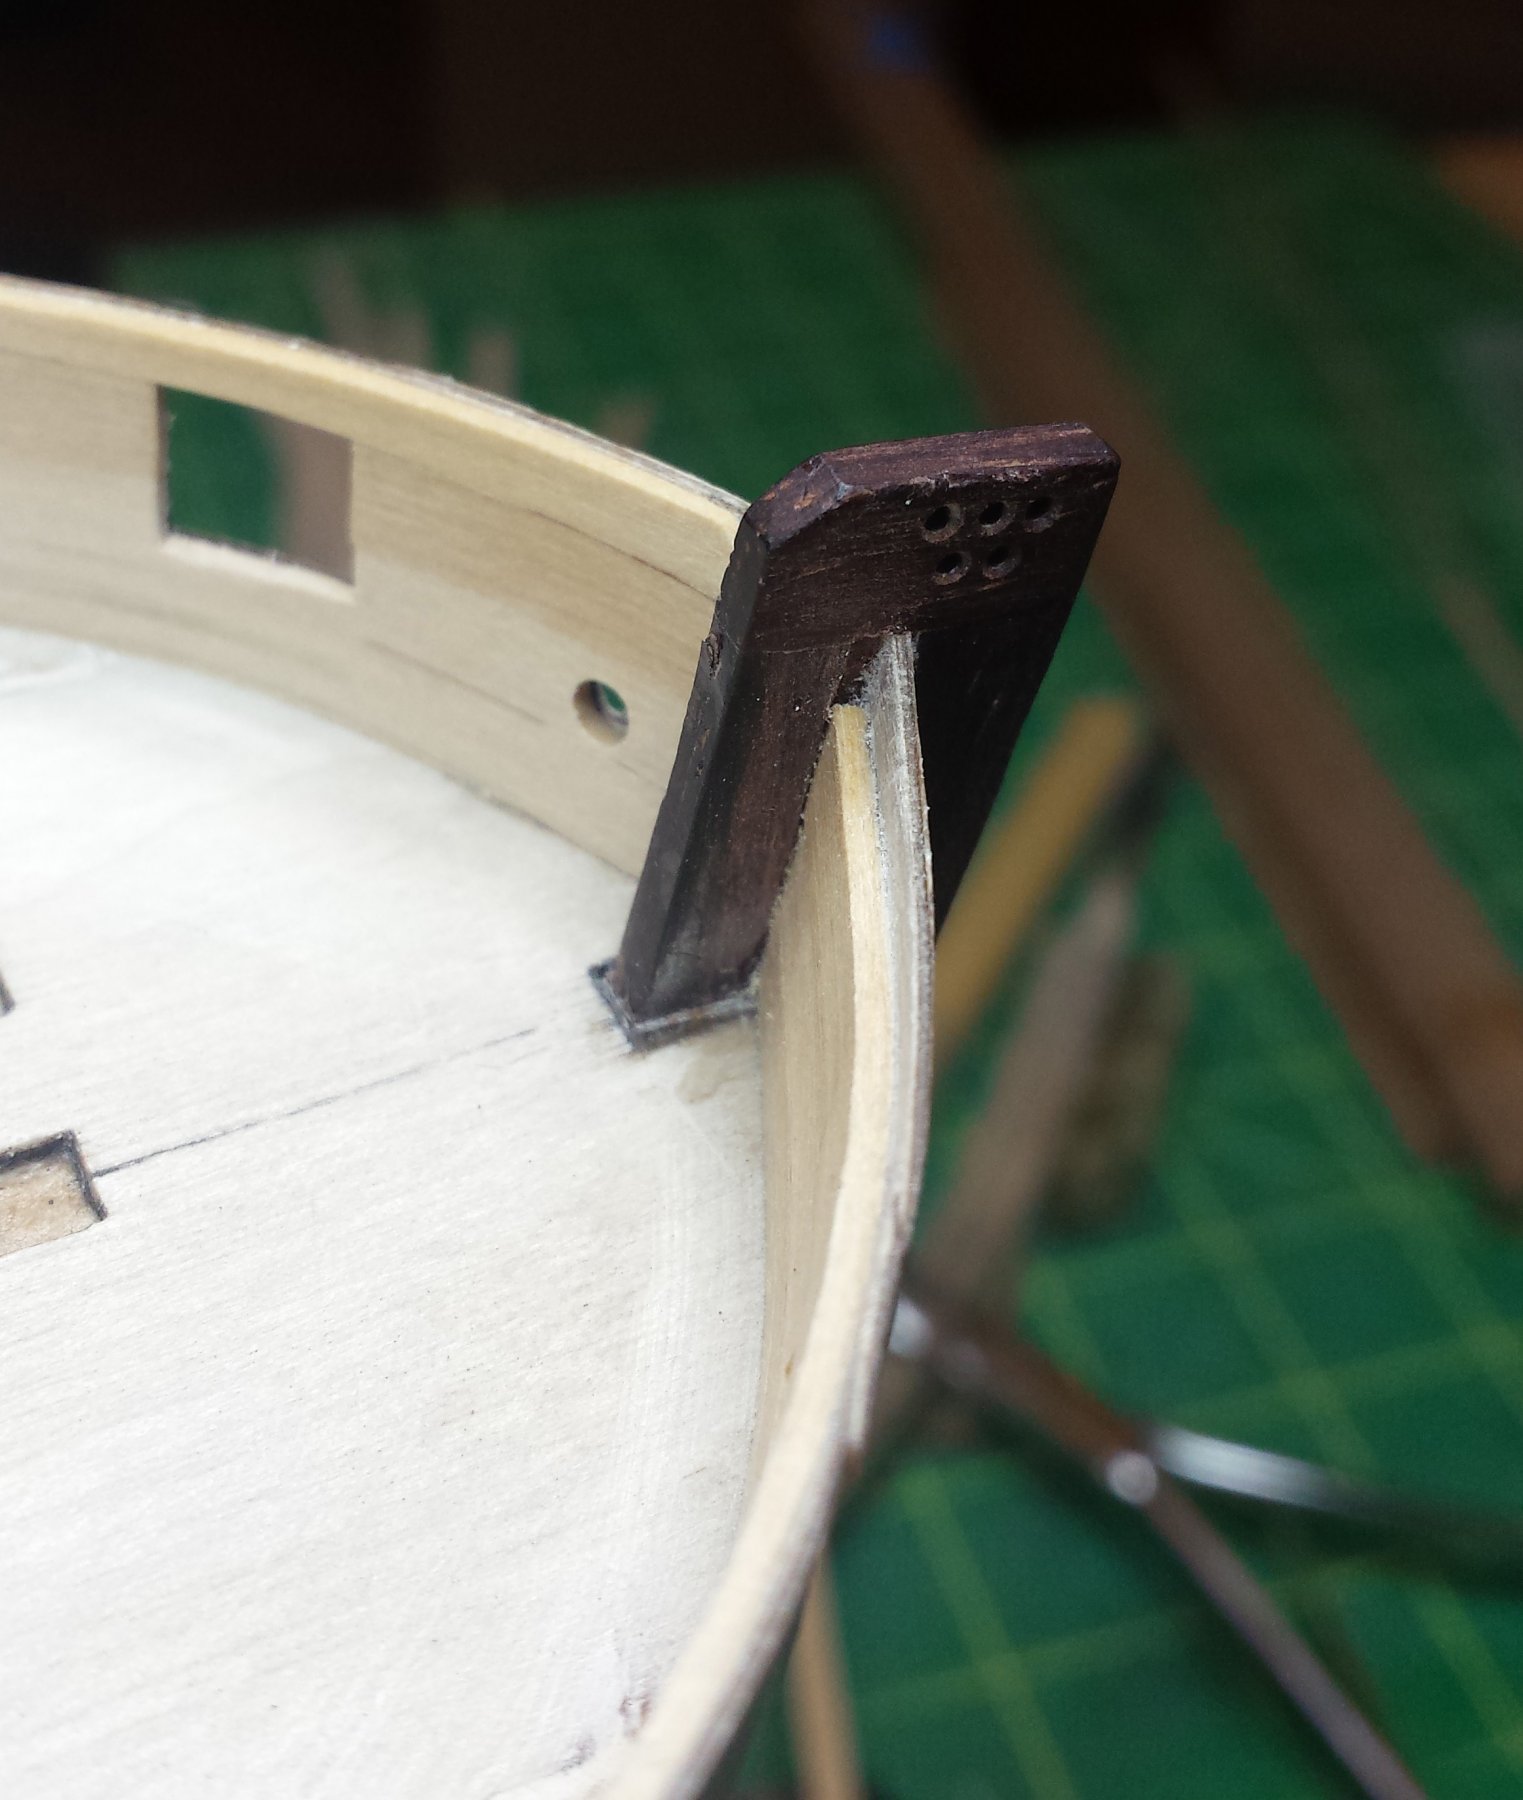
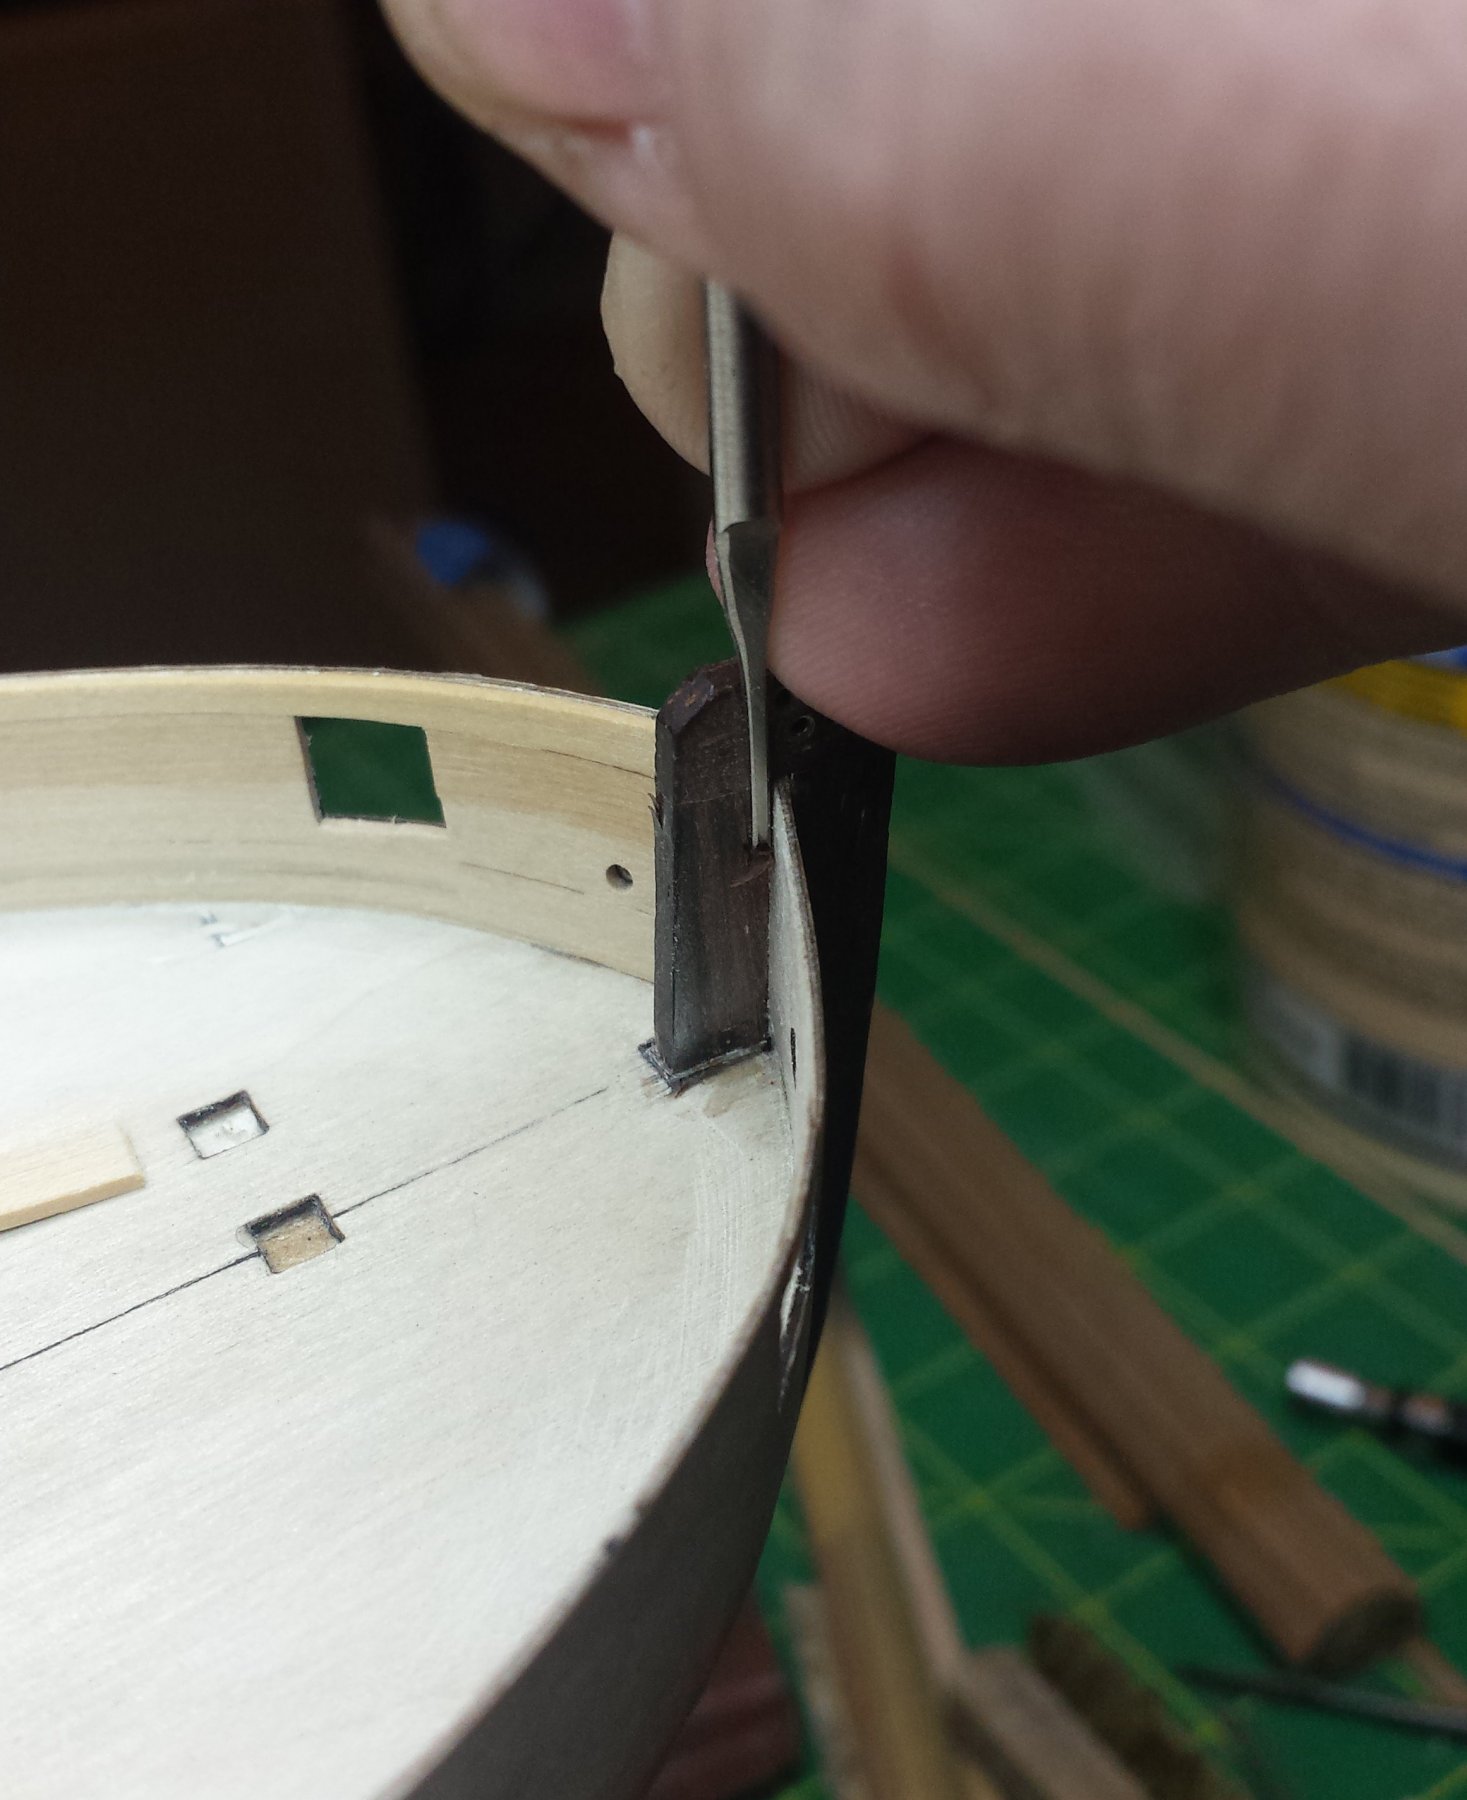
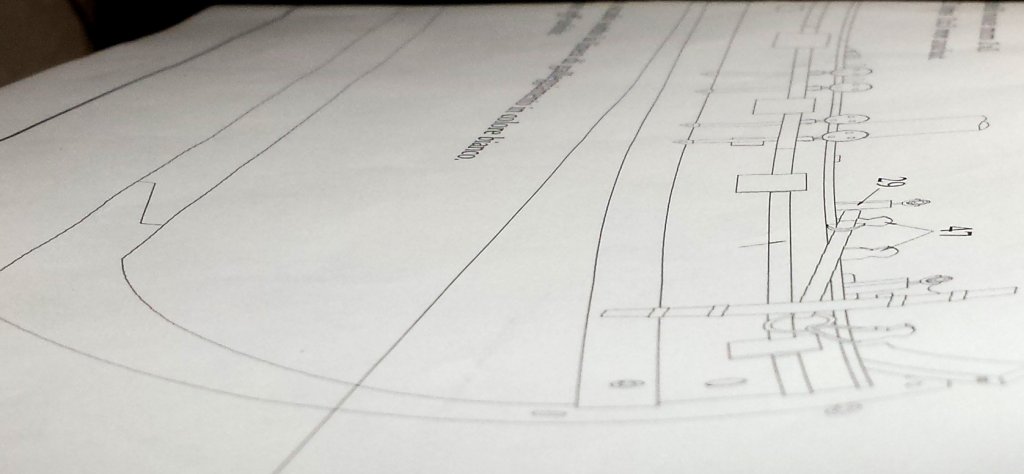
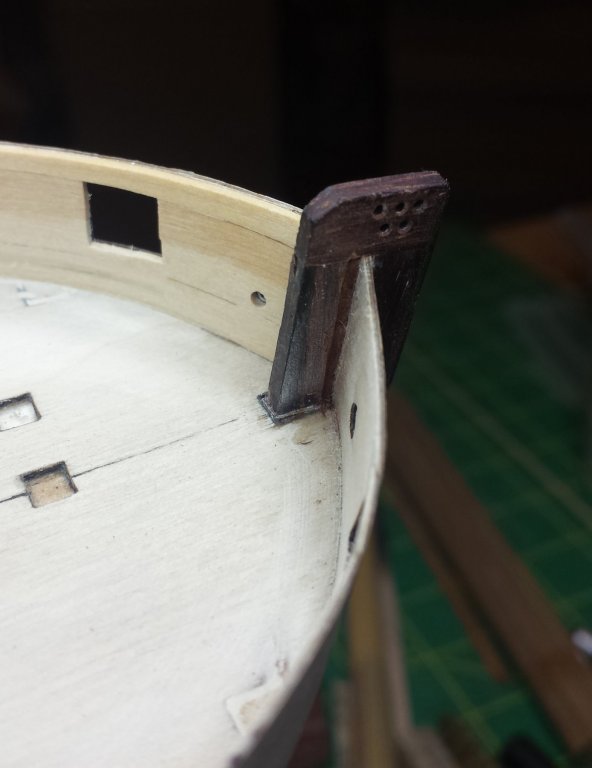
First Alexander, good luck on learning English. In some ways I think it's about the worst of the choices for the international language. First, it's actually three languages merged, old English and old Norse and the language of the Normans, plus a considerable number of words from Latin. And if you compare English and Spanish, English has approximately three times the words Spanish has. And it has more exceptions to the rules than any language I'm aware of and pronunciation that makes pretty much zero sense. So good luck Your work as usual is beautiful! We call that traditional acanthus patterns, based on a Mediterranean plant called acanthus. Here is a good example. Also, Gaetan's next project is a 1:24 scale 74 gun French ship. It's going to be HUGE, close to 3 meters when finished. Make sure you follow his progress, it's amazing. I have yet to start actually carving with them, but I am using Mikhail's tools daily working on my ship. I've been telling people to not think of them only as tools for carving, but the best micro tools for making small wood joints on ships. They're a real joy to use. For example, try finding another tool that could cut a planking rabbet like in the image below. Of course it makes more sense to cut that rabbet before the stem piece is attached to the ship, but the kit doesn't call for a rabbet here and I didn't think of cutting one until I received Mikhail's tools. And the wood of the stem piece is cocobolo, not at all easy to carve. I am considering taking them to my lathe though and remove the handle, leaving just enough wood for a threaded insert. I could then switch between the palm and pencil type handles depending on application. I also wish Mikhail would make it possible to completely remove the tool from the handle, like gravers used for engraving. I am trying to design a sharpening jig for the straight and skew chisels, and it would be much easier if there was no handle on the tools at the time we sharpen.


-
They're usually sold to woodworkers as a group with raw sienna and burnt sienna and burnt umber and black, basically red brown and green brown and black. But you can get them in all colors, see Highland Woodworking.
-
I now wish I'd mentioned that as you've found out, the only valid test of a filler color is dried And if at all possible you use test pieces off the main work. People will also say test in a small corner but if you use a small unnoticed corner chances are it's hard enough to see that your judgment of the color is going to involve a degree of luck. You can get the color you need with universal tints, guitar makers use them every day, as long as your filler is considerably lighter than the color you need so you can add more filler if you go too dark.
-
There ya go, win-win for everyone! And it was about 80 outside yesterday Back in reality, very nice progress and she looks great.
- 1,354 replies
-
- 2
-
-
- constitution
- model shipways
- (and 1 more)
-
Rick, that sounds correct, it wouldn't surprise me at all if stern names were reserved for 6th rates and up. But this might be one case where I intentionally deviate from reality, as a display object for the average viewer having the name on the counter seems right. But I haven't decided for certain. Sailor, that's actually an interesting idea, I'll keep that in mind Popeye, pretty sure I have some extra cooling jackets, they'd be a tad big though, and thanks for the well wishes. I actually pinged PPD and told them they should advertise here, really surprised they don't already, this forum is chock full of likely customers.
- 714 replies
-
- 3
-
-
- lady nelson
- victory models
- (and 1 more)