vossiewulf
-
Posts
1,477 -
Joined
-
Last visited
Content Type
Profiles
Forums
Gallery
Events
Everything posted by vossiewulf
-
 Have fun Rick! Don't worry, I'll just keep count of what's your fault for not being here
- 714 replies
-
- 3
-

-
- lady nelson
- victory models
- (and 1 more)
-
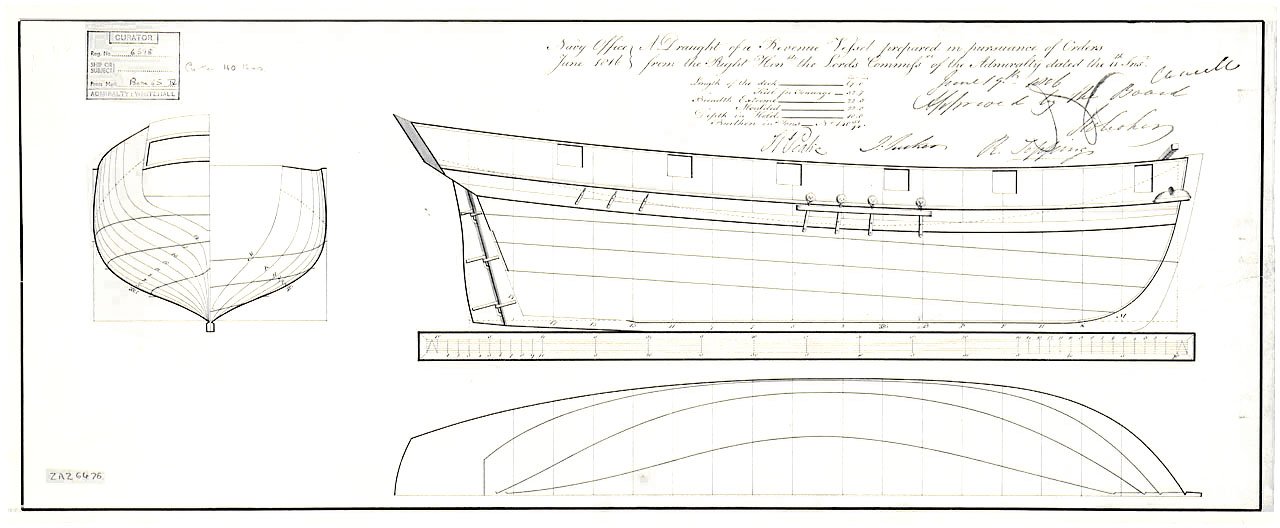
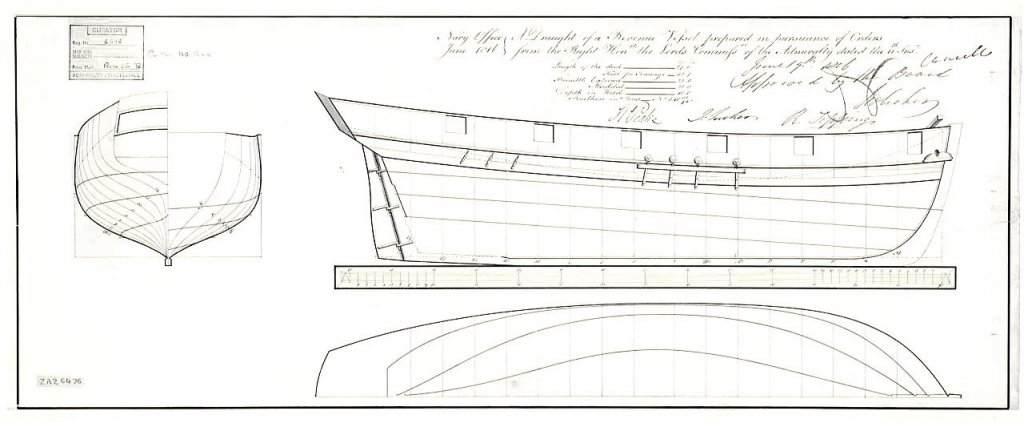
I forgot the other part of the spookiness, it's noticeably easier to sharpen than A2, at least as easy as O1. So pay attention with the first sharpening to get a feel for the rate of metal removal. Tony thanks. Although it's Jay/Vossie, Grant is just commenting here. I answer fine to Vossie, have had some version of this name for like 26 years now. Ex-wife #2 who I'm still close to calls me that frequently, usually when she thinks I'm misbehaving. I read your discussion and some of the others on the topmast position to know that you could make an argument for either position but that forward seemed to be more common, so that's what I'm going to do. I wish I had known there was something of a consistent problem with gunports. In my case the issue is the kit designers have gunports following gunwale top line sheer not the deck sheer, and that results in guns at either end that can't shoot low and ones in the middle that can't shoot high. Well that's an exaggeration but they do have differing fields of fire. I think the problem is simply that on the real ships the deck sheer followed the top line sheer. This is 1817, but still quite close to the LN generation, similar top lines and gunports, but you can see the deck indicated just above the wales following that same sheer. Or at least I think that's the deck. If you're wondering I fiddled with this quickly to make it a bit clearer. But a couple more questions while I'm at it - 1. Why is LN carvel built, I thought clinker was still standard early 1800? 2. What in the world is the purpose of the upper mini-wale on LN that crosses the gunports? It's broken in 6 places, its contribution to bulwark strength is going to be pretty close to zero.
- 714 replies
-
- 4
-
-
- lady nelson
- victory models
- (and 1 more)
-
You have to understand Gaetan, a 1:24 74 built to your level and fully RC would probably be enough for people to make a physical pilgrimage to see it under sail in the local lake Me included. At 1:12, no need for RC you can ride inside with head through the quarterdeck, sailing her with a zillion little lines run down below deck
-
Yeah but remember the point is to collect it Although if you're creative you could probably sort of aim the belt sander at a little cup full of thinned glue, if you try that make sure someone records it and post it to Youtube. For educational purposes of course.
-
Good start Achu, looks like you're thinking of the right things, just need to keep looking ahead and relying on the experience of others until you've done enough to figure out the right ways for you to do things.
-
Moxis, any good CA glue should work very predictably and all that I buy these days do. It sounds to me like you're using too much, CA is not a glue you want squeezing out because one, that squeezeout is going to rapidly get rock hard and is not fun to remove, and two the glue sets much more slowly if there's lots of it. You want an extremely thin layer with maximum surface contact. Take two short pieces of planking material and put a very thin bead of medium CA glue on one, not enough that it will squeeze out. Press both of them together with fingers for 30 seconds. Now try to get them apart, good luck Medium is the standard thickness used, the thin is like water and only has certain useful applications. The thick/slow you only use when you need to fill gaps.
-
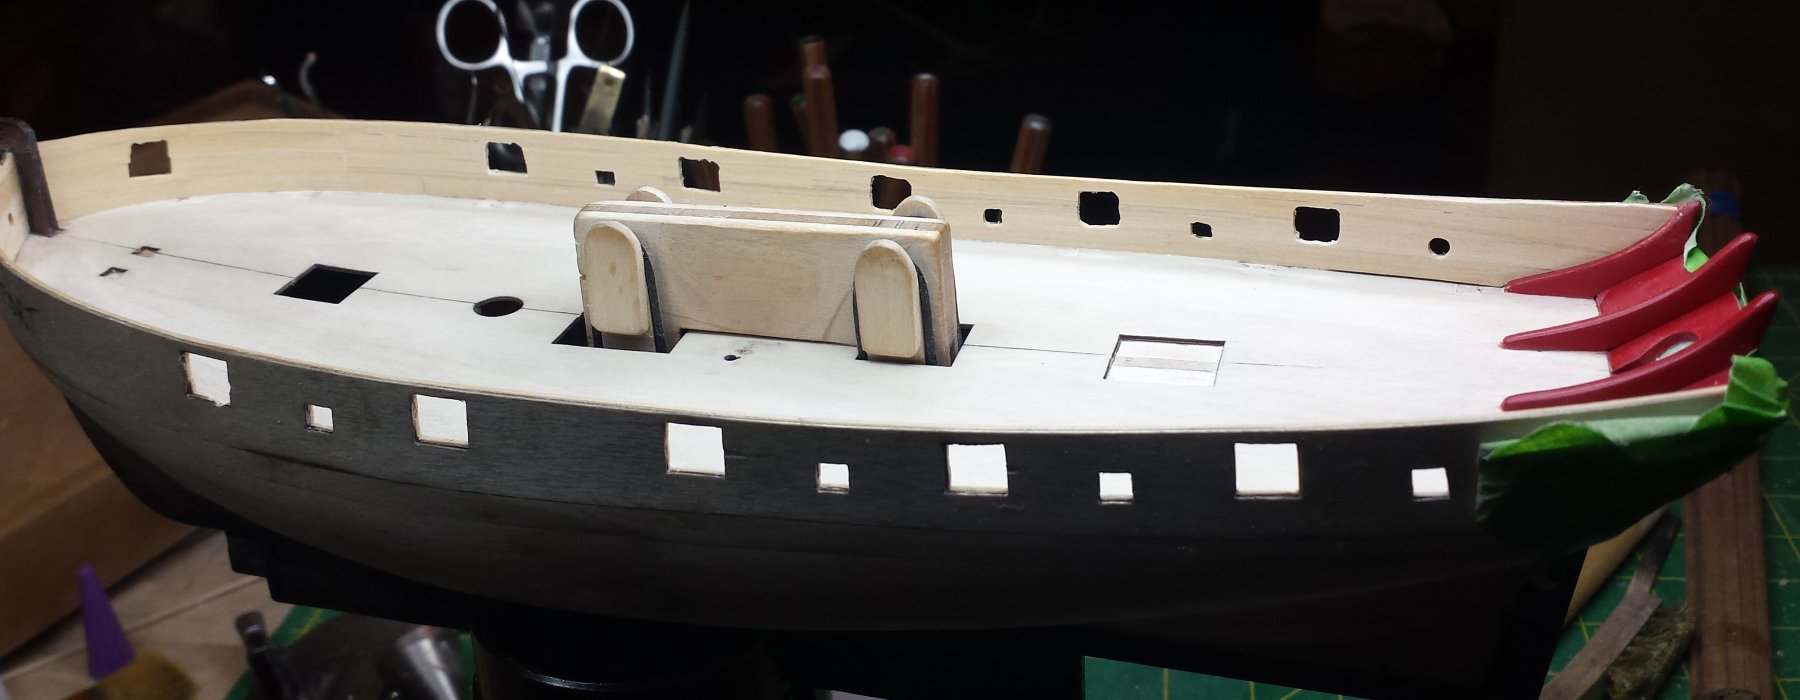
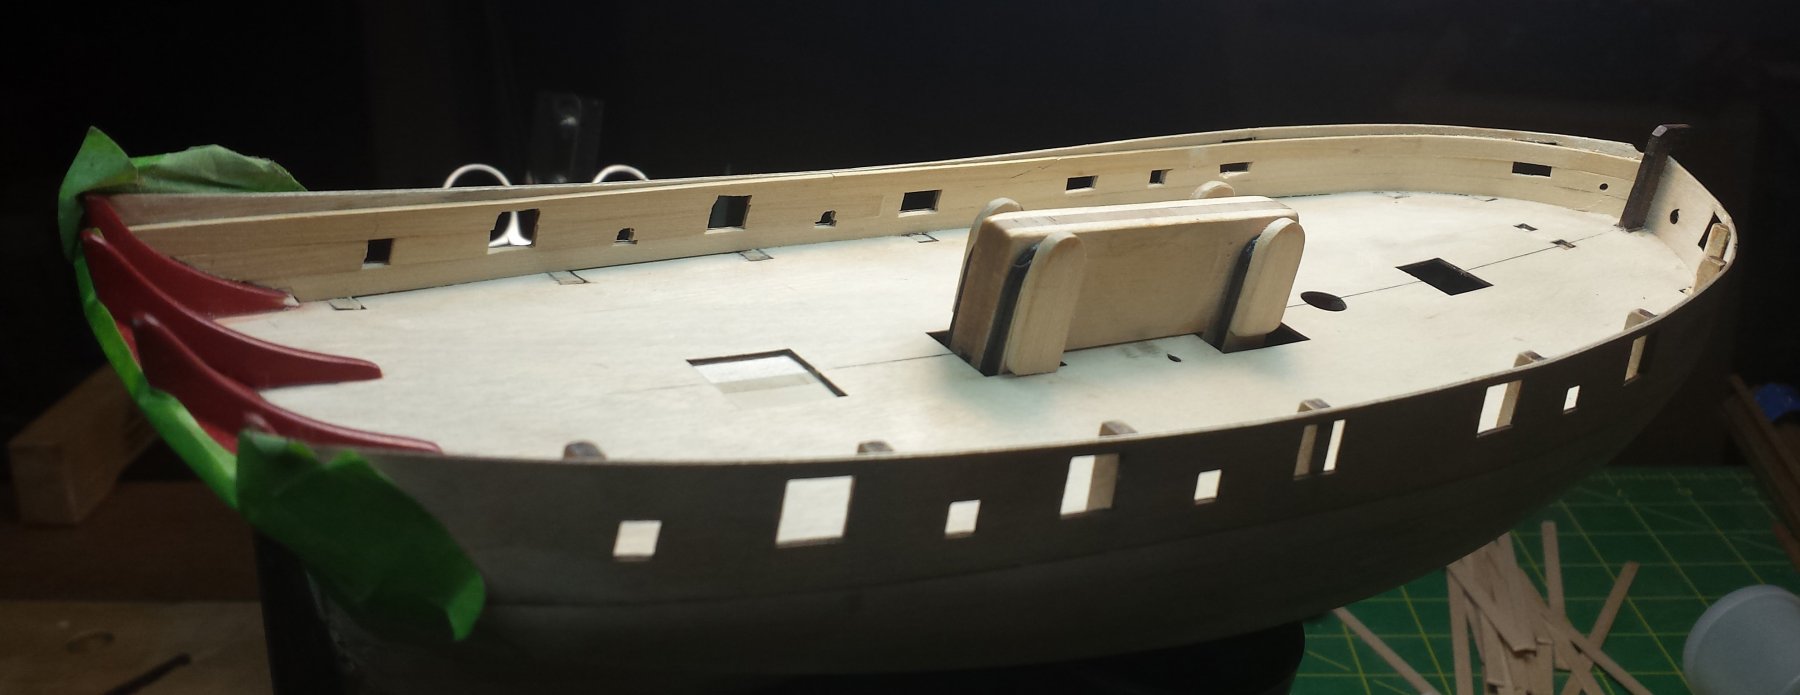
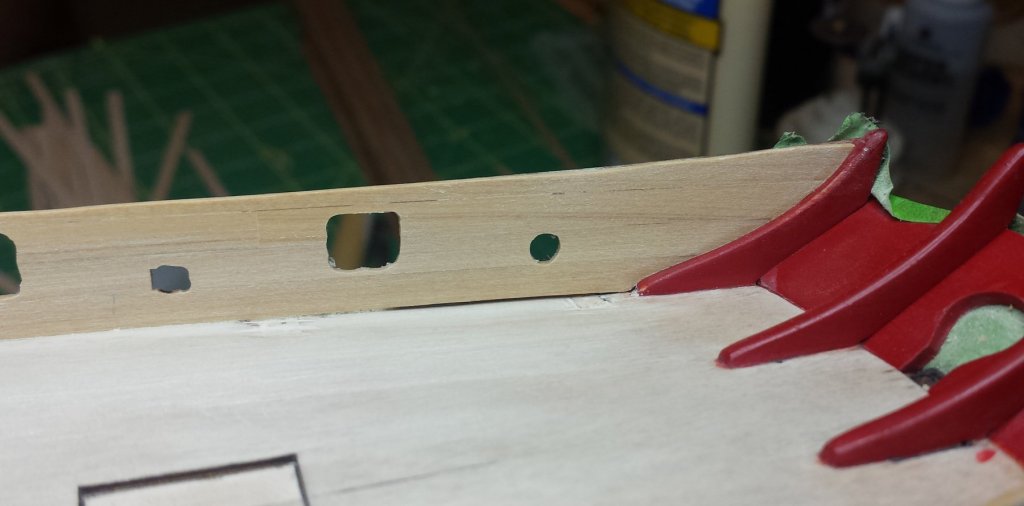
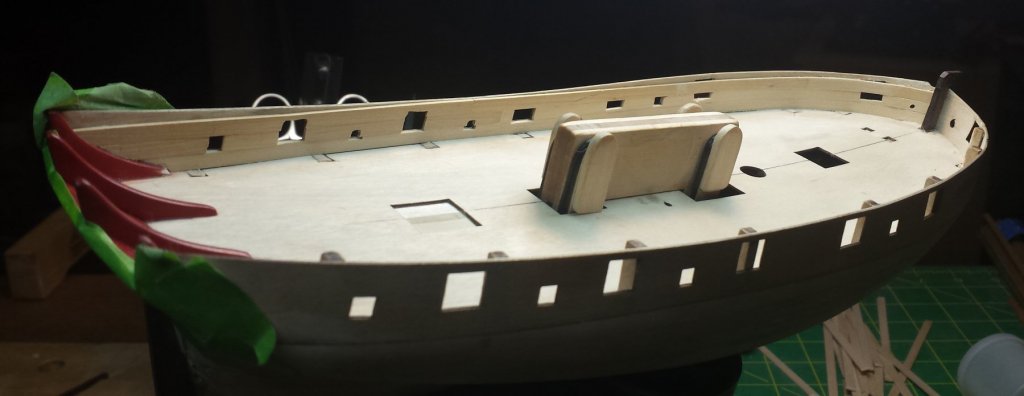
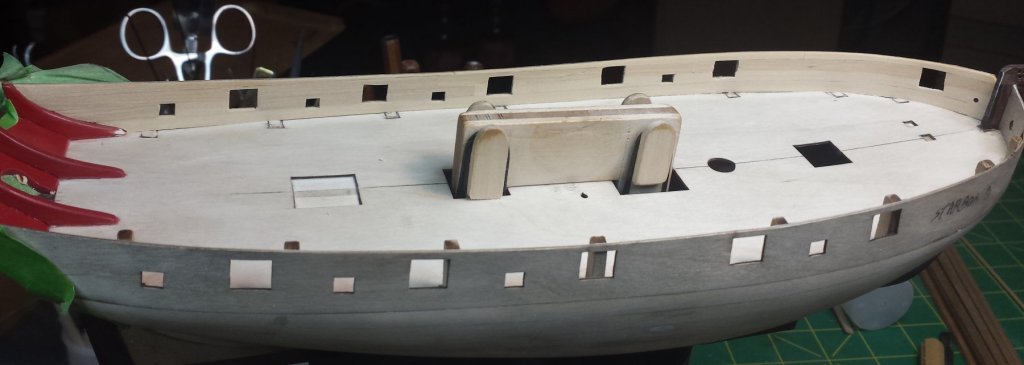
Another concern is that you can see the false deck edges were considerably less right than I thought they were, there are gaps on both sides where the deck dips well below the planking line. This is going to cause problems for getting the waterways right, they currently don't have a good level glue surface. Not sure what I'm going to do about it yet.
- 714 replies
-
- 1
-
-
- lady nelson
- victory models
- (and 1 more)
-
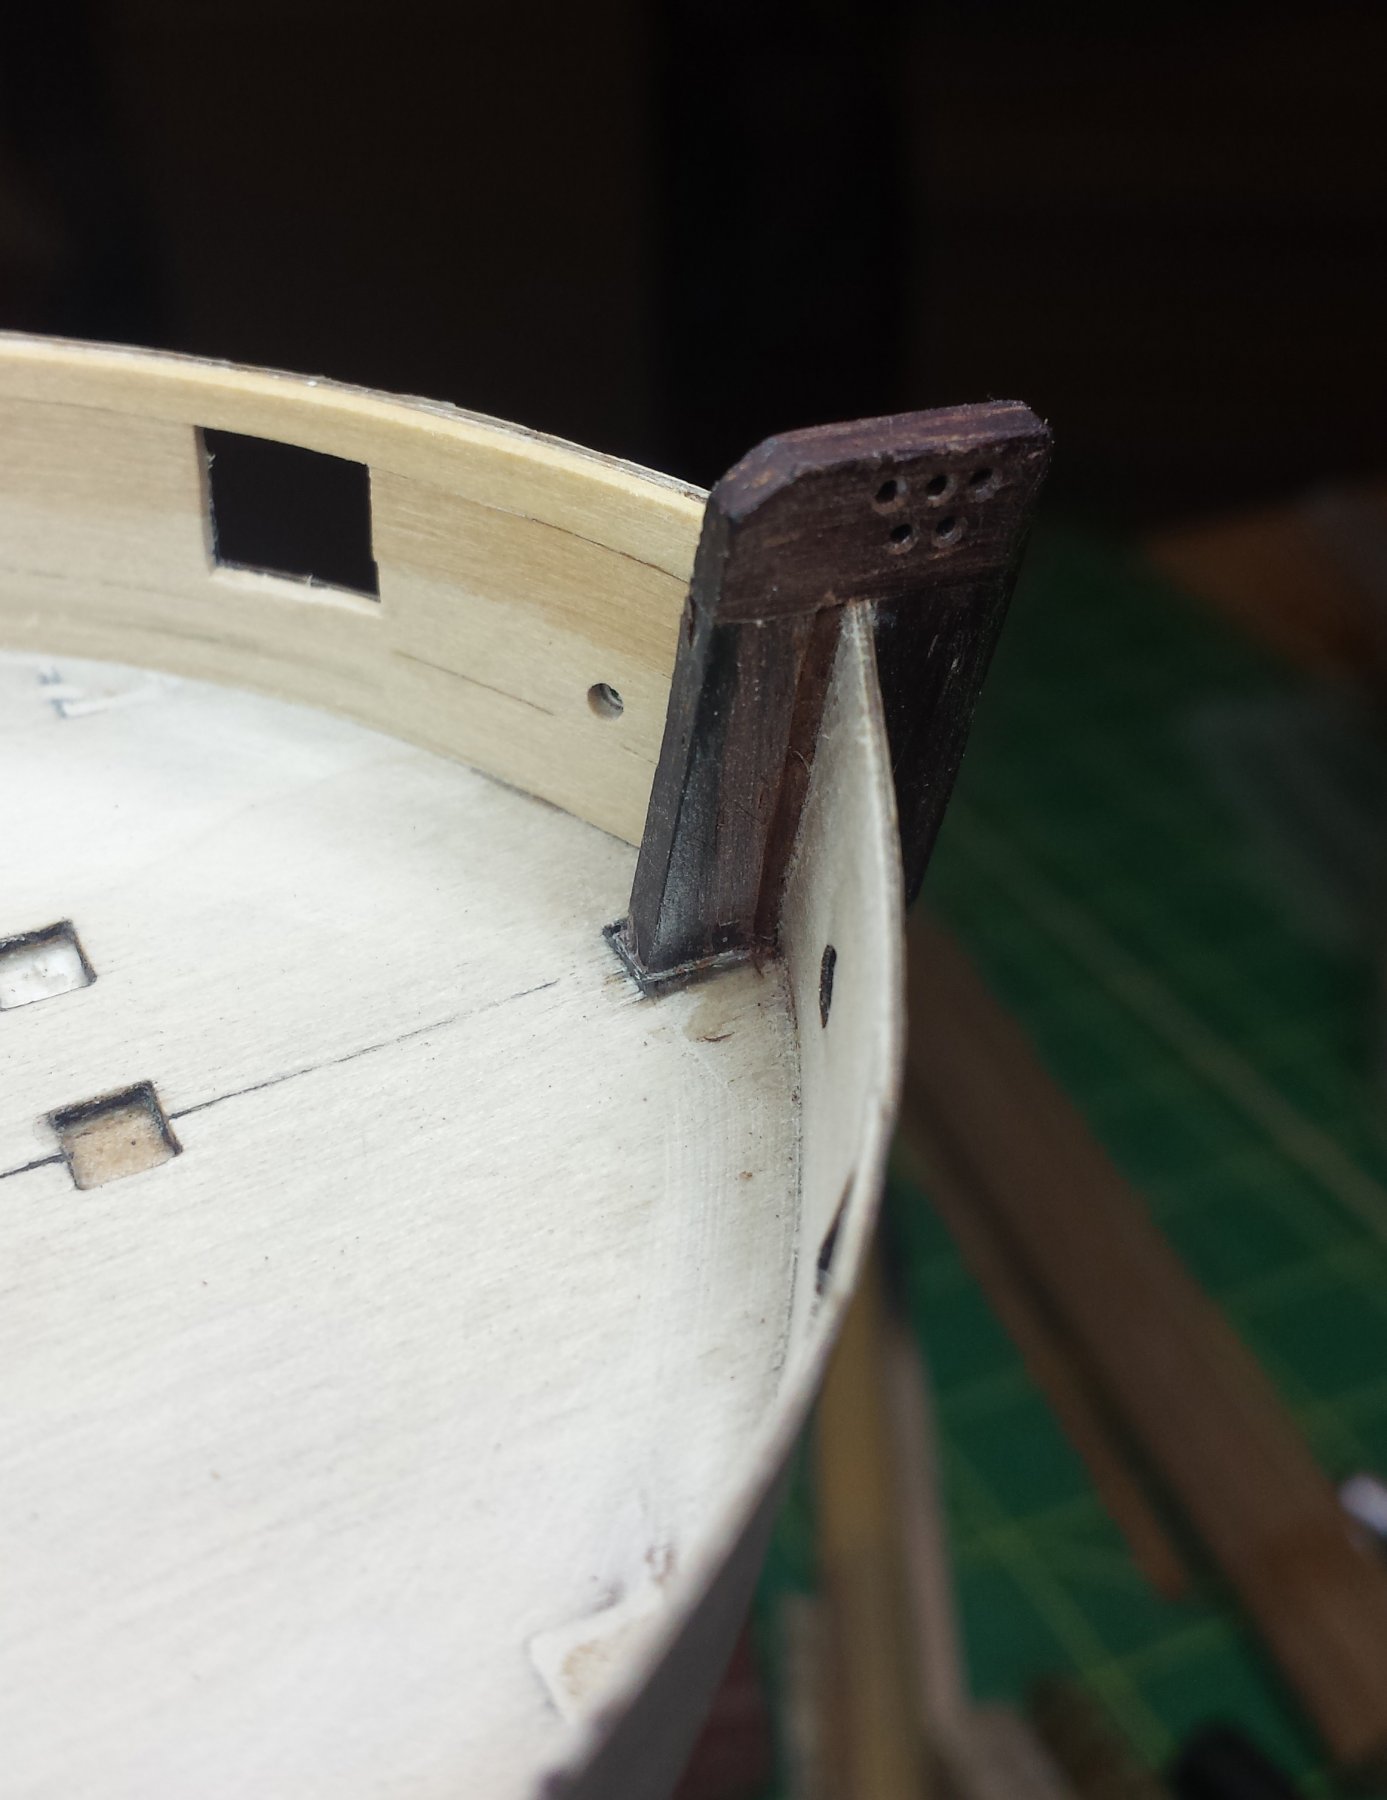
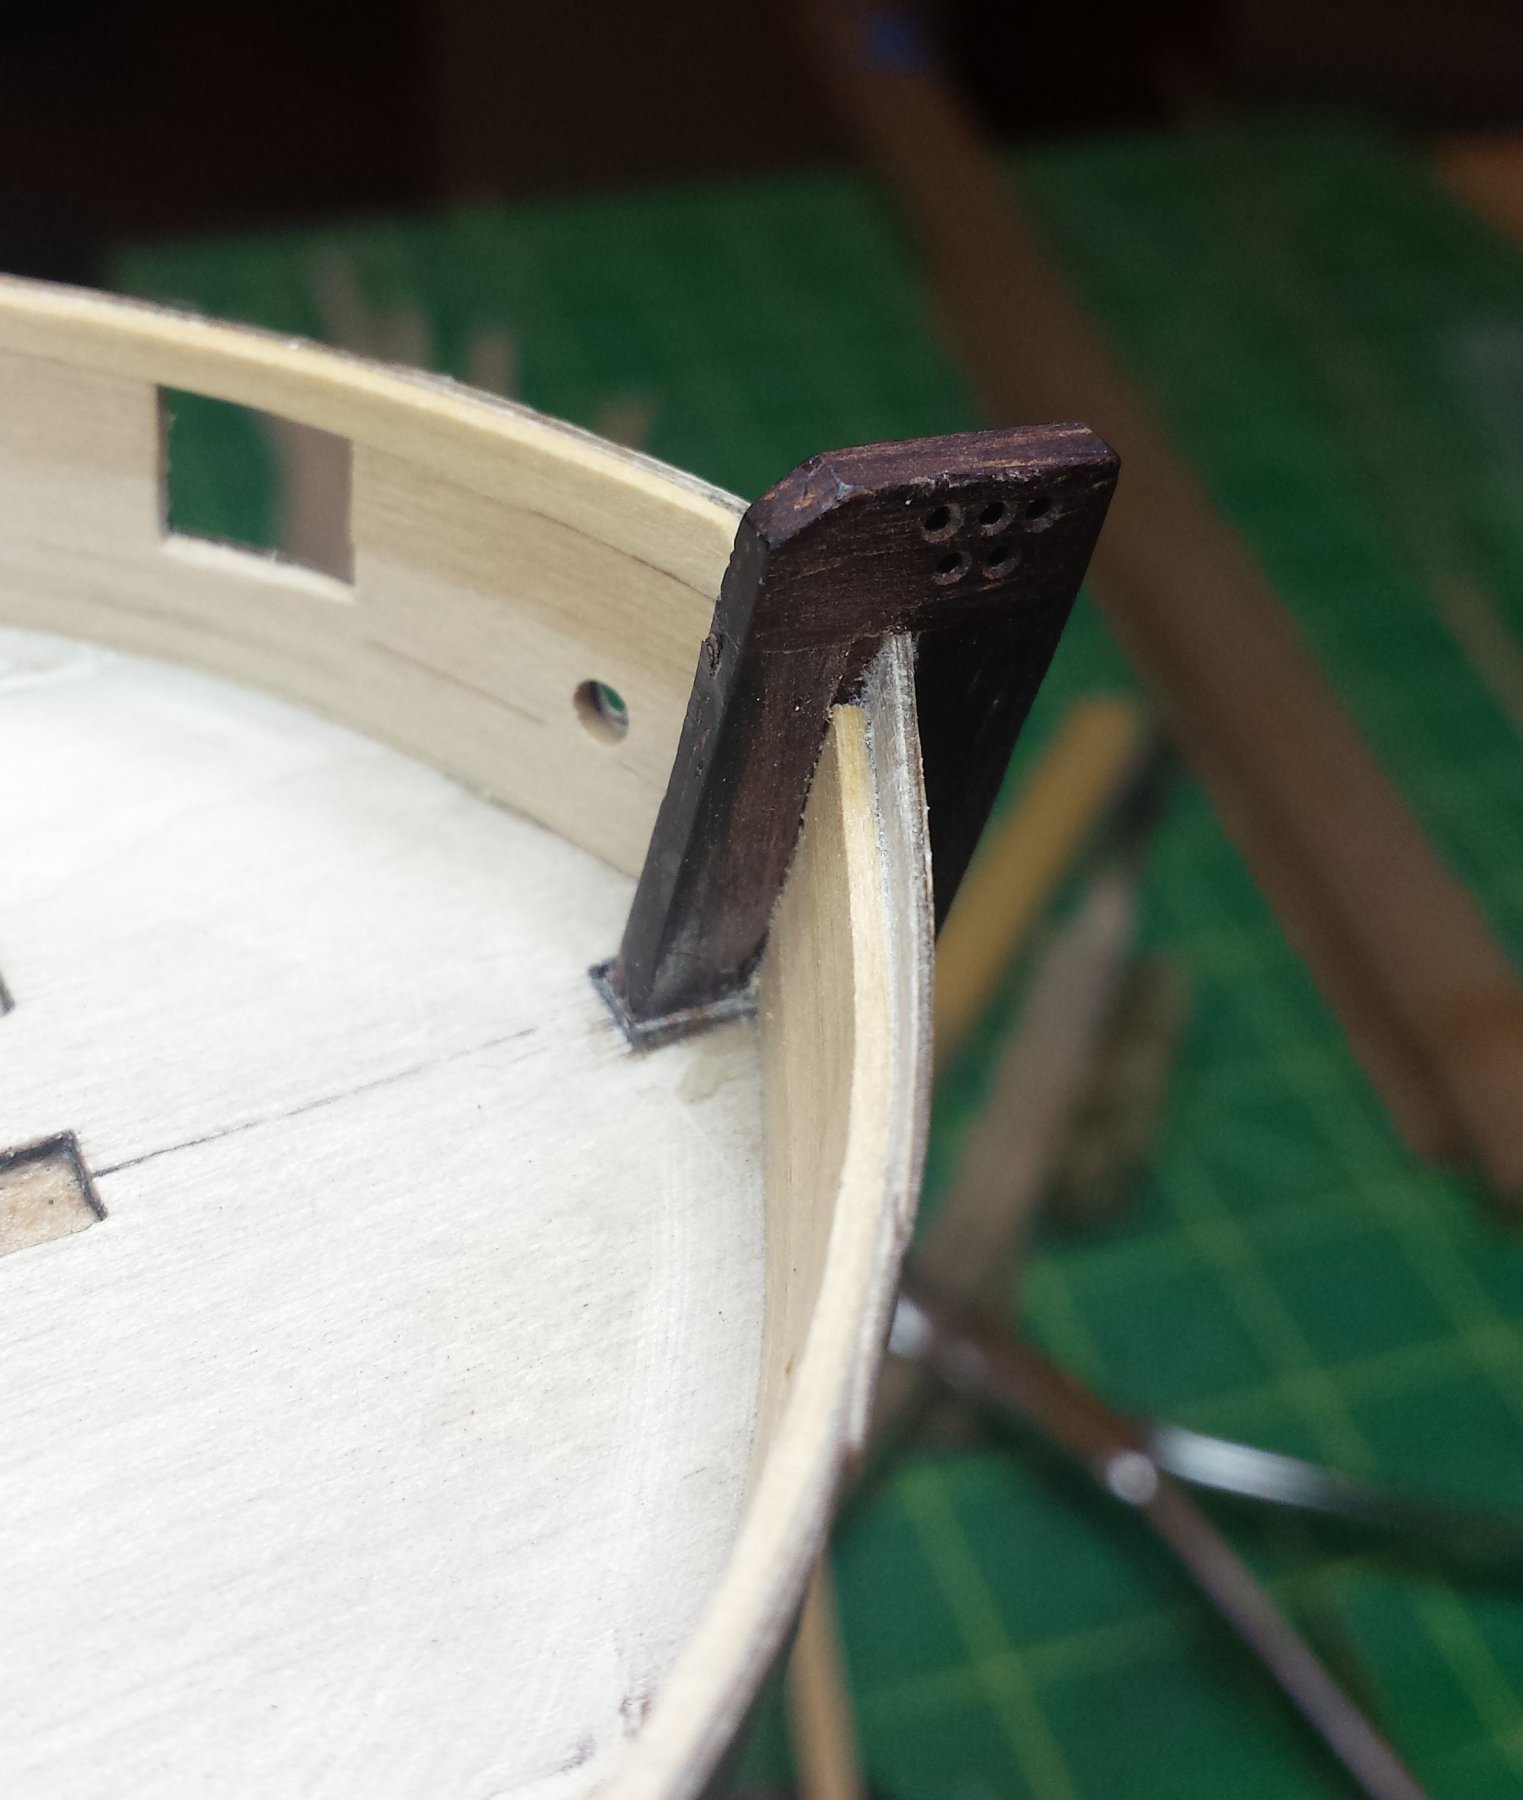
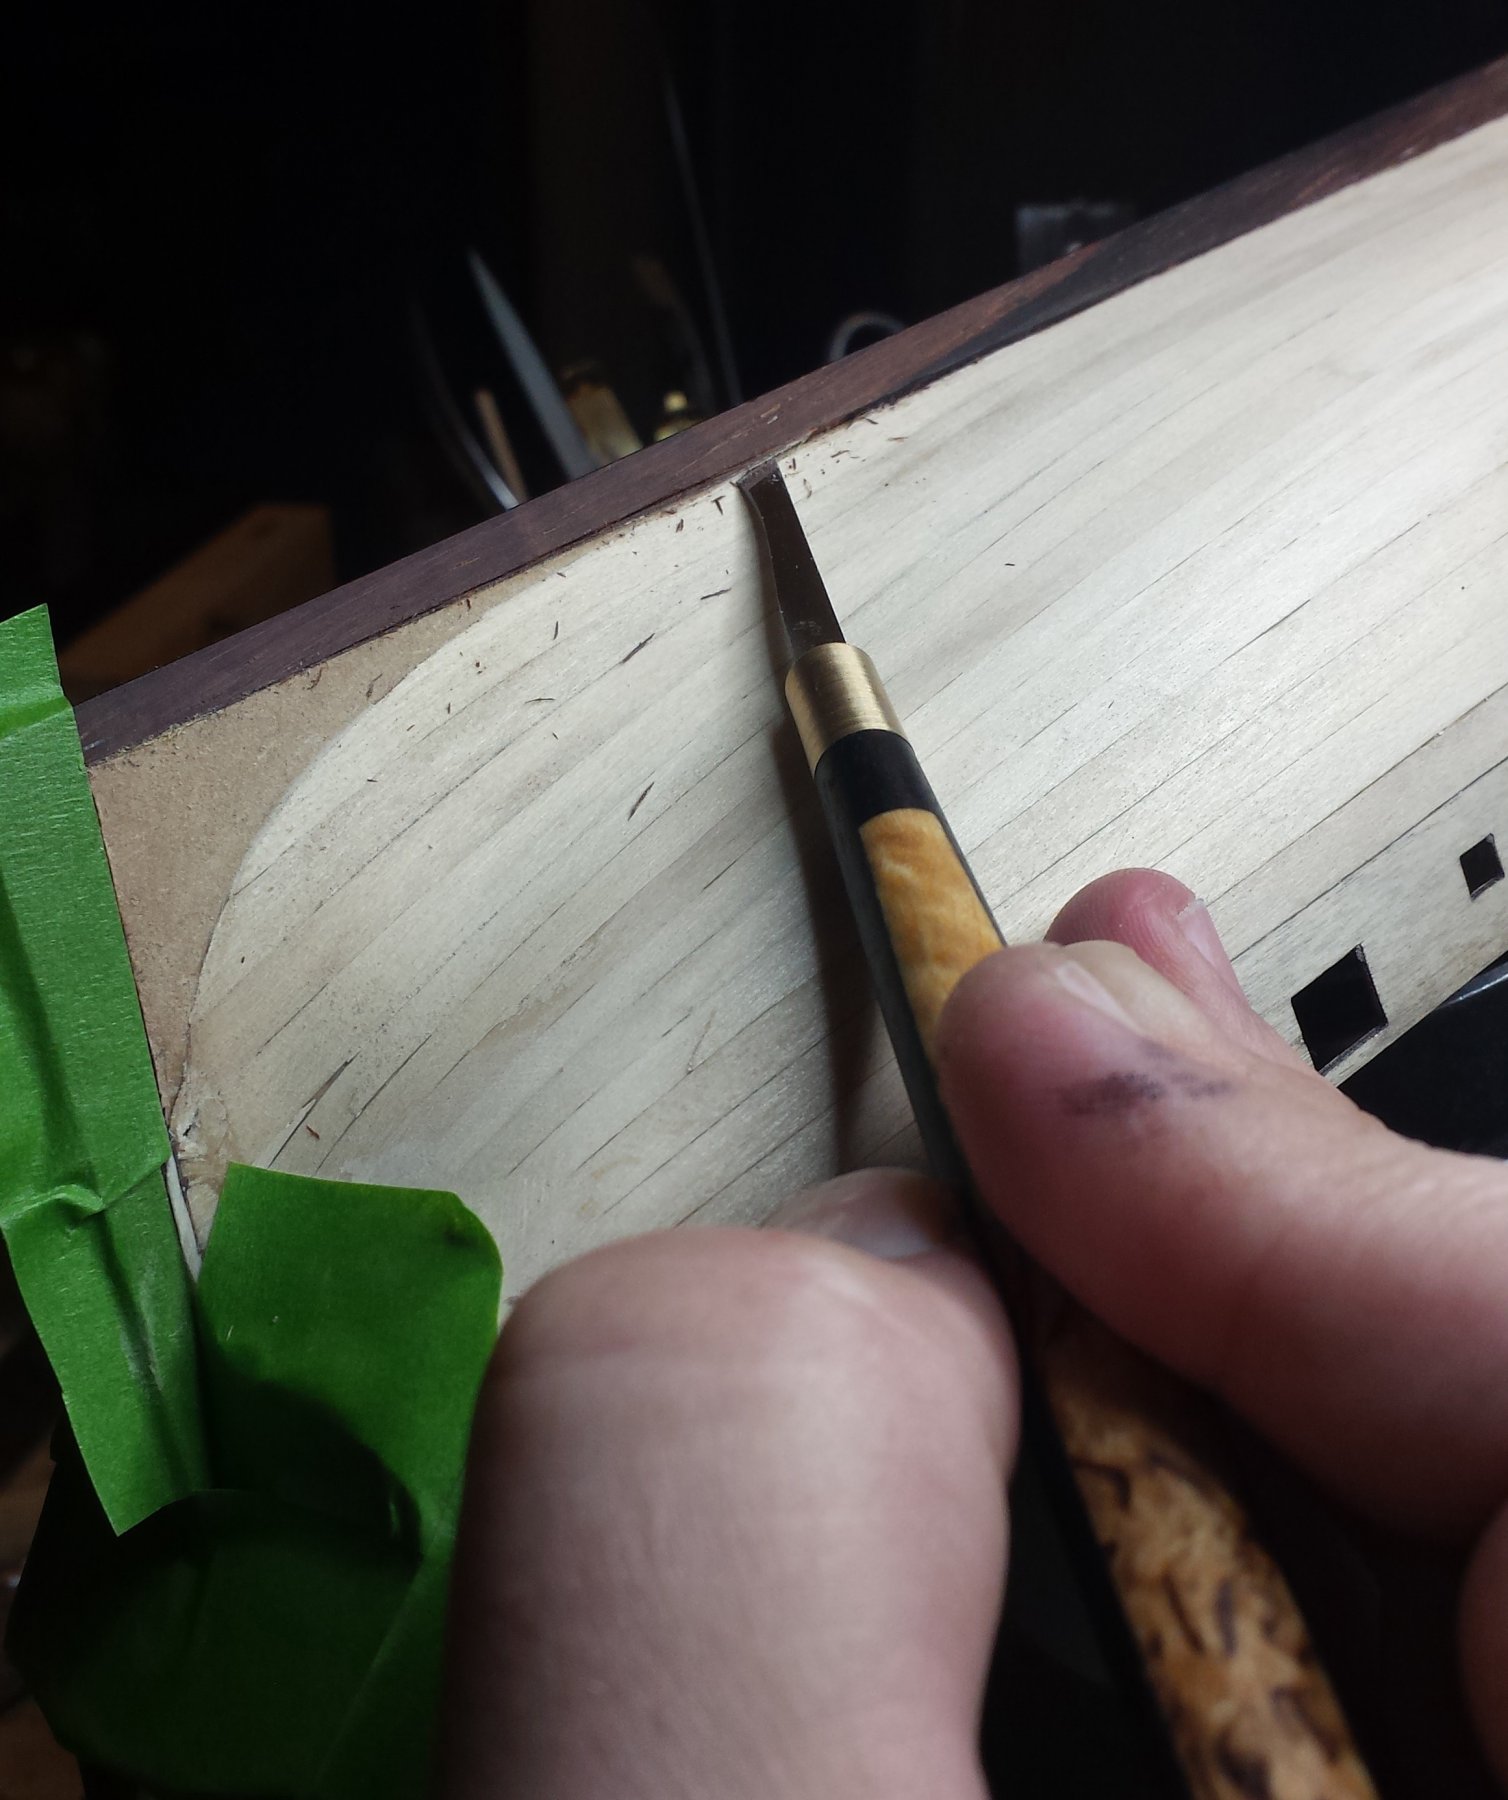
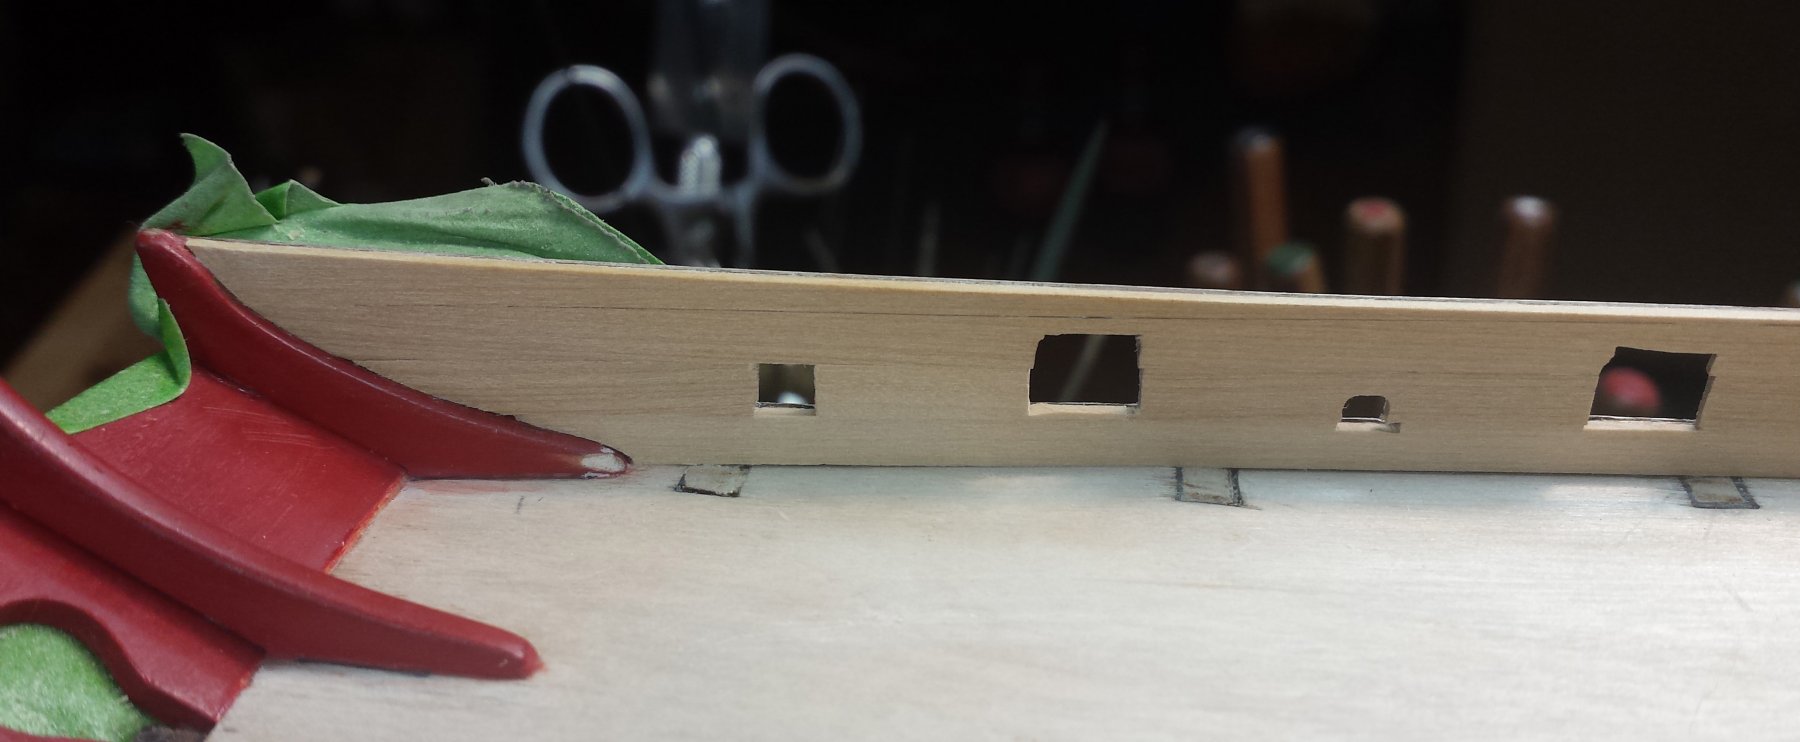
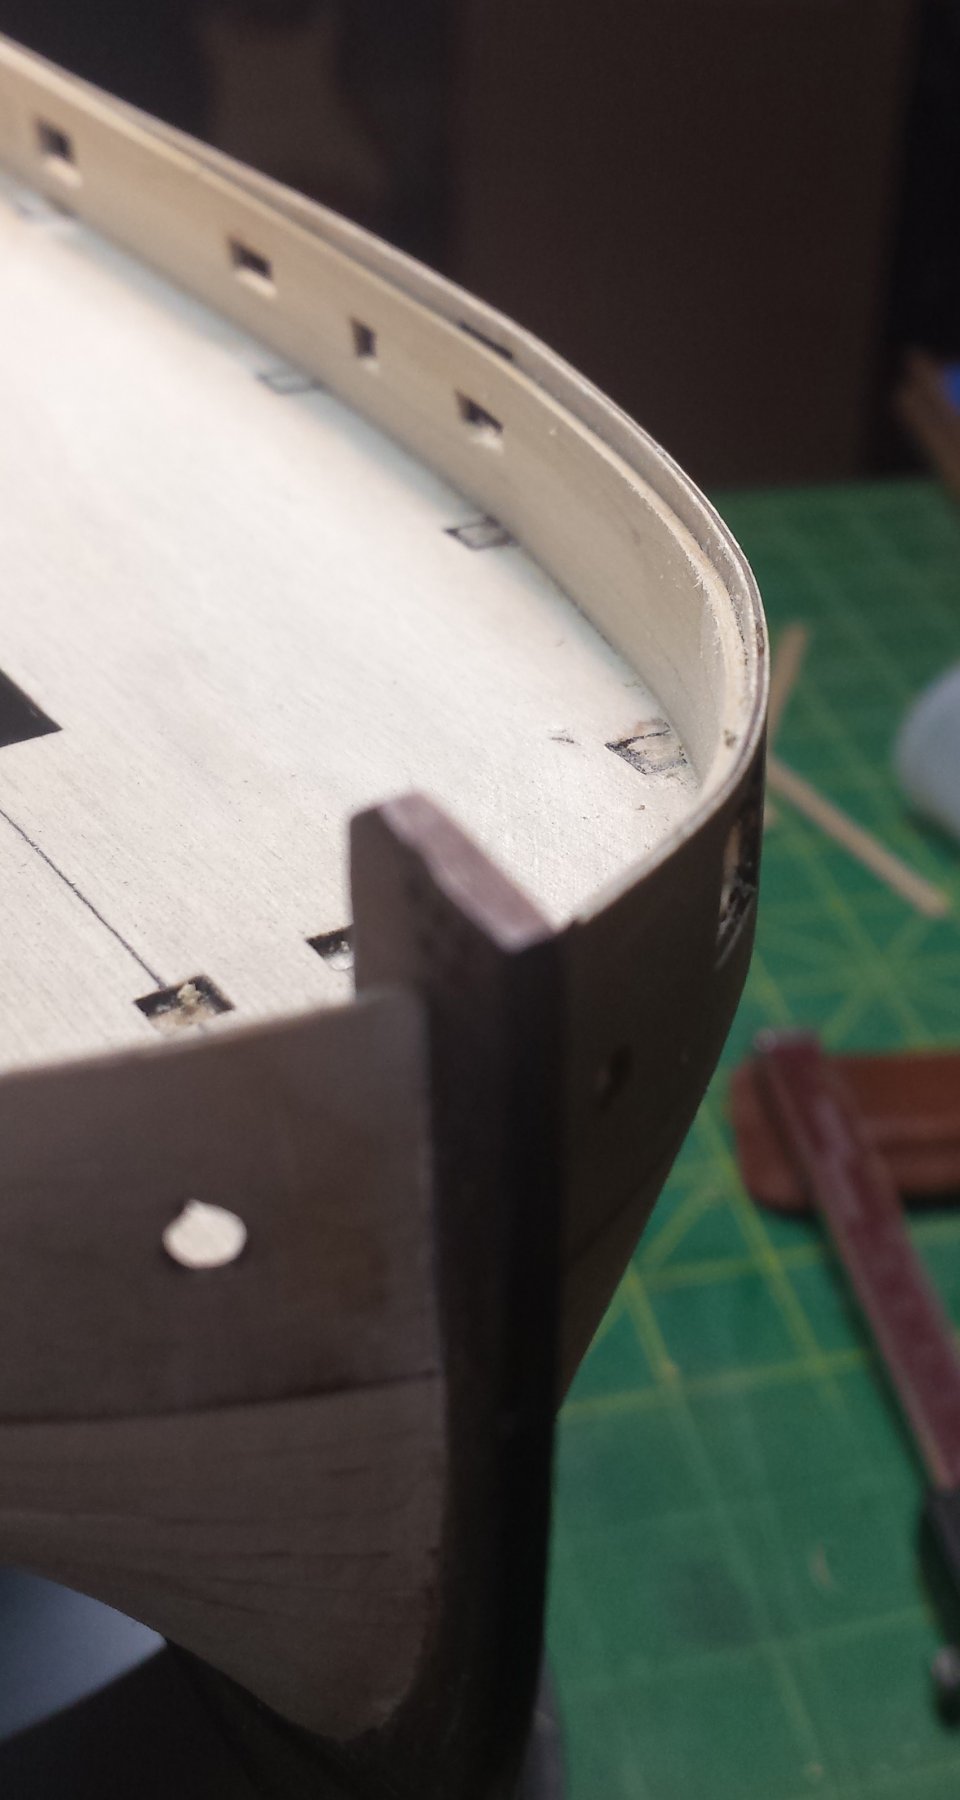
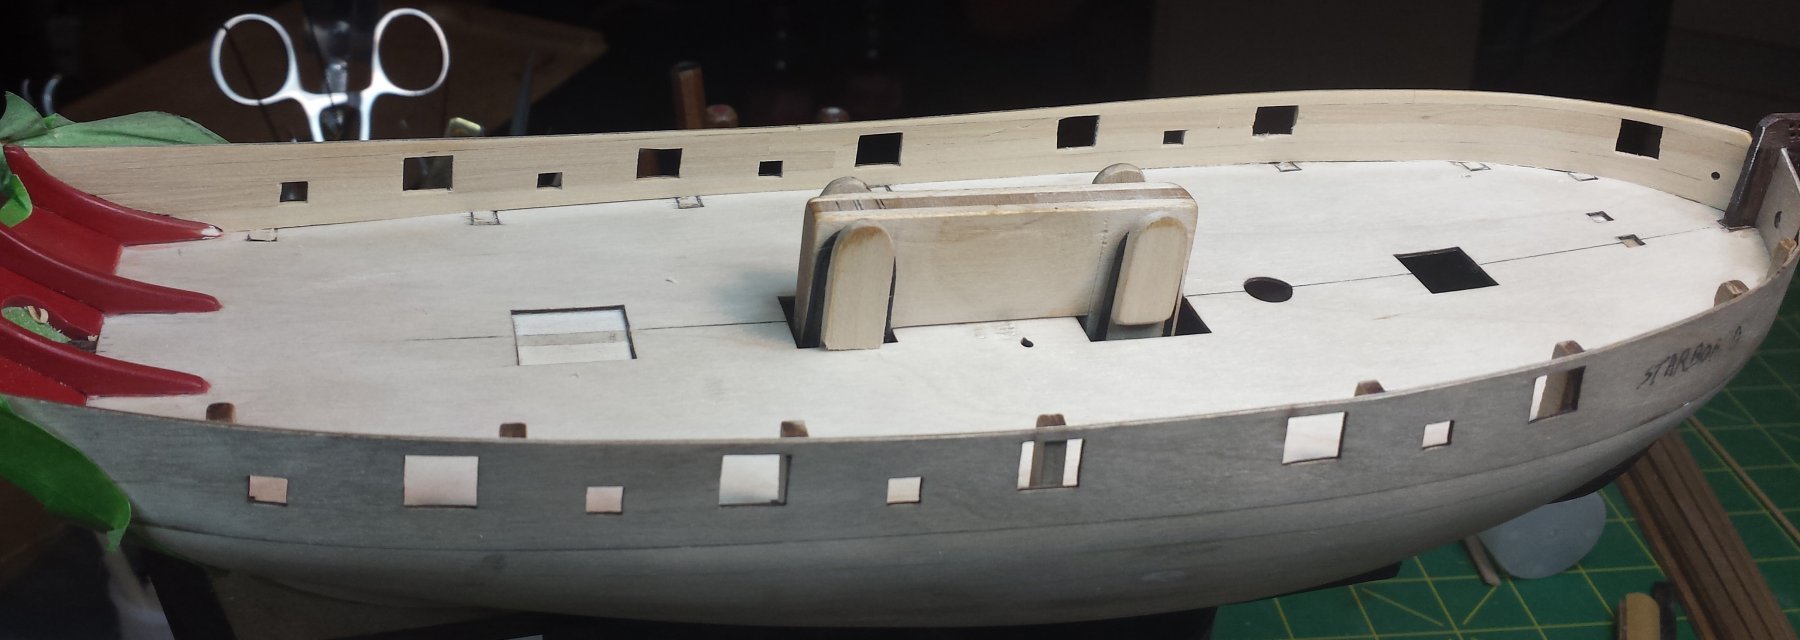
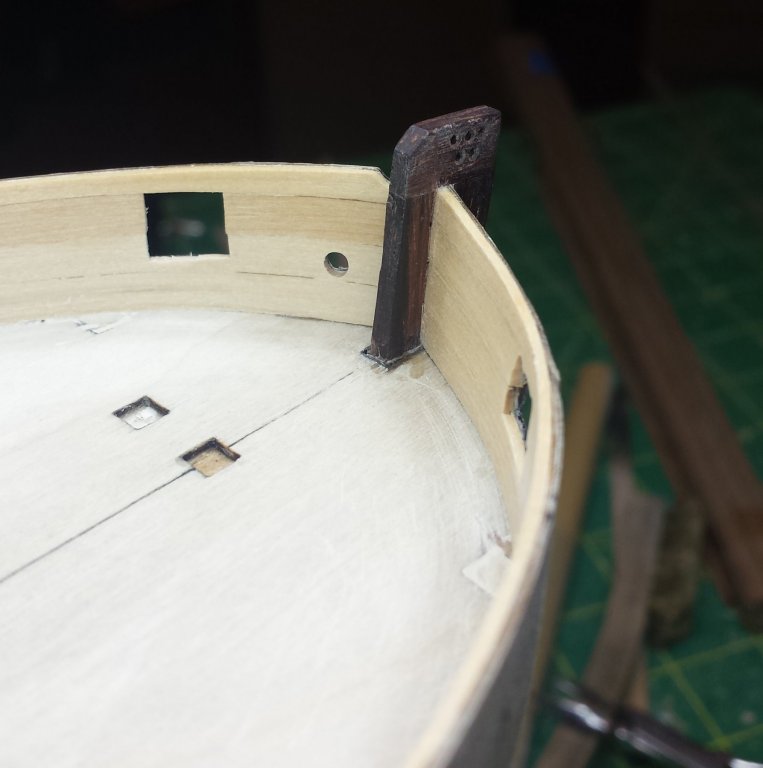
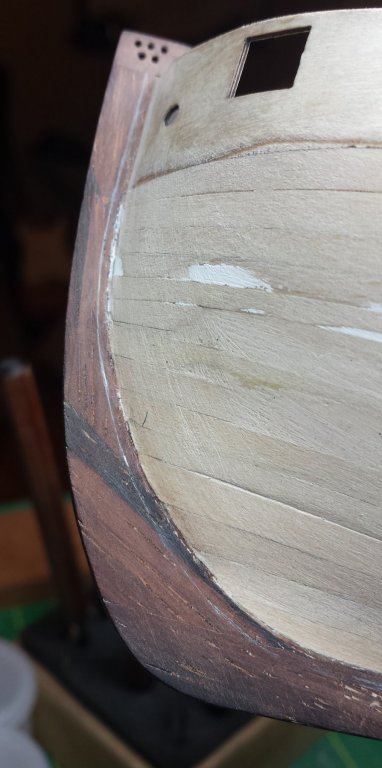
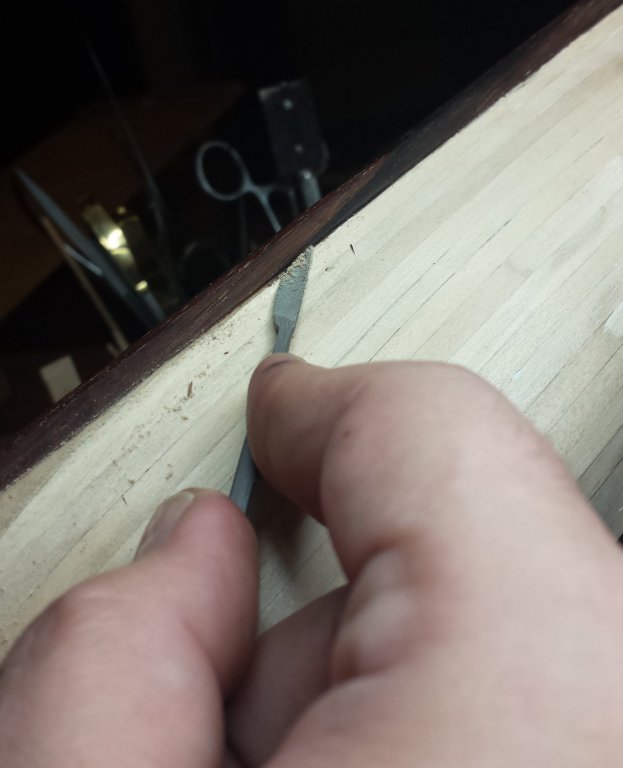
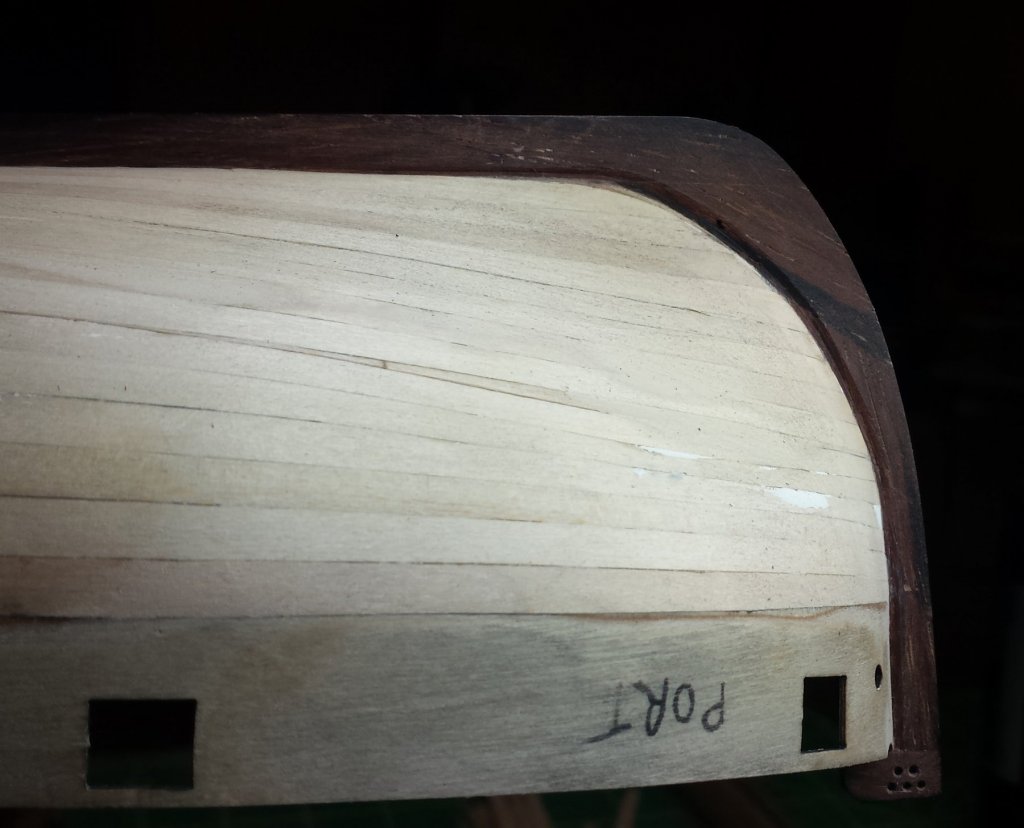
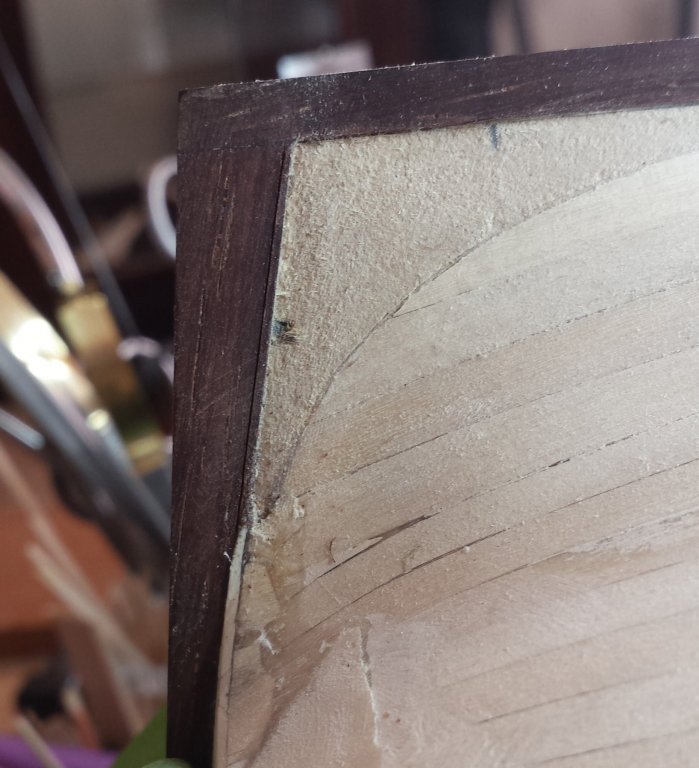
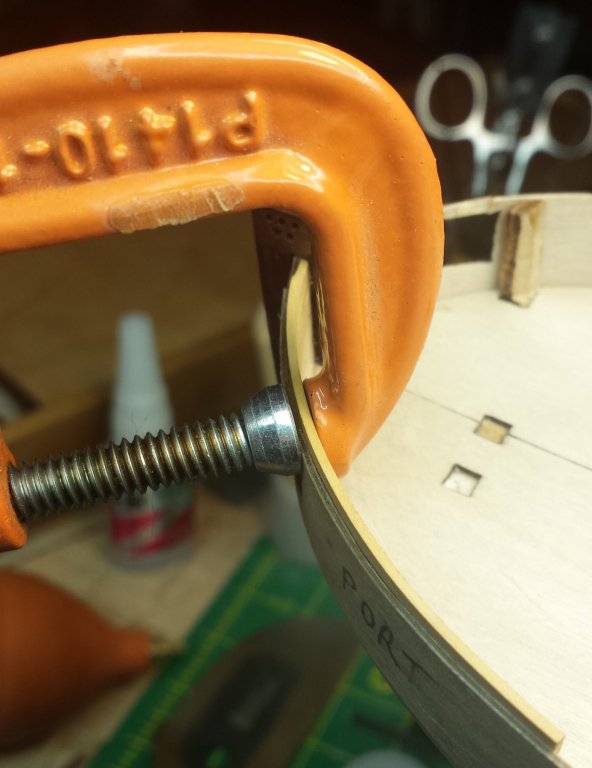
It's of course a double-edged sword issue, like pretty much everything. You get so much more adjust and also abort time- you can recognize a major issue and still easily pull the piece off and clean up both sides. But it also means you have to clamp the hell out of everything and that really gets complicated. What I'm doing is much less complicated and zero need for clamps, but I have to position everything exactly right the first time, even with slow CA they grab almost immediately. But as you see you can get very good glue lines when you use all 10 fingers to clamp a 1.5" length, and the other advantage is it's quick, you can walk your way down a plank in a short time as you only need to hold each section 30 second and then give it another 30 seconds to harden a bit- I finished the other side of the inner bulwark planking, most of the time being spent fiddling fits to be much better than they need to be. So that's done, need to do starboard side rabbet for outer planking then can start the outer planking. In an effort to get Grant treated for rabies due to excessive drooling, here I am cutting the stem rabbet for the starboard side. Rick, I also think this helped me with the planks at the bow, and I'd recommend anyone do it- but obviously do it before the stem is attached to the hull when it would be very easy. It provided a very positive lock for all the inner gunwale planks. Here it looks like the fashion piece came second, so I score this a win. And the bow looks nice and clean with the rabbet. And overall starboard side. Pretty much same as other side, very good glue lines except for the top strake. Which is really annoying as I was really trying to make that better on this side, but it's getting painted so moving on. Just bothered I'm not still sure what happened there.


- 714 replies
-
- 6
-
-
- lady nelson
- victory models
- (and 1 more)
-
Yes, I decided a couple of weeks ago that this is going to be the rigging standard I'll be striving for with my little cutter. And it's extremely unlikely I'll achieve parity
-
The Byrnes table saw zero-clearance insert blanks are aluminum. If the Proxxon doesn't have an insert I'd seriously consider doing what I had to to give it one, cutting away the surface around the blade and creating a mounting for a drop-in insert. Zero-clearance inserts are just plain required for precision work and his saw is of limited usefulness if it doesn't have one.
-
Thanks for the encouraging words everyone It's good the get thumbs up from people who know of which they speak. Grant, hopefully you paid the extra to get the PM-V11 chisels? That steel is downright spooky in how long edges last before having to resharpen. I got the PM-V11 iron for the first smoothing plane I bought from them, and all subsequent purchases have been with the PM blade/iron option. It's one of the rare cases where paying the premium for the best is actually a money saver, you sharpen so much less with PM-V11 tools that you make back in time more than every penny spent. But be prepared to understand our ancestor's cries of "wizardry!" when you chop through miles of hard exotic wood and find the edge is still super sharp, a part of your brain will want to put it down and back away and run go summon the village priest. Regardless they're great chisels even going with A2 or O1, and will make tons of nice furniture. Also don't forget it's in the woodworker's handbook that whenever you buy new chisels you have to go hand cut some dovetails with them Also WRT Mikhail's tools, as above unless you're intending to try carving consider getting a reduced set of just the straight and skew chisels from Mikhail, I'd guess maybe $150-$200 for I think 11 tools. All of the skews are single bevel and come in left and right hand versions in three sizes. Send a PM to me when you're ready and I will give you his email address. Rick, you were doing yellow glue right? I'm still using CA. I put glue on an inch or 1.5" length, hand clamp, move on, I always want to be managing the smallest practical joint with the least glue possible at any one time, bad glue lines for me are almost always the result of trying to glue too much at one time. Also there are many butt joints here, several of which are nigh invisible that allowed me to work with shorter lengths presenting simpler glue problems. I in fact wanted to do yellow glue here, but of all my small clamps only the c-clamps provide enough squishing power to get good joints, I am strongly considering making my own small cam clamps for ship work. I have always like cam clamps since I first learned woodworking, a standard 8" version should be able to do ~300lbs and if you're using them every day all day you can get amazingly fast at declamping and reclamping with them. Further, unlike spring clamps, they can apply a range of force from 0 to their max. I think that might be the best solution for this type of clamping, if nothing else before I start another ship I'm going to spend some time on infrastructure like making clamps based on my experience building this ship.
- 714 replies
-
- 7
-
-
- lady nelson
- victory models
- (and 1 more)
-
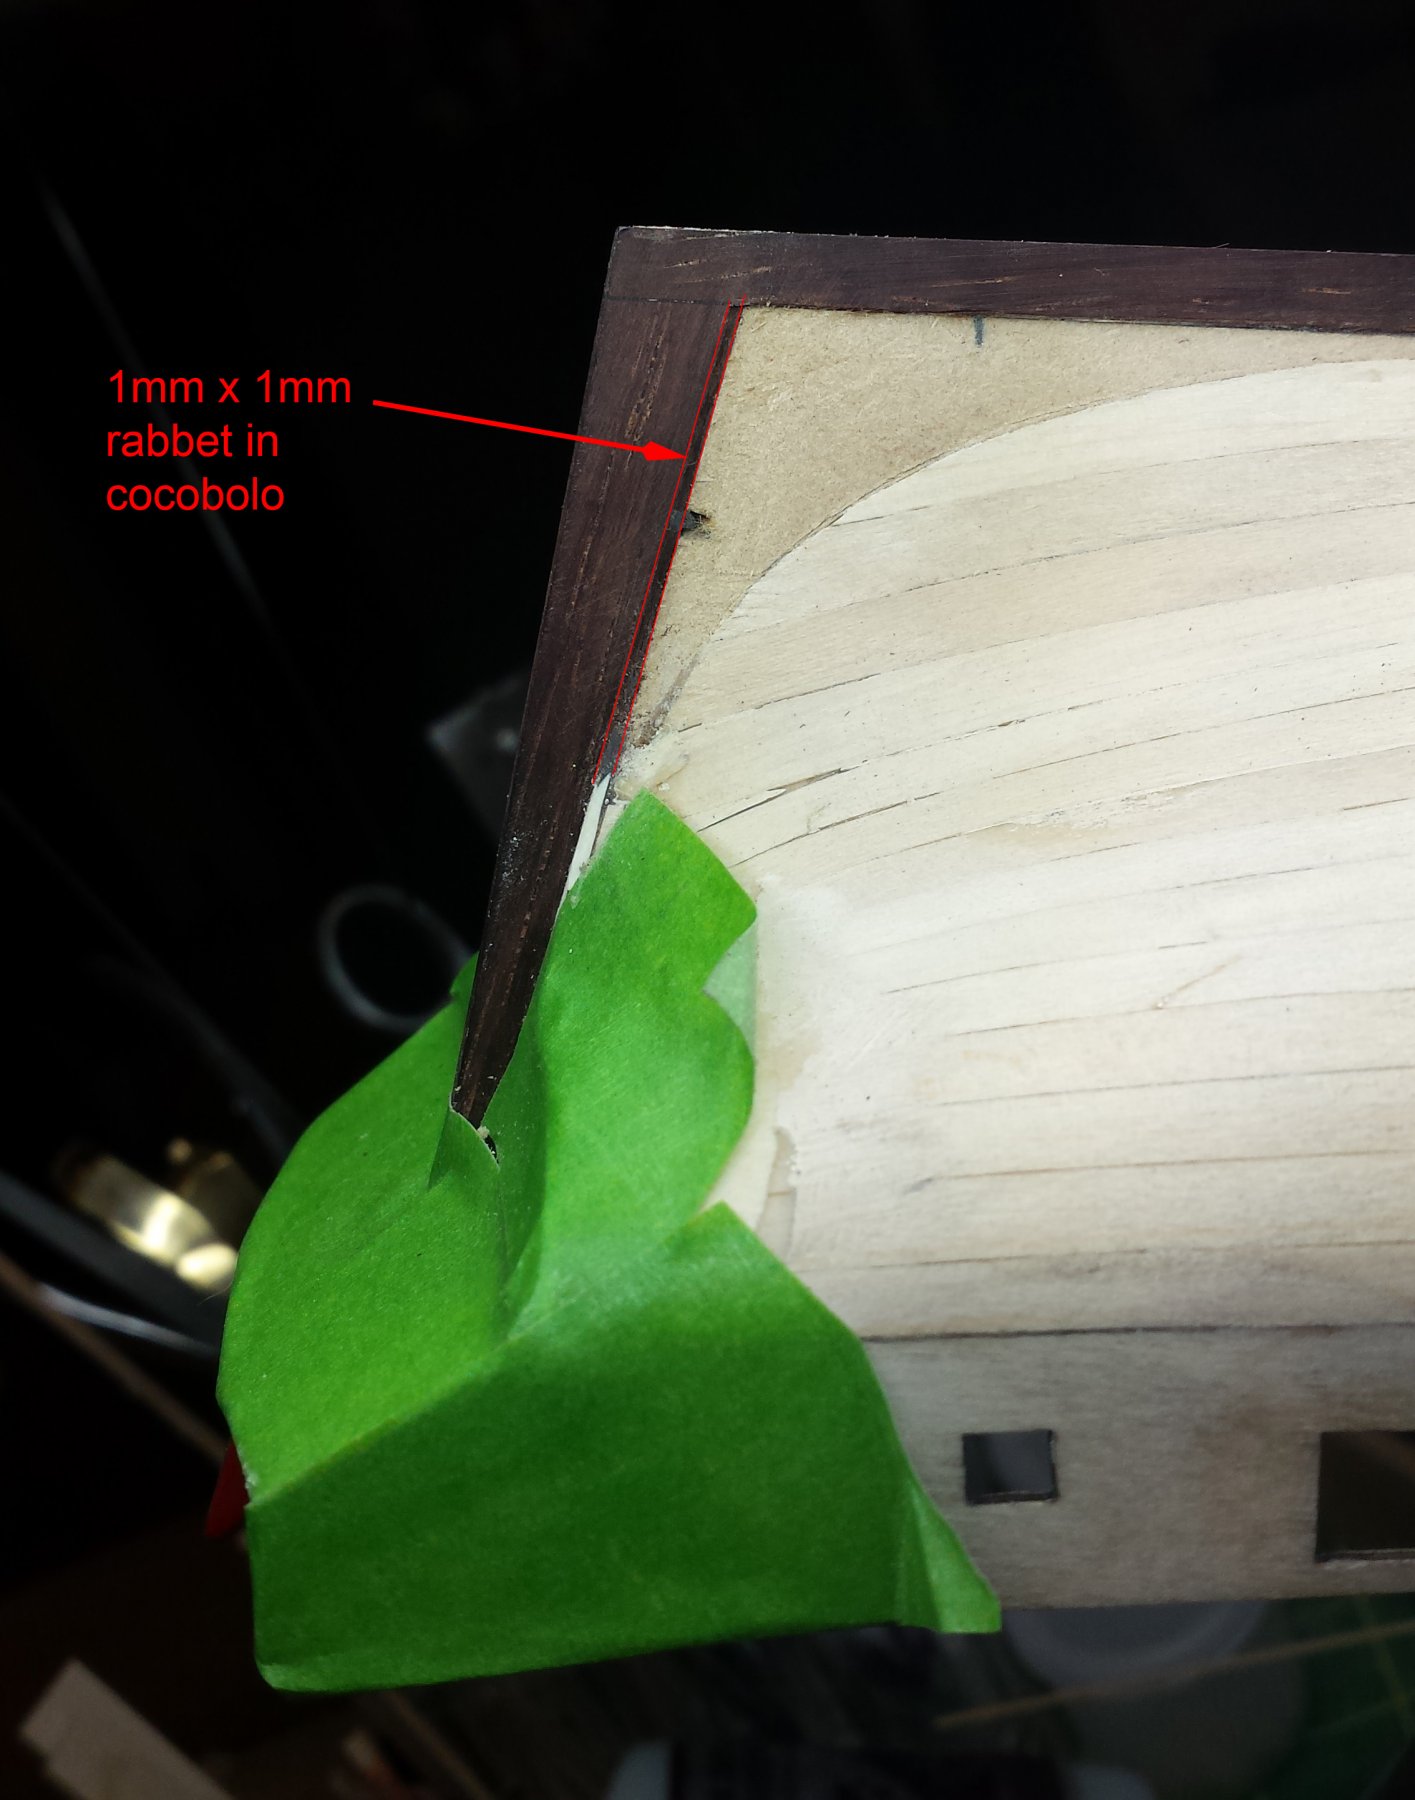
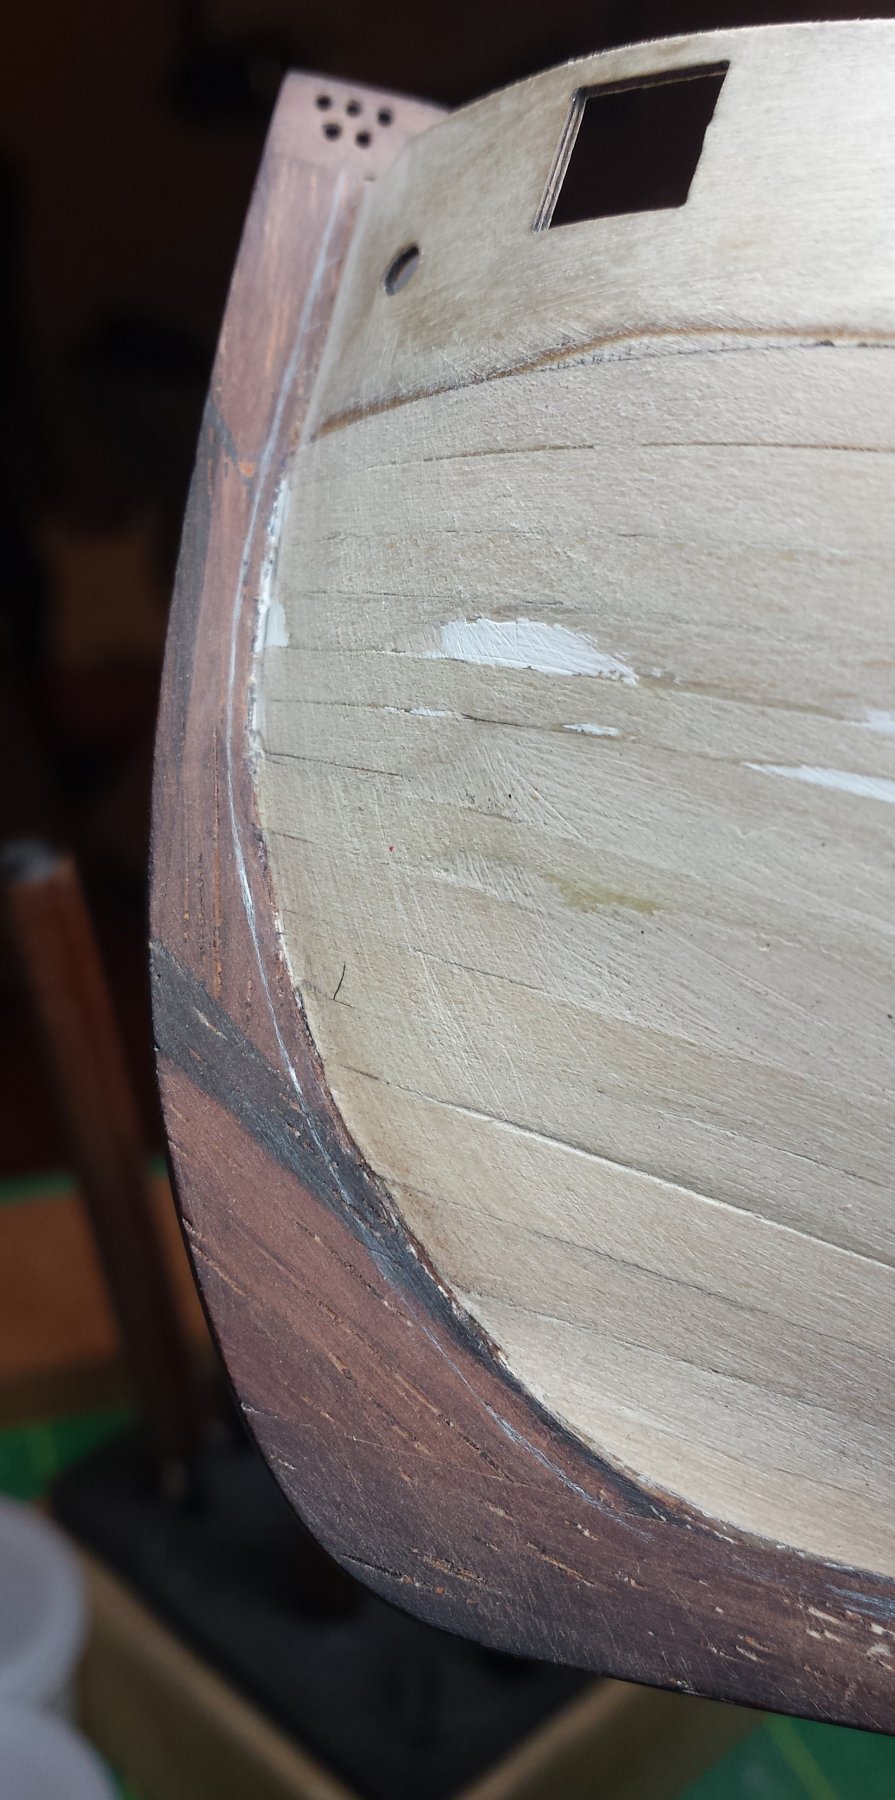
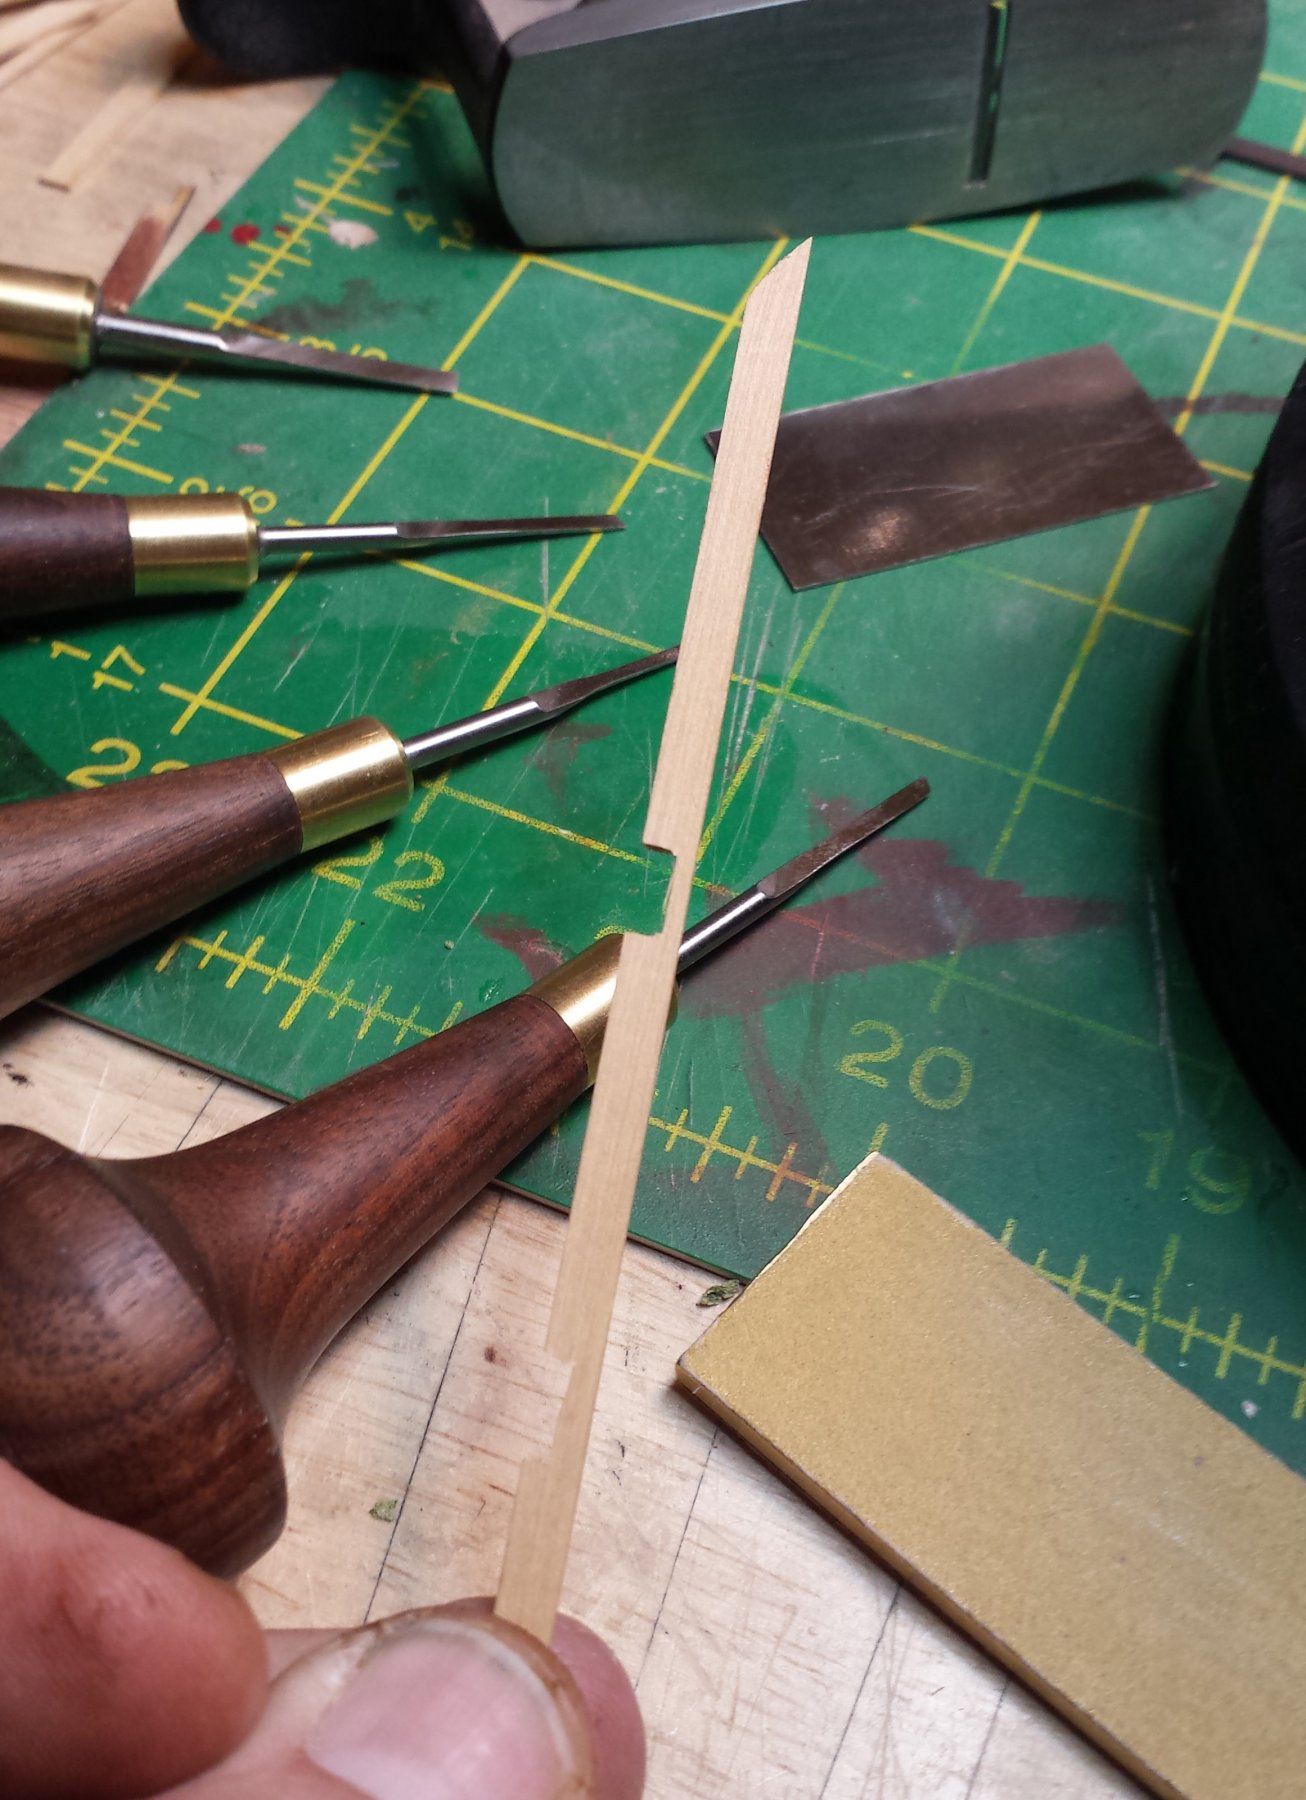
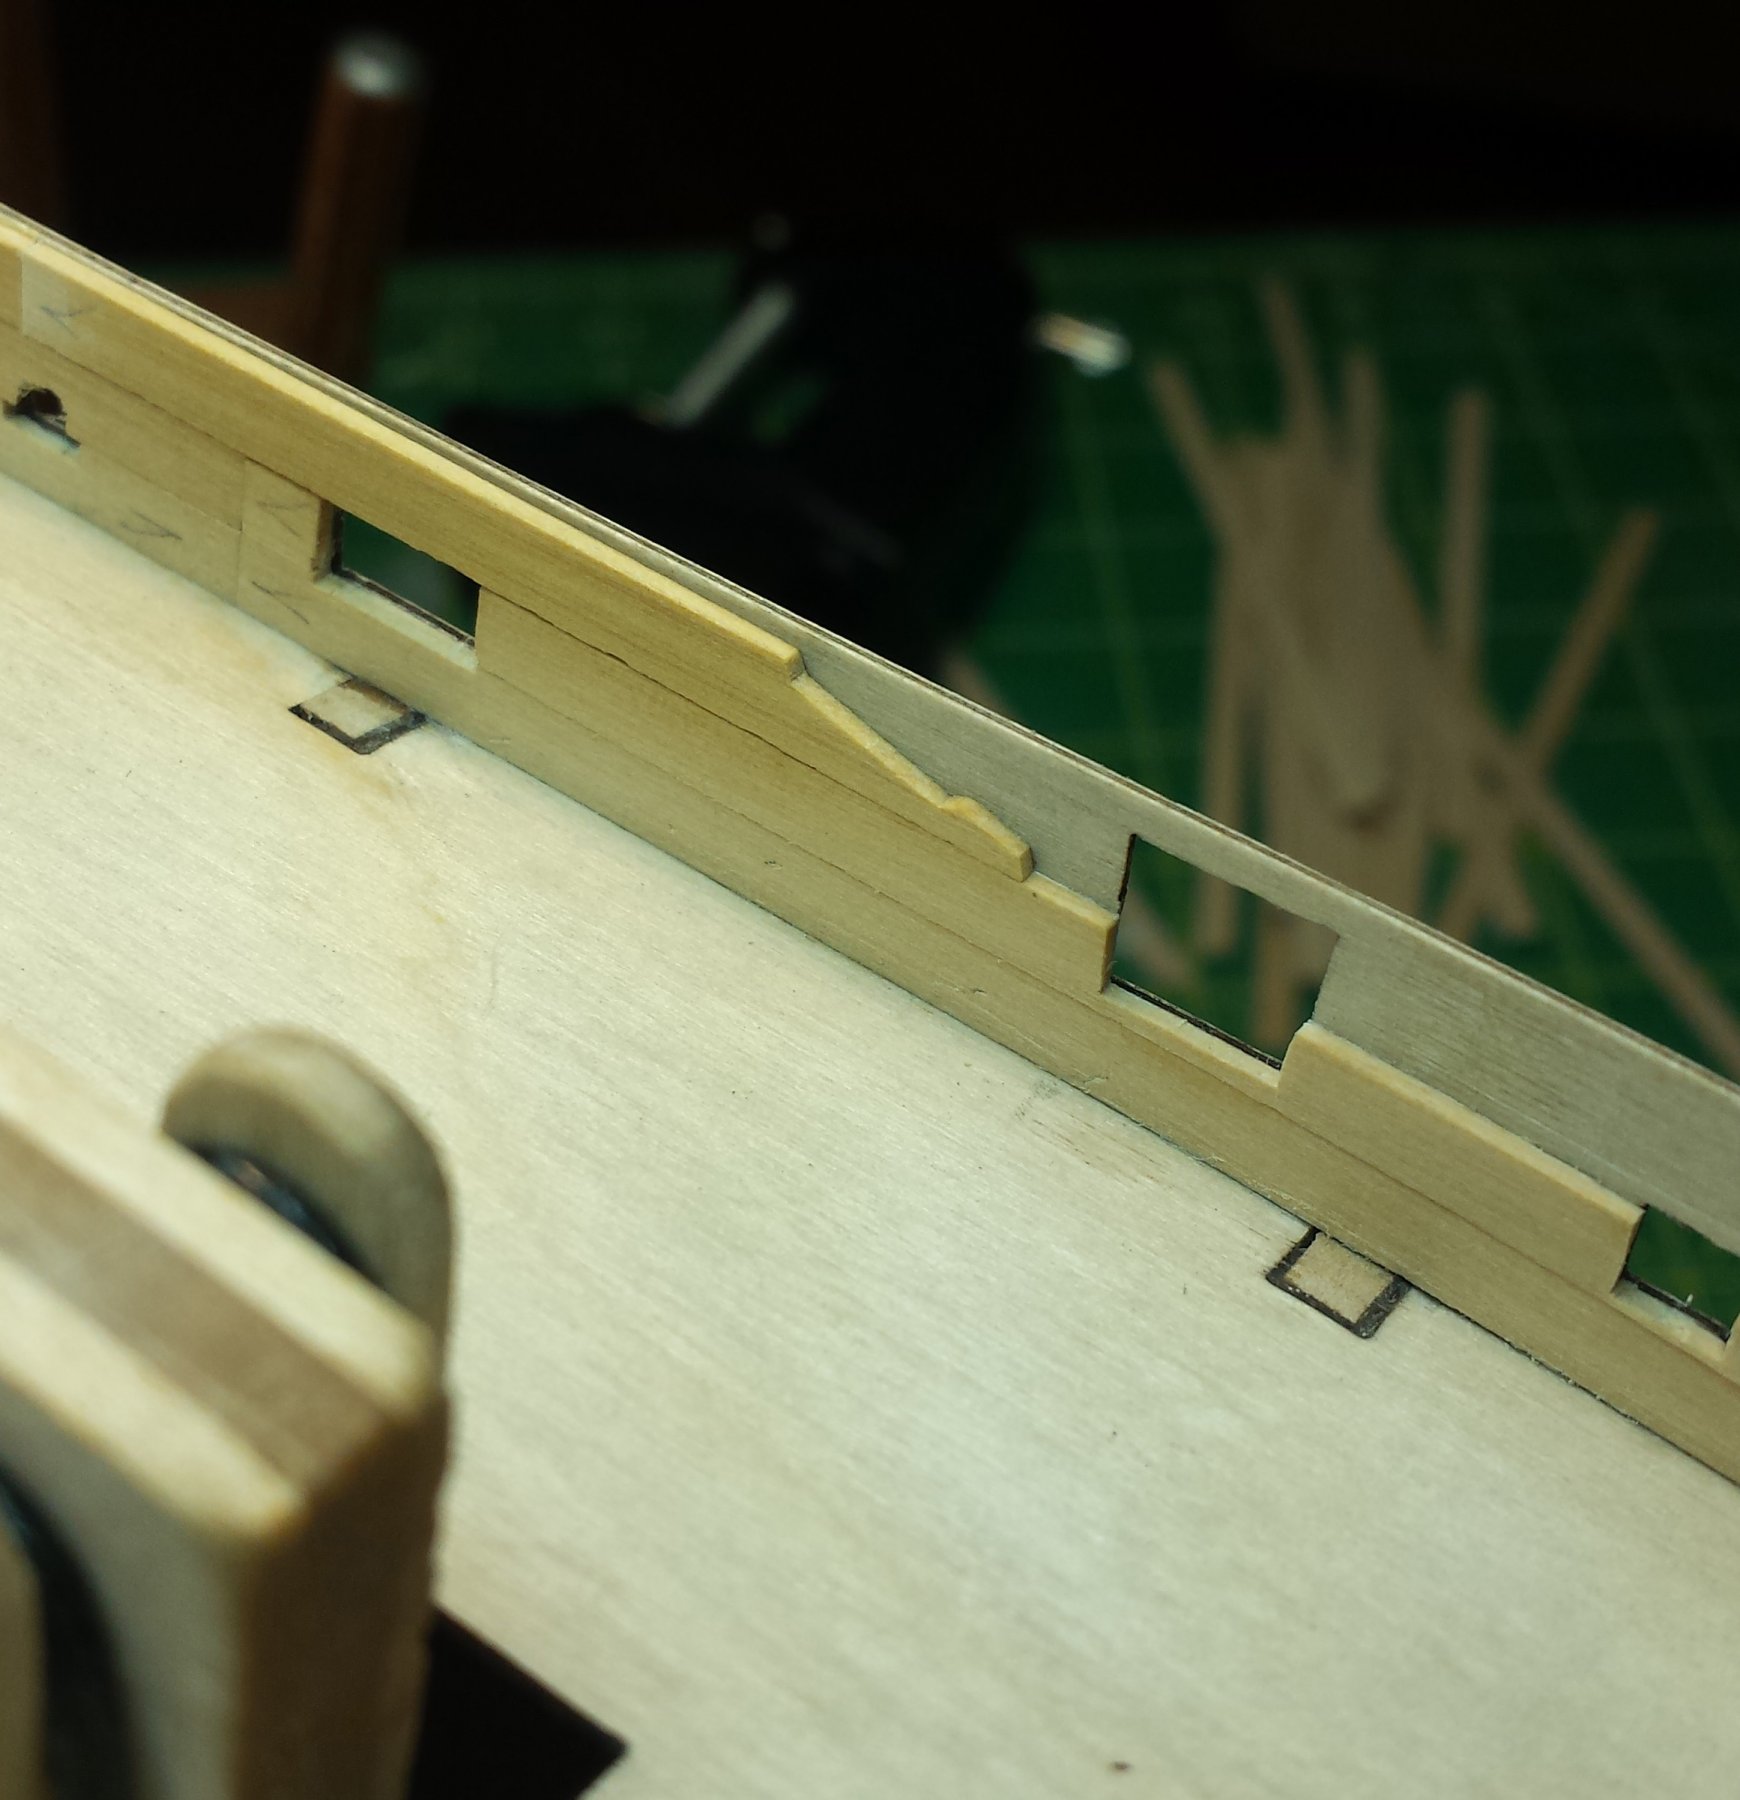
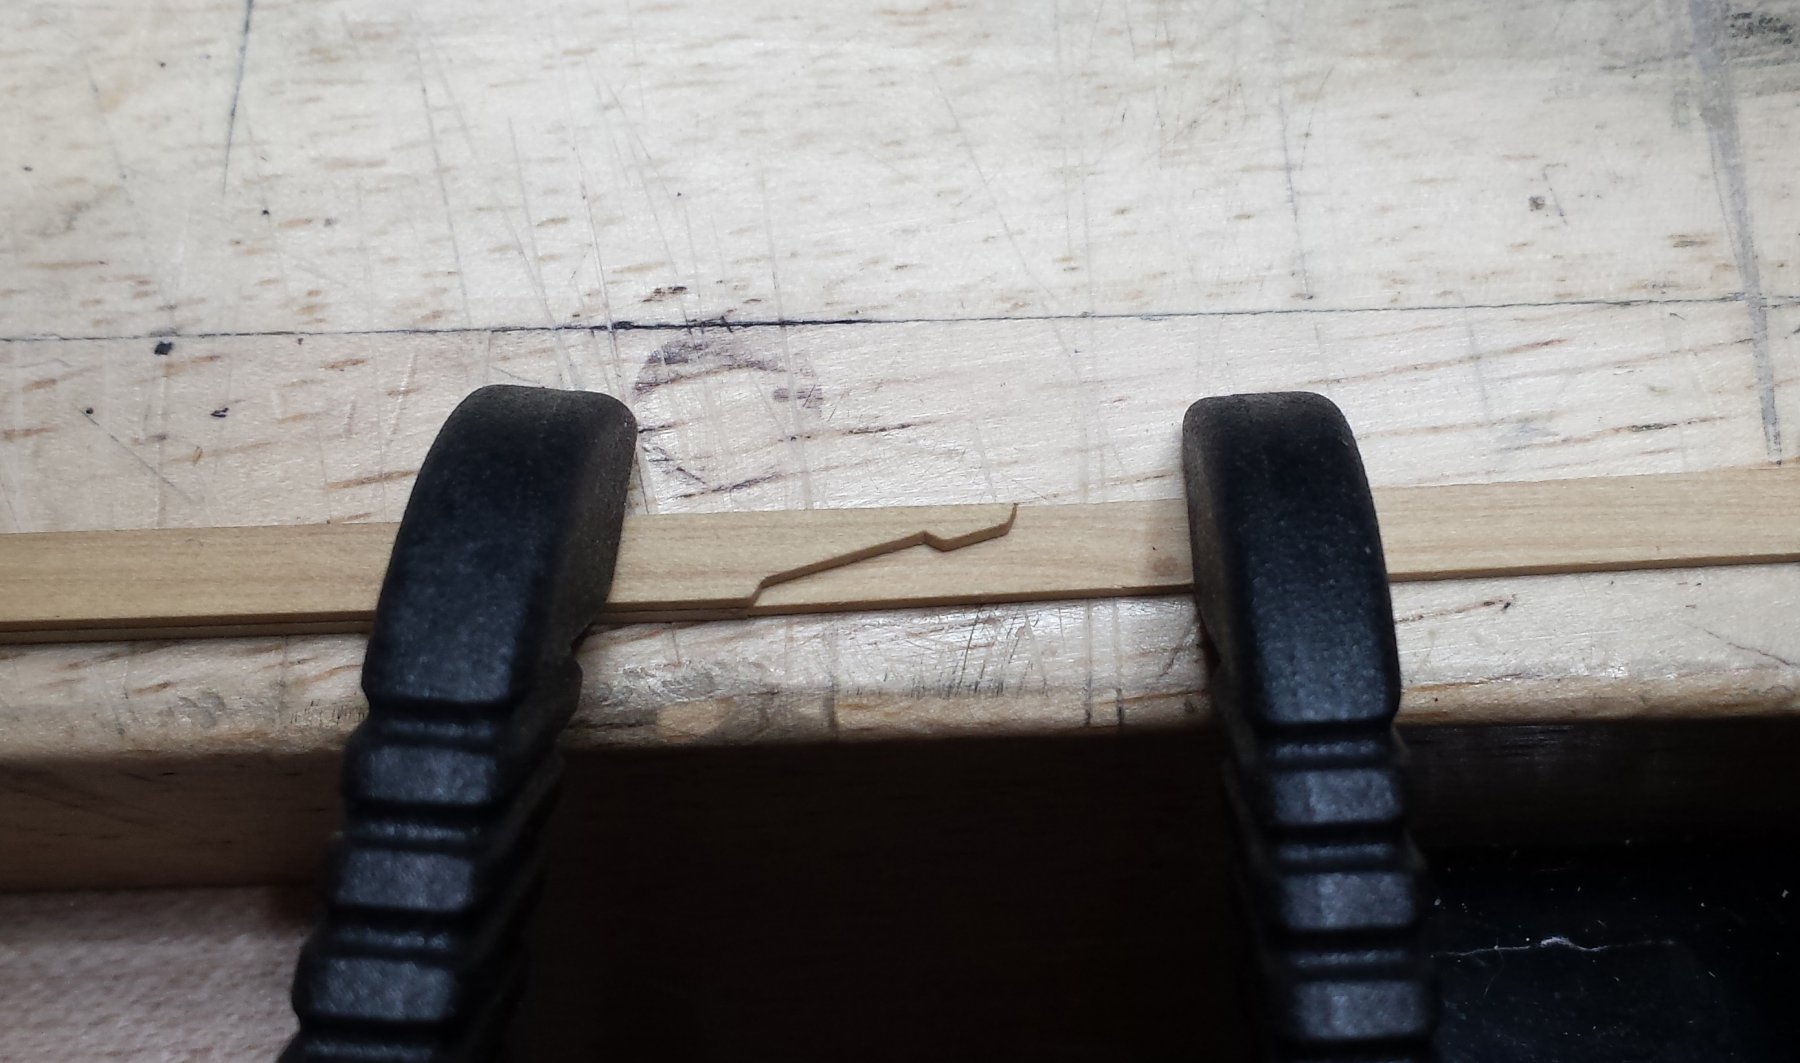
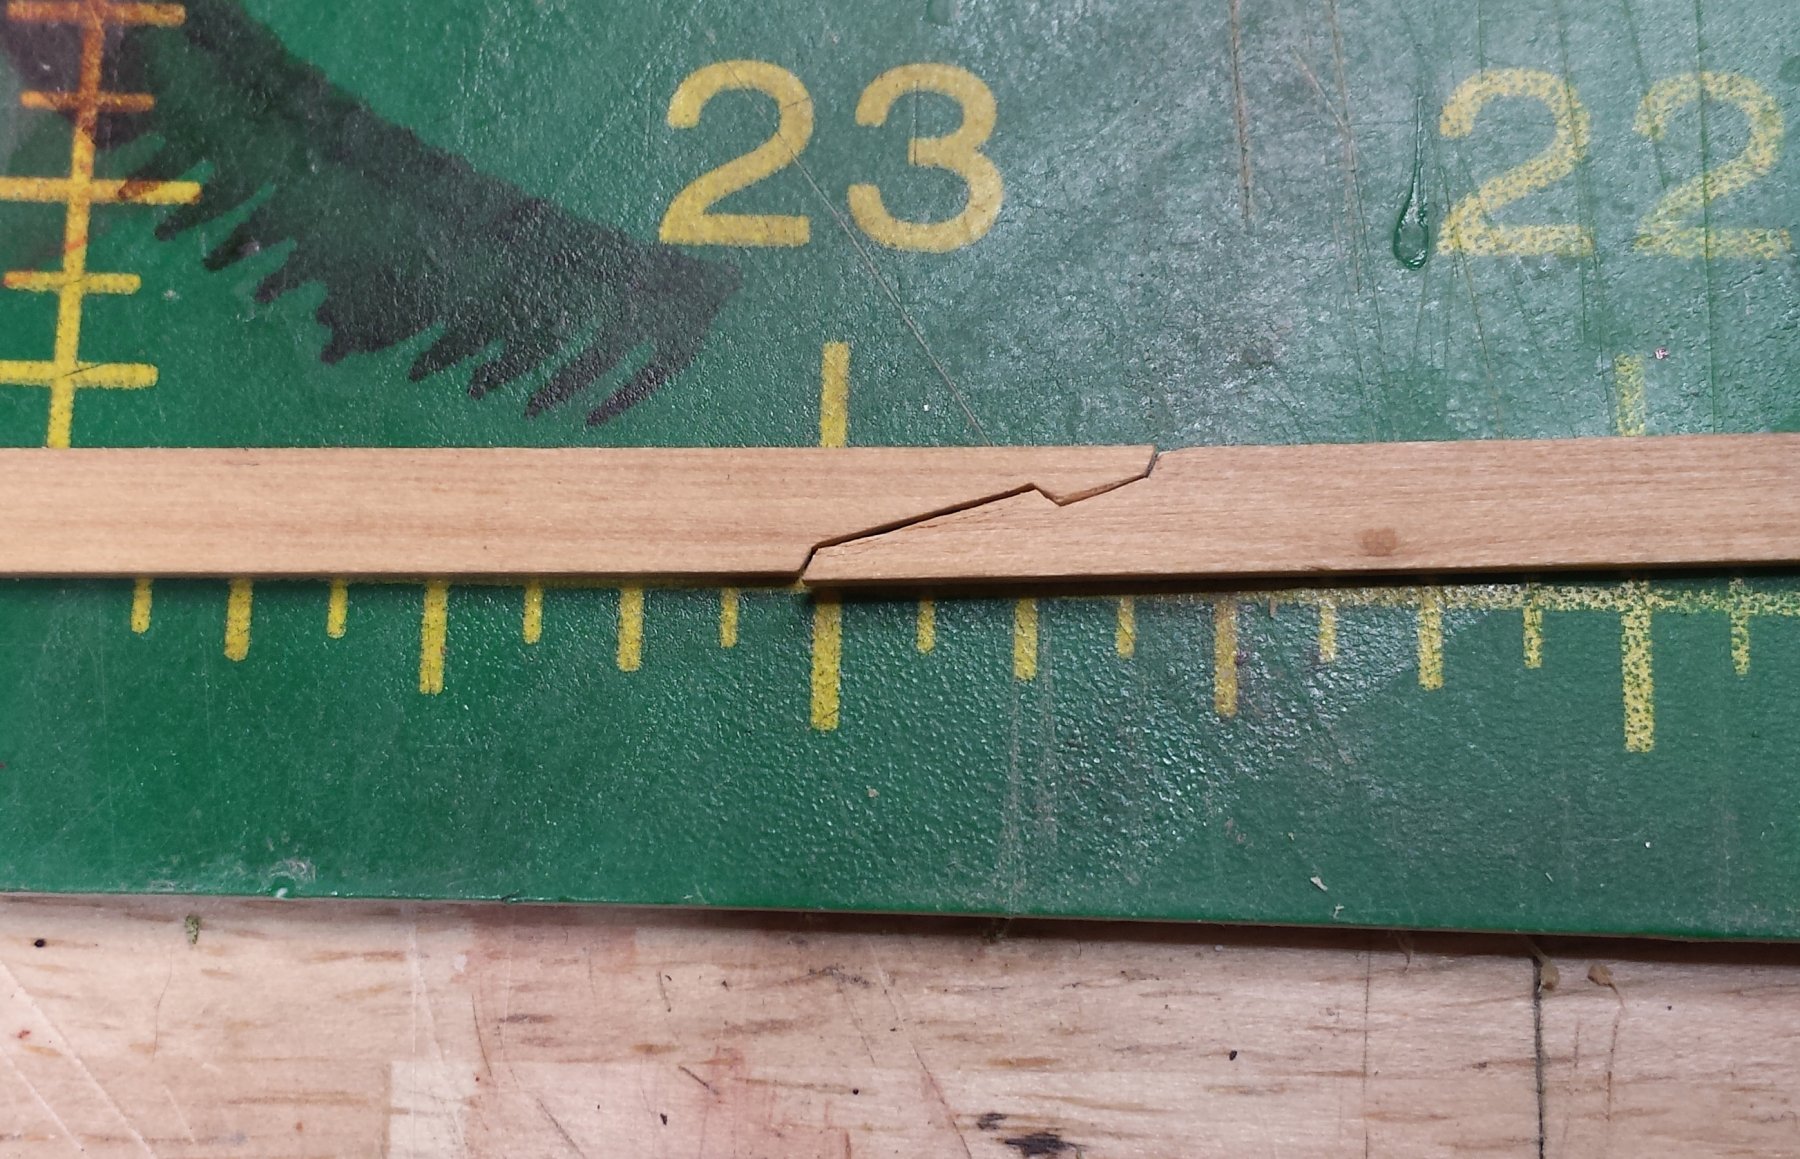
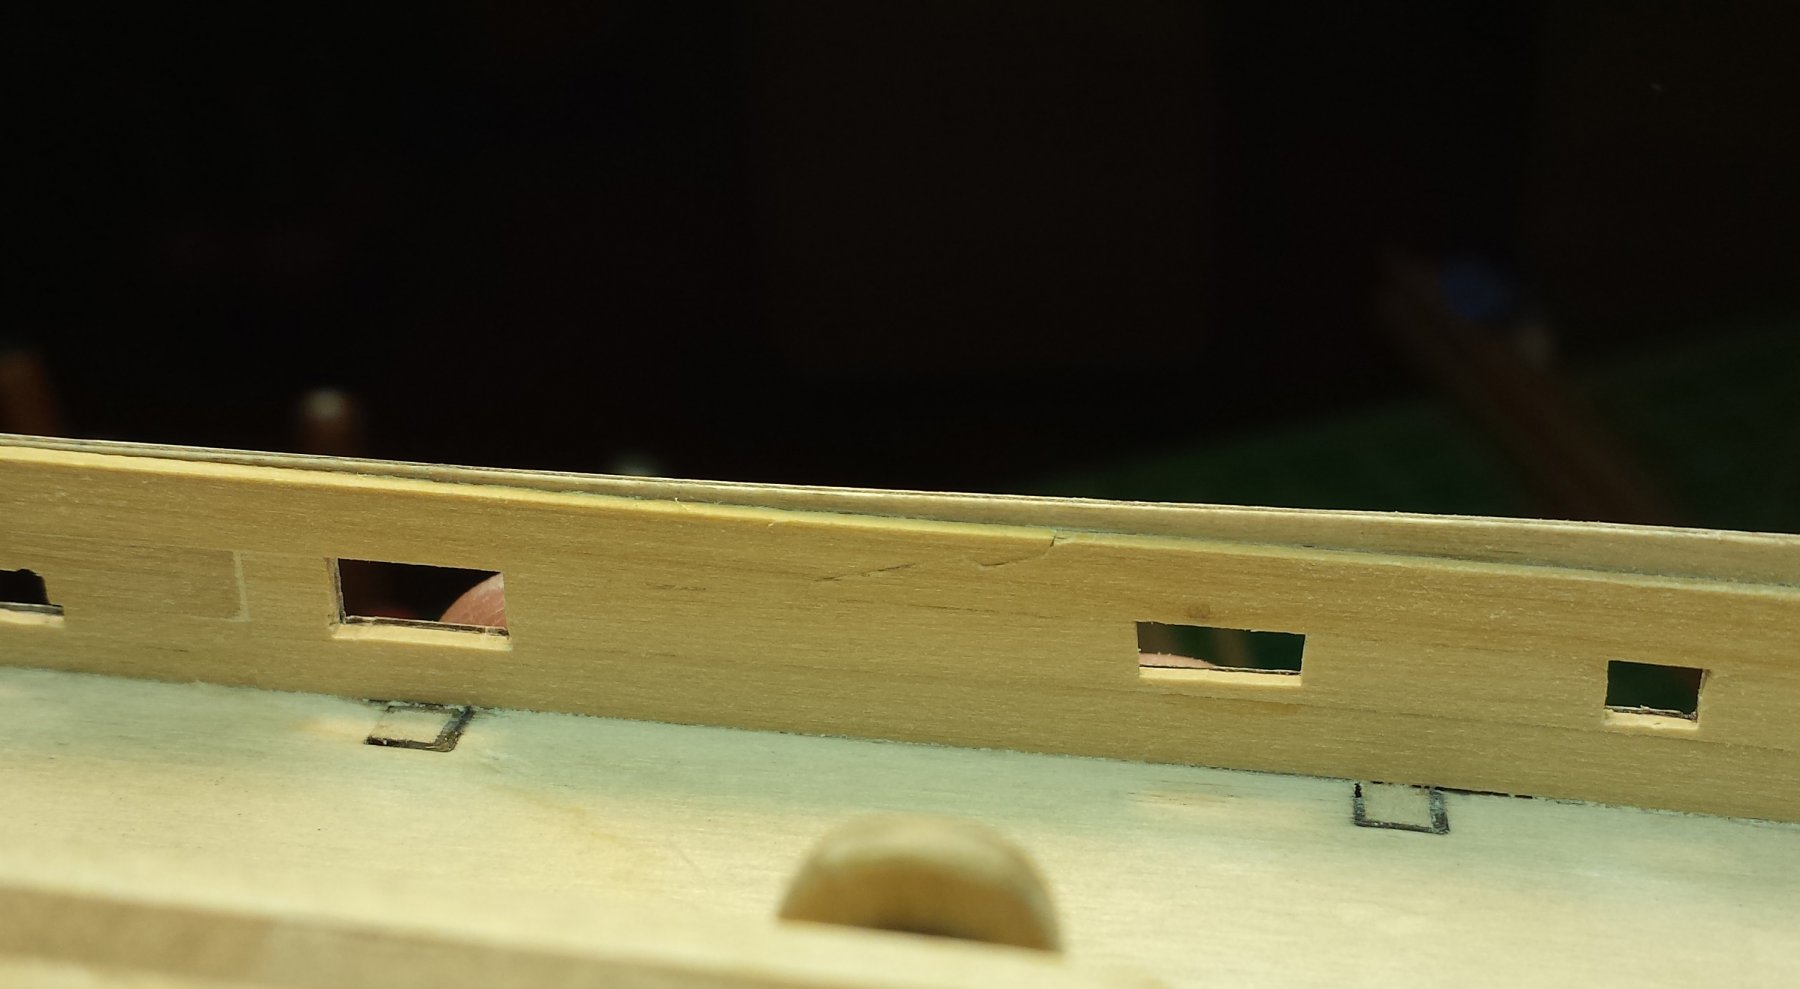
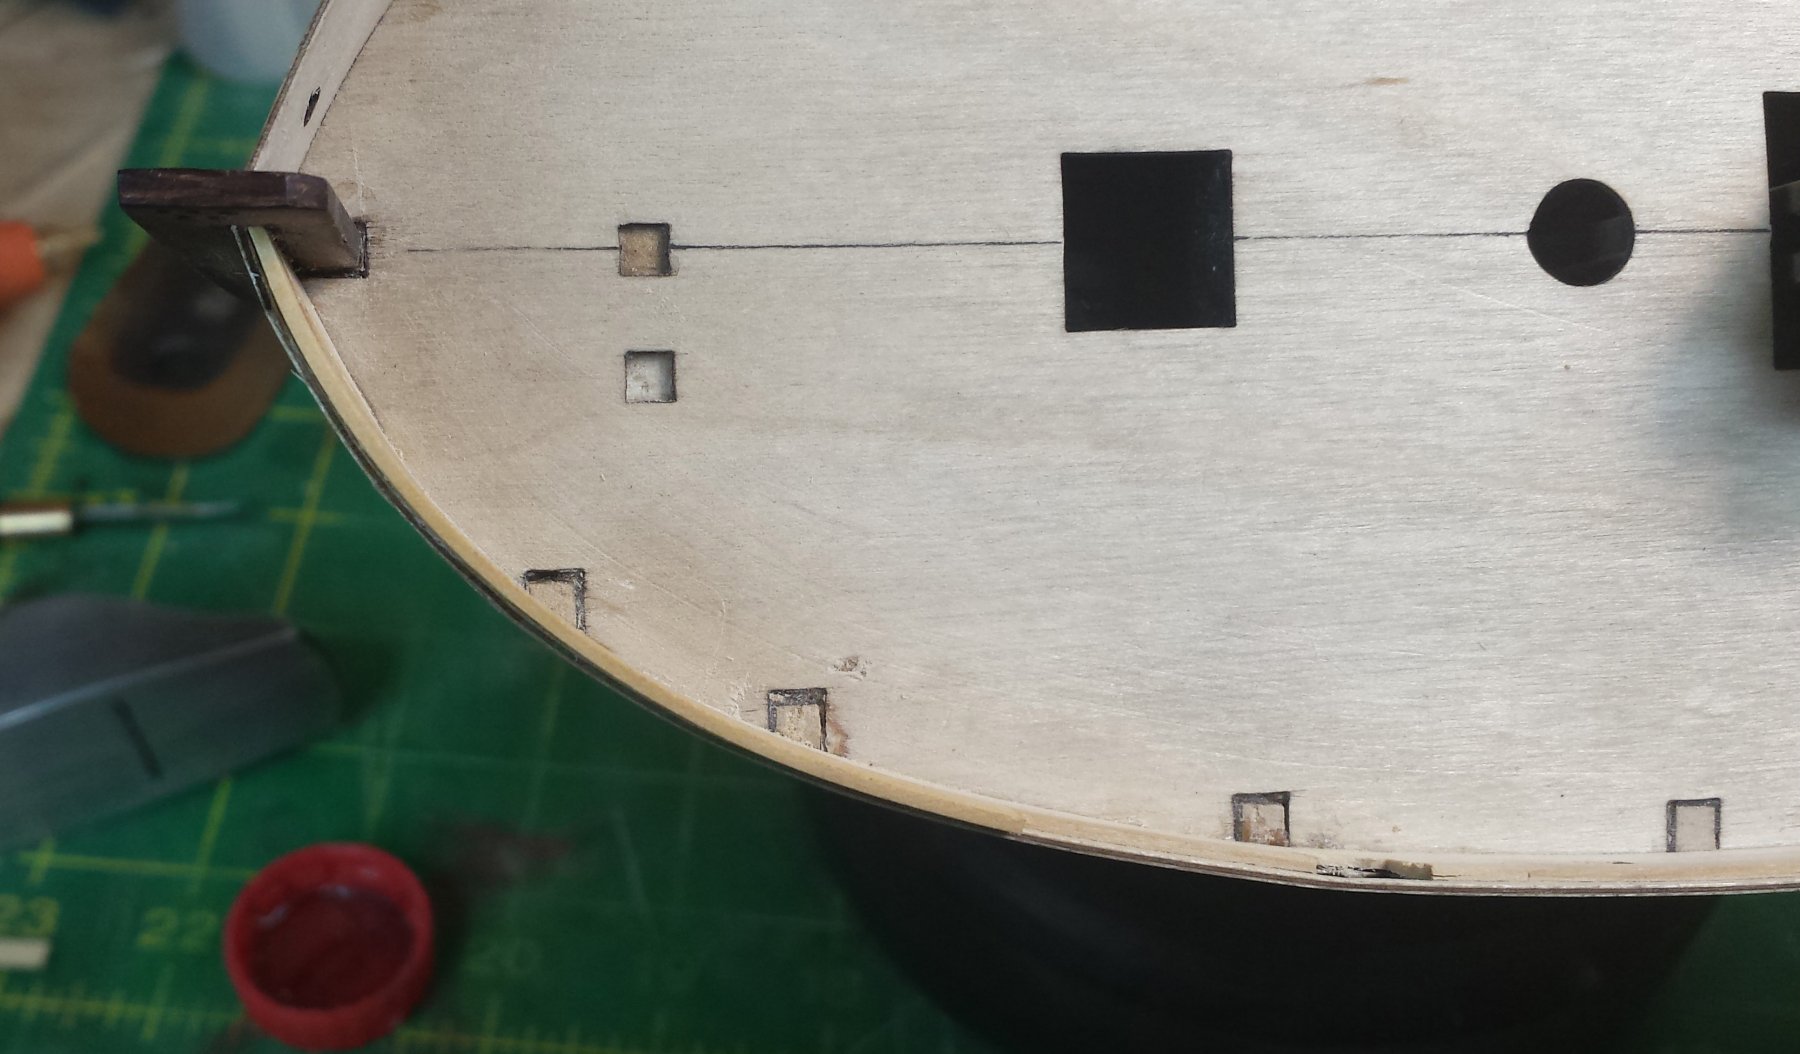
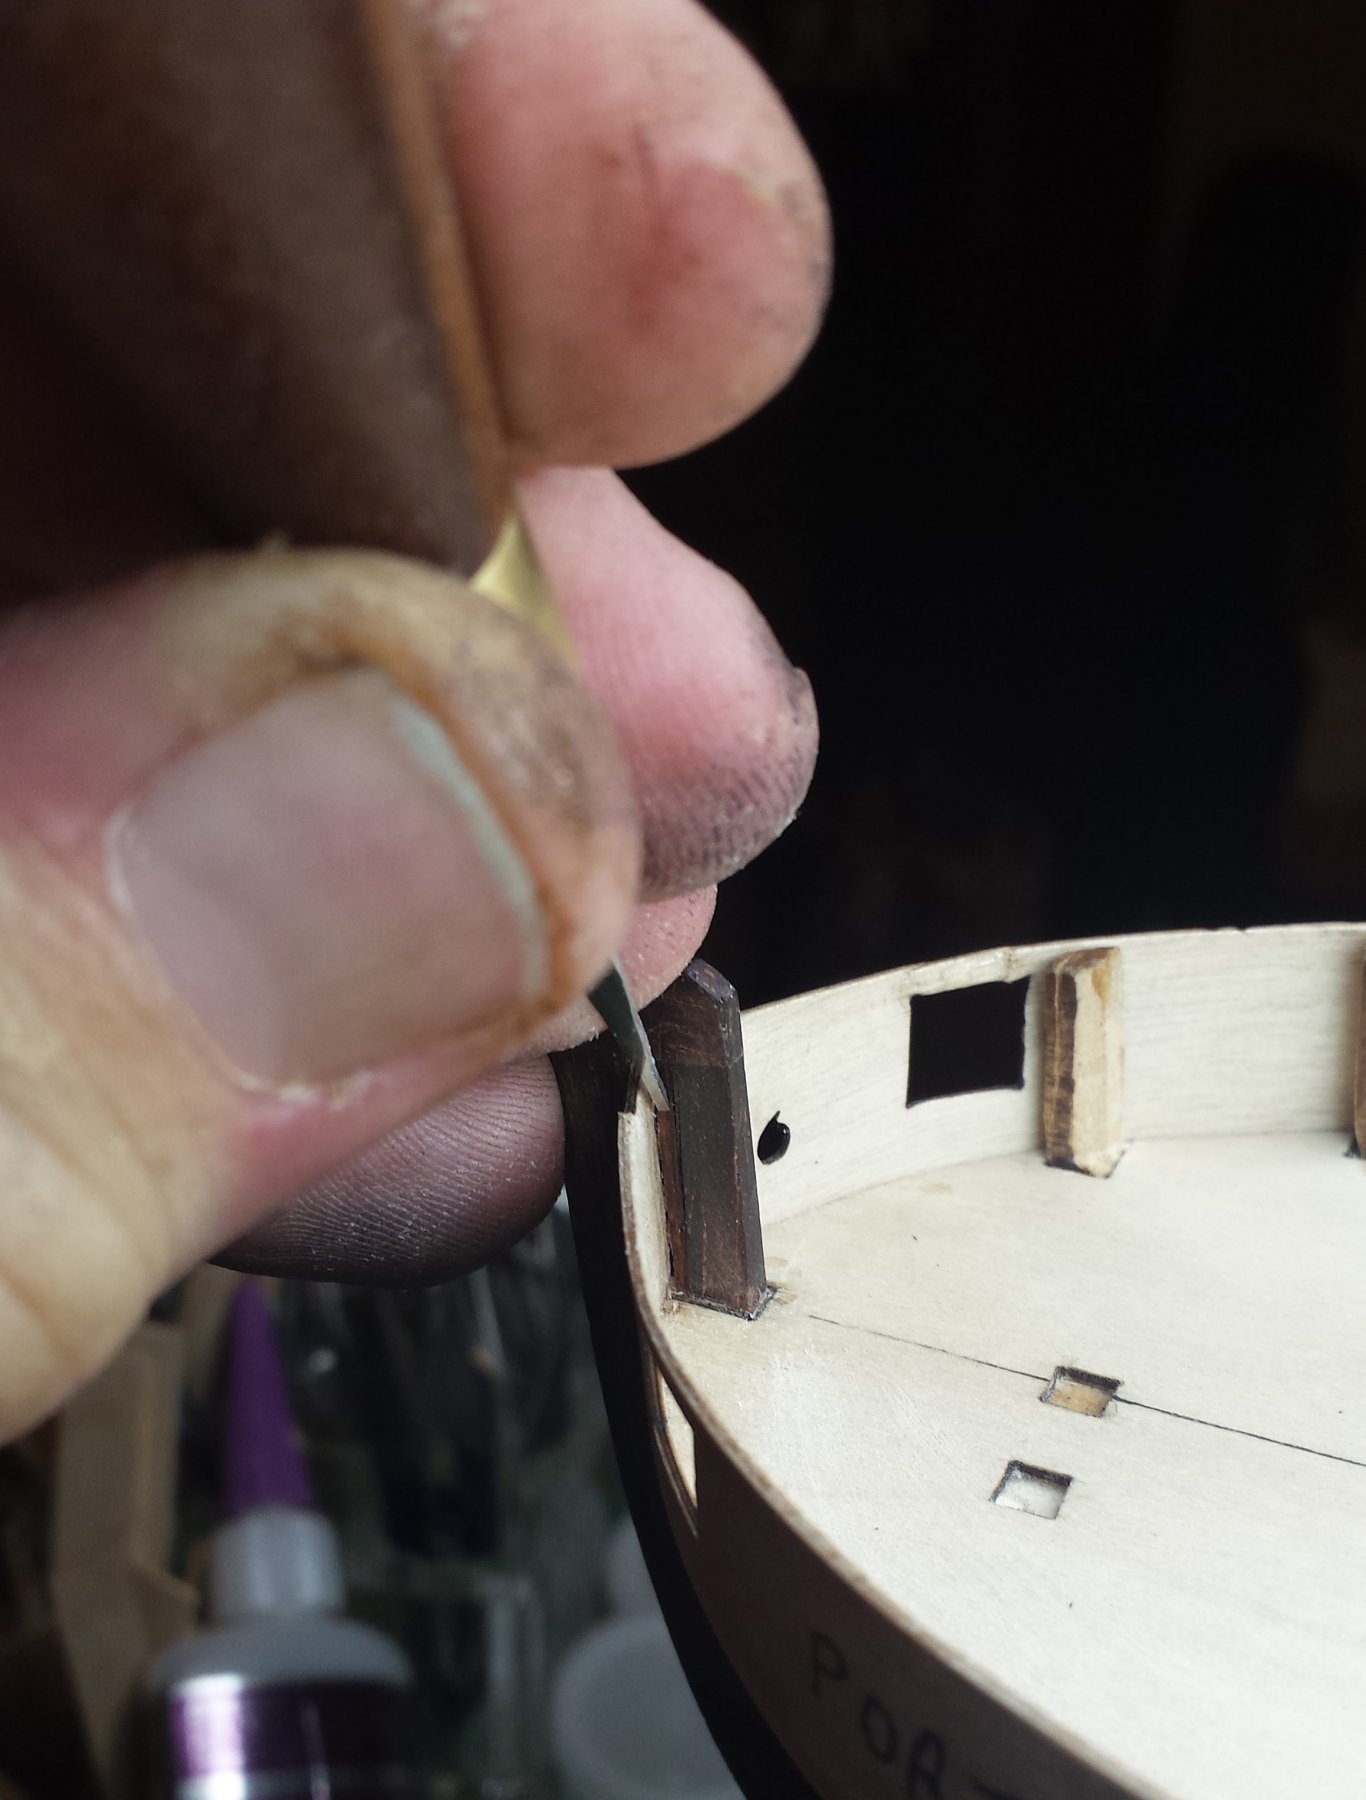
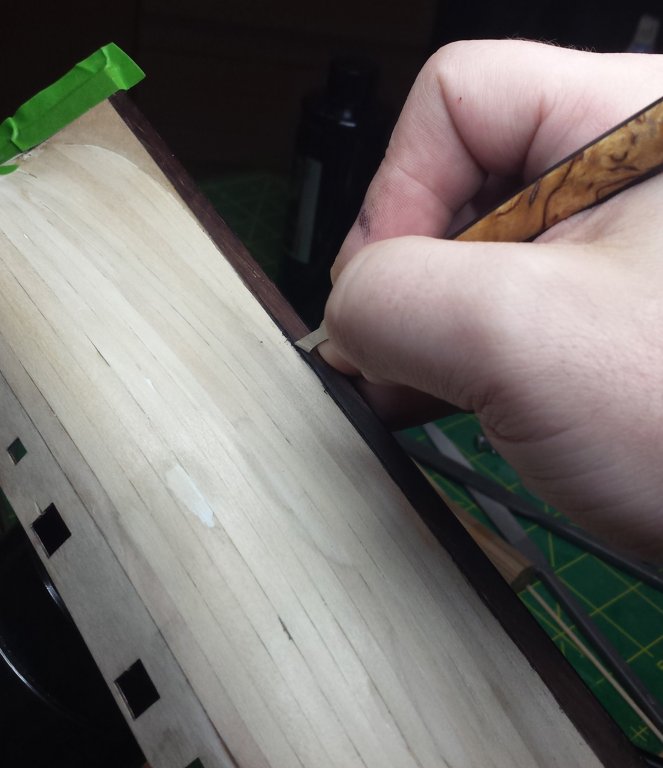
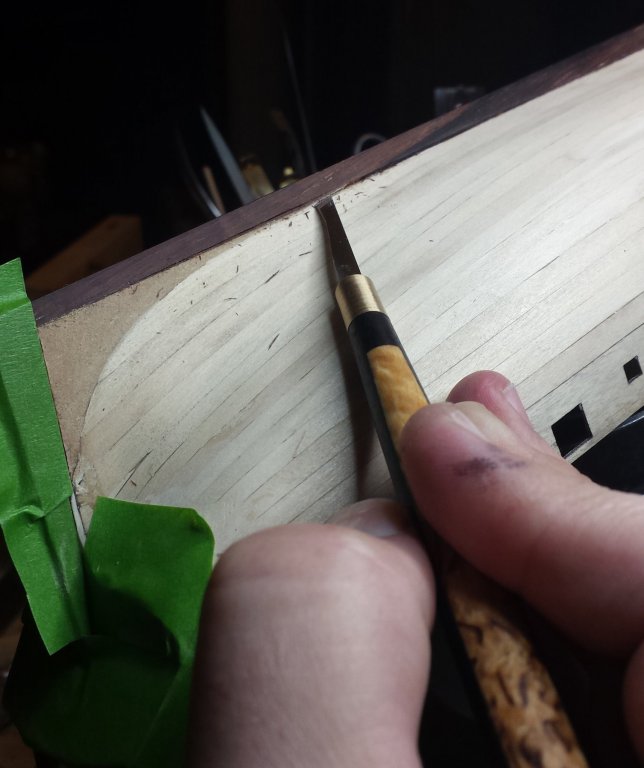
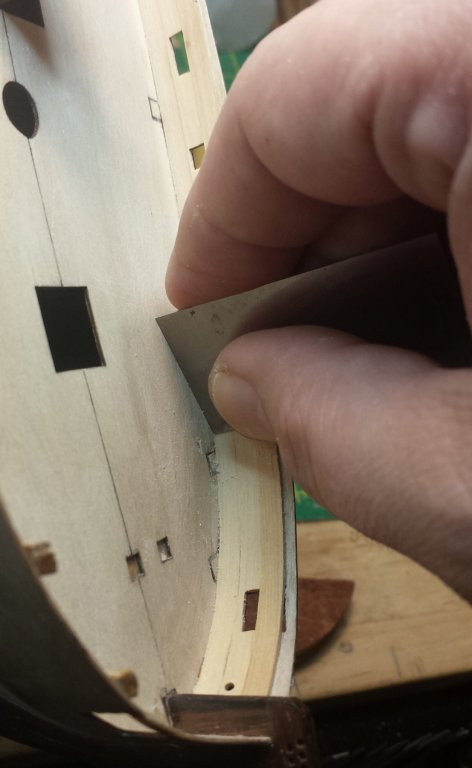
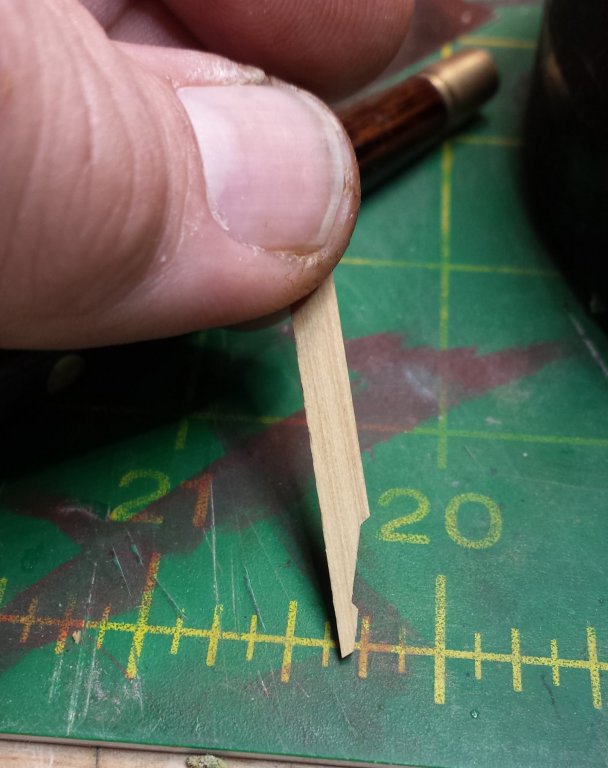
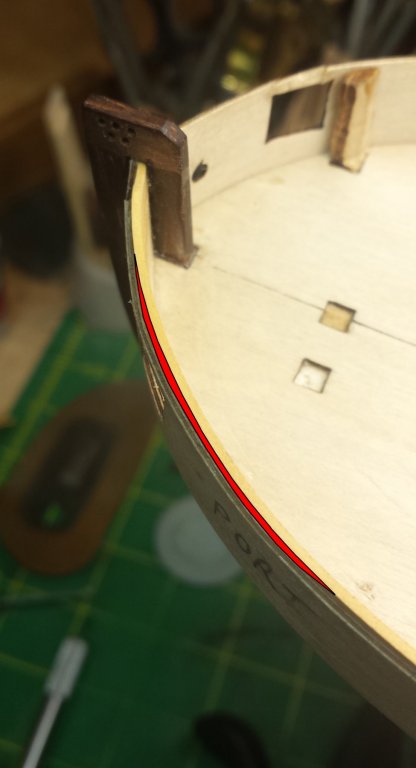
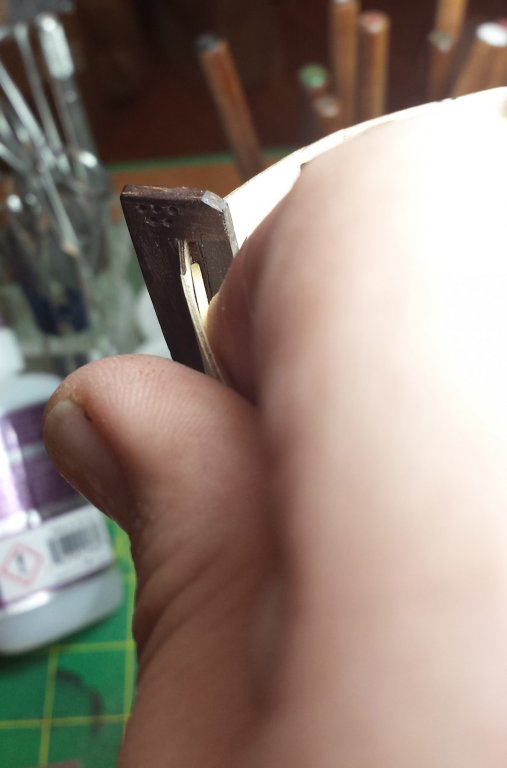
Thanks Popeye And Rick, the reason I cut the scarf joint while planking the inside of the bulkheads is because I will be doing that joggling of the deck planks. I hope Tony is still listening, he did a pretty fancy job of the planking on his. I've got a good top view of a well-done Cheerful, if nothing else I'll just copy that here. So we left off with the resolution of the Great Gunwale Debate, and BTW Rick haven't heard a peep back from Amati. While we were arguing back and forth with that, I did the port-side rabbet for the second planking. If you remember I did the first primarily with my rotary tool, this time for safety's sake I decided to use edge tools and it was a good reason to use Mikhail's tools. People shouldn't see them as carving tools, more than half the set is straight and skew chisels and I'm sure he would sell a set of just those. All of the straight and skew chisel tools are fabulous micro-joinery tools. First mark it out more carefully than the first one. Cutting the top and bottom lines with Mikhail's knife. Finishing with the same riffler I used before. This one seems specifically designed for model ship planking rabbets. All was well on the bow end. But as mentioned above, on the stern end the plans don't account for the thickness of the planking they told you to put on the transom, leaving it overhanging the rudder post where the final planking is supposed to end. So either we get a jaggy line or cut a piece of the rudder post out, I did the latter, starting with scoring the line. And then I used Mikhail's straight and skew chisels to cleanly remove the required wood, and lemme tell ya cocobolo isn't the most carving-friendly wood. Here I went back to the gunwale/bulkhead planking... what the hell are they? Both? Anyway the inner planking of the deck wall things And Rick, the answer is cut those puppies into as many pieces as possible Well more accurately, fit and mark as one plank but I rapidly concluded that particularly working with a hard wood like boxwood that I would want to glue short pieces if possible and remove as much waste as possible before applying pieces to the model. Here is another demonstration of my new tools, cutting a rabbet for inner bulkhead planking into a stem piece that's already installed. I also want to know why, within ten minutes of sitting down in the shop area, my fingers always look like I've been fighting in Stalingrad for three weeks. And successfully test-fitting a plank. As mentioned, for practice I cut a scarf joint in one of the strakes, just eyeballing the first half. Looks more or less right. Clamp it and the other half down and mark it with a knife, pencils are way too fat for this. Cut to the marked line, and theoretically it should be dead on. Overall view of progress. I am using my scraper to basically level each plank as it's glued on. Or you could wait to the end and try to level four boxwood planks at the same time. Your call Rick was right, you do get some good ripple removal from the inner planking. But like everything there are limits and I'm still glad I spent time getting them as close as possible to right back when I did the original bending. And as noted, it doesn't fix everything. This is one pernicious ripple that doesn't want to go away, highlighted in red. I played around with clamping before glue, and glad I did as it had to be placed in exactly the right place to correct close the gap. And now we have a completely fair line and no gaps and without any need for sanding or filling to get it that way, that makes me happy. Obviously I'm leaving the openings somewhat rough until the outer planking goes on and we can finalize them. This is the stern area done, and I can only see one out of four glue lines and the fit with the fashion pieces looks good so overall happy. And full view with port side inner planking done. The very top strake ended up with a visible line most of the way, not sure why, it looked as good as the rest dry fitting. But that's maybe a half star reduction, overall I'm pleased with the results, although this is as easy as planking gets. Proof will be in how I do with the bending and twisting of the outer planking.


- 714 replies
-
- 12
-
-
- lady nelson
- victory models
- (and 1 more)
-
Ditto I think the skylight, galley vent, and all the trimmings look great. Stick some clear acetate inside for windows and paint that puppy.
- 453 replies
-
- 6
-
-
- thermopylae
- sergal
- (and 1 more)
-
In my 20s I did a 1/32 F-4J Phantom with every single knob and switch in both cockpits, my normal eye focal distance was about 3" and I could do that work without any magnifiers. Yeah I can't do that anymore I finished one rabbet, only minor annoyance is that this is one of the places they act like planking has zero thickness. You have the counter bulkhead aligned with rudder post, you plank that surface and now it isn't aligned with the rudder post and your final planking either is going to have a jag in length or you have to cut 1mm away of the rudder post, which I did. It's not easy to cut a perfectly square 1mm piece out of the edge of cocobolo, thank god for Mikhail's new chisels. Then working on inside planking, probably finish that tomorrow. Have been taking longer than was needed since these will be painted, providing good opportunity to experiment with boxwood and having butt joints and for no particular reason other than practice for the future I even cut a fancy scarf between two pieces. I can see why people like boxwood for this as it's hard but not too hard, and can have nice detail and crisp lines. Only downside I see so far is it blows out very easily, going to have to really pay attention to that. Will post some of the pics tomorrow probably.
- 714 replies
-
- 2
-
-
- lady nelson
- victory models
- (and 1 more)
-
More tools - Luthier, jeweler, fly-tying
vossiewulf replied to vossiewulf's topic in Modeling tools and Workshop Equipment
Welcome Michael. However the one I have seems fully hardened and it would seem to need to be, so you'd need to be able to heat treat or have someone do it for you. Also if you want some special shapes, contact Ron Hock at Hock Tools, he will usually do things like this for what I consider very reasonable prices (like my knife blade was $20). -
Make sure you look at existing tools - remember people have been making strips for inlay work for a few hundred years. Lie-Nielsen has a traditional inlay strip cutter and a thicknesser. Lie-Nielsen inlay tools Japan Woodworker has a traditional Japanese inlay strip cutter as well:
-
Now we just need 150 guys who are 3" tall and equipped with tiny adzes.
-
Fokker Dr.I by Torbogdan - FINISHED - Model Airways
vossiewulf replied to Torbogdan's topic in Non-ship/categorised builds
I forgot to reply to last message and congratulate you on getting the parts finally. The wings are looking great, Anthony himself would nod approval You're making great progress, hopefully you can continue with the fuselage, except for alignment issues it should be easier than the wings. -
Here we go.. New modeler; new member.
vossiewulf replied to Achu's topic in New member Introductions
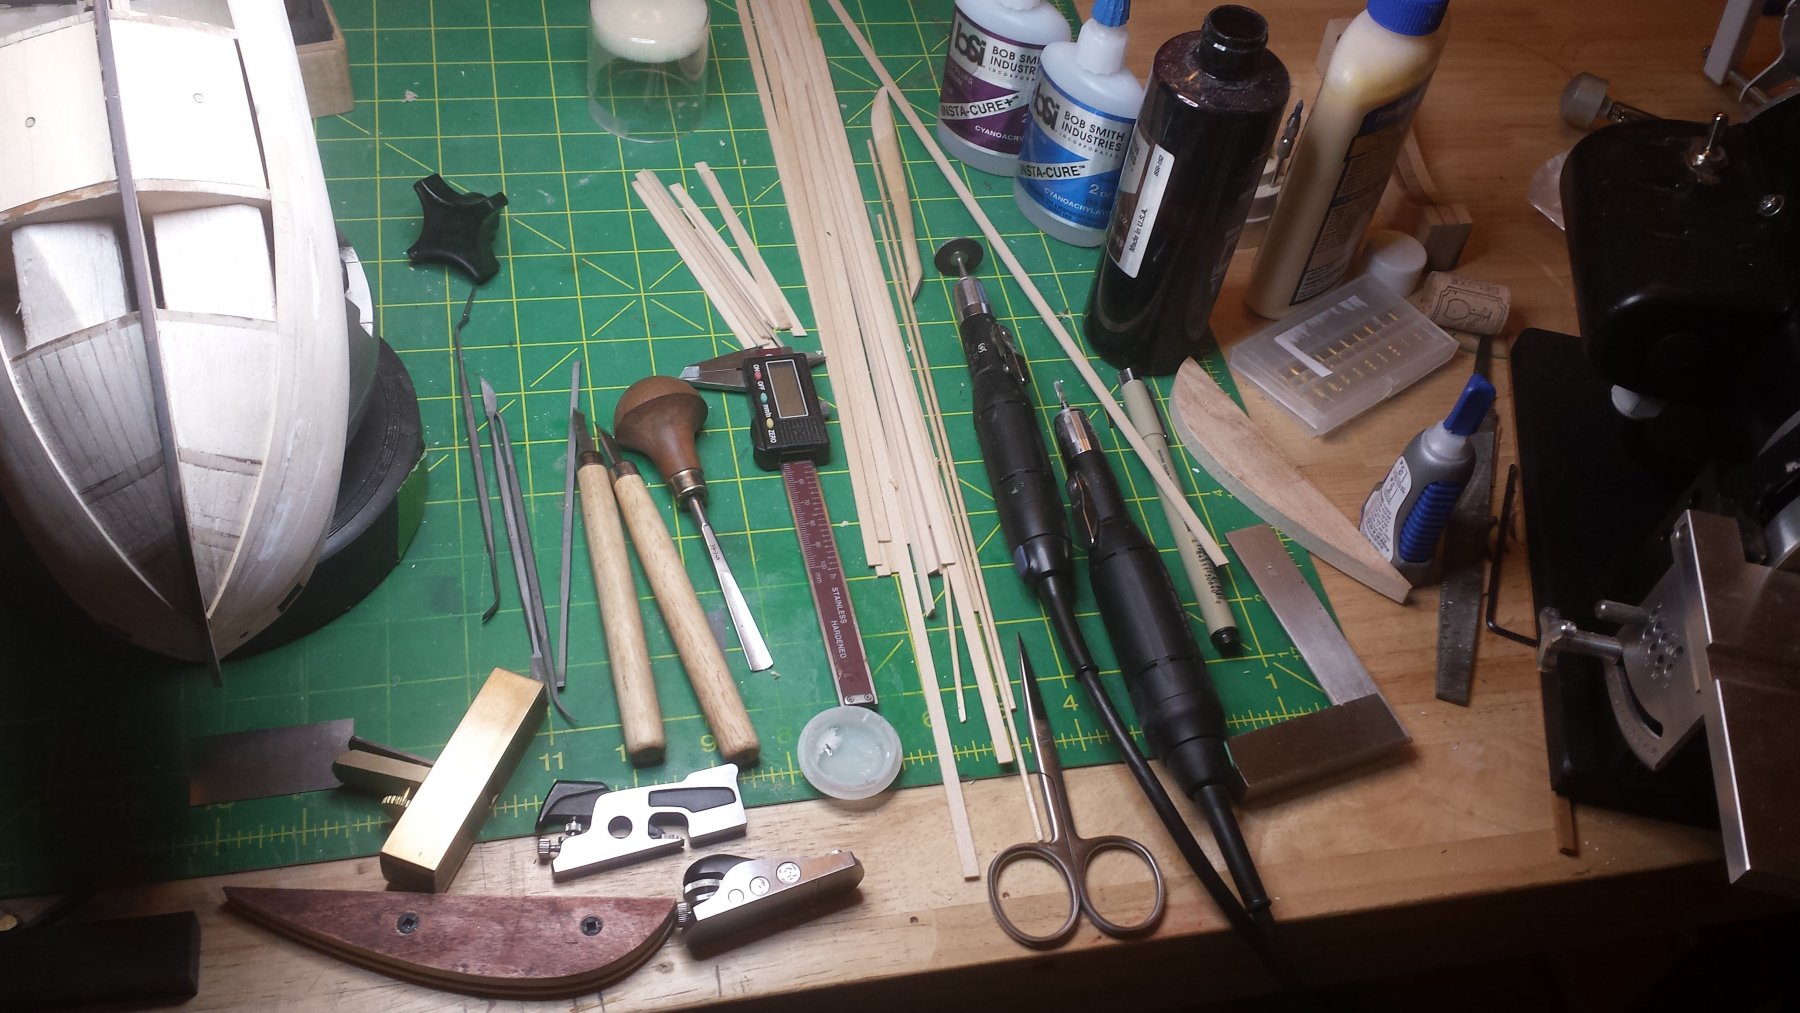
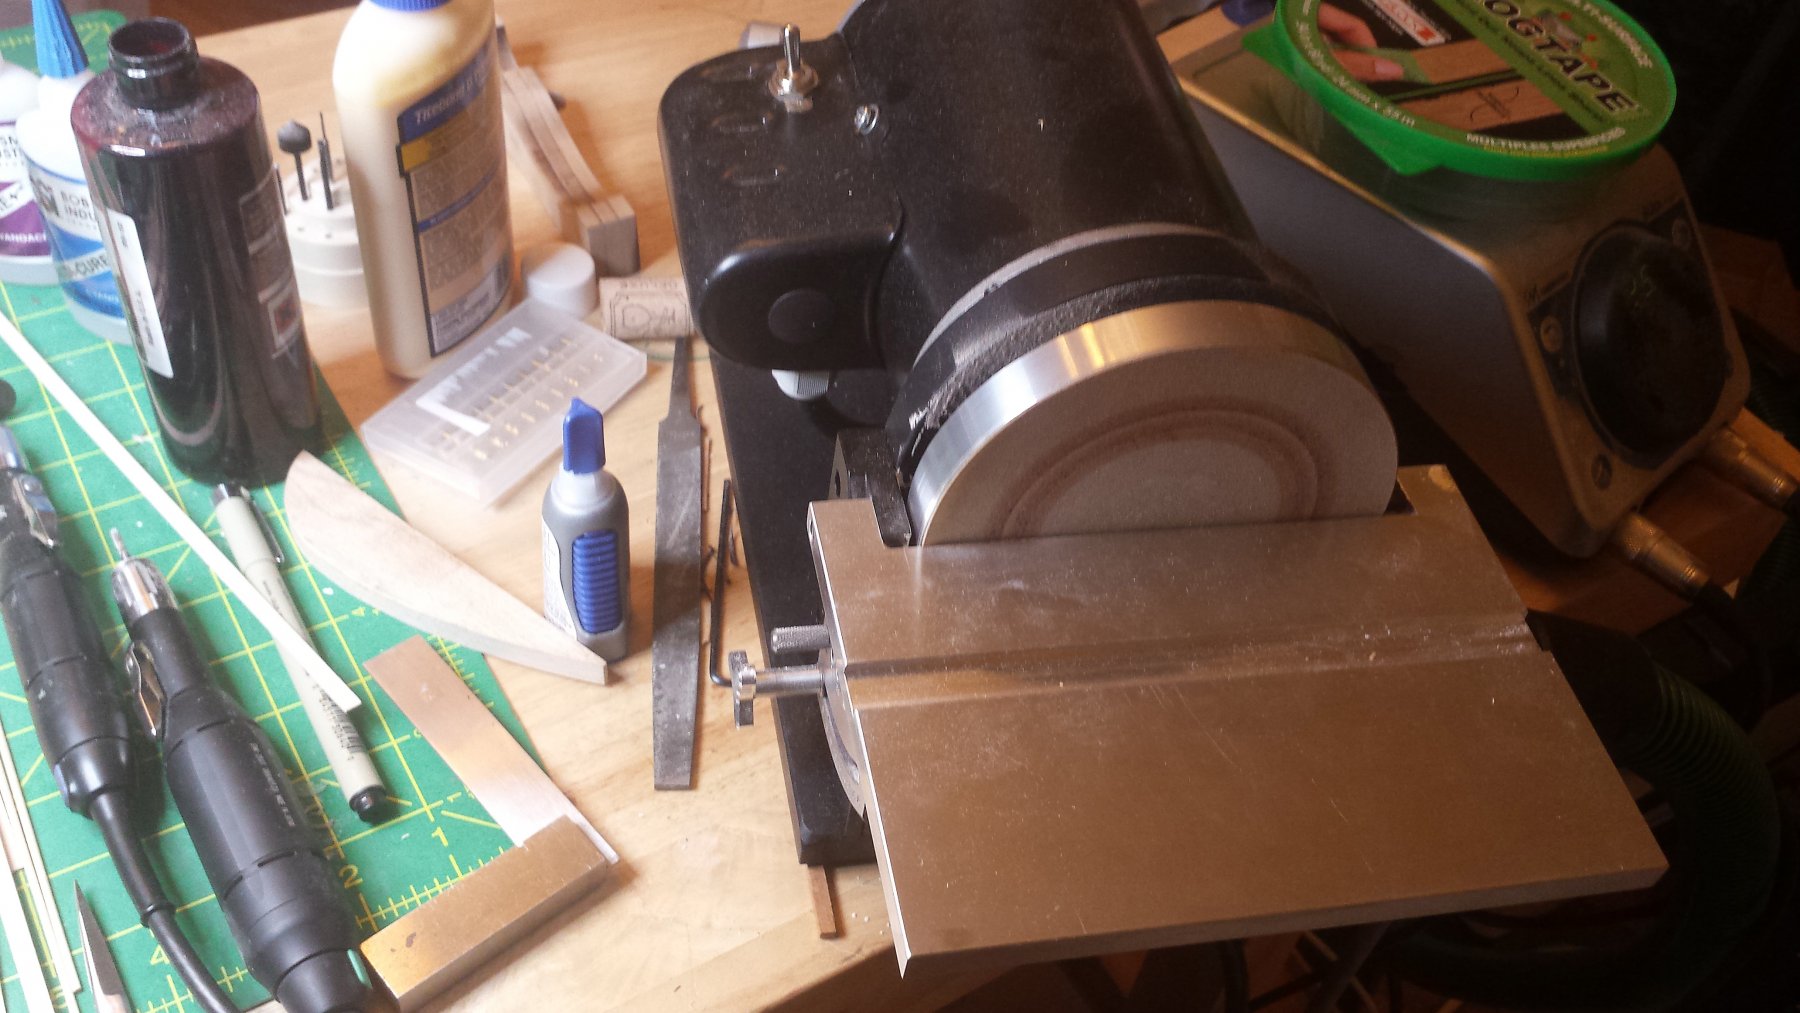
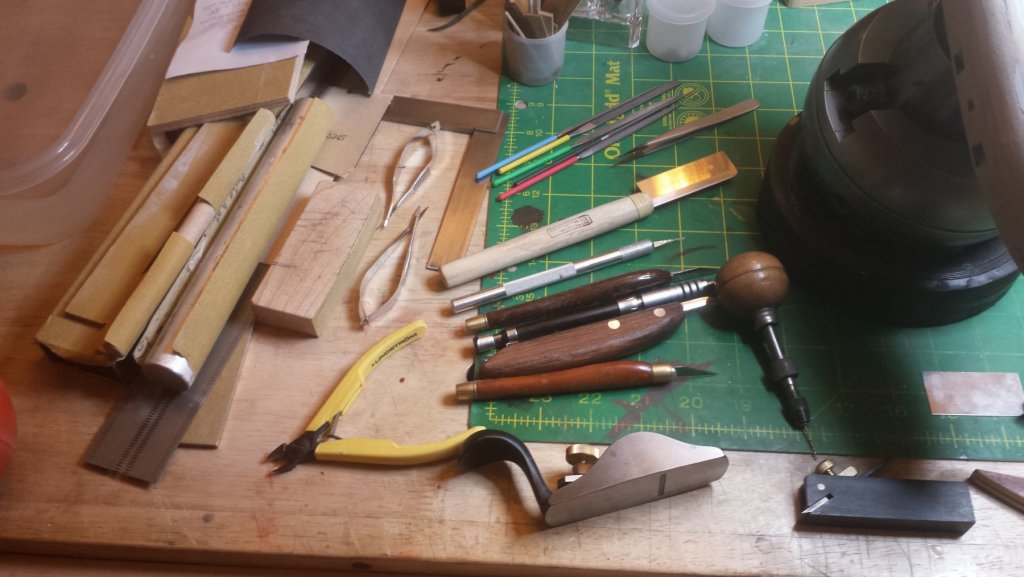
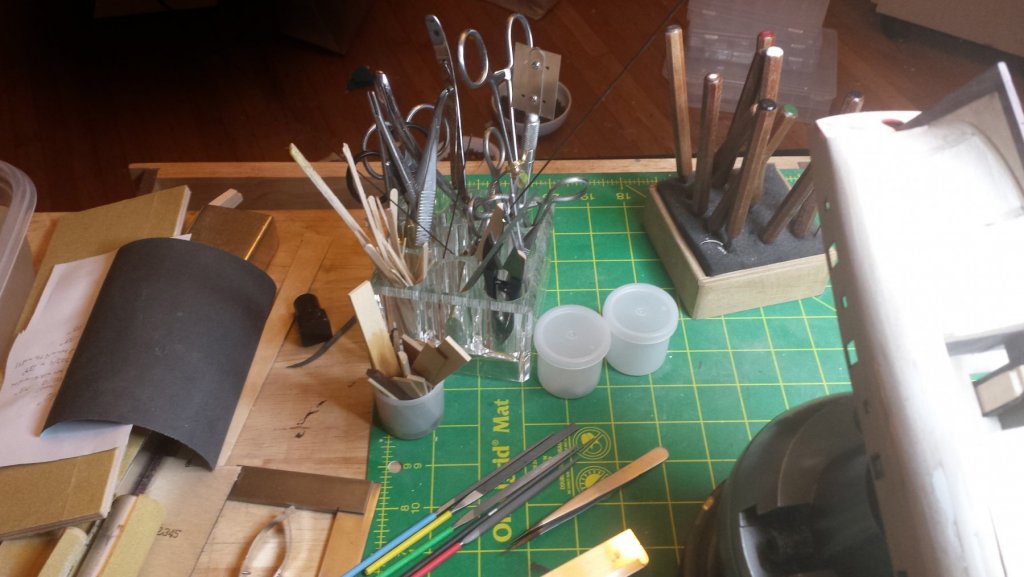
Welcome Achu! Being a hardened, grizzled, steely-eyed veteran ship constructor with like three months and one third of one ship under my belt, I can say do as much girding of thy modeling loins as possible, both in terms of tools and knowledge. And the single most important thing I think I've learned is that this is not a craft where one even considers leaping without looking. You look. Then you do it several more times. You walk across the valley to see what the leap looks like from that angle. And three or four more places around the area, including renting Mr. Henderson's hot air balloon for an aerial view. A bit of laser range-finding later, we know exactly how high cliff is and the angle of the leap, the effect of the updraft on final impact velocity, and exactly what bones you will be breaking and in what order. At that point you're sure you're ready for the leap. You're wrong :). You have to then make sure you'll get the best ambulance service and that the road into the quarry is clearly marked and level enough for a standard ambulance to navigate. And then because you'll be unconscious you tattoo on your chest to go to Mercy hospital and take 82 because 95 is down to two lanes near Simpsonville. Click on the link in my signature and you'll see me make a series of mistakes, every one of which can be traced to not following some part of the steps above- either not looking long and hard enough to see a problem that already exists or not walking through the next steps in enough detail to see that my cunning plan had not been thought through. Then go read some build logs from one of the master scratchbuilders and watch those things not happen because there are no ambushes or surprising events for which they weren't prepared. And that in the end they make progress faster even though they're spending five times as much time preparing and double checking than less experienced builders. The wonderful thing about this site and the community is that if you feel the slightest doubt or aren't sure if you're seeing all the woods that that need to be checked for hiding bears, just pause and ask a question. You'll get an answer from minutes to a few hours from people who've already built the kit and know three ways to handle whatever has you bothered. I have a friend who wants to do ship modeling and asked me what tools he needs; although I'm new to ships I've been building aircraft and other things for a quite long time and I'm pretty well equipped. Instead of trying to list many things I just put everything I had been using to build the hull on my workbench and took some pics. You don't need everything you see here, for example you can probably struggle by with less than four knives and only one rotary tool. But you will find everything here useful and they will make many tasks easier and faster. You'll soon figure out which ones you want/need most and can set a priority order for buying. You'll of course get good advice here on what exactly to get and who has the best prices. Only thing hard to see is overflowing clear stand top left, inside are like 8 kinds of scissors including tiny Castroviejo ophthalmic surgery scissors and lots of forceps and tweezers and splinter forceps and diamond files.

-
More tools - Luthier, jeweler, fly-tying
vossiewulf replied to vossiewulf's topic in Modeling tools and Workshop Equipment
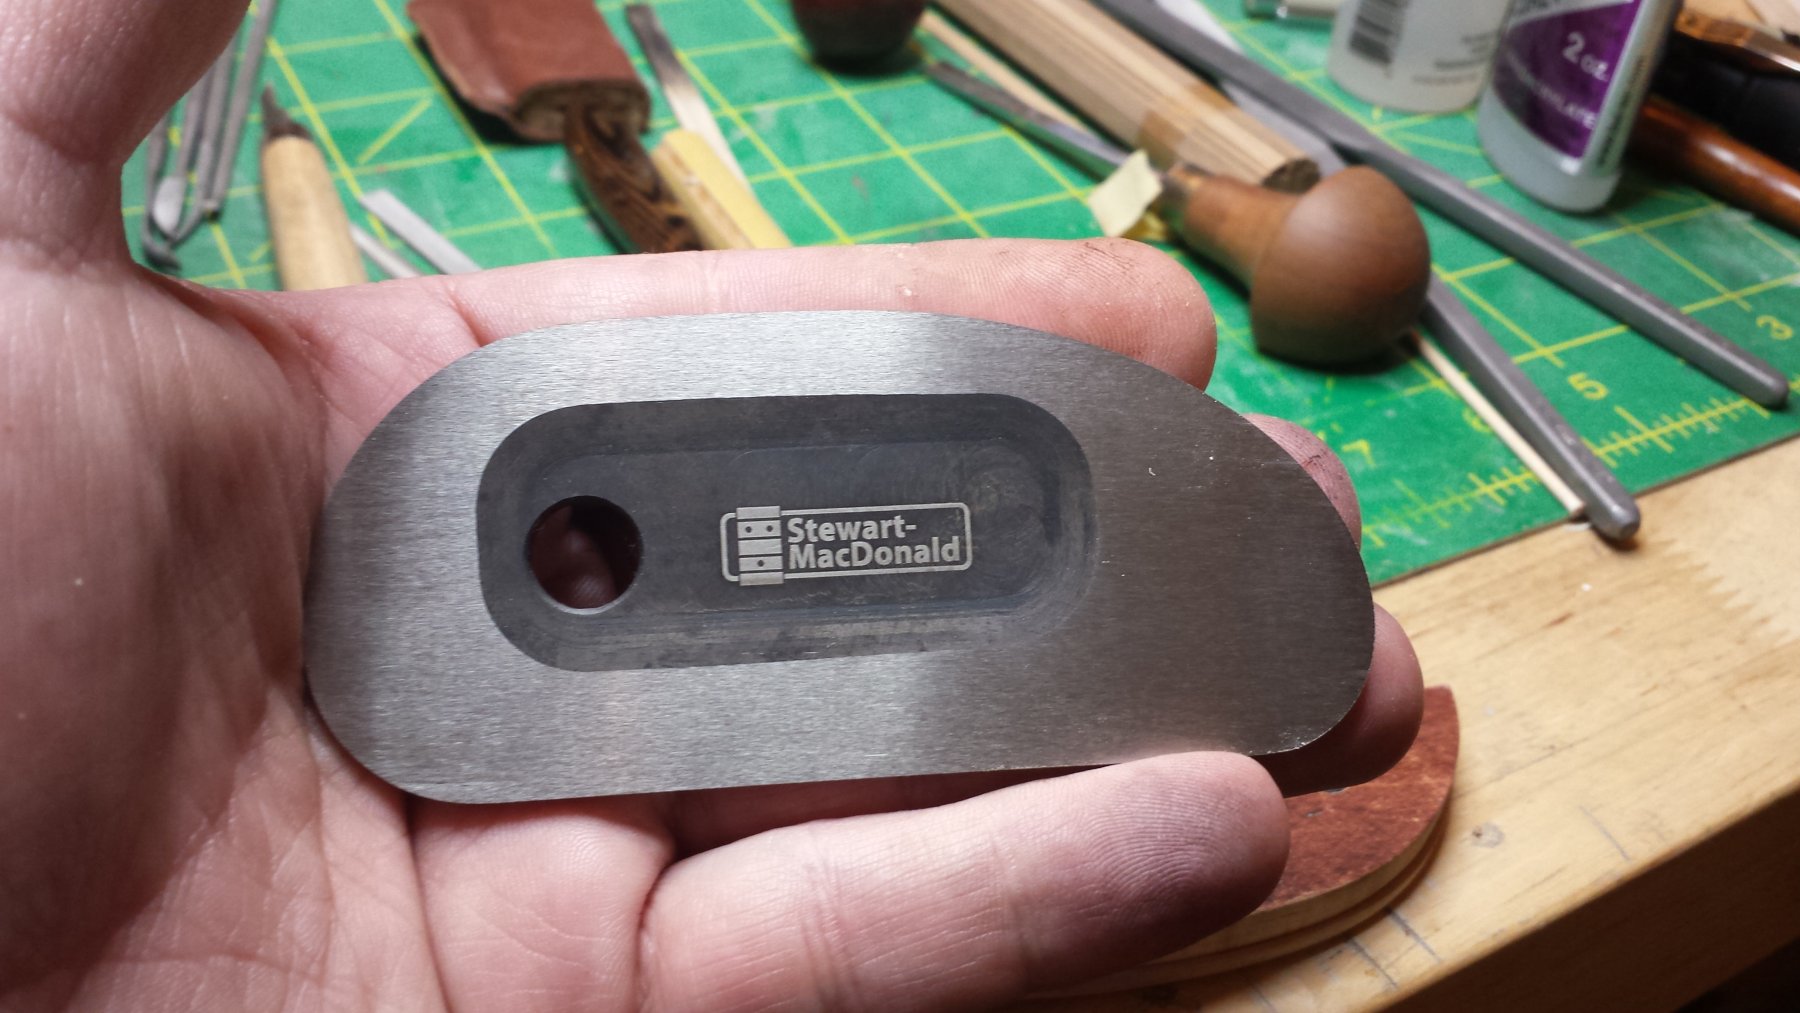
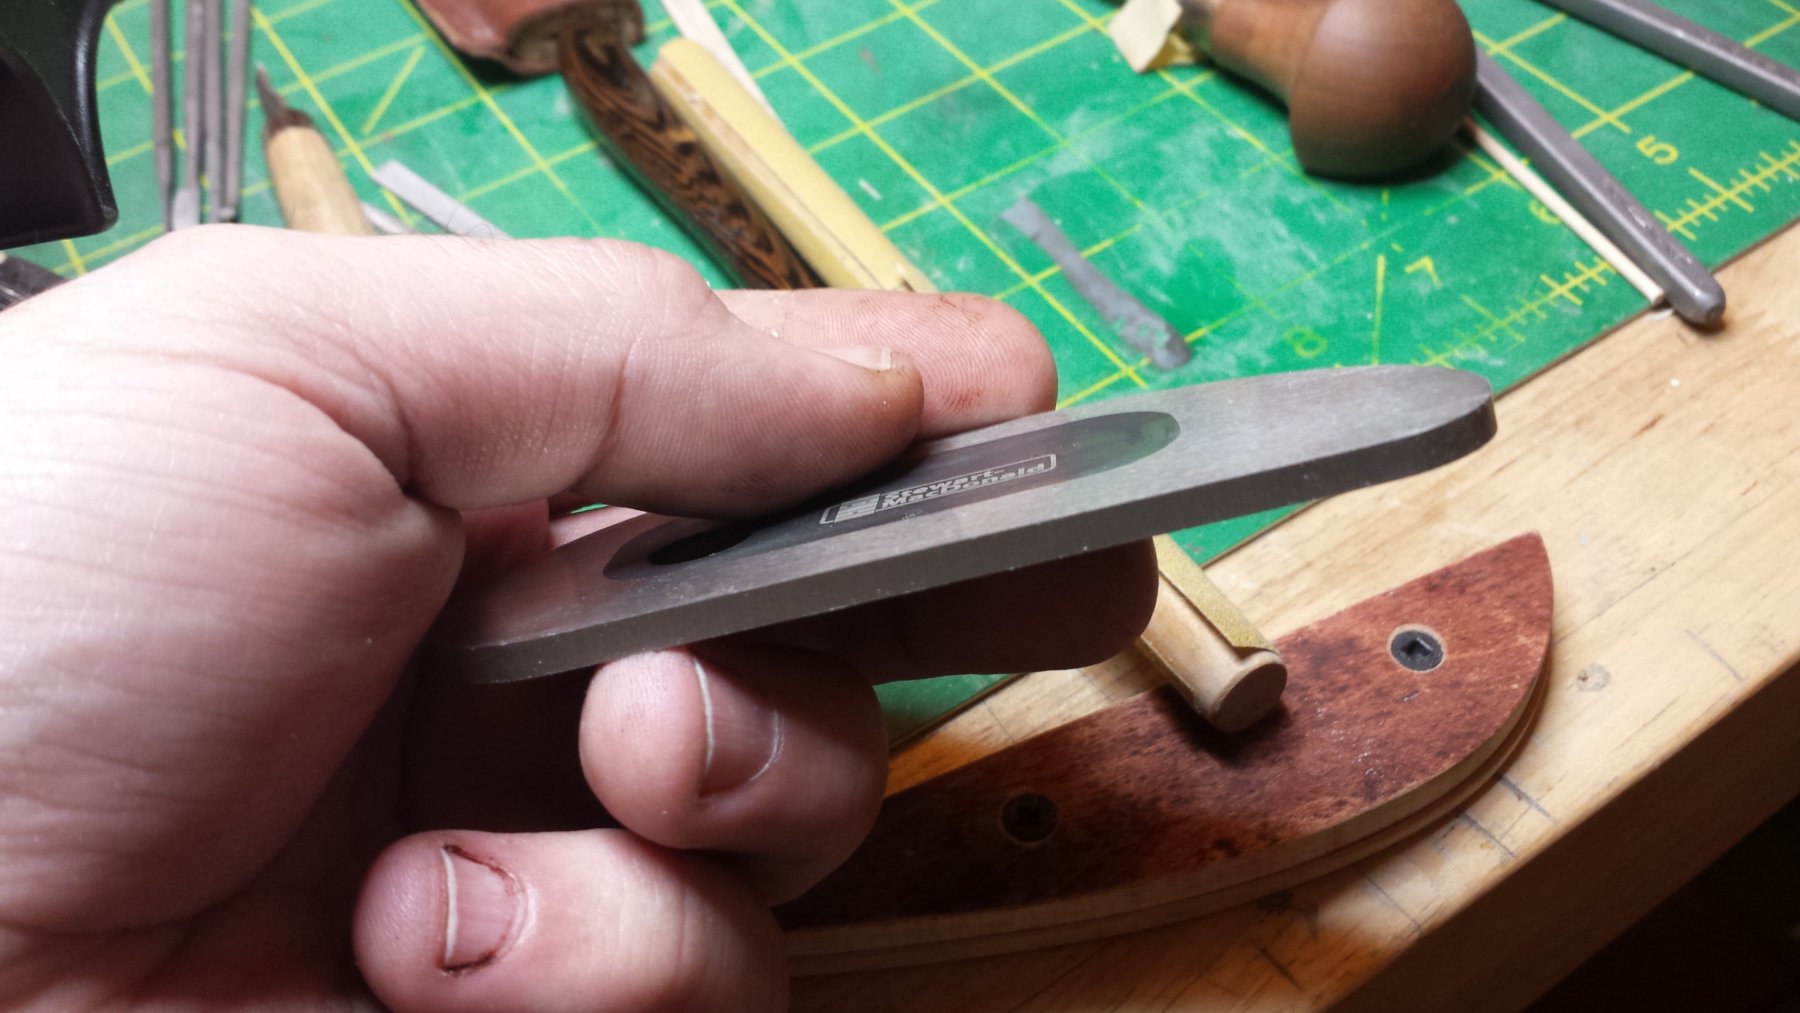
This is made for watchmakers, so it's quite sticky but leaves nothing of itself behind. People figured out that would make it also useful for cleaning rotary burs and files, and now also sells for that purpose. It doesn't replace a file card for big files or a fine brass brush for needle files, but used together they will make your files and burs look brand new. I use it whenever I stop to do a deep cleaning on a file, you can squash a needle file into it and pull it out without a speck of the sticky stuff remaining on the file. It's kind of creepy that it's as sticky as it is and yet leaves a total clean surface. Probably lots of other uses for it too. (Link to its listing on Otto Frei) (Link to StewMac listing. They're not cheap, this one is about $30, but they have a mini one at $24 that might be a better ship use option) This is another scraper, one favored by luthiers. It comes from the "heavy" school of scrapers and hence requires a very different and light touch, with these you mostly let its own weight put on the required pressure. And it's got a good selection of straight sections and curves which would make it a one-stop-shop for scraping hull planks level. I couldn't find mine when I was scraping down first layer of planking on my LN, but I will be using it on the final boxwood planking- very good quick way to level planking without the risks associated with planes.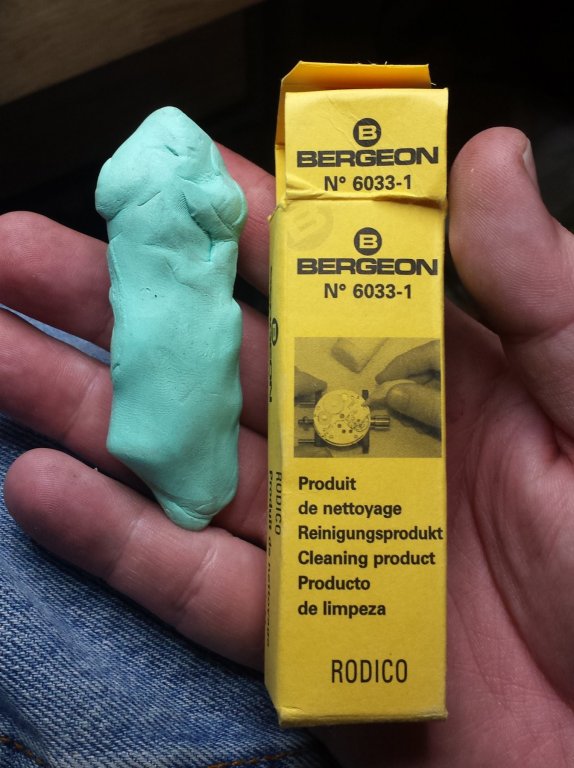


- 86 replies
-
- 10
-
-
Headband style magnafier
vossiewulf replied to Dan_L's topic in Modeling tools and Workshop Equipment
I also had been looking for a new magnifier light, I'm using my woodworking bench for ship model building and it wasn't equipped in some way for modeling like this, and I wanted to leave my other magnifier light over my metal lathe as it's very helpful there. I looked at ones up to $350, and although I'm sure the $350 one was superb, this one seems to have very nearly as much bang for 1/3 price. It just arrived today, will report back on it.
-
Headband style magnafier
vossiewulf replied to Dan_L's topic in Modeling tools and Workshop Equipment
What John said. https://www.amazon.com/Carson-MagniVisor-Head-Worn-Magnifier-CP-60/dp/B007CDJKM2/ref=sr_1_1?ie=UTF8&qid=1488332305&sr=8-1&keywords=Carson+Optical+Magnivisor -
Awesome, thanks Rick Now I have this here for reference, and once we get closer I'll start matching what I have against the needs, and I think Chuck's "natural" hemp color is pretty good, at least the new one that's less green than the original. I also wanted to get a serving machine, I'm aware of Chuck's plus the Russian guy (I think) who also makes some tools. Are there reviews of these on MSW or elsewhere?
- 714 replies
-
- 3
-
-
- lady nelson
- victory models
- (and 1 more)
-
More important factors than choice of wood finish (there are many that will work fine) is preparation of surface prior to finishing and correct leveling of the surface during finishing. This is speaking as a long time furniture maker rather than ship modeler, I am new to the latter. However as I look through finished models and build logs, I see many severely marred by lack of a few simple steps during finishing. First of.course is sanding, you can get away with 220 but when I want good wood to look really nice under a clear coat, I will take the wood sanding out to 600 grit. If you are using an open-grained wood like walnut or oak where the pores are way out of scale, you should use a fill coat(s) to fill the pores, either a colored filler or clear sanding sealer or really good are the two-part epoxy clear fillers used by guitar makers a lot these days, system 3 is a good example. When it comes to the final finish, even if you wet the wood to raise the grain before final sanding, you're never going to get all of the fuzz. So it's very important to run over your surfaces lightly with 1500 grit or so after the first coats, doing so will improve the final result quite a bit. After a second coat I usually work it a little harder but with 2000 grit, this will help remove lots of high and low spots in the finish. And I'll always hit the final coat with 2000 or 2500 one last time. Following these steps should ensure you get a nice finish with ripples no larger than should be at scale. All of that applies to paint just as much as clear, except for a painted surface there is no reason to sand past 220.
-
BTW Rick did you use the kit rigging line? I've picked up lots of lines, like one of everything Chuck sells plus a bunch from a guy in England and I have a good supply of fly-tying thread as I intend to do some very small subjects too. The thing I like about your rigging is that (besides overall looking very clean and well done) it looks much more in scale than most ships, all but the best seem to have excessively heavy rigging everywhere. So at a minimum I'd like to know the sizes you used for the various applications, but that can come later after we've going through the many steps of external planking and wales and decks and things.
- 714 replies
-
- 2
-
-
- lady nelson
- victory models
- (and 1 more)