Javlin
-
Posts
1,664 -
Joined
-
Last visited
Content Type
Profiles
Forums
Gallery
Events
Everything posted by Javlin
-
B-25 Mitchell "Meet Miss Runyon" by Javlin-HK-1/32
Javlin replied to Javlin's topic in Non-ship/categorised builds
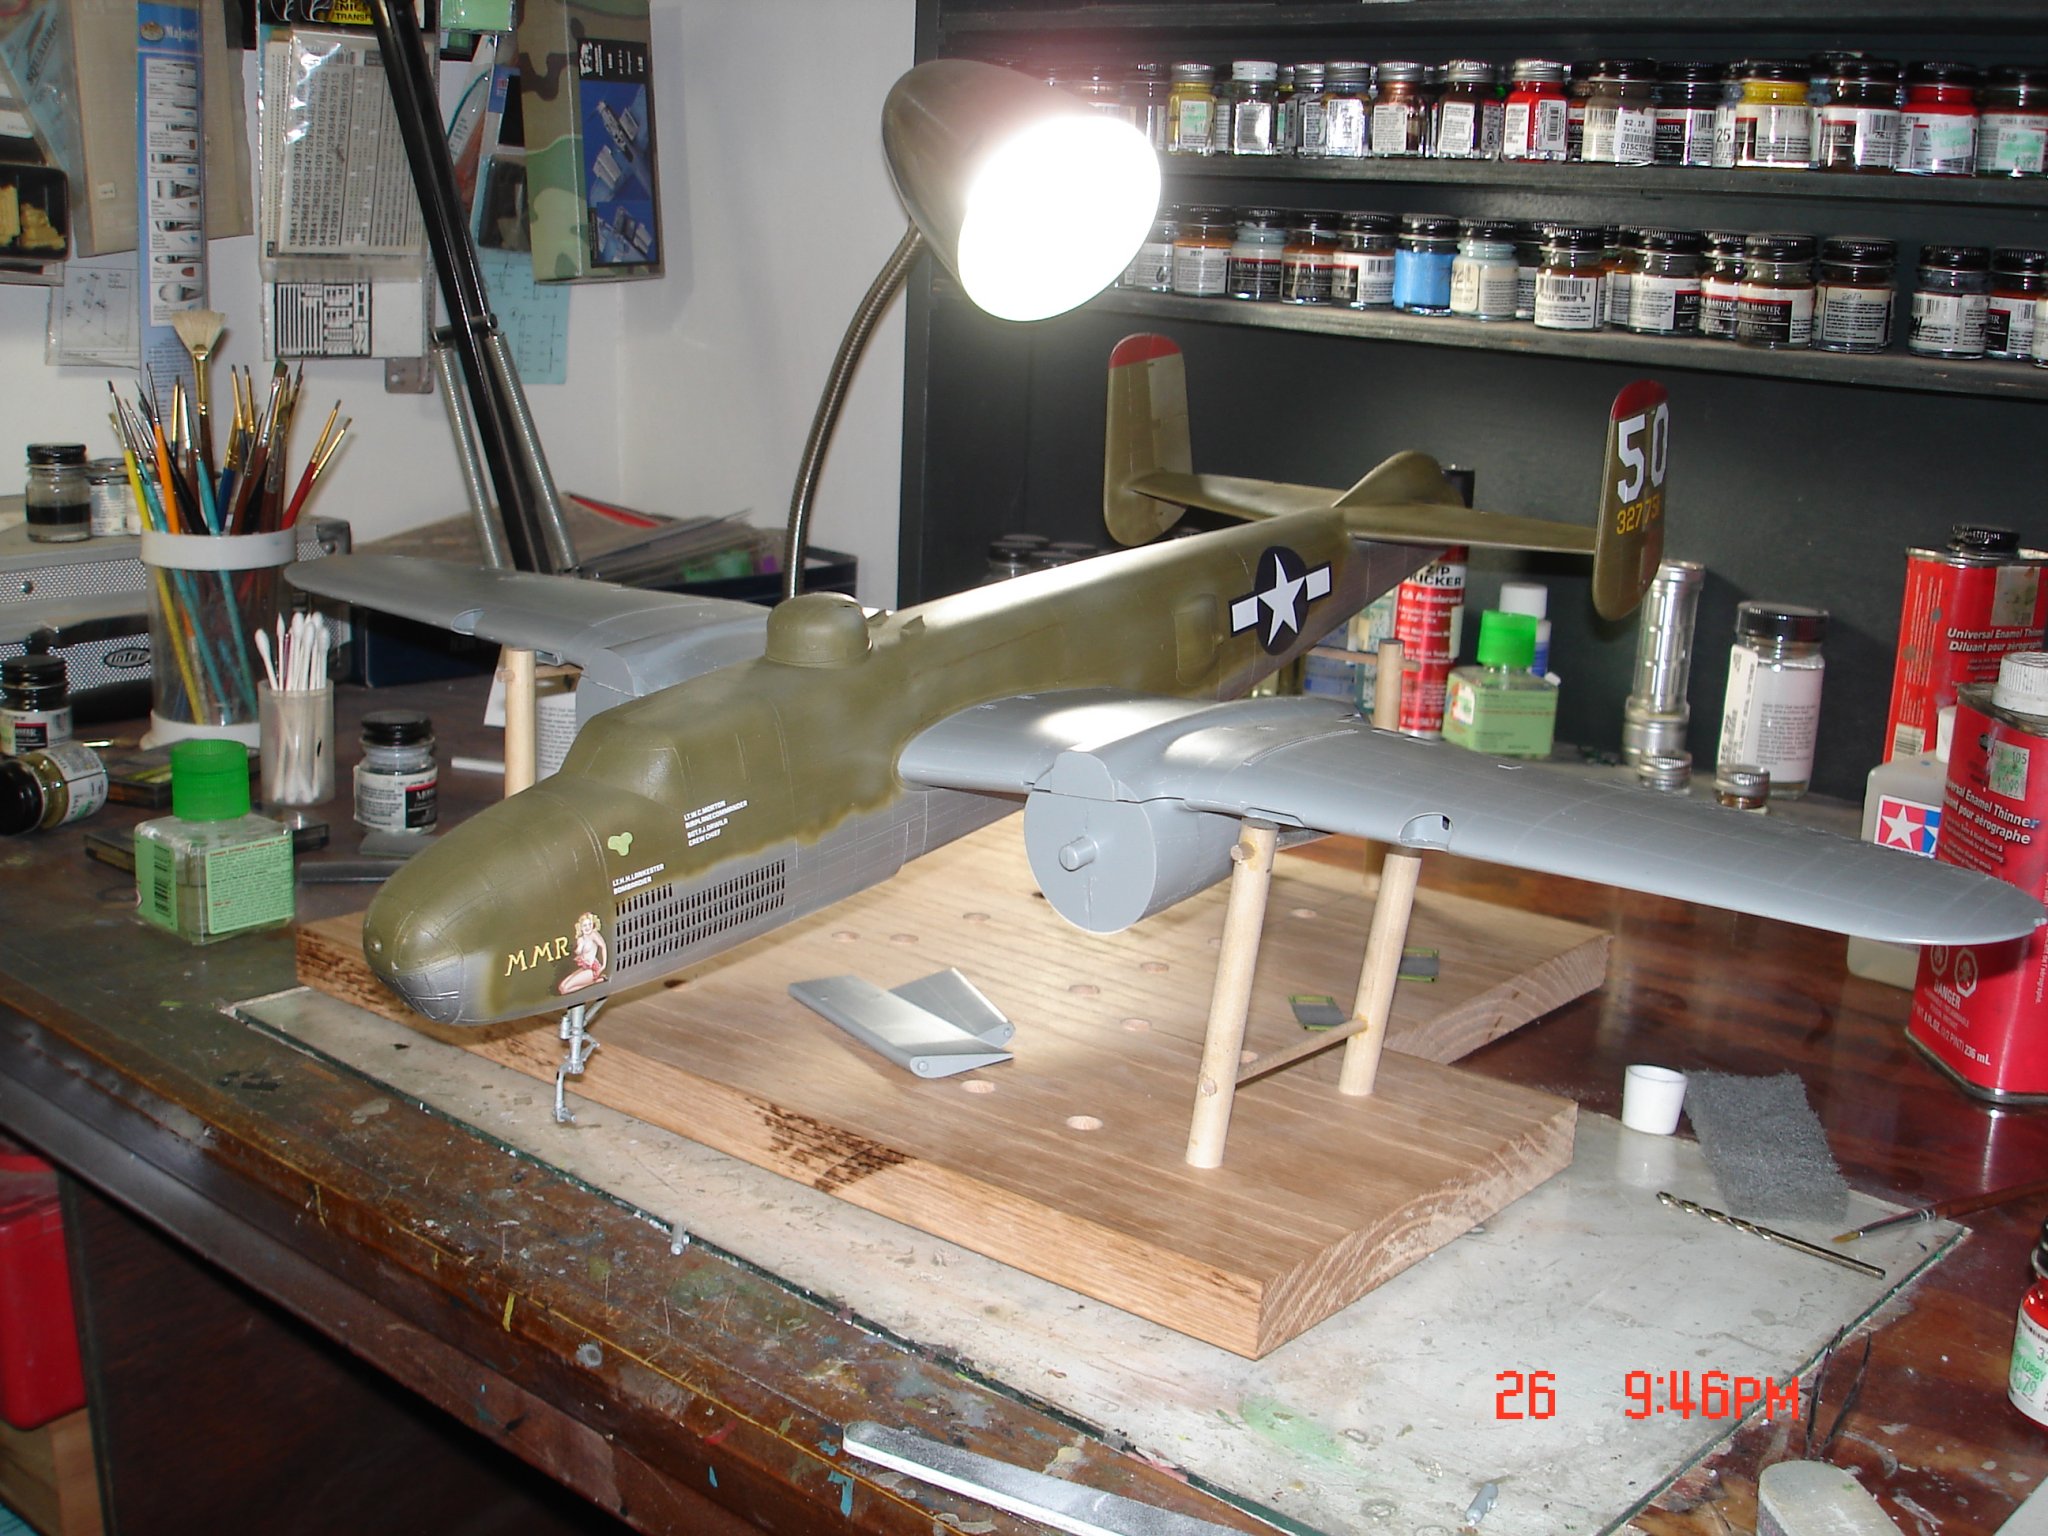
She gets even Bigger Kevin and a better look at Miss Runyon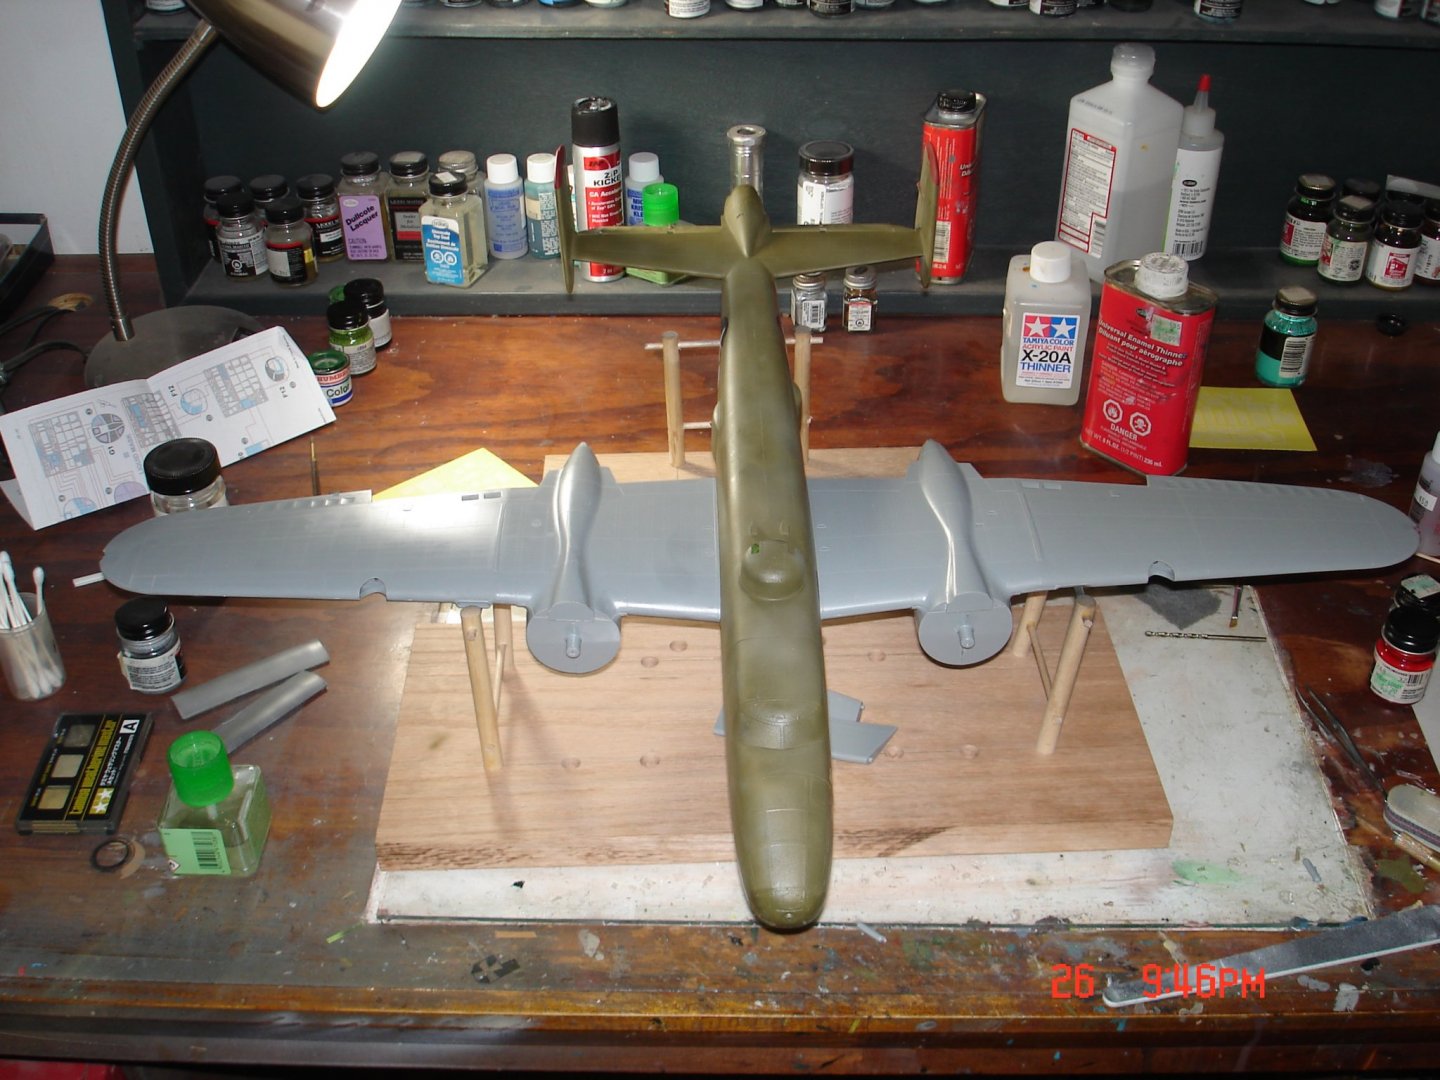
- 209 replies
-
- 17
-

-
B-25 Mitchell "Meet Miss Runyon" by Javlin-HK-1/32
Javlin replied to Javlin's topic in Non-ship/categorised builds
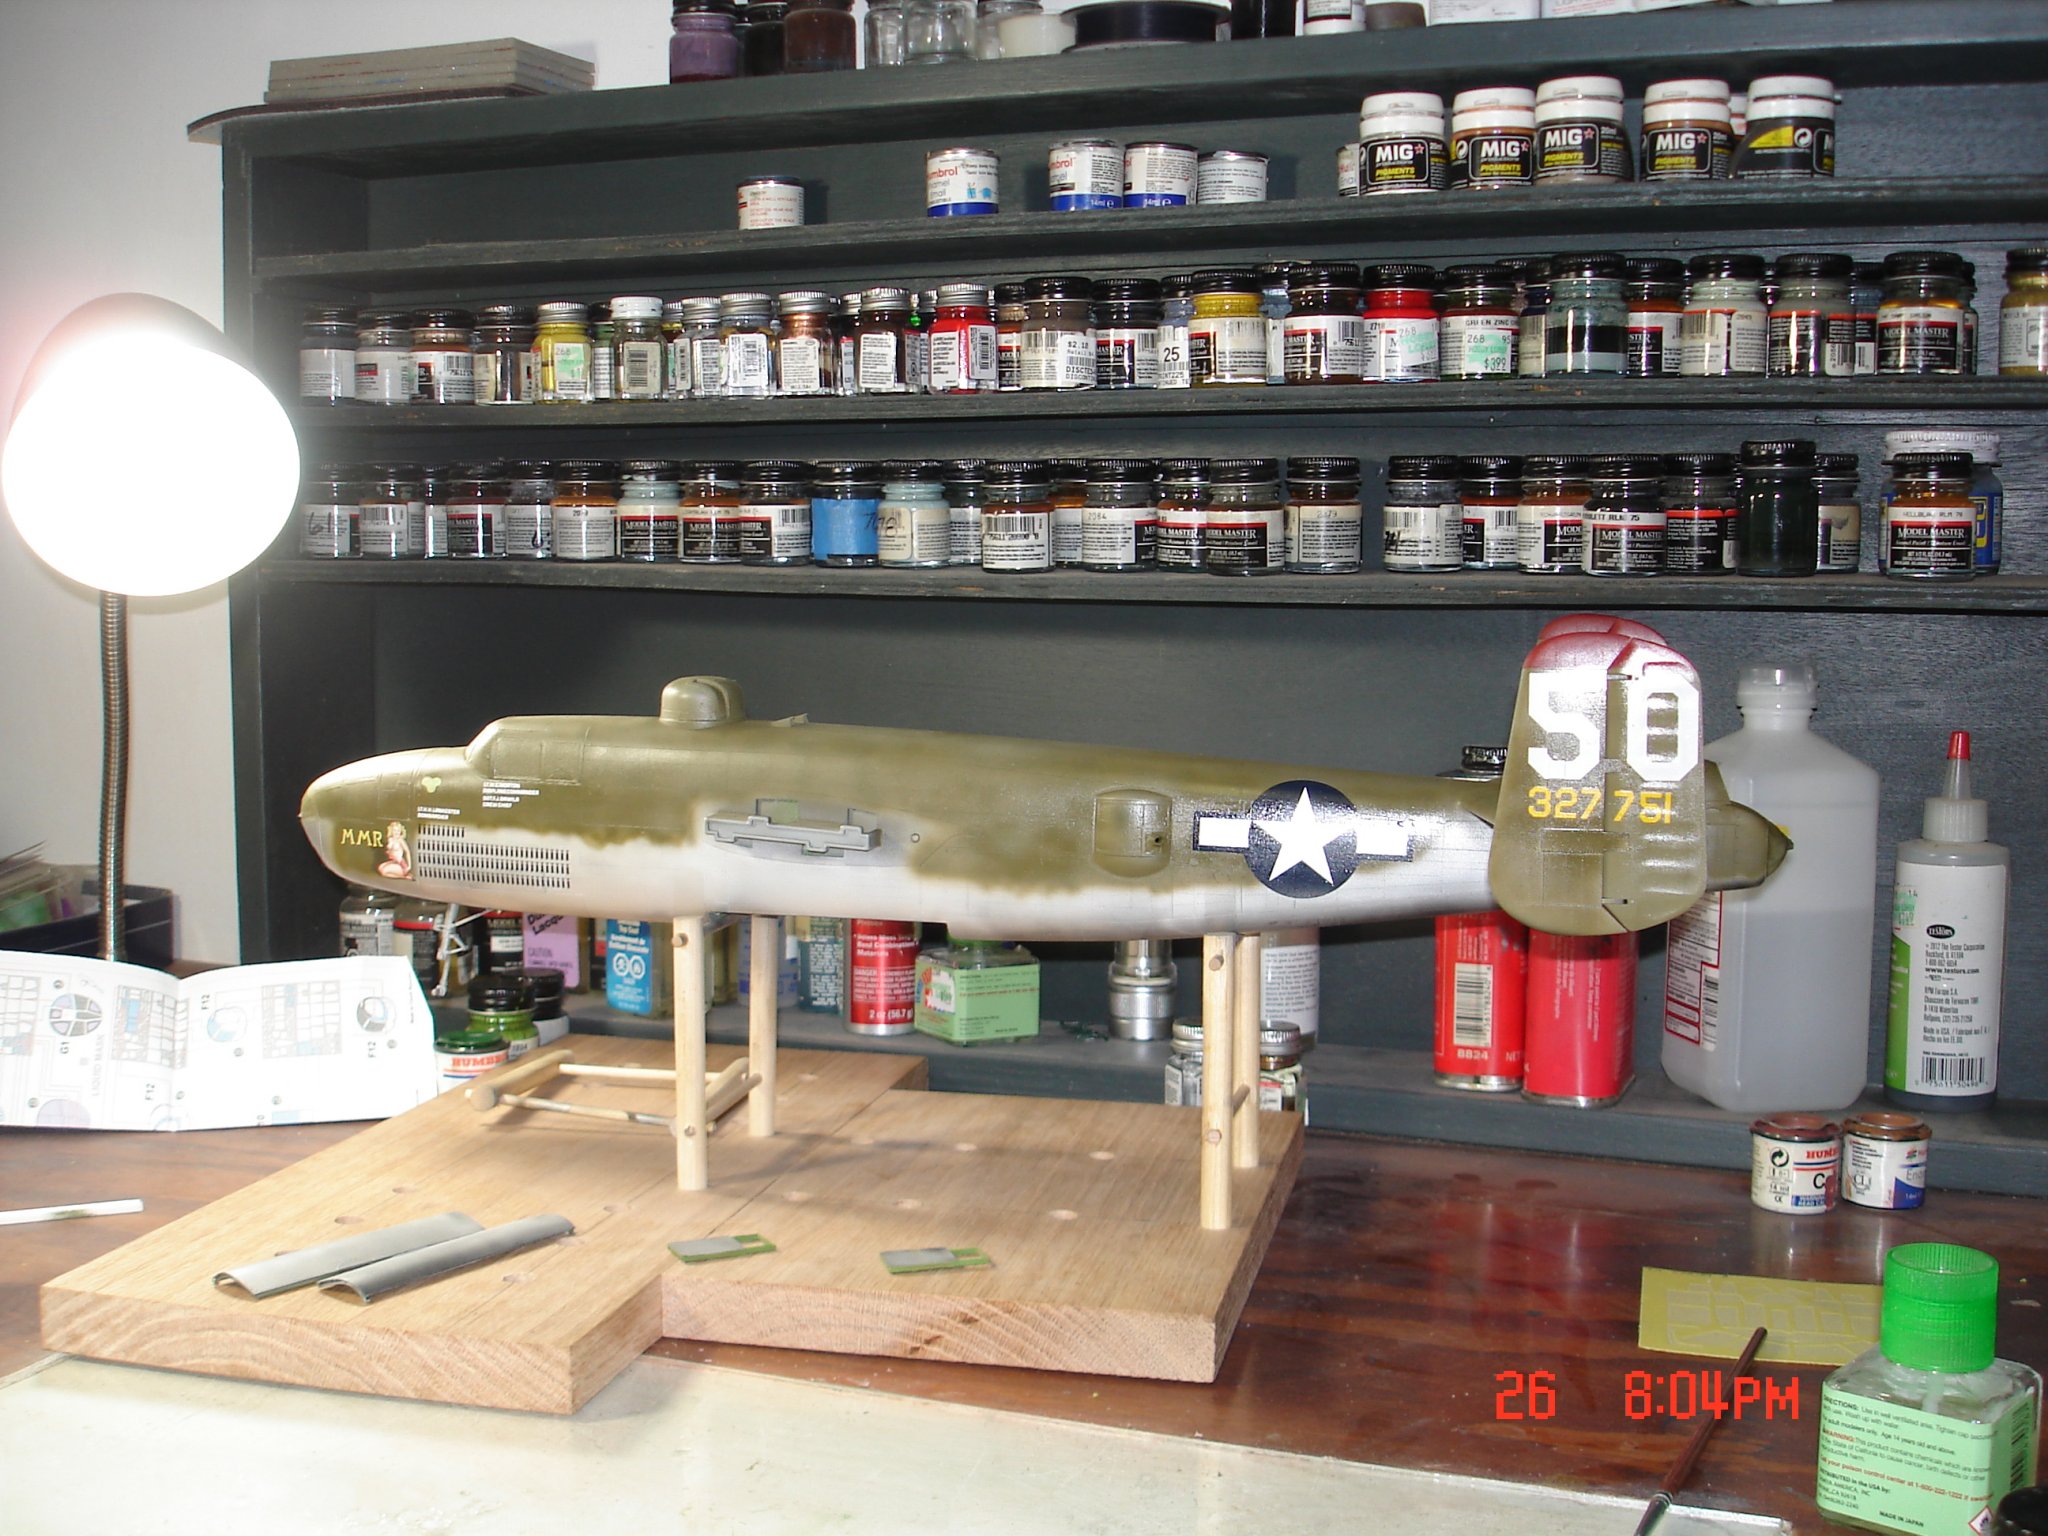
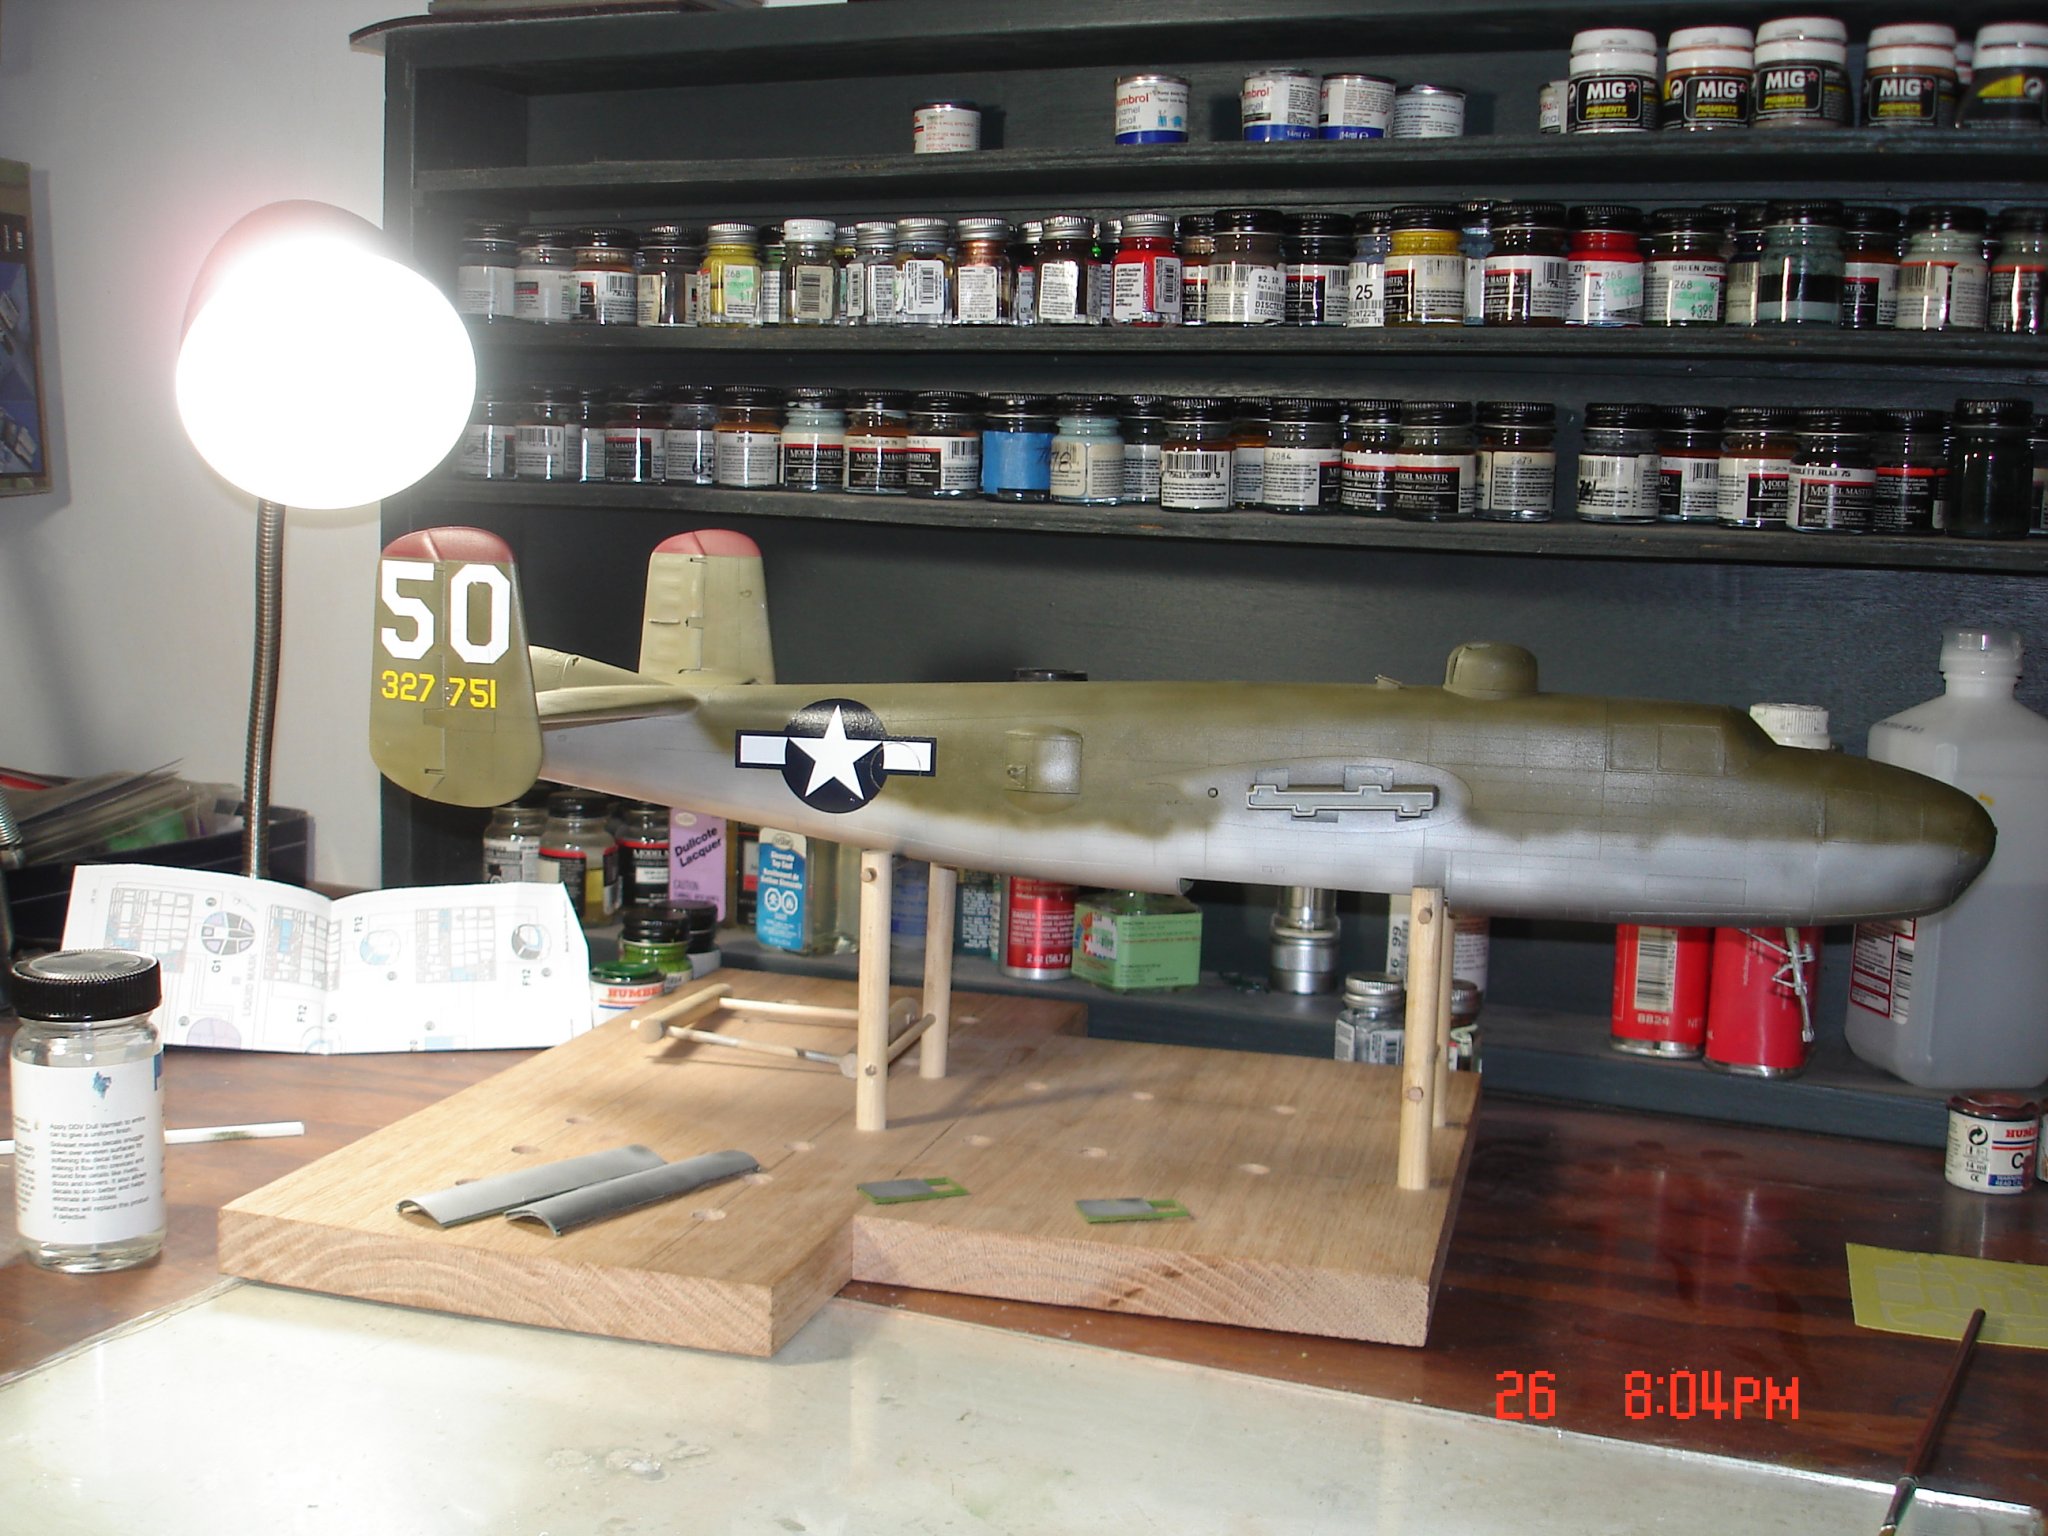
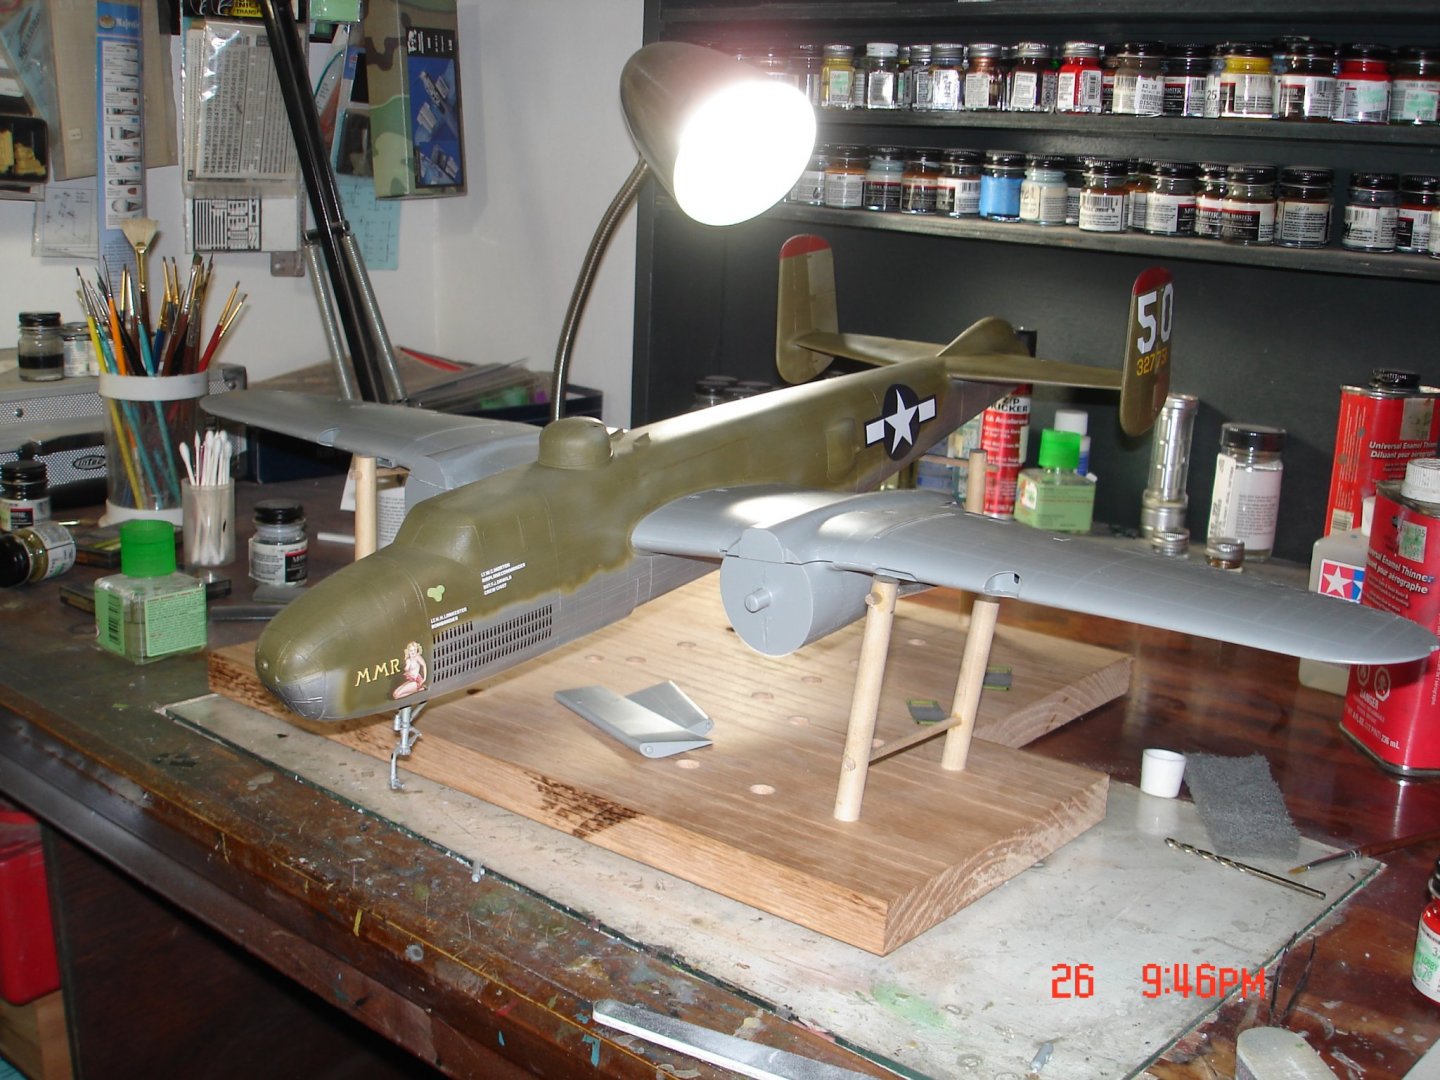
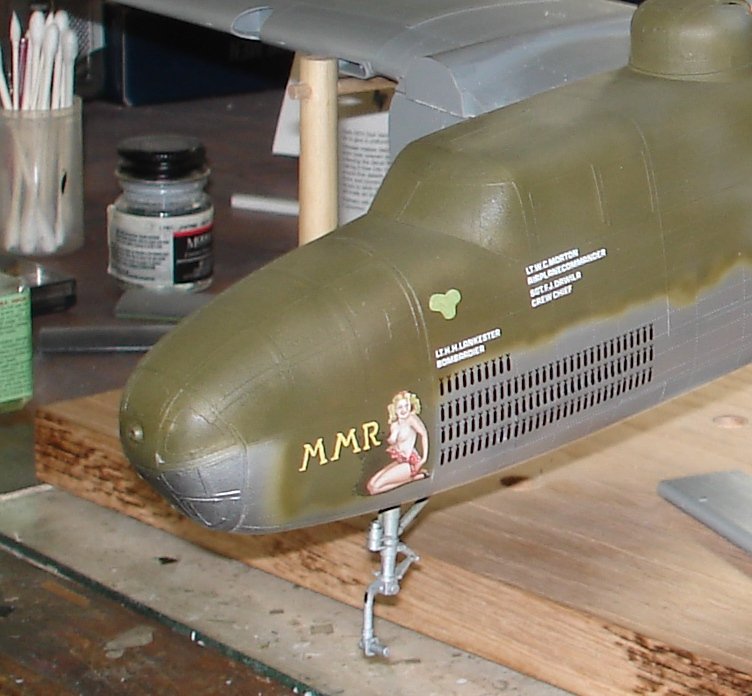
Decals added gloss (future) over the decaled area next maybe in a couple hours the flat Kevin "Catch 22" anybody I think that's a 100 missions on the nose?

- 209 replies
-
- 10
-
-
The idea OC is to tape off all glass leaving the framing exposed and then glue all glass into play and spray.The temptation is high to remove the tape but leave it till all decals and clears have been applied this gives the paint a uniform coat.You will be okay as it sits but did you remove the tape from the canopy and why it is taped as such now? Kevin
-
B-25 Mitchell "Meet Miss Runyon" by Javlin-HK-1/32
Javlin replied to Javlin's topic in Non-ship/categorised builds
She is a big girl Denis when I look at it I go dam that crate is BIG but I feel the pics don't pull that through...anyways the most fun I have had in a build in a while Kevin -
B-25 Mitchell "Meet Miss Runyon" by Javlin-HK-1/32
Javlin replied to Javlin's topic in Non-ship/categorised builds
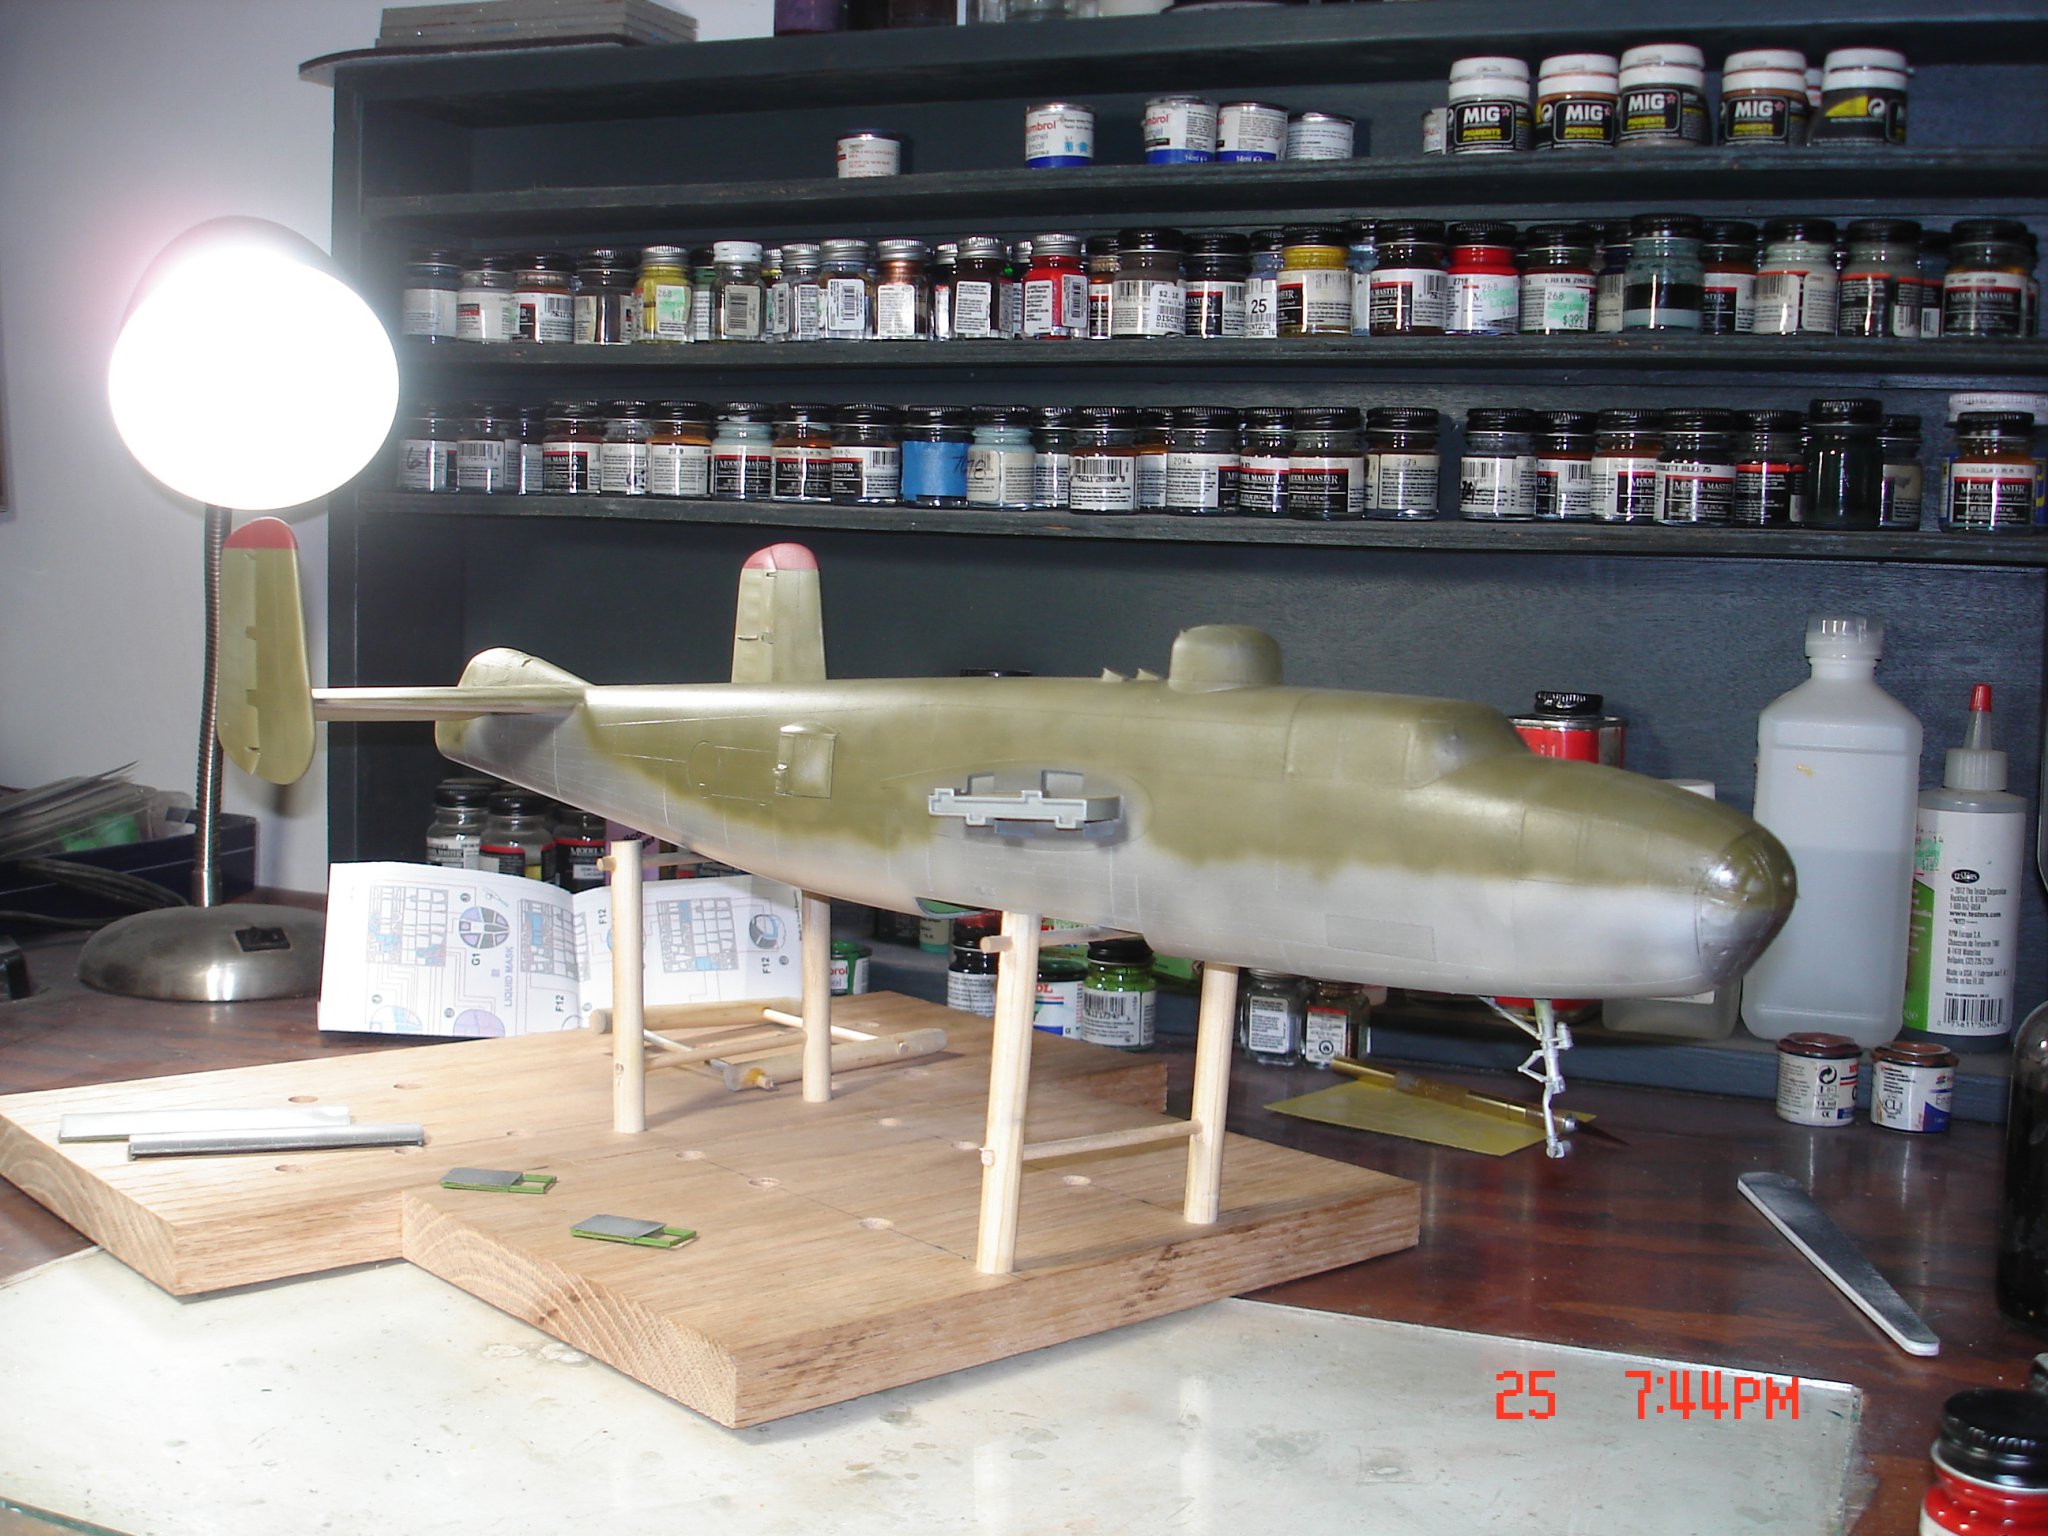
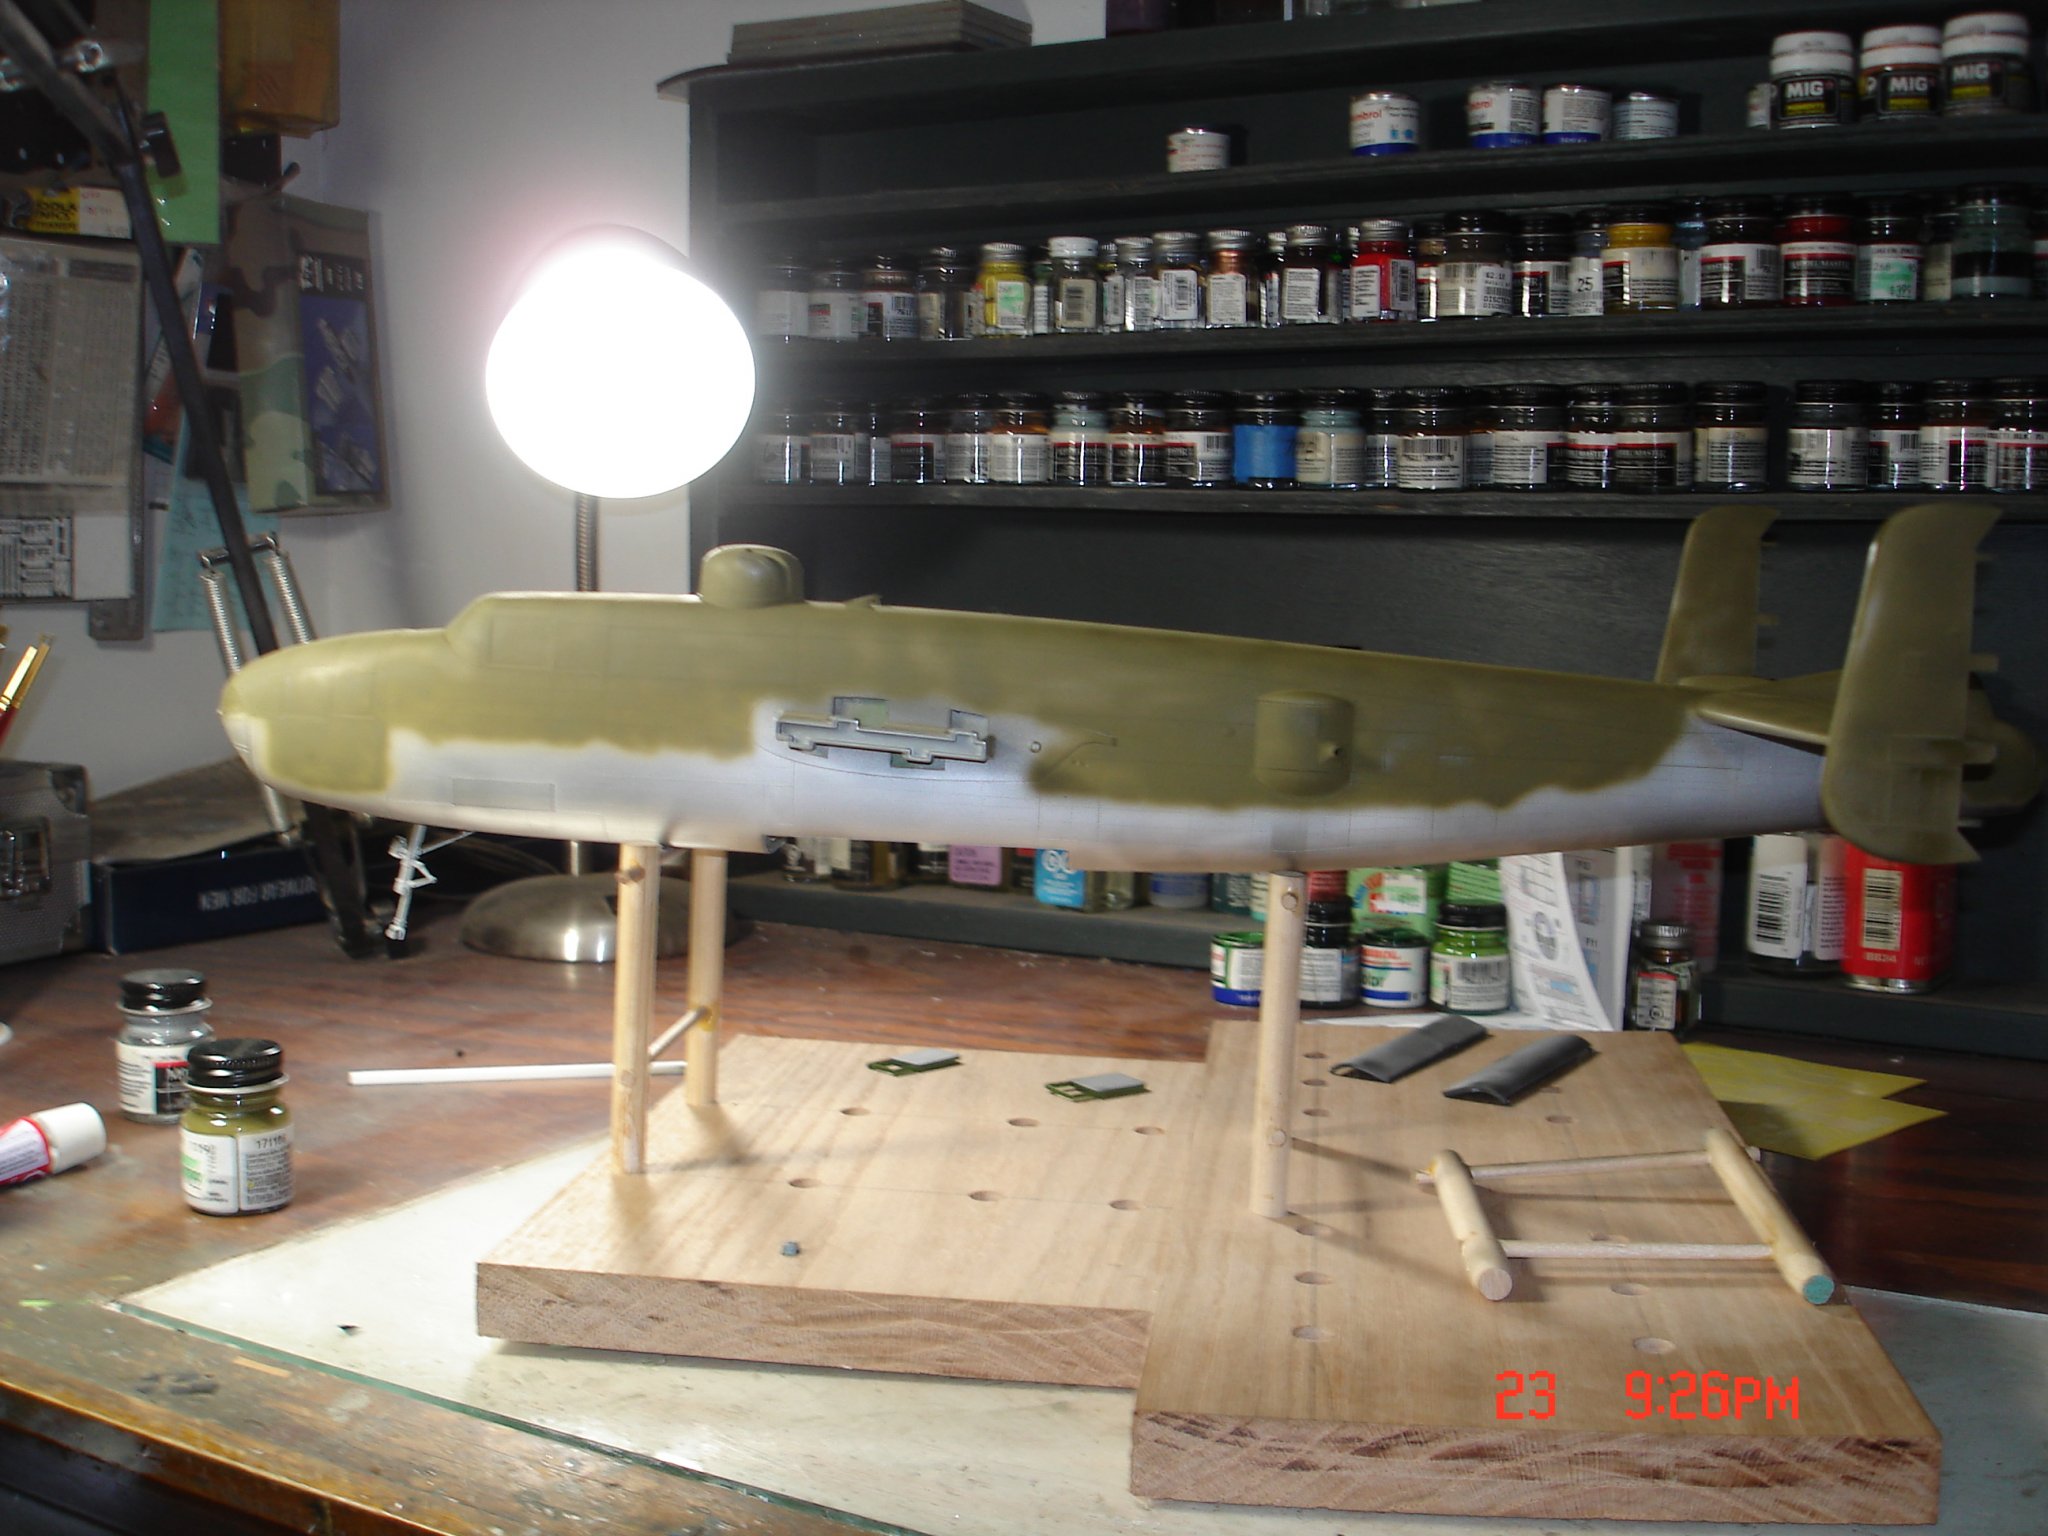
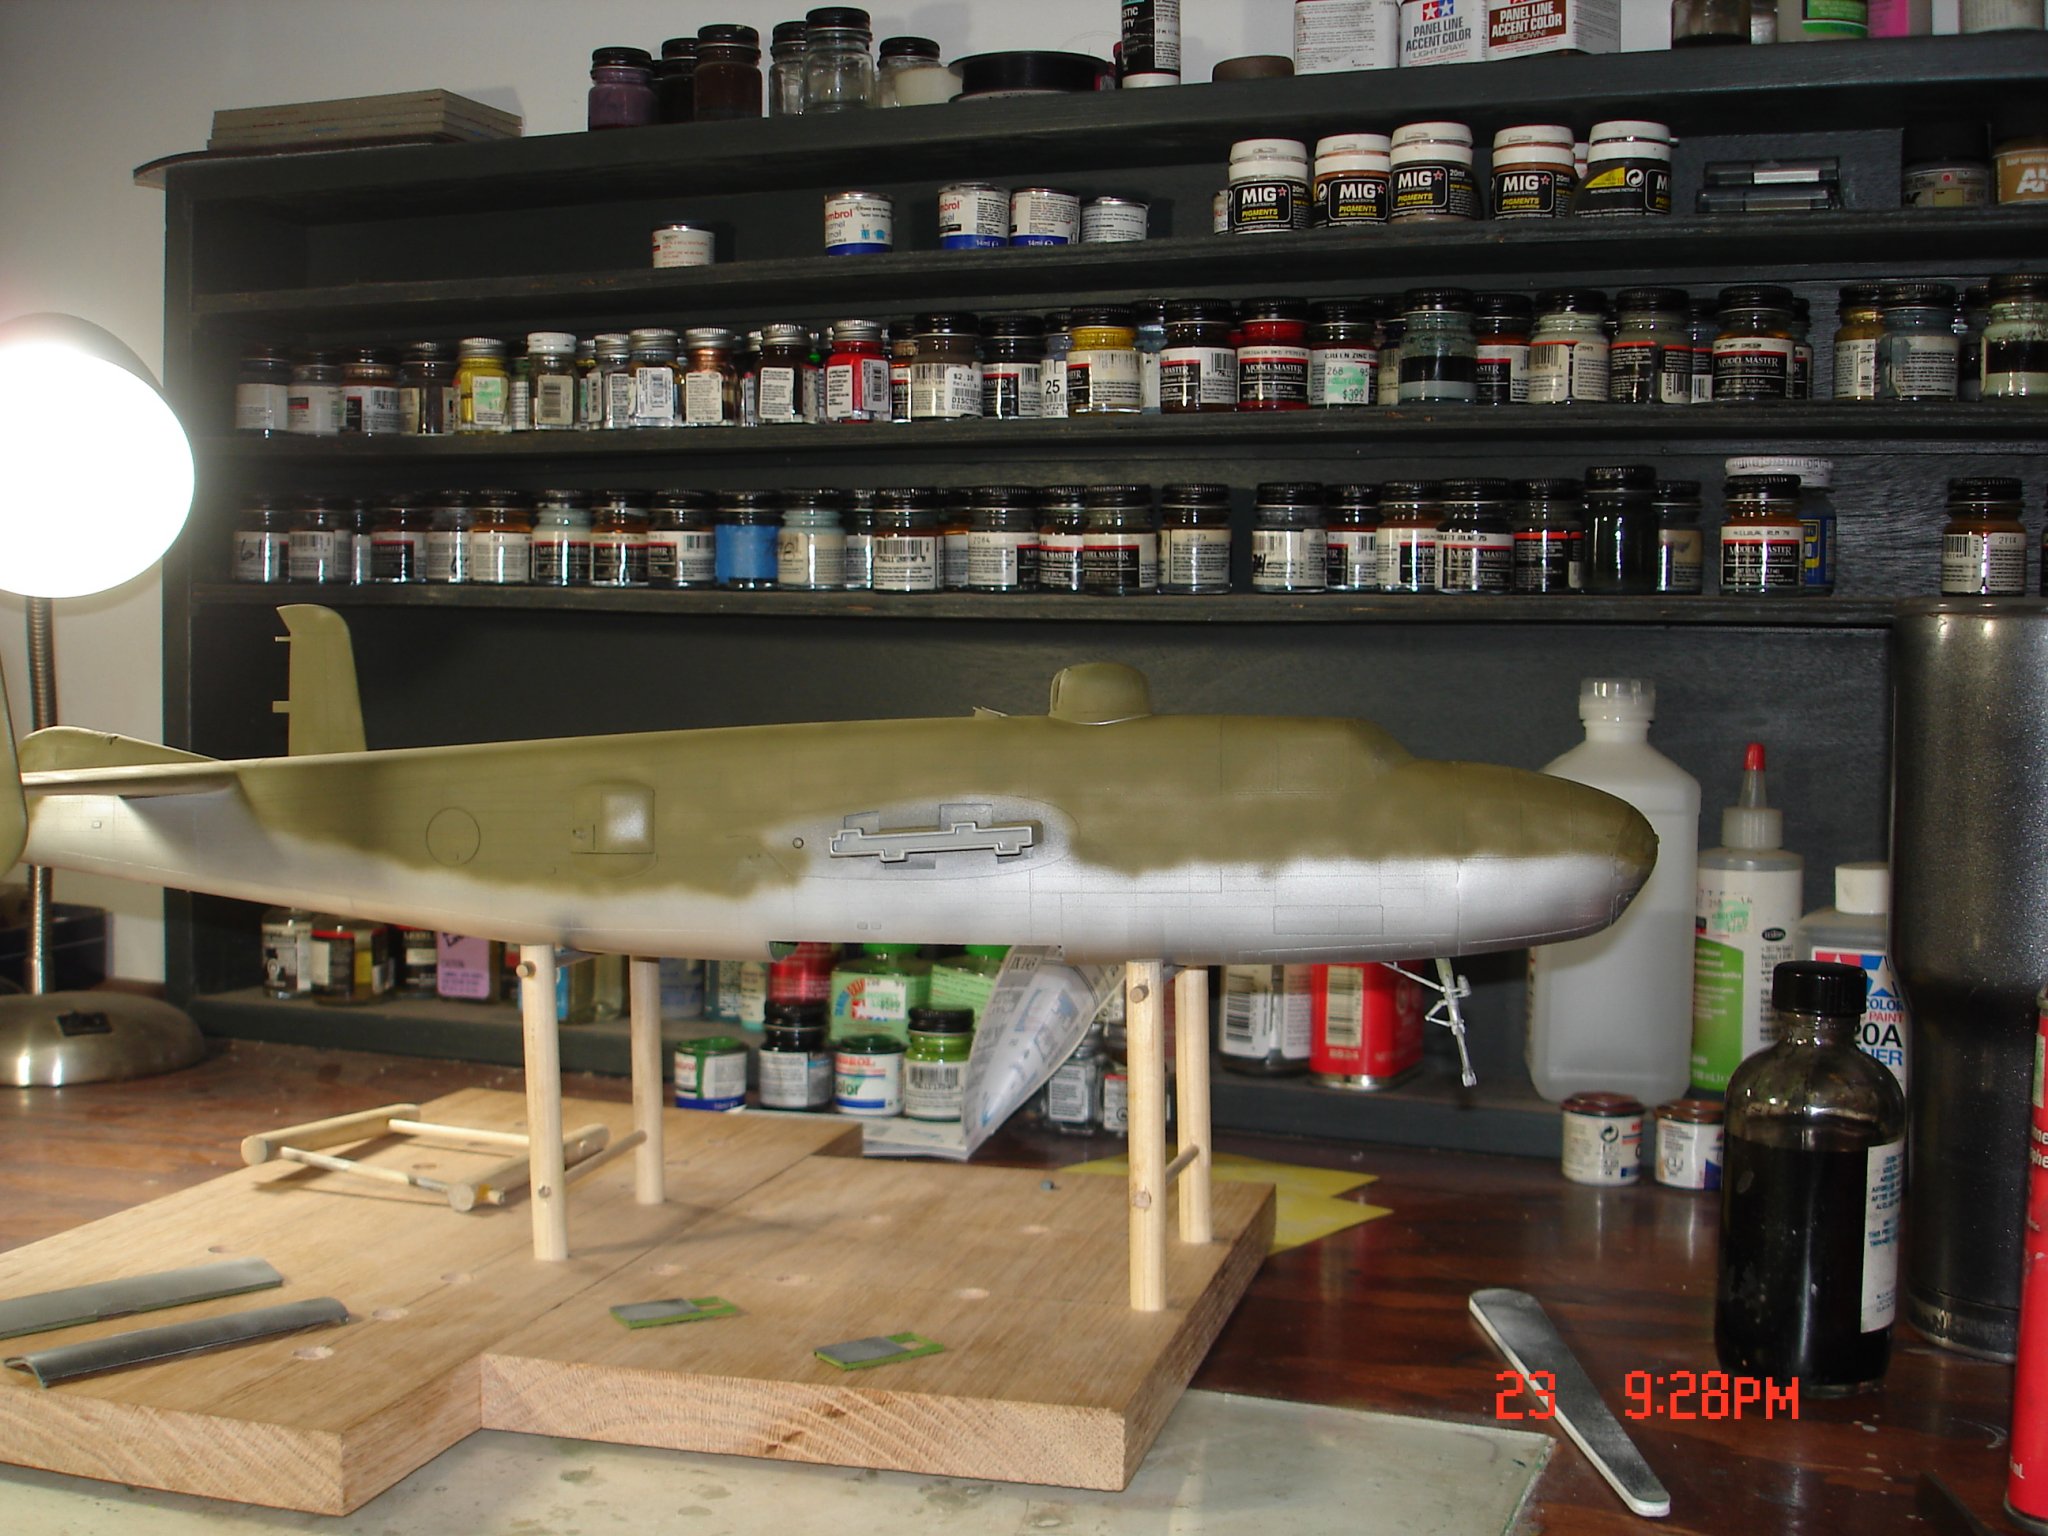
Thanks Gentlemen(a term used loosely) for all the likes and looking in got some color added and a few coats of future.The second pic you can see that the fabric colored pieces were painted in a faded batch of OD with some sprayed here and there about the fuse you may have to expand the pics to see the effect.I may try to lay the decals for the fuse tomorrow night and future on Thursday then a flat. Kevin

- 209 replies
-
- 14
-
-
One of the biggest PIA's when building planes but yours will do . Kevin
-
Oh you can just feel the love with all this bickering going on sounds like work Kevin
-
B-25 Mitchell "Meet Miss Runyon" by Javlin-HK-1/32
Javlin replied to Javlin's topic in Non-ship/categorised builds
It can CD got a good bit worked the life saver was that area got OD in the long run.I did not care for the Duraluminum so buffed and hit with MM Al Plate smooth finish the Dura came out blotchy.That bottle of filler I P/U in New Orleans last year at the LHS works great for a crack/seam so-so on that fix for the nose. Kevin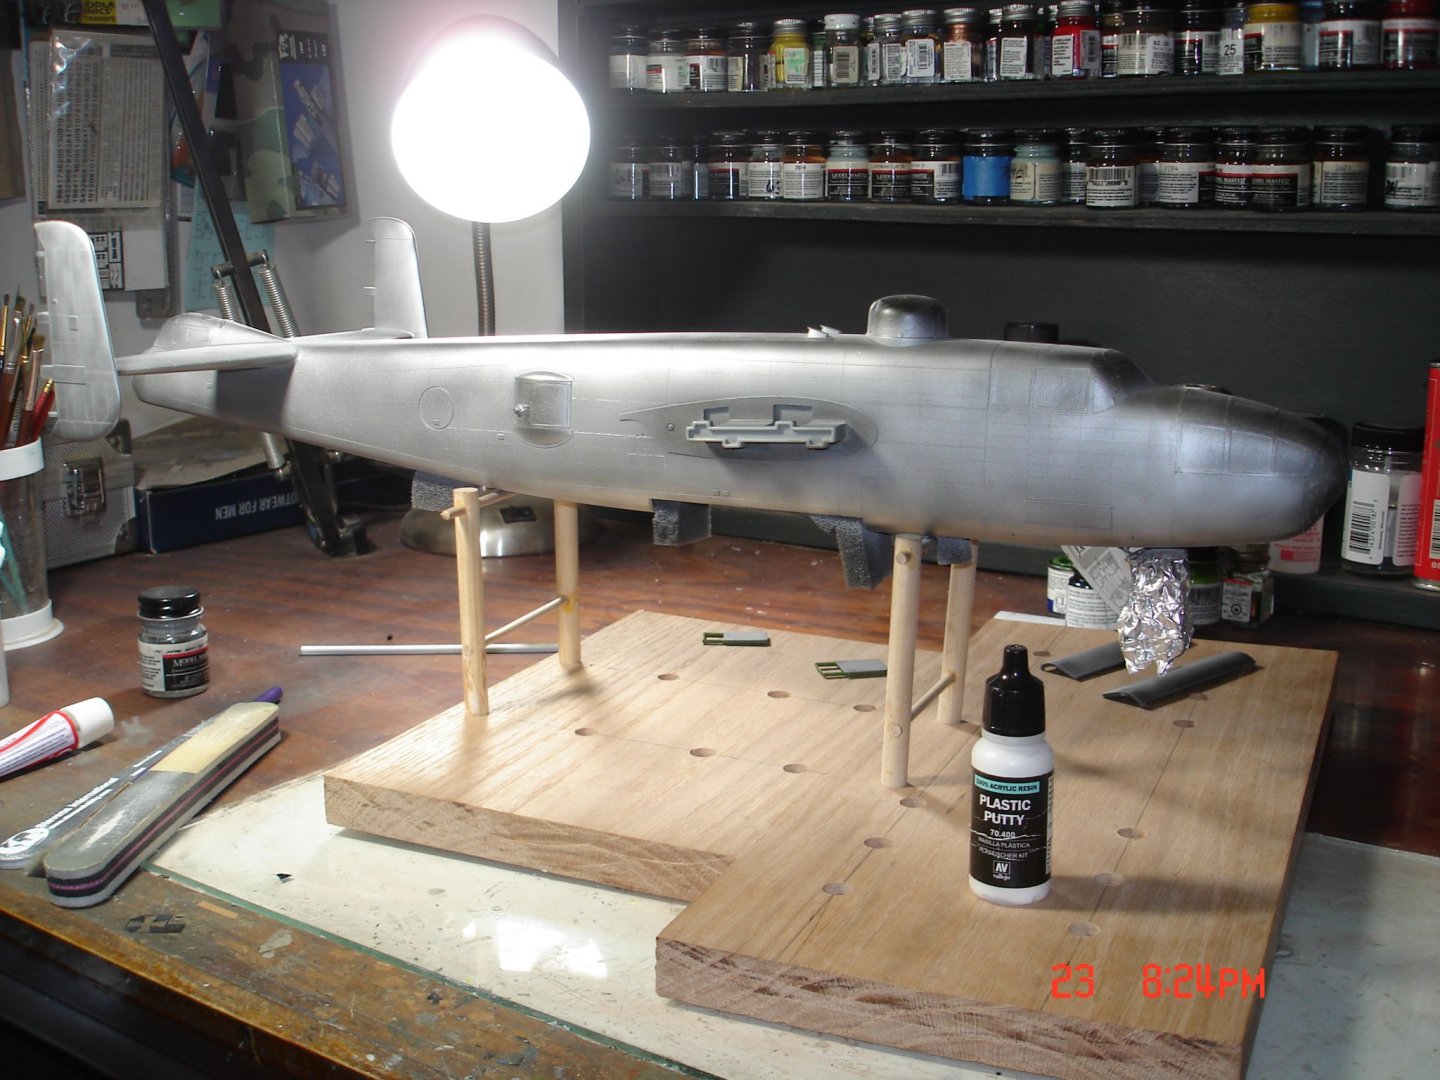


- 209 replies
-
- 13
-
-
Well I have been using Badger Airbrushes since I was about 12 years old with cans of ProPel and that plastic airbrush back then if you keep diving into plastics you know somewhere down the line............? Kevin Then I have seen some hand painted look as good or better.
-
B-25 Mitchell "Meet Miss Runyon" by Javlin-HK-1/32
Javlin replied to Javlin's topic in Non-ship/categorised builds
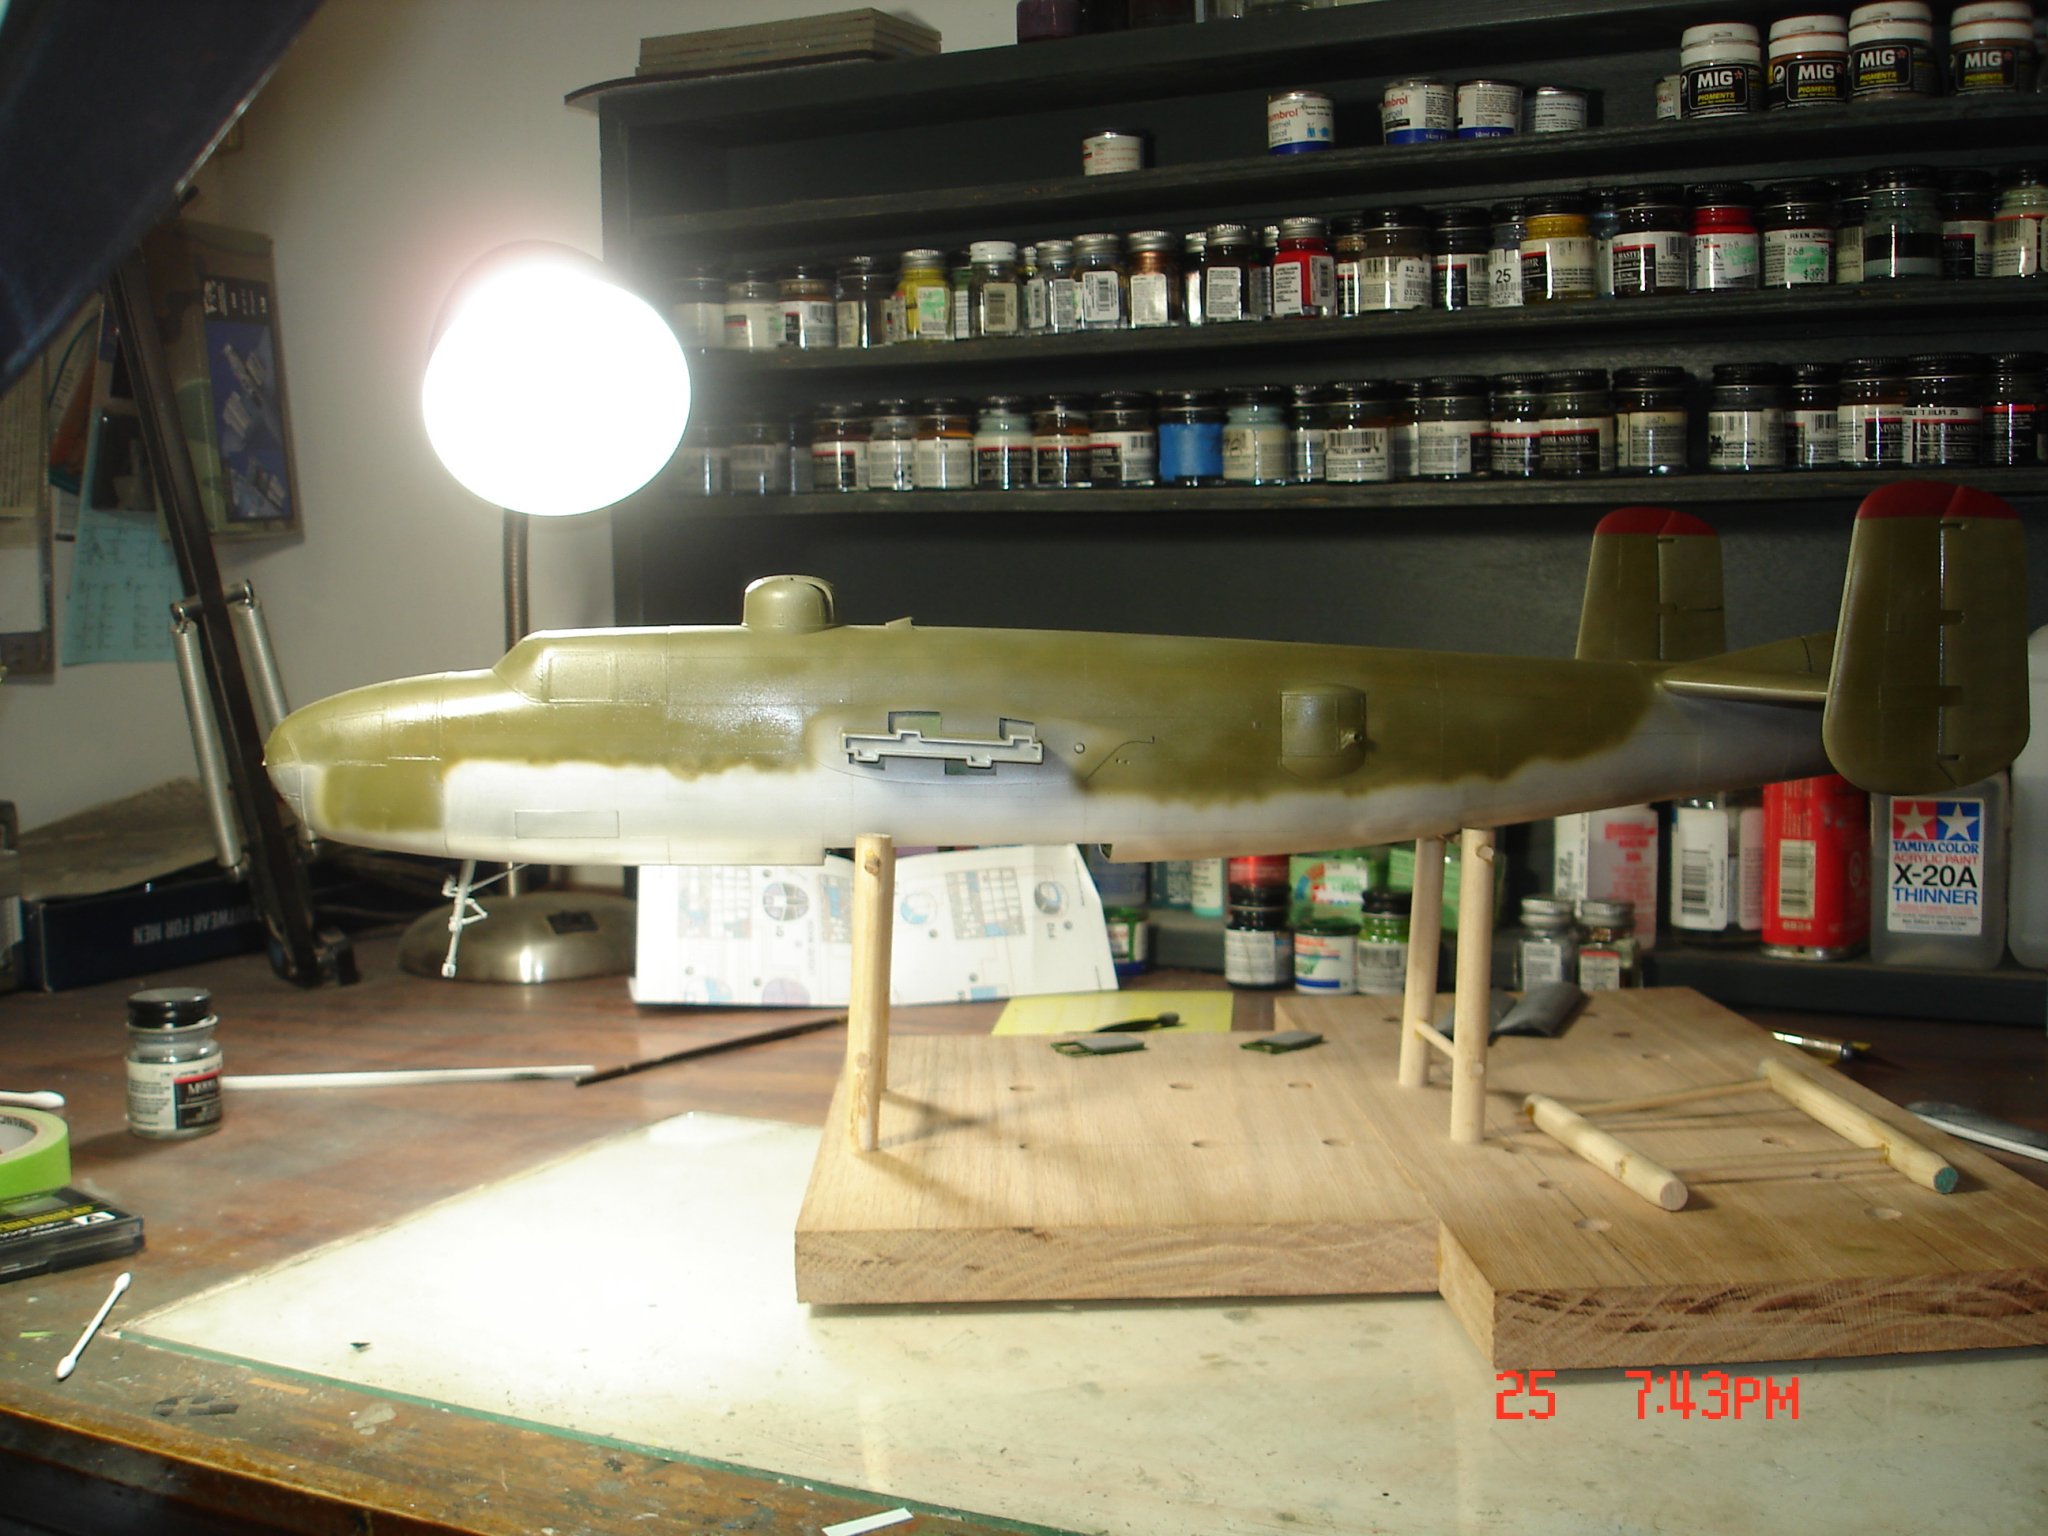
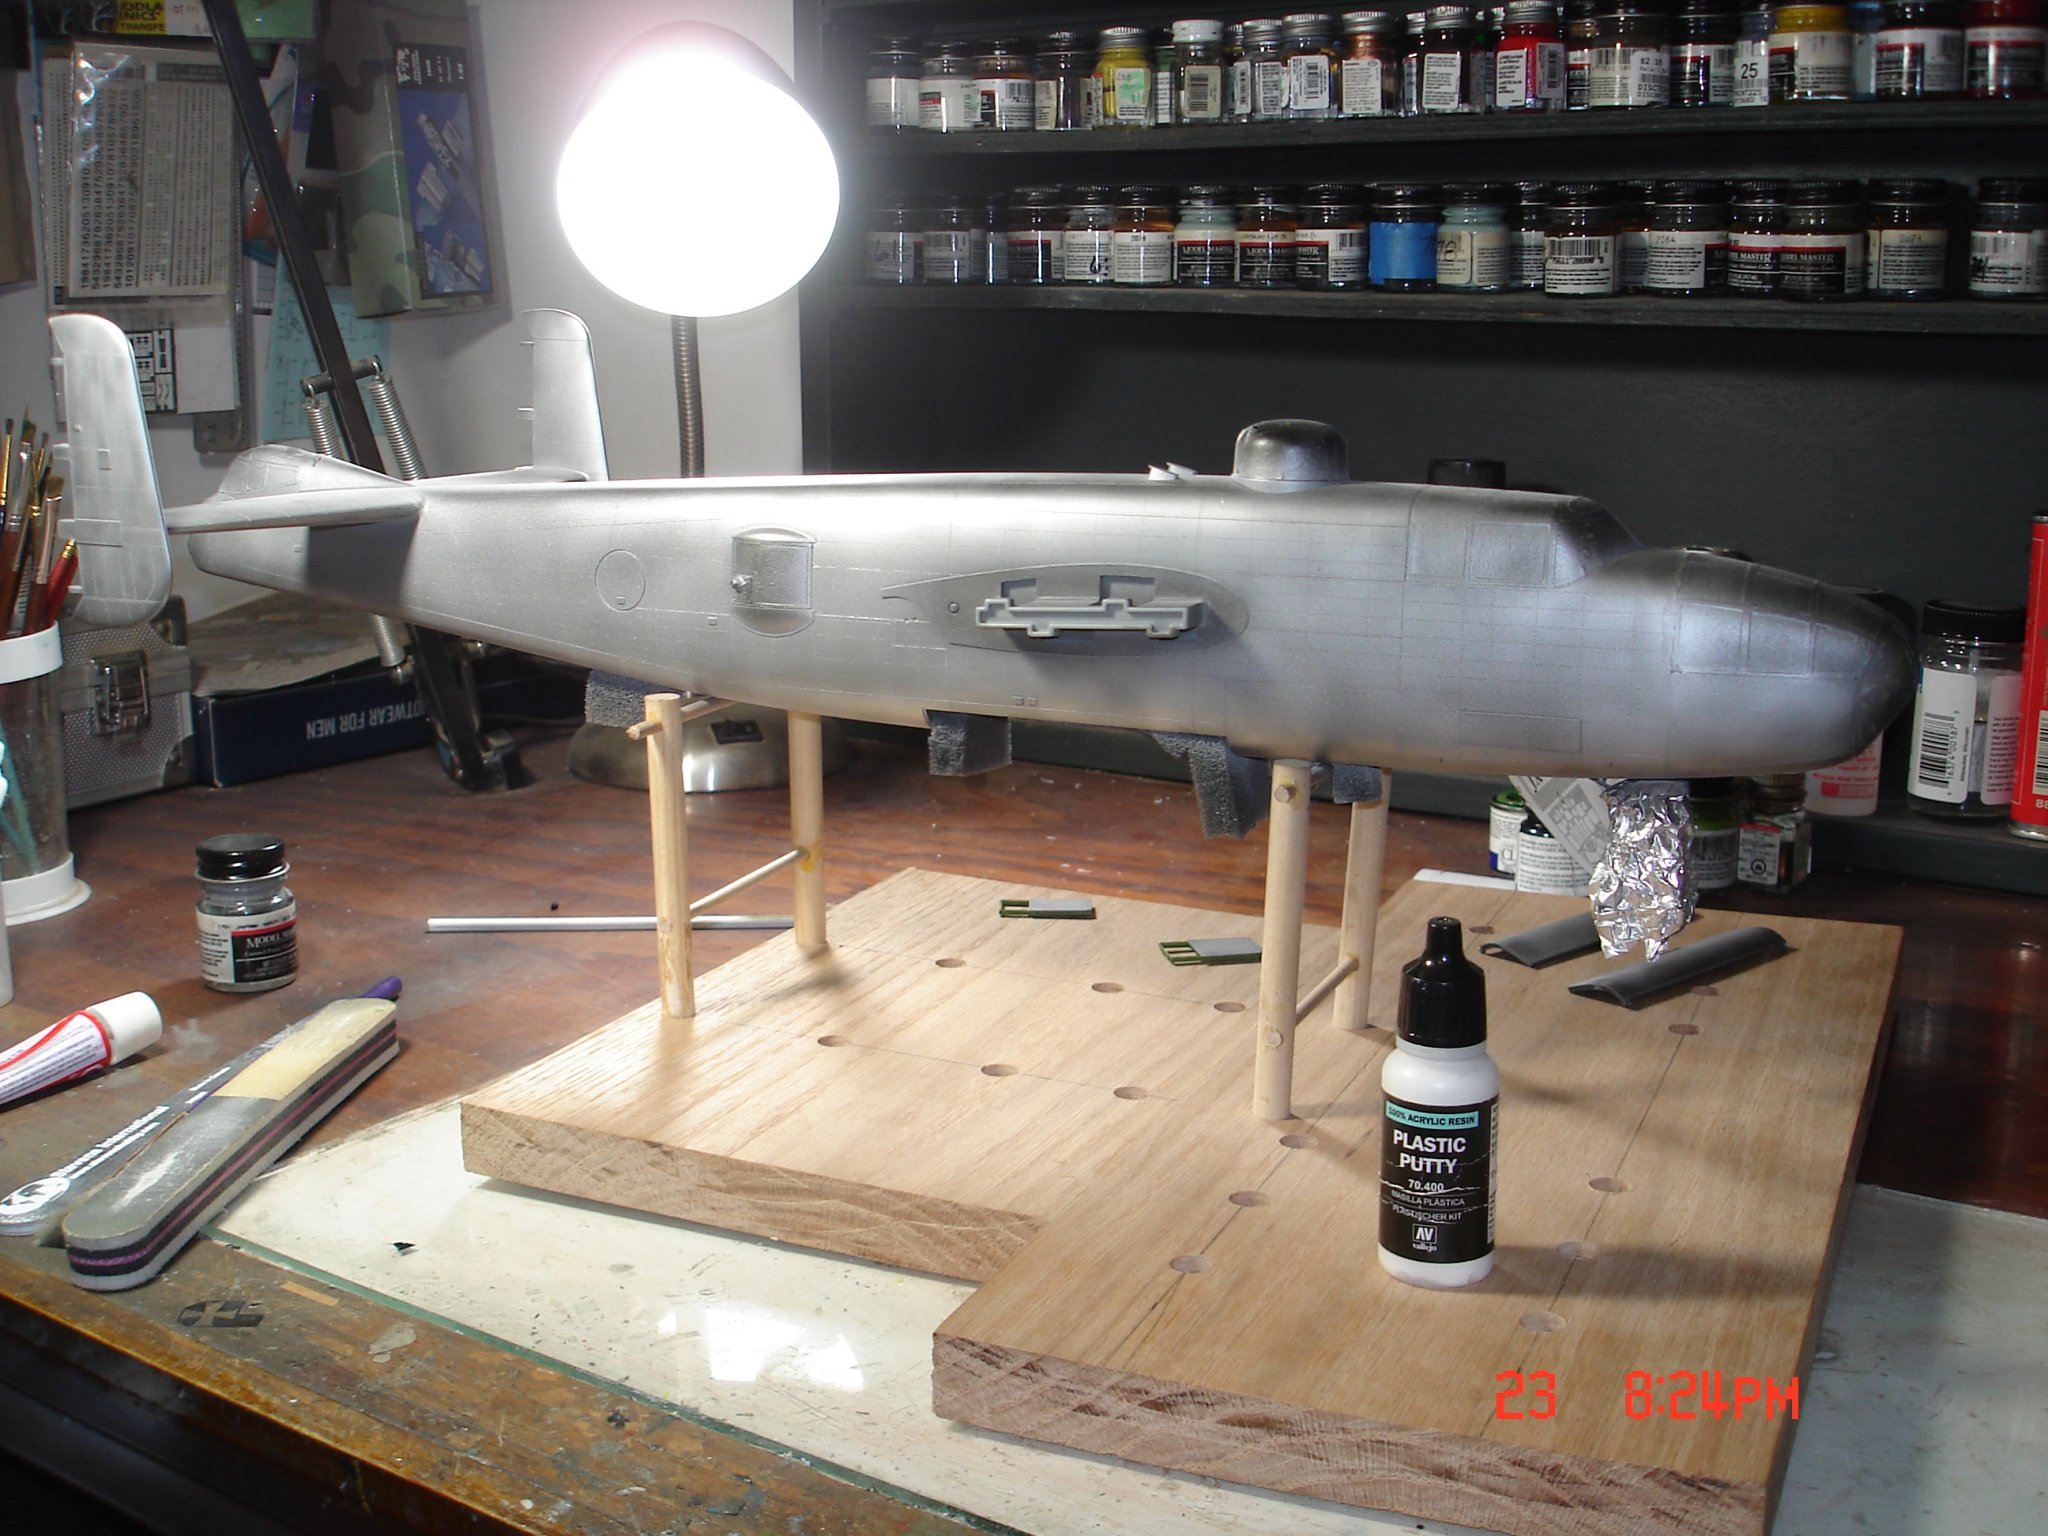
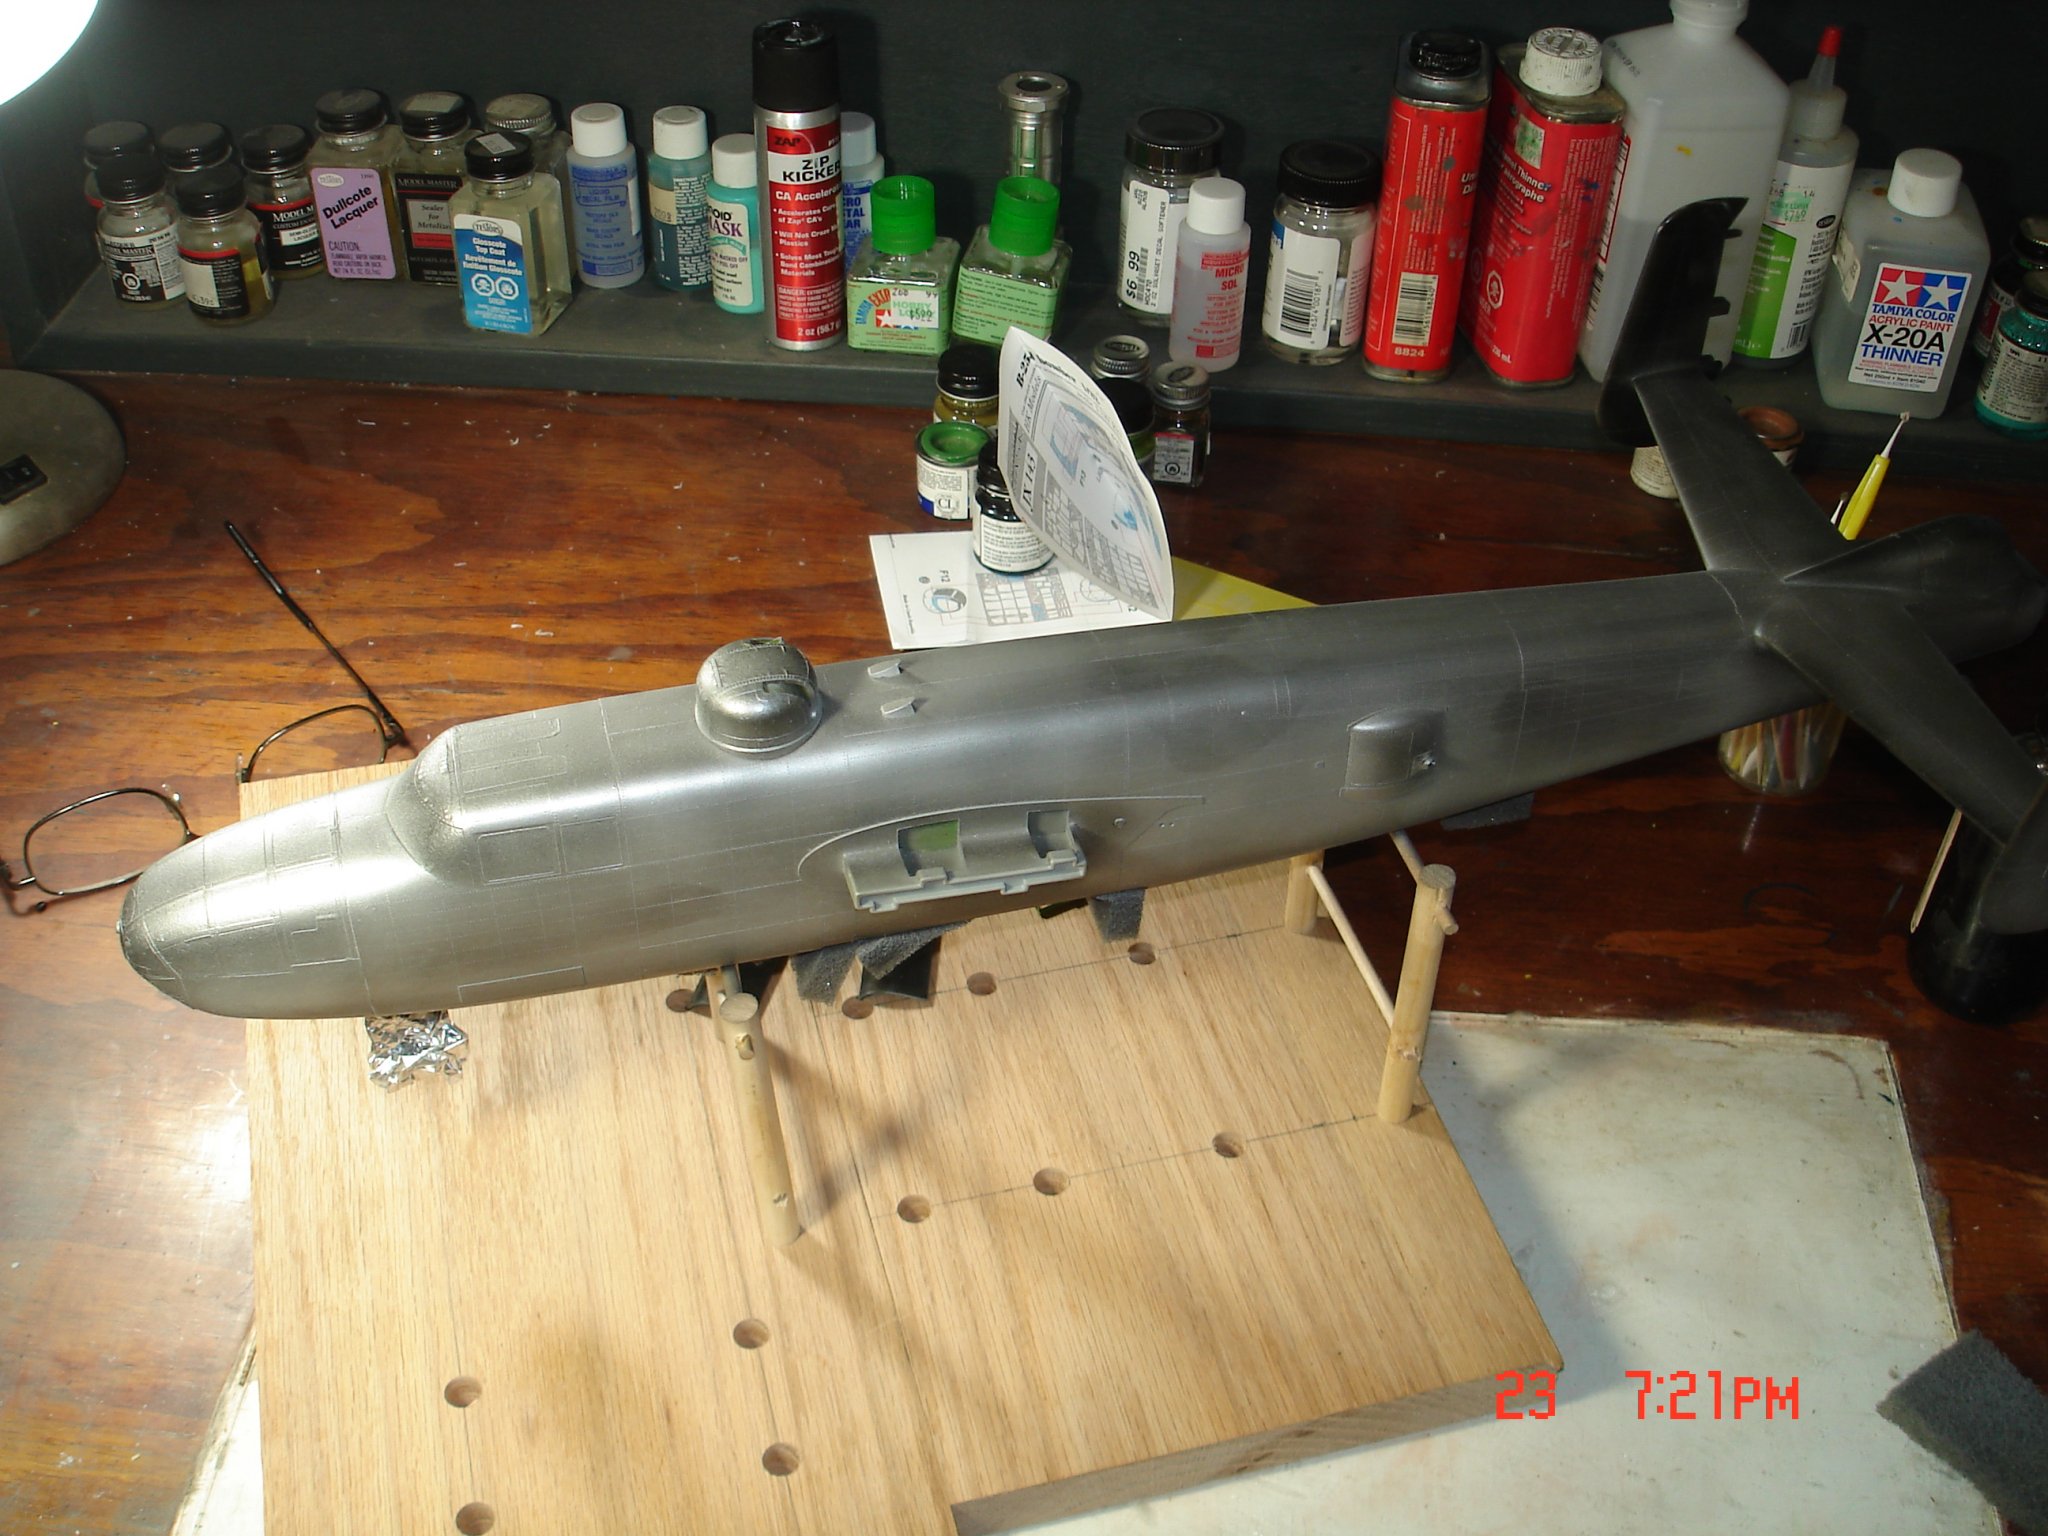
I am using duraluminum by AlClad CD I already found a bumpy spot were the nose piece meets the fuse that I need to smooth out.I then like tonight hit it (silver) with an 800 grit scotch brite to smooth and level it off it actually made the seam along the spine disappear for the most telling the OD will hide it.I have had to paint a plane a few times to get it the way I like like my 1/32 P-47 this one is working pretty good thus far I wanted a matt worn look.

- 209 replies
-
- 12
-
-
B-25 Mitchell "Meet Miss Runyon" by Javlin-HK-1/32
Javlin replied to Javlin's topic in Non-ship/categorised builds
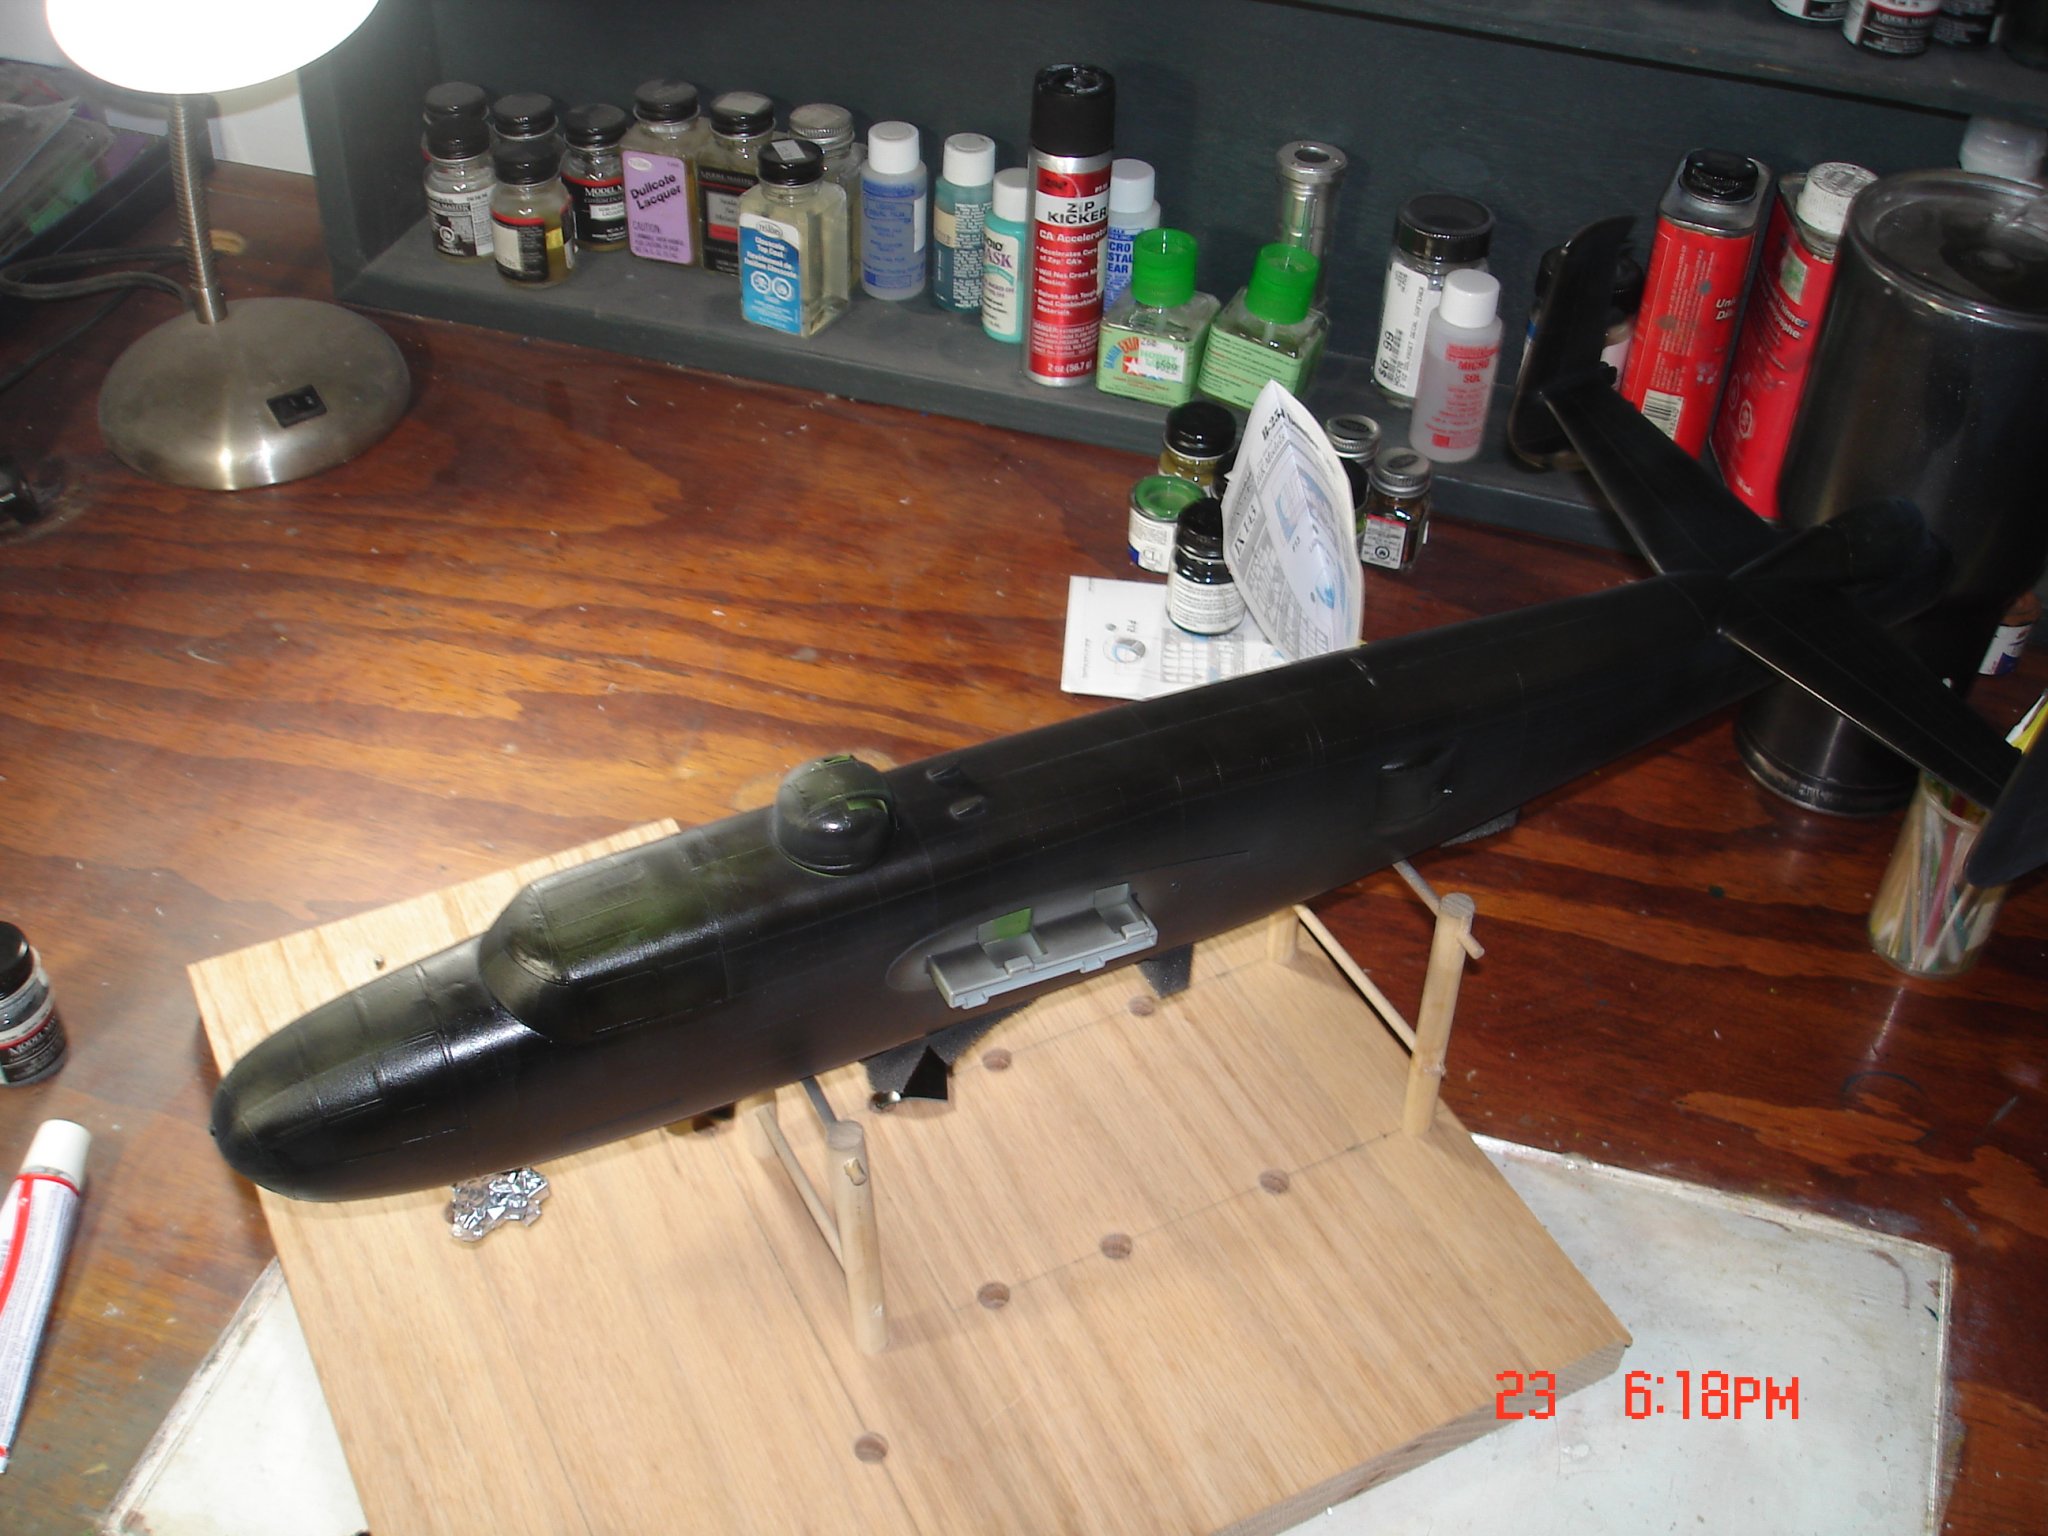
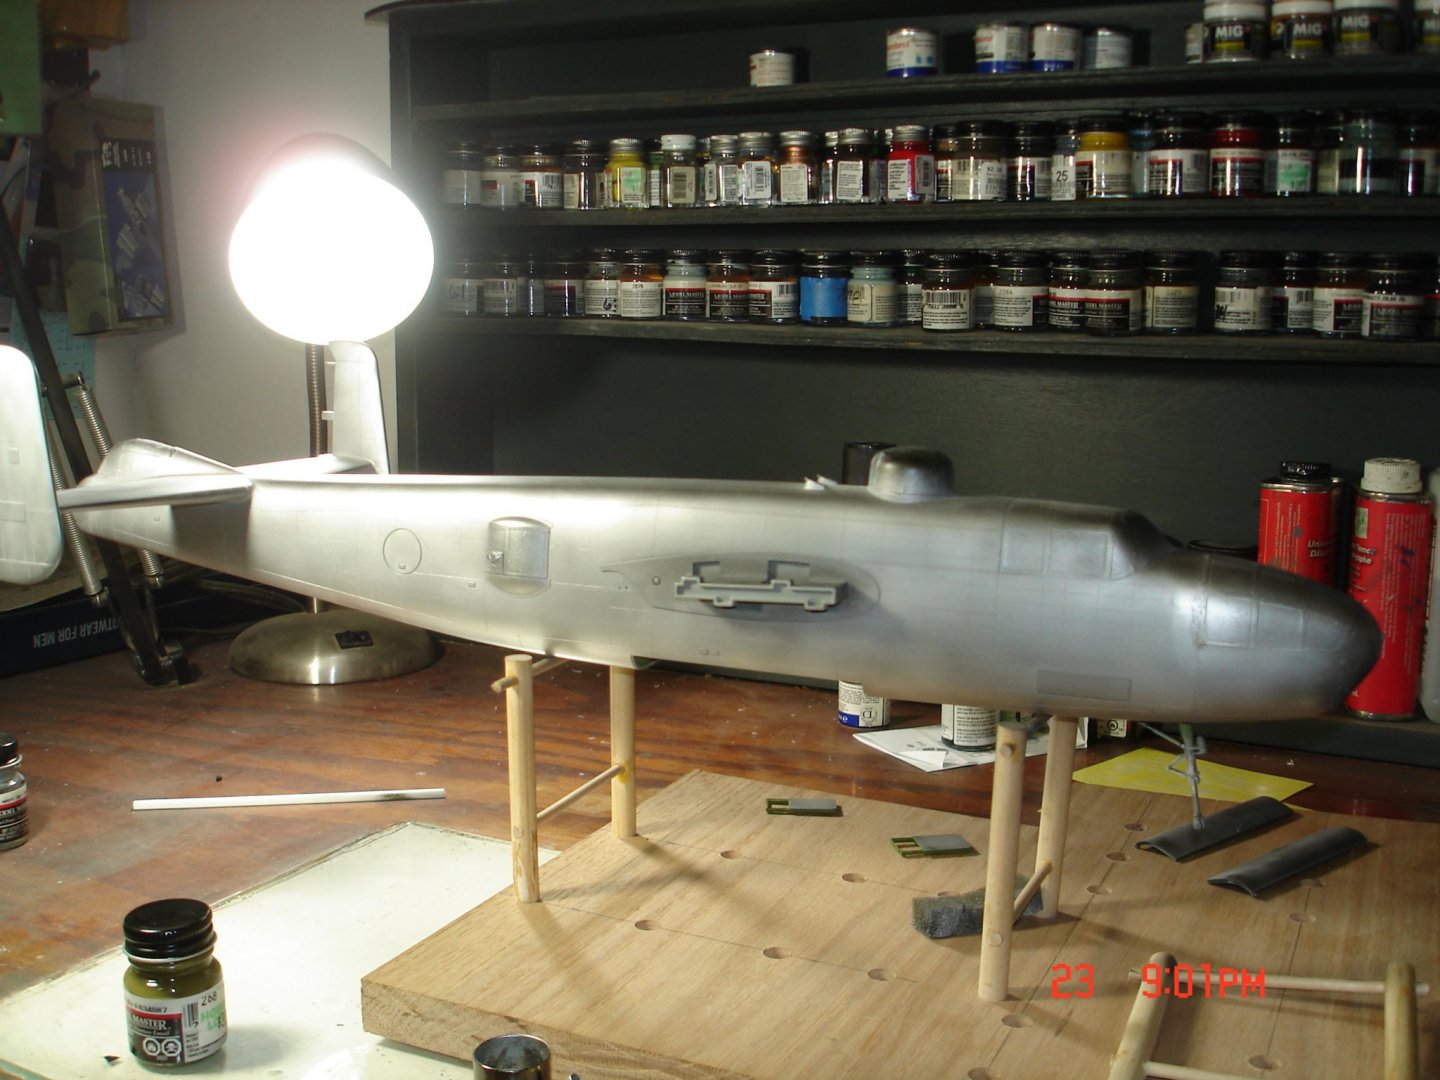
I have laid the black base for the silver and then it is OD for the upper surfaces.I left the fabric pieces off so when I do the OD later should be a tad lighter Kevin

- 209 replies
-
- 12
-
-
Decals look to be SOL when I pulled it out today. Kevin

-
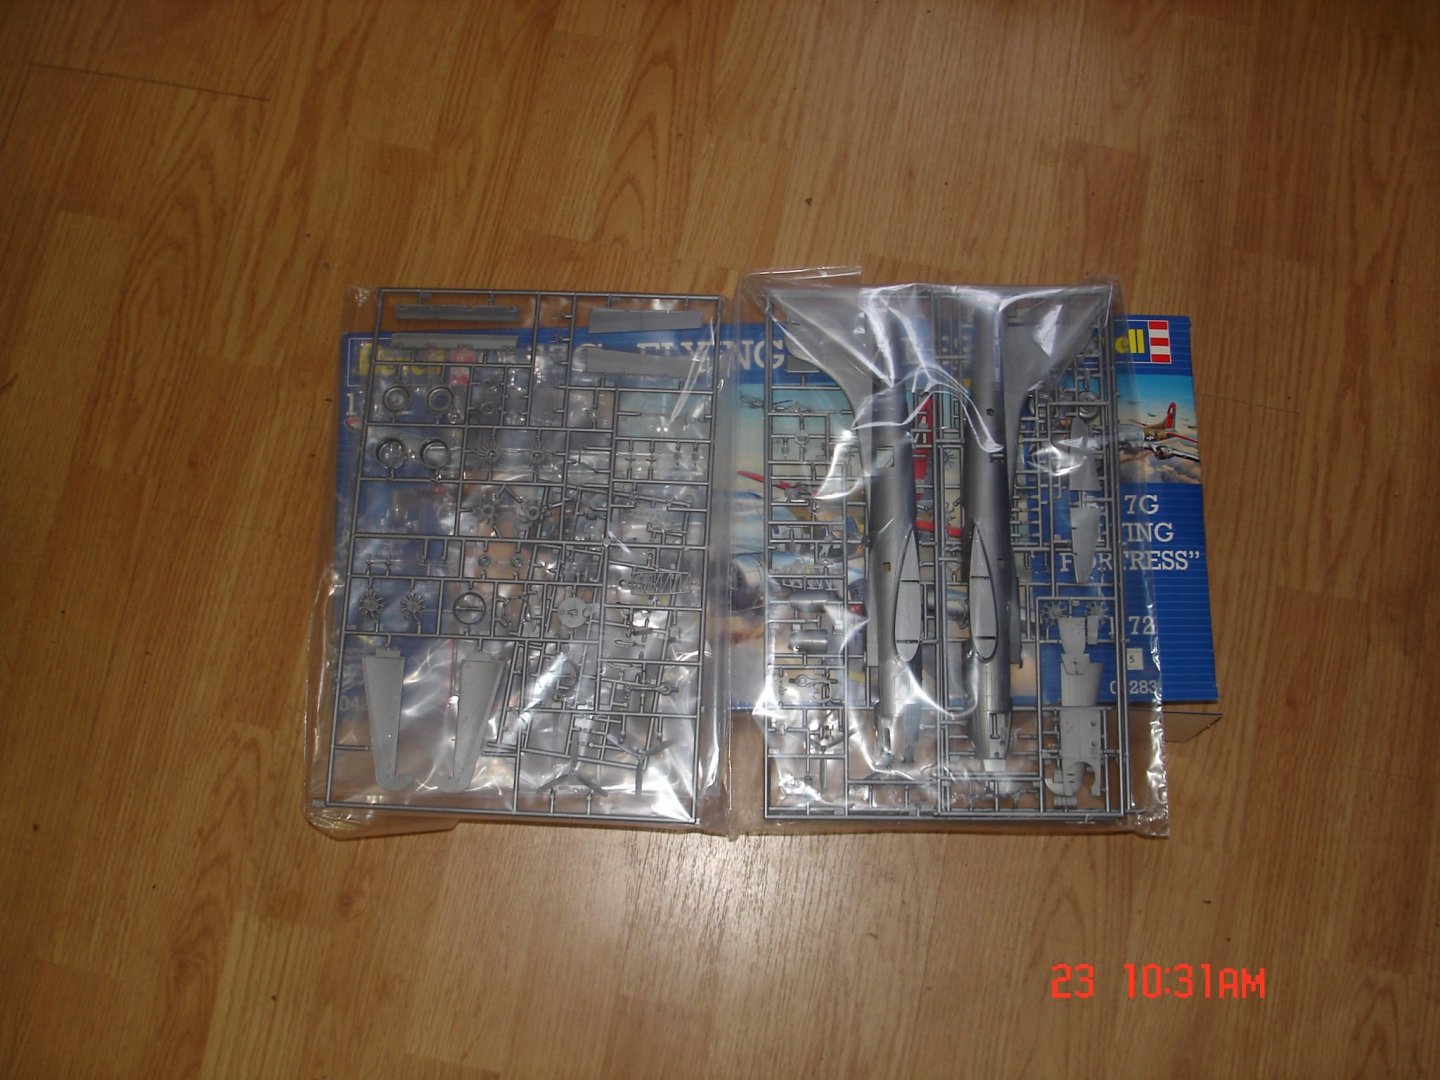
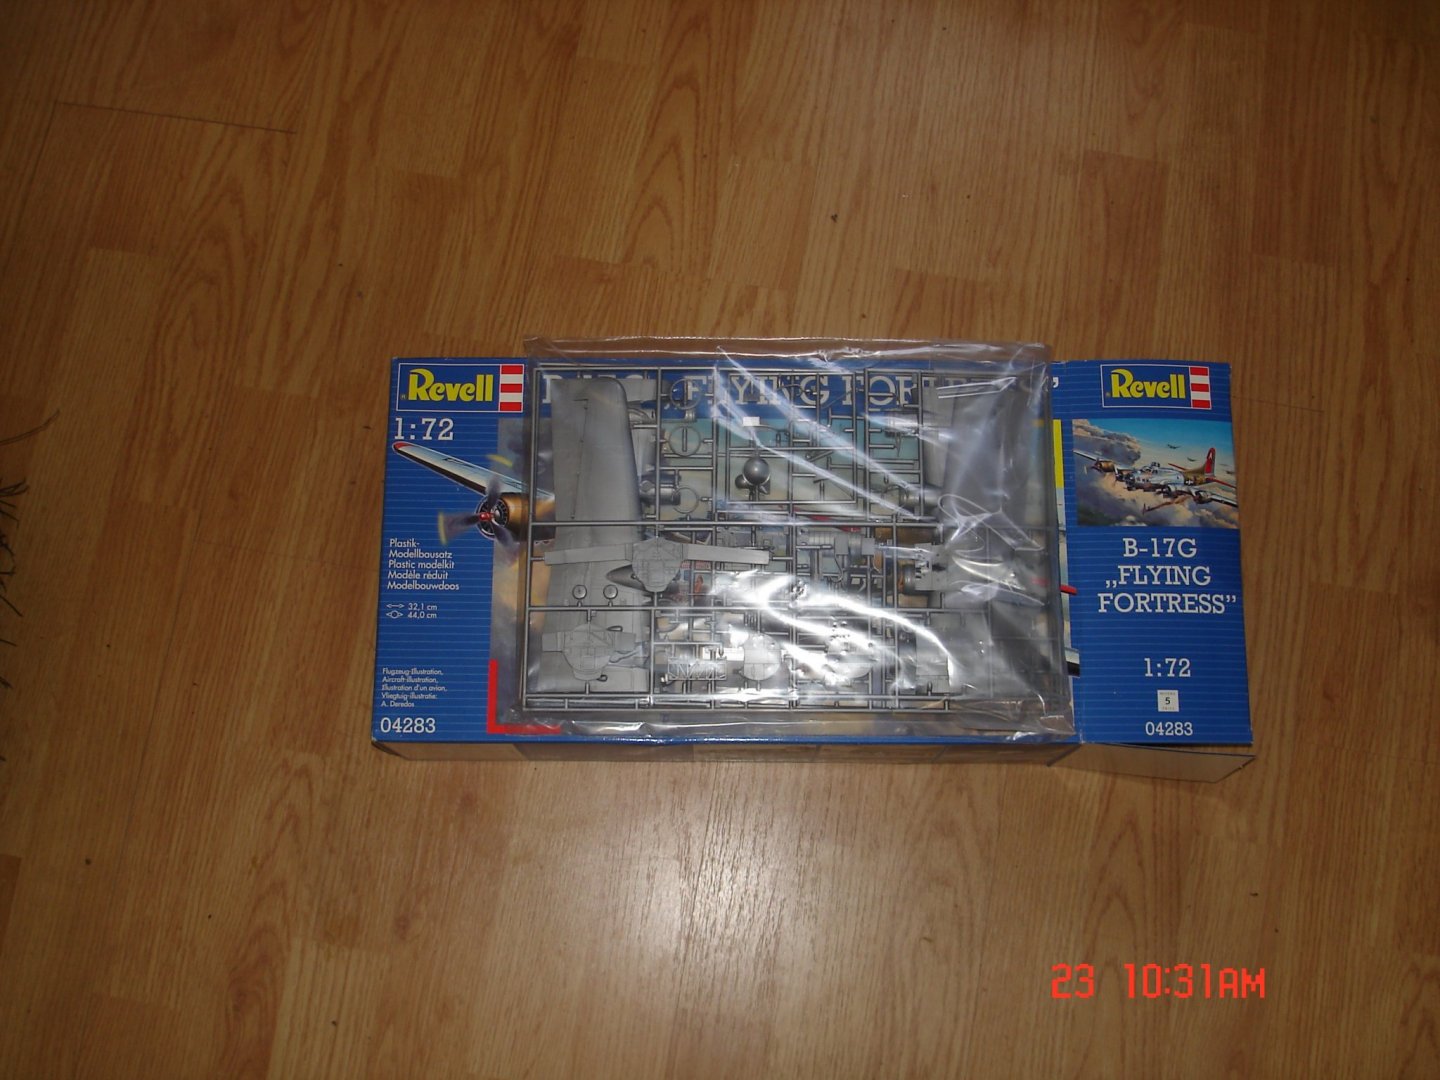
She is unbuilt my eyes for 1/72 are finally starting to fade for the up close stuff have to wear 1.0'sto focus not bad but I have a holiday today to me NO WORKEE today playtime in the shop.I will get a pic of the box art for ye though and contents. Kevin
-
Going to need a hangar for that CD I have the 1/24 Zero from Trump built OOB and the Pit was excellent as is. I P/U one some years back for cheap it makes my Hk B-25 look small.I wish I could get into the Navy side of things in the PTO but they are all blue and grey unlike the AAF.I like the build and you are not cheating in 1/32 you just get/we see it better. Kevin
-
Was exactly my thoughts also Excellente! Yves Kevin
-
B-25J Mitchell by Tom E - Revell - 1:48 Scale - PLASTIC
Javlin replied to Tom E's topic in Non-ship/categorised builds
Looks like a nice PE selection I like how they provided the rear walkway I will keep an eye on the build have a couple smaller 25's in the stash to build. Kevin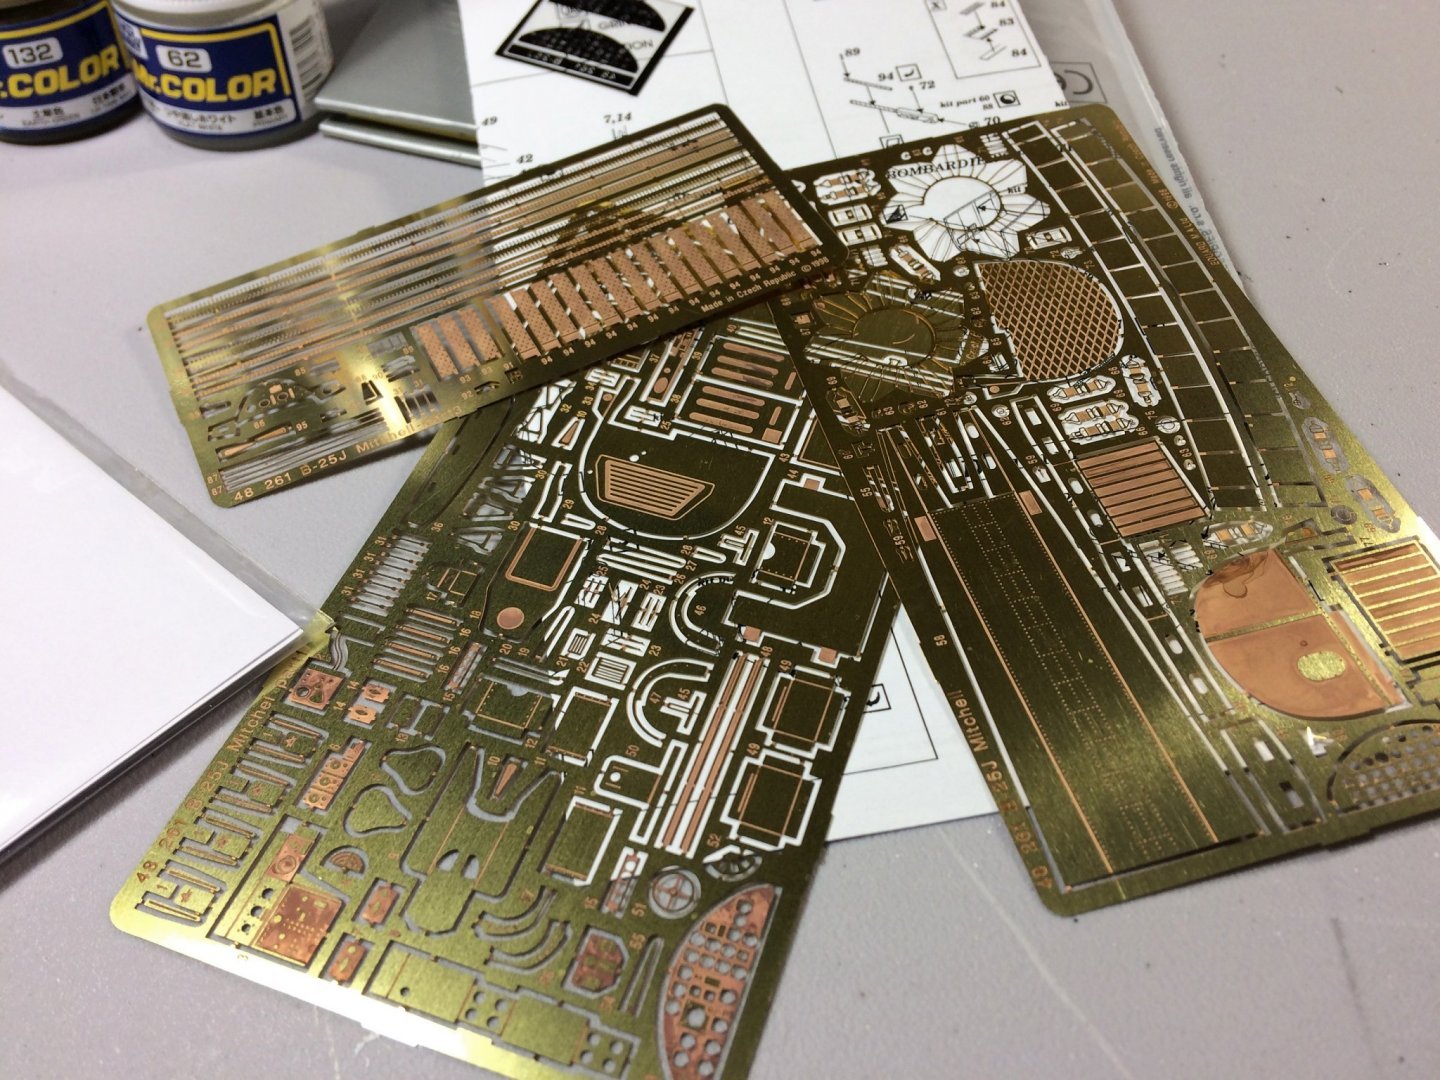
- 120 replies
-
- 10
-
-
The build is looking good OC Kevin
-
B-25 Mitchell "Meet Miss Runyon" by Javlin-HK-1/32
Javlin replied to Javlin's topic in Non-ship/categorised builds
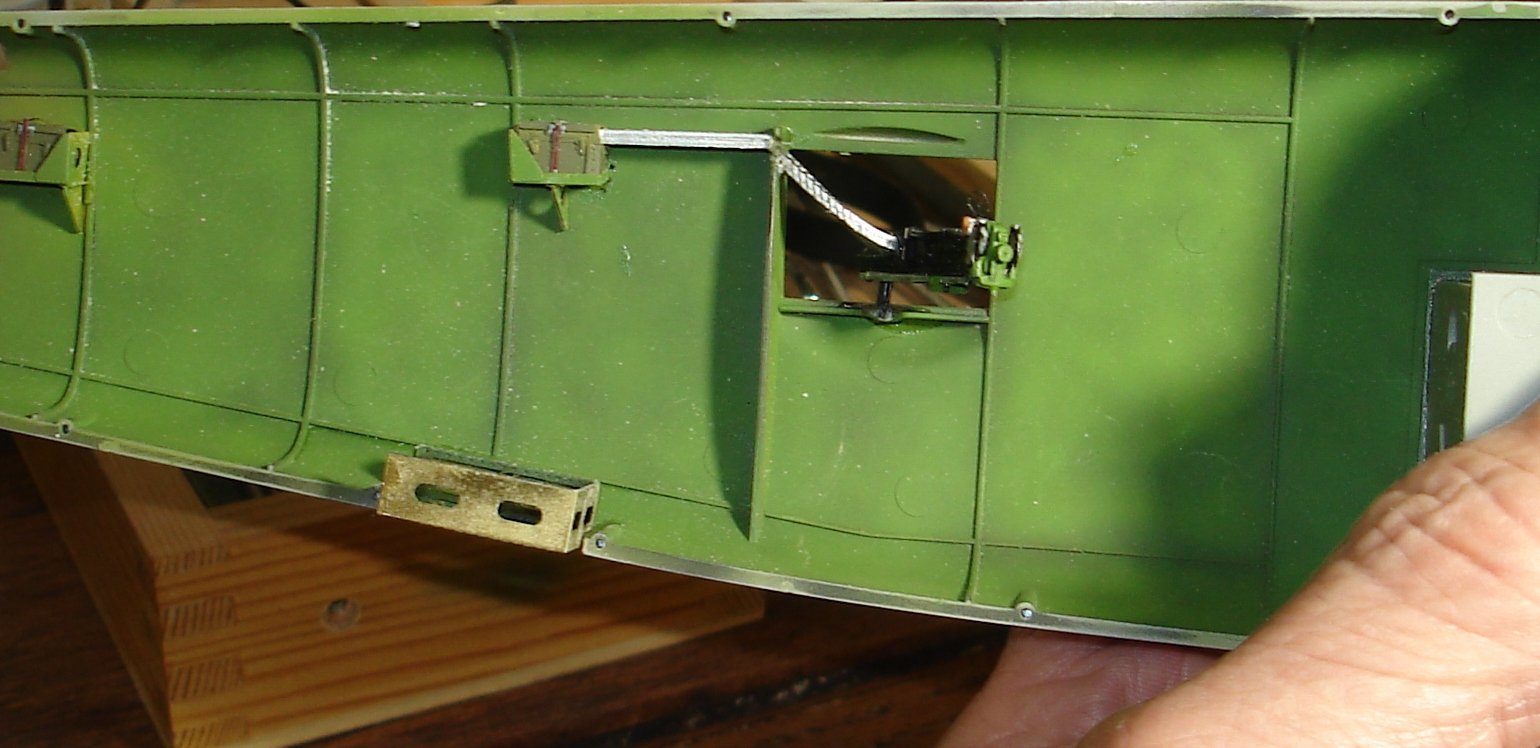
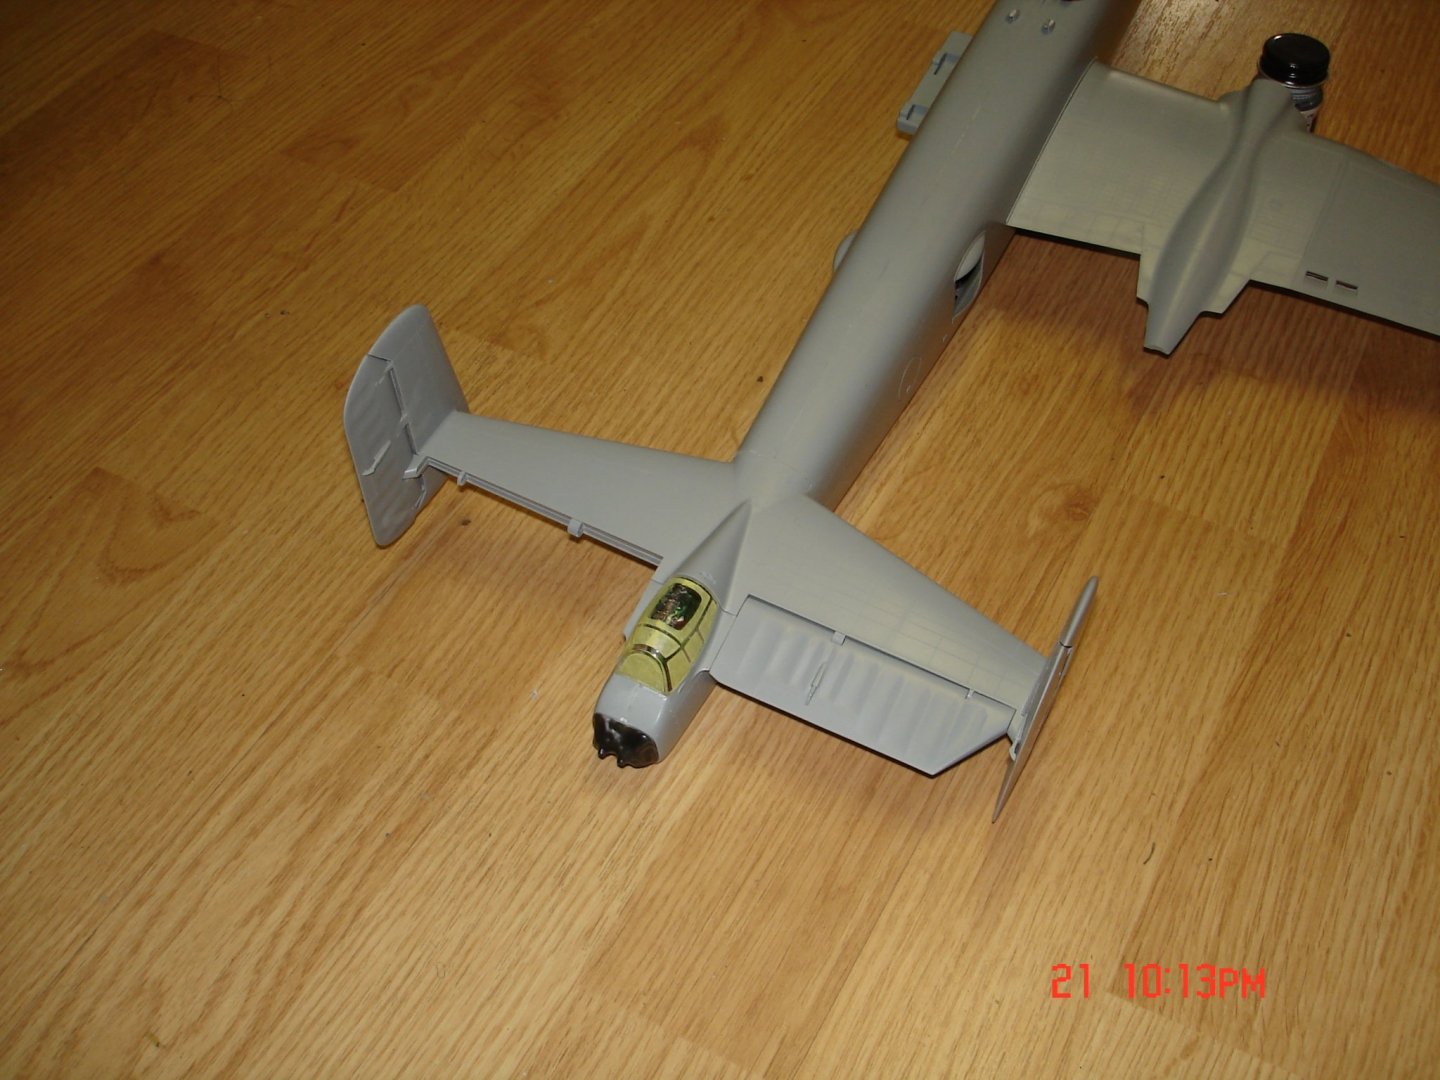
I've been pulling all nights this week so not alot to show.The fuse was married some days ago and sanded when I had ambition and time to which I broke out 3Xbombs,busted the mount for the upper ball turret and broke the 50cal out of the nose piece.Good thing all are easy repairs and the only one left to fix is the bombs going to wait till the paint is laid.I took the advantage of the nose gun coming loose to retread with the appropriate color thread of grey and most of the masking is just about done.The plane is huge the bottle of paint was to show the size but it really does not work but I can tell you the tail is about 7/8" across the wingspan of a 1/48 fighter.I am going to finish the wings before I move on to the engines.Thks for looking in Kevin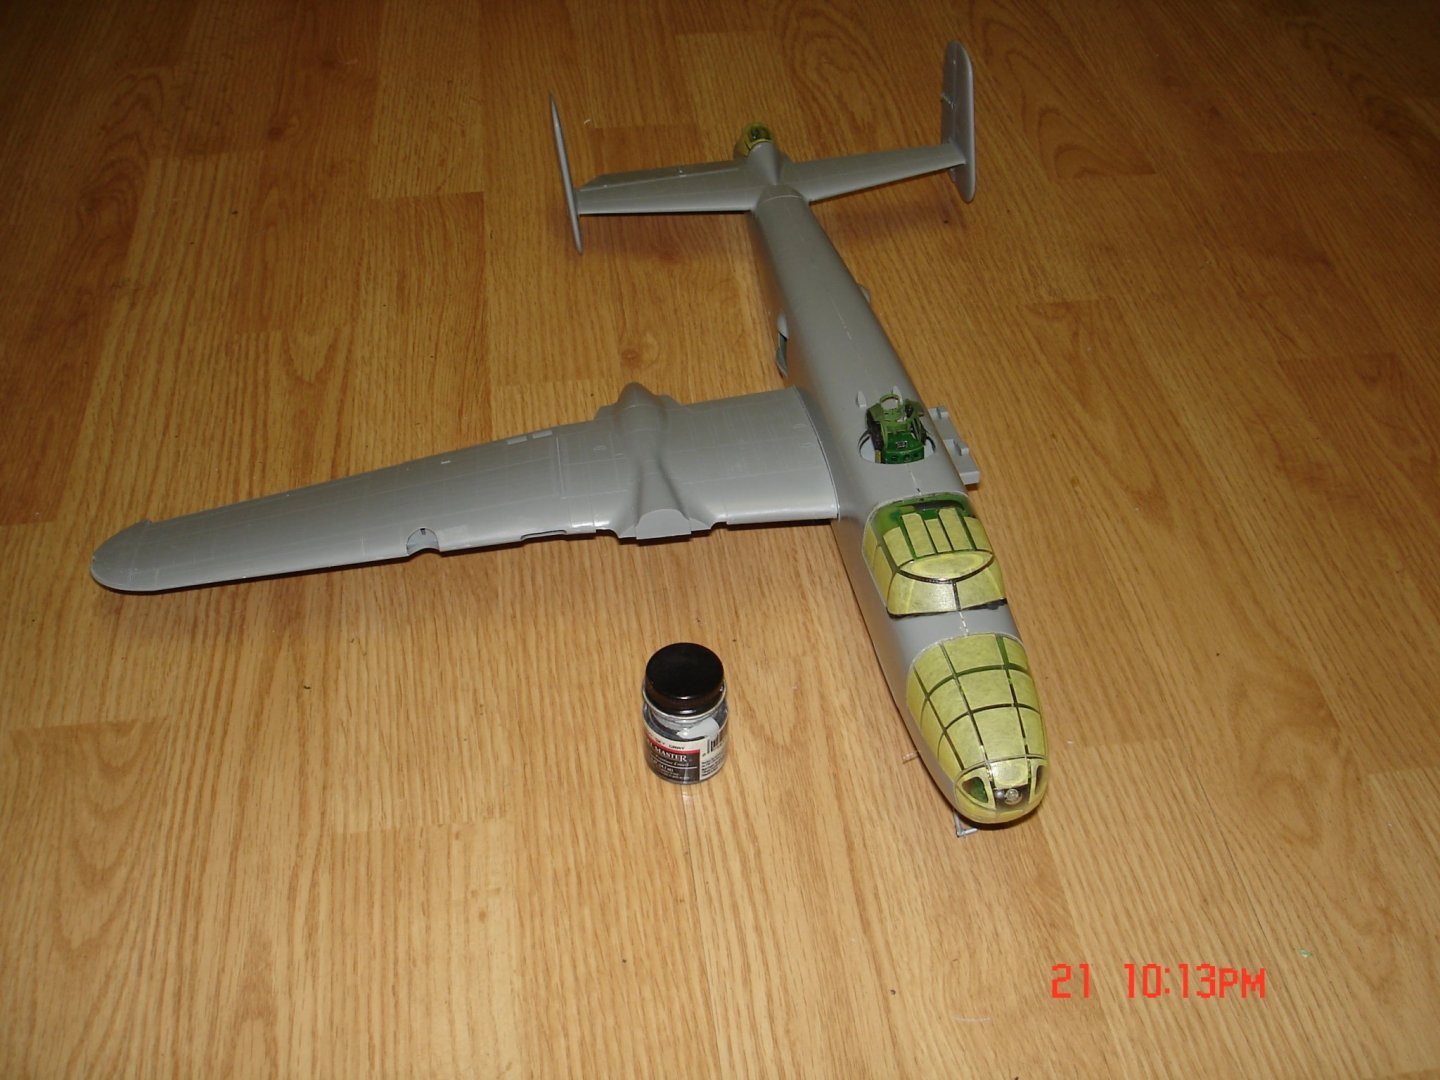
- 209 replies
-
- 13
-
-
Oh it looks that way most excellent work now this pic you took gave me a quick illusion of Steps on the first glance. are you thinking what I am thinking?
-
B-25 Mitchell "Meet Miss Runyon" by Javlin-HK-1/32
Javlin replied to Javlin's topic in Non-ship/categorised builds
Still don't know if it will be enough Lou may put some in the engines?thks Mike Kevin -
B-25 Mitchell "Meet Miss Runyon" by Javlin-HK-1/32
Javlin replied to Javlin's topic in Non-ship/categorised builds
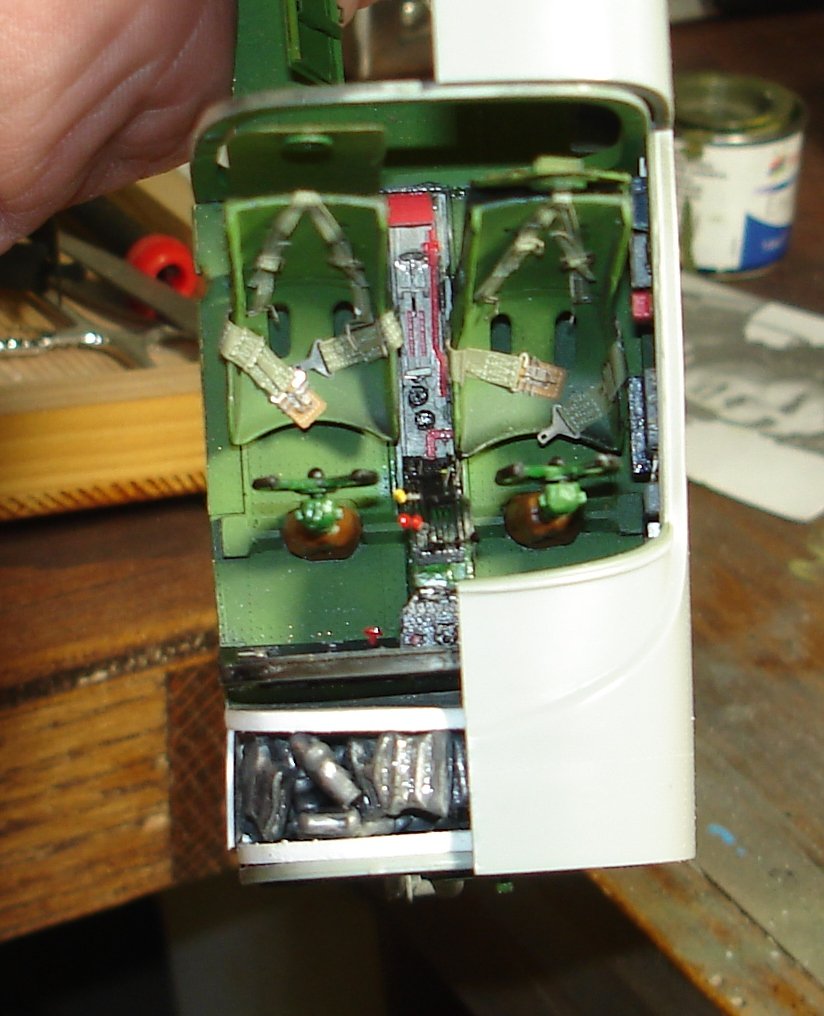
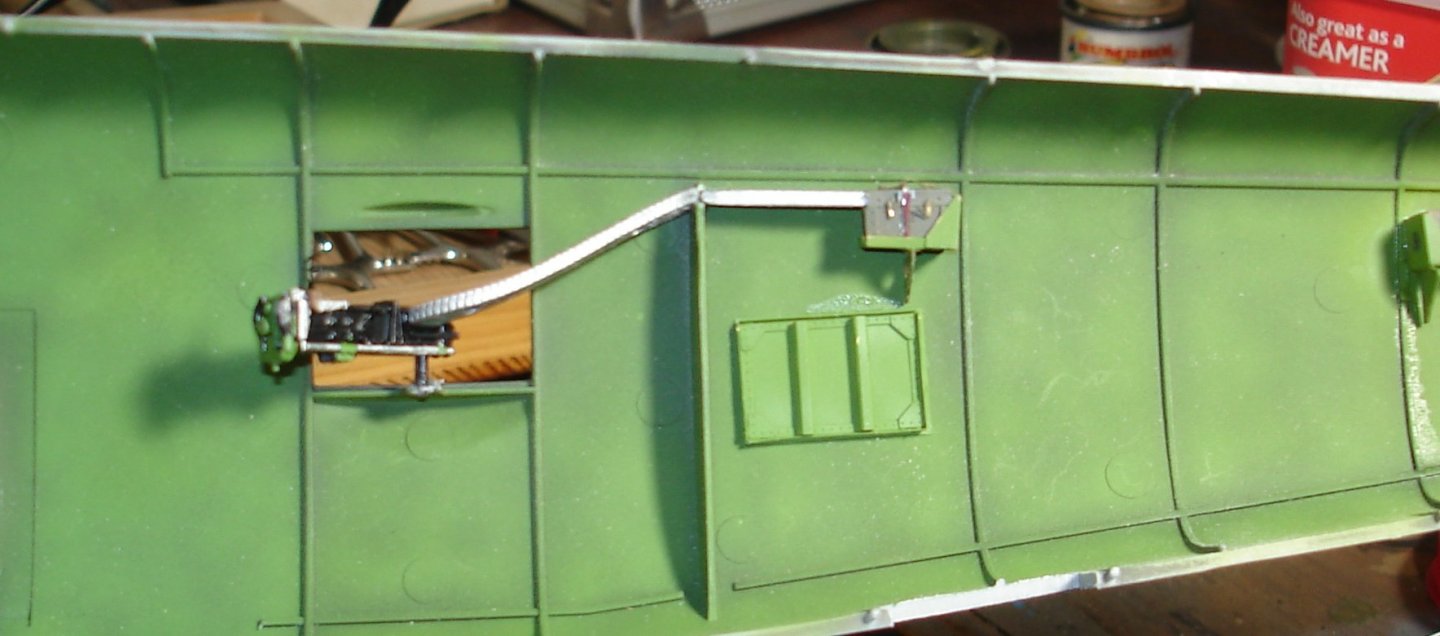
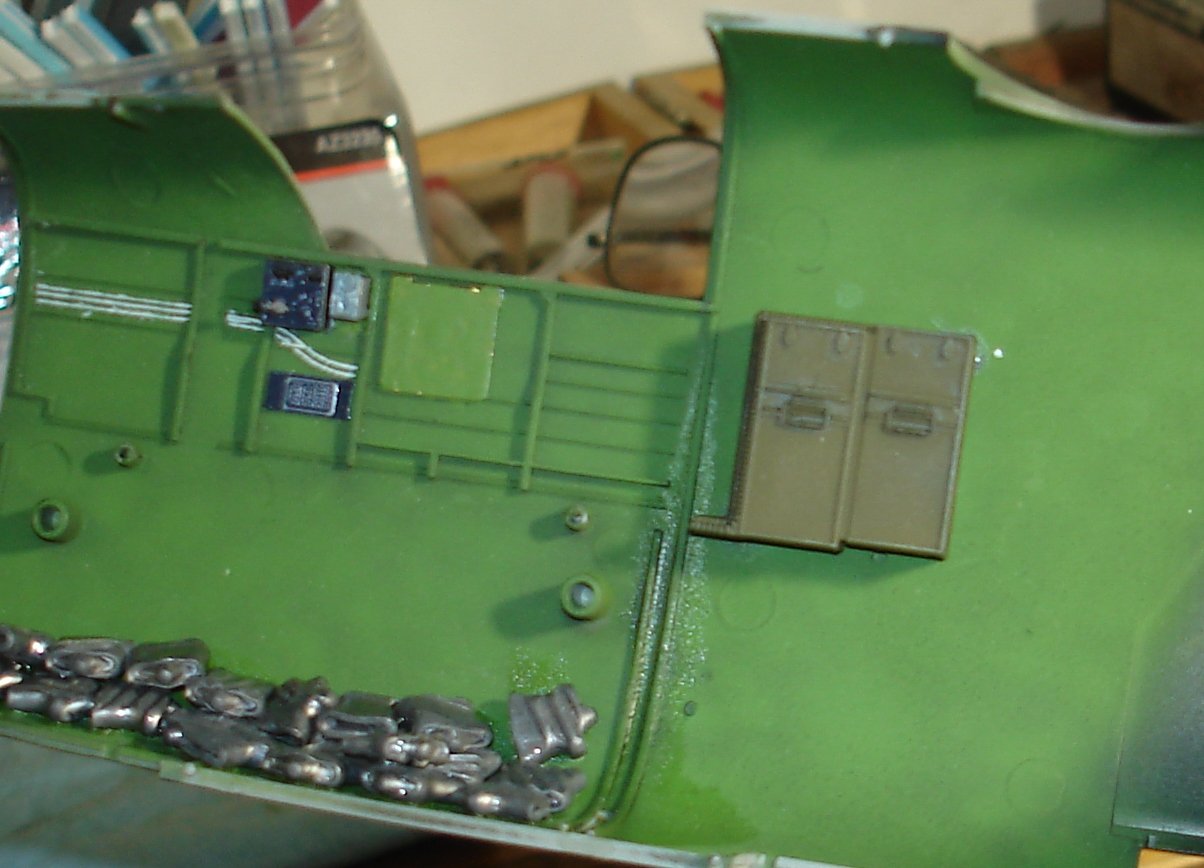
I have taken this interior about as far as I am willing to go she now sits over night with the top seam drying.I made the box to hold some lead .22 pellets smashed out and started filling the wheel well area and underneath the floorboard of the bombardier section.As for the belts I think I am going back to Radu's they are easier to play with in my opinion used them on the P-51. Kevin http://www.radubstore.com/index.php?main_page=product_info&cPath=89_126&products_id=201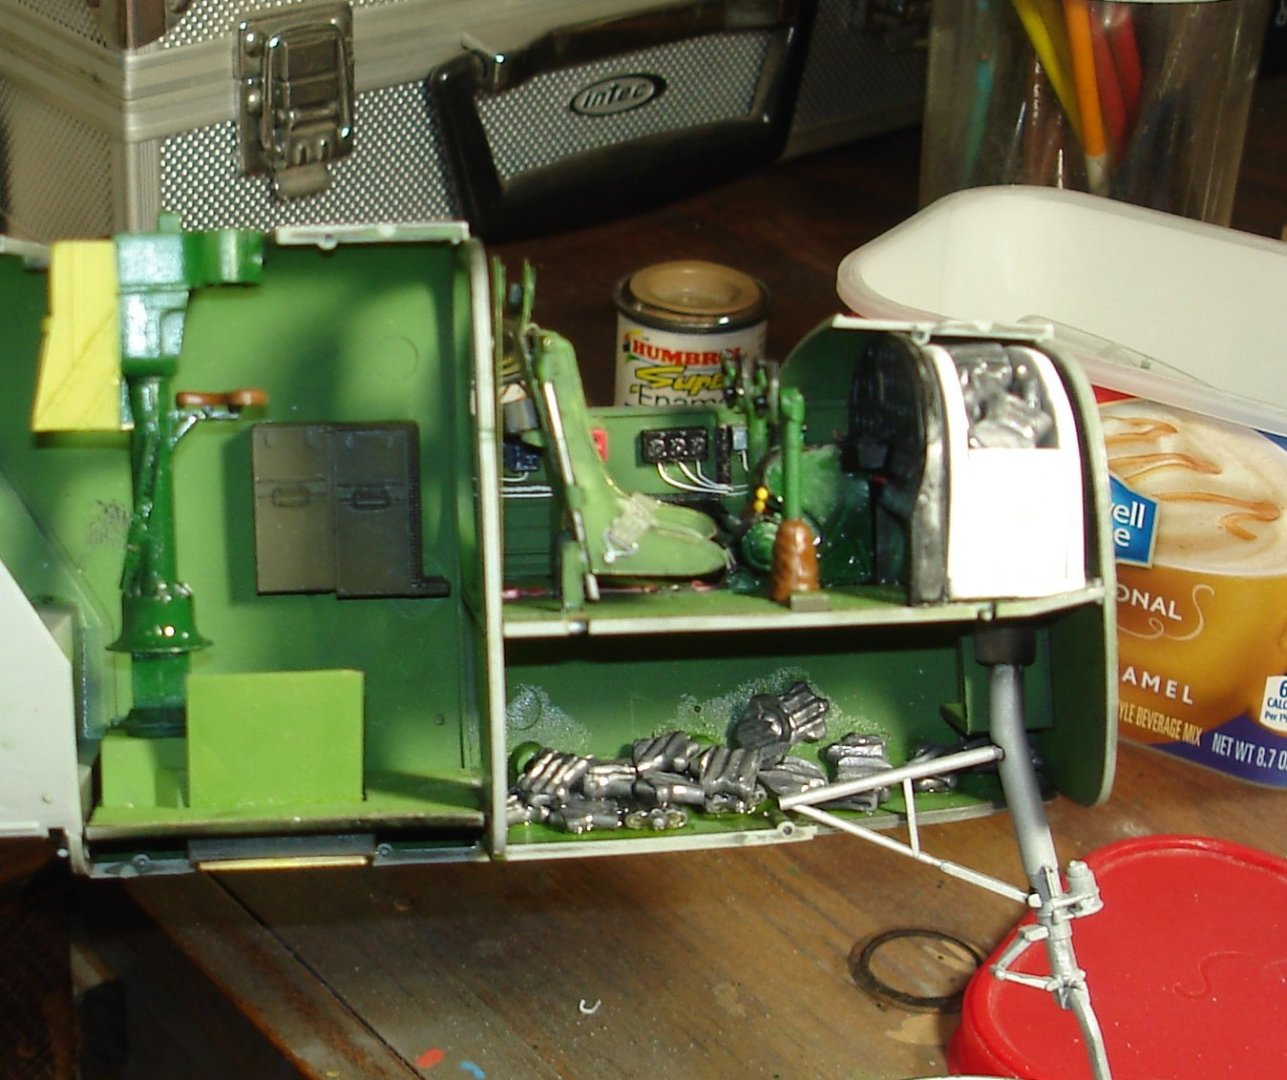

- 209 replies
-
- 13
-
-
I know what you mean did that years ago on a 1/24 Me109 G-6 I think I had 11+ pieces in a scratch-built O2 regulator it stood out. Kevin
-
I like the way that came out OC looks like a natural state. Kevin
-
To cool feels like a movie prop Kevin