Django Posted January 2, 2023 Share #1 Posted January 2, 2023 My father built a model of the Malek Adhel after returning from his time in the CCC. He began it in February 1938 and completed it in February of 1940. It took him 2,500 hours. After retiring, he gave it to my older brother. My brother’s wife hated it and the ship along with it’s custom made case went into the basement. The case was destroyed, the base warped, the masts, bowsprit and rigging badly damaged. After years of neglect, my brother asked me if I wanted it, (I did not). I ended up with it anyway. Now that I am retired and have some time to devote to the project, I have decided that it is time to get to work on it. I have replaced the damaged spars and I planed the original base and routed the edges, (he chose a beautiful piece of wood). I also have an antique display case for it. My father did an amazing job, especially considering that he was only 20 years old when he started building it. He made his own little lathe and used to borrow his mother’s washing machine motor to operate it. My grandfather hand cut the lettering from a thin sheet of gold using a jeweler’s saw. Most of the standing rigging is still solid, but the running rigging is very fragile and will need to be replaced. I do have the original blueprints and the 1938 Popular Science articles, but I was hoping that someone might be kind enough to post some closeup pictures of similar boats and rigs. Thank you in advance for any advice and pictures. Wintergreen, Dave_E, mtaylor and 5 others 8 Quote Link to comment Share on other sites More sharing options...
ccoyle Posted January 2, 2023 Share #2 Posted January 2, 2023 Hi! That's a beautiful model, and I wish you success in your restoration efforts. I have moved this to a more appropriate area of the forum -- hope you get your rigging questions answered soon. Quote Chris Coyle Greer, South Carolina When you have to shoot, shoot. Don't talk. - Tuco Current builds: Brigantine Phoenix Link to comment Share on other sites More sharing options...
Django Posted January 2, 2023 Author Share #3 Posted January 2, 2023 Thank you mtaylor 1 Quote Link to comment Share on other sites More sharing options...
ccoyle Posted January 2, 2023 Share #4 Posted January 2, 2023 It occurred to me that you might try sending a message to @alross2. He's the designer-in-residence for BlueJacket Shipcrafters, and they make a kit of the US Navy brig Perry 1843, a contemporary of Malek Adhel, so they would have had similar rigging. Al might be able to direct you to reliable sources, or you might even be able to make use of Perry's rigging plan, which you can purchase from BlueJacket.. Ryland Craze, Django, alross2 and 1 other 3 1 Quote Chris Coyle Greer, South Carolina When you have to shoot, shoot. Don't talk. - Tuco Current builds: Brigantine Phoenix Link to comment Share on other sites More sharing options...
GrandpaPhil Posted January 2, 2023 Share #5 Posted January 2, 2023 I see that you have the original rigging plans from 1938. That looks like a standard brig configuration. If you search for brig by title on the search function, for Model Ship World, you can see the other brigs that have been built on this forum. That way you can get a visual idea of how the rigging goes together, which is what I think you are asking for. I have a book called Historic Ship Models by Wolfram Zu Mondfeld. It is a most excellent resource for understanding most aspects of model ship building, but rigging in particular. I use that book so much that I am on my 3rd copy of it. Django, mtaylor and Dave_E 2 1 Quote Building: 1:64 HMS Revenge (Victory Models plans) 1:64 Cat Esther (17th Century Dutch Merchant Ships) On the building slip: 1:72 French Ironclad Magenta (original shipyard plans) On hold: 1:98 Mantua HMS Victory (kit bash), 1:96 Shipyard HMS Mercury Favorite finished builds: 1:60 Sampang Good Fortune (Amati plans), 1:200 Orel Ironclad Solferino, 1:72 Schooner Hannah (Hahn plans), 1:72 Privateer Prince de Neufchatel (Chapelle plans), Model Shipways Sultana, Heller La Reale, Encore USS Olympia Goal: Become better than I was yesterday "The hardest part is deciding to try." - me Link to comment Share on other sites More sharing options...
alross2 Posted January 2, 2023 Share #6 Posted January 2, 2023 Here are a few that might be useful. GrandpaPhil, mtaylor and Dave_E 3 Quote Link to comment Share on other sites More sharing options...
Django Posted January 2, 2023 Author Share #7 Posted January 2, 2023 (edited) I appreciate all of the help. I was a journeyman tool and die maker for 29 years before graduating and working as a mechanical engineer for the rest of my career. Working with ship models is out of my experience and comfort zone. I was a proficient sailor, but my experience was with sloops, cutters and catboats. The terminology used here is foreign to me. Seeing the model up close and touching it, especially working on it is a bit surreal. It brings up a lot more feelings than I care to feel at this stage of my life. I went through the same experience when I completed a heavily modified Stuart 5A that he had redesigned and begun. It’s a little like working with a ghost looking over your shoulder. There is also the burden of responsibility. The engine turned out well and I am sure that he would have been satisfied, and I am optimistic that his beloved model will turn out well to. The attachment shows the case that the ship model will be in along with the Stuart 5A and two small engines that my father built from castings. Edited January 2, 2023 by Django Wintergreen, Keith Black, Prowler901 and 5 others 8 Quote Link to comment Share on other sites More sharing options...
ccoyle Posted January 2, 2023 Share #8 Posted January 2, 2023 Be sure to update your project as you go -- that is the purpose of a build log like this: document your progress & get help and encouragement. We get asked many times for advice on how to restore models, but it is rare that someone brings forward a true scale model of a real vessel where both the vessel and model have interesting back stories. Good luck! Knocklouder, Django, mtaylor and 2 others 4 1 Quote Chris Coyle Greer, South Carolina When you have to shoot, shoot. Don't talk. - Tuco Current builds: Brigantine Phoenix Link to comment Share on other sites More sharing options...
Roger Pellett Posted January 3, 2023 Share #9 Posted January 3, 2023 I think that it is important to restore these old models. If you have children and grandchildren, these can become a link to your father; perhaps the only link. It’s important for future generations to have tangible examples of your father’s accomplishments. I’m sure that he would be pleased to know that you are carefully restoring his model. Roger GrandpaPhil, Django, mtaylor and 1 other 4 Quote Link to comment Share on other sites More sharing options...
Django Posted January 3, 2023 Author Share #10 Posted January 3, 2023 (edited) 11 hours ago, Roger Pellett said: I think that it is important to restore these old models. If you have children and grandchildren, these can become a link to your father; perhaps the only link. It’s important for future generations to have tangible examples of your father’s accomplishments. I’m sure that he would be pleased to know that you are carefully restoring his model. Roger I agree. Unfortunately, I don’t see my daughters or grandchildren becoming the caretakers of his ship or the engines. They will probably go to my nephew, and that’s fine. This is the second restoration of this model. My father enlisted as an aviation cadet in the Army Air Corps in January of 1942, shipped out in August 1942 and didn’t return home until after the end of the war. He was MIA and presumed dead, then found to be a POW. During that time, all of his belongings including the ship were put into storage and his model was badly damaged. He repaired the damage only to have it happen again when it went to my brother. I want to make sure that it ends up in a place where the cycle won’t be repeated. sadly, the last time he saw it, it was in the disintegrating case with three broken spars, yards hanging, a badly warped base and the rigging coming down. It’s nice to see that there are people that still appreciate craftsmanship and history. I collect and restore antique phonographs and sadly, there is little interest past my generation, (I am 67). I hope that future generations will appreciate these finely crafted models. Time will tell. I have taken an artist’s brush and dusted the model, but I was wondering how to go about safely cleaning it. Can anyone identify the wood used for the base? It seemed very plain until I ran it through the planer and routed the edges. It’s a beautiful piece of wood. I finished it with Dutch Oil and Butchers Wax. Edited January 3, 2023 by Django mtaylor 1 Quote Link to comment Share on other sites More sharing options...
Roger Pellett Posted January 3, 2023 Share #11 Posted January 3, 2023 Wood base- Possibly Cherry? I have two models of the same vintage, both built by my father. I have restored both. I have a son and a daughter and three granddaughters. My father died before any of my granddaughters were born. I hope that someday at least one of them will look at one of these models and will want to know about the man who made them. Hopefully your father’s handsome model will inspire questions from future generations. Roger Keith Black, mtaylor and Django 2 1 Quote Link to comment Share on other sites More sharing options...
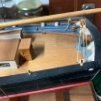
Django Posted January 3, 2023 Author Share #12 Posted January 3, 2023 (edited) A little more accomplished. I am taking it slowly while I gain some confidence and experience. So far I have planed the base and routed the edges, reset the building frames, made two new top masts, the end the bow sprit and one belaying pin. I had to reattach one of the blocks at the stern, replace the broken belaying pin and belay the sheet. I have also done some untangling, cleaning, reattached the cabin, capstan and binnacle and done some sorting sorting and of course, some studying. Please feel free to correct my terminology. I have a lot to learn. The first image below, shows the block that was torn free. I was able to extract the eyelet with wire frame that secured the block, reshape it and reinstall the assembly. The second image shows the new belaying pin that I turned from a piece of Ebony. The third image shows the repair work at the stern with the block secured and the sheet belayed. The last image shows some of my progress, (I have a long way to go, but I am glad to have the beginning of the journey behind me). Edited January 3, 2023 by Django Prowler901, Knocklouder, mtaylor and 4 others 7 Quote Link to comment Share on other sites More sharing options...
mtaylor Posted January 4, 2023 Share #13 Posted January 4, 2023 On 1/3/2023 at 4:24 AM, Django said: I have taken an artist’s brush and dusted the model, but I was wondering how to go about safely cleaning it. The "best" way to clean is to use Q-Tips (cotton swabs) and saliva. Wet the bud and gently brush. It's slow but it works incredibly well. From what I've read here on MSW even museums use that method. Oh... don't stick a dirty one in your mouth to add more saliva. The dust etc. can be very nasty to your body. Django and Wintergreen 1 1 Quote Mark "The shipwright is slow, but the wood is patient." - me Current Build: Past Builds: La Belle Poule 1765 - French Frigate from ANCRE plans - ON HOLD Triton Cross-Section NRG Hallf Hull Planking Kit HMS Sphinx 1775 - Vanguard Models - 1:64 Non-Ship Model: On hold, maybe forever: CH-53 Sikorsky - 1:48 - Revell - Completed Licorne - 1755 from Hahn Plans (Scratch) Version 2.0 (Abandoned) Link to comment Share on other sites More sharing options...
MrBlueJacket Posted January 4, 2023 Share #14 Posted January 4, 2023 Although saliva sounds disgusting, there are enzymes in it that do a marvelous job of cleaning. I personally know several professional modelers who use this technique, and I have used it for stubborn spots. Mainly I use Qtips in water. Nic mtaylor and Wintergreen 2 Quote Link to comment Share on other sites More sharing options...
Django Posted January 5, 2023 Author Share #15 Posted January 5, 2023 (edited) Work has come to a stop for the next few days while I wait on come tools and supplies. I also want to do some more studying and neaten up and organize my work area. The Malek Adhel is safely back in the case for now. Edited January 6, 2023 by Django ccoyle, Wintergreen, Knocklouder and 3 others 6 Quote Link to comment Share on other sites More sharing options...
Django Posted January 16, 2023 Author Share #16 Posted January 16, 2023 (edited) I have started working on my father’s ship again. It was one of those “the more I do the further behind I get” days. I had to replace the top masts and the jib boom, (I had already completed that). I had noticed that the end of the jib boom was offset approximately 30 degrees. I thought that was odd and referred back to the drawings. It was a mistake from the original build and the jib boom was supposed to be centered. The jib boom cap has a square opening that aligns the jib boom , so the best option was to replace the bow sprit. Fortunately, the old glue joints are not very strong and after some gentle persuasion, I was able to completely dismantle the bow sprit. All parts are made now and two coats of amber shellac and white paint have been applied. I will apply some shellac over the paint to match the rest of the white on the model. I am fortunate to have a good Harding Toolroom Lathe, so the tapered spars came out nice. Tomorrow I will turn up the small pins that act as stops. I hope to reinstall the bow sprit, jib boom and mast tops tomorrow. Edited January 16, 2023 by Django Wintergreen, ccoyle, Keith Black and 1 other 4 Quote Link to comment Share on other sites More sharing options...
Django Posted January 20, 2023 Author Share #17 Posted January 20, 2023 I am not sure where or how to post this. I have decided not to go forward with the restoration of the rigging. I had hoped to preserve as much of the rigging as possible, but most of it is too fragile and really needs to be replaced. My relationship with my father was not good, and I hate to say that I am not willing to put the time into the boat. It is a finely built and historical model and it should be properly restored, but I can’t do it with my father’s ghost hanging over my shoulder. The model is approximately 33” LOA and 23” tall on the base. If anyone is interested in re-rigging this historic model, they are welcome to have it along with the original plane and Popular Science magazines that featured it. I live in Claremont NH and would be willing to deliver it within a day’s drive or meet someone part way. The pictures below are as it is presently. Thanks ccoyle 1 Quote Link to comment Share on other sites More sharing options...
Django Posted January 23, 2023 Author Share #18 Posted January 23, 2023 (edited) Please ignore the post above. After an attitude adjustment I have decided that I will continue with and complete the restoration. It’s a beautiful model and I can’t allow 2500 hours of my father’s life to be wasted. Sorry for the pity party. There is a lot of emotion that comes back when working on something of my father’s. He was a POW at Stalag Luft IV and his PTSD was never treated, (through no fault of his own). That aside, he was a fine craftsman and I am amazed that he build this at such a young age. Edited January 23, 2023 by Django ccoyle, Keith Black, Prowler901 and 5 others 6 2 Quote Link to comment Share on other sites More sharing options...
MrBlueJacket Posted January 23, 2023 Share #19 Posted January 23, 2023 I can understand the powerful feelings involved. I once put a partly finished model away fro 10 years, then finally went back to it. I think your father would have been proud of you. If you feel he's looking over your shoulder, it's probably to give you encouragement. Jack12477, mtaylor, Keith Black and 1 other 2 2 Quote Link to comment Share on other sites More sharing options...
Django Posted January 26, 2023 Author Share #20 Posted January 26, 2023 Making some slow progress with an improved attitude. I have been removing and replacing any fraying or fragile rigging. A replacement section of the bow sprit has been lashed in place, (I will lash on the last section after the rest of the rigging is up to avoid breaking it as I move the model around on my small bench. The top masts are in position. The balls on top are real Gold beads, (the letters on the stern were hand cut from a sheet of Gold using a jewelers saw). My grandfather was a fine jeweler, but lost everything during the depression. My father mentioned the lettering to him and he took out a sheet of gold and his tools and cut the lettering at the kitchen table. The “W” of New York has been missing for all of my 67 years. I replaced it today with a “W” that I cut, but the “W” is not made of Gold. My grandfather was very talented. As I work on the model I am amazed at the workmanship. My father had no mentor, no forum or internet to refer to. All he had was his ingenuity, patience and probably the public library and his experience sailing. The gaff and driver boom have been re-rigged, the yards repaired and the chains have on the lower yards have been reattached to the masts. The rudder post has also been repaired and I repaired the front cradle for the pulling boat, painted the pulling boat and lashed it back down. I have also untangled a lot of the rigging and I have been doing some cleaning as I go. I will not move to the midship and work my way up. Some of the stays will have to be done at the same time. I am finding the project satisfying. Keith Black, Wintergreen, Knocklouder and 2 others 2 3 Quote Link to comment Share on other sites More sharing options...
Keith Black Posted January 26, 2023 Share #21 Posted January 26, 2023 DJ, the repairs you've made look great and the "W" looks like it's always been there, your grandfather would be proud. Impressive results thus far, she's cleaning up nicely. Django, mtaylor and Knocklouder 2 1 Quote Current Builds: Wood Hull Screw Frigate USS Tennessee Decorative Carrack Warship Restoration, the Amelia Completed: Early Swift 1805 Model Restoration Link to comment Share on other sites More sharing options...
Django Posted February 9, 2023 Author Share #22 Posted February 9, 2023 (edited) I wanted to add a couple pictures of the model as I received it. The base board was warped and the edges were left plain. The top masts and the end of the bowsprit were broken off. Most of the rigging needed replacing. Some belaying pins, bullseyes and deadeyes needed to be duplicated. One of the yards was falling apart and had to be rebuilt. Some Brass fittings had corroded as well. The last picture was taken this mornin. Everything aft of the fore mast is done. The refitting the bowsprit and lashing down the anchor chains is all that is left. Edited February 9, 2023 by Django mtaylor, ccoyle, Keith Black and 4 others 5 2 Quote Link to comment Share on other sites More sharing options...
Roger Pellett Posted February 9, 2023 Share #23 Posted February 9, 2023 You must have your jeweler grandfather’s genes. The W that you added is indistinguishable from his work. You are going to wind up with a handsome, unique model. Keith Black, mtaylor and Django 2 1 Quote Link to comment Share on other sites More sharing options...
Keith Black Posted February 9, 2023 Share #24 Posted February 9, 2023 (edited) Very nice, DJ. I do hope you've found the end result worth the time you've invested and are at peace with the effort. Edited February 9, 2023 by Keith Black Django 1 Quote Current Builds: Wood Hull Screw Frigate USS Tennessee Decorative Carrack Warship Restoration, the Amelia Completed: Early Swift 1805 Model Restoration Link to comment Share on other sites More sharing options...
Django Posted February 10, 2023 Author Share #25 Posted February 10, 2023 15 hours ago, Keith Black said: Very nice, DJ. I do hope you've found the end result worth the time you've invested and are at peace with the effort. Thank you for the encouragement. I have found it to be rewarding. I have tried to separate the baggage from the model and I have thought a lot about my father as a 20 to 22 year old filling his spare time with this ambitious project. The workmanship is amazing. I have replaced most of the rigging, (even rigging that was still enact). I want to preserve as much of my father’s work as possible while insuring that the model is once again sound and will last for more generations. The remaining original rigging are the shrouds and rat lines. All of the running rigging was made of a line that had become brittle, while most of the standing rigging had remained supple and quite strong. I did have to replace the stays. I will resume working on the bow sprit today. The third portion was broken off and the end was missing and the second portion was not made correctly so I made a new one. The only parts remaining from the original bowsprit are the first portion, the dolphin striker and two of the chains. The entire bowsprit will need to be re-rigged. I will feel much better when the model is safely stored and displayed in it’s case. ccoyle, mtaylor and Keith Black 3 Quote Link to comment Share on other sites More sharing options...
Django Posted February 11, 2023 Author Share #26 Posted February 11, 2023 The Malek Adhel has returned to the safety of it’s display case. I plan to build a box that will raise the model approximately 6” and I will keep all of the documentation inside. I will also have a plaque made up at some time identifying the builder, the dates, (Feb. 1938-Feb. 1940), and the hours invested. I could see the light at the end of the tunnel yesterday, so I began work at 8:00 AM , took a dinner break at 7:00 PM and finished my day at 1:30 AM the next morning. The finishing touches were made this morning. It is nice to see it as I remember it from my childhood. It seemed like every time I got something done, something else would fail, so I ended up testing every line and replacing all the seemed frail, (most of them). Another thing that I inherited was a tremor. I am fortunate that mine hasn’t advanced much yet and I can usually keep my hands steady. I figured that it was now or never for this job. Thank you for the support and for not being judgmental regarding my baggage. davyboy, Prowler901, mtaylor and 8 others 7 4 Quote Link to comment Share on other sites More sharing options...
Keith Black Posted February 11, 2023 Share #27 Posted February 11, 2023 Very well done DJ. It's been a pleasure looking over your shoulder as you restored the Malek Adhel to her former glory. Wishing you the best on your life journey. mtaylor, Django and Knocklouder 2 1 Quote Current Builds: Wood Hull Screw Frigate USS Tennessee Decorative Carrack Warship Restoration, the Amelia Completed: Early Swift 1805 Model Restoration Link to comment Share on other sites More sharing options...
GrandpaPhil Posted February 11, 2023 Share #28 Posted February 11, 2023 Well done! Looking forward to seeing your next build! To minimize the effects of a tremor, brace your arm or wrist on a solid surface. Keith Black, mtaylor and Django 2 1 Quote Building: 1:64 HMS Revenge (Victory Models plans) 1:64 Cat Esther (17th Century Dutch Merchant Ships) On the building slip: 1:72 French Ironclad Magenta (original shipyard plans) On hold: 1:98 Mantua HMS Victory (kit bash), 1:96 Shipyard HMS Mercury Favorite finished builds: 1:60 Sampang Good Fortune (Amati plans), 1:200 Orel Ironclad Solferino, 1:72 Schooner Hannah (Hahn plans), 1:72 Privateer Prince de Neufchatel (Chapelle plans), Model Shipways Sultana, Heller La Reale, Encore USS Olympia Goal: Become better than I was yesterday "The hardest part is deciding to try." - me Link to comment Share on other sites More sharing options...
mtaylor Posted February 12, 2023 Share #29 Posted February 12, 2023 Beautifully restored, D.J. And it should be proudly displayed. Django and Keith Black 1 1 Quote Mark "The shipwright is slow, but the wood is patient." - me Current Build: Past Builds: La Belle Poule 1765 - French Frigate from ANCRE plans - ON HOLD Triton Cross-Section NRG Hallf Hull Planking Kit HMS Sphinx 1775 - Vanguard Models - 1:64 Non-Ship Model: On hold, maybe forever: CH-53 Sikorsky - 1:48 - Revell - Completed Licorne - 1755 from Hahn Plans (Scratch) Version 2.0 (Abandoned) Link to comment Share on other sites More sharing options...
ccoyle Posted February 12, 2023 Share #30 Posted February 12, 2023 Simply outstanding work! mtaylor, Django and Keith Black 2 1 Quote Chris Coyle Greer, South Carolina When you have to shoot, shoot. Don't talk. - Tuco Current builds: Brigantine Phoenix Link to comment Share on other sites More sharing options...

Recommended Posts
Join the conversation
You can post now and register later. If you have an account, sign in now to post with your account.